3 minute read
Engine Añercooler


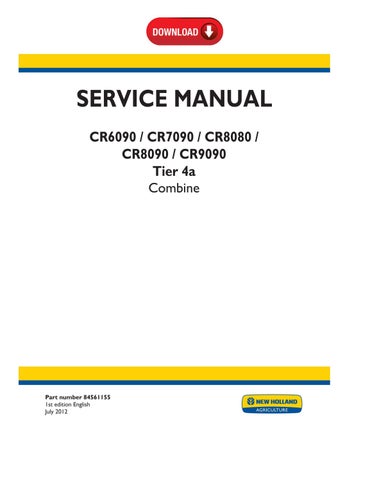
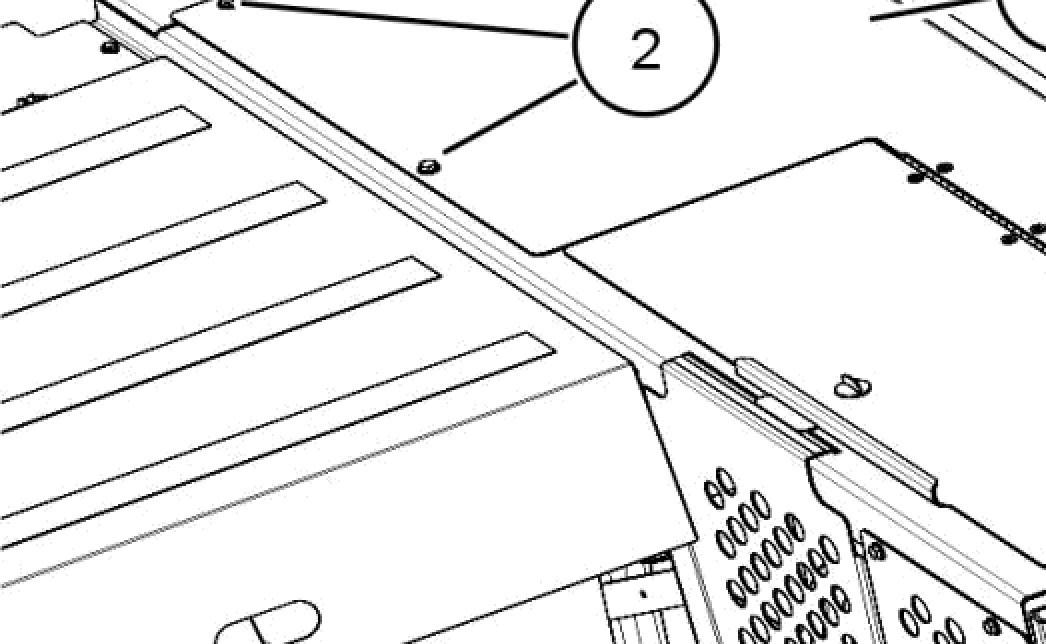
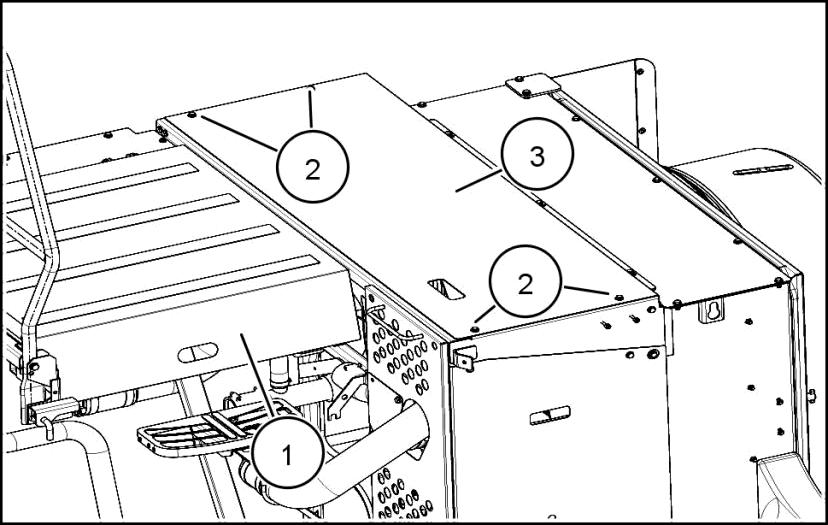
ATTENTION: Foam rubber strips (1) are installed between each component fo prevent damage from rubbing. To remove each component, gently pry the component being removed from the one below it.
11. Gently pry the CAC radiator (2) from the engine coolant radiator (3) and lift the CAC radiator from the cooler box assembly.
Advertisement
Next operation: Aftercooler - Install (10.310).
Aftercooler - Install
CR6090 [YBG115106 - ], CR7090 [YBG115106 - ] NA
Prior operation: Aftercooler - Remove (10.310).
ATTENTION: When installing the components on top one anotheF check the foam strips and replace as needed.
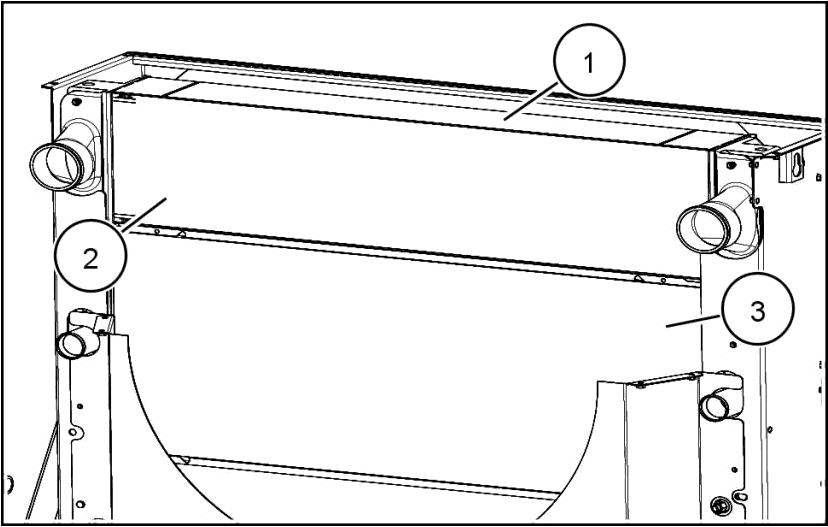
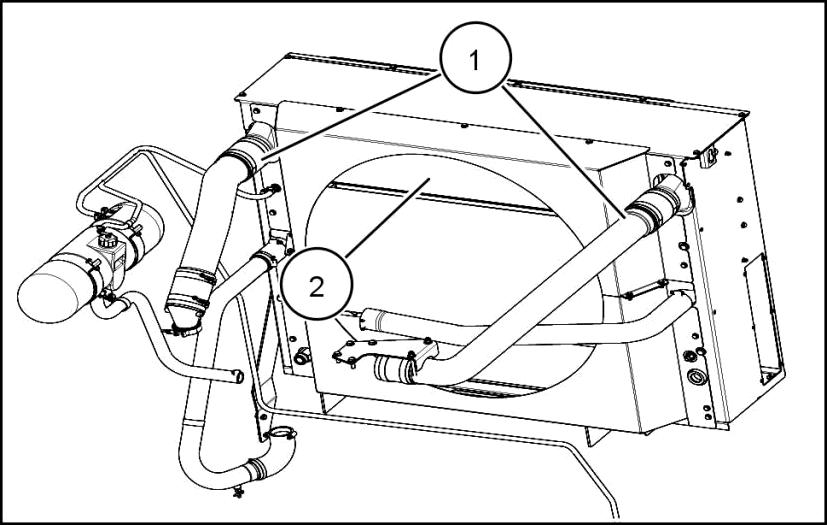
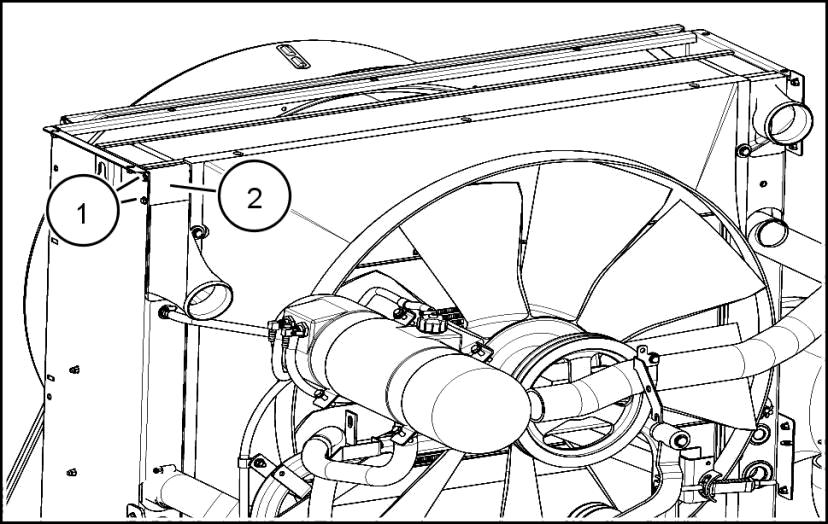
1. Install the charge air cooler (CAC) radiator (1) on top of the engine coolant radiator (2) as shown.
2. On the right hand side of the cooler box, install the two bolts and washers (1), securing the CAC to the cooler box. Tighten hardware to standard torque.
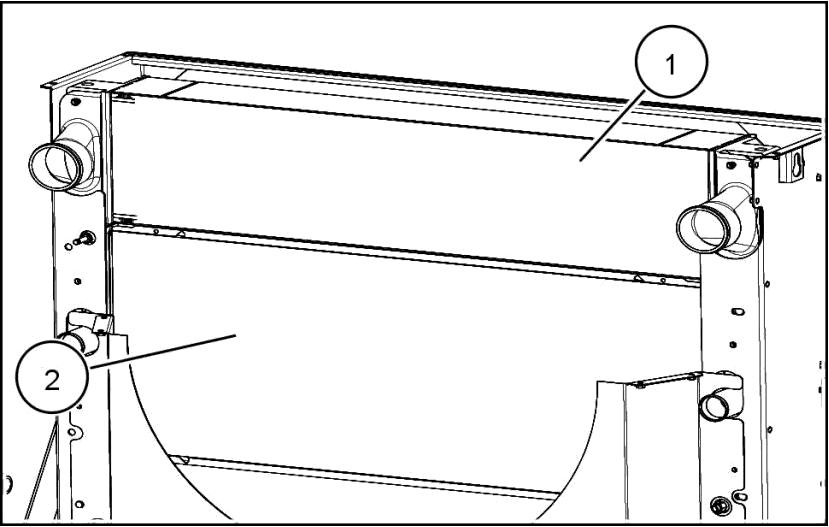
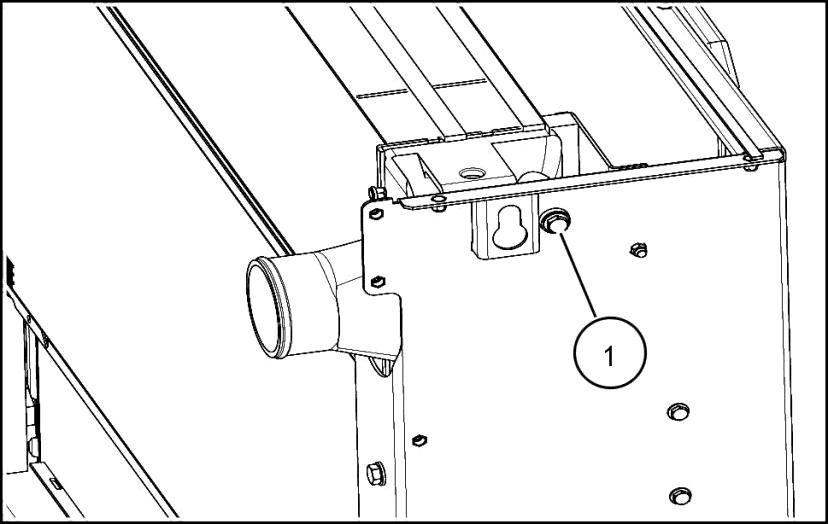
3. On the left hand side of the cooler box, install the bolt and washer (1) securing the CAC to the cooler box. Tighten hardware to standard torque.

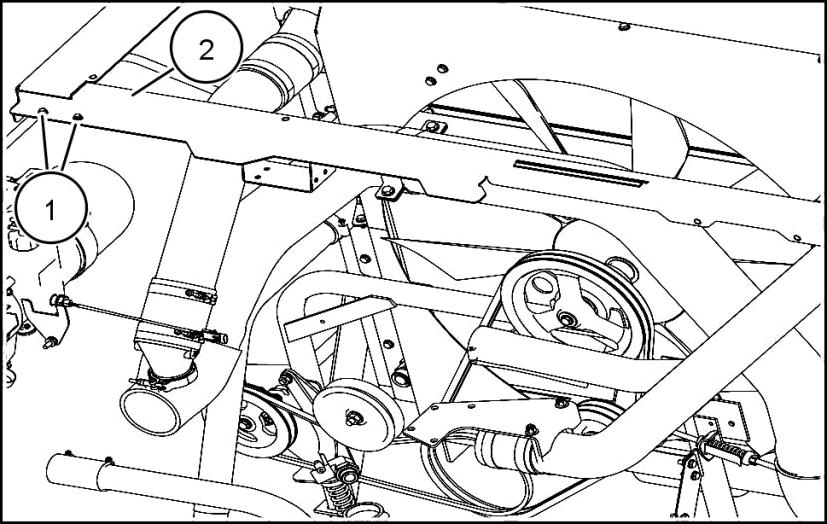

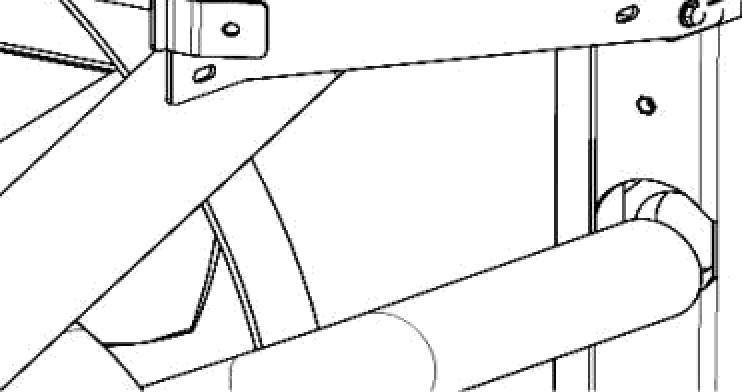
8. Insert the hardware (1) to the left side of the engine shield upper frame (2) and tighten all frame hardware to standard torque.


9. Position the engine corner side shield (2) to the engine cover frame as shown and install the hardware (1) to secure the shield in place. Tighten hardware to standard torque.
10. Install the engine shield (2) by placing it in the slot in frame as shown. Insert the hardware (1) to secure the engine shield to the frame. Tighten hardware to standard torque.
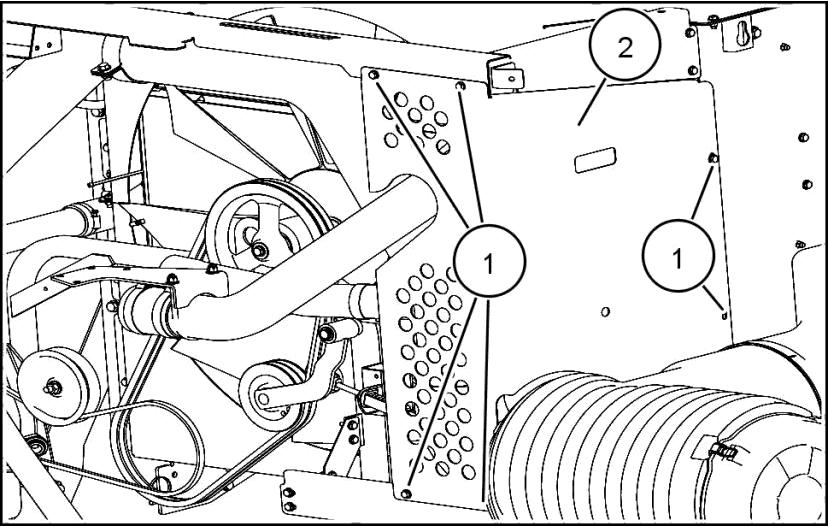
11. Place the top engine cover (1) into position and insert the hardware (2), securing it to the engine cover frame. Tighten hardware tostandard torque.
Next operation: Radiator wiper - Install (10.418).
Aftercooler - Remove
CR8080 [YBG115106 - ] NA, CR8090 [YBG115106 - ] NA
Prior operation: Radiator wiper - Remove (10.418).
ATTENTION: Lefi hand side and right hand side are determined by facing the front of the cooler box.
ATTENTION: Retain all hardware and components unless otherwise specified.
1. Open the top engine hood (1). Remove the hardware (2) securing the top engine cover (3) to the engine cover frame.


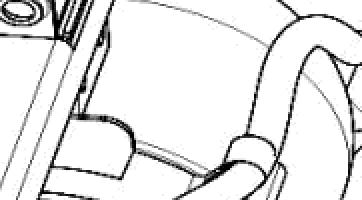
2. Remove the hardware (1) securing the engine shield (2) to the frame. In order to remove the engine shield, rotate the cover (3) to slide the shield away from the tube (4).
3. Remove the hardware (1) securing the engine left side shield (2) to the engine cover frame and remove the shield.


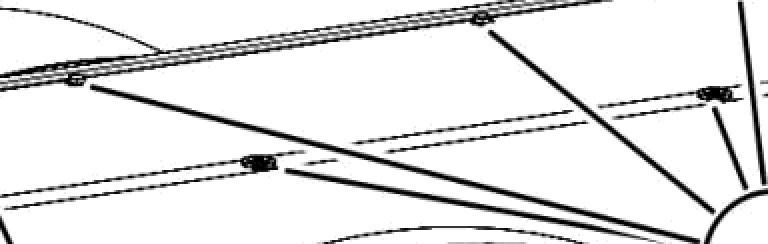
8. Remove the ten M8 X 20 hex bolts and washers (1) from the top plate (2) of the cooler box and remove the top plate.
9. Remove the two M6 X 16 hex bolts and washers (1) that secures the plate (2). Remove the plate.
ATTENTION: Foam rubber strips (1) are installed between each component fo prevent damage from rubbing. To remove each component, gently pry the component being removed from the one below it.
10. Gently pry the CAC radiator (2) from the engine coolant radiator and lift the CAC radiator from the cooler box assembly.


Next operation: Aftercooler - Install (10.310).

Aftercooler - Install
CR8080 [YBG115106 - ] NA, CR8090 [YBG115106 - ] NA
Prior operation: Aftercooler - Remove (10.310).
ATTENTION: When installing the components on top one anotheF check the foam strips and replace as needed.
1. Install the charge air cooler (CAC) radiator (1) on top of the engine coolant radiator (2) as shown.

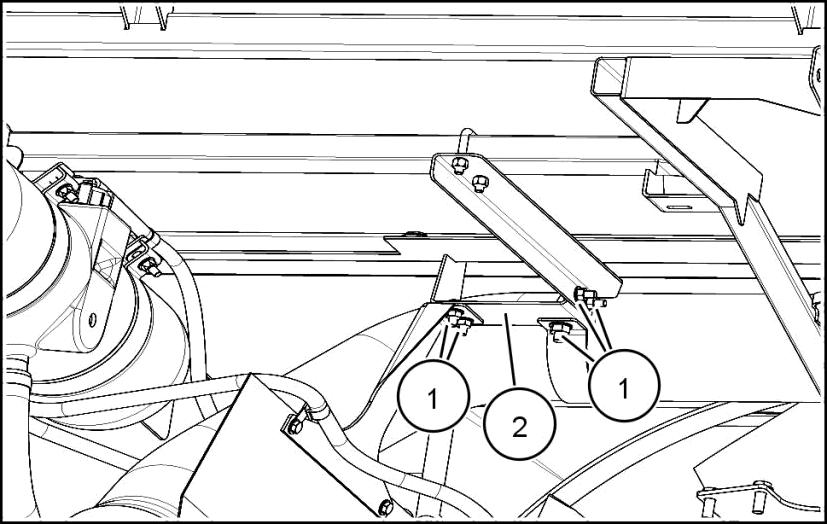
2. Position the plate (2) and insert the two M6 X 16 hex bolts and washers (1) to secure the plate to the cooler box. Tighten to standard torque.
3. Position the top plate (2) to the top of the cooler box, under the lip of fan shroud and insei1 the ten M8 X 20 hex bolts and washers (1) as shown. Tighten hardware to standard torque.


8. Position the engine left side shield (2) to the engine cover frame as shown and install the hardware (1) to secure the shield in place. Tighten hardware to standard torque.
9. In order to install the engine shield (1), rotate the cover (2) to slide the shield past the tube (3), making sure the shield is resting on the support bracket (4). Align the holes, insert hardware (5) and tighten to standard torque.
10. Place the top engine shield (3) into position and insei1 the hardware (2), securing it to the engine cover frame. Tighten hardware to standard torque. Close the engine access cover (1).

Next operation: Radiator wiper - Install (10.418).