Resource Toolkit
Tip Sheet
Advocacy Selector Boards (for Students)
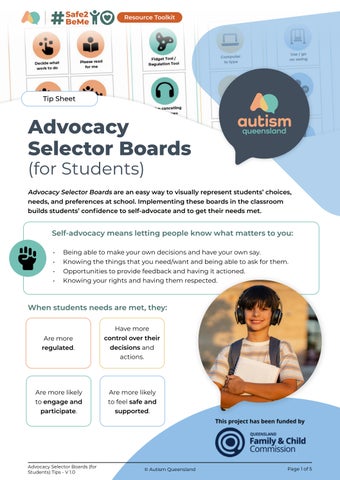
Advocacy Selector Boards are an easy way to visually represent students’ choices, needs, and preferences at school. Implementing these boards in the classroom builds students’ confidence to self-advocate and to get their needs met.
Self-advocacy means letting people know what matters to you: • • • •
Being able to make your own decisions and have your own say. Knowing the things that you need/want and being able to ask for them. Opportunities to provide feedback and having it actioned. Knowing your rights and having them respected.
When students needs are met, they:
Are more regulated.
Have more control over their decisions and actions.
Are more likely to engage and participate.
Are more likely to feel safe and supported.
Advocacy Selector Boards (for Students) Tips - V 1.0
© Autism Queensland
Page 1 of 5
Advocacy Selector Boards Tip Sheet Creating Advocacy Selector Boards Advocacy tools come in a range of different formats and can be modified to provide different options and choices.
Where to find Advocacy Selector Board icons?
Example icons:
Icons or images can be accessed from a variety of sources depending on the student’s needs and interests. It is preferable to work with students to select the icons to ensure they are meaningful representations of the items on their board. Some options might include: • Free icons available through Microsoft Word. • Free icons or images via internet search. • Boardmaker icons or similar programs. • Pictures or icons drawn or photographed by the student.
Example student-drawn icons:
Noise-cancelling headphones
Please scribe for me
Need more time
I need help...
Advocacy Selector Boards (for Students) Tips - V 1.0
Chill-out room
© Autism Queensland
Page 2 of 5
Advocacy Selector Boards Tip Sheet Advocacy boards can be divided into categories that are meaningful and useful to the student. Some examples of categories and options are: Adjust the work or learning tasks to: • Support individualised learning and participation. • Provide options for how students engage and demonstrate what they know. • • • • • • • •
Change the order of my work. Decide what work to do. Easier work. Harder work. Different work to peers. One type of work for the day/week. Please read for me. Reduce my work.
• • • • • • •
Show me an example. Allow me time to think. View my schedule. Computer to type. Pencils, pens, coloured pens. Please scribe for me. Speech to text.
Adjust the environment to better suit the needs/desires of each person. • • • • • • •
Change my location. Change the people in my space. Change my seat. Decide what time to do my work. Fan/aircon on/off. Fidget/regulation tool. Food/drink.
• • • • • • •
Headphones. Lights on/off. Move and listen. Music. Peer to help me. Quiet space. Work alone.
Other strategies, equipment, or adjustments to encourage participation across all contexts throughout the school day. • • • • • •
Take a break. I’m feeling confused. Discuss my tasks. Glasses/sunglasses. Help me please. Ice/ice pack.
Advocacy Selector Boards (for Students) Tips - V 1.0
• • • • • •
iPad/tablet. Need more time. Plan my next activity. Movement break. Talk with an adult. Access my toolbox.
© Autism Queensland
Page 3 of 5
Advocacy Selector Boards Tip Sheet Introducing the Advocacy Selector Board to a student... Each board should be set up in the way that supports the individual. It’s important to remember individual needs are dynamic and will likely change as skills develop or changes in preferences are advocated for or noticed.
Trial & review: You might talk through each option and collaboratively choose which would be most suitable on their board. Continuously trial and review options as needed. •
Allow the student to trial different icons and observe their understanding (you may need new or additional icons over time).
•
Adults will need to explicitly teach students how to use the board and then model how to use the board to request something before expecting the student to use it.
•
Make note of which icons are used over a period of time. Use this information to create a board that displays only the options that help the student.
•
It is good practice to regularly review the board to ensure it is serving the student’s needs and promotes meaningful participation and engagement.
Reflective conversations: Discuss how the different advocacy options accessed feel. Was it helpful? Would they like to change something or use a different option? •
When introducing and using the board, support the student to tune into their thoughts, non-verbal cues, and feelings. E.g. If requesting a quiet space to work, we might explicitly link this to their experience: “When the classroom is noisy, I can see it’s hard for you to concentrate
on reading and understanding the questions. You can use the quiet space to work and then come back when you are finished.”
Advocacy Selector Boards (for Students) Tips - V 1.0
© Autism Queensland
Page 4 of 5
Advocacy Selector Boards Tip Sheet Trust: When a student requests something using their board, it is your responsibility to honour and carry out that request (negotiating if required for safety purposes). •
Supports that are listed on the board need to be readily available at all times to the student. If there is something listed where there are conditions to its use (e.g. because of supervision requirements), this needs to be explicitly explained to and understood by the student.
•
Ensure that all staff working with the student are aware of the board and how that student will use it to request support.
Preferences: Think about the student's preferred ways to communicate their needs and preferences (e.g. visual choices, using the board, writing it down). It might be suitable to do this in a private, quiet place free of distraction (others may enjoy sharing in a group). •
Identify people the student is comfortable with to support them in using the board, especially during board trial periods.
•
Have a conversation with the student about where they would like the board to be kept. They might prefer the board to be on their desk where it is visible and easy to access for all, or more private, for example, by putting the icons on a keyring which they can keep in their pocket.
Scan QR code for more #Safe2BeMe Toolkit resources designed to ensure all students feel safe and supported at school.
Autism Queensland is here to help—get in touch to learn more: Email: css@autismqld.com.au Phone: (07) 3273 0000 Website: autismqld.com.au Advocacy Selector Boards (for Students) Tips - V 1.0
© Autism Queensland
Page 5 of 5