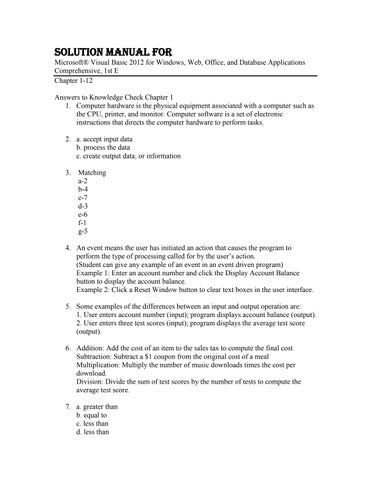
Solution Manual for Microsoft® Visual Basic 2012 for Windows, Web, Office, and Database Applications Comprehensive, 1st E Chapter 1-12 Answers to Knowledge Check Chapter 1 1. Computer hardware is the physical equipment associated with a computer such as the CPU, printer, and monitor. Computer software is a set of electronic instructions that directs the computer hardware to perform tasks. 2. a. accept input data b. process the data c. create output data, or information 3.
Matching a-2 b-4 c-7 d-3 e-6 f-1 g-5
4. An event means the user has initiated an action that causes the program to perform the type of processing called for by the user‟s action. (Student can give any example of an event in an event driven program) Example 1: Enter an account number and click the Display Account Balance button to display the account balance. Example 2: Click a Reset Window button to clear text boxes in the user interface. 5. Some examples of the differences between an input and output operation are: 1. User enters account number (input); program displays account balance (output). 2. User enters three test scores (input); program displays the average test score (output). 6. Addition: Add the cost of an item to the sales tax to compute the final cost Subtraction: Subtract a $1 coupon from the original cost of a meal Multiplication: Multiply the number of music downloads times the cost per download. Division: Divide the sum of test scores by the number of tests to compute the average test score. 7. a. greater than b. equal to c. less than d. less than
e. equal to 8. The student can list any 3 databases that they could be found in: College Student Database Driver License Database Social Security Database 9. Syntax is a strict set of usage rules that a developer uses when coding a program. The reason syntax is important is that even a single syntax error can cause a program to execute improperly. 10. A Toolbox in Visual Studio 2010 contains .NET components that you can use to develop the graphical user interface for the program. It saves you time since you can place buttons, picture boxes, labels, radio buttons, and other objects in the window. 11. The button properties could be the size of the button and the text that appears within the button. 12. Visual Basic, Visual C#, C++, F#, Javascript 13. The Windows store (online location maintained by Microsoft) 14. Visual Basic has a wide range of productivity features that enable developers to quickly generate high-quality software applications for Windows. VB is also English-like and one of the easier enterprise-level programming languages to learn. 15. a. .NET class library b. ADO.NET 4.5 c. ASP.NET 4.5 d. Common Language Runtime 16. A developer can write code one time and save it as a class. Then, all other programs can use the code when required. A class can be stored in a class library, which makes the class available to all developers. 17. The difference between a class and an object is that a class acts as a general template and an object is a specific item generated based on the class template. Examples of a class are: Button class, ADO.NET class, and ASP.NET class. Examples of an object are: button, textbox and picture box. 18. ADO.NET 4.5 provides the functionality for a program to perform the four primary tasks required when working with a database: get the data, examine the data, edit the data, and update the data.
19. The process of translating statements written by the developer is called program compilation. Program compilation for Visual Basic 2010 creates a set of electronic code expressed in an intermediate language called Microsoft Intermediate Language (MSIL). 20. Five types of applications are Windows, Windows Store, website, Office, and database.
SC Visual Basic 2012 Answers to Chapter 2 Student Assignments KNOWLEDGE CHECK 1. New Project button 2. Toolbox (displayed all the time since Pushpin is vertical) 3. Windows Form object 4. Form1.vb [Design] tabbed page 5. Properties window 6. Rapid Application Development 7. The purpose of the Auto-Hide button on the Toolbox title bar is to display or hide the Toolbox depending on whether the Pushpin icon on the button is vertical or horizontal. If the Pushpin on the Auto-Hide button is vertical, then the window has been pinned and will be displayed. If the Pushpin is horizontal, the Toolbox is in Auto Hide mode. 8. The red snap lines indicate that text within an object is aligned. The blue snap lines indicate when the sides of the objects are aligned. 9. frm 10. objects
11. To select four Button objects, select the first Button object and then hold down the CTRL key and click the other Button objects. 12. The purpose of a mock-up is to obtain client approval of the design. After the users and others approve the interface design, the developer can design the program elements required to implement the functionality of the program. 13. The first phase of the program development life cycle is to gather and analyze the program requirements. The second phase of the program development life cycle is to design the user interface. 14. lblVideo 15. btnSubmit 16. picTablet 17. (Name) property 18. Alphabetical 19. To save the interface mock-up that you have completed, you can click the Save All button on the Standard toolbar. 20. The Windows Form object is a window that you will use to build the program and is the window that will be displayed on your screen when you execute the program. The Label object displays a message on the user interface. The PictureBox object displays a picture. The Button object is used to cause an event to occur when the program is executing. DEBUGGING EXERCISES 1.
Step 1: Click the Place Order object, and then CTRL+click the Close Window and Information Button objects. Click FORMAT on the menu bar and point to Align. Step 2: Click Bottoms on the Align submenu. Step 3: While the Button objects are still selected, click FORMAT on the menu bar and then point to Horizontal Spacing. Step 4: Click Make Equal. Step 5: While the Buttons are still selected, click FORMAT on the menu bar and then point to Horizontal Spacing. Step 6: Click Increase. Step 7: While the Buttons are still selected, click FORMAT on the menu bar and then point to the Center in Form command. Step 8: Click Horizontally on the Center in Form submenu.
2. Correct Order: 1. User taps or clicks the Coffee button or Frappuccino button. 2. Program displays a picture of the coffee order selected by the user and enables the Place Order button. 3. User taps or clicks the button not selected in Step 1. 4. Program displays a picture of the coffee order selected by the user. 5. User taps or clicks the Place Order button. 6. Program displays an order confirmation message and disables both order buttons. The Close button becomes active. 7. User terminates the program by tapping or clicking the Close button. PROGRAM ANALYSIS 1.
Step 1: Select the Save the Penguins Label object. Scroll to the Font property in the Properties window. Click the Font property in the left column of the Label Properties window. Step 2: Click the ellipsis button for the Font property. Step 3: In the Font dialog box, scroll through the Font list and click Tahoma. Click Bold in the Font style list. Click 18 in the Size list Step 4: Click the OK button.
2.
Step 1: Select the Save the Penguins Label object. Click FORMAT on the menu bar and then point to Center in Form on the FORMAT menu. Step 2: Click Horizontally on the Center in Form submenu.
3.
Step 1: Select the penguins PictureBox object. Click FORMAT on the menu bar and then point to Center in Form on the FORMAT menu. Step 2: Click Horizontally on the Center in Form submenu.
4.
Step 1: Select the Donate Now Button object. Scroll to the Font property in the Properties window. Click the Font property in the left column of the Button object Properties window. Step 2: Click the ellipsis button for the Font property. Step 3: In the Font dialog box, scroll through the Font list and click Tahoma. Click 10 in the Size list. Step 6: Click Horizontally on the Center in Form submenu.
5.
Step 1: Click the Donate Now Button object, and then CTRL+click the Close Window Button object. Click FORMAT on the menu bar and then point to Align on the FORMAT menu.