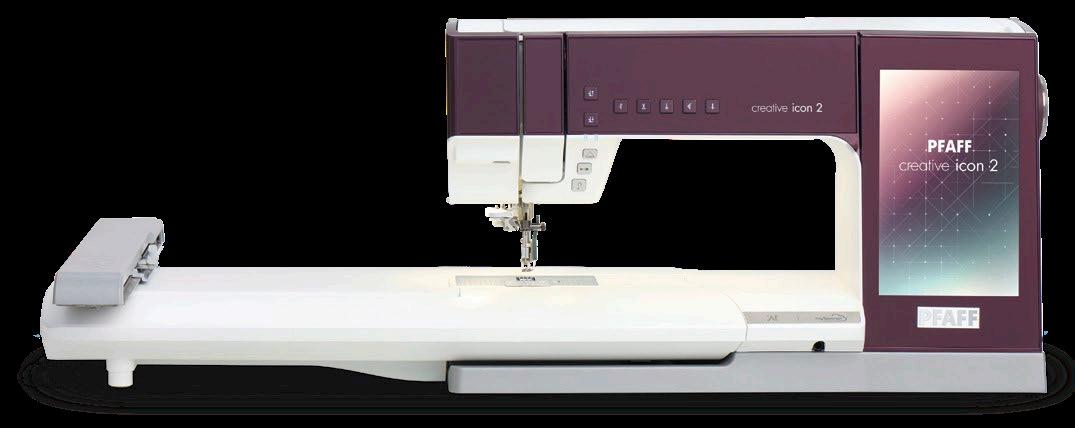
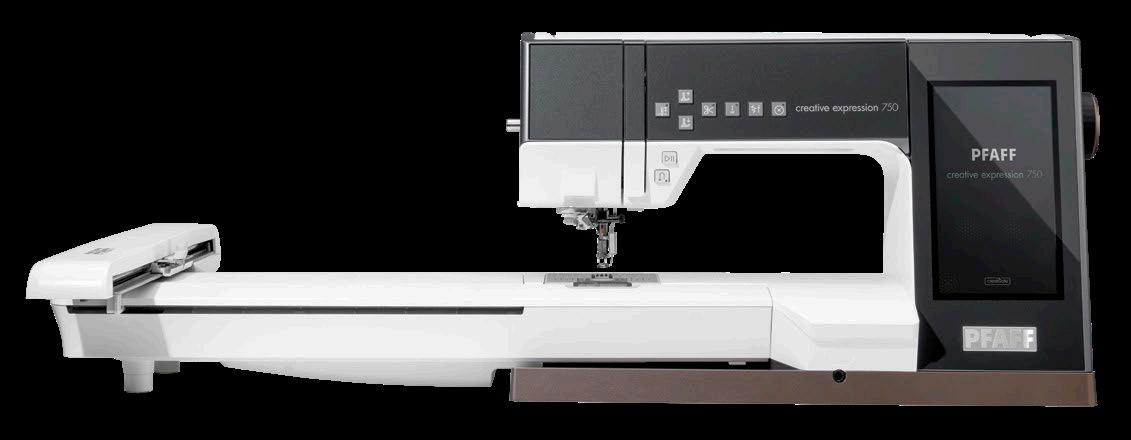
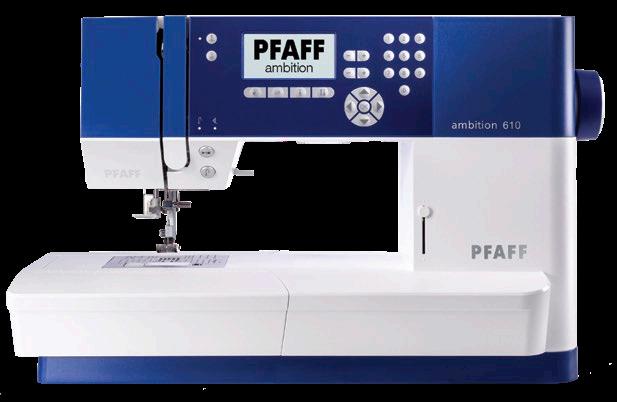
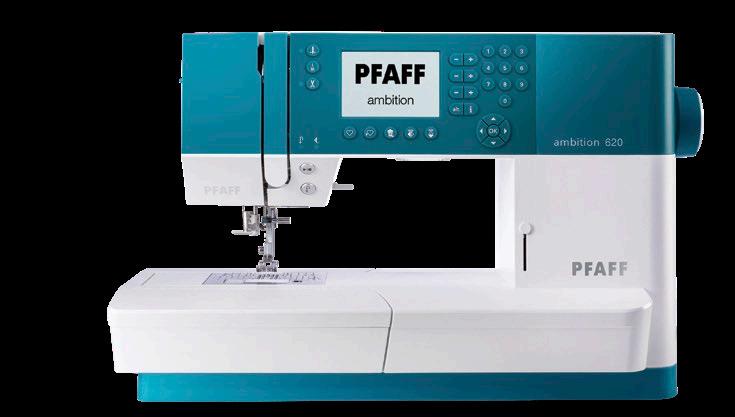
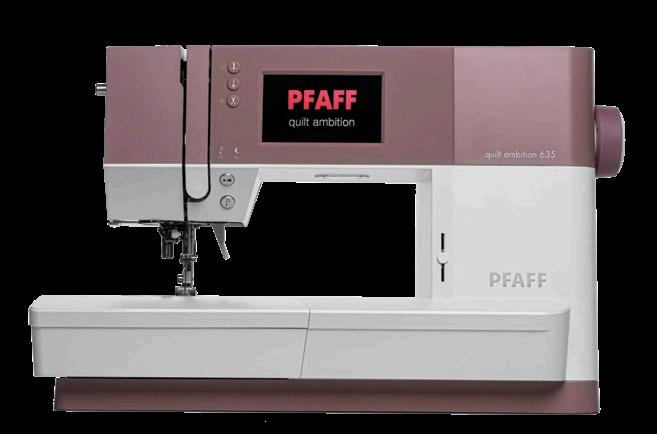
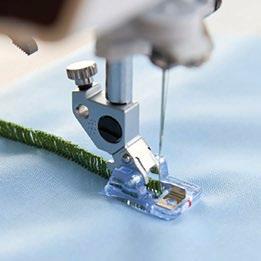
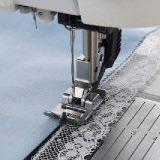
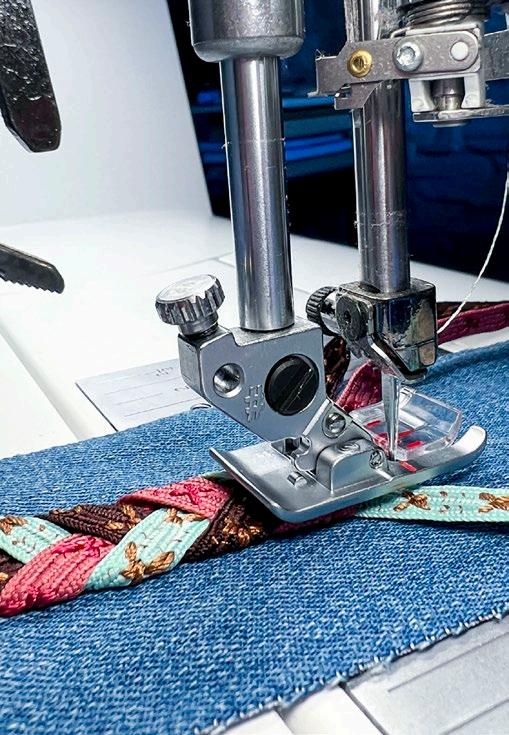
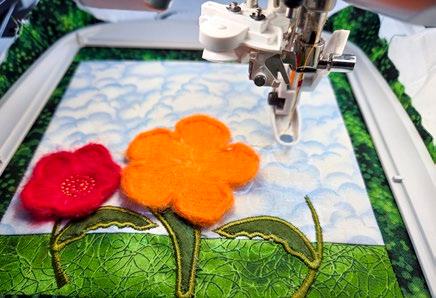
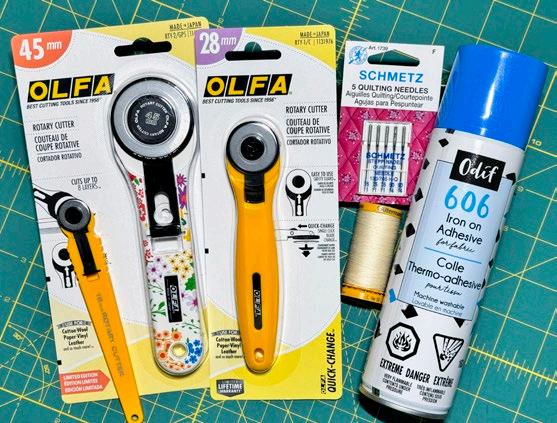
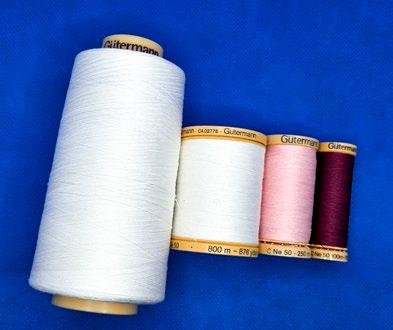
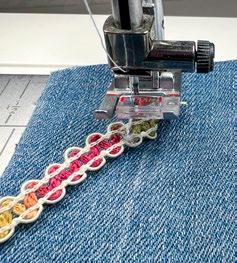
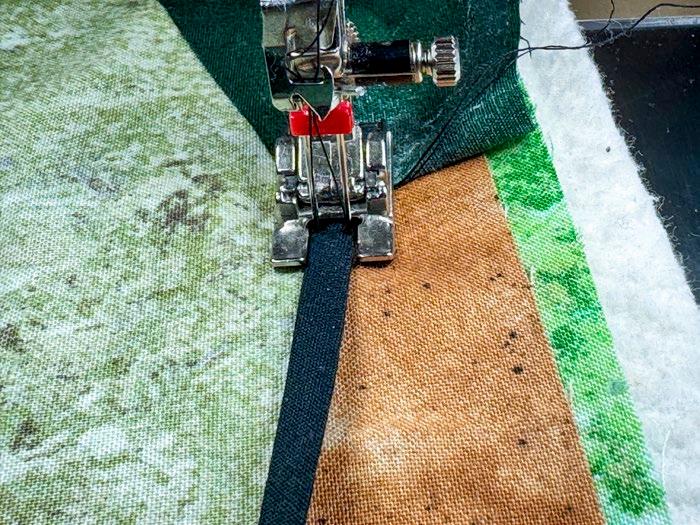
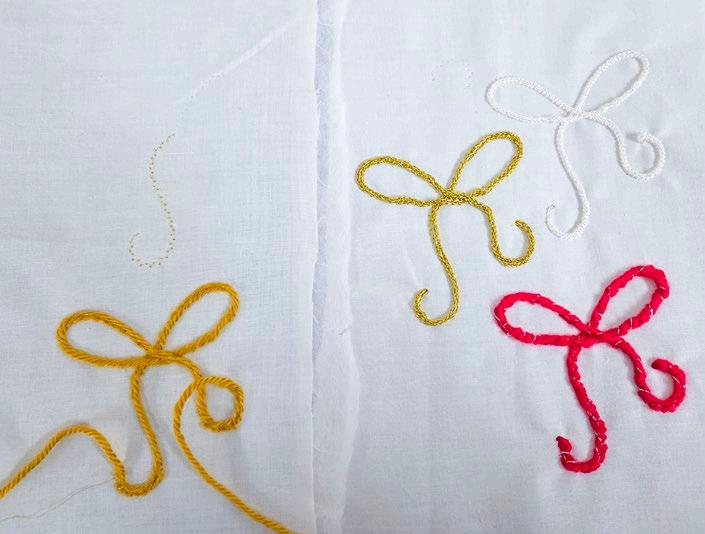
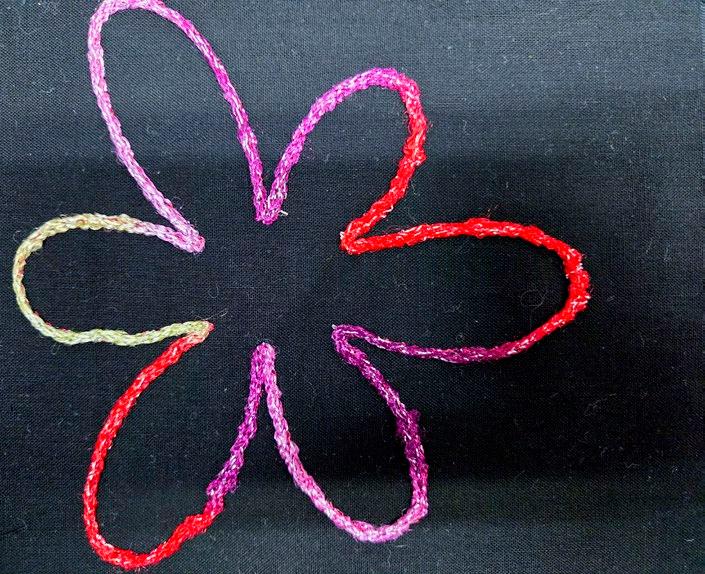
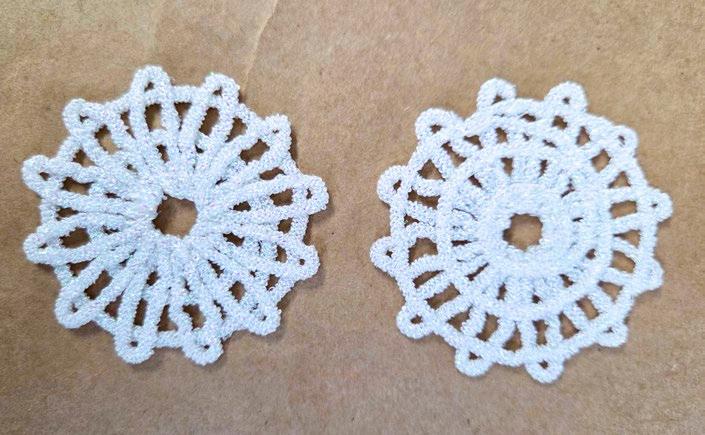
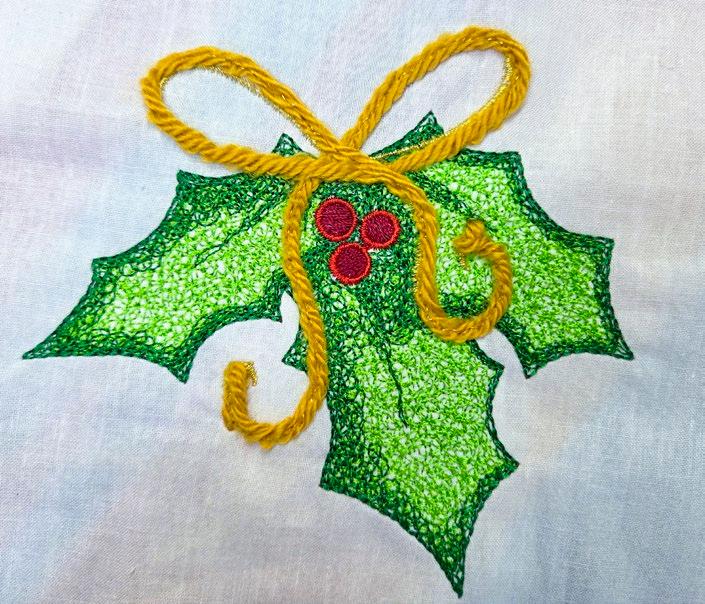
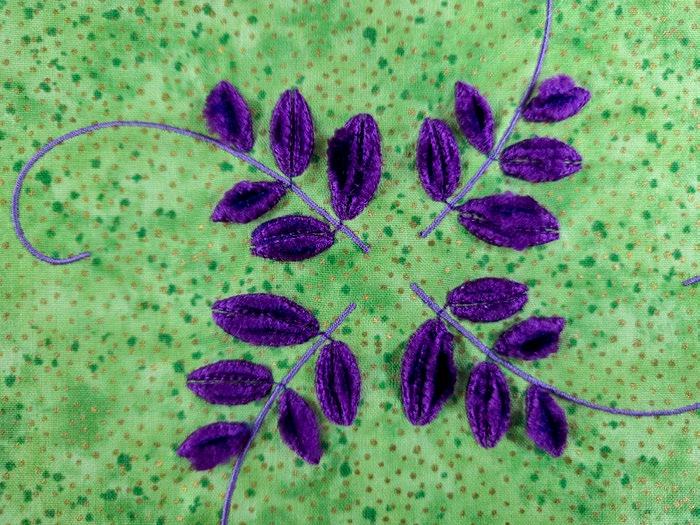
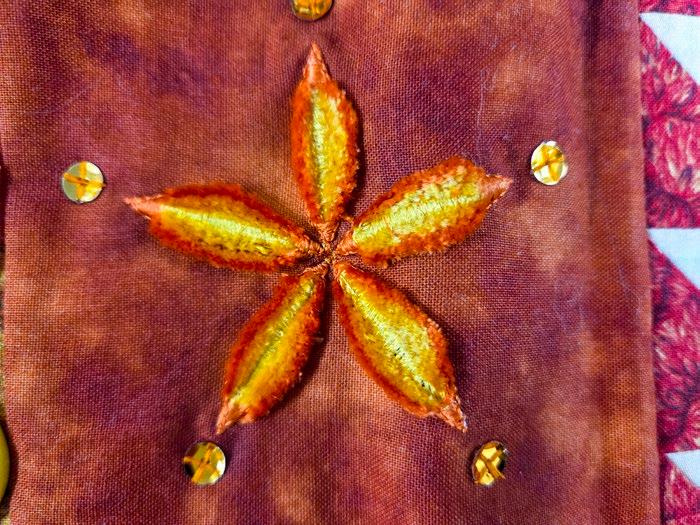
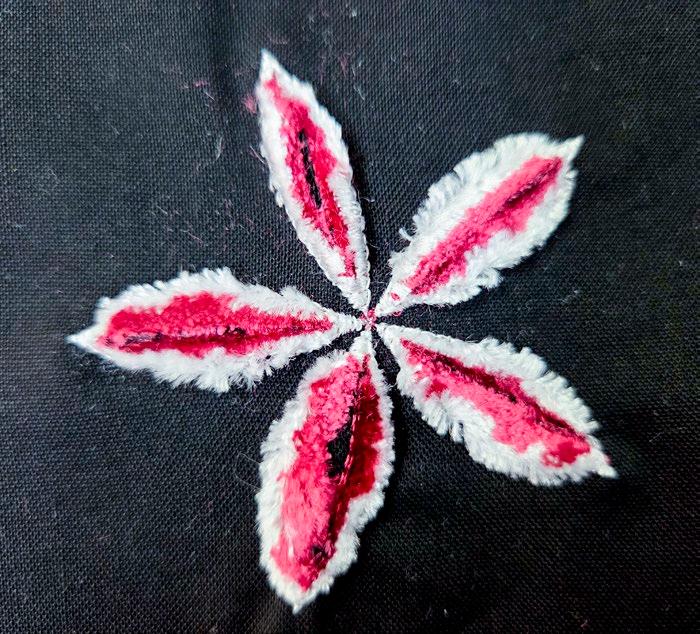
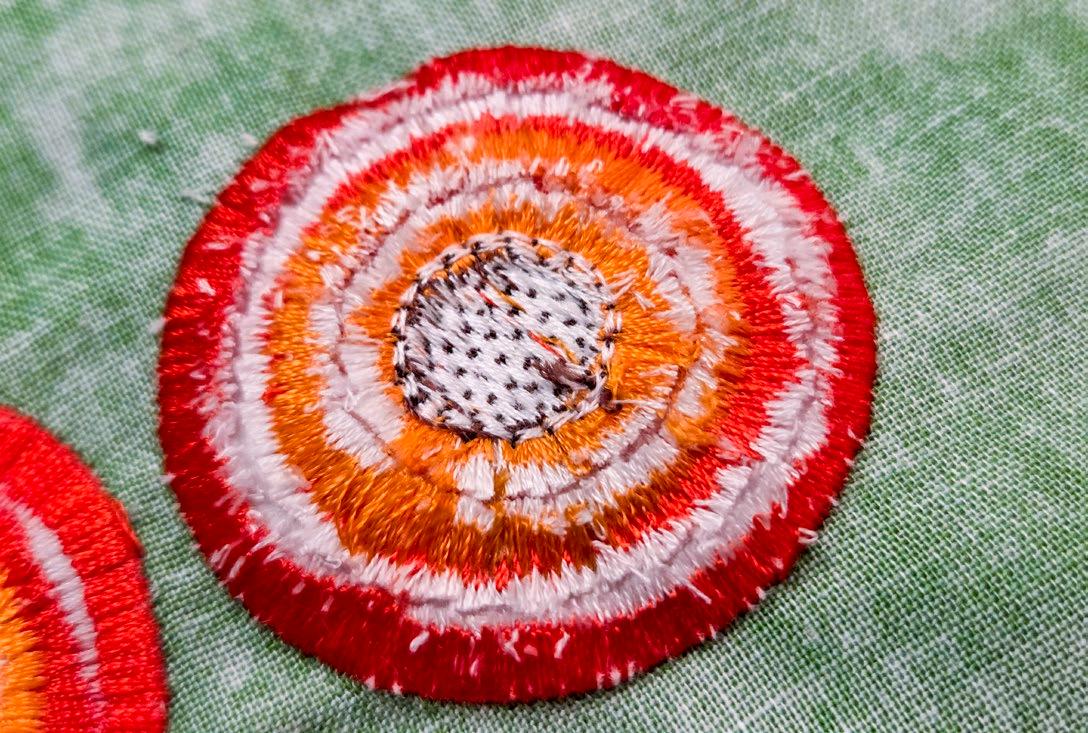
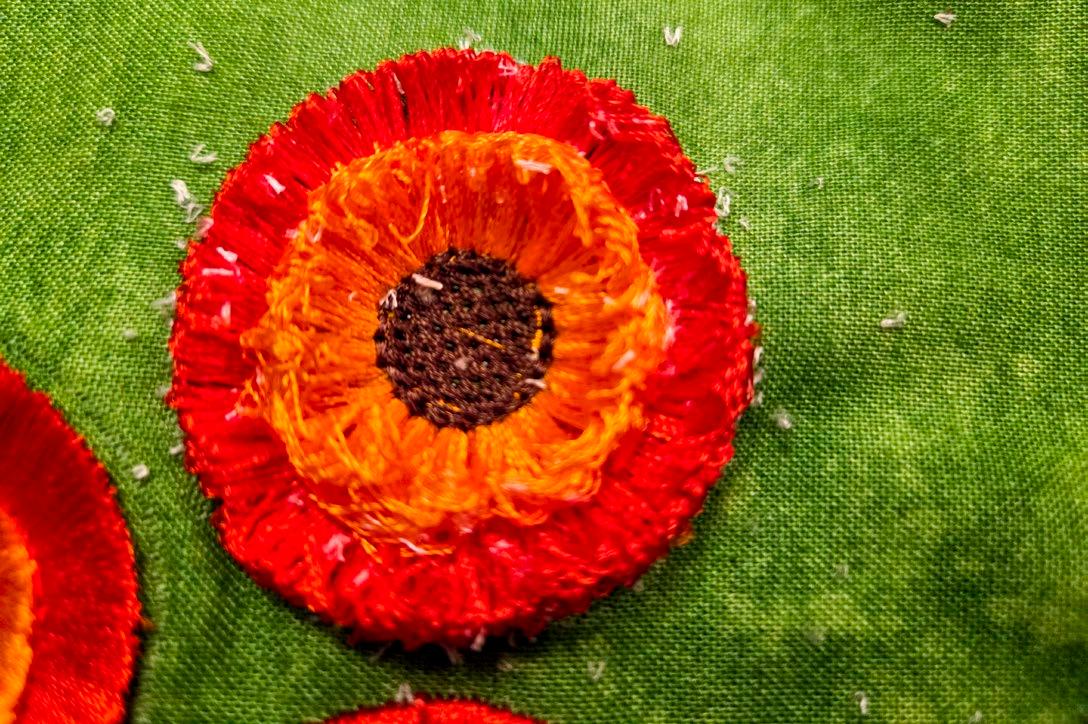
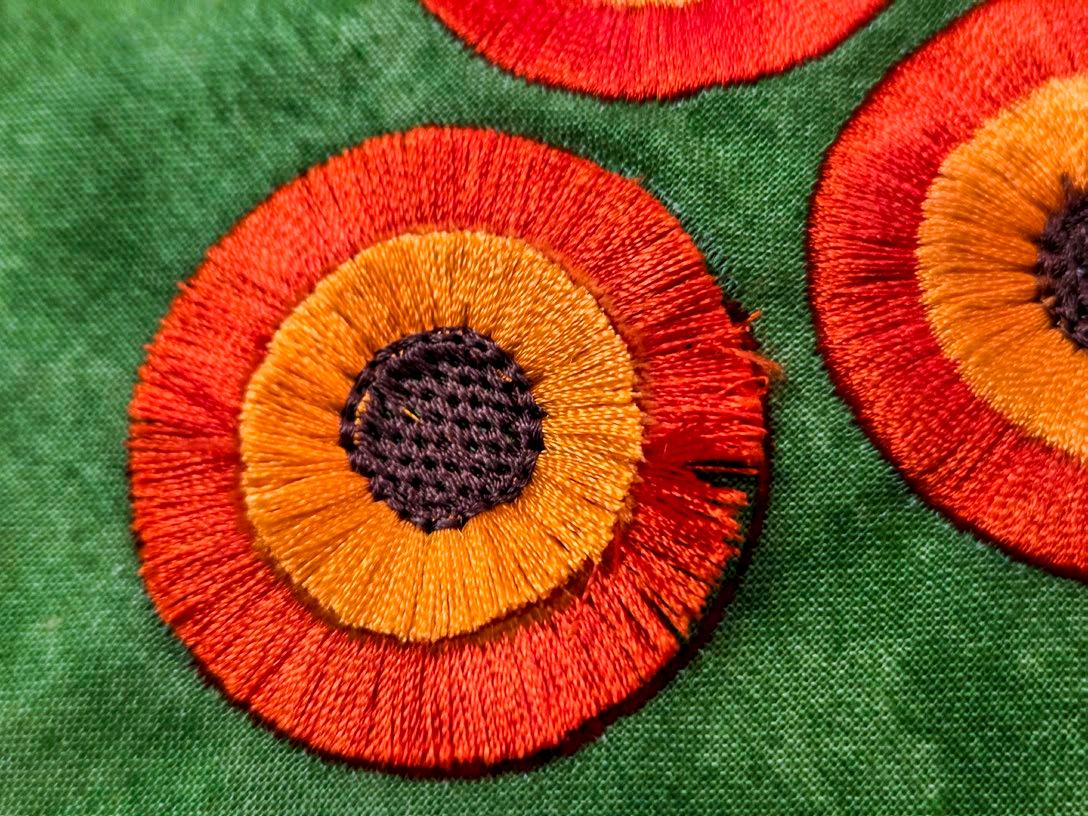
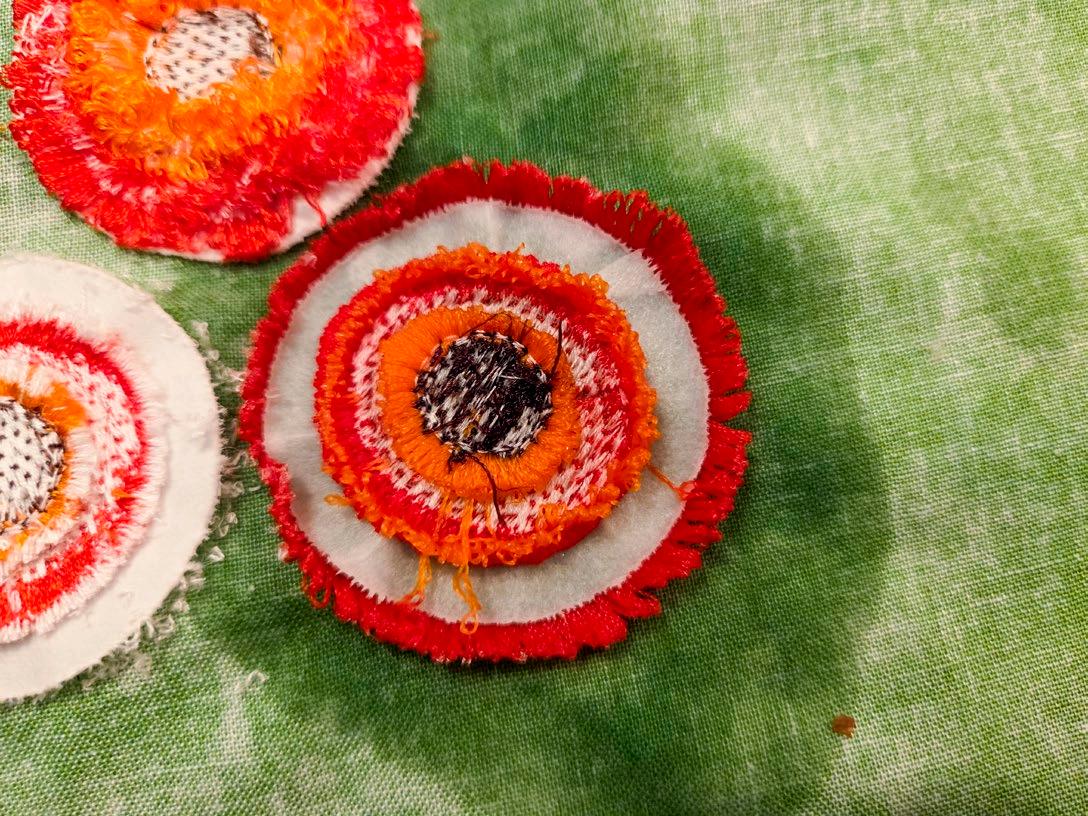
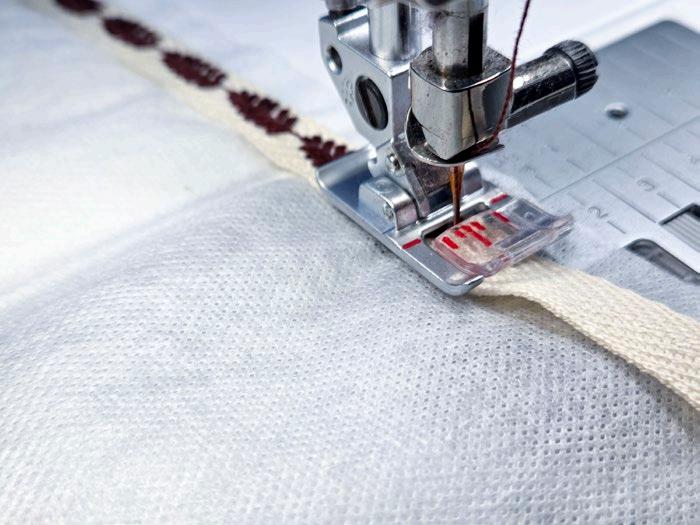
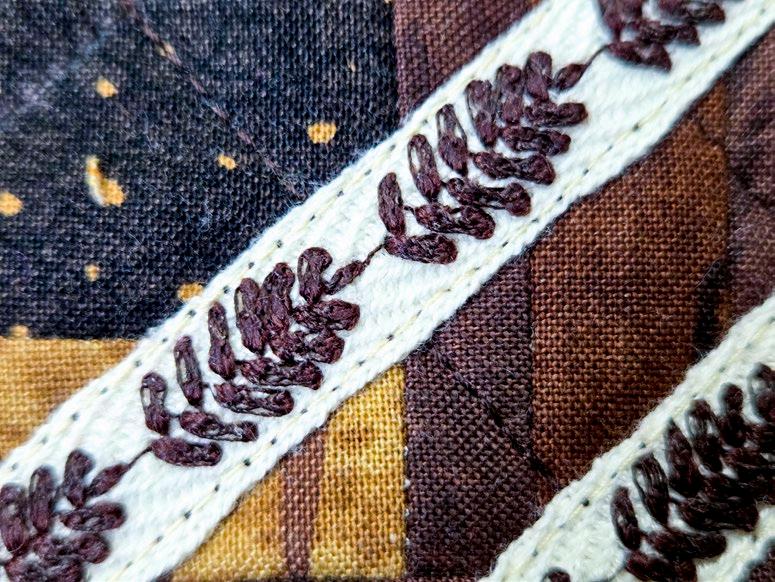
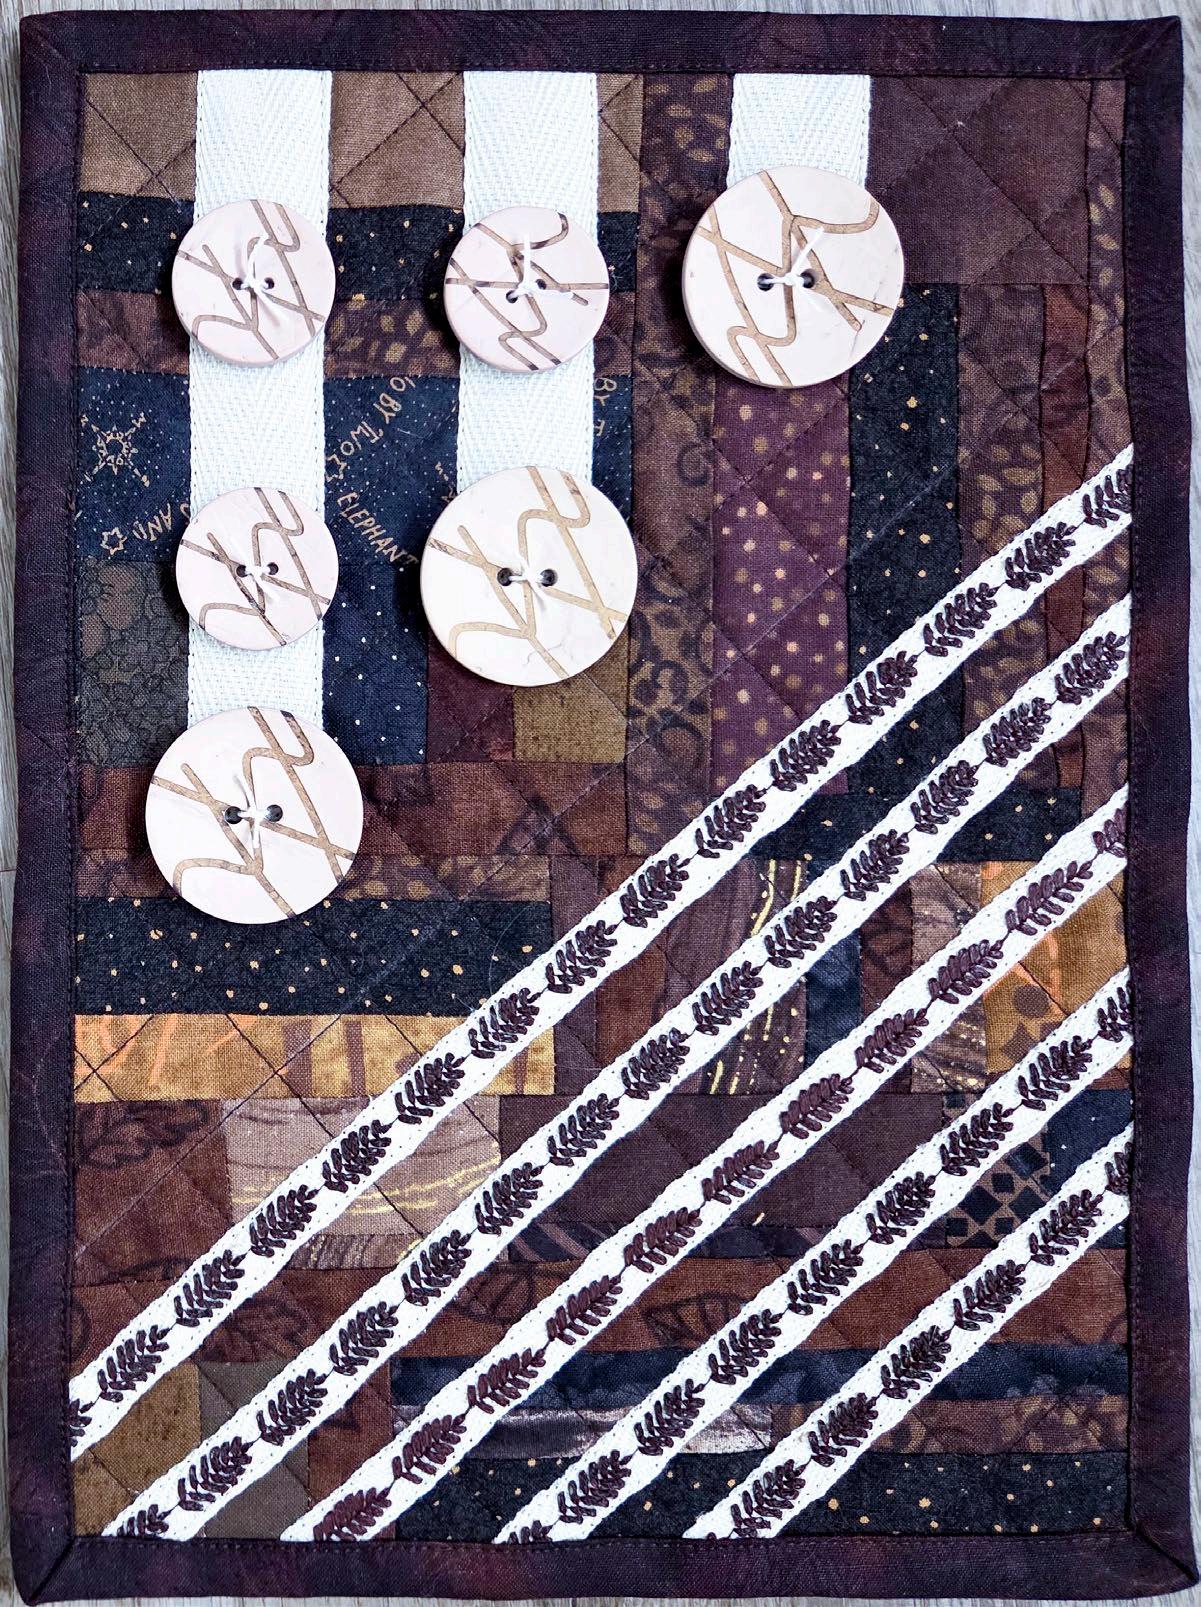
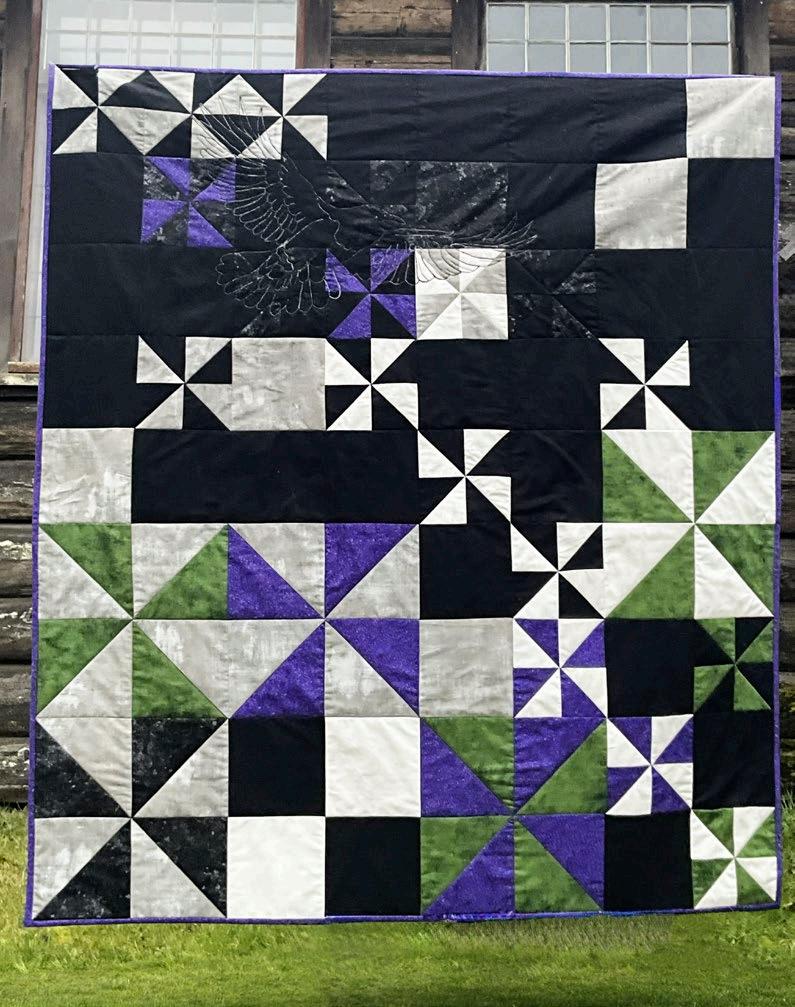
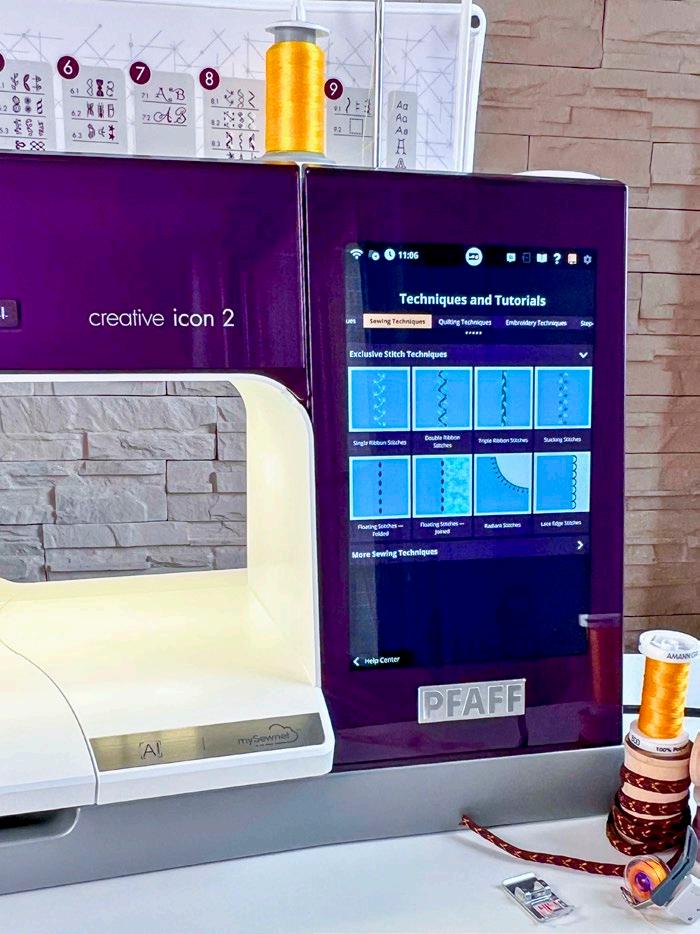
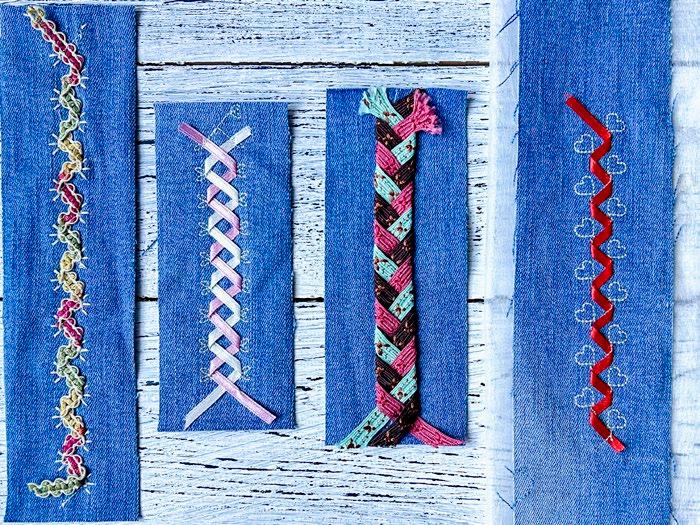
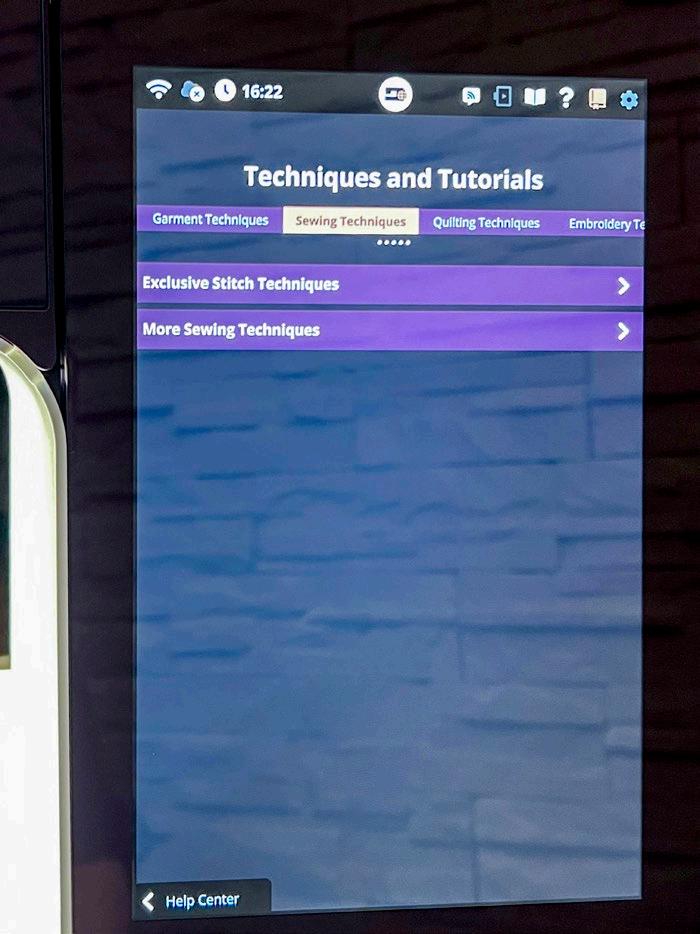
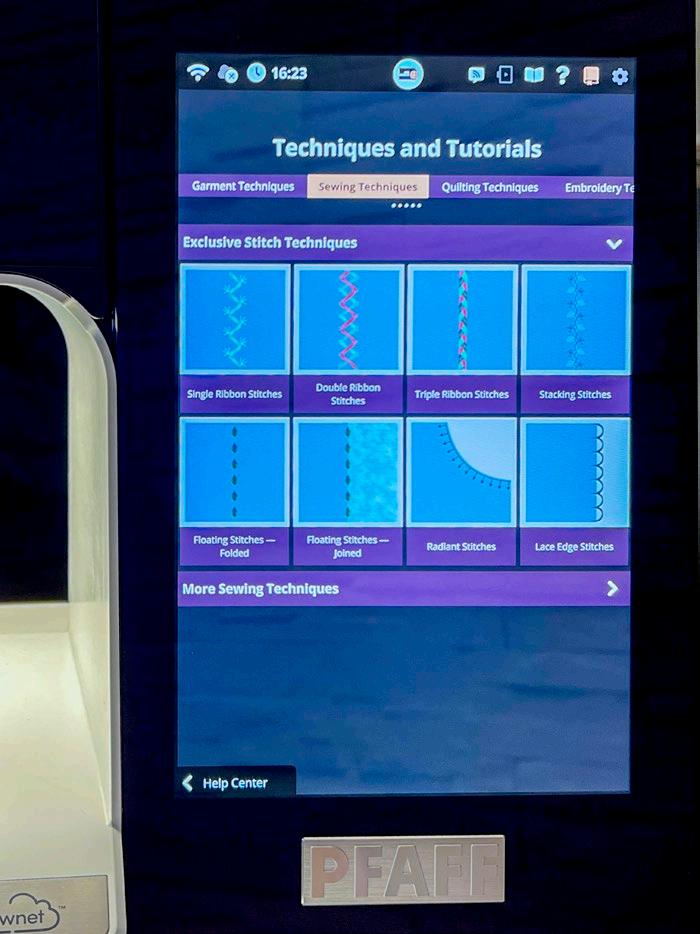
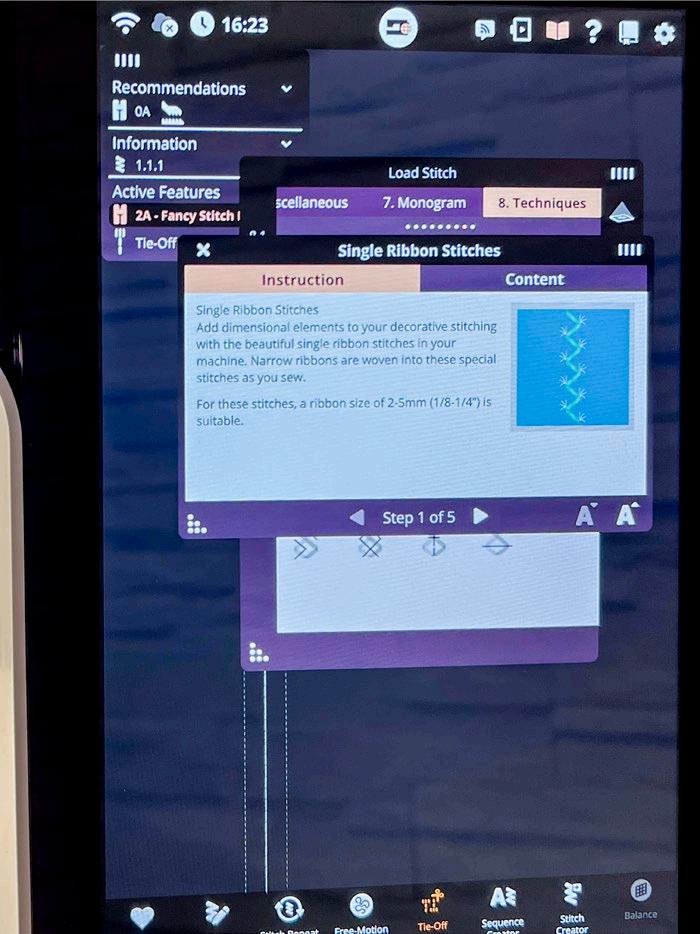
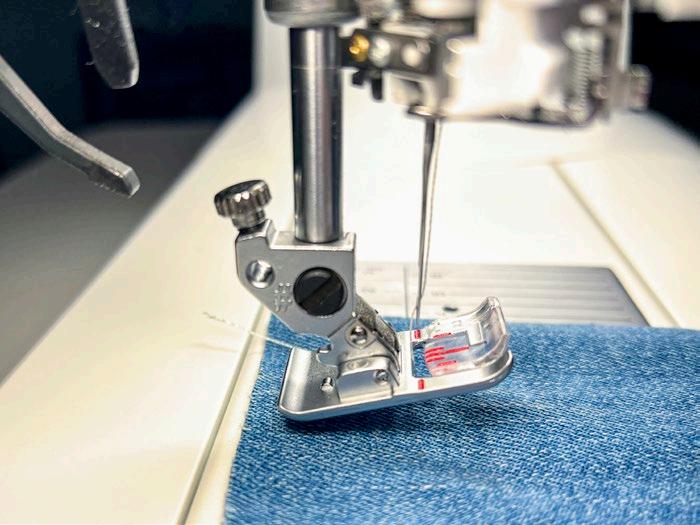
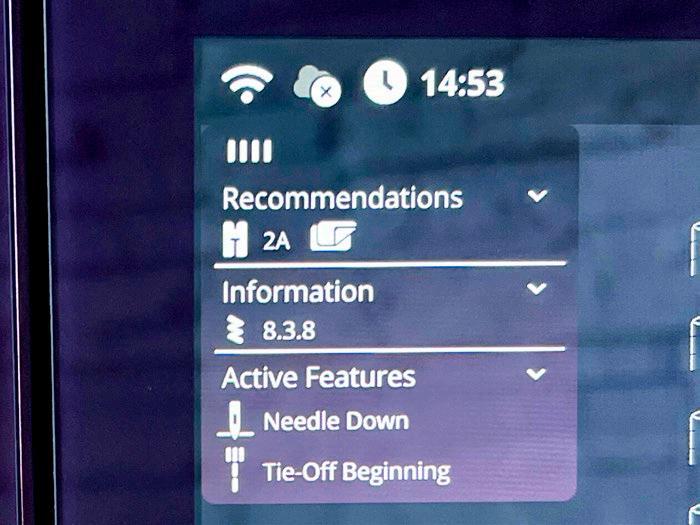
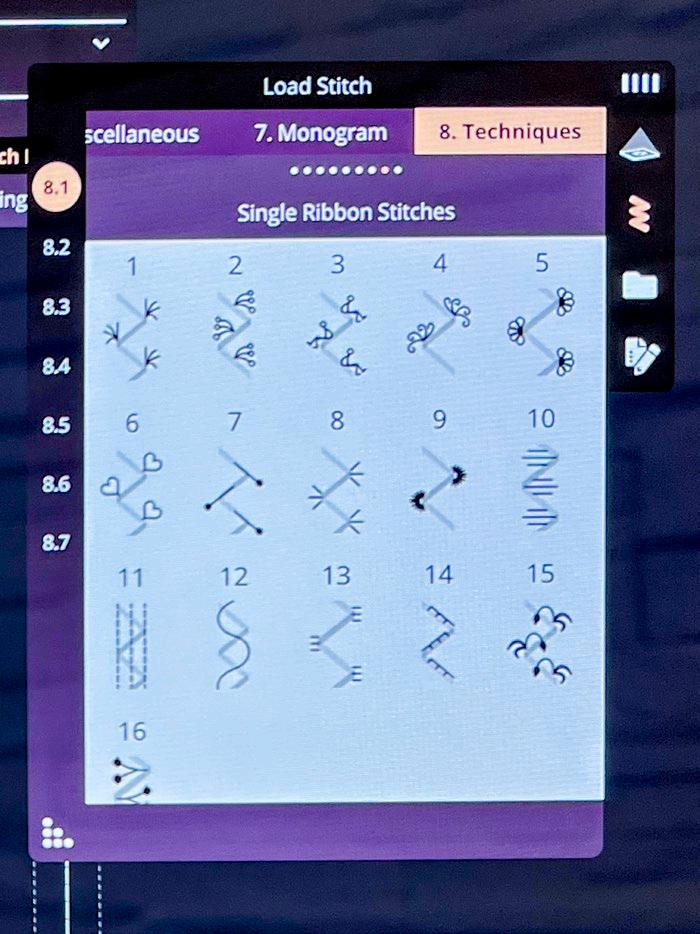
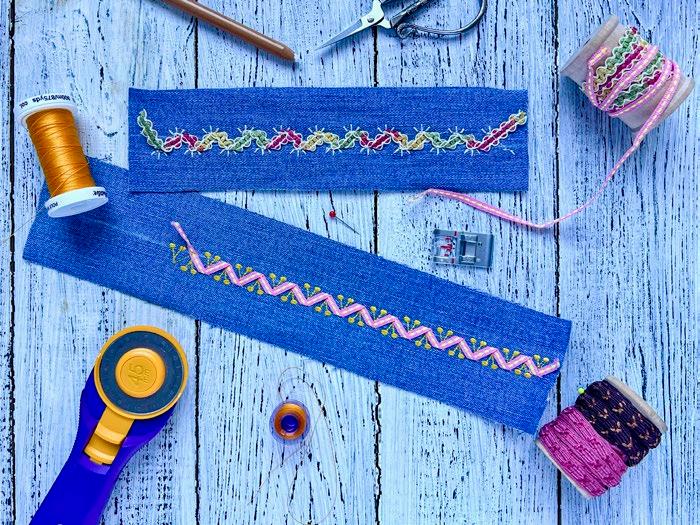
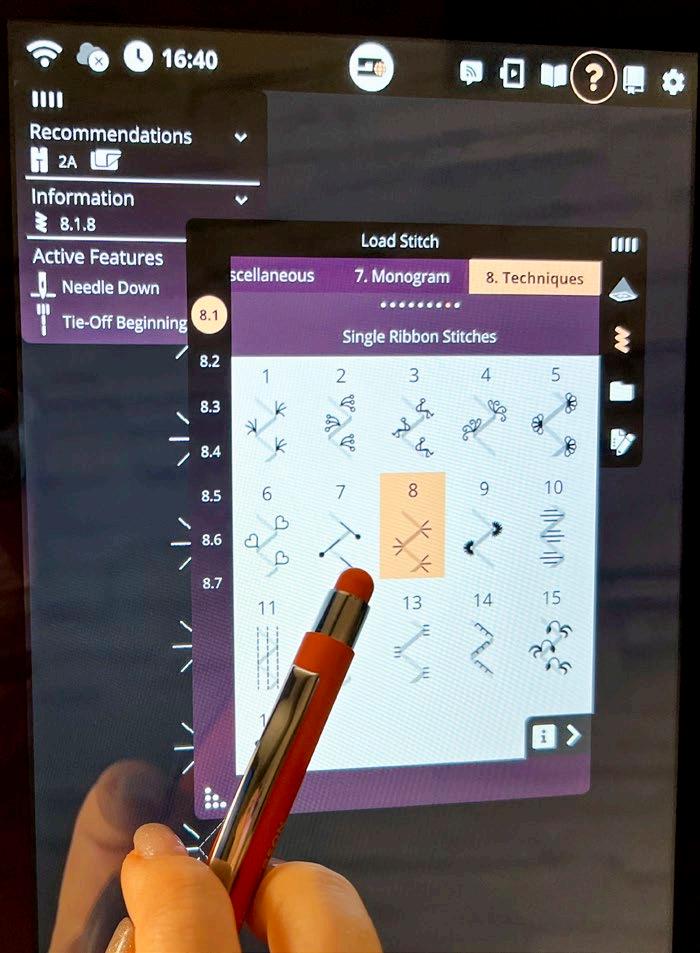
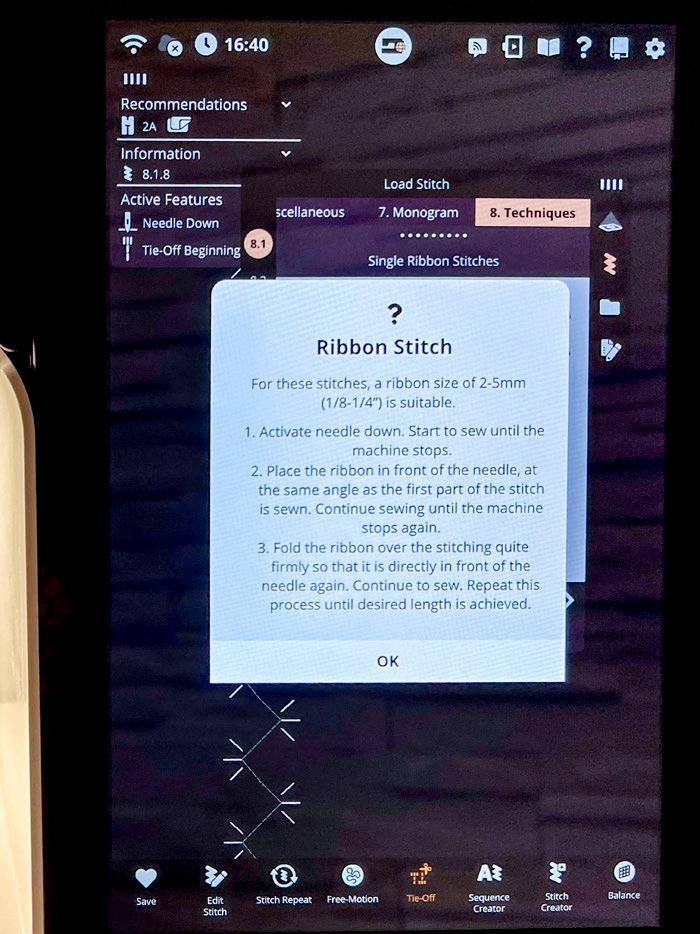
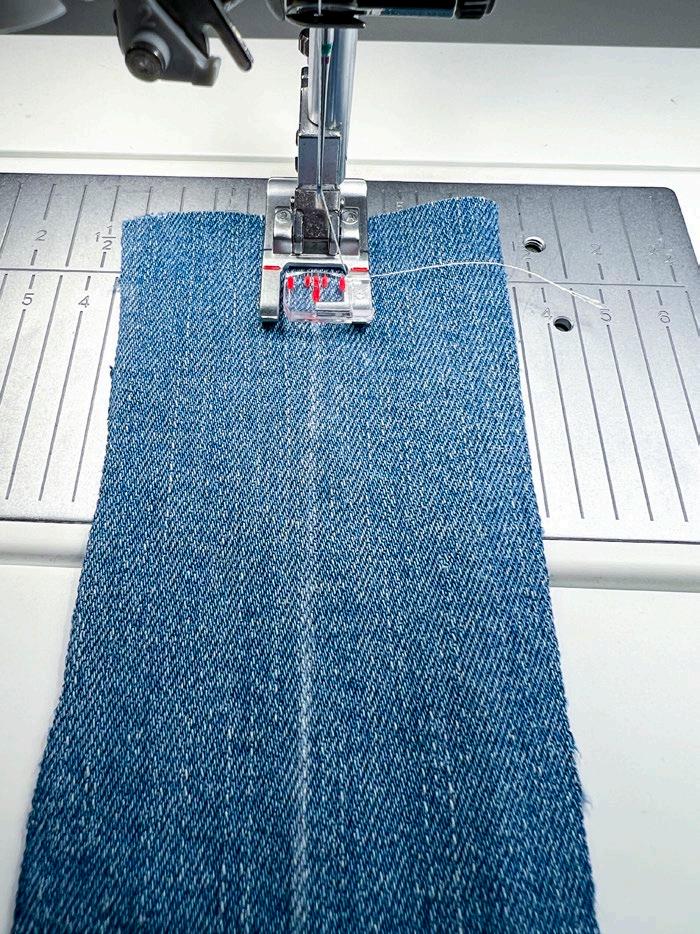
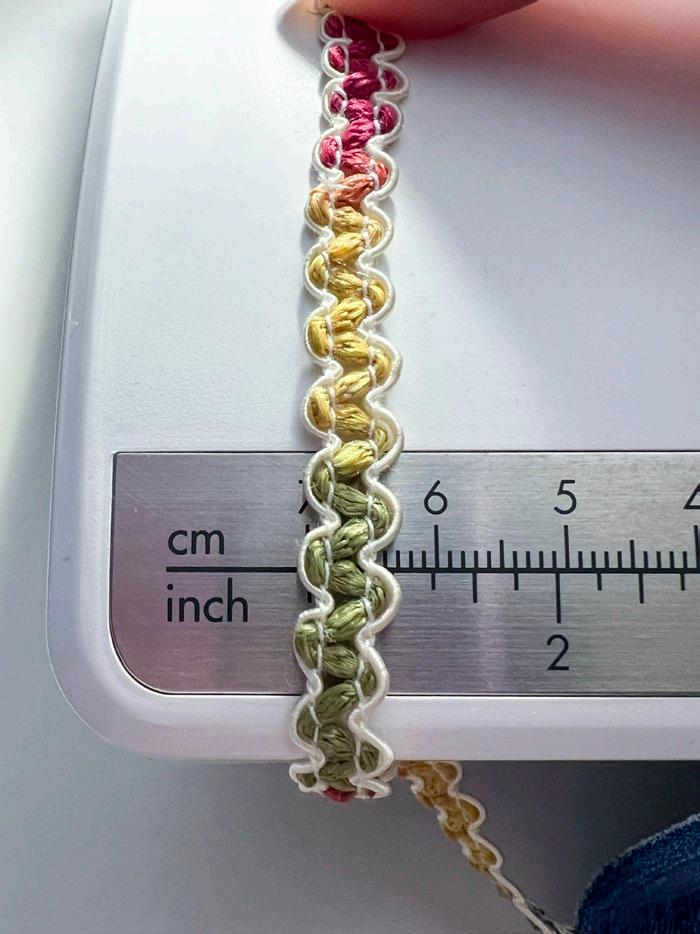
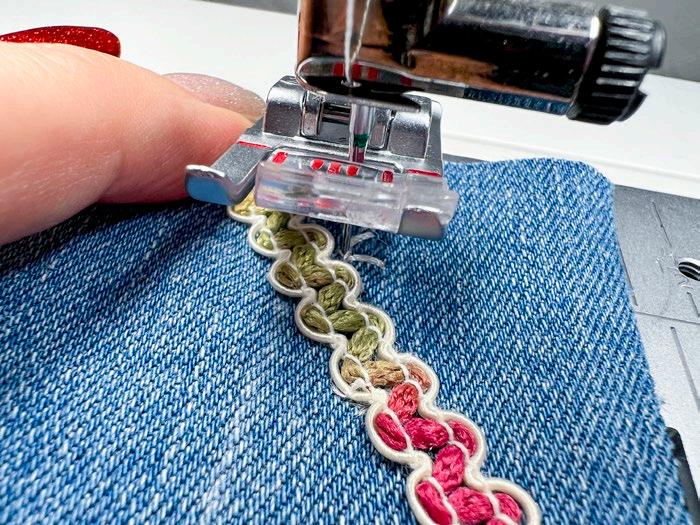
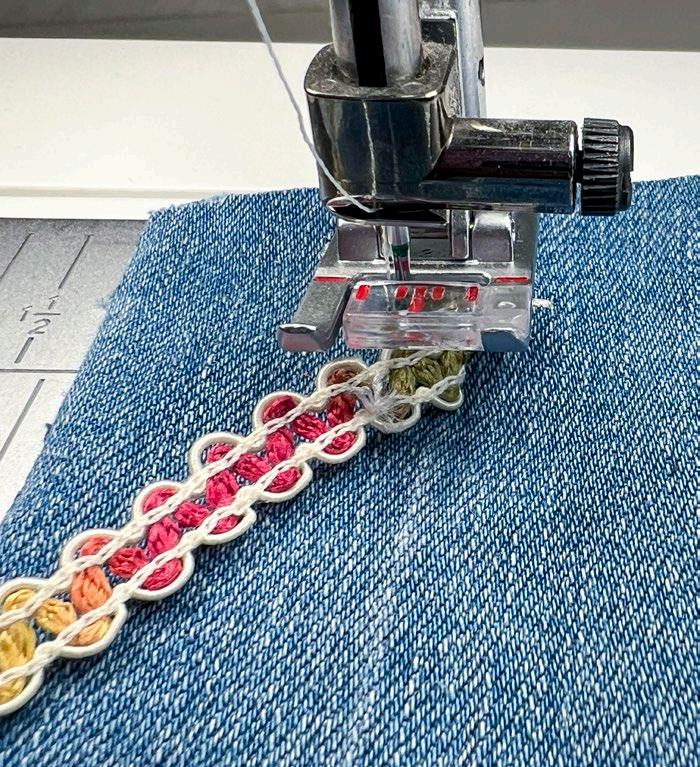
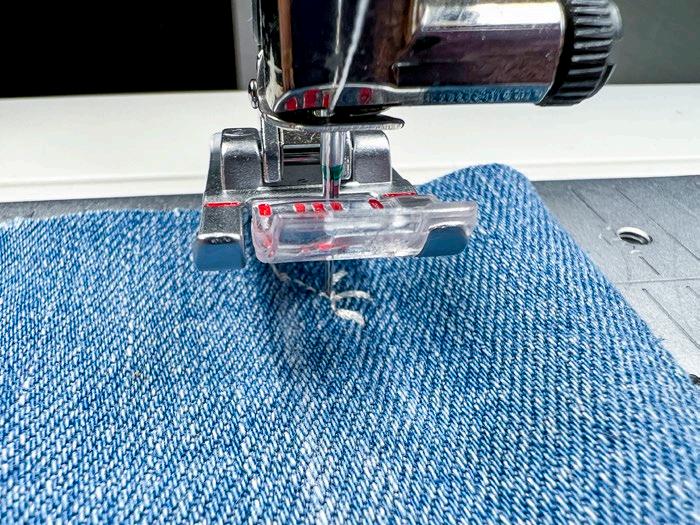
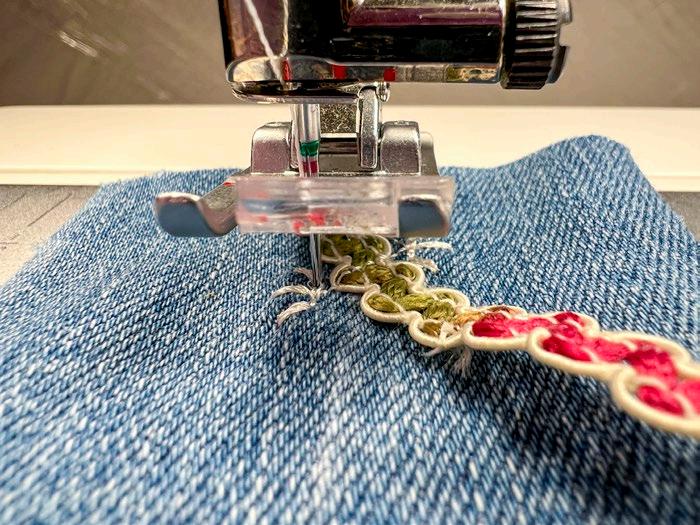
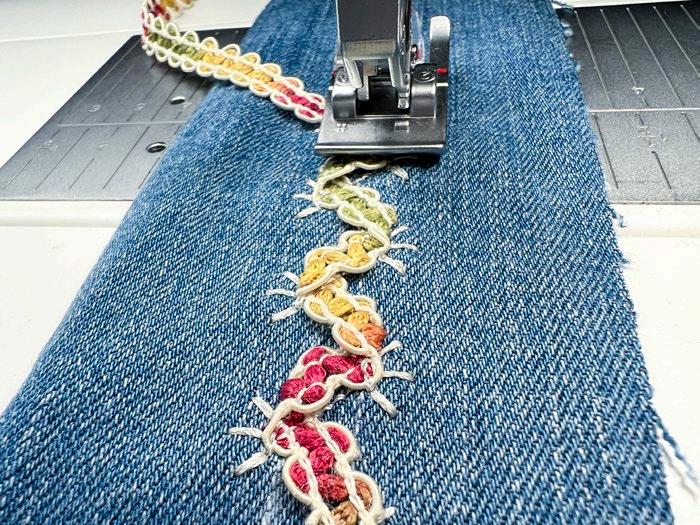
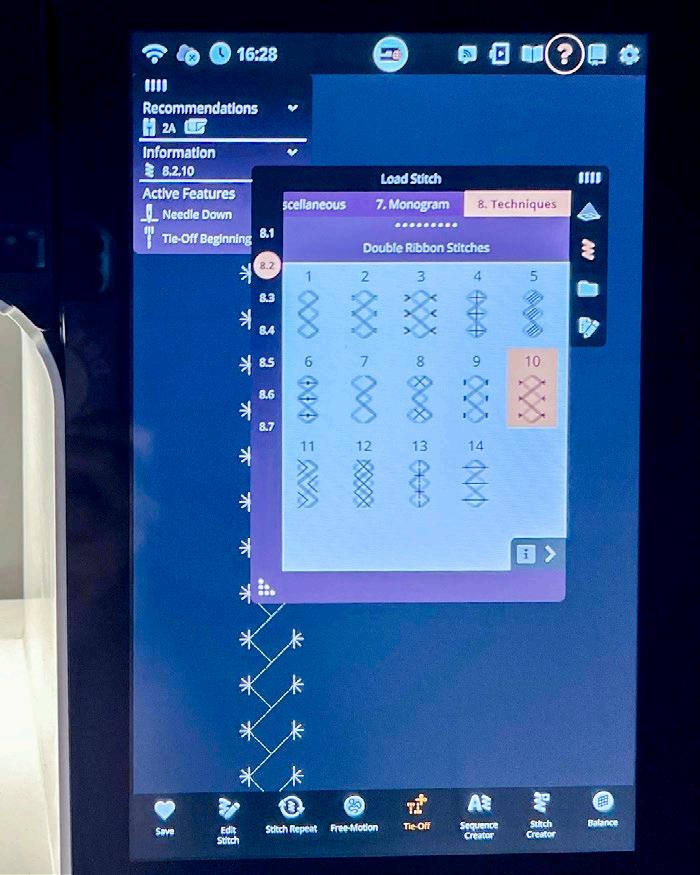
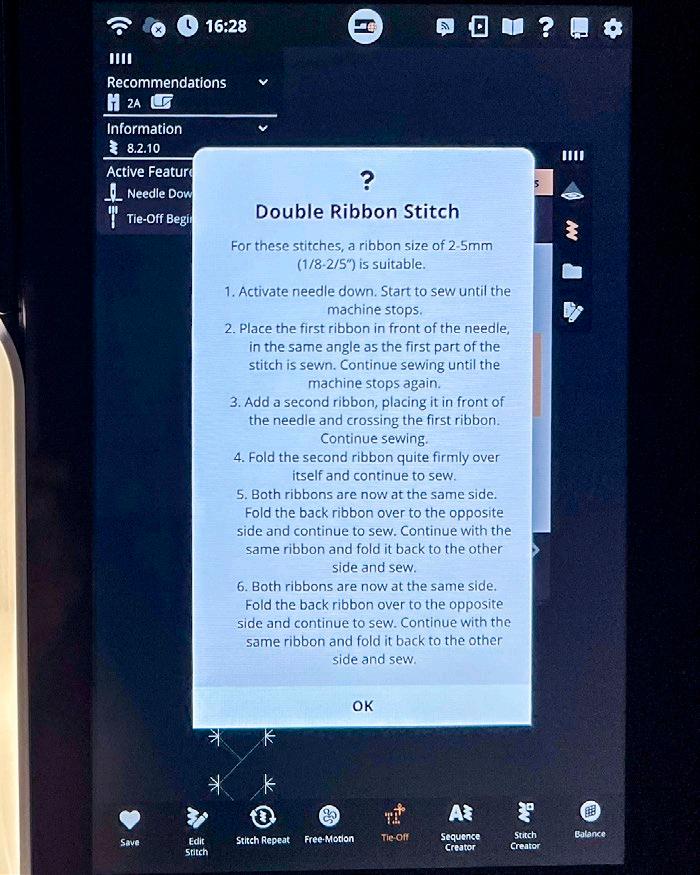
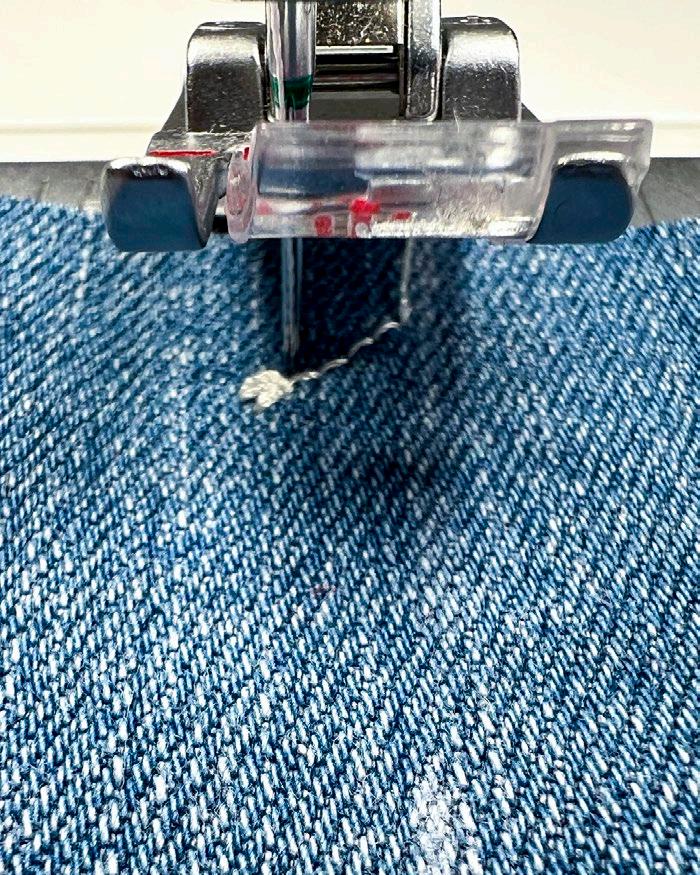
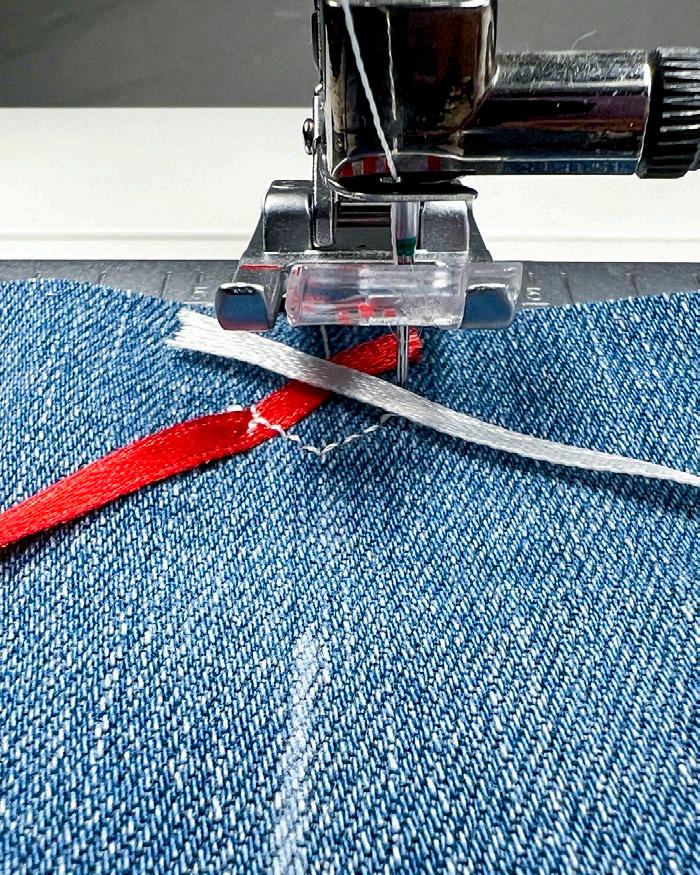
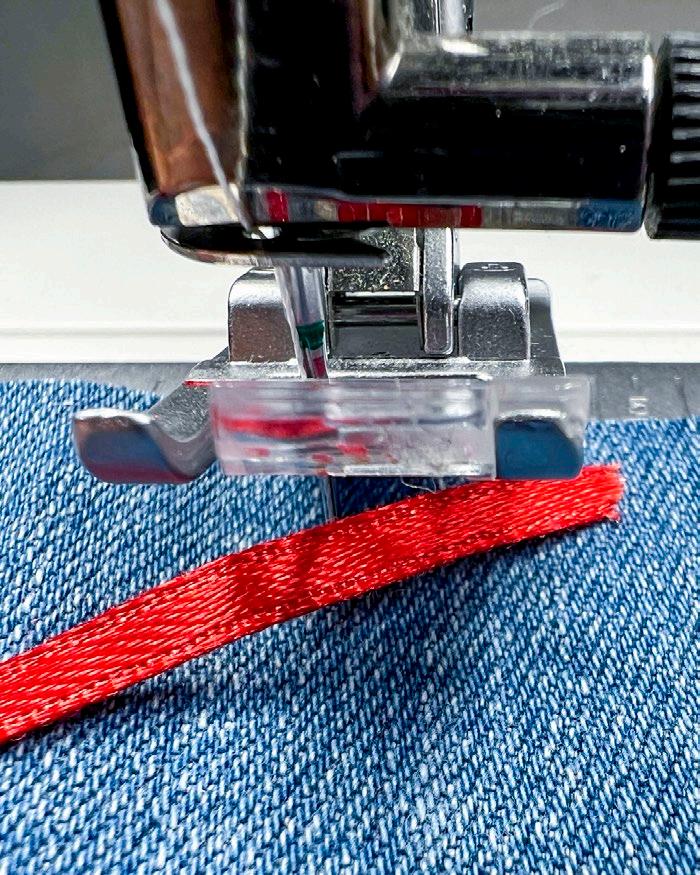
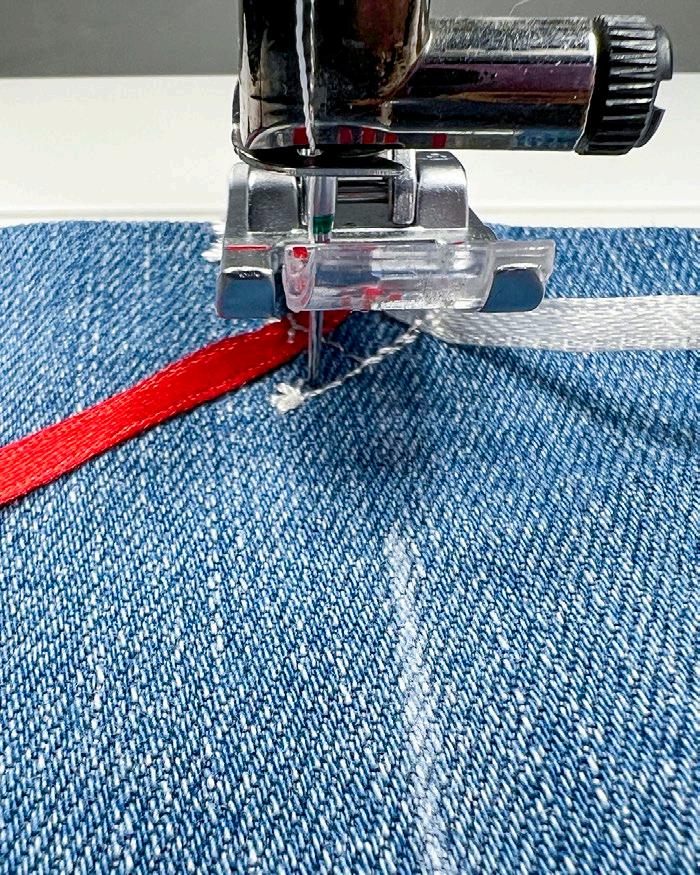
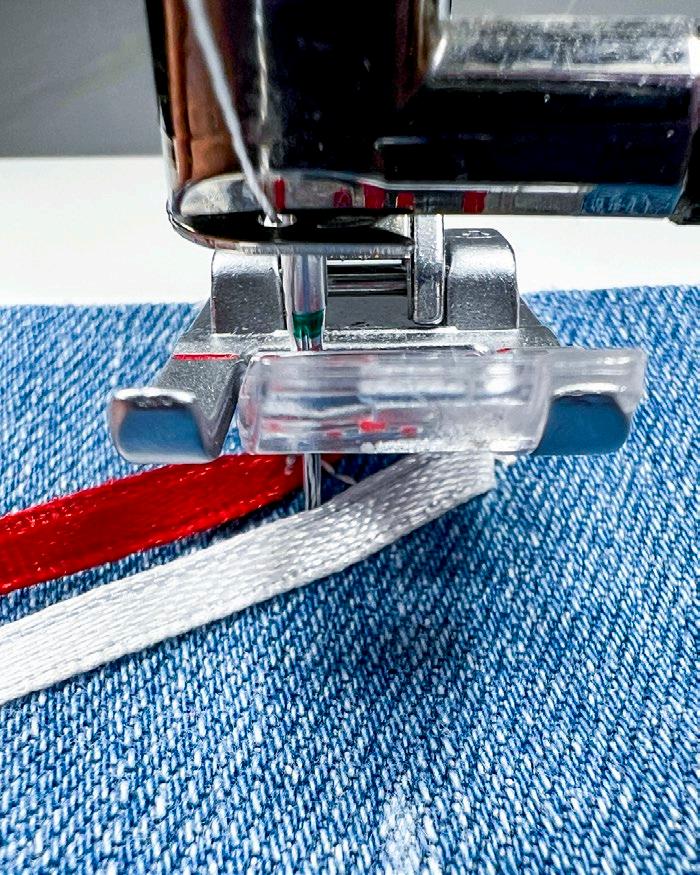
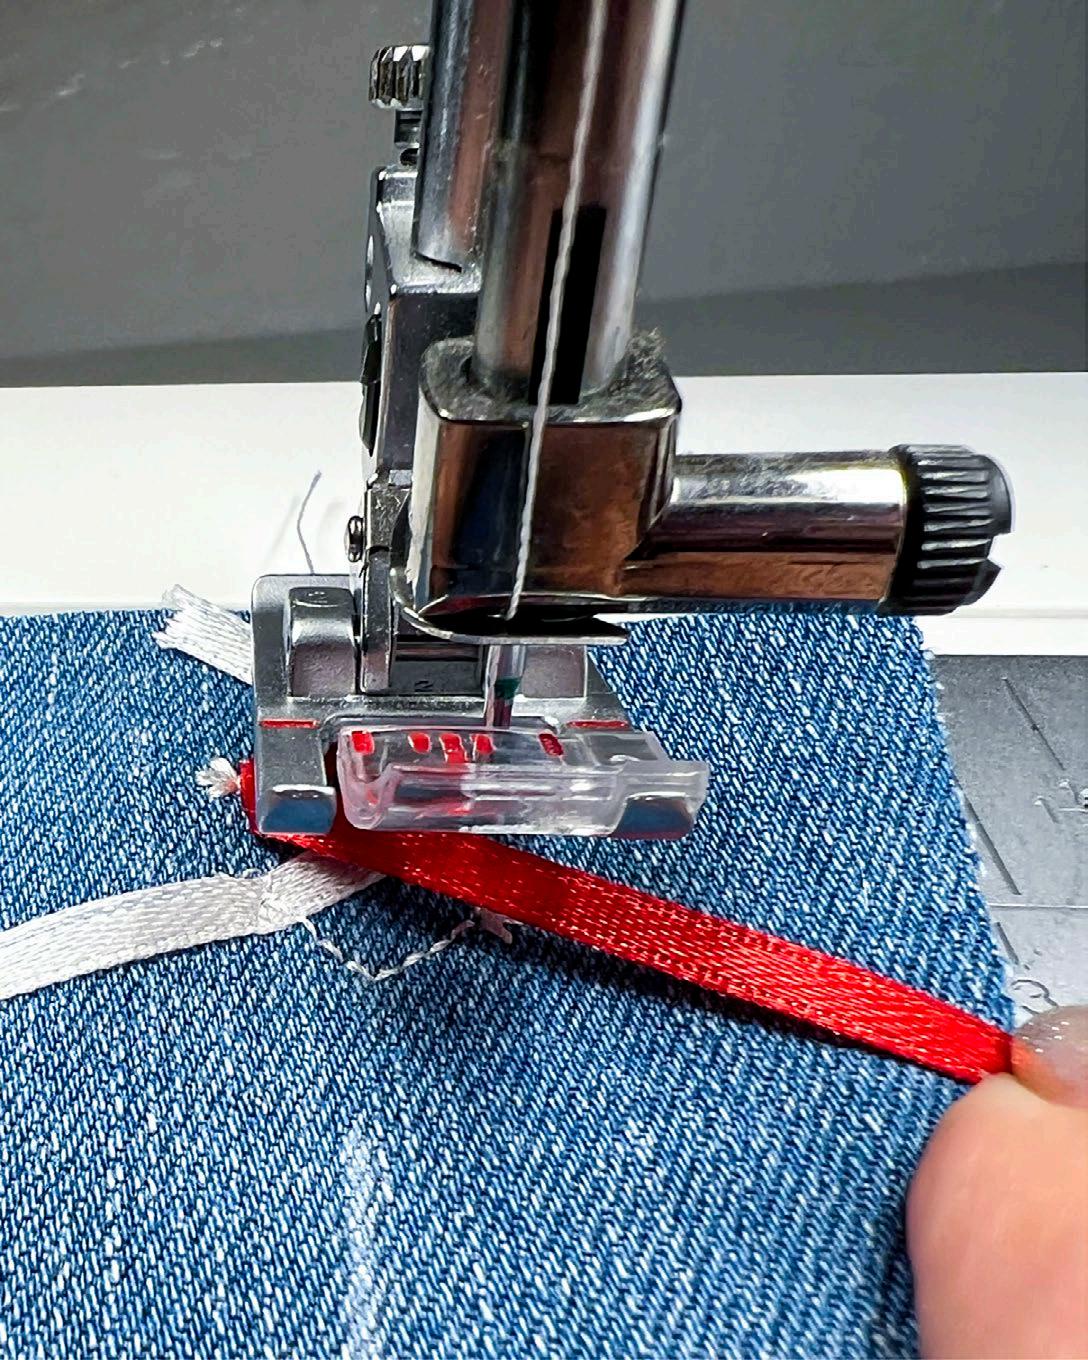
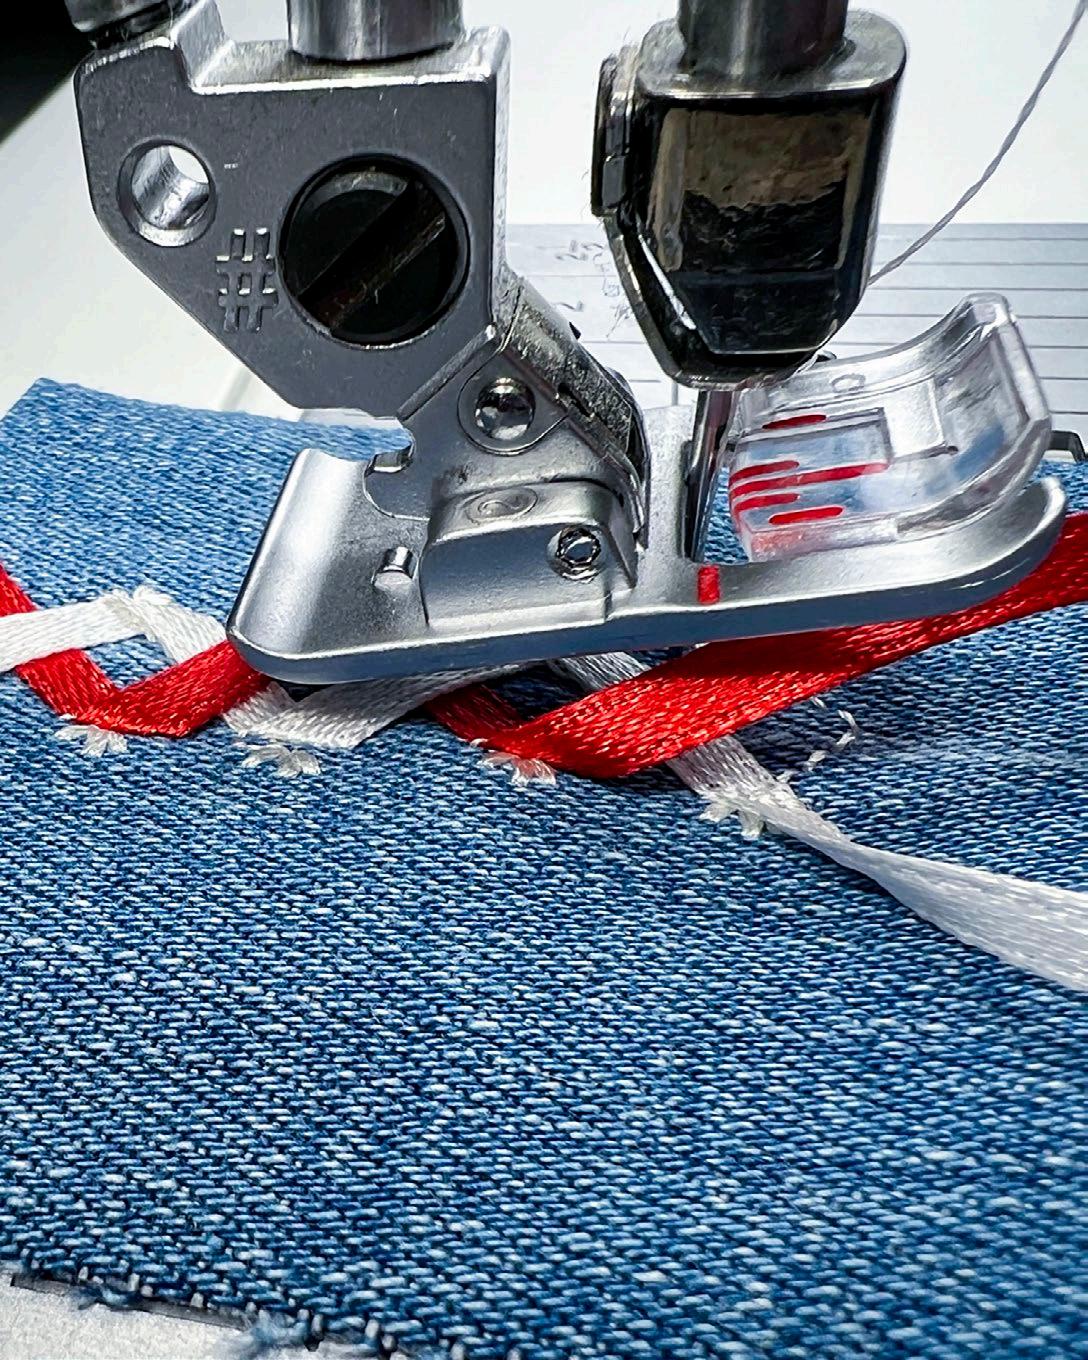
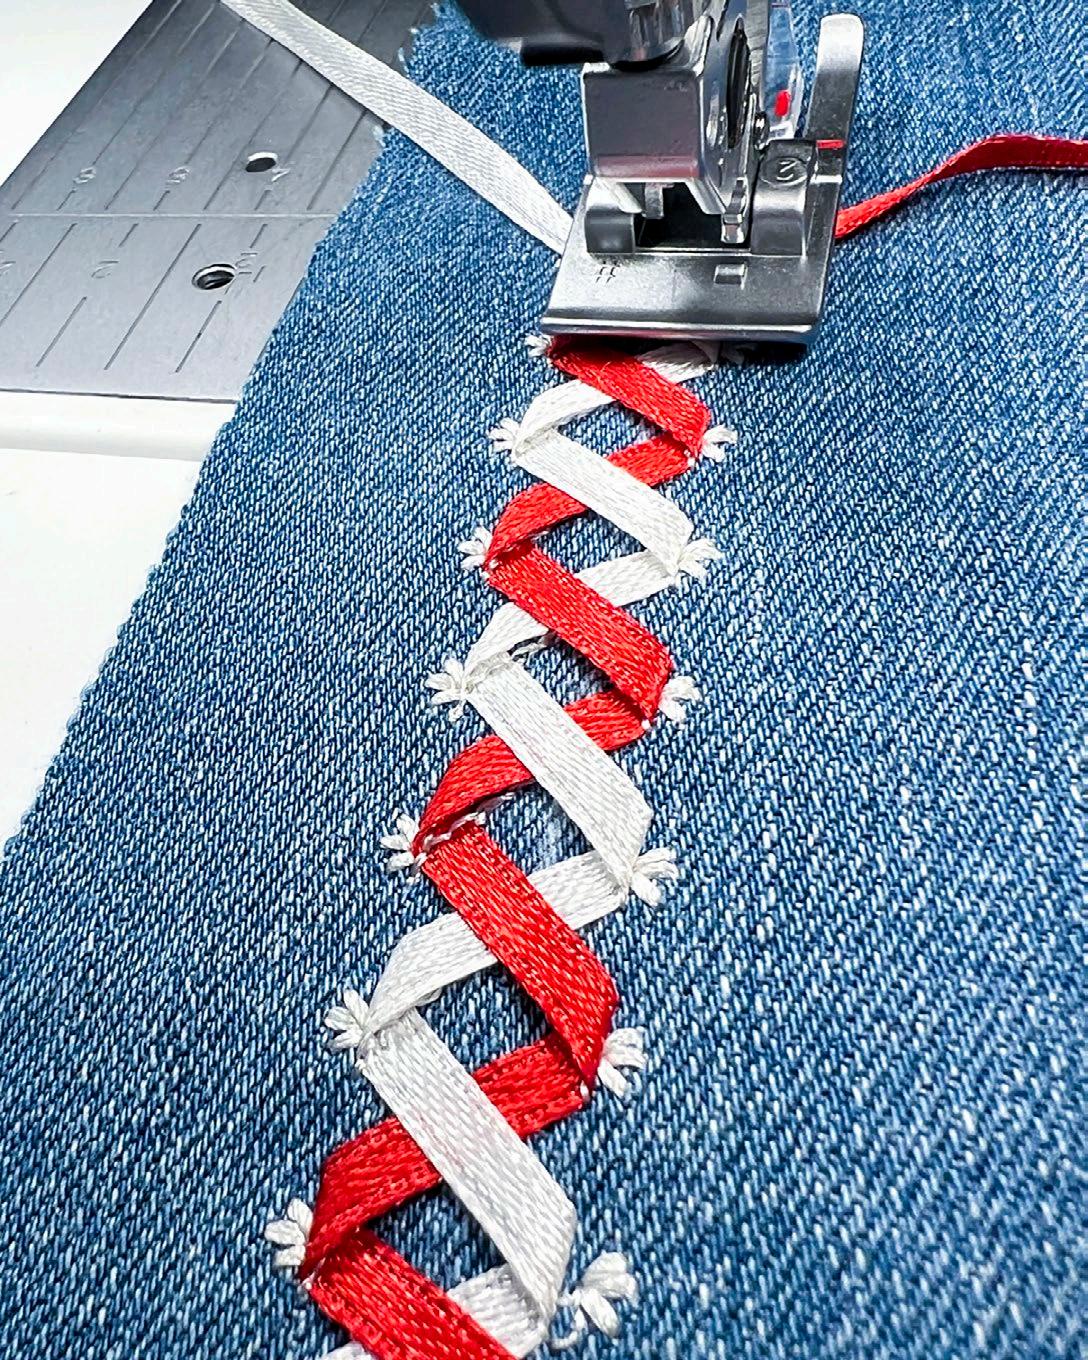
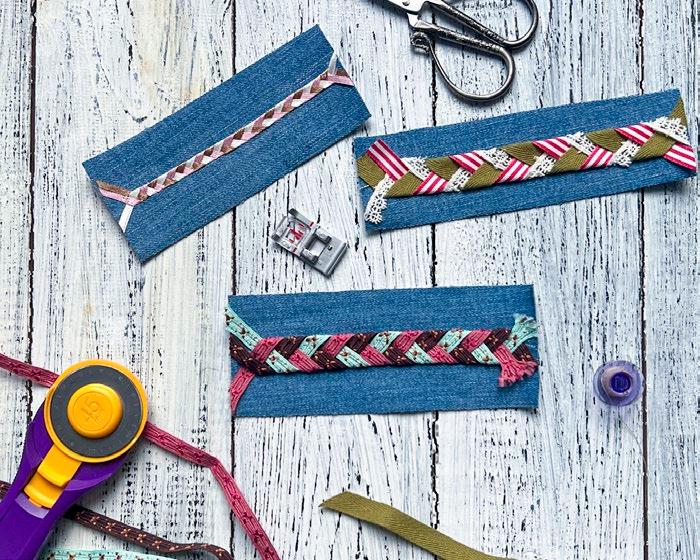
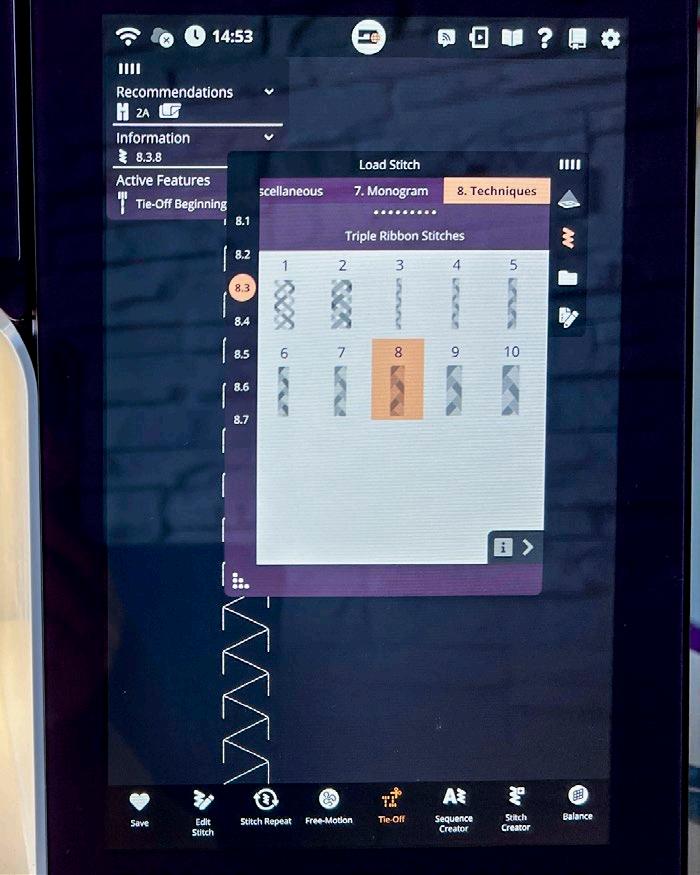
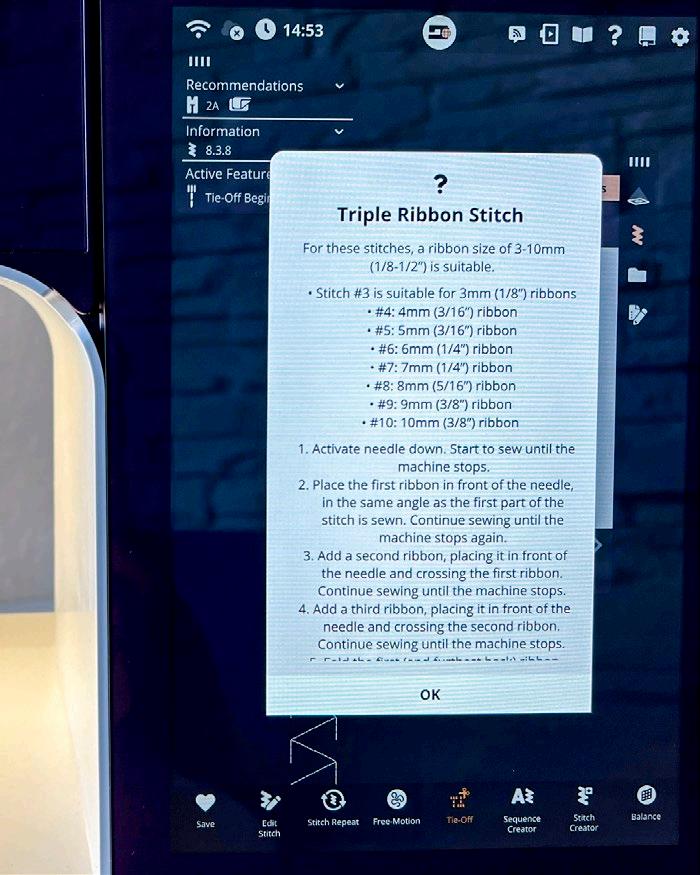
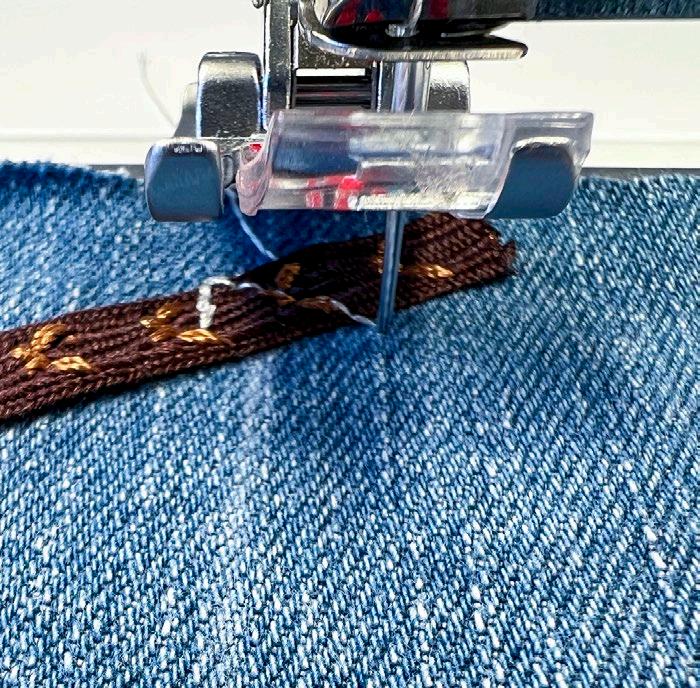
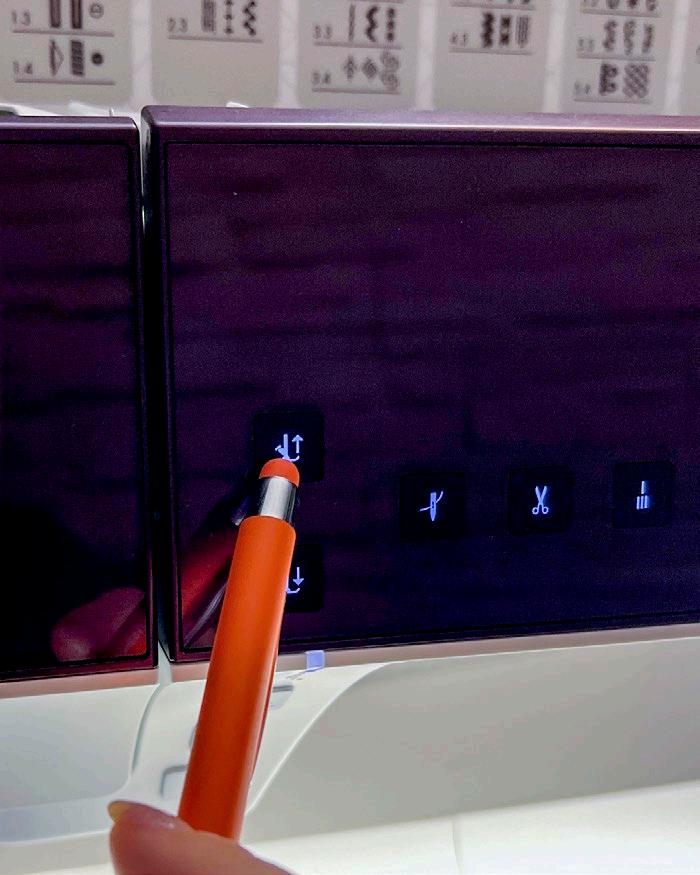
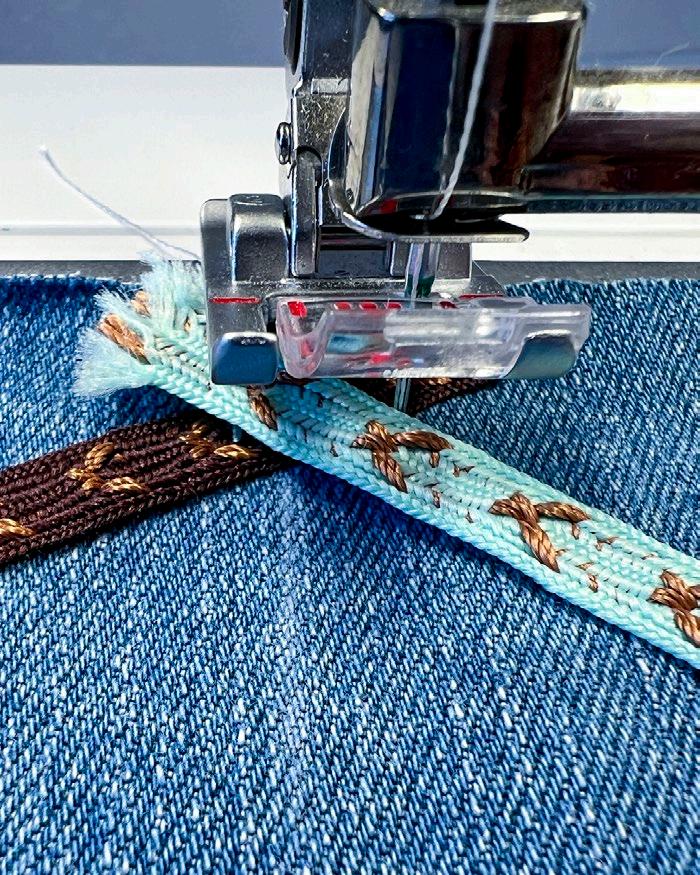
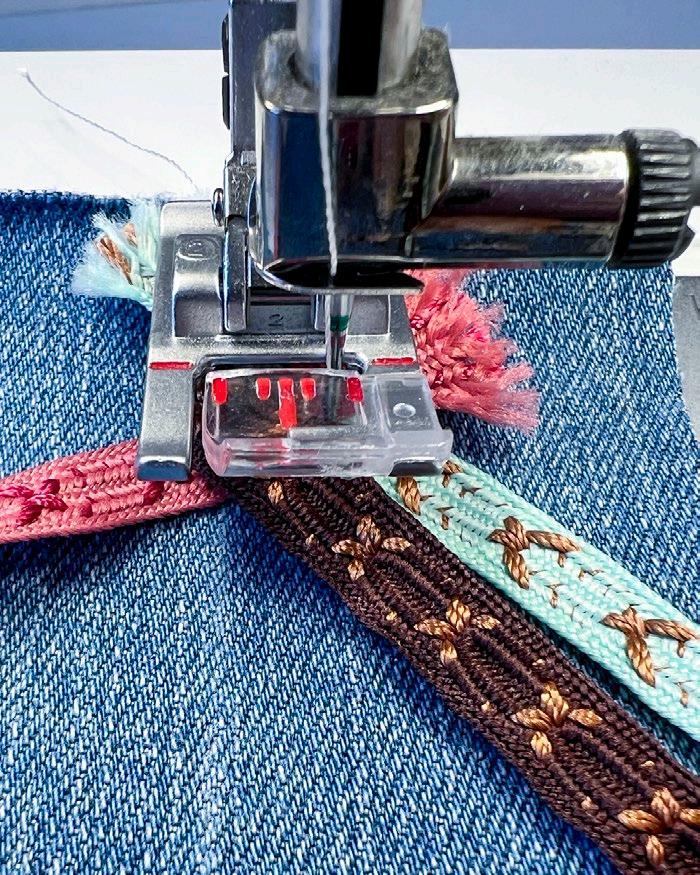
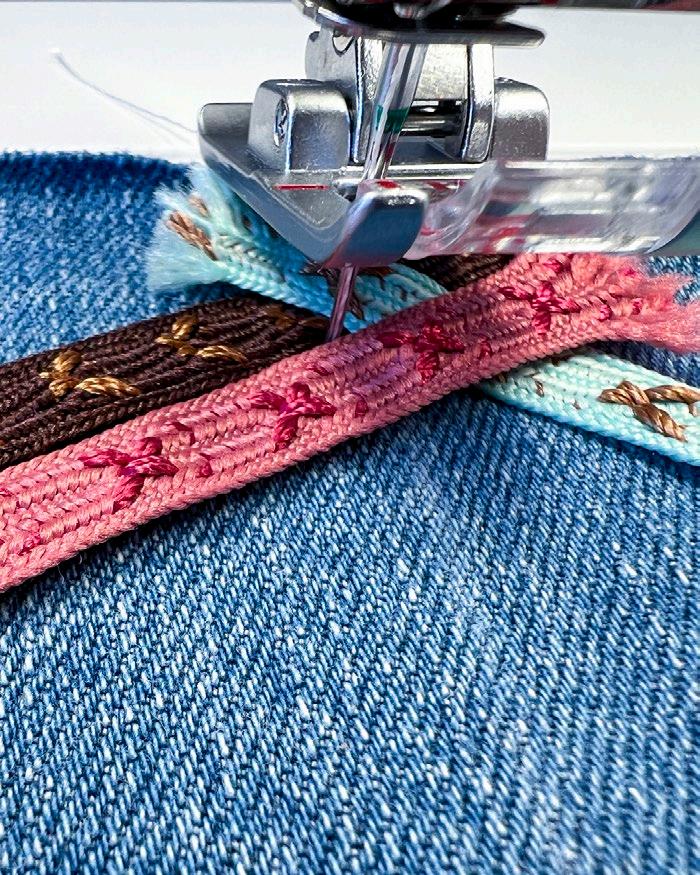
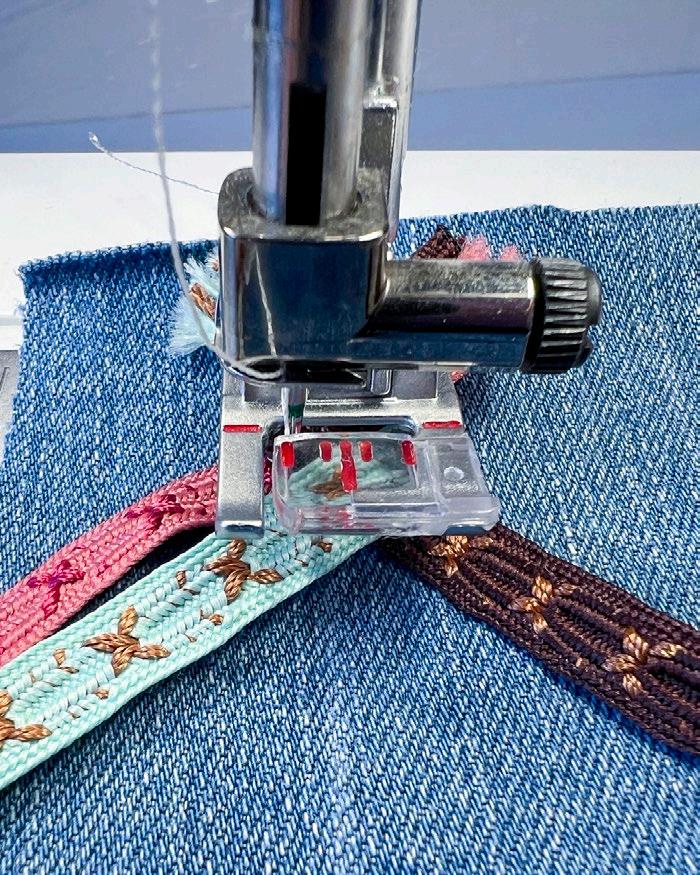
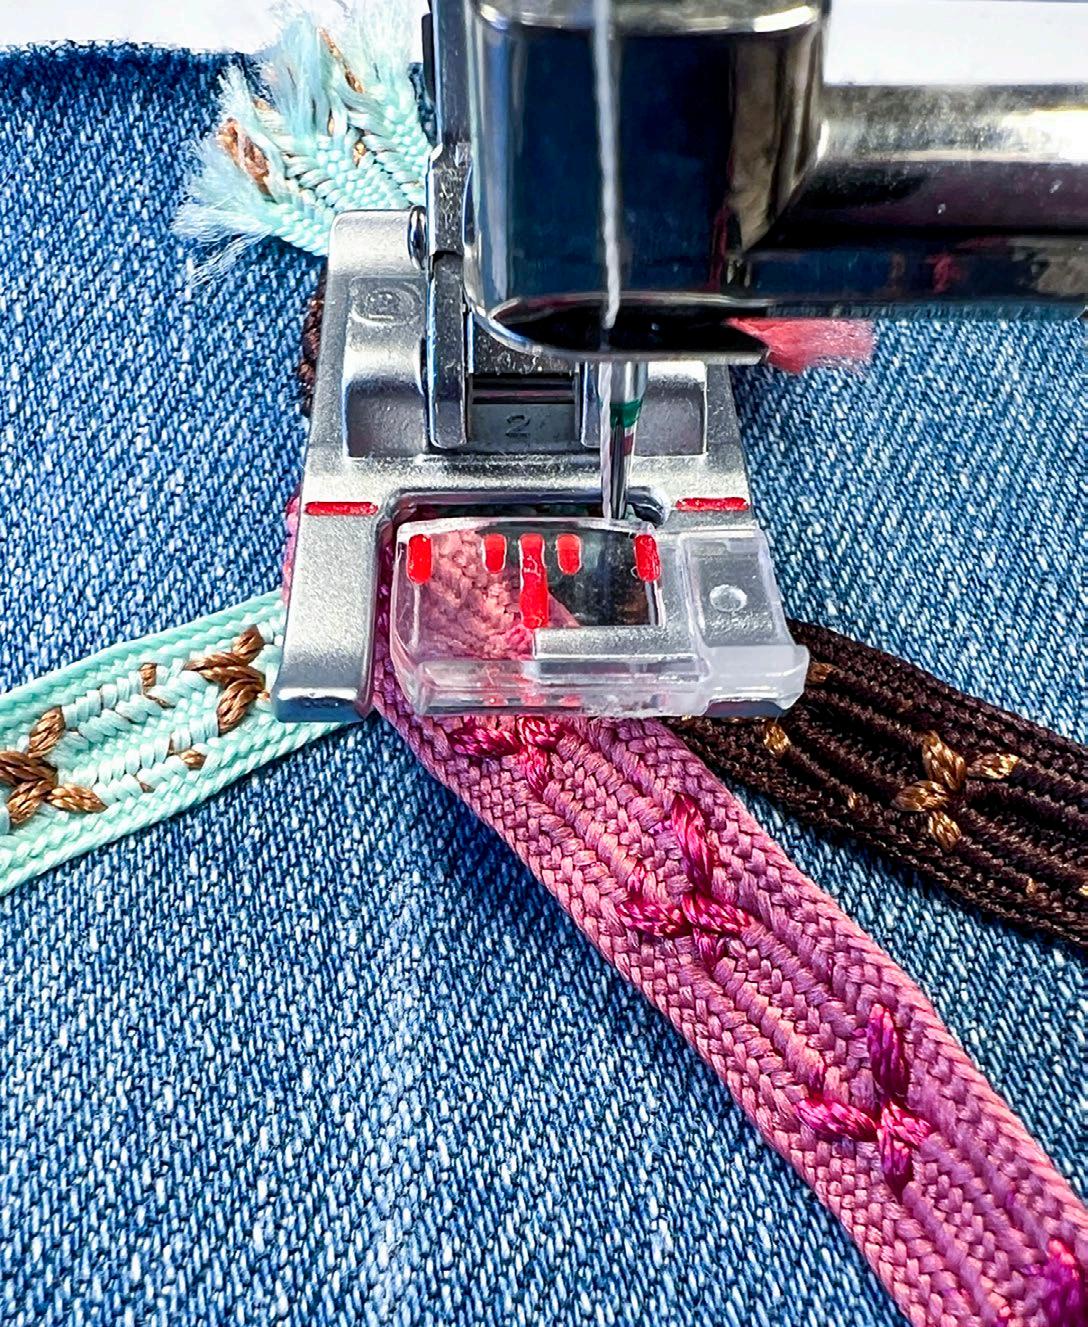
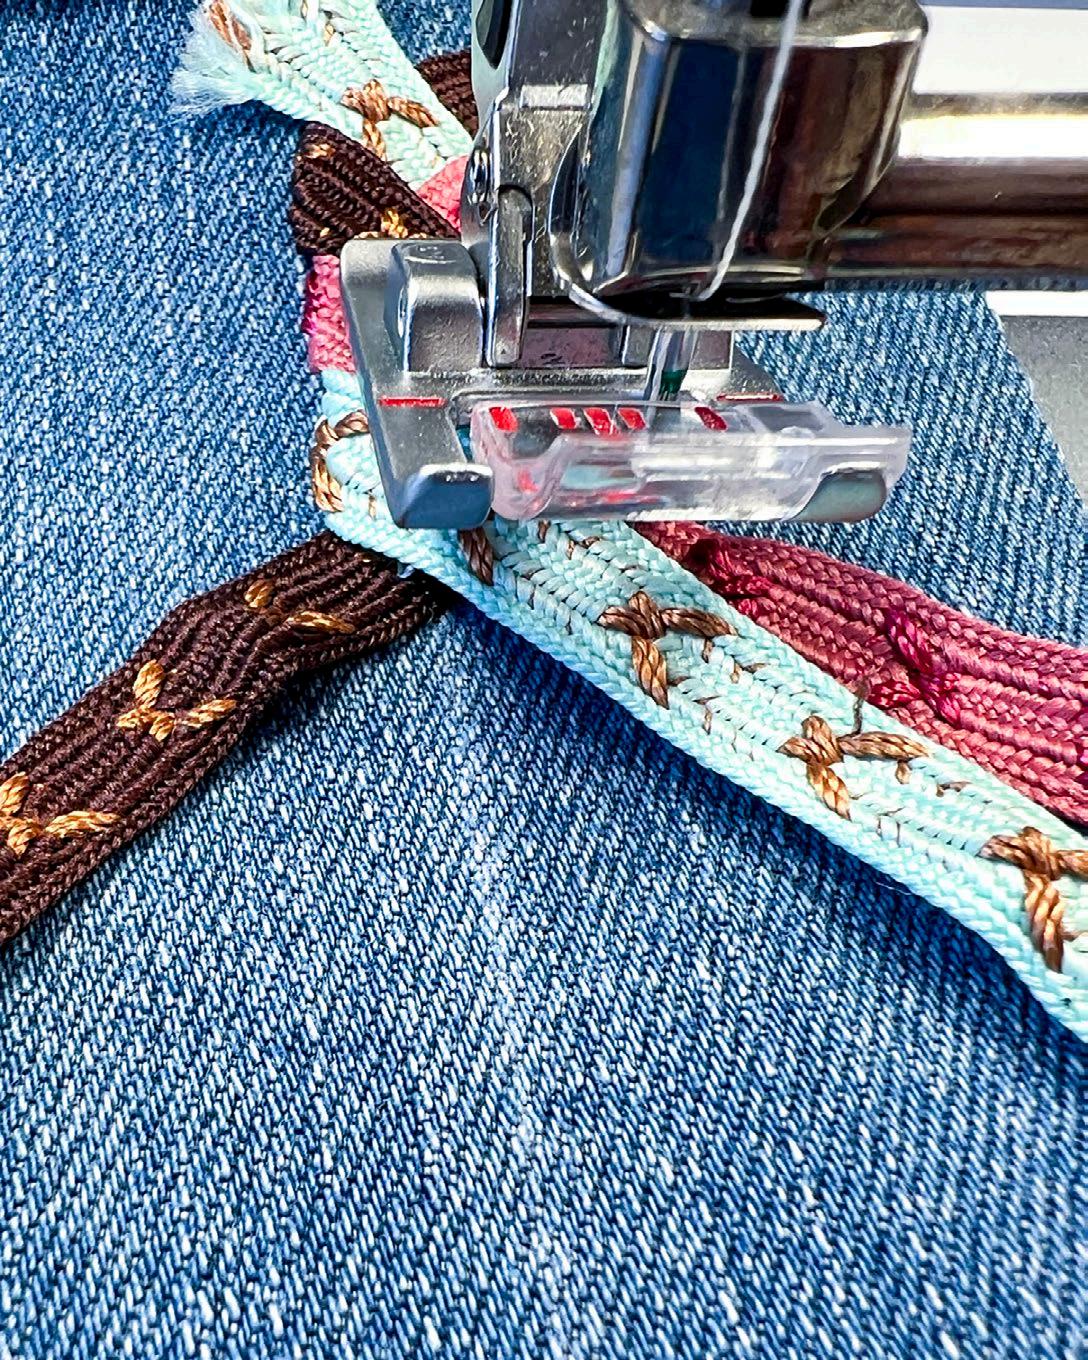
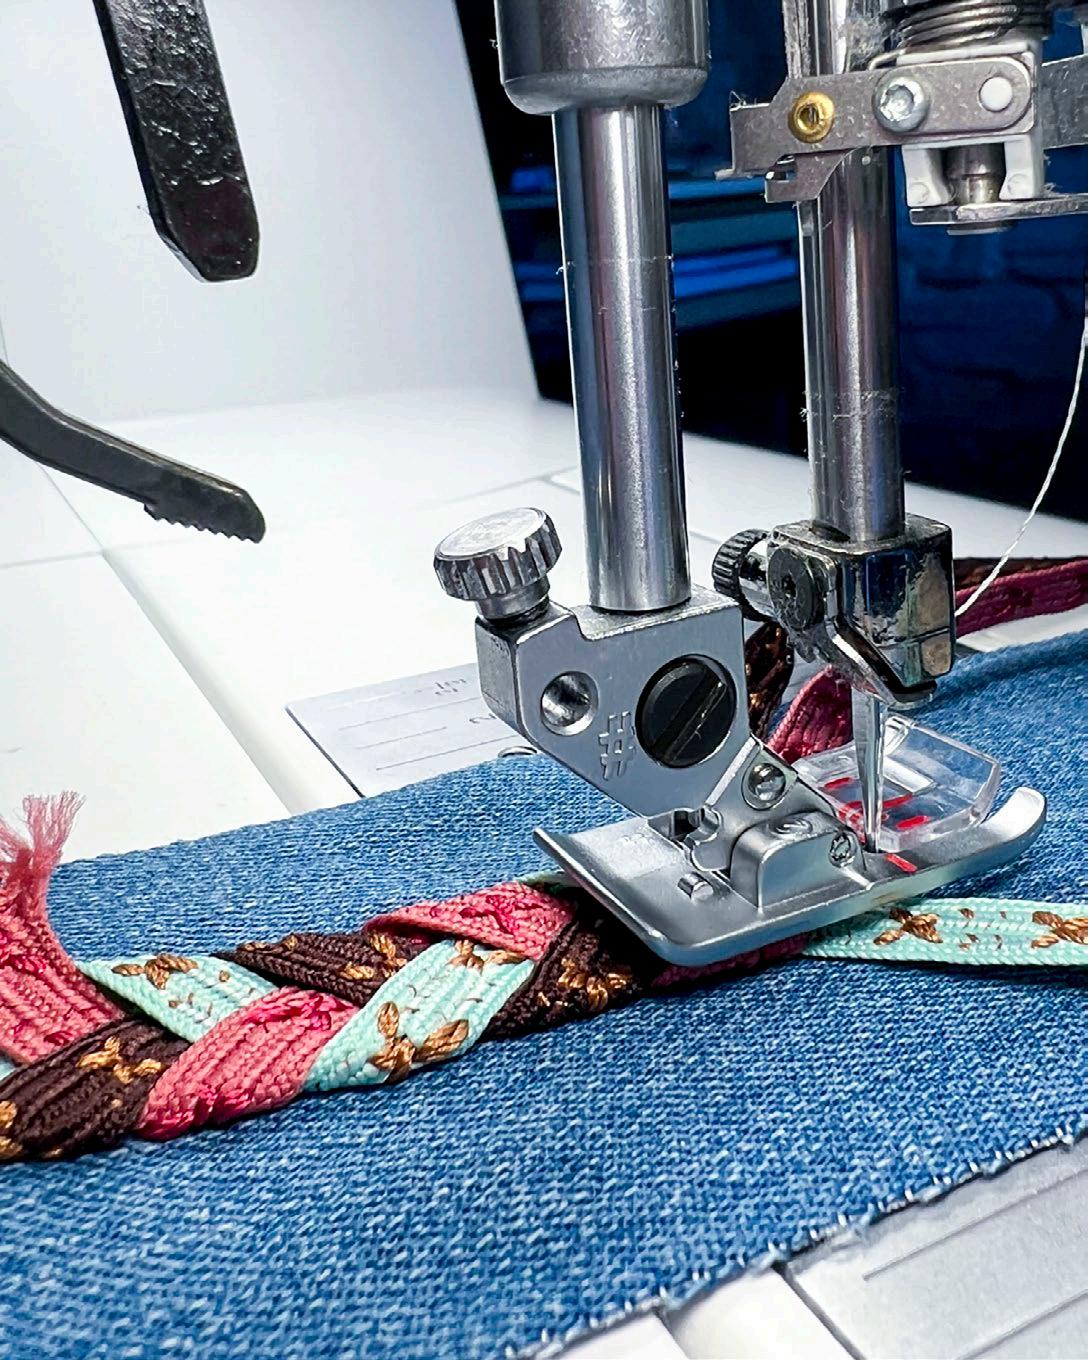
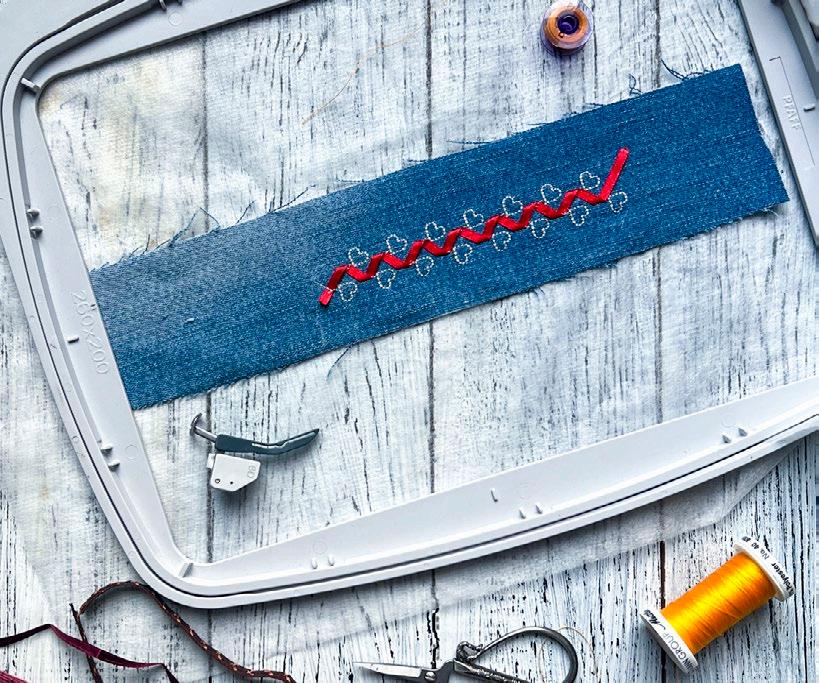
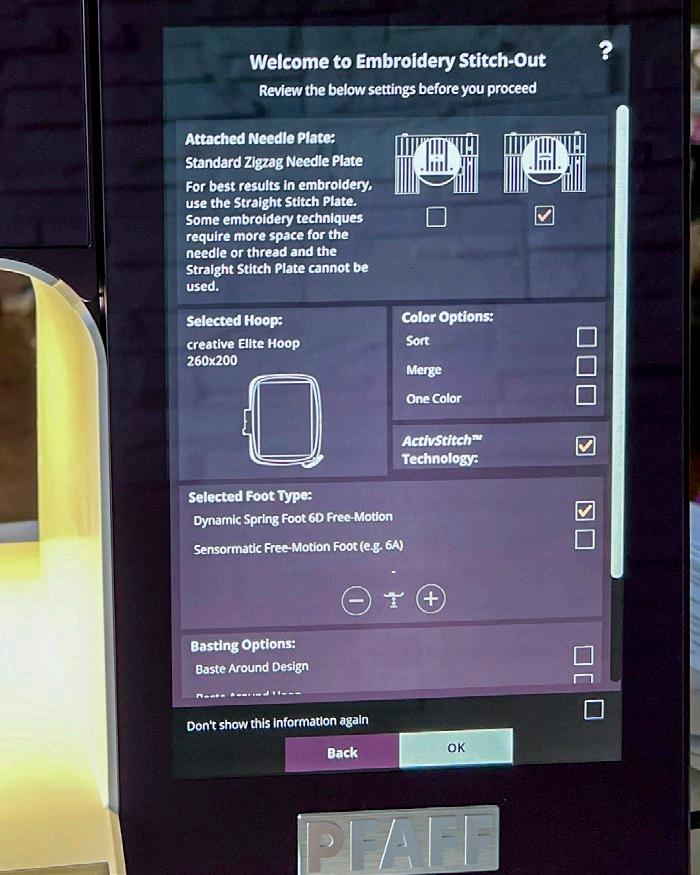
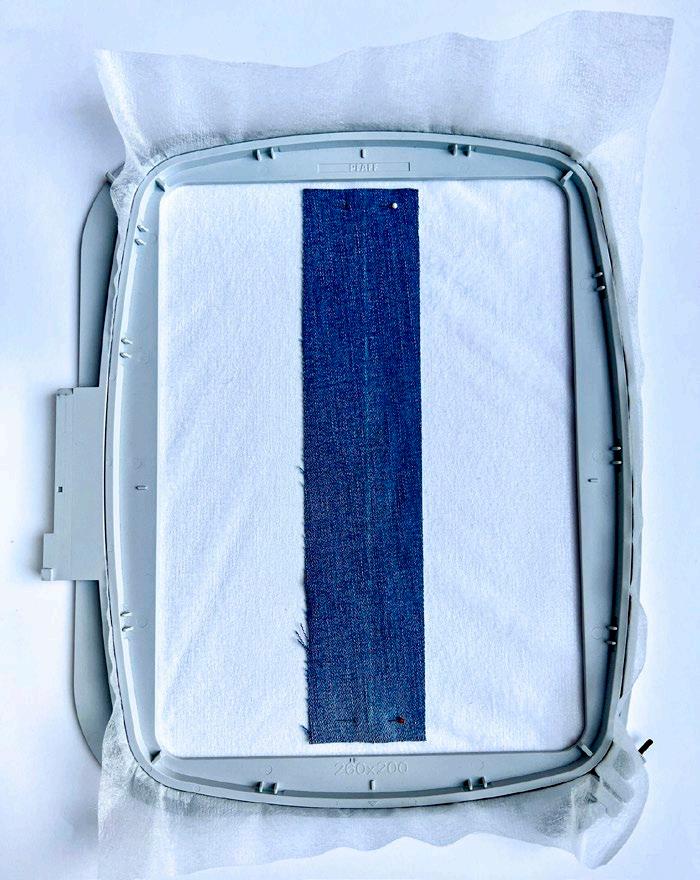
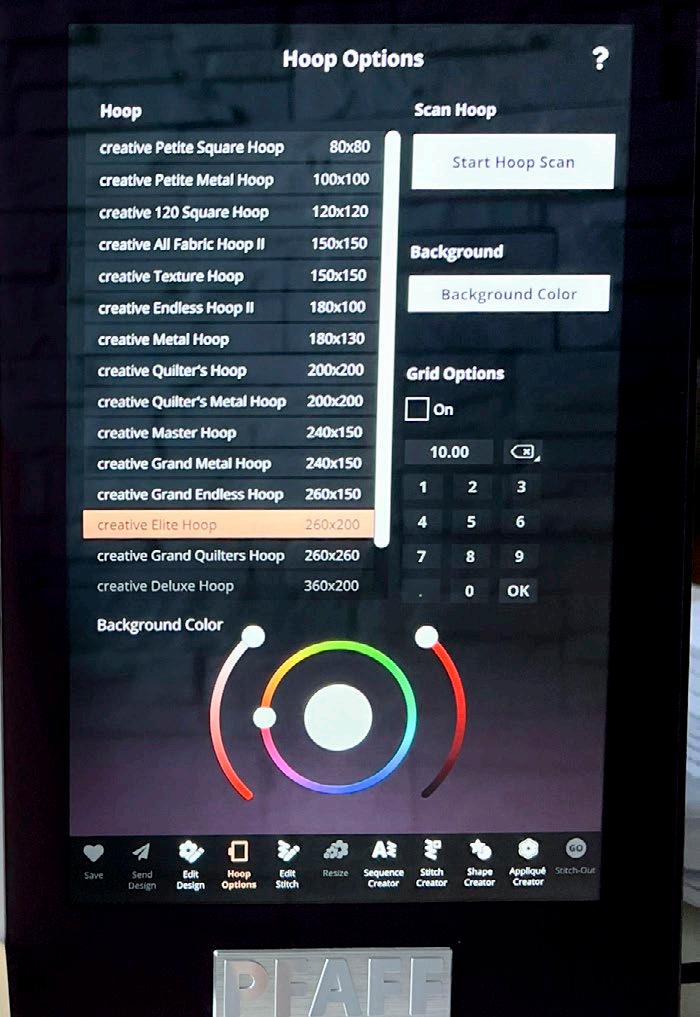
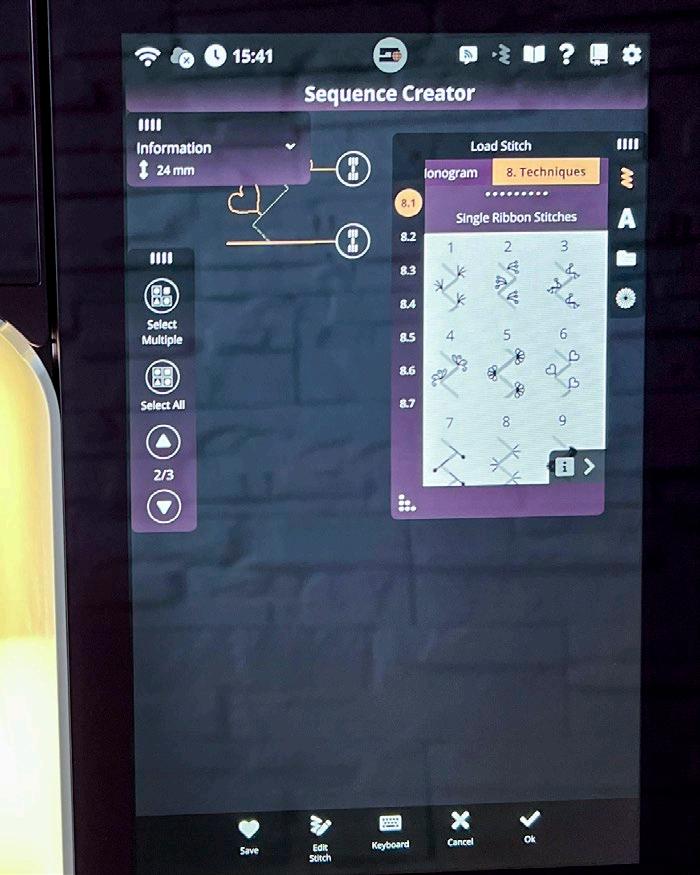
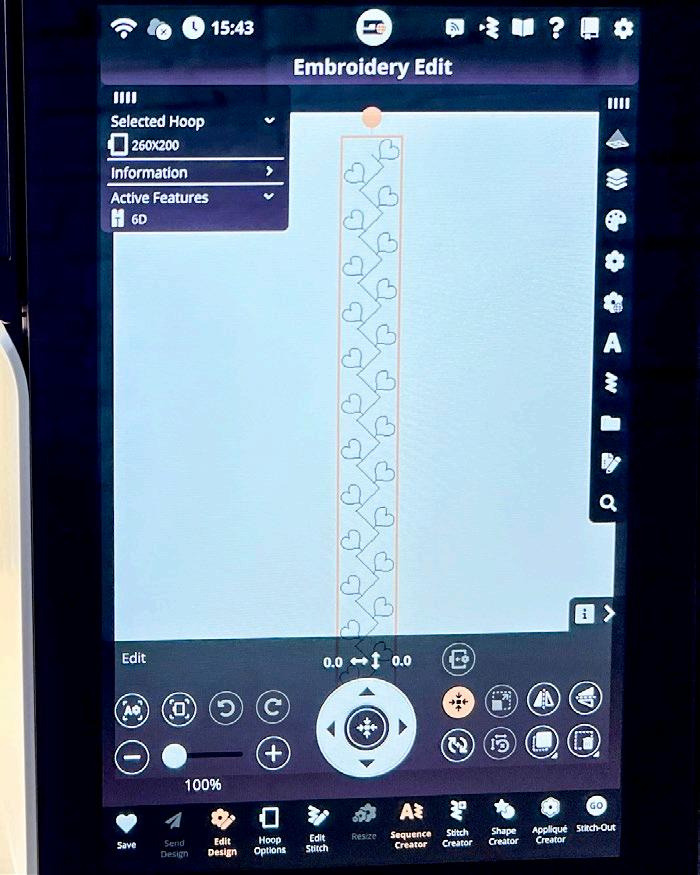
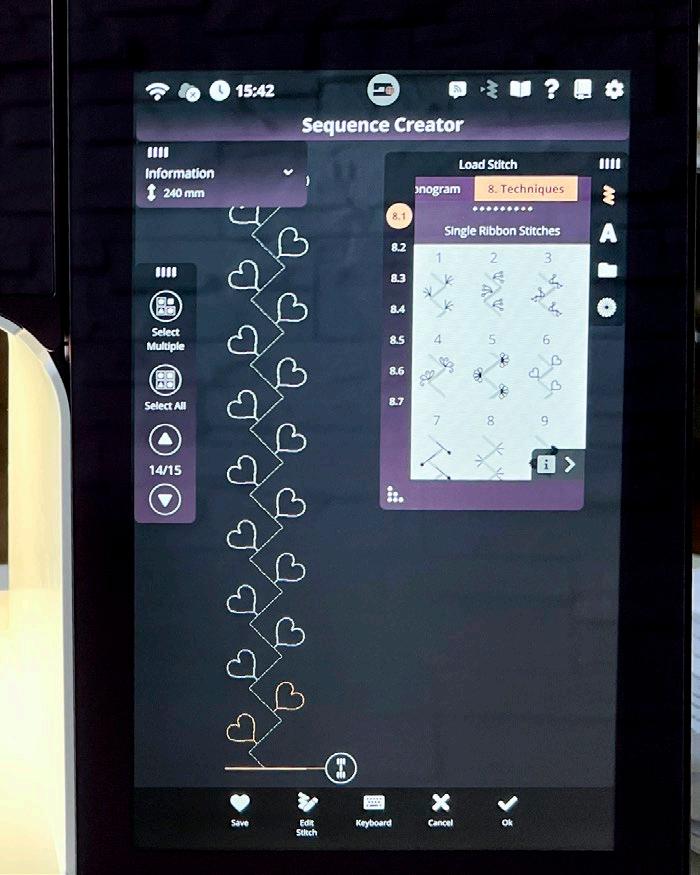
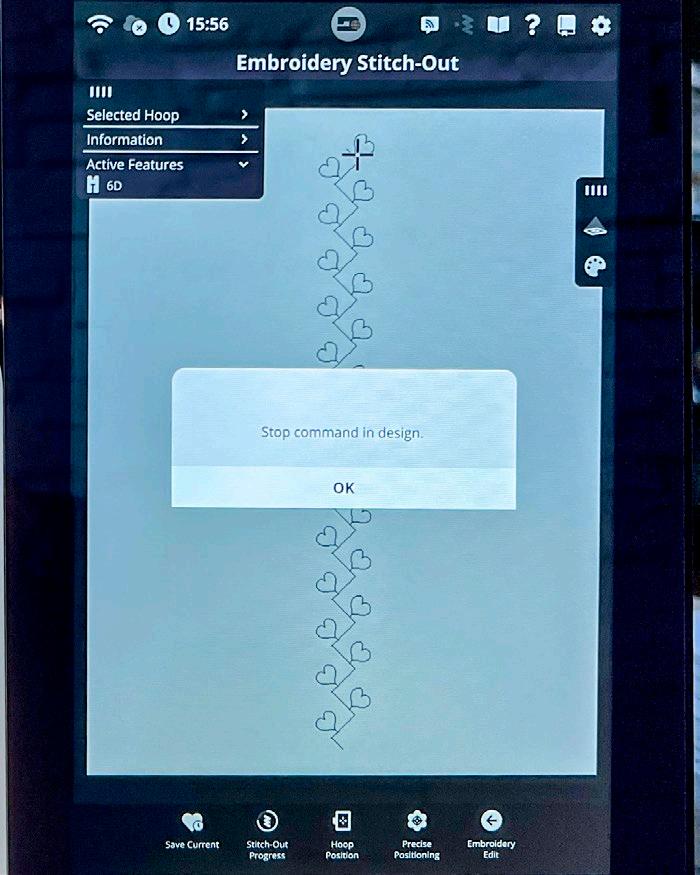
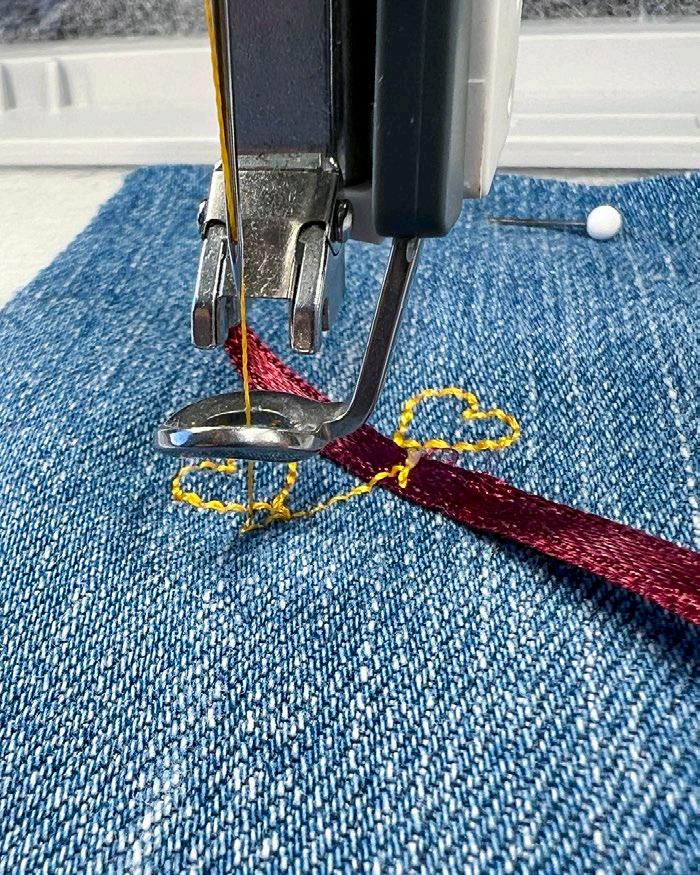
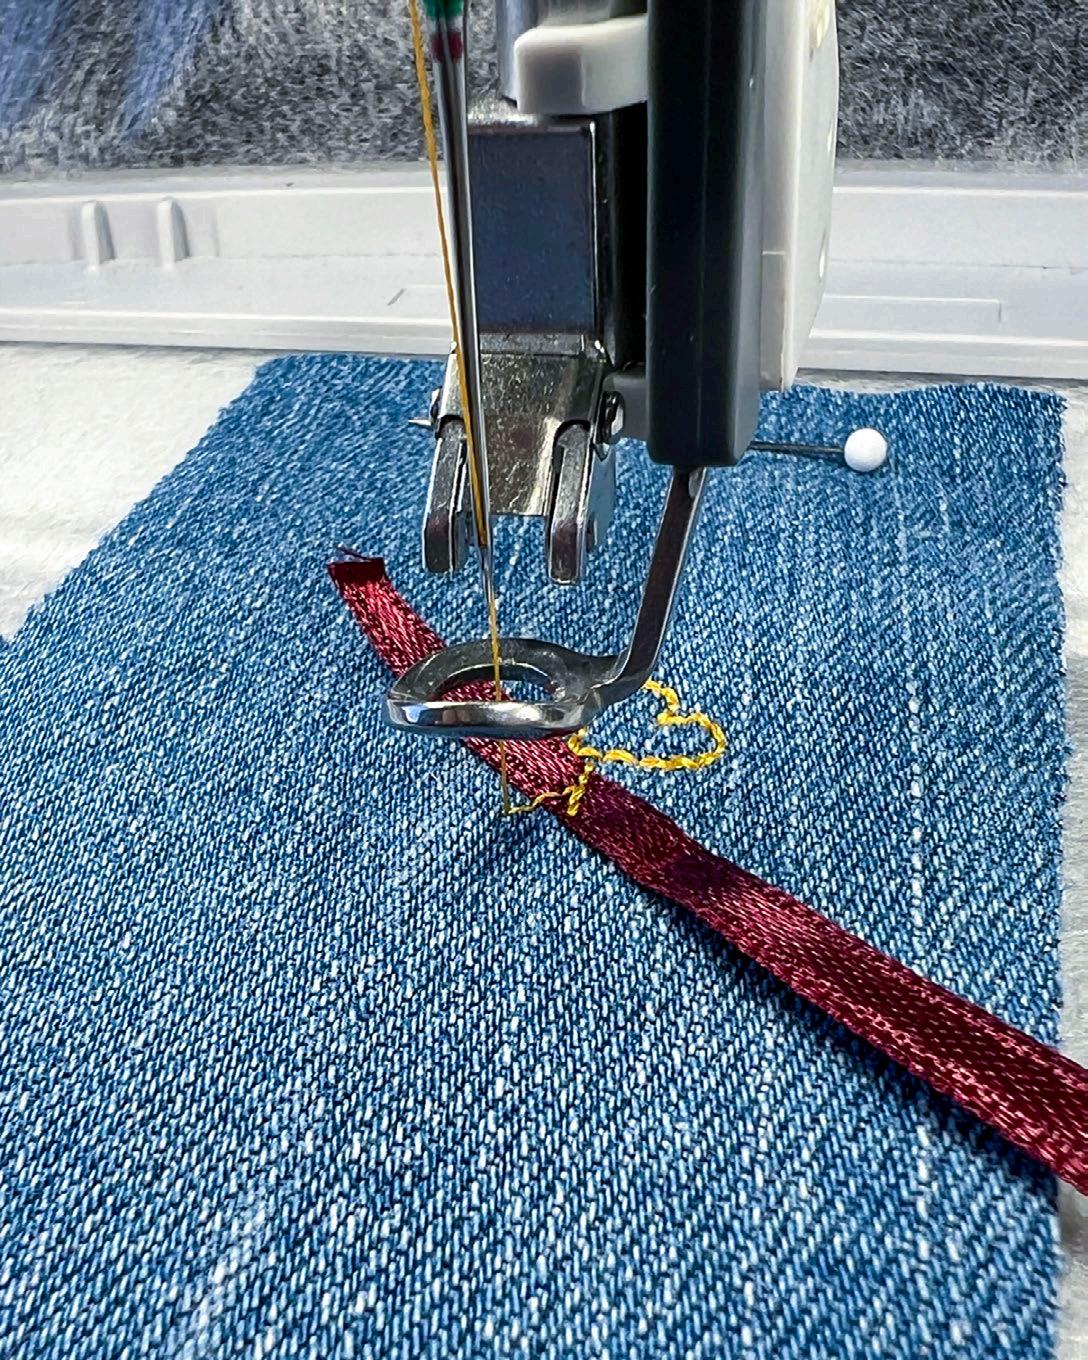
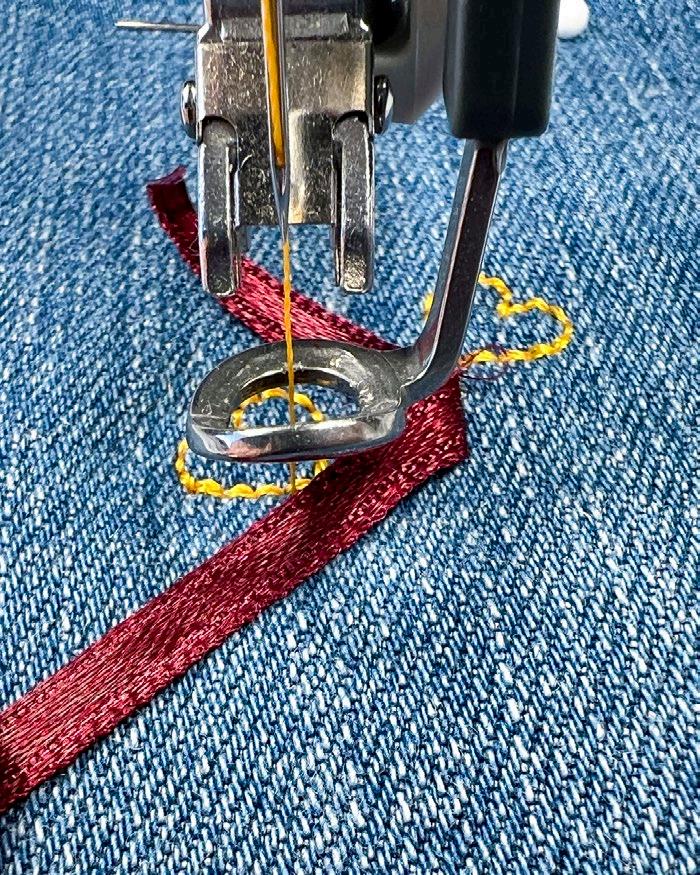
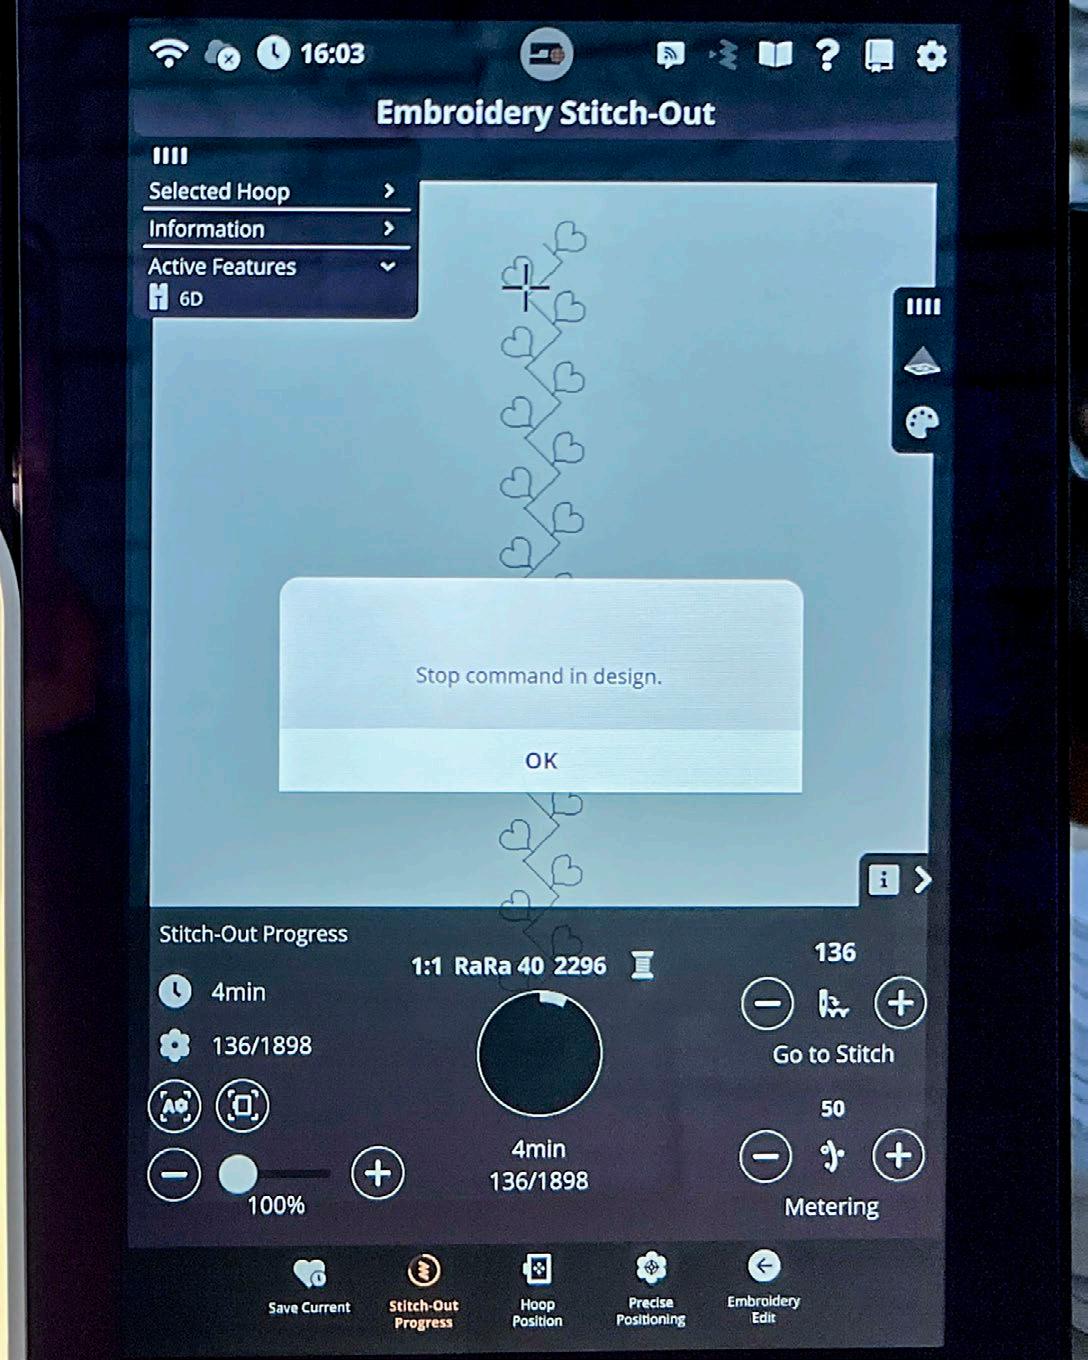
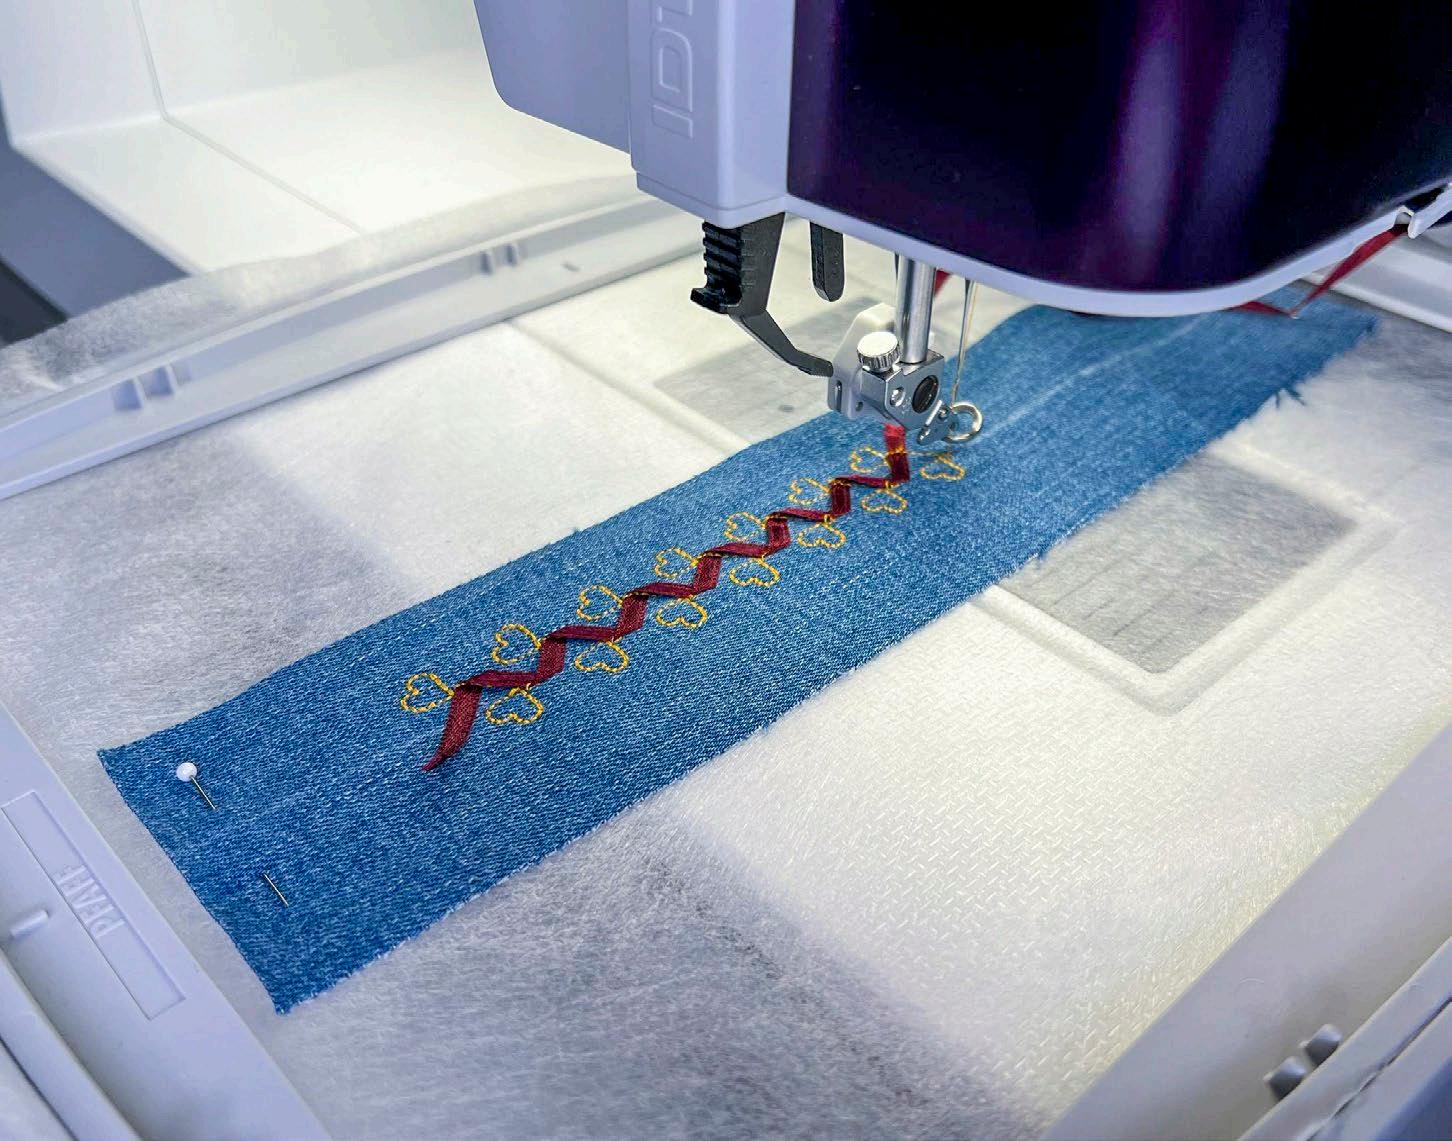
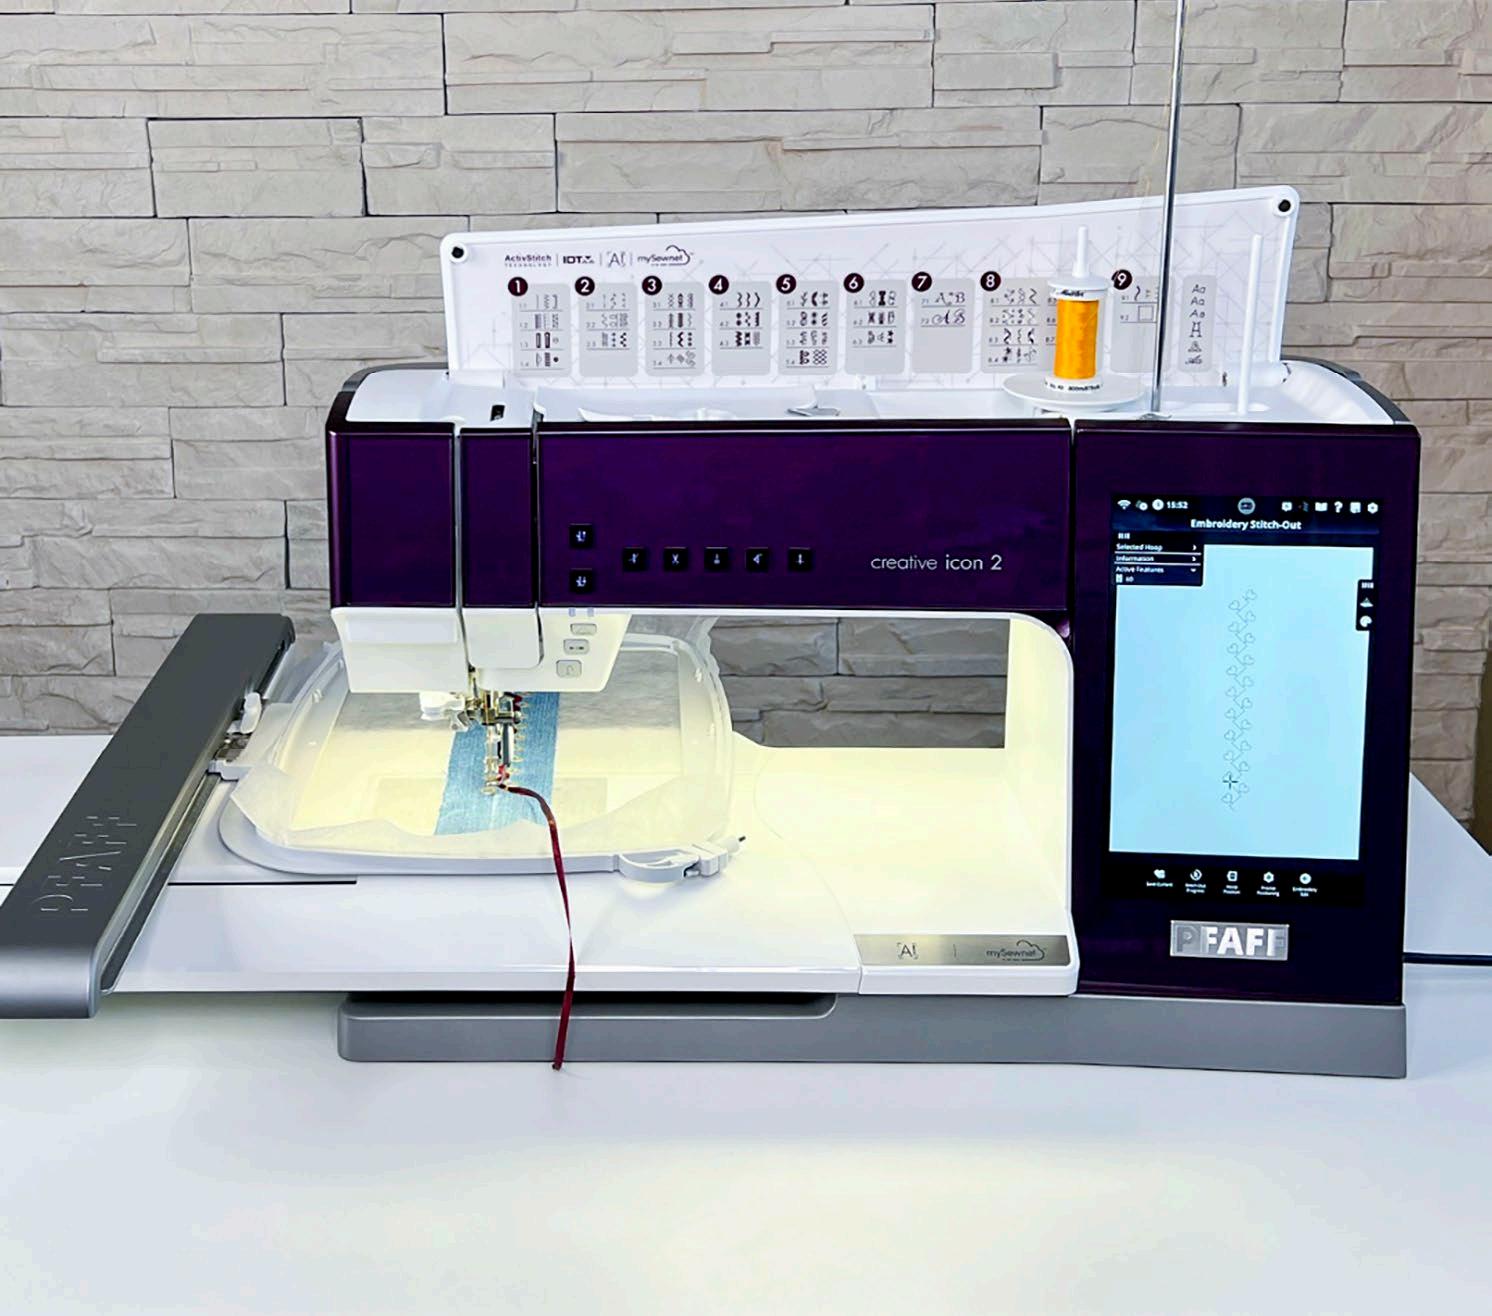
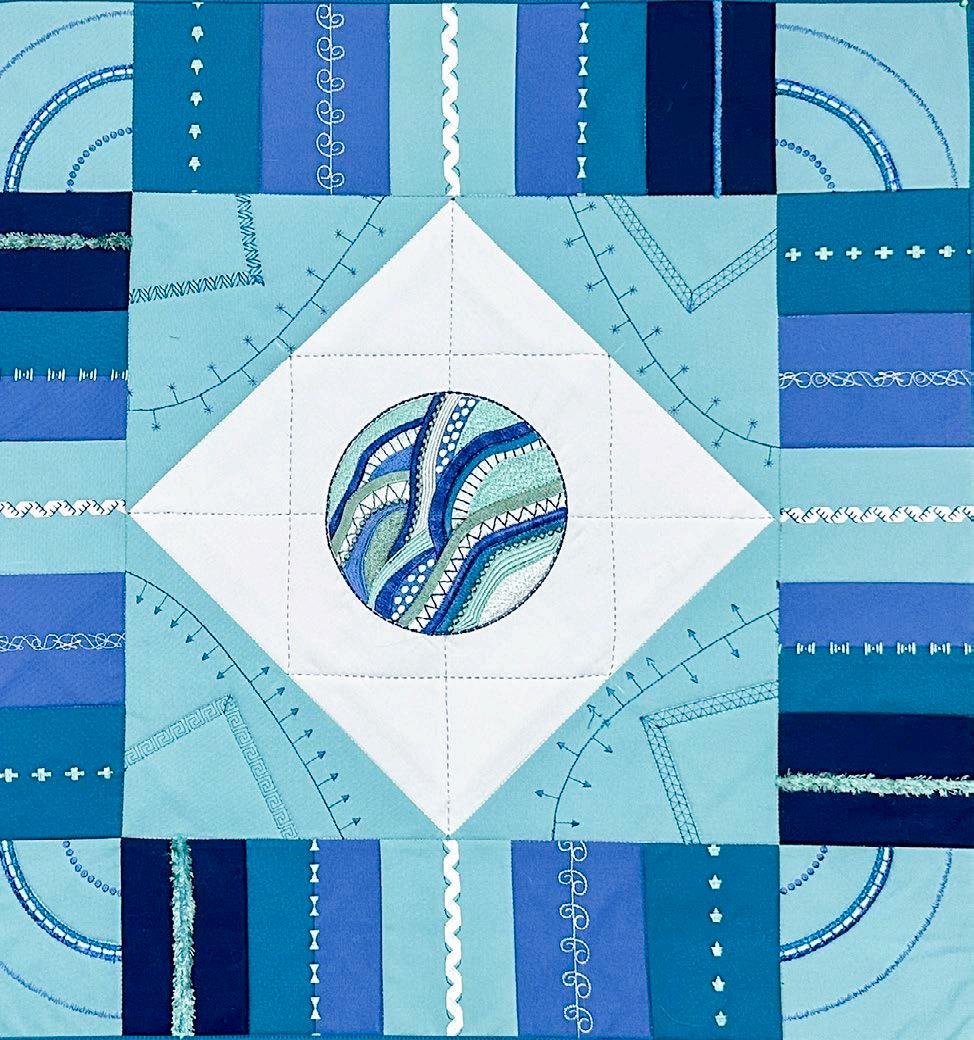
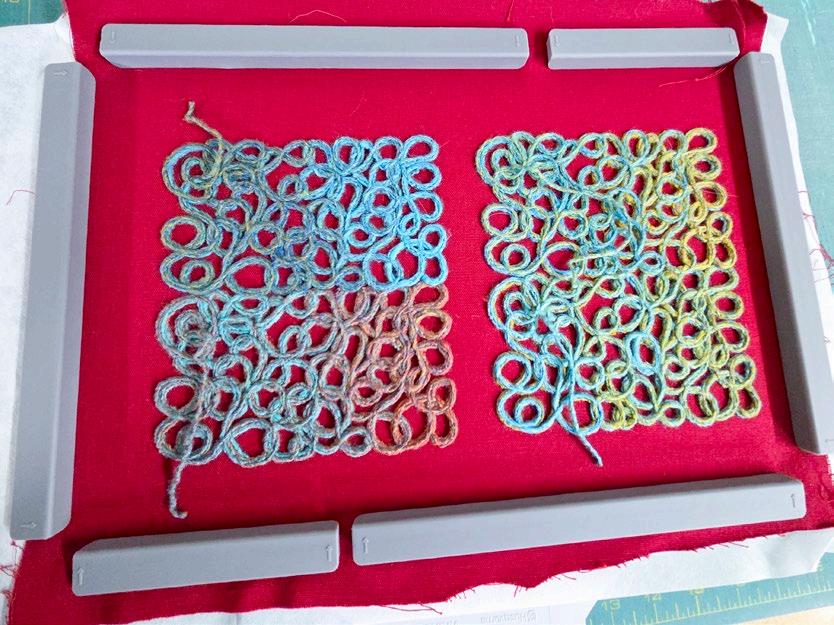
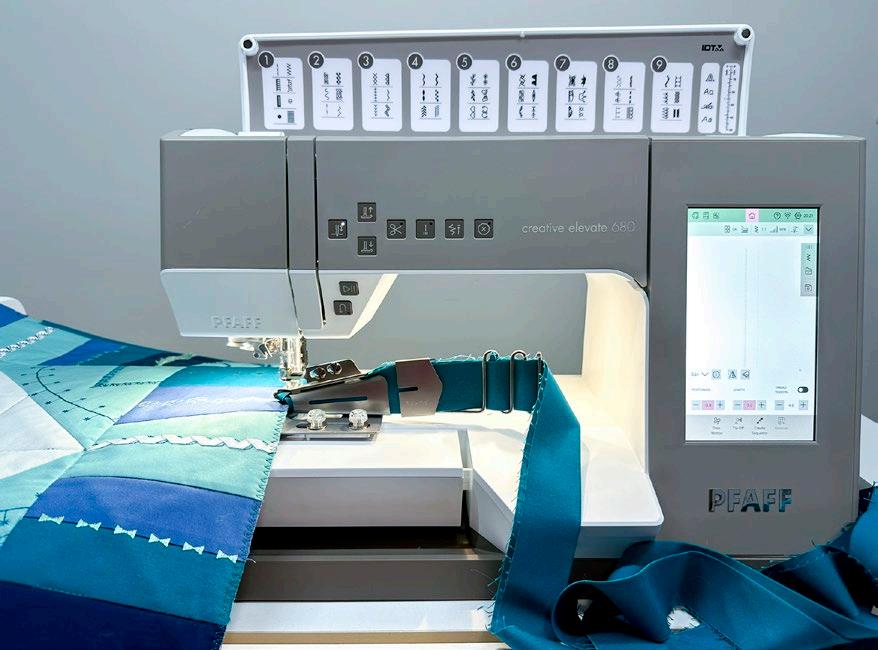
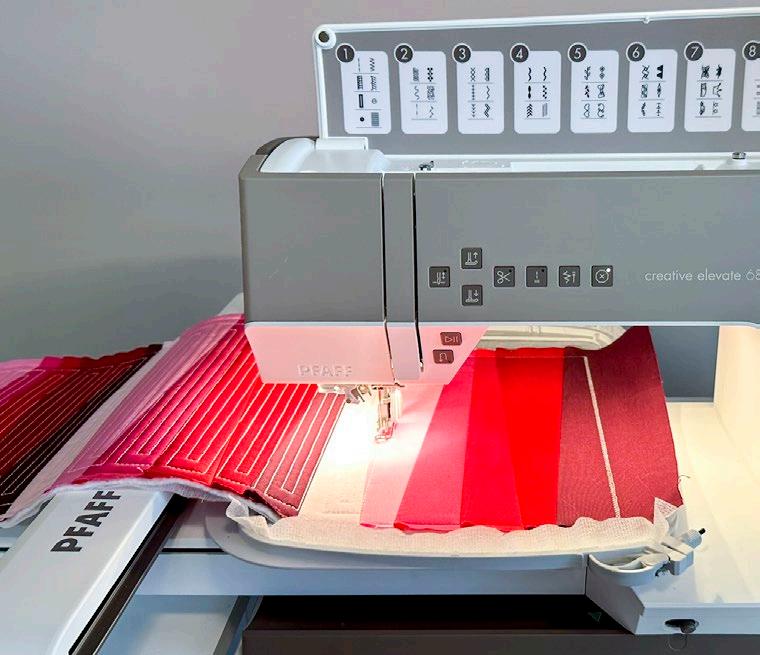
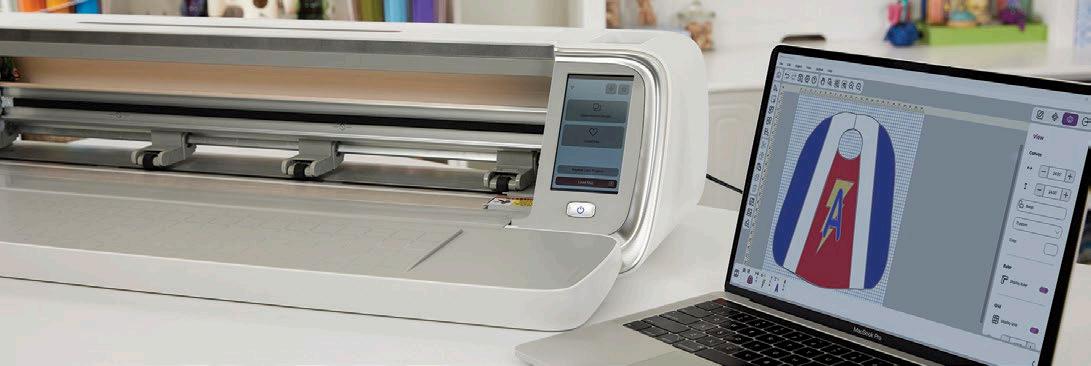
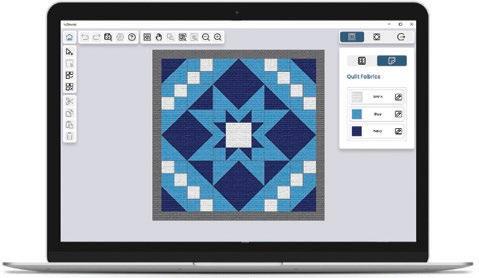
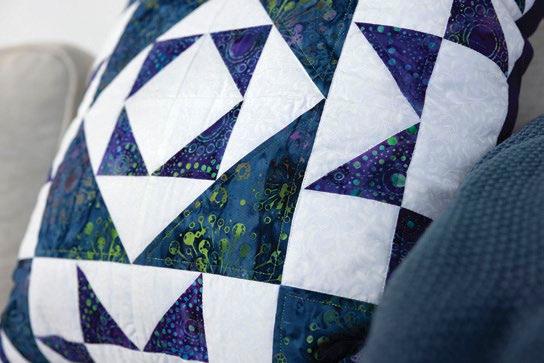
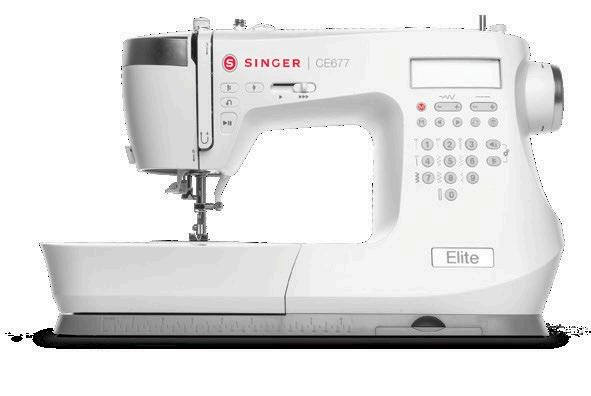
Exclusive Ribbon Stitch Techniques on the PFAFF creative icon 2
Fringe
Embroidery & Thread
Velvet
Embroidery
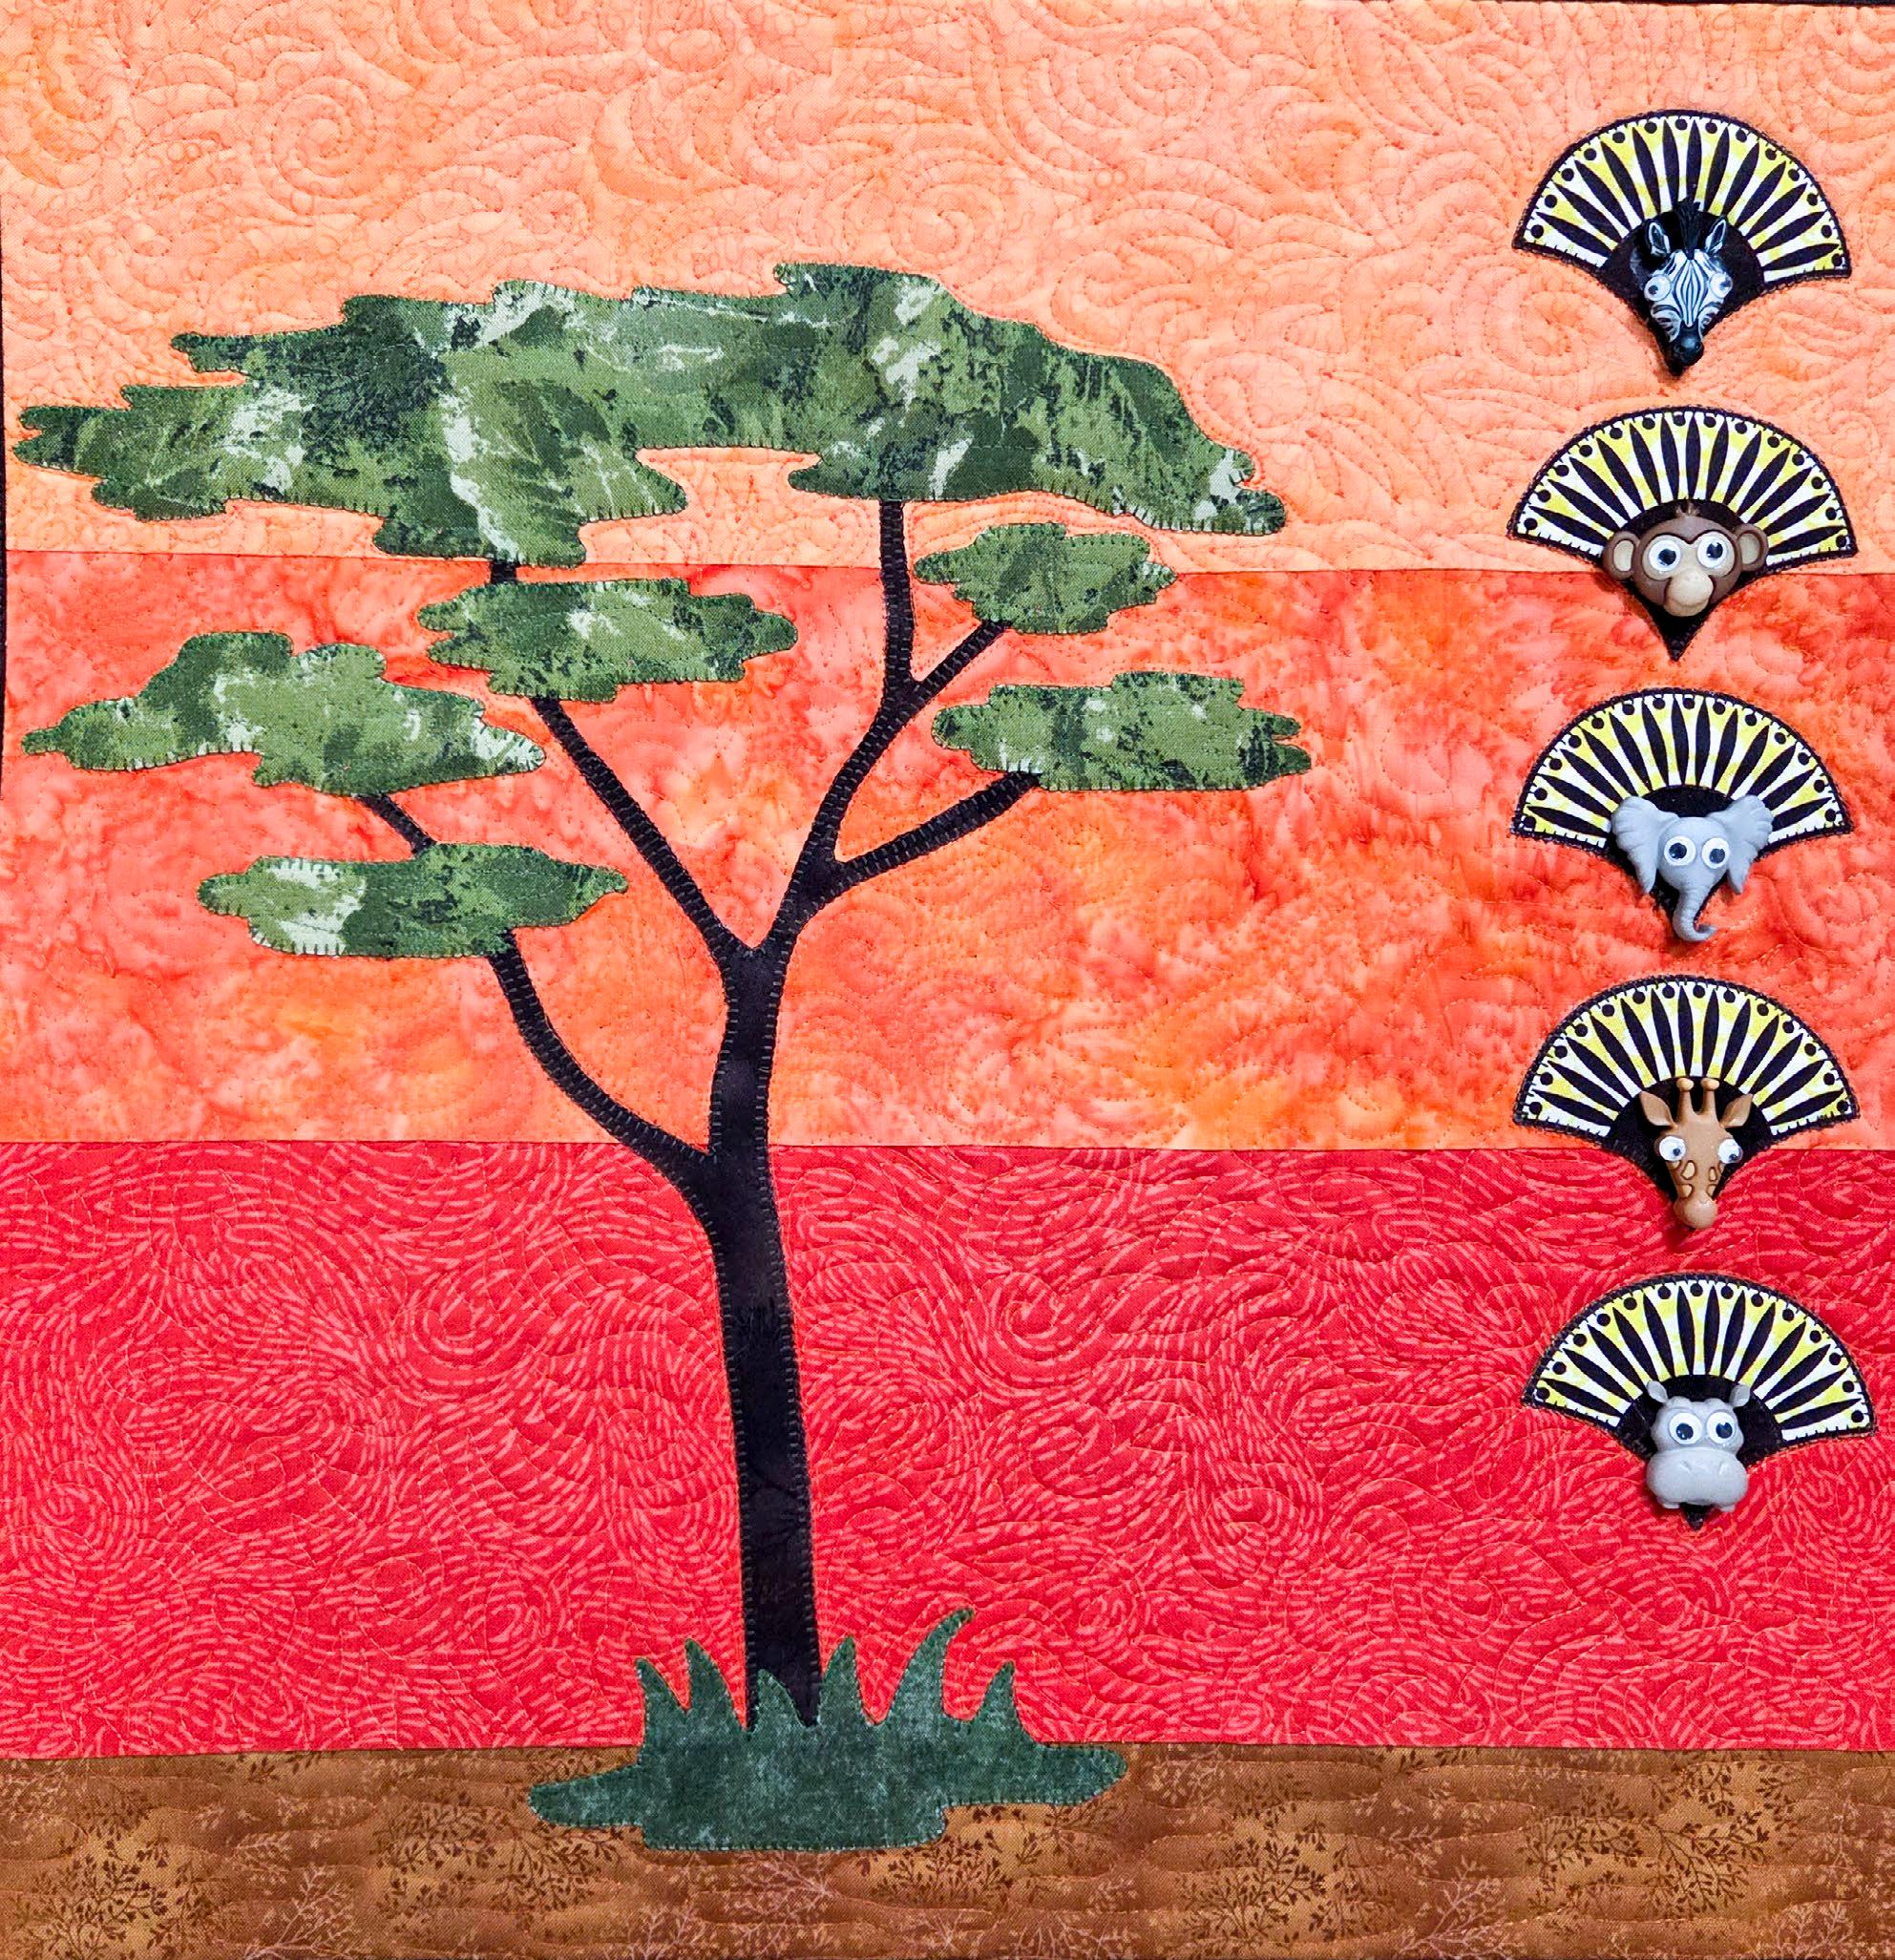
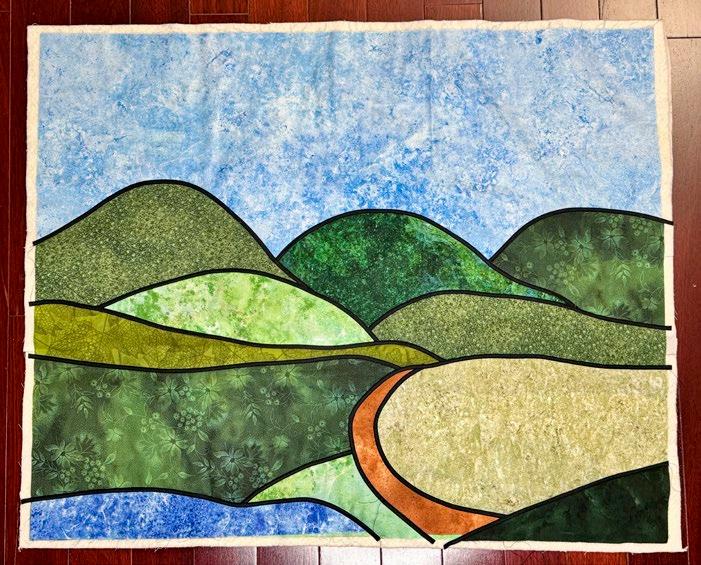
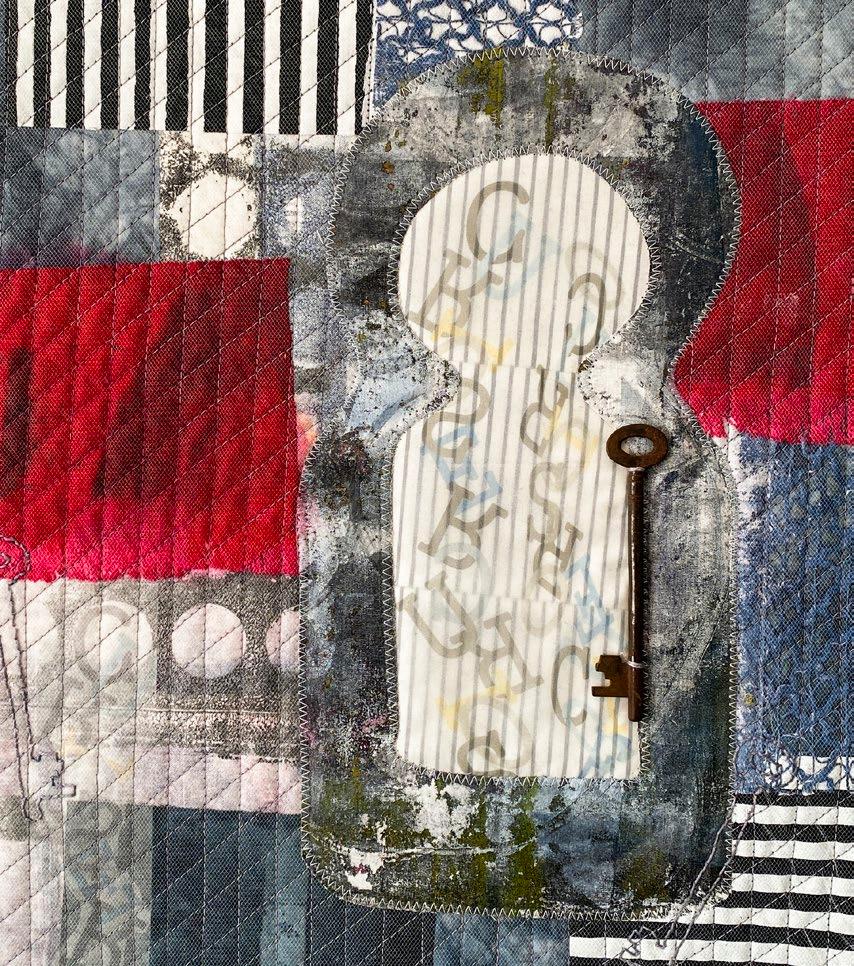
Button-Inspired Art Quilts with Applique and Free Motion Quilting
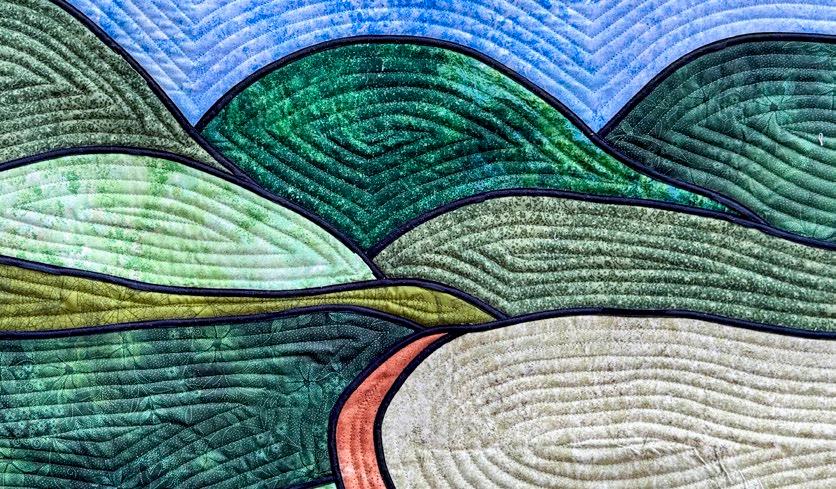
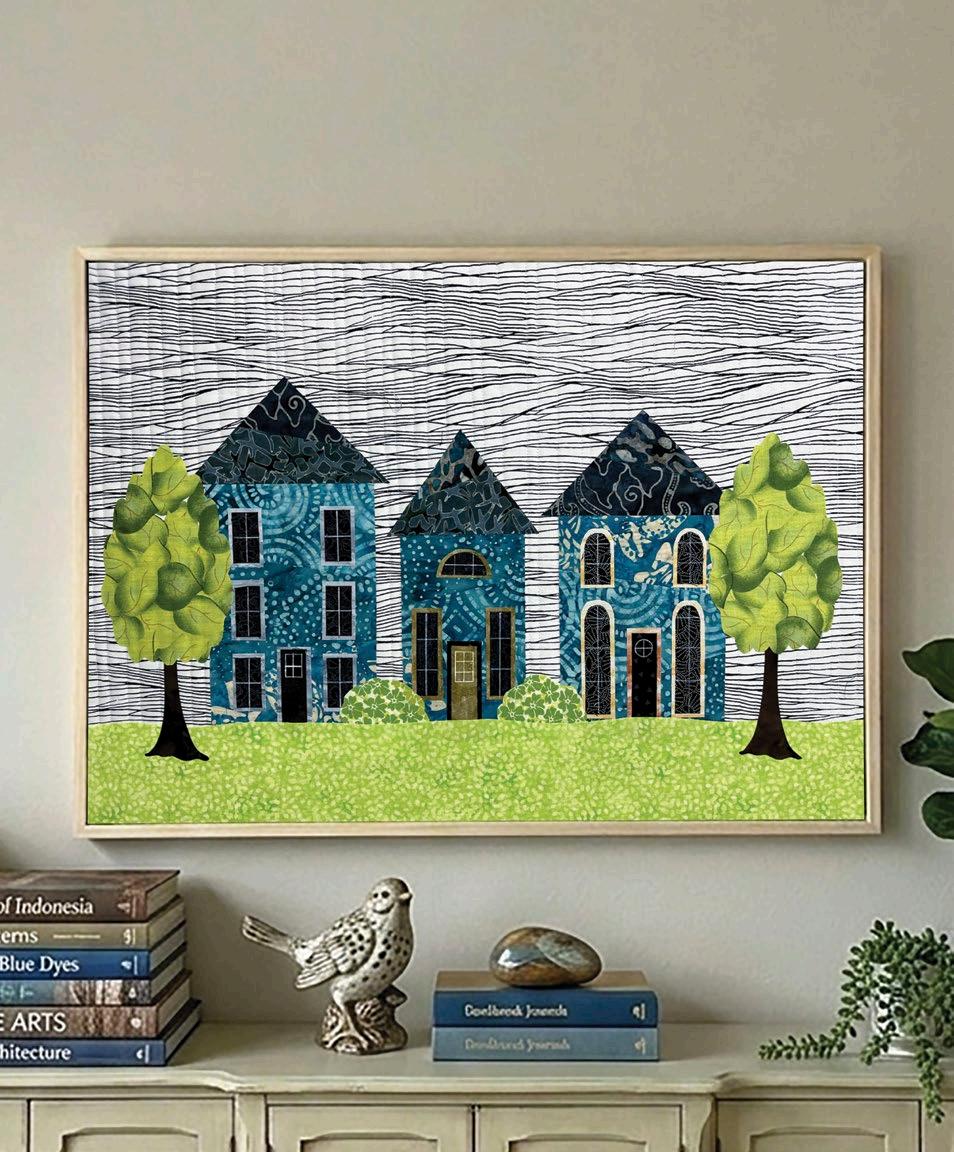
MAKE YOUR FIRST LANDSCAPE QUILT
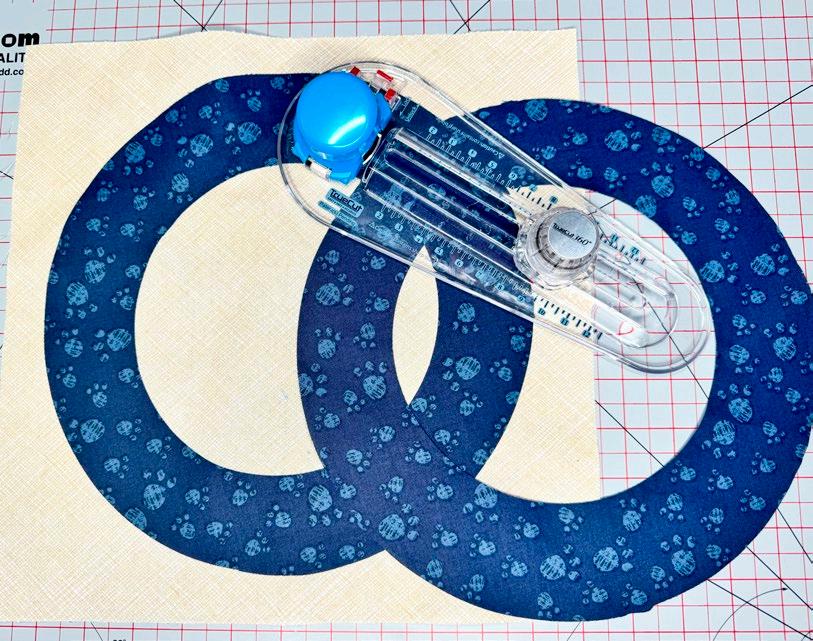
Cutting curves freehand with OLFA Rotary Cutters
Seasons Remembered Quilt
Welcome to Issue 36 of QUILTsocial, where creativity meets technique in the most inspiring ways. This issue brings together trusted tools, innovative methods, and artistic exploration to help you elevate every stitch. We begin with a powerful trio, Gütermann , OLFA , and SCHMETZ , working together to create a seamless quilting experience. From selecting the right thread to precise cutting and needle choice, these essentials set the stage for success. You’ll also discover how tools like Odif 505 Temporary Adhesive and Clover Quick Bias Tape can transform your quilting process, making it easier to secure layers and add bold, graphic definition to your projects. Watch as it all comes together in the stunning Seasons Remembered Quilt , finished with beautiful echo quilting.
Editor'sLetter
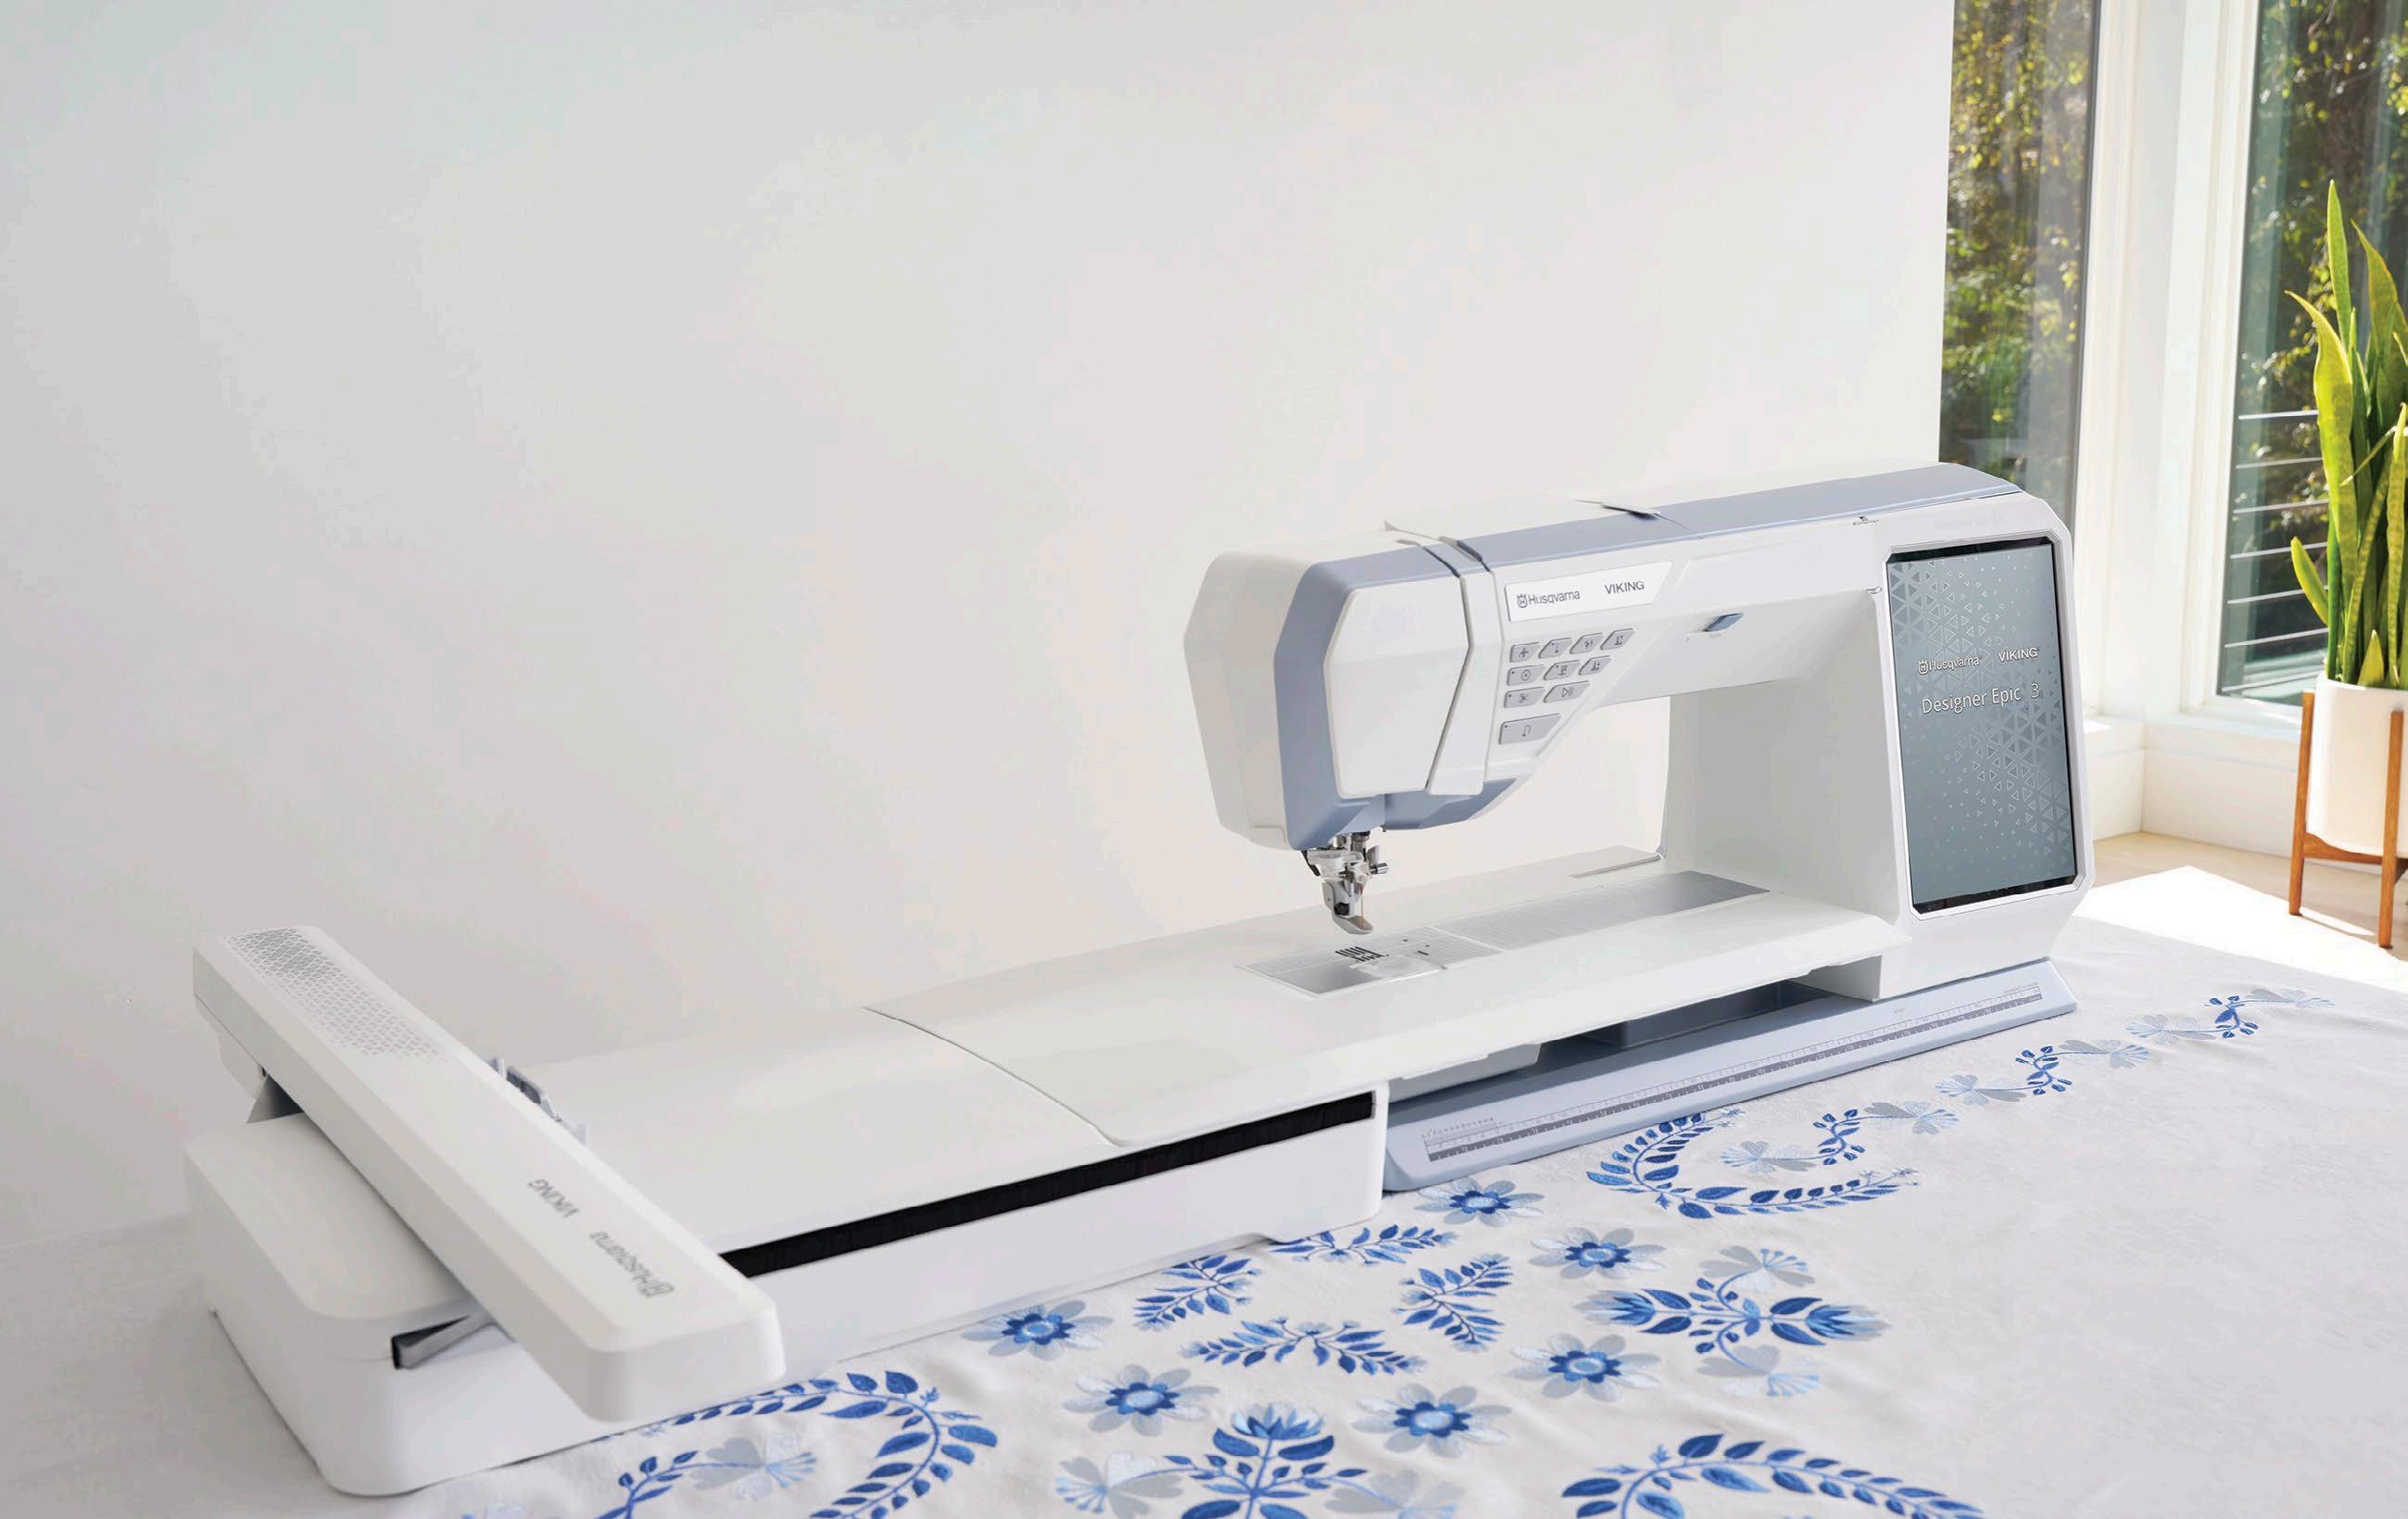
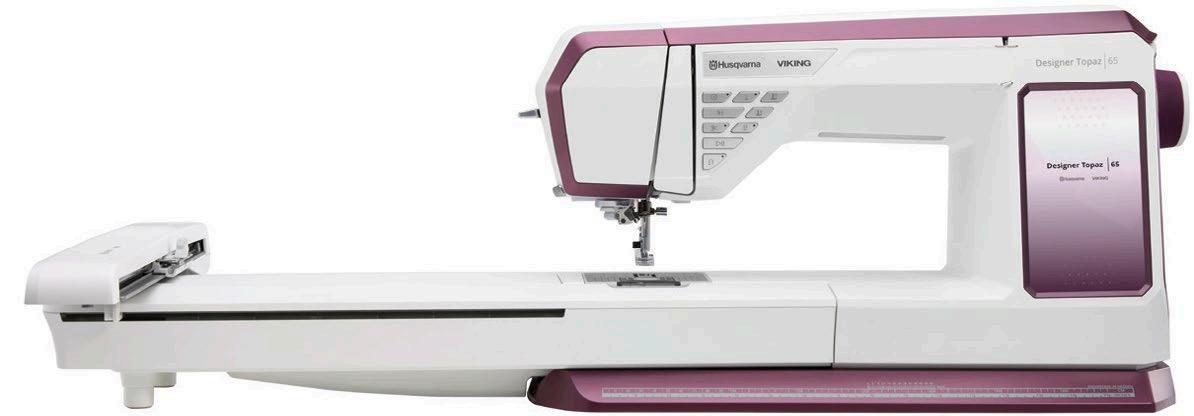
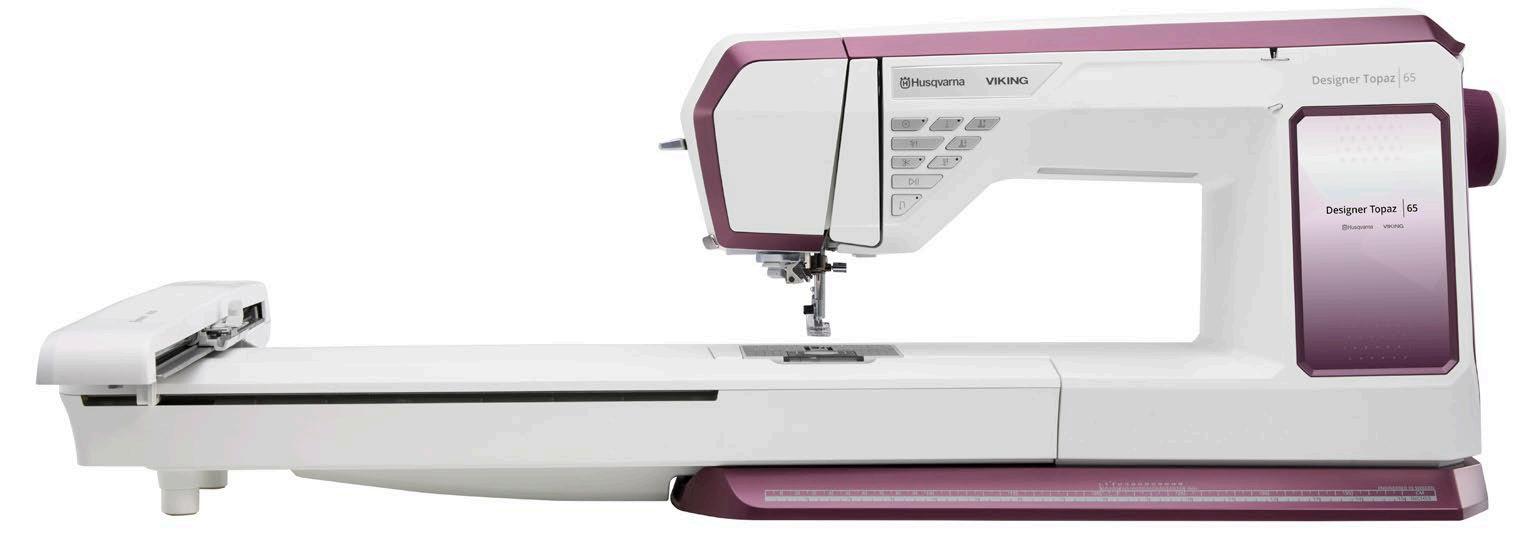
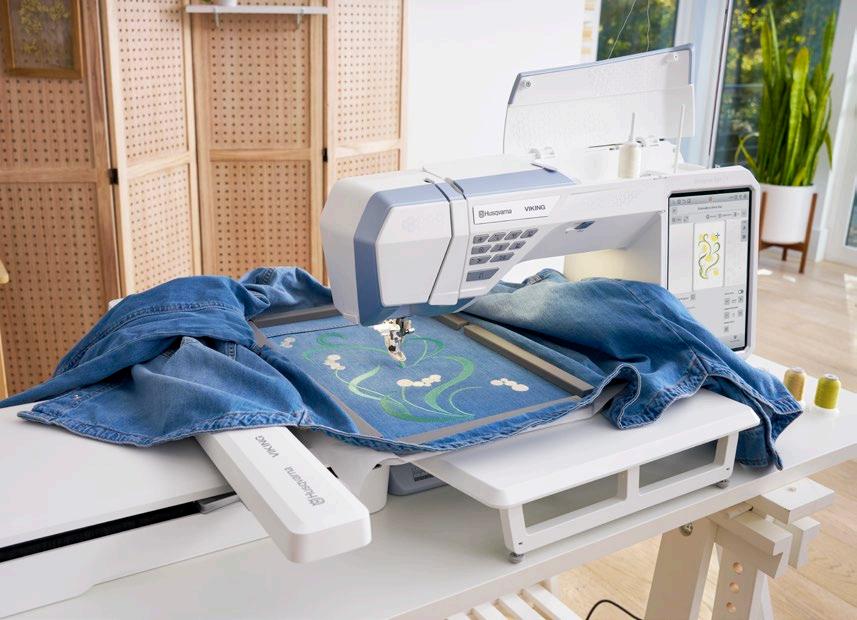
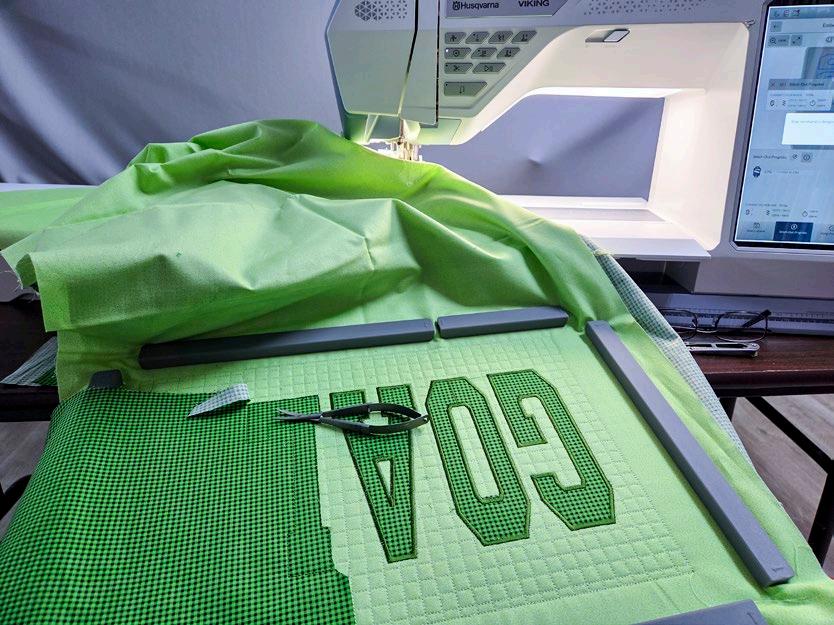
This issue also shines a spotlight on the Husqvarna VIKING Designer Topaz 65 , a machine designed to impress. Explore its incredible stitch-out features and push creative boundaries with techniques like yarn couching, thread velvet embroidery, and fringe embroidery, each adding texture and dimension to your work.
We continue with thoughtful guidance on choosing between cotton and rayon Gütermann threads, followed by a playful and artistic journey into felting with wool roving, including freeform techniques using machine embroidery.
For those who love to experiment, our button-inspired art quilts and abstract quiltlets invite you to mix materials, textures, and stitches in unexpected ways.
And finally, we take a deep dive into the exclusive Ribbon Stitch techniques on the PFAFF creative icon 2 , from single- to triple-variation stitching, and even stitching in the hoop, opening the door to truly distinctive embellishment. This issue is all about expanding your creative toolkit and exploring new dimensions in quilting and embroidery.
Cheerfully,
by Kristina Tochilko
Photo
OUILT
PUBLISHER, EDITOR-IN-CHIEF, ART DIRECTOR
Carla A. Canonico carla@QUILTsocial.com
PUBLISHER, ADVERTISING SALES
John De Fusco john@QUILTsocial.com
PHOTOGRAPHERS
Carla A. Canonico, John De Fusco
BLOGGERS/CONTRIBUTORS
Elaine Theriault crazyquilteronabike.blogspot.com
Paul Léger paullegerquilts.com
Olesya Lebedenko olesya-l-design.com
GRAPHIC & WEB DESIGN
Carla A. Canonico carla@QUILTsocial.com
GRAPHIC ASSISTANT and SOCIAL MEDIA
Sondra Armas
Maria Corina Guillen
WEBSITE / BLOG: https://QUILTsocial.com
Like us on Facebook : QUILTsocial
Follow us on Pinterest : quiltsocial
Follow us on Instagram : quiltsocial
Follow us on X: @QUILTsocial
WHERE TO GET YOUR COPY
QUILTsocial is a quarterly eMagazine published by A Needle Pulling Thread. It is available free for personal use online at https://QUILTsocial.com
EDITORIAL
Designers and other contributors who would like to be considered for future issues please email carla@QUILTsocial.com with a brief description of your work and your proposed project for the magazine.
No part of this publication may be reproduced without written permission from the publisher.
All designs, patterns, and information in this magazine are for private, non-commercial use only, and are copyrighted material owned by their respective creators or owners.
8 Gütermann, OLFA, and SCHMETZ unite for a Quilting Delight
10 Cutting hills freehand with OLFA Rotary Cutters
14 Finish the Seasons Remembered Quilt with Odif 505 and Echo Quilting
16 Meet the Husqvarna VIKING Designer Topaz 65
18 Incredible Stitch Out features on the Husqvarna VIKING DesignerTopaz 65
20 Yarn Couching with the Topaz 65 Embroidery Machine
22 Thread Velvet Embroidery with the HV Topaz 65
24 Fringe Embroidery on the Husqvarna Viking Topaz 65
28 Cotton or Rayon: Which Gütermann Thread Should You Use
31 Creating Felted Flowers with UNIQUE CRAFT Wool Roving
35 Free Form Felting with Wool Roving Using Machine Embroidery
39 Button-Inspired Art Quilts with Applique and Free Motion Quilting
42 Creating an Abstract Quiltlet with Buttons, Twill Tape, and Decorative Stitches
46 Exclusive Ribbon Stitch Techniques on the PFAFF creative icon 2
48 Exclusive SINGLE Ribbon Stitch Techniques on the PFAFF creative icon 2
50 Exclusive DOUBLE Ribbon Stitch Techniques on the PFAFF creative icon 2
53 Exclusive TRIPLE Ribbon Stitch Techniques on the PFAFF creative icon 2
56 Ribbon Stitching in the Hoop on the PFAFF creative icon 2
Gütermann, OLFA, and SCHMETZ unite for a Quilting Delight
Paul Léger
Seasons Remembered Quilt
I can’t believe we’ve already had our first snowfall; it’s not even winter yet. Still, the memories of my favorite season are fresh in my mind.
I love spring for the promise it brings, the start of everything growing again.
I love summer for its lush greenery and the time it gives me to be outside.
Fall is beautiful - its colors, its crisp air, those peaceful walks in the woods.
And winter… well, I love it best when I’m sipping a cocktail on a Mexican beach!
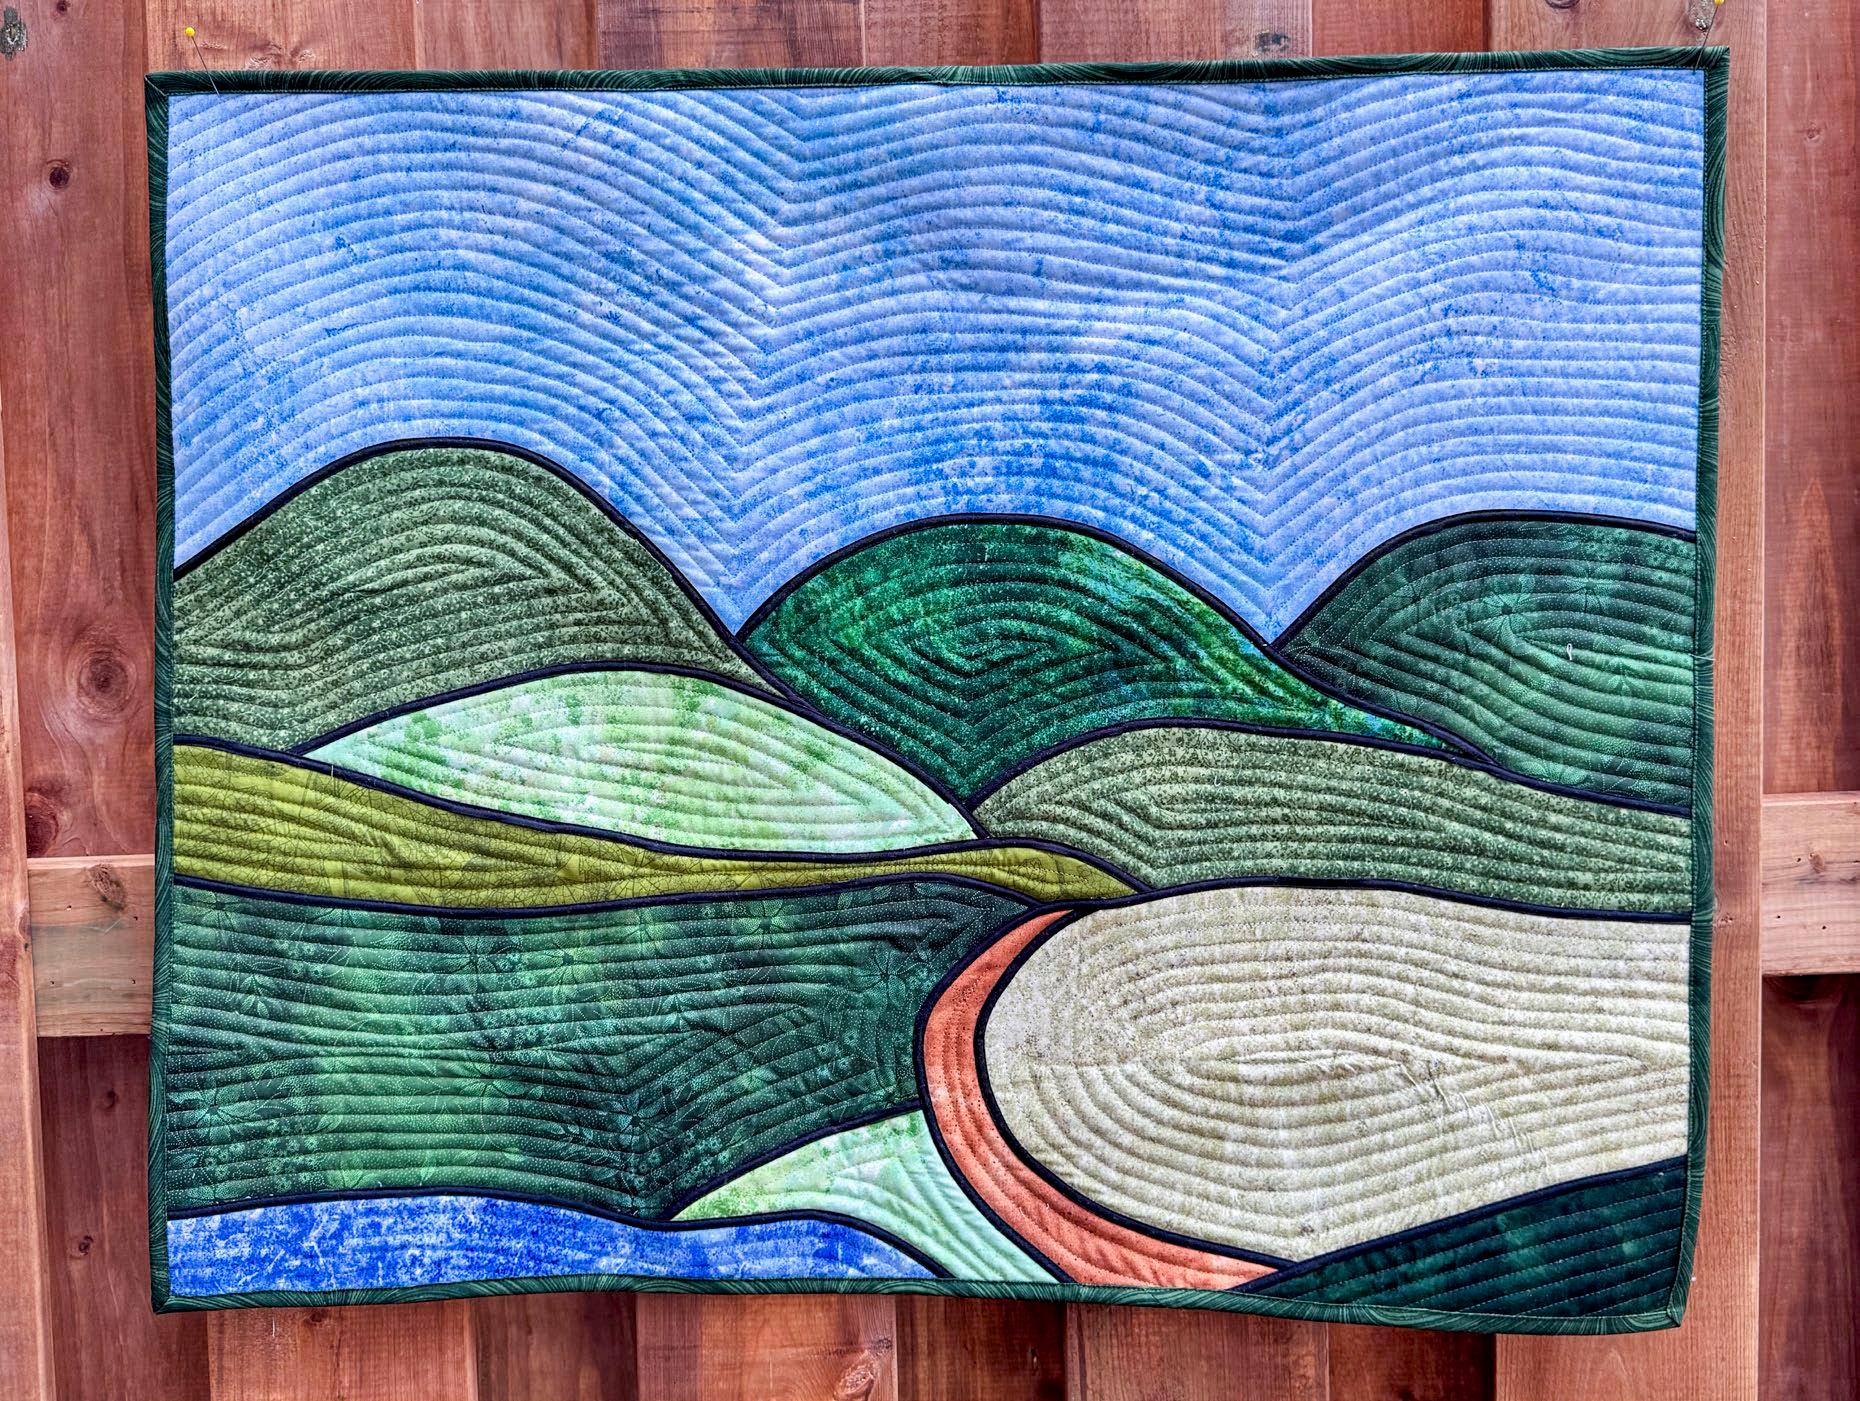
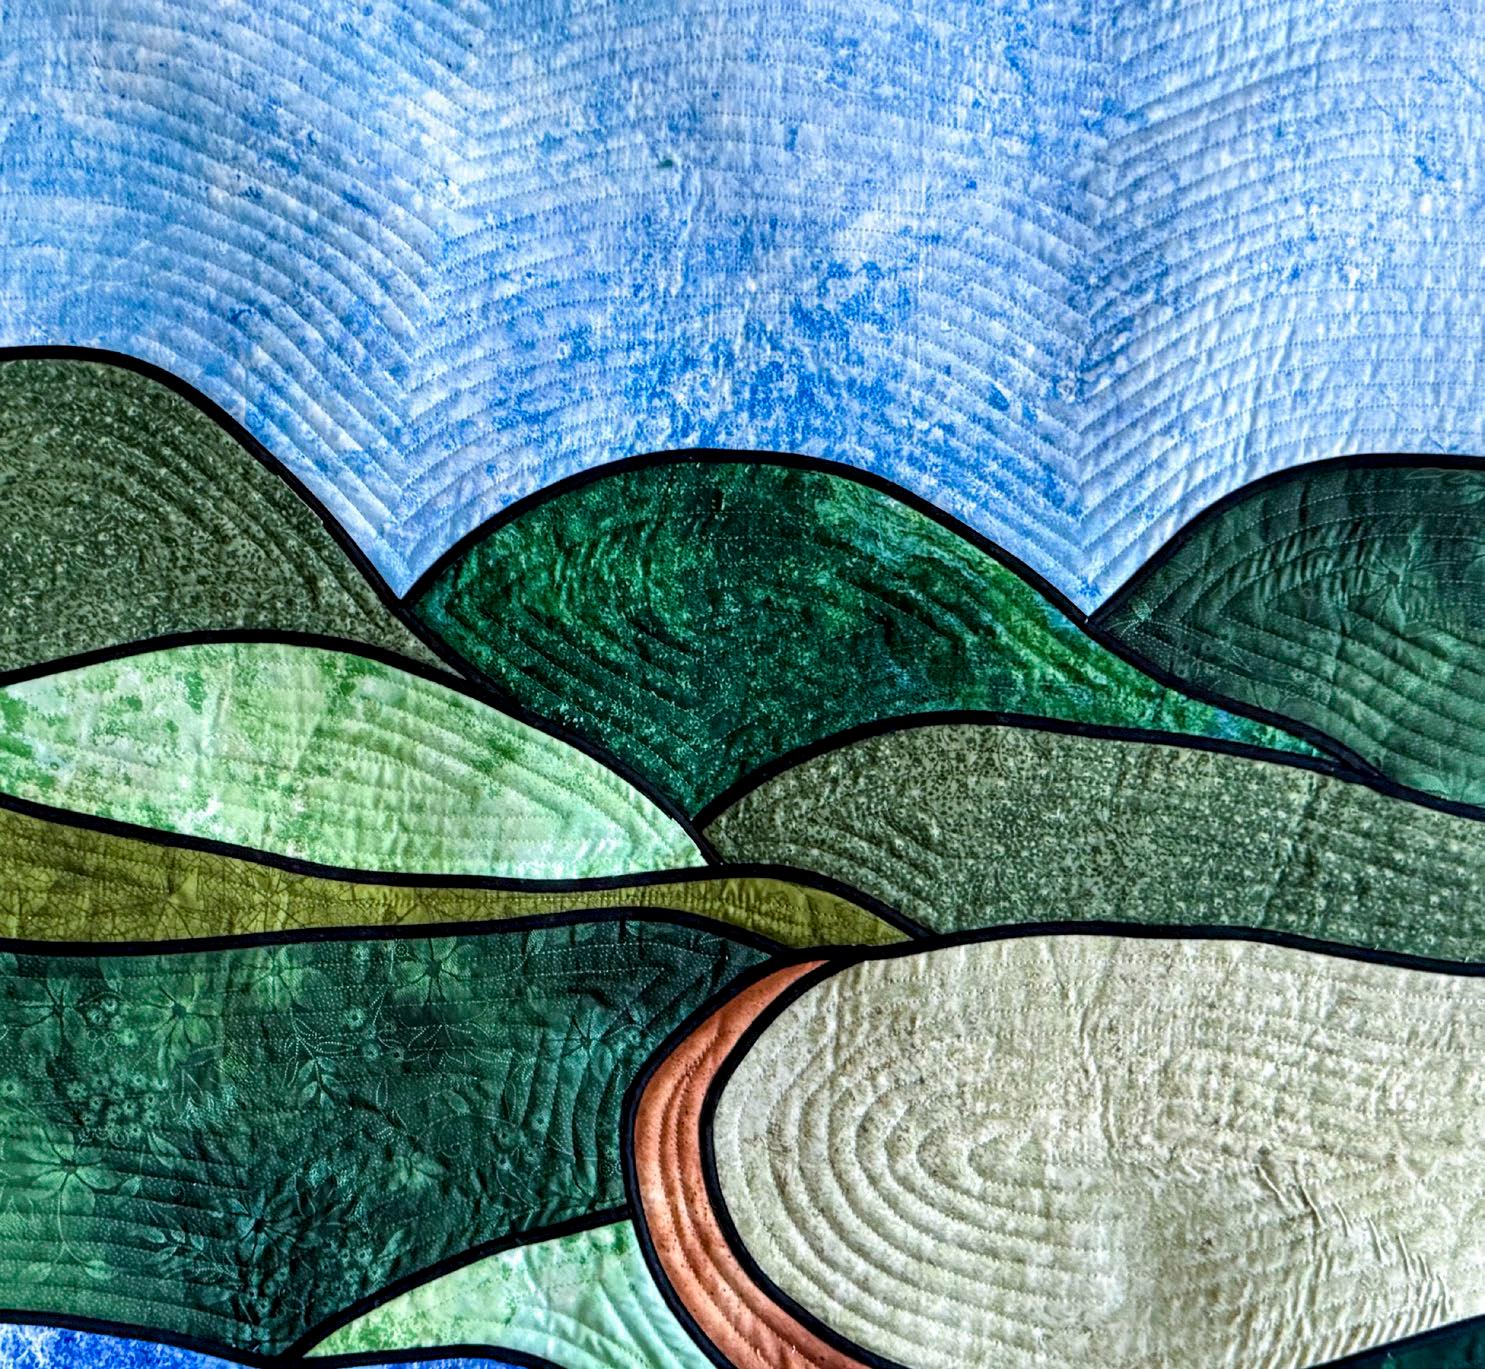
With all that in mind, this project is my way of capturing one of these seasons, a landscape quilted banner I call Seasons Remembered Quilt, inspired by the seasons I love most.
Here are some of the essential sewing and quilting tools that are helpful making this project:
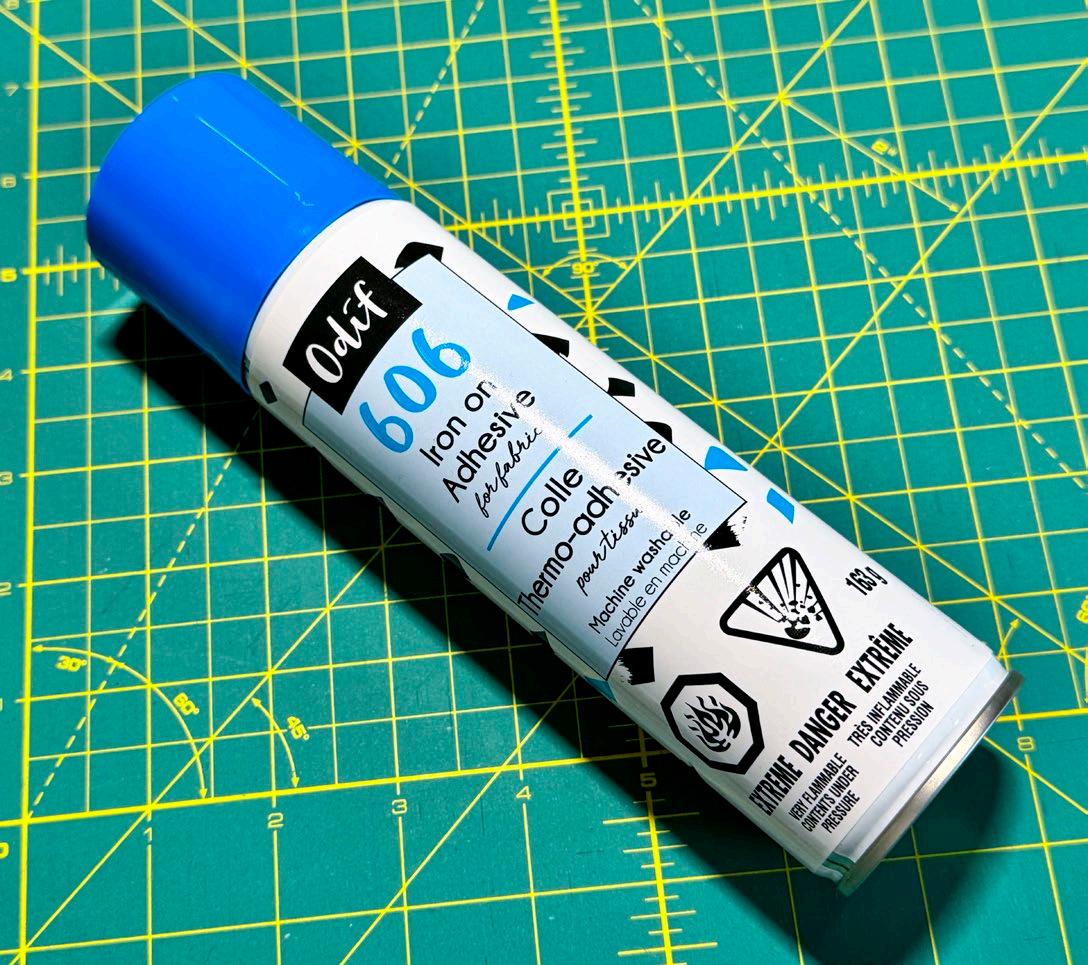
• ODIF 606 Spray and Fix No-sew Fusible Adhesive Web - 163g
• OLISO PROTM TG1600 Pro Plus Smart Iron - Tula PinkTM
• SEW EASY Imperial French Curve - 30'' (76cm)
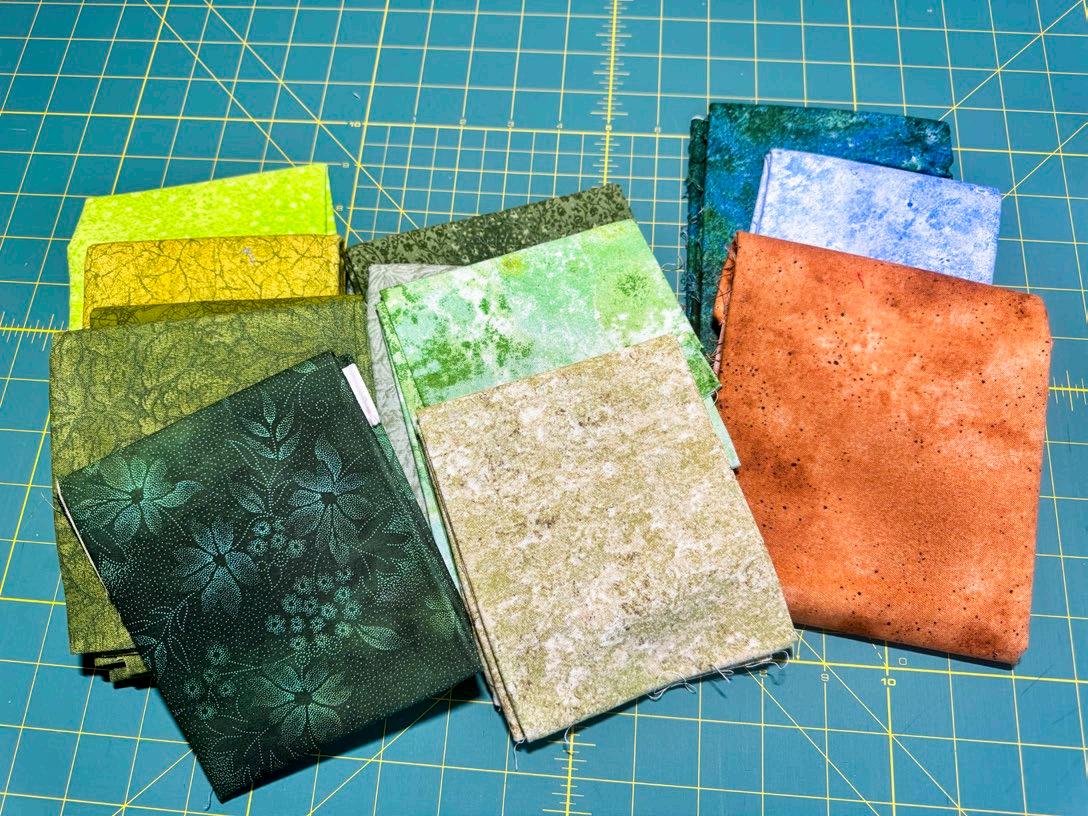
The fabrics were pulled straight from my stash. Will I use them all? Probably not. Will I add more colors? Most likely. There’s no right or wrong when it comes to this project, only the joy of choosing what makes us smile when it’s done.
Photos by Paul Léger
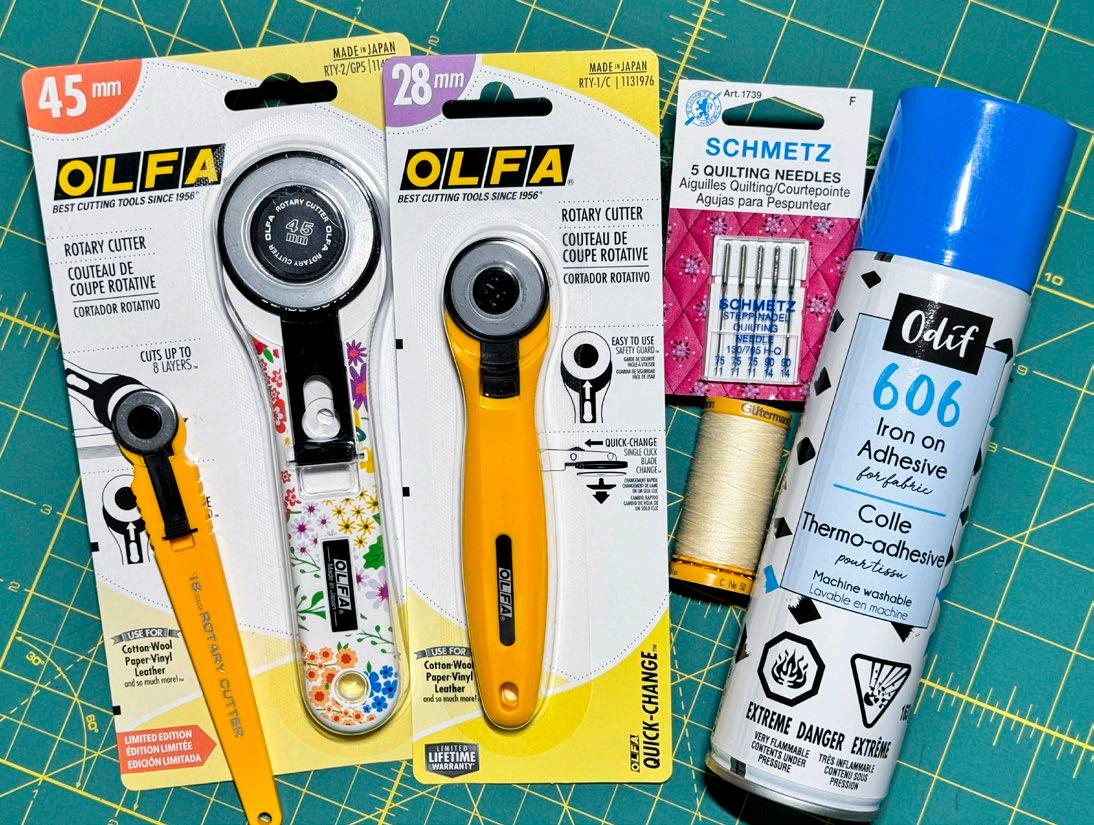
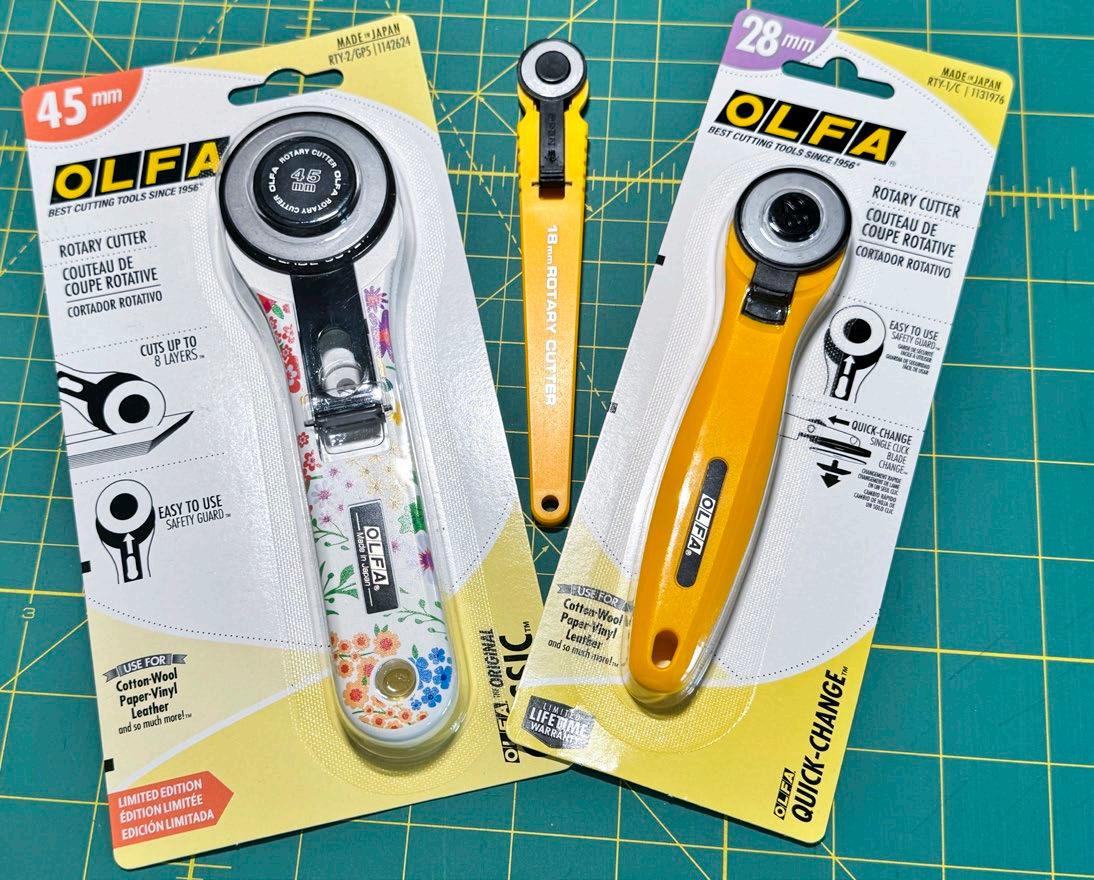
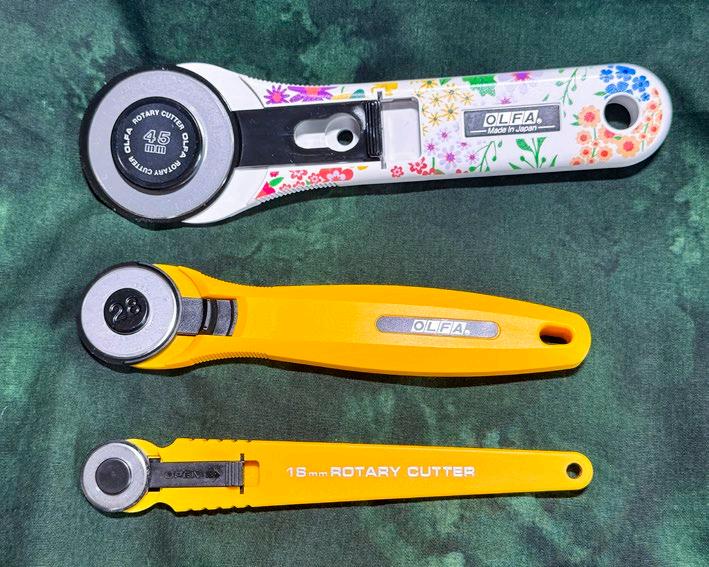
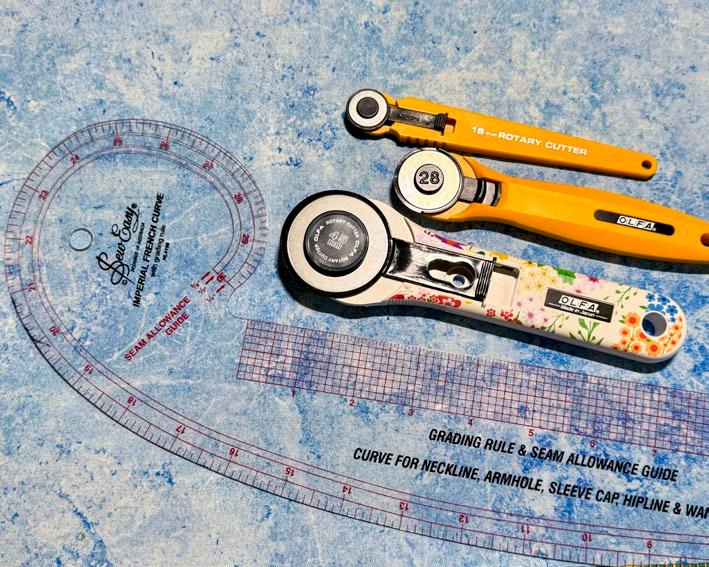
I haven't decided which rotary cutter to use for this project, but I know at least two will be involved. The OLFA 45mm rotary cutter will be my go-to for squaring off the fabric. With the French curve ruler, I’ll switch to the 18mm rotary cutter for those graceful, flowing cuts. And if I decide to slice through multiple layers of fabric, the OLFA 28mm cutter will step in to do the job.
There are several techniques for creating the Seasons Remembered Quilt. One of my favorite quilting tools is ODIF 606 Fusible Adhesive Web.
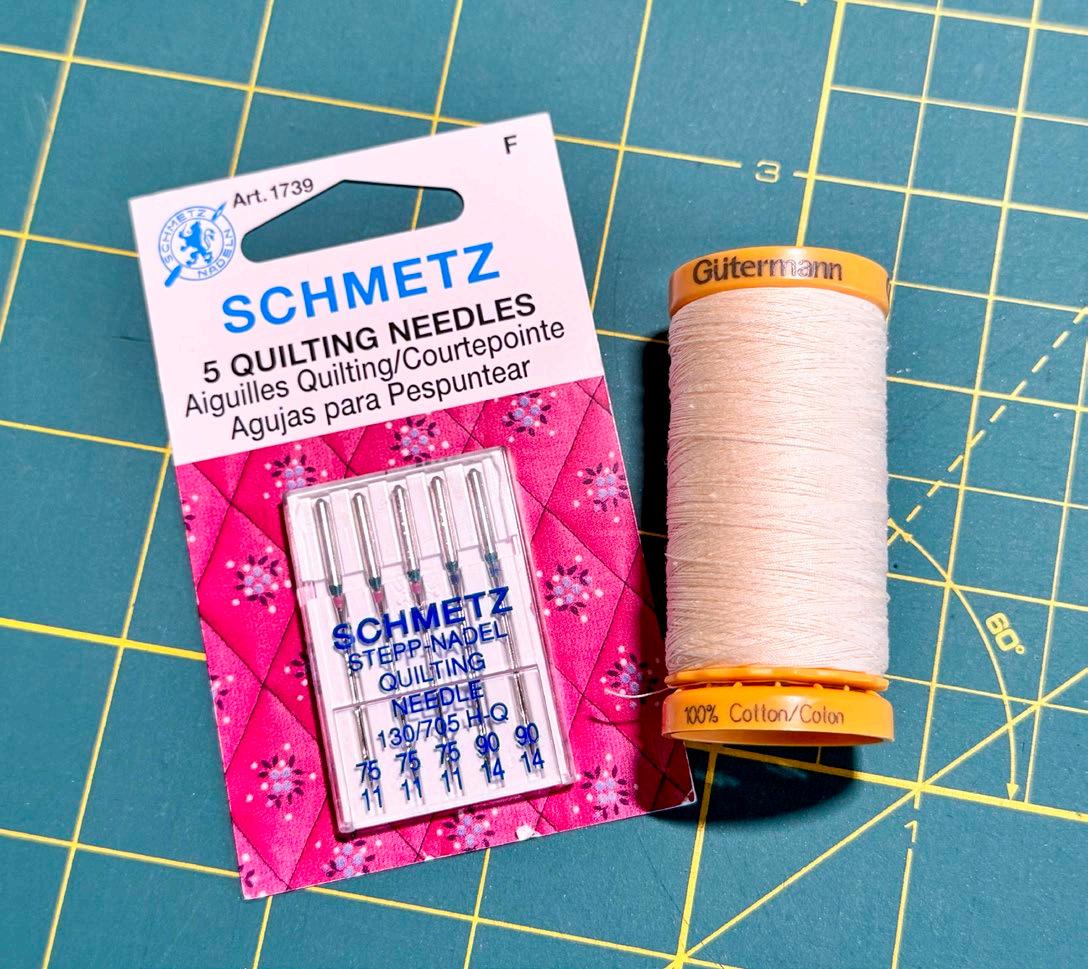
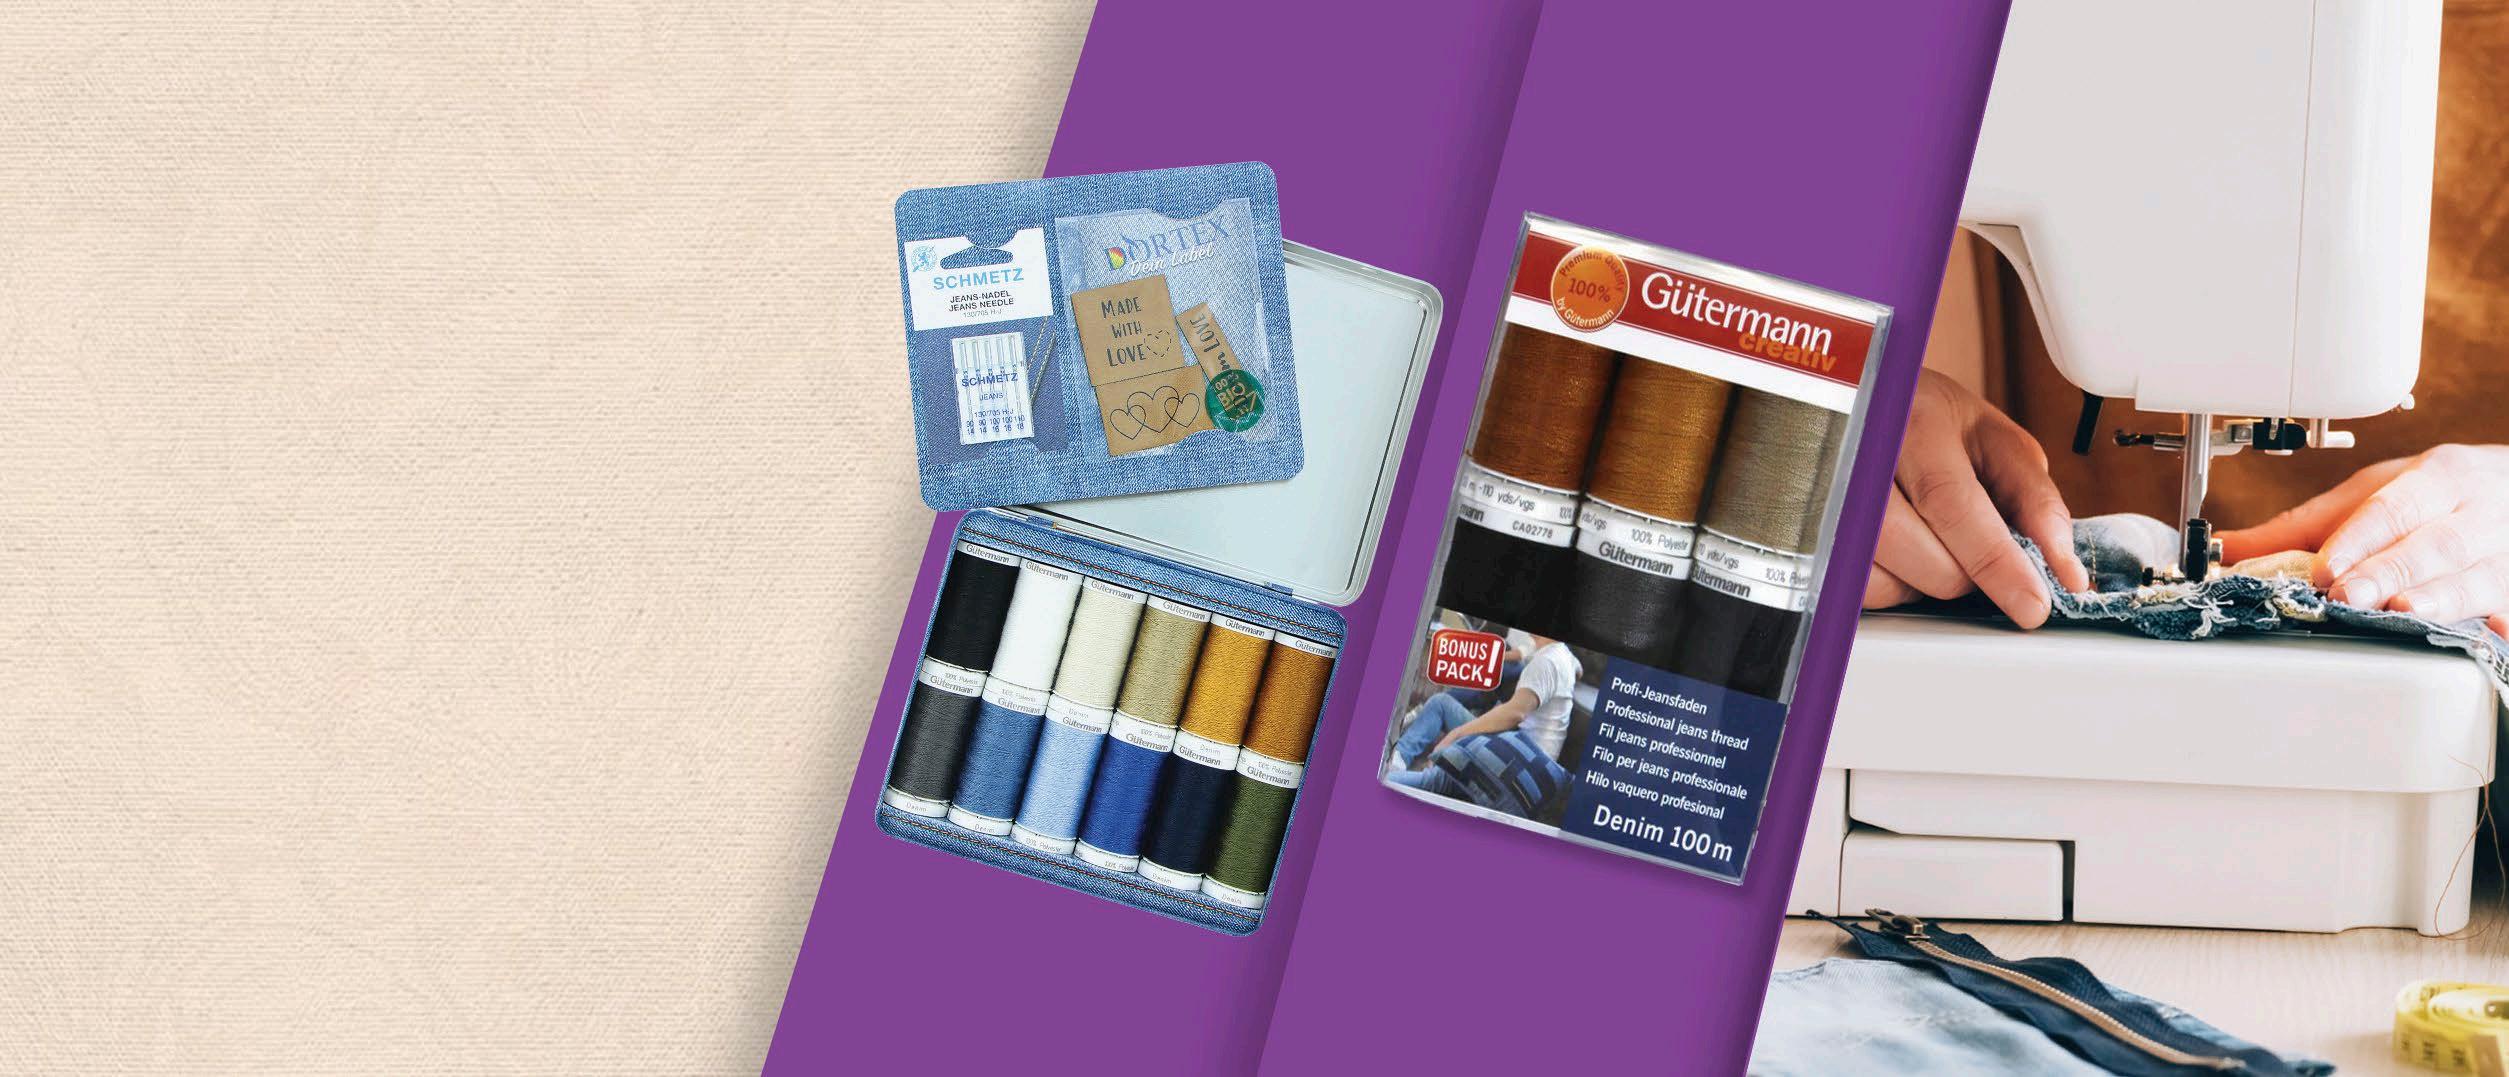
The last required items to complete the wall quilt are SCHMETZ Quilting Needles and a spool of Gütermann Cotton 50wt thread - Ivory.
Before we dive in, gather the following essential tools and notions to be ready to bring your wall quilt to life.
Essential tools used for making the Seasons Remembered Quiltk
Fabric selection
OLFA rotary cutters
Odif 606 fusible Adhesive web
SCHMETZ quilting needles and a spool of Gütermann cotton thread
Cutting hills freehand with OLFA Rotary Cutters
I want to talk about the fabric selection for this quilt. When I first got the idea to make it, I started looking through all the green fabrics I had, trying to find ones that matched, but with little success. As I was comparing fabrics, I happened to look outside and noticed all the greenery. I realized that none of the shades of green in nature actually match, yet when you see them together, they create a beautiful harmony. That’s when I decided to stop worrying about matching colors perfectly.
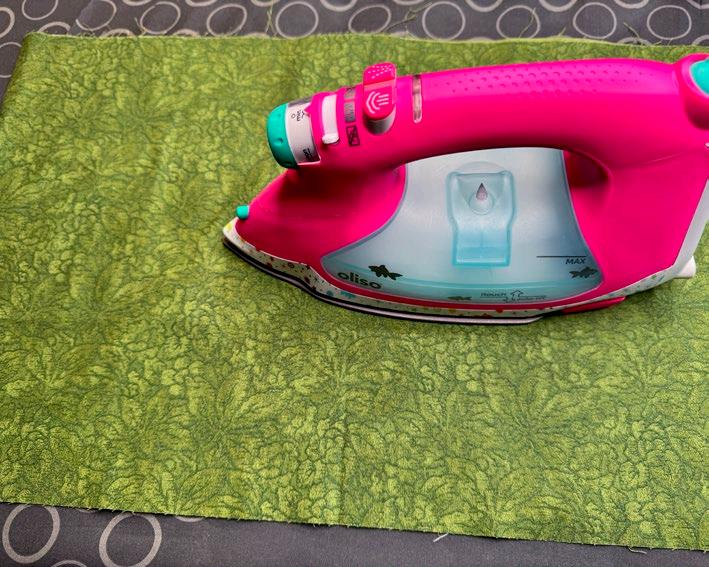
The first task starts with pressing the fabrics using my OLISO PRO TG1600 Pro Plus Smart Iron
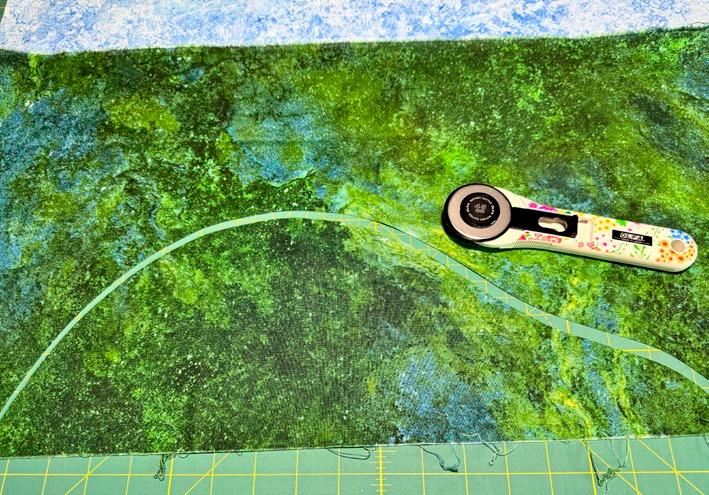
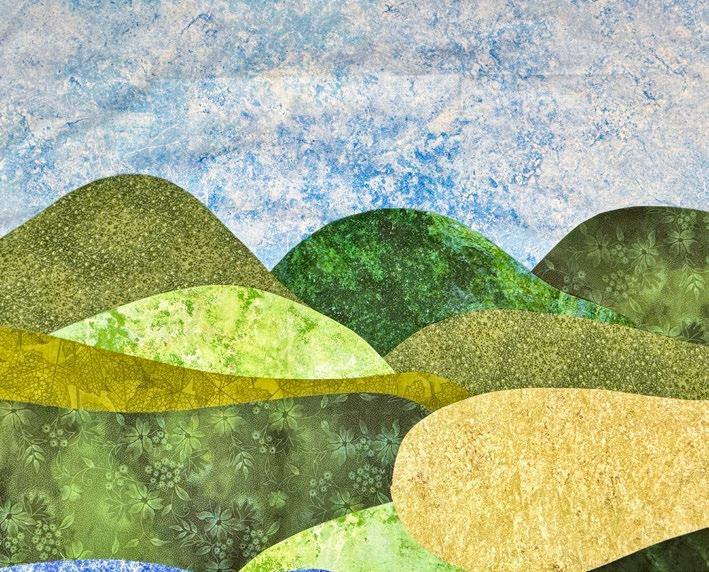
Now the fun starts, the cutting. I’ll be cutting the fabric, shall I say, freehand. What I mean is using the OLFA Printed Handle Rotary Cutter 45mm to cut shapes that will look like hills once the quilt is completed.
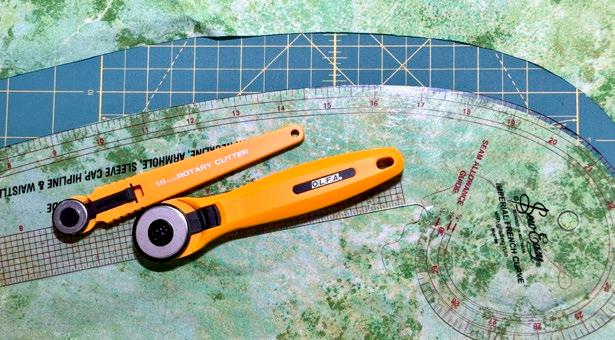
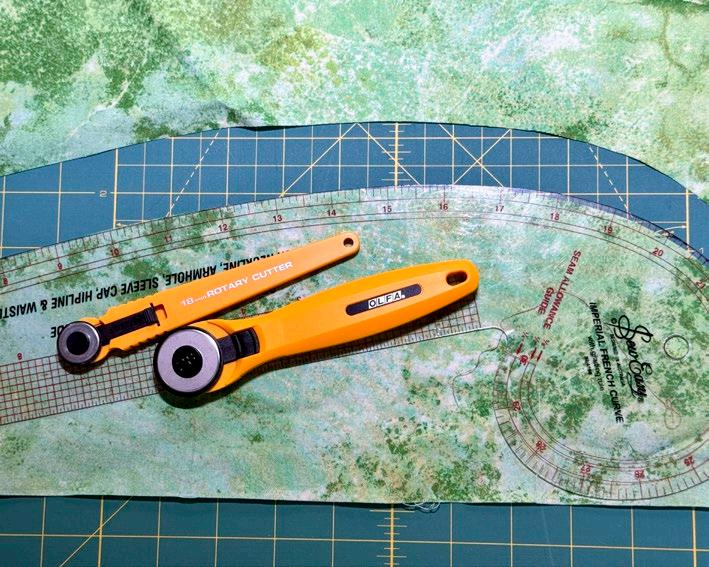
I realize not everyone is comfortable cutting freehand. If this is the case, I suggest using the SEW EASY Imperial French Curve along with either the OLFA Straight Handle Rotary Cutter 18mm or OLFA Quick Change 28mm Rotary Cutter. In the end, it becomes a personal choice. I recommend a rotary cutter with a smaller-diameter blade because it’s easier to use along a curved ruler. Also, since the Sew Easy French Curve ruler isn’t as thick as a typical quilting ruler, there’s less chance of nicking the edge.
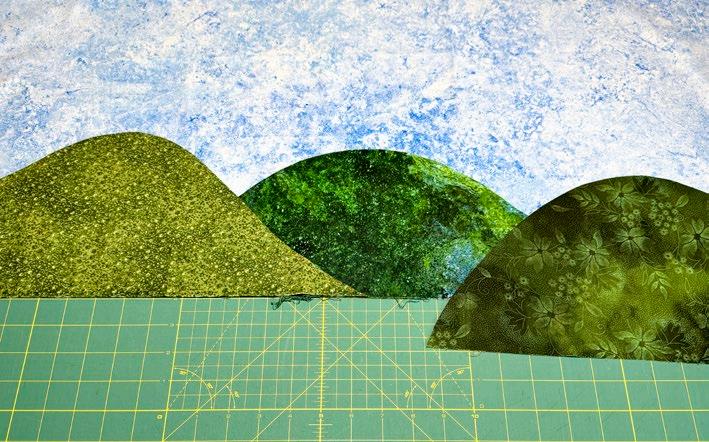
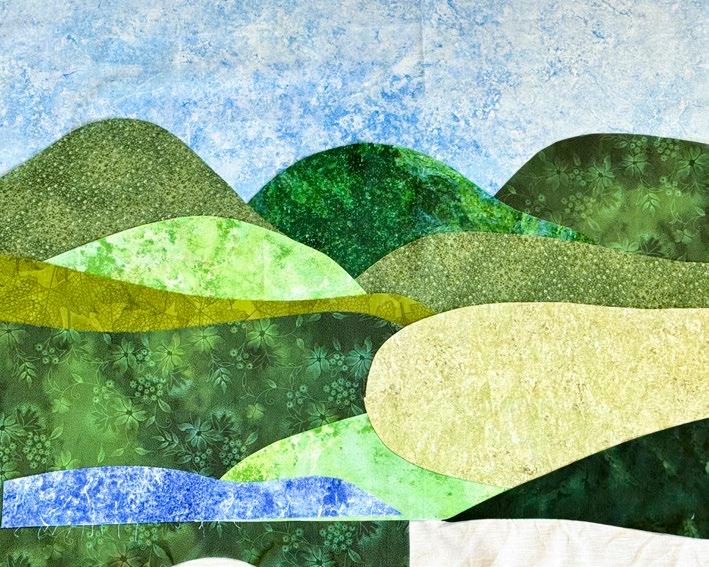
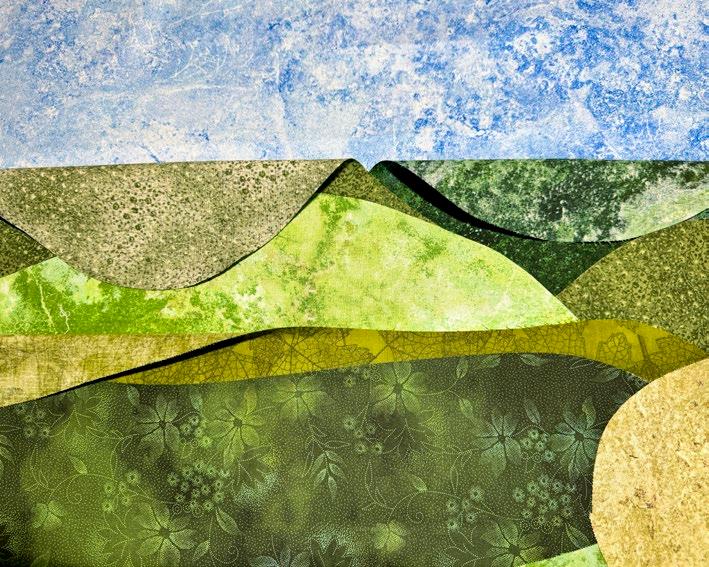
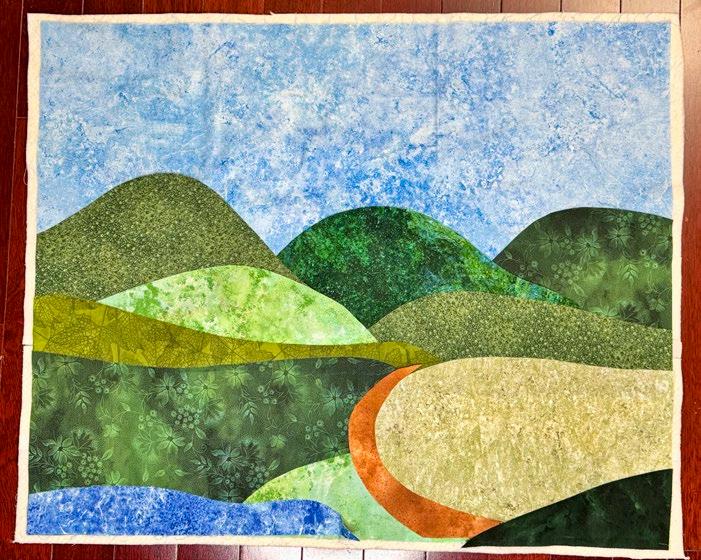
Cut hill-like shapes, then layer them to add depth to your design.
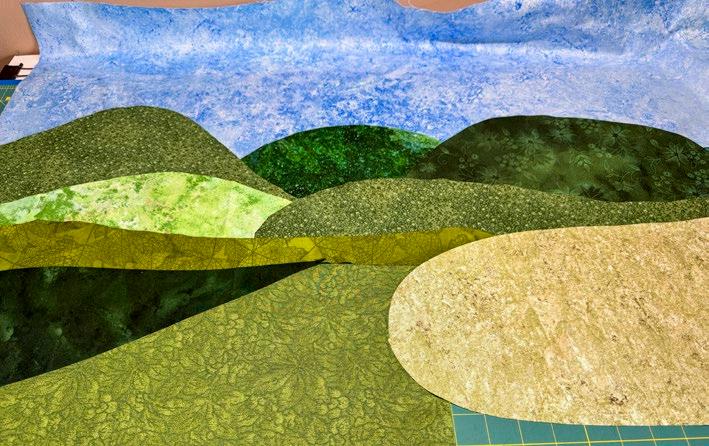
Keep cutting and, for every new layer, gradually reduce the hill angles to create a smooth, natural look.
I’ll keep playing around with the hills and meadows. Not sure how much more will be added to this art piece, and everyone is welcome to experiment by adding, removing, or moving elements around to create a landscape enjoyed by all.
and
The process of creating can feel scary, but it can also feel so very liberating! I don’t want anyone to stress making this landscape. Have fun. If there's an element of the quilt that you’re not enjoying, change it. As the creator of the quilt, you can change it as often as needed; there are no limits to the changes that you can make.
OLFA 45mm, 18mm and 28mm rotary cutters
Oliso PRO TG1600 Pro Plus Smart Iron
OLFA printed handle rotary cutter 45mm
OLFA 18mm and 28mm rotary cutter, and the Sew Easy French curve ruler
Layered hill-like shapes
Creating the landscape
OLFA 45mm, 18mm
28mm rotary cutters with the Sew Easy French curve
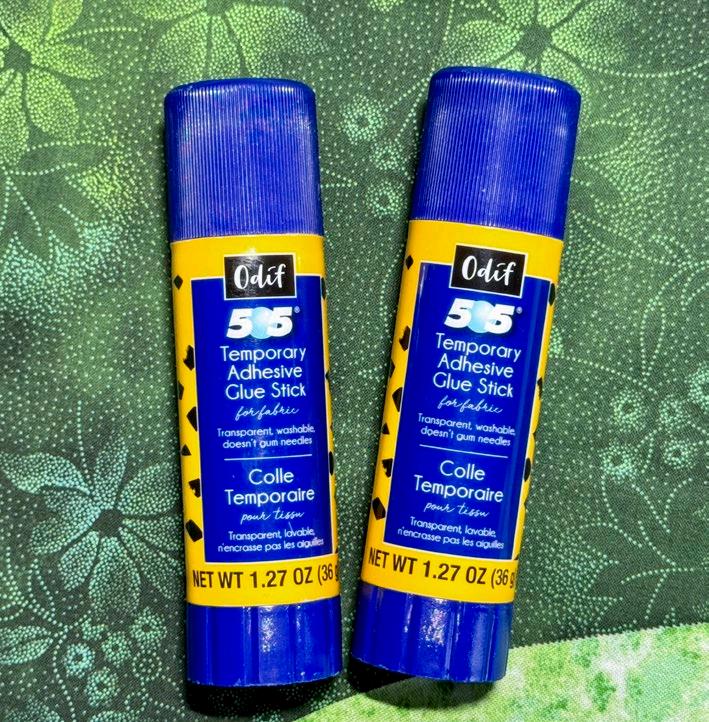
Securing fabric layers with Odif 505 Temporary Adhesive Glue Stick
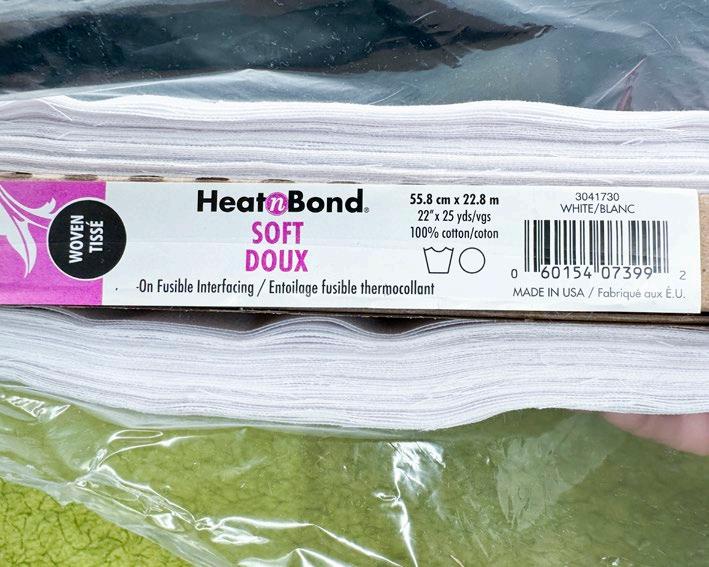
Now, we’re securing the fabrics in place using the HeatnBond Woven Fusible Interfacing - Soft White - 55.8cm x 22.8m (22'' x 25yds)
The amount of HeatnBond Woven Fusible Interfacing needed depends on the width of your landscape. This morning, I looked at it again and played around a bit more with the fabric placement. Once I was happy with the landscape, I measured the layout's width. It came out to 32".
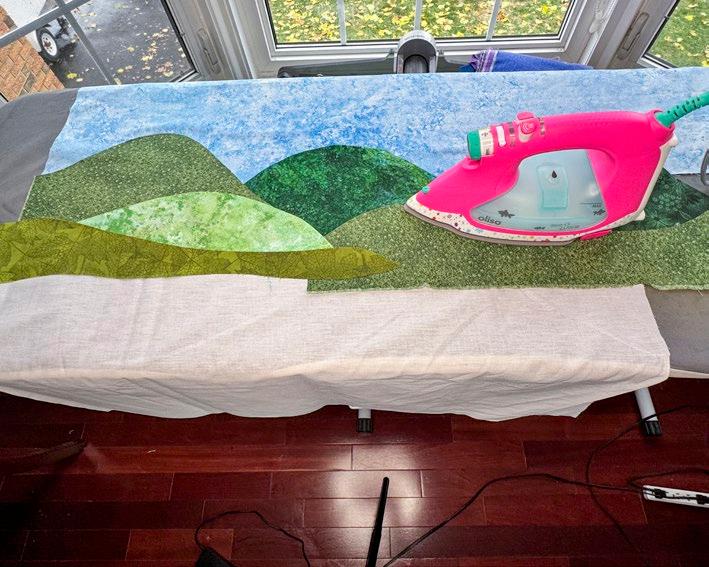
With the HeatnBond fusible cut to size, I laid it on the ironing board. I overlapped the sky fabric about one inch over the edge of the HeatnBond interfacing. Then I placed a few pieces of fabric that will represent the rolling hills. Once the first pieces were arranged the way I wanted them, I secured them in place using the OLISO PRO TG1600 Pro Plus Smart Iron
Continue the process until all the pieces are in place and secured to the HeatnBond interfacing.
To better appreciate the art piece, I cut off the excess fabric to square it up. It definitely improved the overall look!
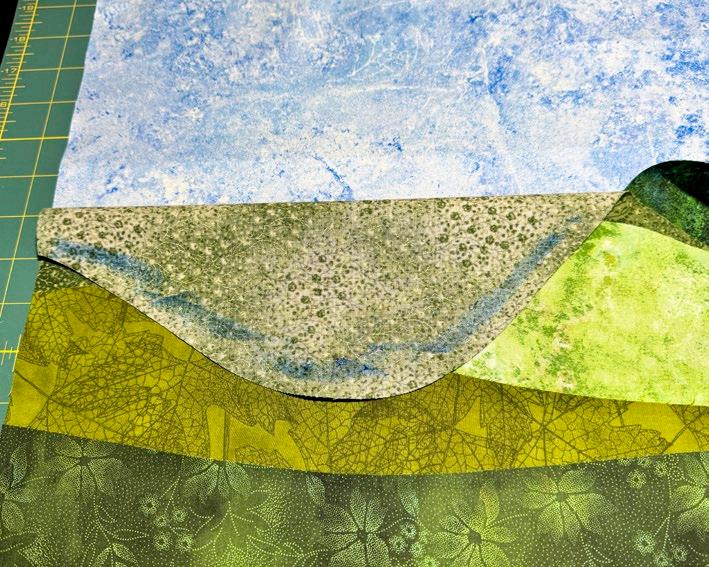
Due to fabric overlap, some areas will not be fully fused.
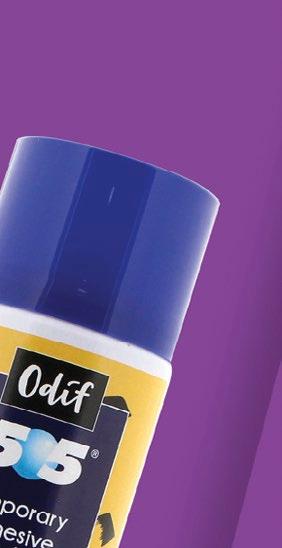
To solve this issue, Odif has developed a product that works perfectly: the ODIF 505 Temporary Adhesive Glue
Apply Odif 505 Temporary Adhesive Glue Stick along the edges of the fabrics you want to secure.
Carefully inspect all the pieces to ensure that all fabric layers are securely adhered to the base fabric. Press gently along the edges and seams to confirm that nothing lifts or shifts.
We all learn to love and rely on Odif 505 Temporary Quilt Basting Adhesive Fabric Spray for basting our quilts. I can confidently say that ODIF 505 Temporary Adhesive Glue Stick will quickly become another well-loved Odif product in everyone’s quilting toolkit.
HeatnBond Woven Fusible Interfacing
Securing fabrics on the HeatnBond interfacing
Progress on the landscape wall quilt.
Once delivered from the extraneous interfacing, the hills appear!
Non-fused fabric layers
Odif 505 Temporary Adhesive Glue Stick
Odif 505 Temporary Adhesive Glue Stick applied to fabric
Stick
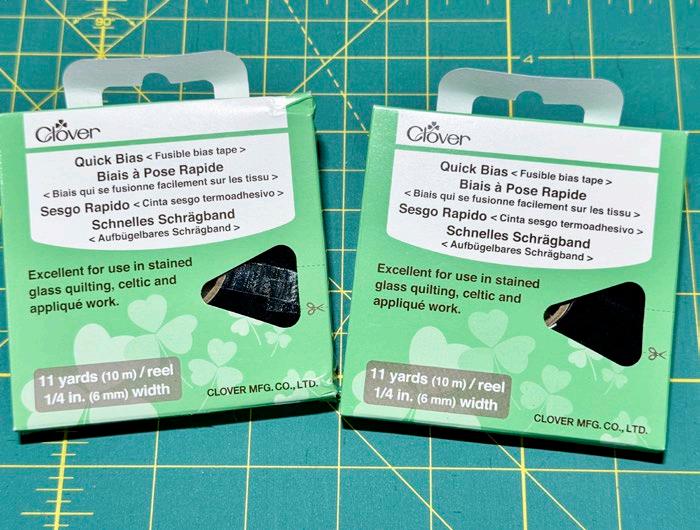
Clover Quick Bias Tape adds bold definition to quilt landscapes
We’re enhancing what is already a beautiful piece of art. This will be done with CLOVER Quick Bias Tape.
Before starting with the Clover Quick ¼” Black Bias Tape, I decided to add an extra element of interest to the quilt—a road!
To create the road, I cut out a shape in proportion to where I wanted it to appear. I then flipped it over and sprayed ODIF 606 Spray and Fix No-sew Fusible Adhesive Web on the back. I like to think of it as “interfacing in a can”, another product I can’t live without!
Once the adhesive is applied, I bring the piece to the ironing board and press it in place, just as I would when using regular fusible interfacing.
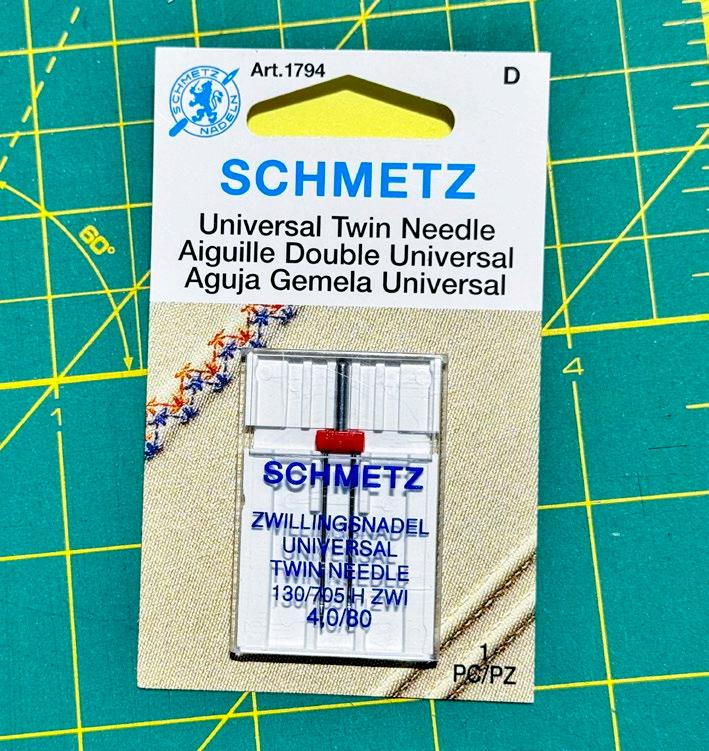
The quickest and easiest way to sew down Clover Quick ¼” Black Bias Tape is with a SCHMETZ #1794 Twin Needle Carded - 80/12 - 4.0mm
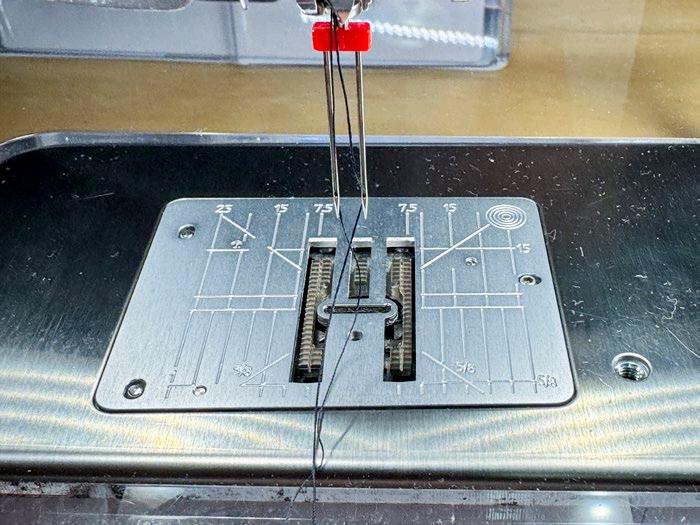
The main difference from using a single needle is that two spools of thread are required. Threading the machine is essentially the same as usual, except for one key step: one thread goes on one side of the tension disk, and the other on the other side. Once threaded correctly, the twin needle creates perfectly even parallel stitches for a professional finish.
For best results, use a ¼” open-toe embroidery foot or a similar foot. These are ideal for sewing down the Clover Quick ¼” Black Bias Tape accurately and neatly.
What a huge difference adding Clover Quick ¼” Black Bias Tape can make to a quilt—it really elevates the overall look! It’s incredible how just two simple tools, a SCHMETZ #1794 Twin Needle Carded - 80/12 - 4.0mm and CLOVER Quick Bias Tape, can transform the process and make creating a fun, vibrant wall hanging an absolute joy!
With the quilt top finished, it’s time to dive into the quilting part, something I’m super excited to share with you.
Clover Quick ¼” black Bias Tape
Adding a road detail to the Seasons Remembered Quilt
SCHMETZ Twin Needle 80/12 - 4.0mm
Threading a SCHMETZ Twin Needle
Sewing the Clover Quick ¼” Black Bias Tape with a SCHMETZ twin needle.
The completed quilt top
Finish the Seasons Remembered Quilt with
Odif 505 and Echo Quilting
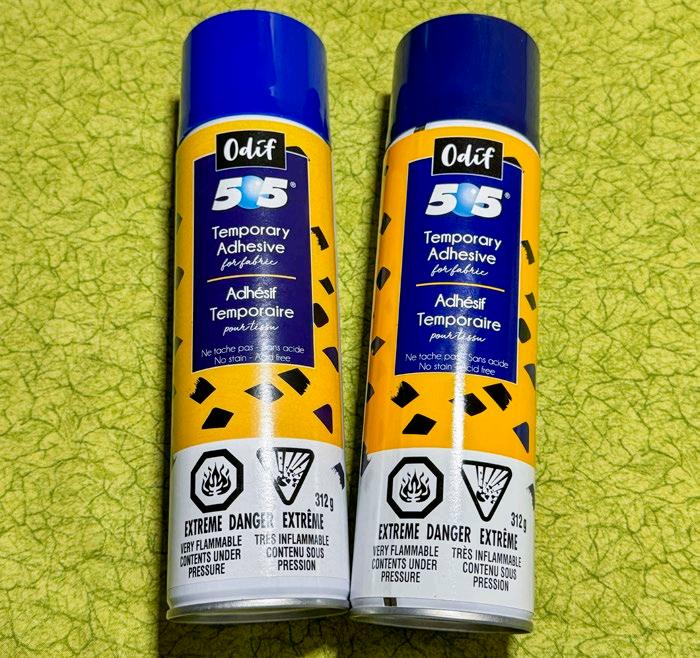
With the help of Odif 505 Temporary Quilt Basting Adhesive Fabric Spray, we’re getting this quilt ready for quilting, making the process so much easier and more enjoyable!
How to use Odif 505
To baste a quilt, lay the backing fabric flat and smooth with the wrong side up, then lightly spray it with Odif 505 Temporary Quilt Basting Adhesive Fabric Spray. Place the batting on top and smooth it out. Before positioning the quilt top, spray a light layer of Odif 505 onto the batting as well, then carefully align the quilt top right side up. Starting from the center and working outward, gently press the layers together. The goal is to keep everything smooth, secure, and perfectly in place so nothing shifts while you quilt.
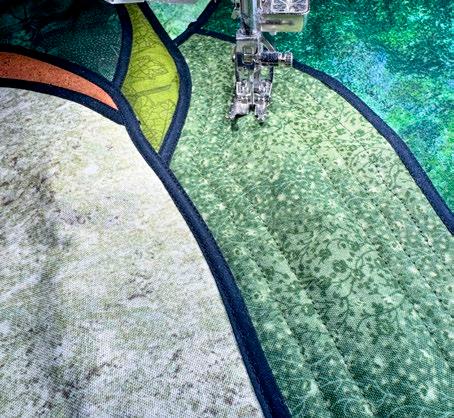
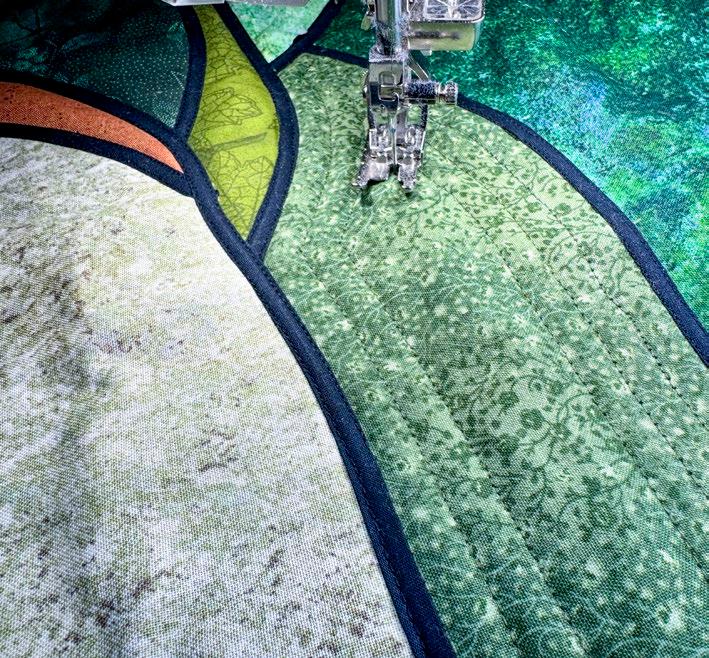
With the quilt basted, it’s finally time to start quilting! One of my favorite quilting methods is echo quilting, which creates clean, beautiful parallel lines that add texture and movement to the piece.
With the binding added, the quilt is completed.
I really love how the quilt turned out! Now that it’s completed, I find myself wishing I hadn’t given away my novelty fabrics—imagine how much fun it would be to add little details to the scene. A few trees, a couple of houses, a horse in the field, or even a tiny car on the road… the possibilities are truly endless!
Odif 505 Temporary Quilt Basting Adhesive Fabric Spray is such a helpful quilting tool.
Quilting parallel lines
The completed Seasons Remembered quilt.
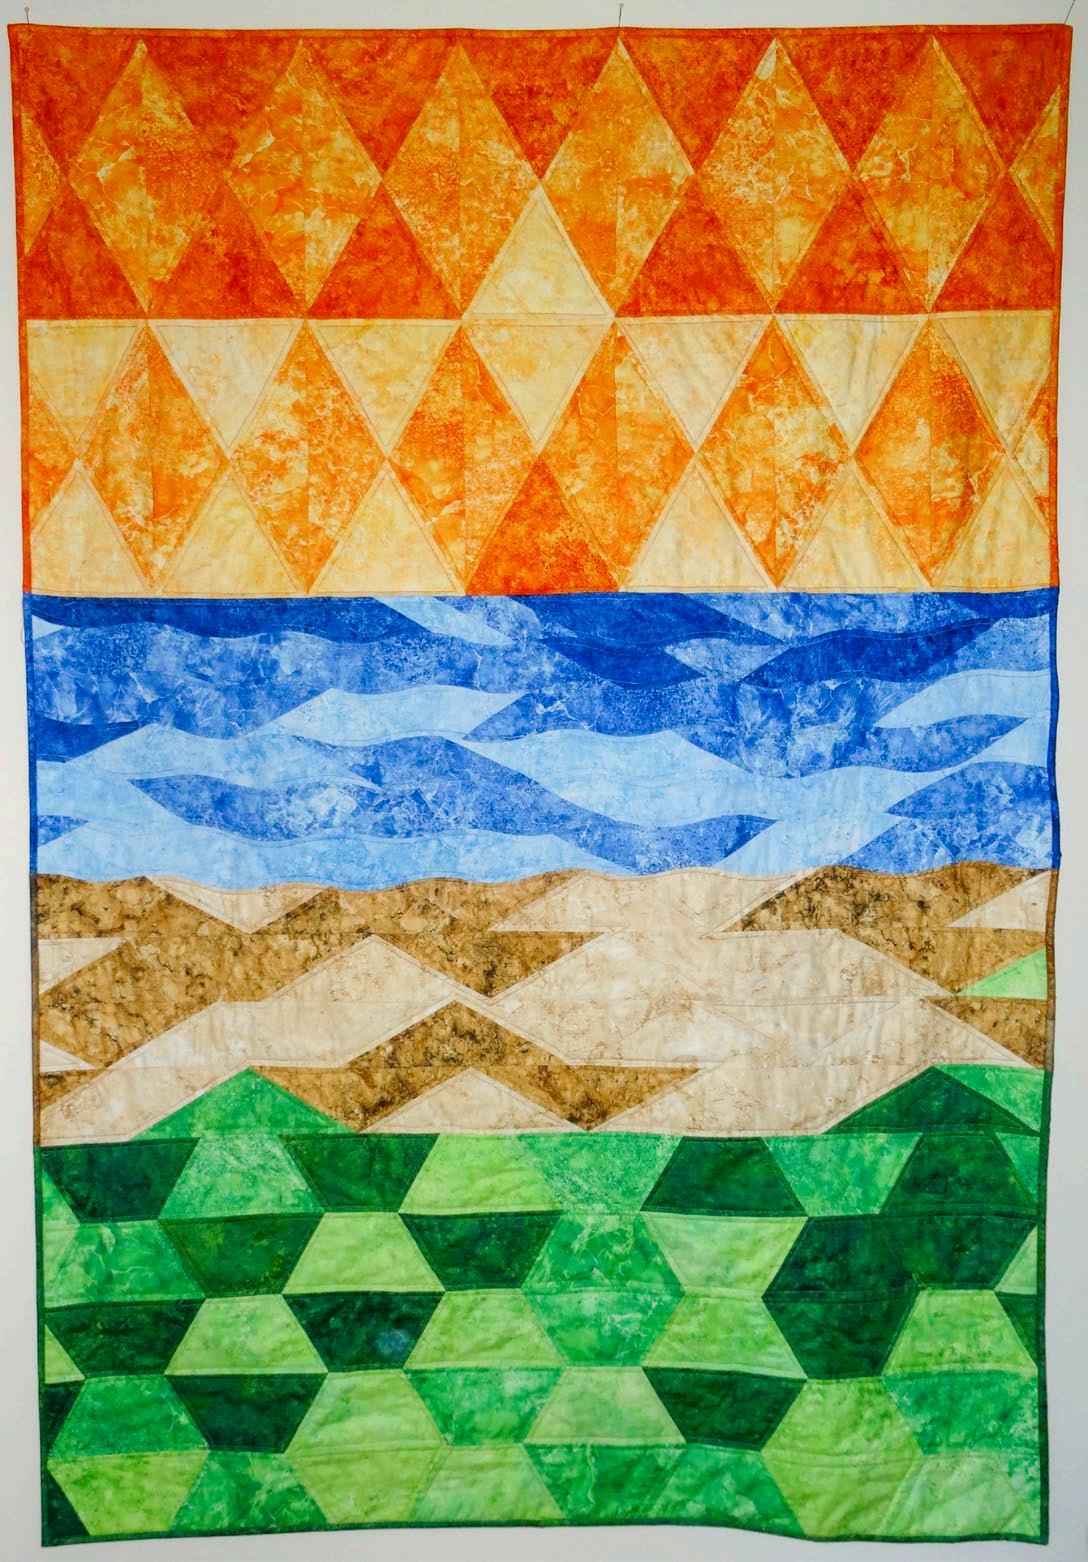
In the past few years, I created two other landscape quilts. This one, titled “If Monet Were a Quilter,” I made in July 2017 as part of a QUILTsocial post. I was challenged to use all kinds of rulers to construct the quilt, and it was such a fun, creative exercise. I hope everyone recognized it as a beach sunset!
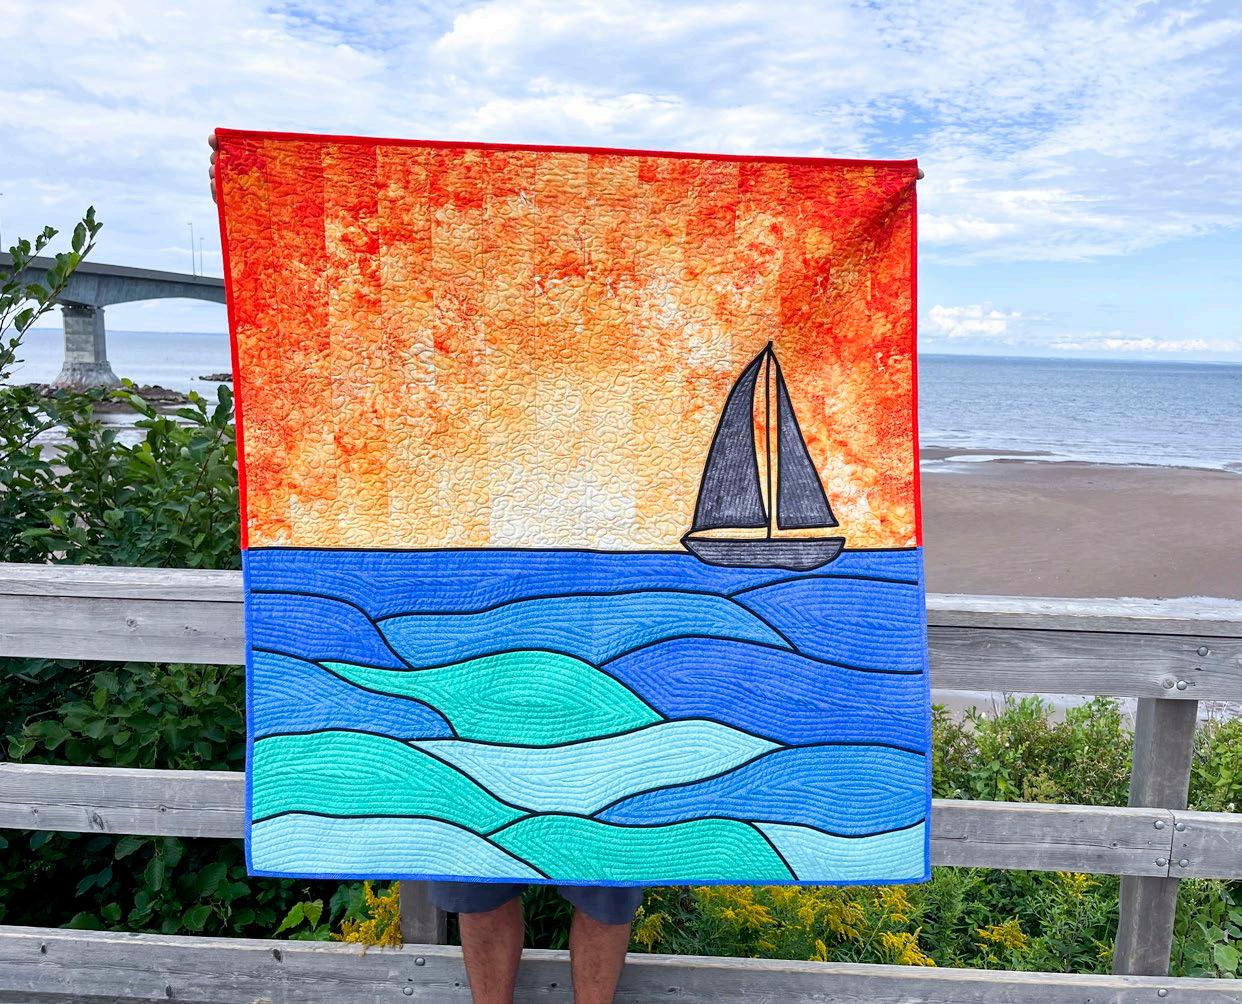
Another quilt using this technique is when I was invited to write a quilt concept for A Needle Pulling Thread magazine I jumped at the opportunity to participate since I absolutely loved the theme, ‘Oceans’. The quilt I created, Come Sail Away Wall Quilt, was featured in Issue 60. The techniques I used to make this quilt are very similar to the ones I’ve shared in this feature; clearly, it’s a technique I really enjoy!
If Monet Were a Quilter Quilt
Come Sail Away Wall Quilt
Meet the Husqvarna VIKING Designer Topaz 65
Elaine Theriault
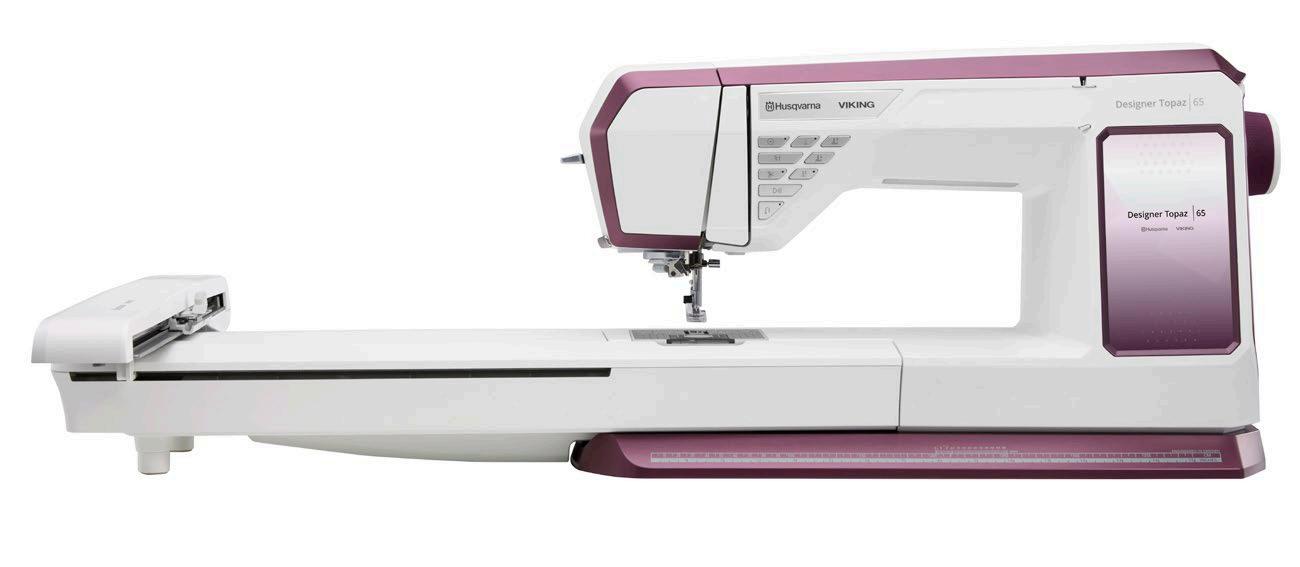
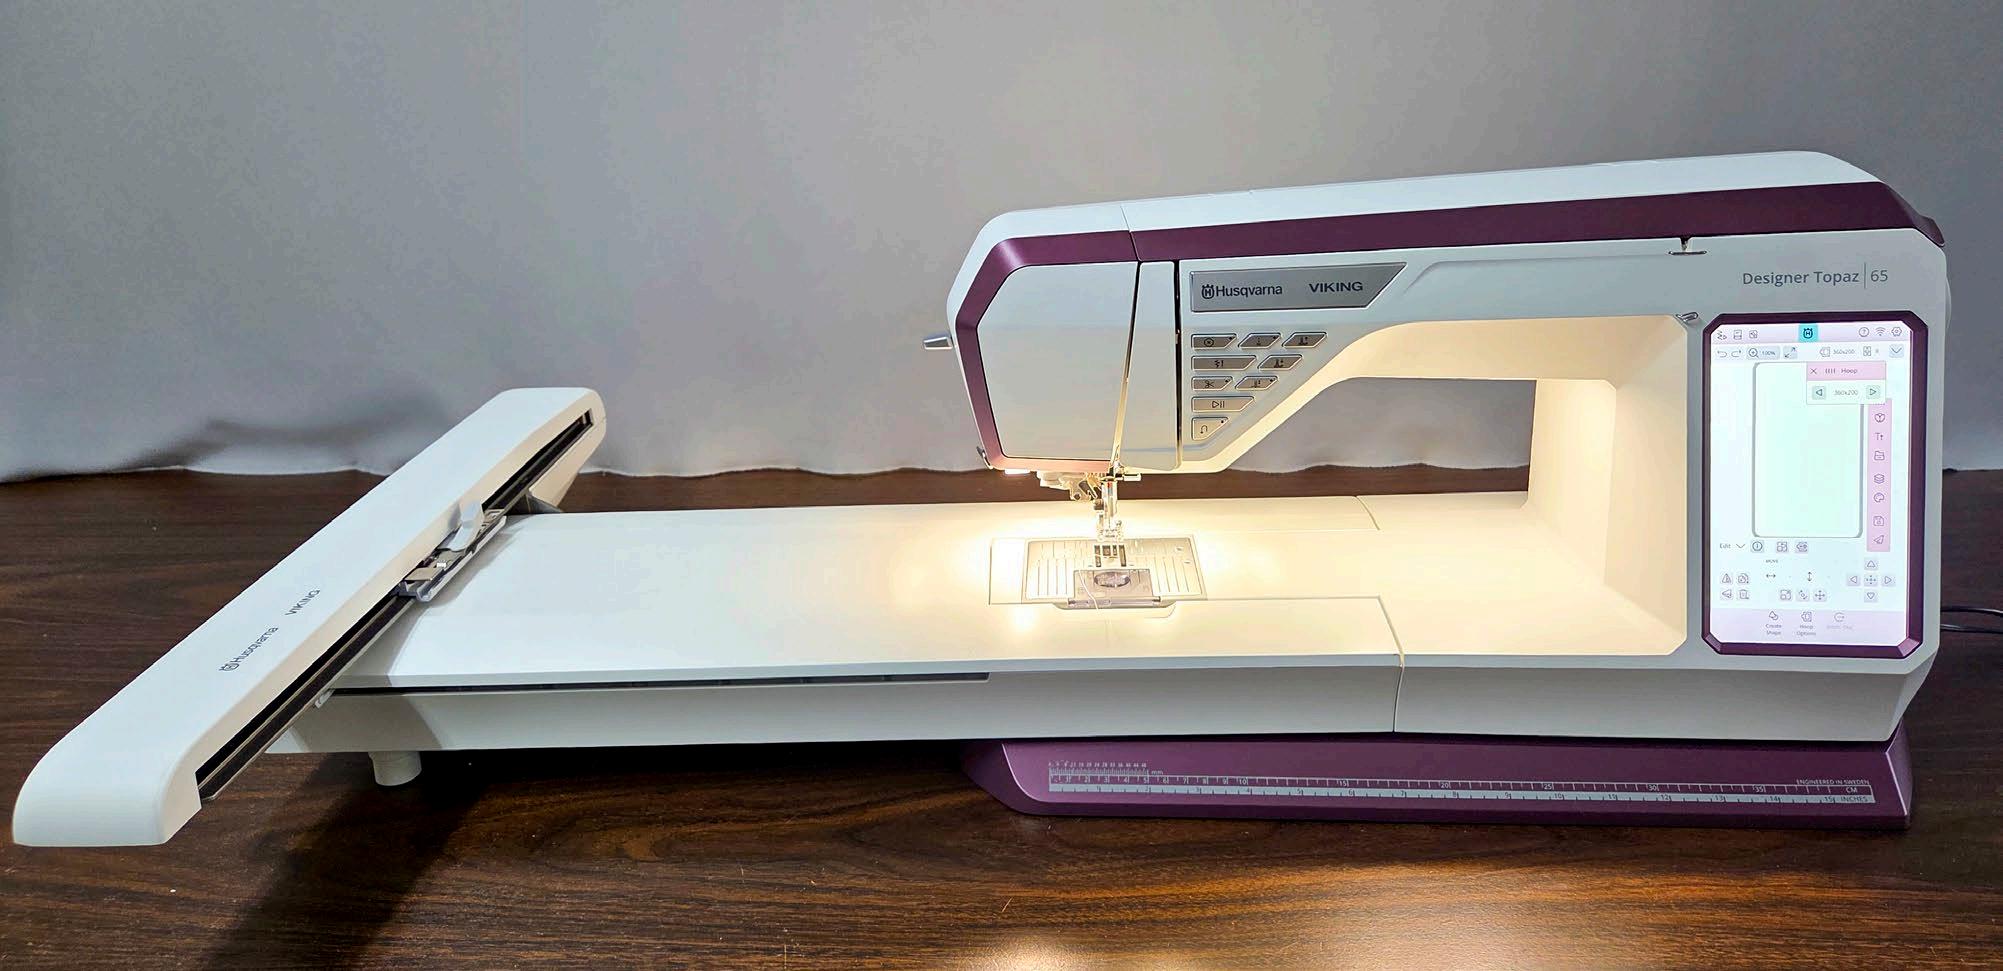
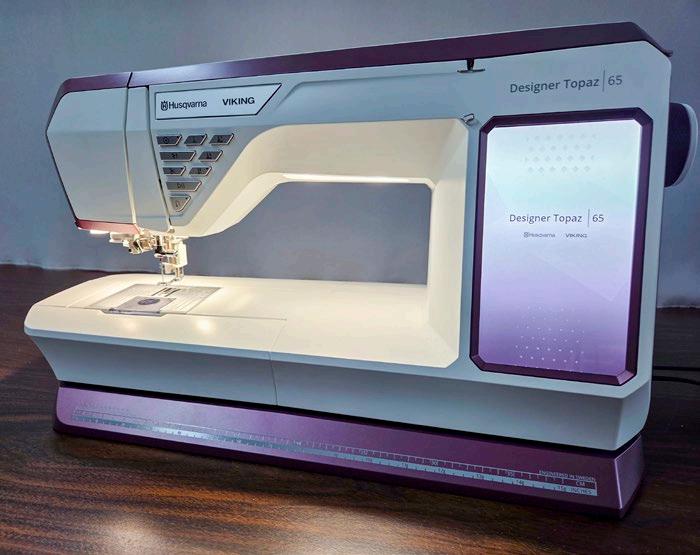
I'm test-driving the brand-new Husqvarna VIKING Designer Topaz 65, a versatile embroidery and sewing machine, and it's fantastic!
The last time I wrote was about the Husqvarna VIKING Topaz 55Q, which is essentially the same machine. However, the Designer Topaz 65 has embroidery capabilities, whereas the Topaz 55Q is a sewing-only machine.
To review the sewing mode functions, refer to my post about Unboxing the New Husqvarna VIKING Topaz 55Q
One thing I can say about an embroidery machine is that when I bought my first embroidery machine over 25 years ago, I knew nothing about machine embroidery. I was a quilter, and to me, there was no reason I would want or need one. However, after seeing a demo at my local Husqvarna VIKING dealer, I became intrigued and thought it would be neat to have the ability to personalize items. So I bought that embroidery machine (of course, a Husqvarna VIKING) and I've never regretted that decision. So even if you don't think you are in the market for an embroidery machine, check out the articles that follow, get a demo from your local dealer, and think outside the box. I now use my embroidery machine for all aspects of quilting, embellishing ready-made items, and so much more!
Now let's turn on the Designer Topaz 65 and have a look. Did you notice how large that touchscreen is? You know what this means! I'll have plenty of room to edit and combine embroidery designs right on the screen! I can't wait to get started!
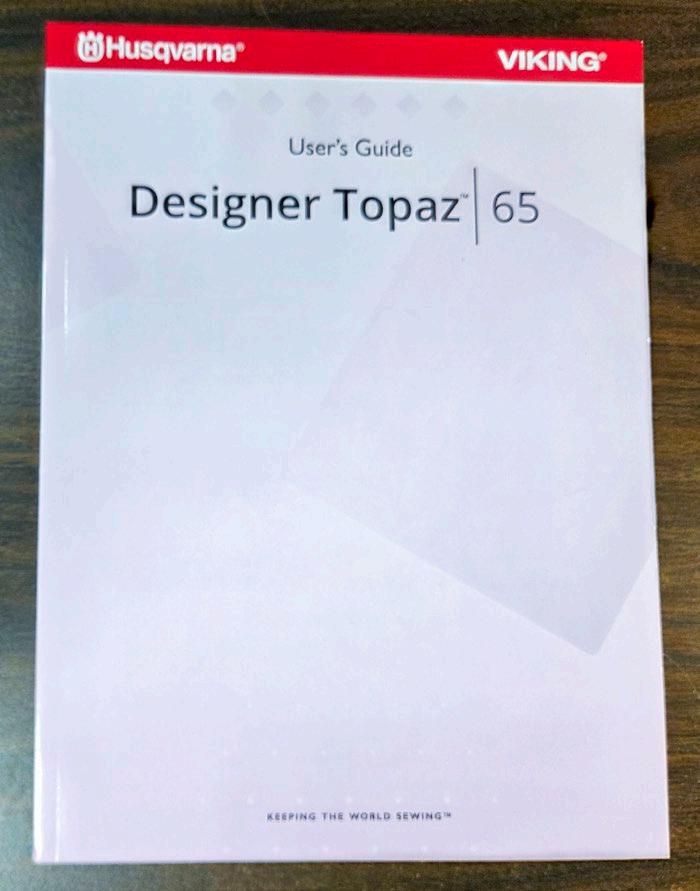
I would be remiss if I didn't mention reading through the User's Guide! I do NOT recommend sitting down and reading through it at one sitting. That thought bores me to tears! You need to take one page at a time. Sit in front of the Designer Topaz 65 and touch the buttons. Become familiar with the accessories and explore the available time-saving features and functions of this excellent sewing and embroidery machine. You'd be surprised at what you can learn.
Not only is there a physical copy of the User's Guide, but there is also a copy built into the DesignerTopaz 65. You can access the digital copy in multiple ways, and you can easily search for topics, which is a lot easier to do than with the physical copy.
The built-in User's Guide is available from multiple points, and there's also the Quick Help function. This video will help you understand the various ways to access the User Guide information directly on the touchscreen. Even if digital information is "not your thing," I think it's important to understand the future of technology. Our sewing and embroidery machines are more sophisticated yet not complicated, utilizing the latest technology to make our sewing and embroidery experiences even more exciting.
If you do nothing else when you take your Designer Topaz 65 home, be sure to review the machine embroidery section in the User's Guide and locate the diagram for the Embroidery Edit screen. All the icons and their functions are listed. If you don't become familiar with this screen, you are not utilizing your embroidery machine to its maximum potential.
Let's have a closer look at Embroidery Edit. The Embroidery Edit screen features numerous options, so I've grouped them into several videos for your convenience. This first video explains the icons displayed in the top two rows.
Next, let's look at the various ways you can load an embroidery design into the Embroidery Edit screen. While many people are happy to purchase embroidery designs, put them on a USB stick, and load the design from there, there are many other possibilities.
Photos by Elaine Theriault
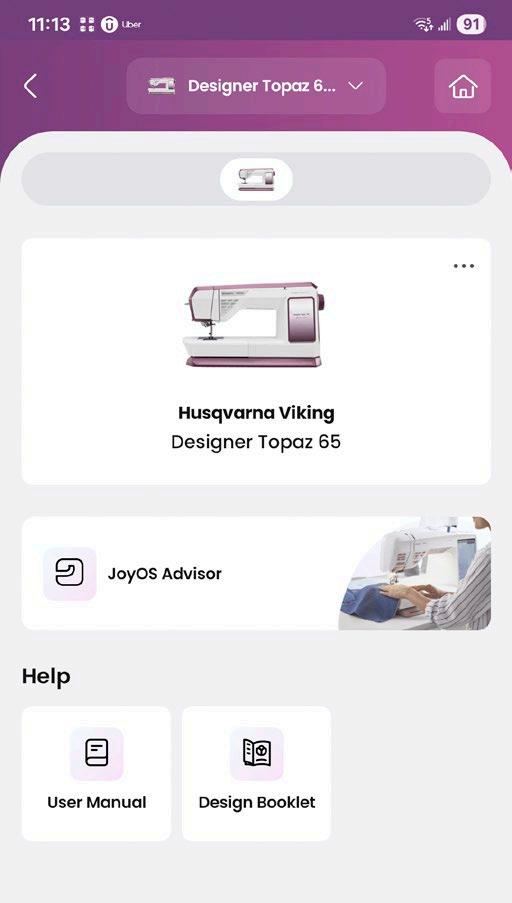
Husqvarna VIKING Designer Topaz 65
User's Guide for the Designer Topaz 65
Be sure to check out the Sample Book (available as a PDF in the JoyOS Advisor) for the built-in designs, as well as the online Design Catalogue on the Creativate website. Please note that a subscription to the Creativate digital toolkit is required for many of the designs, although some are available for free in the catalogue.
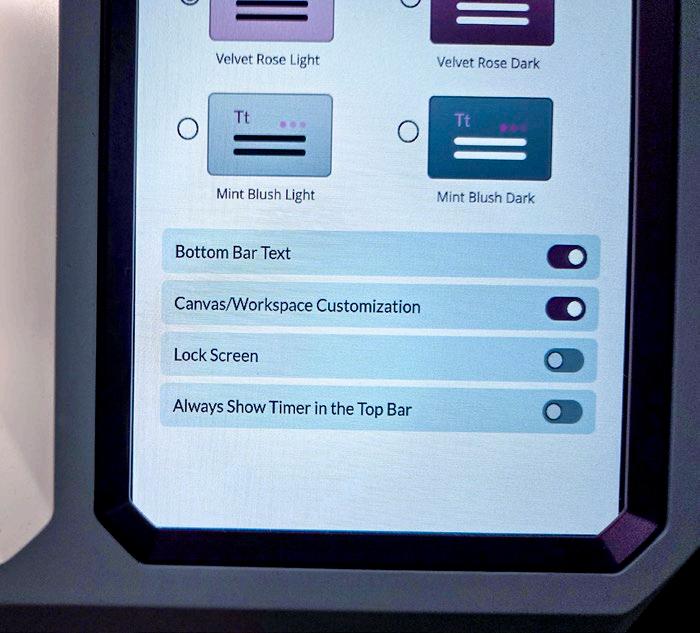
In this video on how to load embroidery designs, I mentioned the Machine Settings icon in the top right-hand corner of the screen. Open that up and check the settings. In this menu, you can personalize your machine by adding the clock, changing the screen color and contrast, and many other great features.
There are also numerous ways to edit a design on the Embroidery Edit screen, including scaling, rotating, duplicating, and moving. Here's a quick overview of some of those editing capabilities. The last part of the embroidery edit screen on the Designer Topaz 65 is at the bottom of the screen. Here we find the Hoop Options, as well as the Create Shape tool. This video about embroidery editing tools provides a brief overview of how these tools work. Be sure to sit in front of your Designer Topaz 65, with the User's Guide and push those buttons! I love to play with the Create Shape tool, as I never know what kind of design I'll come up with!
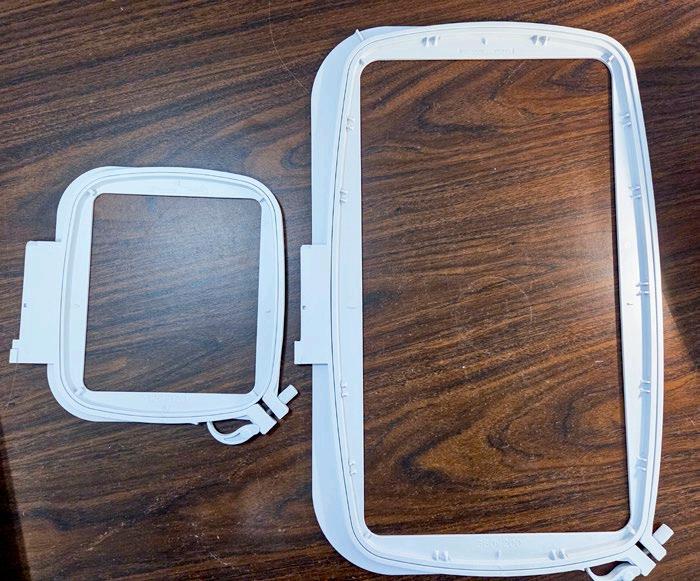
There are two hoops that come with the Designer Topaz 65:
• Designer Splendid Square Hoop (120 by 120 mm)
• Designer Royal Hoop (360 by 200 mm) There are numerous options for Embroidery Edit, so be sure to explore them and become familiar with the tools on this screen. Use the physical or the digital copy of the User's Guide, and let's not forget the tutorials – more on that in the next article. Quick Help is a great way to find information on a topic quickly. I'm so impressed, and I just love that large touchscreen. It makes editing any machine embroidery design so easy! Be sure to stop by your Husqvarna VIKING sewing machine dealer to get a preview of all that the Designer Topaz 65 can do. You'll be impressed.
The embroidery settings under the Machine Settings Menu
Two hoops are part of the accessories for the Designer Topaz 65
Incredible Stitch Out features on the Husqvarna VIKING Designer Topaz 65
Now that we’ve learned how to bring in designs and do some basic editing, it’s time to see what features are in the Stitch Out Mode.
Some of the fantastic features are only available when specific settings in Machine Settings are engaged. The one I have in mind is called Canvas/Workspace Customization, which I think you should always have engaged. Keep in mind, you won’t see any immediate changes.
Even though the touchscreen on the Designer Topaz 65 is large, there are times when some of the function menus display more information than you need. Wouldn’t it be nice to have only the information you want?
Check out this video to learn how to enable Canvas/Workspace Customization and discover how it makes customizing your workspace easy.
After experimenting with those options in Embroidery Stitch-Out, I decided to explore other menus to see how many were customizable. Should I tell you what I found? Or should I leave you to find them? OK – I have to tell.
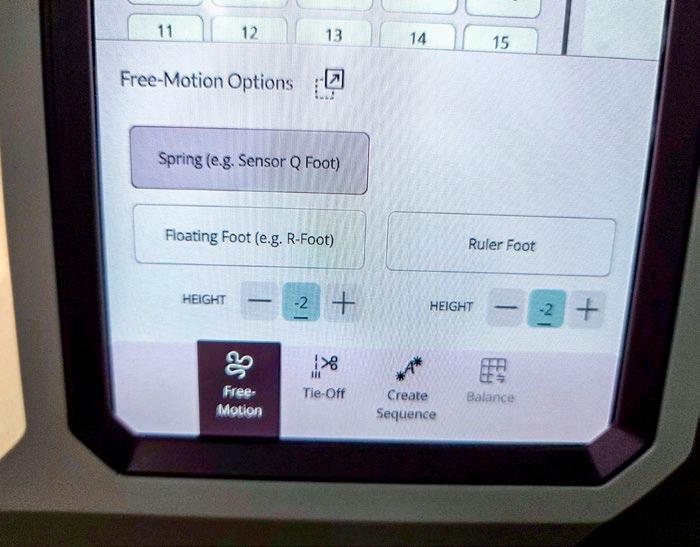
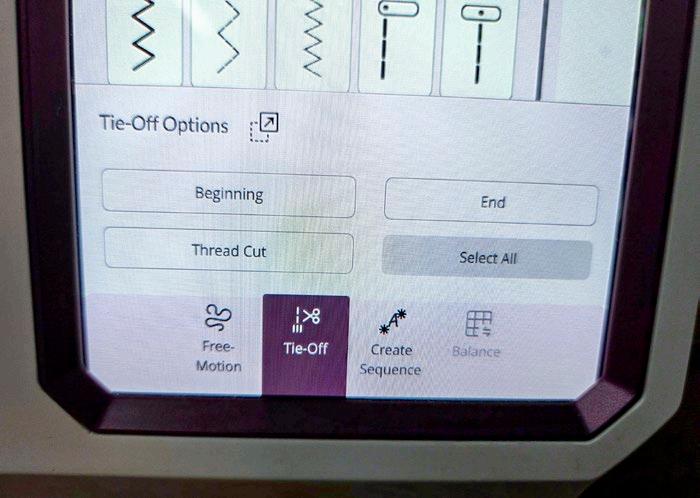
I found two instances in Sewing Mode – one for the Free-Motion Options and one for the Tie-Off Options. There could be more – those were the two I spotted.
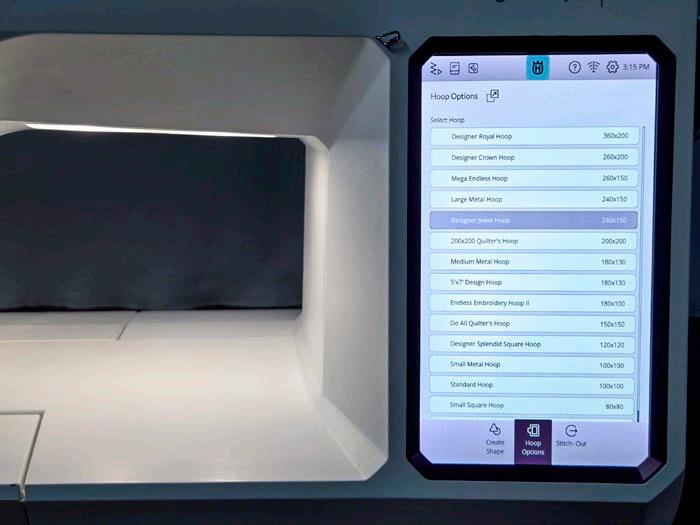
I found two in Embroidery Stitch Out, which you saw in the video (Stitch-Out Progress and Hoop Position), and I found one in Embroidery Edit for the Hoop Options Menu.
There could be more. And if new features are incorporated, there could be further customization potential. Although I always wonder how they could improve, the Designer Topaz 65 is already jampacked with features. Remember that if there is an update, it’s easy to download the firmware file and perform the update without taking the Designer Topaz 65 to your dealer or worrying about USB sticks.
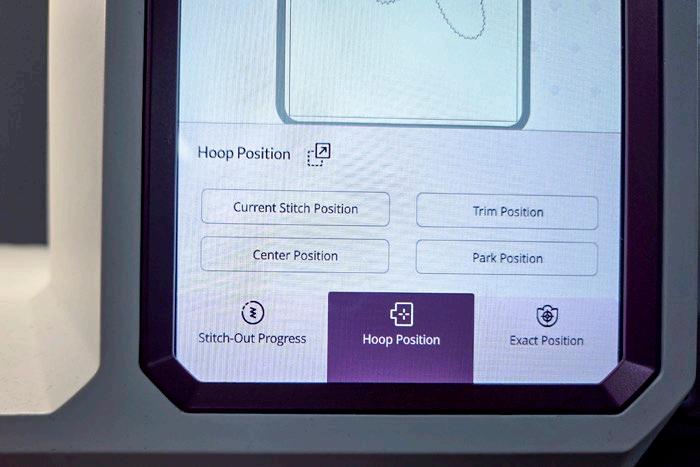
Speaking of the Hoop Positions, there are 4 on the Designer Topaz 65. All of them serve a purpose, and it’s essential to understand when to use each one.
Watch this video to see how the embroidery arm moves when selecting each of these positions. You may not use all of them, all the time, but knowing they exist will make machine embroidery much more enjoyable.
The Embroidery Stitch-Out Settings Menu is another component of setting up your embroidery machine to maximize your options. When you move from the Embroidery Edit to Embroidery Stitch Out, a menu appears on the screen. Please scroll down, as not all the information fits on one screen. These are the default settings, which you can change in the Machine Settings for Embroidery. Alternatively, if you need to make a temporary change, you can do so right on the Embroidery Stitch-Out Settings Menu screen.
A menu in Machine Settings
Customization is possible in the Free-Motion Options Menu in Sewing Mode
Customization is also available in the Tie-Off Options Menu in Sewing Mode
Customization is also available in the Hoop Options Menu in Embroidery Edit Mode
The Hoop Position Menu
While you can choose not to see that screen when moving from Edit to Stitch Out, I think it’s a great idea to keep it visible. It’s a reminder to check that you have, in fact, installed the correct Stitch Plate and Embroidery Foot on the Designer Topaz 65.
Another great feature in Embroidery Stitch Out mode is the Color Block List. You have several options here, such as Baste (around the hoop or the design), change the color to monochromatic, but the most important is Ghost Mode. You will NOT want to embroider without this tool. It’ll highlight which color is about to be stitched, which is great if there are a lot of colors in your embroidery design.
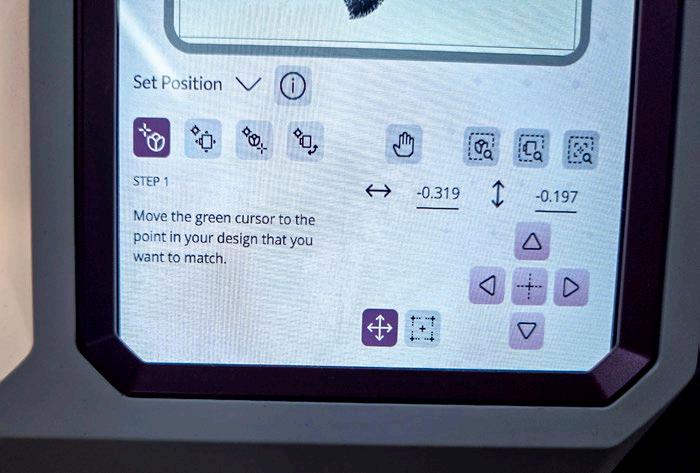
One of my all-time favorite tools, and probably the one that is least understood by many, is Exact Position. Its previous name was Design Positioning. This four-step positioning tool helps you align your embroidery designs precisely where you want them. For those of us who aren't super precise about hooping our fabric perfectly, this is a great tool.
While this video is not a tutorial, it should provide enough information for you to play. When you want to check the needle position against what's in the hoop, you can manually drop the needle. I use the handwheel on the side; you can use the needle up/down if you wish.
There’s also a Set Cursor Point tool located at the bottom of the screen, which can be helpful for quickly moving your cursor to the four corners or the center.
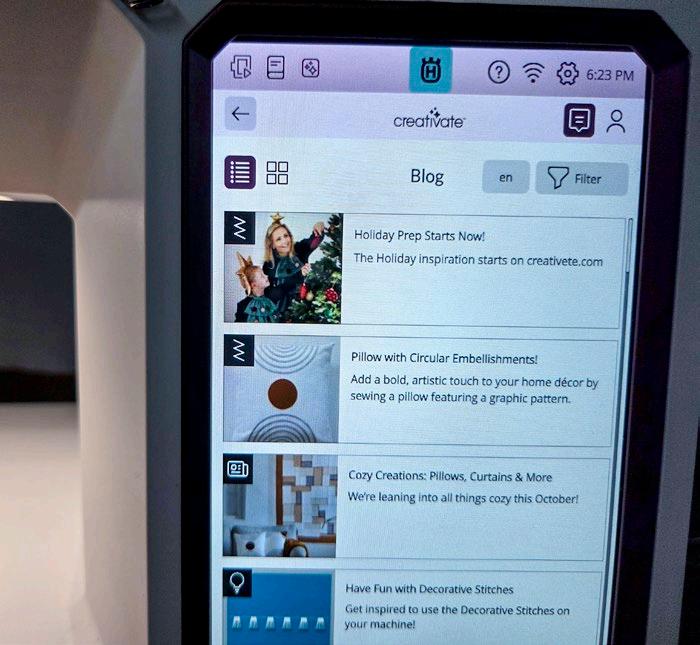
I briefly mentioned the Creativate Blog earlier, and if you're looking for ideas or inspiration, this is the place to go. The Designer Topaz 65 must be connected to the internet to access the blog. You can also sign up for a FREE Creative account. Five categories of information are updated periodically through the blog, so there isn’t an overload of new information. It depends on how busy the bloggers are!
You’ll get Sewing Projects, Social Media events, and so much more! Select one of the options, and you never know what will pop up. Sometimes, blog posts include embroidery designs that you can download directly into Embroidery Edit. It’s that simple!
Now that I have a good grasp of the Embroidery Edit and Embroidery Stitch Out, it’s time to get stitching!
I’ll spend doing some tactile embroidery! Some designs use only thread, while others require yarn. My goal is to focus on embroideries that can work perfectly for a sensory mat. I’ll explain more next.
Be sure to check out the Husqvarna VIKING Designer Topaz 65 at your local dealer, and come back to see what interesting embroidery motifs I’m stitch next, and how I find them!
The Exact Position Menu
The Creativate Blog on the Designer Topaz 65
Husqvarna VIKING Designer Topaz 65
Yarn Couching with the Topaz 65 Embroidery Machine
While many embroidery designs rely solely on thread, the Designer Topaz 65 offers several different embroidery techniques that are really fun to stitch. While that’s great news, how do we access them and learn to use them?
This video explains where to find the Machine Embroidery tutorials in the JoyOS Advisor and how to use them efficiently. Lastly, the video explains how to find designs for the various embroidery techniques. Be sure to sit at your Designer Topaz 65 when you watch the video, as you will not want to miss any details.
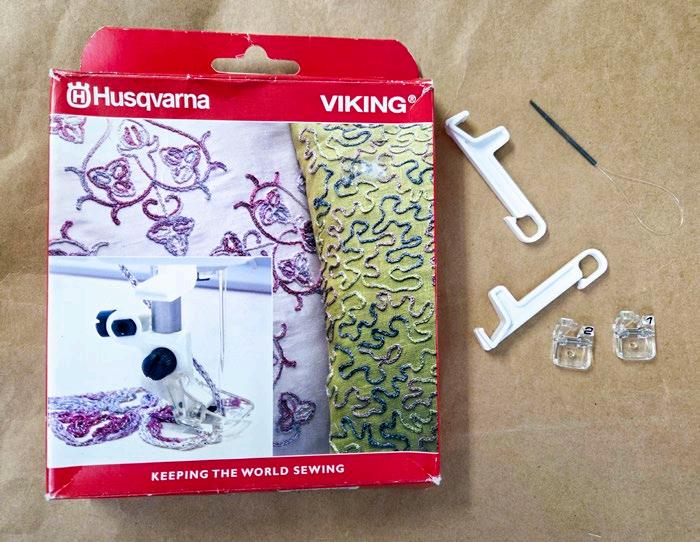
To stitch yarn couching in embroidery mode, the optional Yarn Couching Feet Set is required. Inside the box, you’ll find two different embroidery feet, depending on the thickness of the yarn. They are similar to the included R foot but have a hole in the center to hold your yarn in place. There’s a threader to help facilitate threading the foot, as well as two sets of holders for the yarn. The ones shown below are compatible with Category 7 embroidery machines, including the Designer Topaz 65.
Setting up the Designer Topaz 65 for yarn couching in embroidery mode
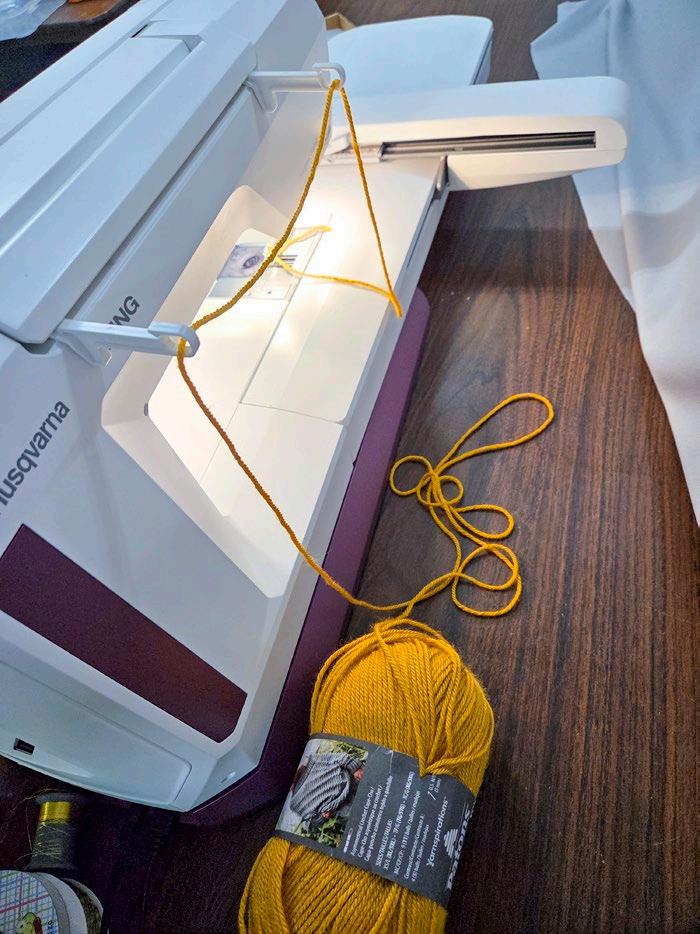
1. Place the two holders in the slots under the handle on the back of the Designer Topaz 65. These guides ensure the yarn flows properly into the foot. Ensure your yarn flows freely from the skein; otherwise, it will not stitch properly.
2. Use a matching thread on top and the bobbin thread of your choice. You could use a contrasting thread, but I prefer a matching one.
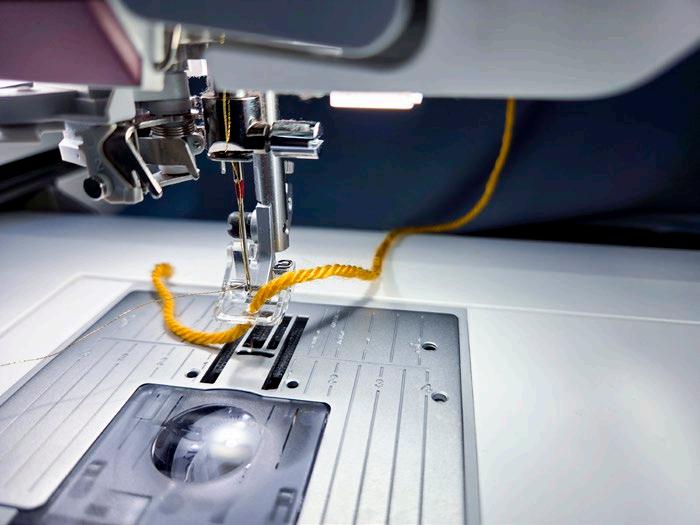
3. Thread the yarn into the hole in the foot.
4. Attach the foot, and you are ready to start stitching.
Here’s a close-up of the yarn threaded in the yarn couching foot attached to the embroidery machine.
Tips
for successful yarn couching in embroidery mode
1. Use the speed control to slow down the embroidery machine – at least half speed or less.
2. Use a soft yarn. I tried a variety of yarns and cords. While I love the metallic cord in this photo, it was stiffer, making it harder to turn corners and to anchor at the beginning. I could use it, but I’d have to go back and do some additional stitching in sewing mode, wherever it didn’t turn properly, and I don’t really want to do that. The white cord was softer, while the red yarn worked best.
3. Ensure that the yarn flows freely from the skein.
4. Leave a long tail at the beginning and the end. Use a darning needle to pull the yarn through to the back side of the work. Keep the thread tail out of the way when you start stitching.
5. TEST before you stitch! To do this test, I only stitched the yarn couching color block from the design.
Here is the yarn couching design that I discovered in the Content tab of the Yarn Couching tutorial in the JoyOS Advisor on the Designer Topaz 65. It’s easy to pull the yarn tails to the back of the work. Notice that this type of design lacks structure, so it requires a fabric base.
The Yarn Couching Feet Set for machine embroidery
The guides for the Yarn Couching feet set
The yarn threaded through the embroidery yarn couching foot
A sample of four types of yarn for yarn couching in embroidery mode
Here’s an example of a “Free-standing Yarn Couching” design. I used a watersoluble stabilizer, and after rinsing the stabilizer away, the design maintains its shape because it has enough yarn structure to support itself. I used a soft white cord for these designs.
You can also have designs that incorporate yarn couching with traditional embroidery. I searched through the online Creativate Design Catalogue and found a collection of beautiful, seasonal designs that incorporated the yarn couching with basic embroidery. Of course, I had to give it a try.
This video shows how I navigated the Design Catalogue and used the search functions to find these designs. I could have refined it a bit, but I always like to see all the designs in a category because there are so many, you never know when you’ll come across something you didn’t know existed.
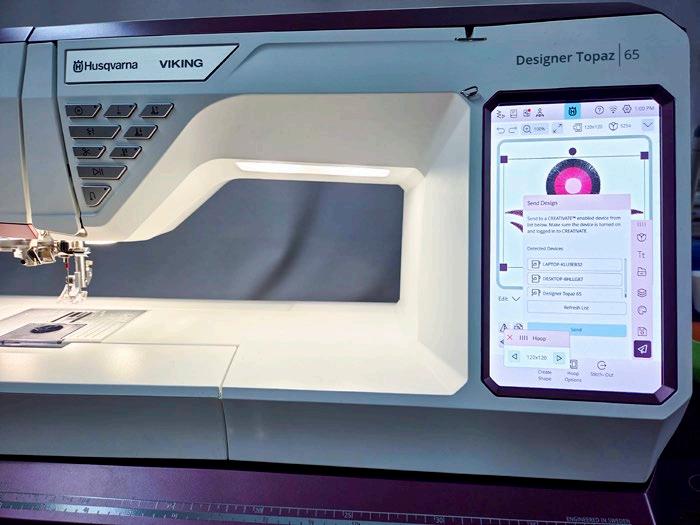
Check out the video to see how the design appears on the Designer Topaz 65. Transferring files through the Creativate network is a great way to share designs between devices, such as the Creative Embroidery Software on your computer and any other Husqvarna Viking Wi-Fi-enabled embroidery machine.
You’ll also see a fantastic application for the Canvas/Workspace Customization and the hoop menu!
Now it’s time to embroider this design. This series of designs offers the option to use only the satin stitch for the bow, but also allows for yarn couching. How do you know the difference? If you are using ghost mode (in the Color Block List), you’ll see that the yarn couching is a small zigzag stitch, while the satin stitch is a satin stitch.
I decided to stitch out all the options because I can. I love experimenting with techniques, and just because a design uses specific techniques doesn’t mean you have to follow the “rules.” Think outside the box!!!
It was easy to use the Color Block List to select which bow options I wanted. Alternatively, I could have used the Creativate Embroidery Software to modify the design.
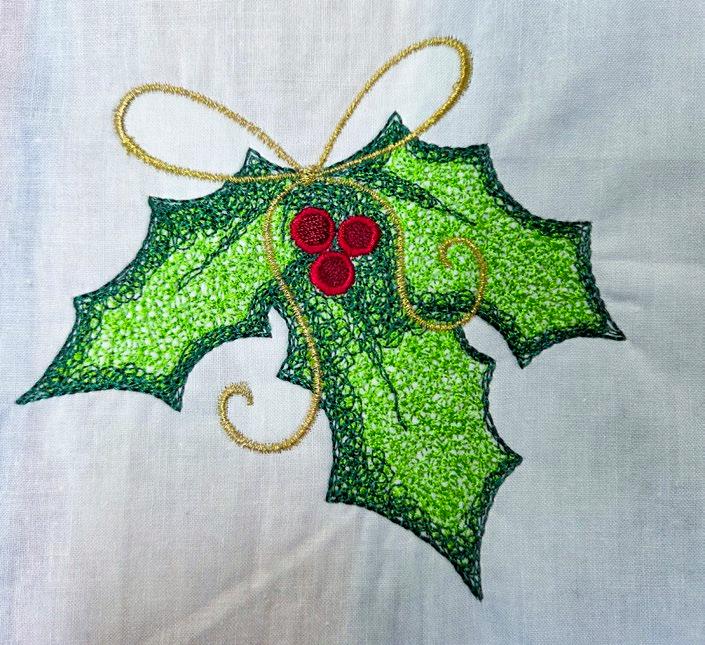
In this picture, I’ve stitched both the satin stitch and the yarn couching stitch. You can see a little bit of the satin stitch under the top loops of the bow.
I eliminated the final color block, which is the yarn couching.
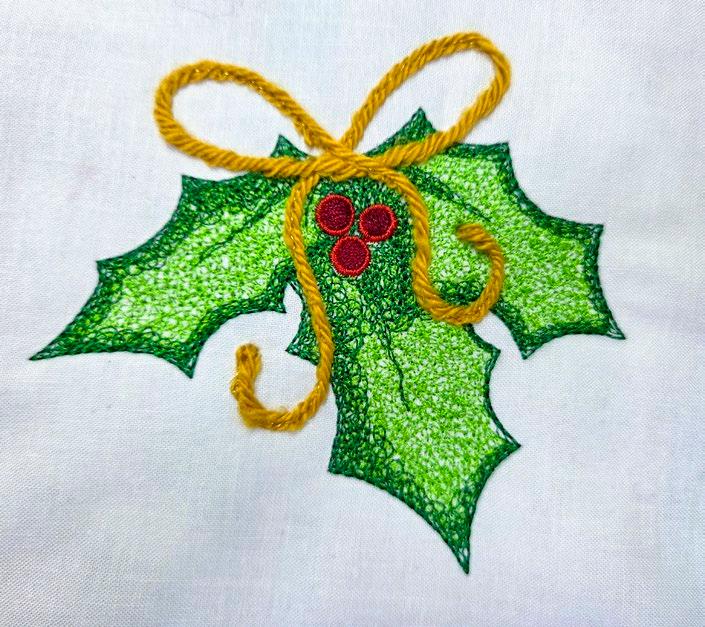
And the third option is to bypass the satin stitch and only stitch the yarn. I think I like this third option the best. It adds a little bit of punch, and the bow is much more noticeable using the yarn. I stitched the yarn in place using a metallic gold thread.
Before I close, I made a very short video showing the Designer Topaz 65 in action as it stitched out the yarn.
And there you have it – a great way to embellish your embroidery designs using yarn couching. There are so many possibilities with the designs in the online Creativate Design Catalogue. There are not enough hours in the day!
Test out the yarn couching function on the Husqvarna Viking Designer Topaz 65 It’s so much fun!!!
A “Yarn Couching on Fabric” embroidery design
Free-standing yarn couching designs
An embroidery design using traditional thread embroidery and yarn couching
The same design without the yarn couching
The same design, with only the yarn couching for the bow
Thread Velvet Embroidery with the HV Topaz 65
It's so easy to learn about new embroidery techniques with the Husqvarna VIKING Designer Topaz 65, and super quick to find the designs, whether built into the embroidery machine or in the Creative Design Catalogue.
I'm sharing tutorials from the JoyOS Advisor and selecting another embroidery technique. This time, it's all about Thread Velvet, which is very textural, easy to do, and uses only thread, no additional accessories required.
I'll find a design by accessing the Creativate Design Catalogue directly from the Husqvarna VIKING Designer Topaz 65.
Oh my – I realize there is an entire series of these cute seasonal designs, and most of them use Thread Velvet or Yarn couching techniques. You know what this means! I want to make them all –they will make a fantastic holiday wall quilt or door hanger. Hmm … I have my work cut out for me!
Essentially, Thread Velvet consists of two color blocks, preferably with two contrasting thread colors, and multiple layers of satin stitches. The more contrast those colors have, the better the design is (in my opinion). Of course, you still have the textured feel, so it's up to you.
Here's a sample of Thread Velvet, where the thread colors are very similar. While you are seeing the blooming effect of the cut thread, you don't see the two different colors.
In this example, I've used two very highcontrast threads, and once cut, you can see the inner color bloom out.
The more the item gets handled, the more it blooms. Be cautious, though – if the design will be on something that will get flattened, this technique may not be a good idea. This sample sits in a page protector in my sample book, and you can see how the velvet effect is getting squashed.
Now let's stitch out the Christmas motif. This technique differs from a satin stitch in that it has reinforced stitches around the edge of the section you will cut. Those reinforced stitches will prevent the threads from coming out after they are sliced open.
Now that the stitching is complete, the next step is to take a sharp blade and CAREFULLY cut the stitches. You do NOT want to cut through all layers, as this will weaken the design and turn it into a non-solid piece of fabric.
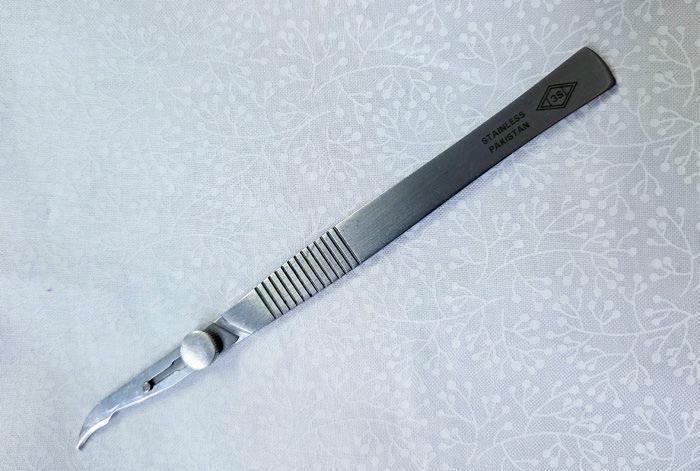
I like to use a surgical seam ripper to cut. You could use your rotary cutter, but that is a challenge, unless you are using the smallest one.
It may be easier to make several passes to ensure you don't cut right through, and if the design has a curve, you want to slice in the direction of the curve.
Be sure your device is sharp!!!
The Husqvarna VIKING Designer Topaz 65
A Thread Velvet sample with two similar thread colors
A Thread Velvet sample with two high contrast threads
Inappropriate storage can flatten the Thread Velvet
Reinforced stitches along both sides of the Thread Velvet technique
Surgical seam ripper is perfect for cutting designs using the Thread Velvet technique
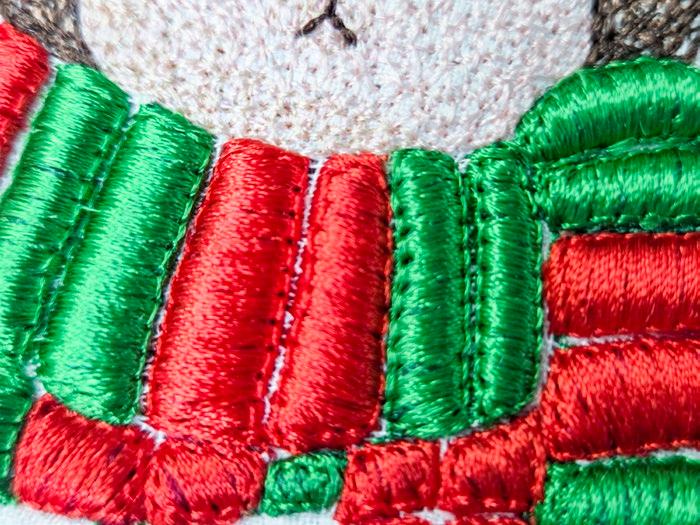
And here’s my embroidered block using the Thread Velvet technique. I'm excited about stitching out this entire collection, and it's a great way to make up a seasonal sensory mat if you wish. Look at the texture of the scarf! It looks like real velvet. There is also Thread Velvet in his ear and his nose! I LOVE touching it! Before I go, you may be wondering, "What is a sensory mat?" It's a placemat-sized quilt with lots of texture, which could be a simple textured fabric, but our
Husqvarna VIKING embroidery machines let us get super creative, and with all the textured designs, this is the perfect thing to do.
Who could benefit from a sensory mat? EVERYONE – from children, to adults, to people suffering from anxiety, stress, or any other ailment. I want to make a couple for myself and leave them by my computer since I seem to have good and bad days with technology!!!
I found MANY exciting designs in the Creativate Design Catalogue. The biggest problem is that I have so many designs to stitch and so little time!!!
CRAFT TRAVEL
Knitting Retreats
Relax, unwind, and knit in beautiful destinations with likeminded makers Perfect for all skill levels
Quilting Retreats
Creative escapes designed for quilters Learn, connect, and stitch in inspiring settings
Craft Retreats & Getaways
Immersive, hands-on experiences that combine travel, creativity, and community in inspiring locations
Curated Bus Trips
Stress-free group travel to craft shops, shows, and local events Just sit back and enjoy the ride
Canadian & International Fibre Festivals
Experience top fibre festivals, from local favourites to globally renowned events
All Craft-Focused Travel
From yarn lovers to multi-craft creatives, discover unique travel experiences tailored to your passion
ScantoDiscoverYour
Contact: Joanne O'Brien 4019 New Street, Burlington, ON, L7L1S8 Toll Free:1-888-739 3117 x 155 Office: 905 631 1700 x 155 https://www facebook com/journeywithjoanne/ TICO 50026402
A Christmas design using the Thread Velvet technique
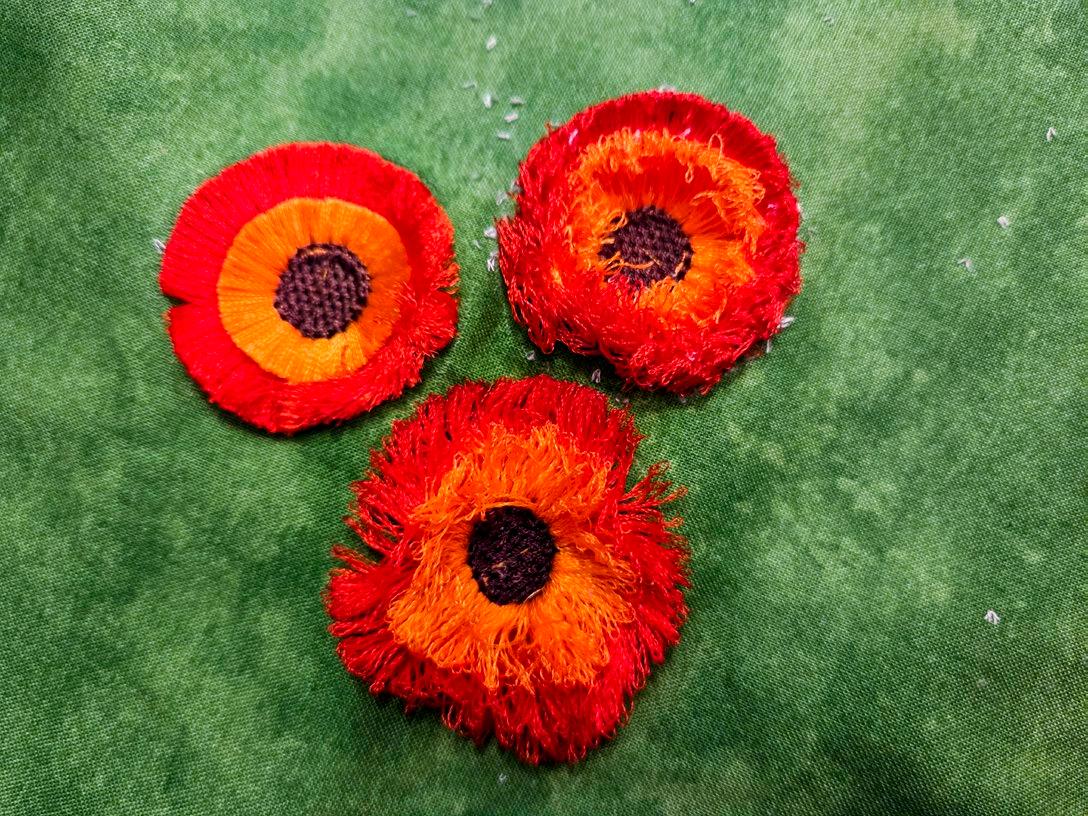
Fringe Embroidery on the Husqvarna VIKING Topaz 65
We’ve looked at multiple ways to access designs here, whether they are part of the built-in embroidery designs or reside in the Creativate Design Catalogue.
You’ll find information about all the builtin designs and some basic instructions in the Design Booklet. There isn’t a hard copy of the booklet, but you can download the most up-to-date version from the Creativate app on your smart device. Ensure you have added the Husqvarna VIKING Designer Topaz 65 to the list of machines, and you’ll have access to the PDF version of the booklet. I like to keep these documents, including the User’s Guides, on my tablet. They are always handy and easy to store.
I want to show you how to stitch out fringe embroidery designs. Actually, the stitching will mostly be the same, but we’ve got some options, and we’ll look at all three.
There’s a very nice fringe design built into the Designer Topaz 65, so let’s use that. I want only to stitch the flower; I don’t want the stem. Now, technically, I could just skip that step when stitching it out. But if I want to position the flower or use a smaller hoop, not eliminating the stem will cause issues with selecting a hoop size and placement of the fringe flowers.
I’m sending the design to the Creativate Embroidery Software and using Modify to eliminate the stem.
Check out the video to see how easy it is to modify a design using the Creativate Embroidery Software.
Then I can send the modified design back to the Designer Topaz 65. Now, when I’m working on the design, I’m only dealing with the flower, not the stem, which will make it easier to use a smaller hoop. If the stem were still attached, even though I don’t want to stitch it out, I’d have to choose a hoop that accommodates it.
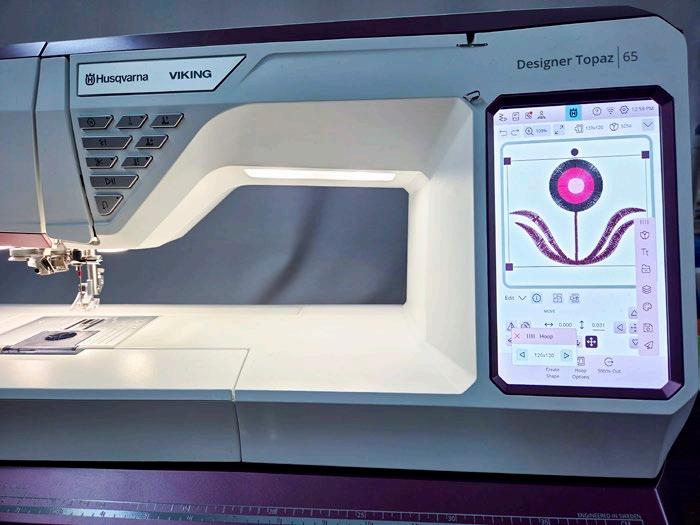
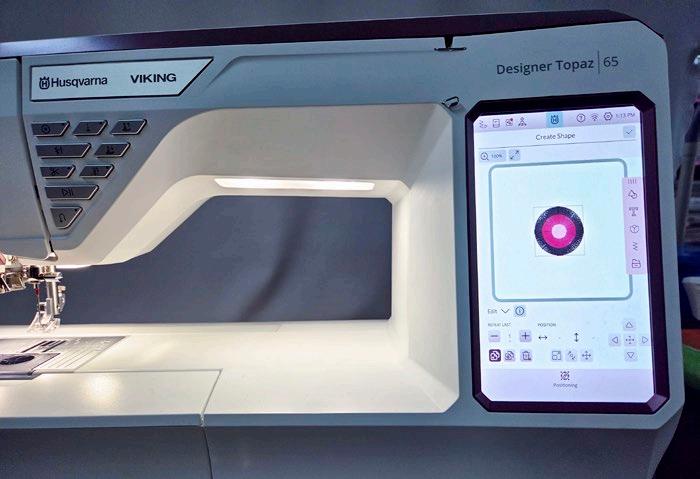
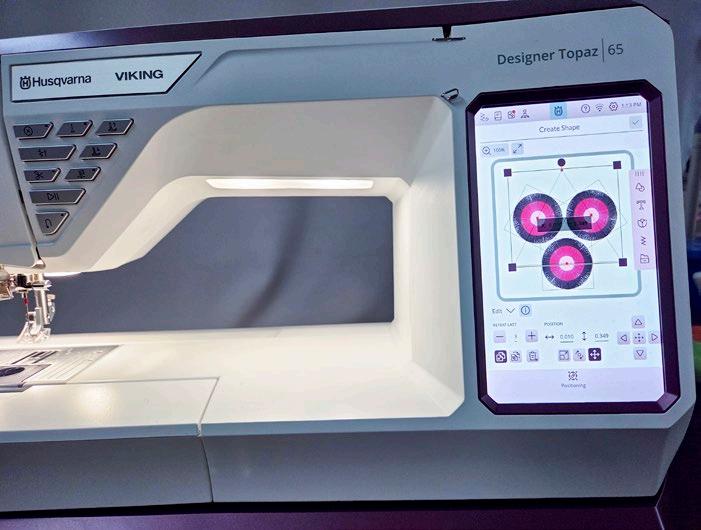
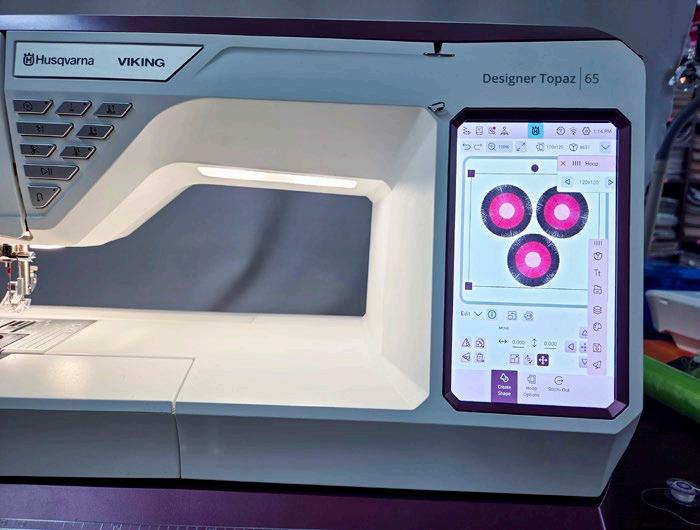
I want to stitch out three fringe flowers, and to make it super easy to get them lined up, I’m using the Create Shape tool. This tool will nicely align the three motifs on the Embroidery Edit screen without me having to do the work.
I’ve chosen a triangle with each motif along each side. There are many settings in the Create Shape tool, and I’ll leave you to play with it. You could play for hours! See why it was essential to eliminate the stem for what I wanted?
The three flowers still fit in the 120-by120 hoop.
Once the three motifs were in the right place, I closed the Create Shape tool and returned to Embroidery Edit.
A screenshot of the Creativate app with a link to the Design Booklet
A fringe design on the Husqvarna VIKING Designer Topaz 65
Sending the design to the Creativate Embroidery Software
The modified fringe flower
Three floral motifs positioned using the Create Shape tool
The three modified floral designs in Embroidery Edit
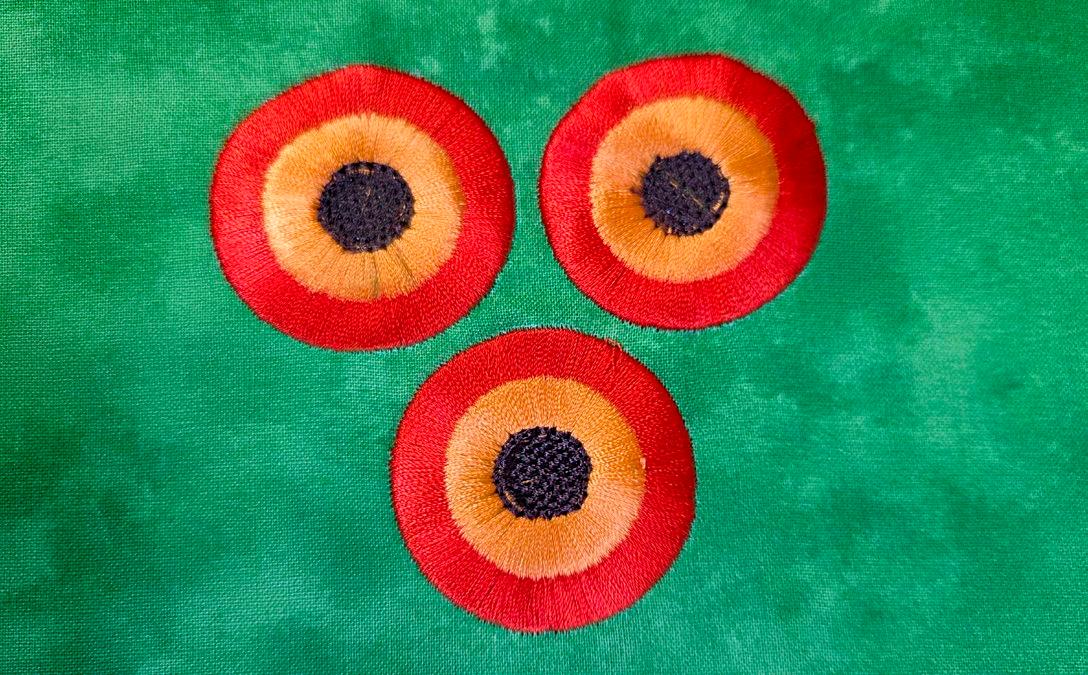
I’ll use the same three 40-weight polyester threads for the top thread. I’m stitching two of them using a 60-weight bobbin thread. For the third design, I’ll use a water-soluble thread in the bobbin. Be extremely careful when using the water-soluble thread and ONLY use it where you want the bobbin thread to disappear. More on that after you see the stitched designs. Here are the three stitched designs, and they look beautiful!
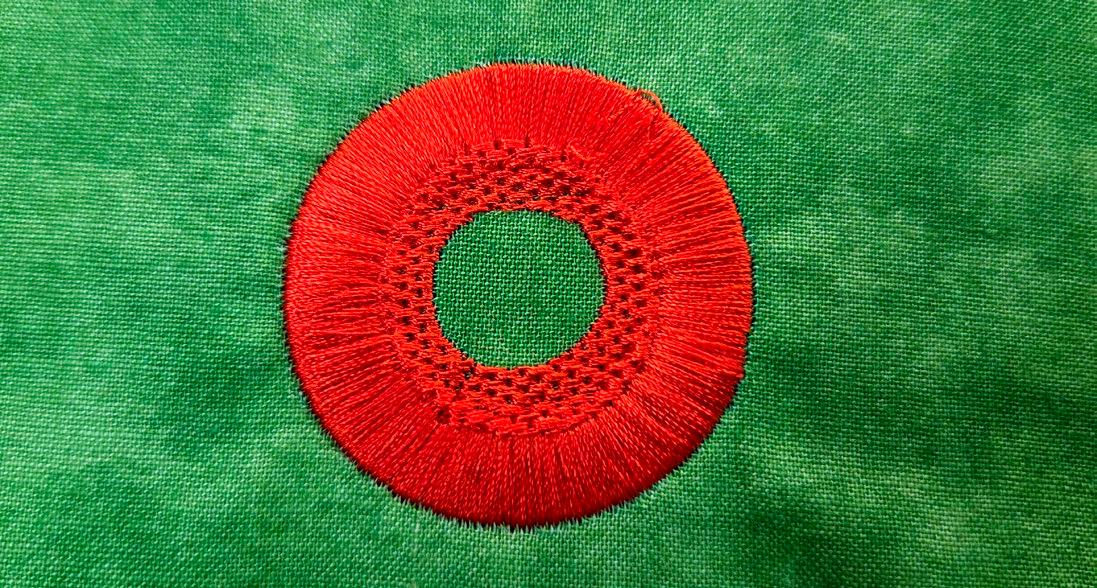
Notice that the center of each section has reinforced stitches, which will anchor and reinforce the threads after cutting. The reinforcing stitches for the outer ring are part of the same colorway, while the reinforcing stitches for the inner ring are the center brown part.
And here’s the front of that method. This results in some messy thread ends from the cut bobbin threads. Gently pull the top thread to the front, and you now have a fabulous fringe flower. Notice that the ends are LOOPS.
For the second one, slice the threads along the front edge. Alternatively, I can slice the threads on the back, but I need to be careful not to cut the background fabric. Use a sharp cutting device to do this. This technique results in straight ends with no loops.
For the first one, I cut the white bobbin thread on the back.
The three stitched designs
The reinforcing stitches
The back of the fringe flower with the bobbin threads cut
The front of the fringe design after cutting the bobbin threads
The front of the fringe flower with the top thread cut parallel to the background
The third technique (with the water-soluble bobbin thread) is to spritz the bobbin threads lightly until they dissolve. Gently pull the threads from the front, and you have another way to get a loopy end on the flower. This process took a bit longer to bring the threads to the surface, but it probably didn’t help because the fabric was wet.
Here’s a picture of all three techniques. The results are interesting – the machine embroidery is identical, but the three finishing methods produce quite different results!
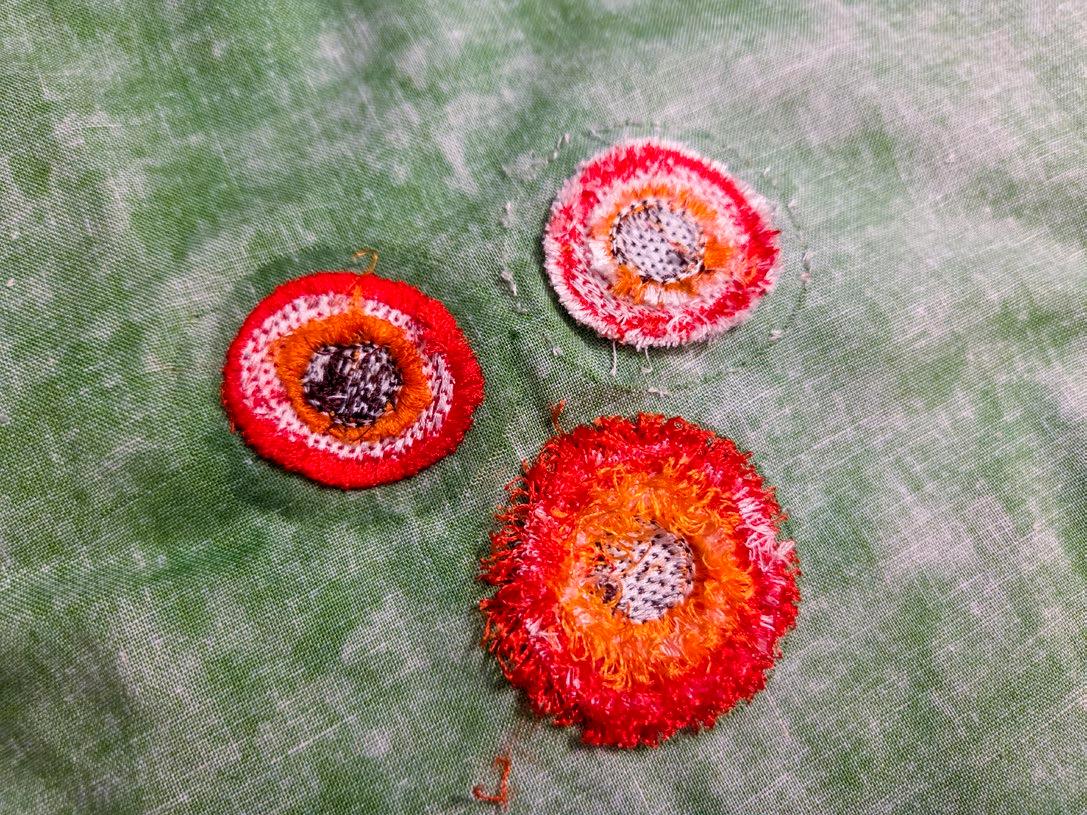
And here’s the back view of the three motifs. Notice how half of the threads on the one (bottom) trimmed at the surface are on the back side of the fabric.
WOW --- who knew that you could do all this with an embroidery machine? Best of all, we were able to incorporate some of the fantastic features and tools from the Husqvarna VIKING Designer Topaz 65 to assist us. Don’t forget to check out the built-in designs or get an account to access the Creative Design Catalogue.
It’s best to check with your local Husqvarna VIKING dealer to get all the details.
I had so much fun exploring different embroidery techniques, the great tools and features, and I’m excited to continue stitching those seasonal designs into a wall quilt. Thanks for following.
Have a wonderful day!
Ciao!!!
Elaine Theriault crazyquilteronabike.blogspot.com
The water-soluble bobbin thread has disappeared
Fringe flower (clockwise from left): threads cut at the surface, bobbin thread cut on the back, and water-soluble bobbin thread
The wrong side of the fringe flowers
Cotton or Rayon: Which Gütermann Thread Should You Use?
Elaine Theriault
I've got some great projects lined up! While we may call ourselves quilters, we are more than that. We make bags, postcards, cushions, wallhangings, machine embroidery, and well, we can do just about anything!
I'm taking a variety of products and will be sharing some ideas for small, quick projects. The articles won't be tutorials per se, but I'll explain where my inspiration came from and, more or less, how I achieved them.
Use the ideas as a starting point to make something unique using the same or similar supplies, and let's see what you can come up with!
Now, it's all about thread. The most significant area we use thread is to piece our quilt tops together. And there are many types and weights of thread. I could spend all day talking about those things, but I don't have the space!
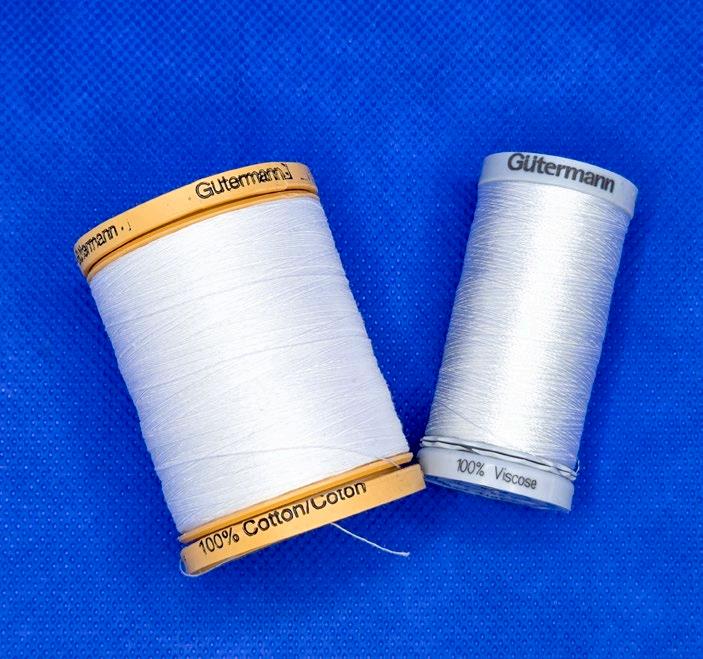
I'm talking about two different types of thread in this feature – one is Gütermann Cotton thread, the other is Gütermann Rayon thread. And just in case you’re curious, viscose and rayon are the same type of thread!
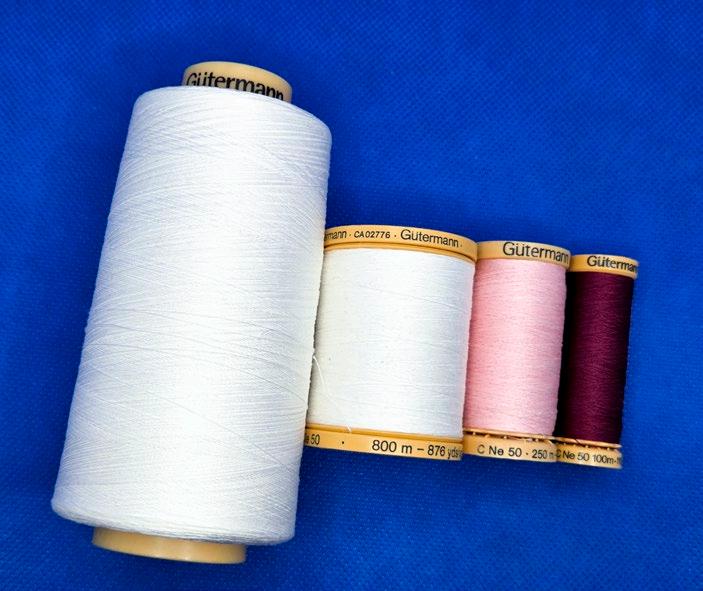
The cotton thread comes in five different sizes: 3000 meters, 800 meters, 400 meters, 250 meters, and 100 meters. I had to chuckle when I took this picture.
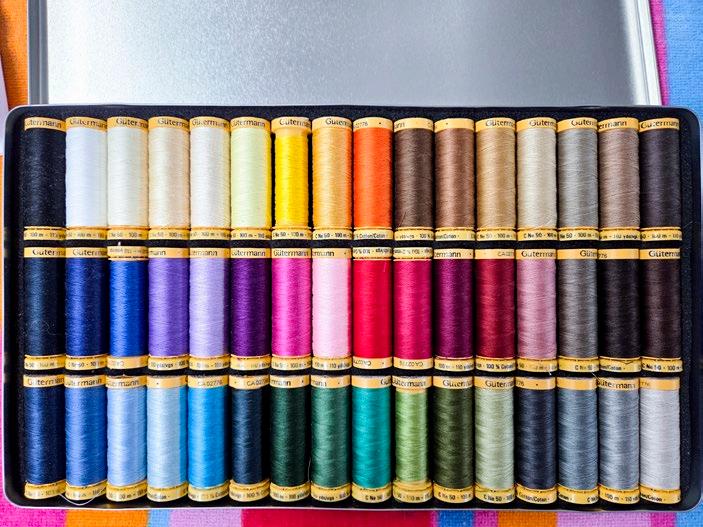
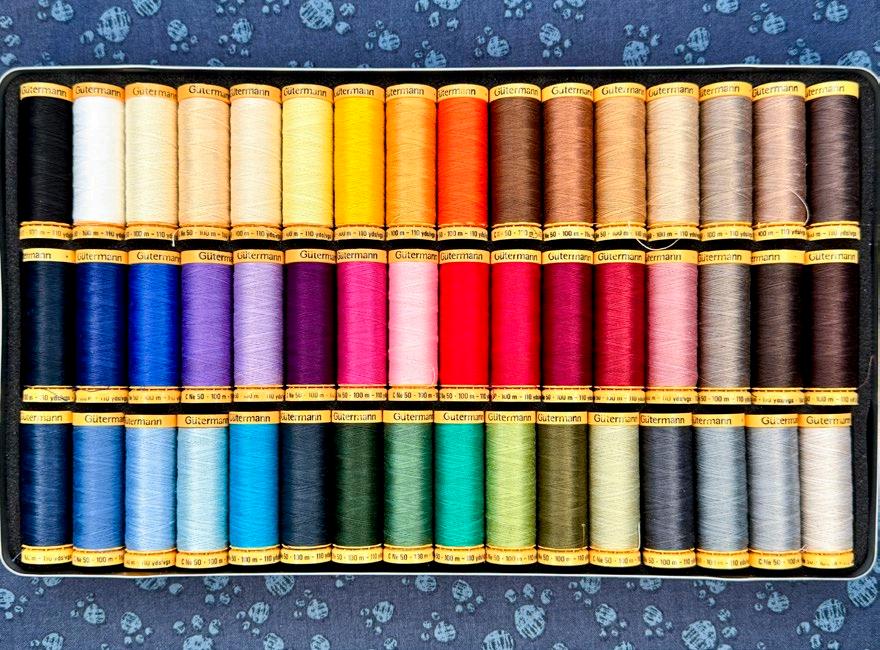
And there are MANY colors to choose from. Here's a 48-spool collection that comes in a very nice storage tin.
Why do I love the cotton thread? The different sizes and color options make buying thread very flexible. I can purchase the 3000-meter cone in the neutral colors I use most frequently, which are typically black, white, and gra. I use those for constructing various projects.
I buy the basic colors in 800-meter spools. These include basic red, blue, green, and so on. Then, depending on what project I’m doing, I’ll buy smaller spools of specific colors, as they take up less storage space. While I love having extra thread on hand, I don’t need a large spool of every color. As the spool size decreases, the number of color choices increases, which makes sense. I do NOT need an 800-meter spool of some random color that I may only use once!
Having access to 5 different spool sizes and a wide range of colors is a perfect way to use the same brand and still benefit from economical sizes and a wide variety of colors. I found it odd that I never seem to buy the 400-meter spool size!
I love topstitching or appliquing my binding to the front of the quilt with colored threads, and Gütermann is my go-to for that. I find a thread that matches the binding and the backing, so it disappears, and YES, I use differentcolored threads in the bobbin and top.
The brown spool identifies the 50-weight cotton threads. You’ll also find the thread information written on the spool, including the type, the weight, and the yardage.
I love using these 50-weight threads for piecing. I'm seeing a trend towards using much thinner threads for piecing, but BEWARE. If you start to use thinner threads, you MUST check your seam allowance. The thinner the thread, the less room it takes when pressing. Always double-check that your seam allowance is appropriate for your thread weight. Use your sewing machine's ¼" foot as a guide, but do NOT trust it until you test. The thread weight can make a huge difference.
Photos by Elaine Theriault
Two spools of Gütermann thread
Four of the five spool sizes
A 48-spool collection of Gütermann cotton thread
The Gütermann cotton threads also come in 12 wt, 30 wt, and 60 wt. There are solid colors and variegated ones, and you’ll always find a thread for all your piecing, quilting, and applique needs. The threads are suitable for machine or hand sewing. Another reason I love the Gütermann threads is that they are readily available at my local fabric store. Now, let's chat about the rayon thread, which I love to use for decorative stitching and machine embroidery. That could involve using it for satin stitch or blanket stitch for applique. Or if you’re using one of the many decorative stitches on your sewing machine, the rayon threads are perfect for that. The rayon threads have a shine, and that's what I prefer for machine applique. That's a personal choice, the cotton threads work just as well, but with a matte finish.
I love machine embroidery, and I decided to test the two threads side by side to see the difference.
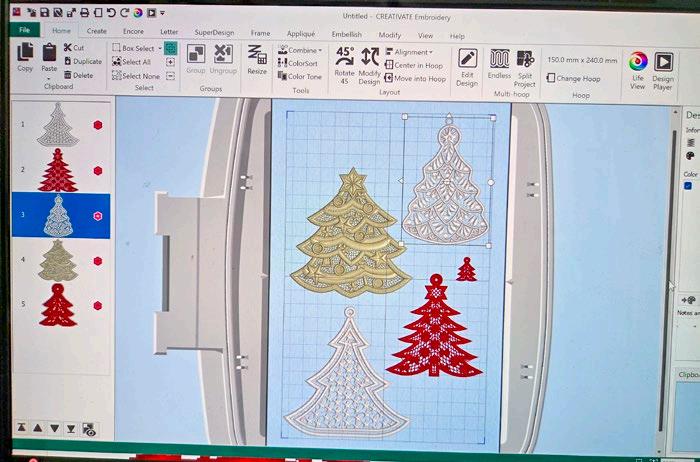
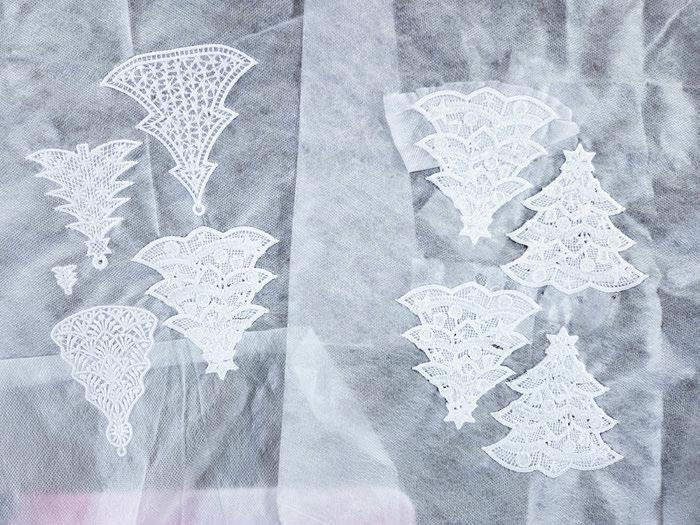
I found a variety of free-standing lace tree ornaments in the online Creativate Design Catalogue. I decided to try them all. Please note that a Membership to the Creativate ecosystem and an SVPbranded Wi-Fi-enabled embroidery machine are required to utilize these particular designs. However, many freestanding lace designs are available.
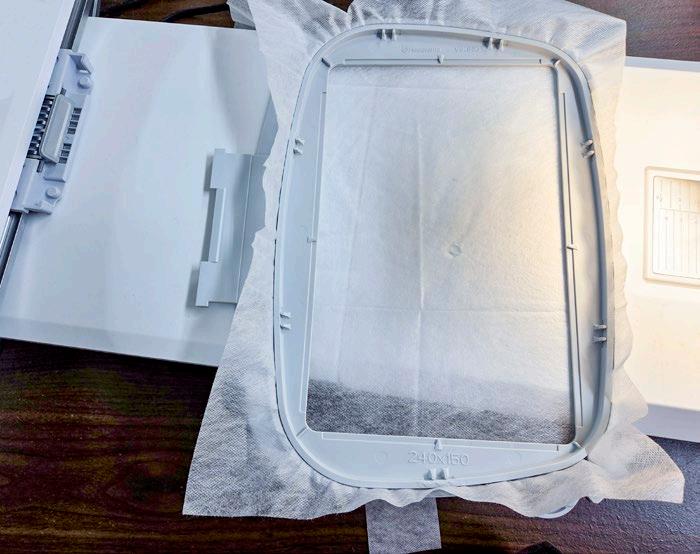
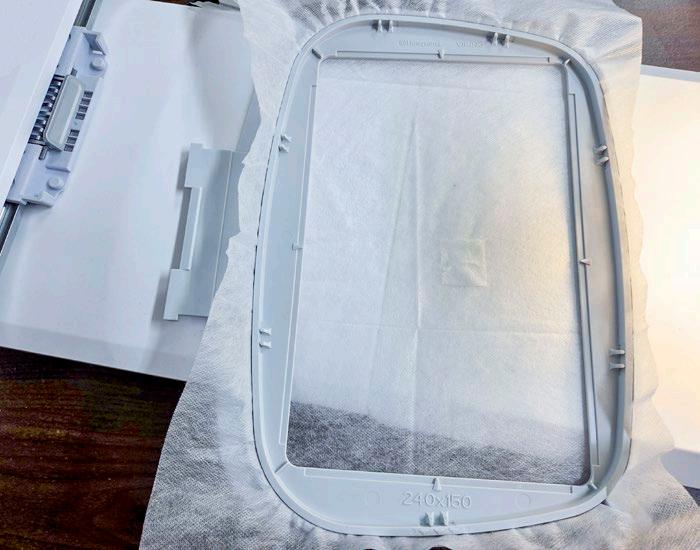
I put a water-soluble stabilizer in the embroidery hoop and sent the embroidery designs to the embroidery machine. I noticed there was a hole in the middle of my stabilizer. At some point, a drop of liquid spilled onto it, and the water-soluble stabilizer quickly dissolved. I likely spilled a drop of warm tea on it! Careful!
I wouldn't have cared about the hole except that it was where some of the stitching was supposed to go. The beauty is that it's easy to make a patch by wetting a small square and pressing it over the hole. Be careful not to make a bigger hole!
I made samples using both Gütermann cotton and rayon threads on top. For the bobbin thread, I used a white bobbinweight thread. As these are free-standing lace ornaments, the back will show, and I want the bobbin color to match the top thread color.
I did not have to change any settings on the embroidery machine; I simply used the default tension, and all was good.
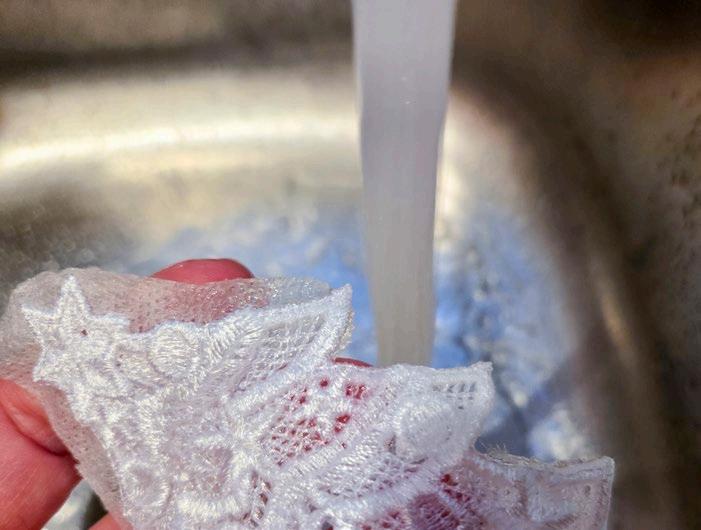
After stitching, I trimmed away almost all of the water-soluble stabilizer. I need to rinse these, but I do not want the excess stabilizer going down the drain. The water-soluble stabilizer becomes gooey when wet, and I wouldn't want a clogged drain from dissolving it in the sink.
I keep the leftover stabilizer to use as a fabric stiffener for other projects.
Then rinse the ornaments under the tap or put a small amount of warm water in the sink and let them soak for a few seconds. It doesn't take long for the stabilizer to dissolve.
Examples of using rayon thread for machine applique stitching
Various free-standing lace tree ornaments
My water-soluble stabilizer has a hole in it!
Patching the water-soluble stabilizer
The free-standing lace ornaments
Rinsing the water-soluble stabilizer
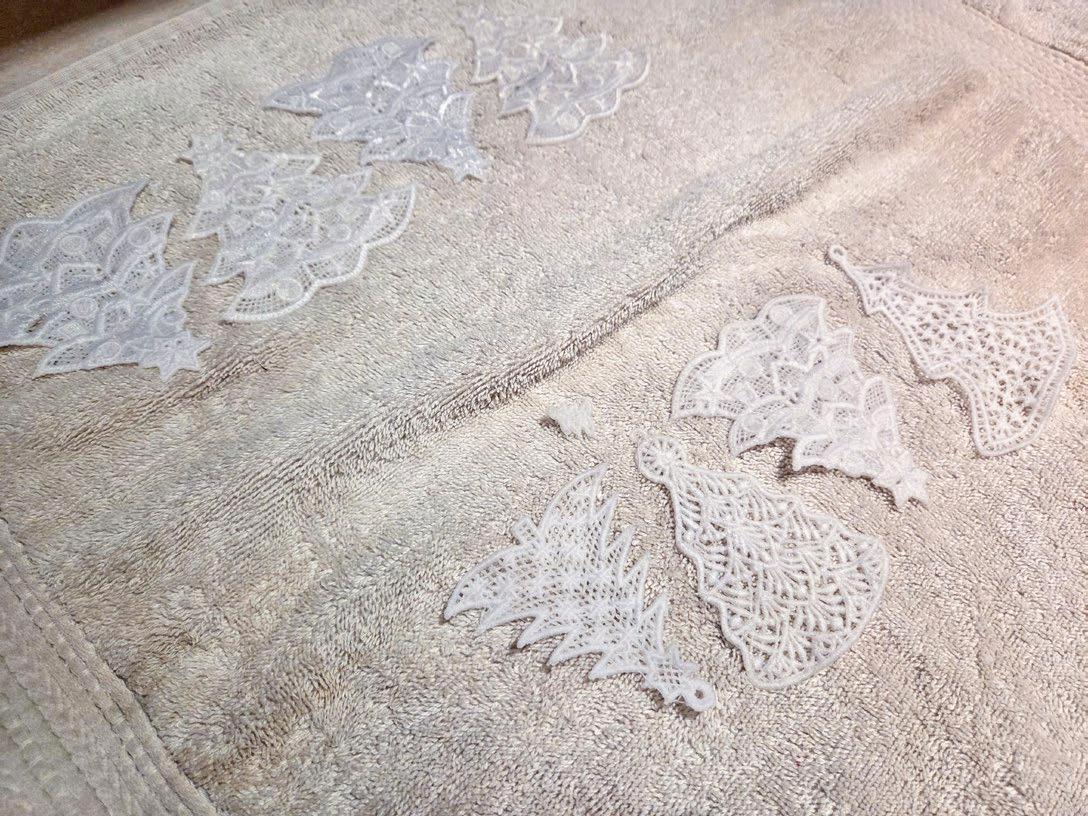
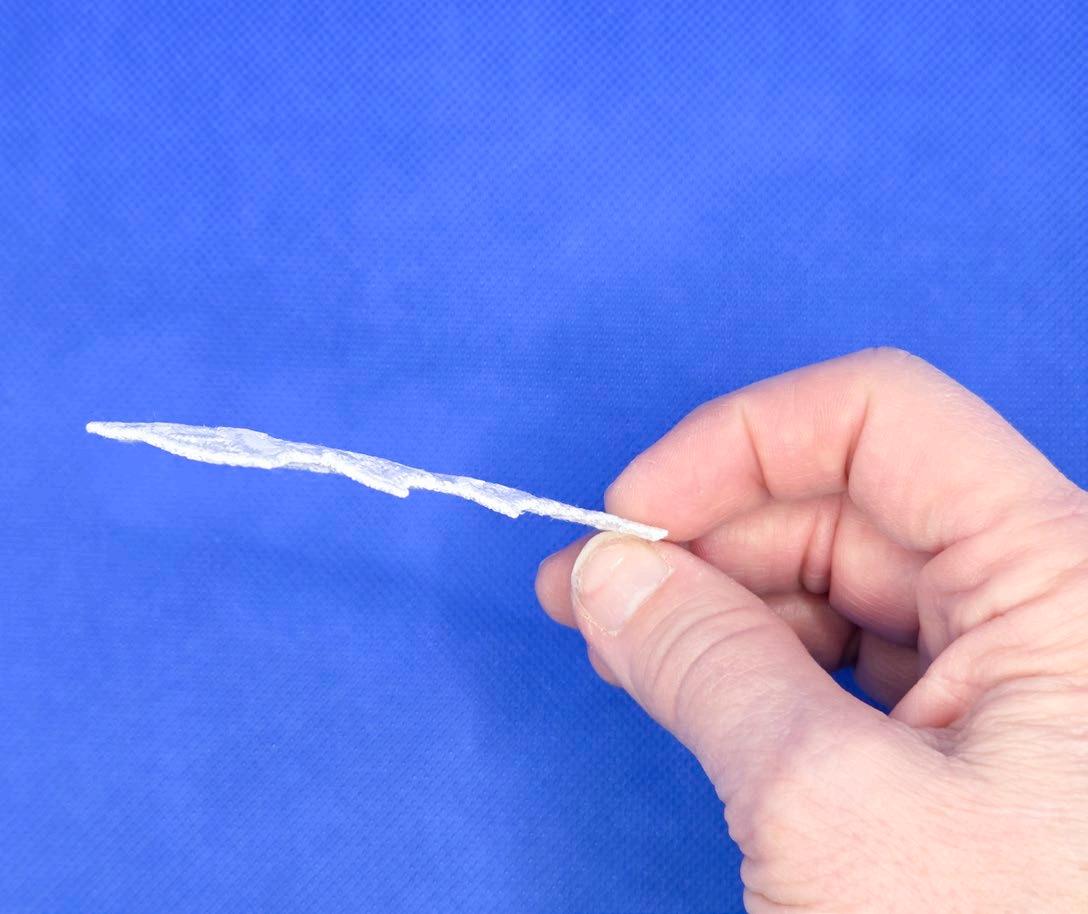
Then I let them dry on a towel. Depending on how much stabilizer is left, the ornaments may be a bit sticky, which is a good thing. Once dry, they pull away from the towel easily. You may find a cloth without a nap is better. When they are dry, press them with steam on a cotton setting and let them lie flat to cool.
I like to leave a bit of the water-soluble stabilizer in the ornaments to help stiffen them. If you have thoroughly rinsed out all the stabilizer, the ornament will be limp. You can give it body by dunking it in a solution of dissolved water-soluble stabilizer, or by spritzing it with starch. As you can see, it's way easier to ensure some of the stabilizer stays in. So a quick rinse is all that's needed.
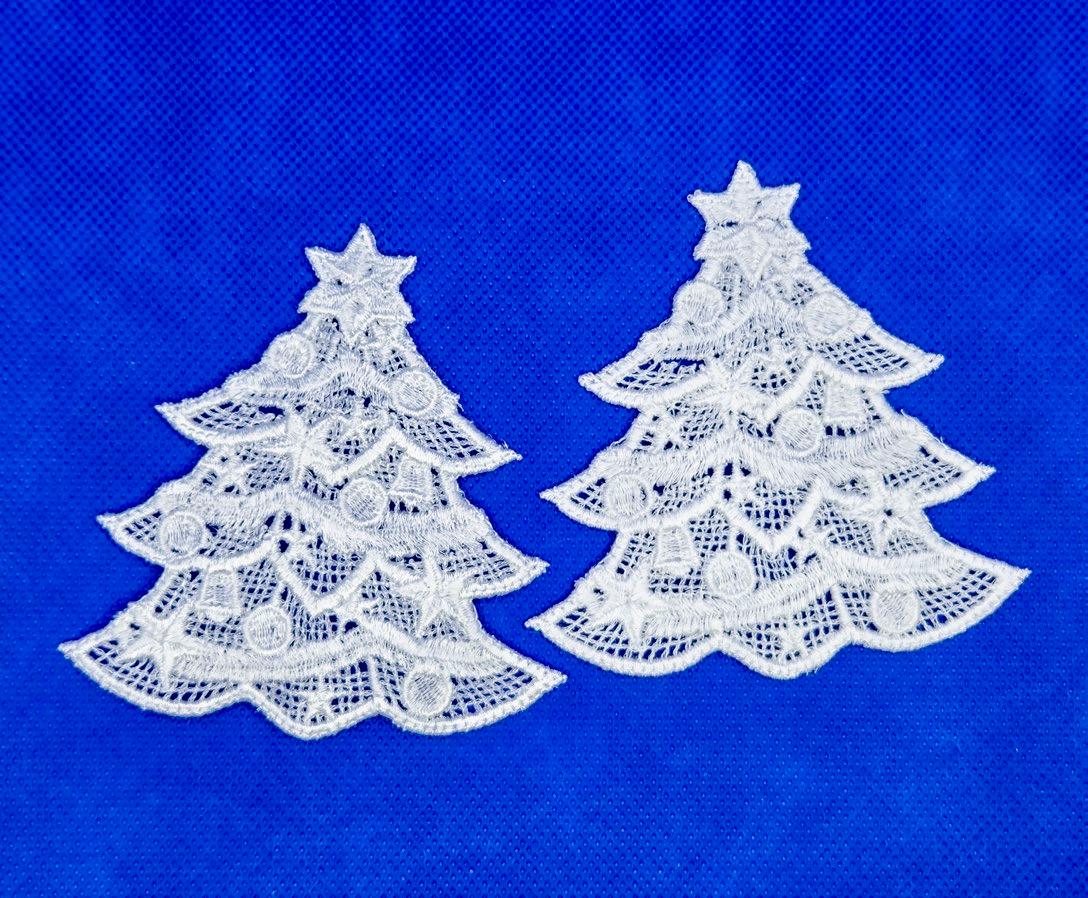
And here are the ornaments! Can you tell which was done with which thread?
The one on the left is made with rayon thread, while the one on the right is the cotton version, which appears slightly thicker and denser. While you can't see it in the photo, the one on the left also has a shine, while the cotton one is matte.
Both are 100% correct – it just depends on the look you want. And both threads stitched beautifully on the embroidery machine!
So the next time you want to embroider something, and you don't have 40-weight machine embroidery thread (that's the industry standard), or you want something with a matte look, dig out that cotton thread!! You can do machine embroidery with it!
It's been great fun playing with Gütermann Cotton thread and Gütermann Rayon thread. Next is all about roving. Don't know what roving is or how to use it? Be sure to come back, because I've got a great project lined up!!
Drying the lace ornaments
Leftover stabilizer in the lace ornaments gives them body
The free-standing lace ornaments
Creating Felted Flowers with UNIQUE CRAFT Wool Roving
It's all about roving. What the heck is roving? Well, it's wool that’s carded and combed into a long skein, used for a variety of projects.
The UNIQUE CRAFT roving comes in 25g or 50g packages
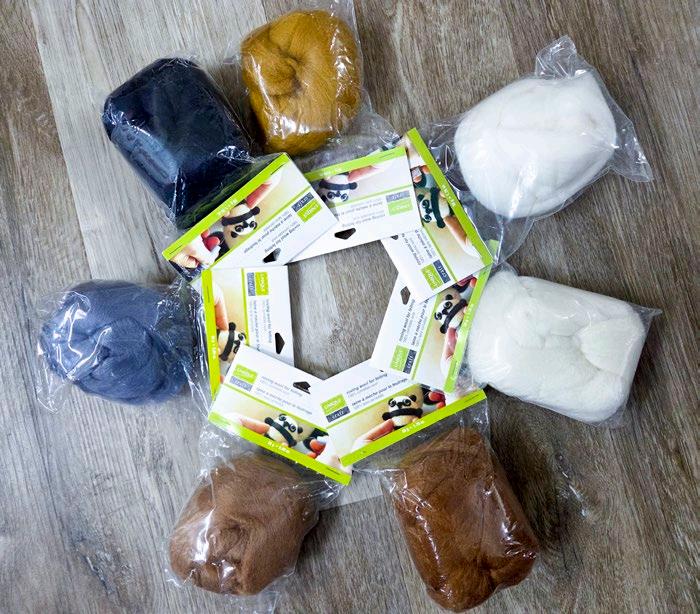
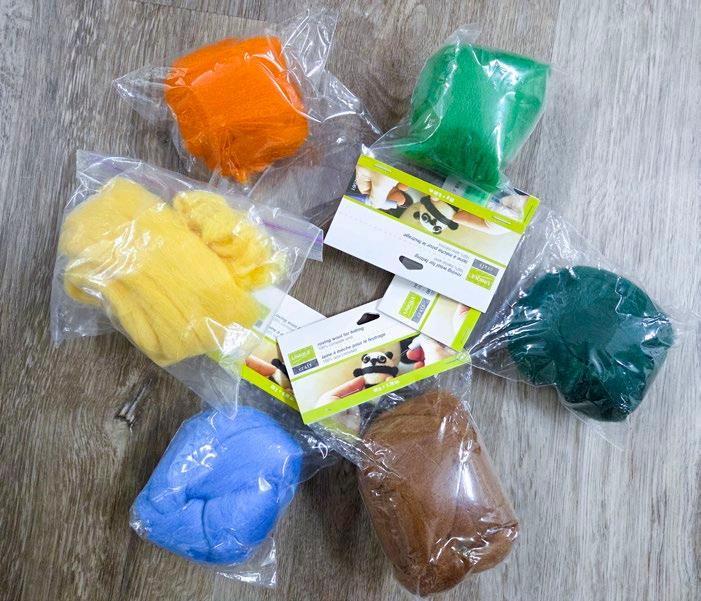
Now let's talk about the variety of colors! Here are some neutral colors, including black, ecru, white, gray, and several shades of brown.
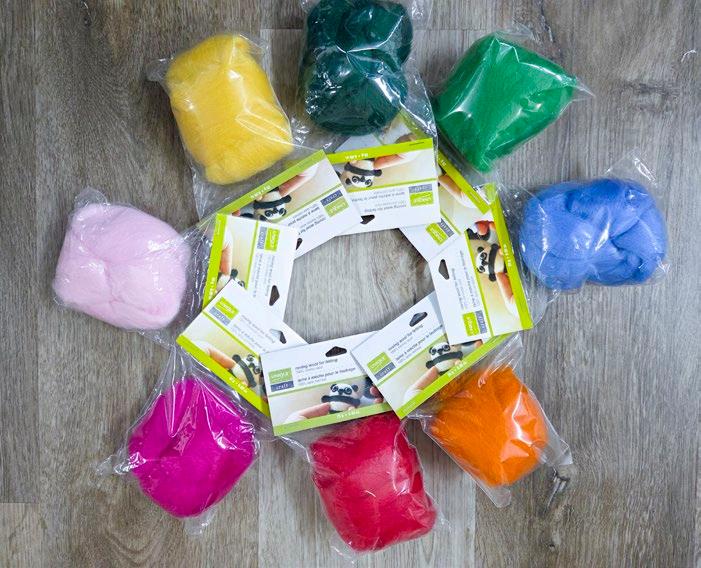
And look at these gorgeous colors! There are 24 different colors (neutrals and colors) in total, and I managed to get my hands on 15 of them! I'm pretty excited about my two projects.
Remember what I said? Even though I classify myself as a quilter, I don't just make quilts. And it seems that the more quilts you make, the more you start to look for new ideas. So making cushions, mug rugs, bags, etc., is a great way to add variety to our quilting world. I also love exploring new techniques to incorporate into my quilting, especially in my art quilts.
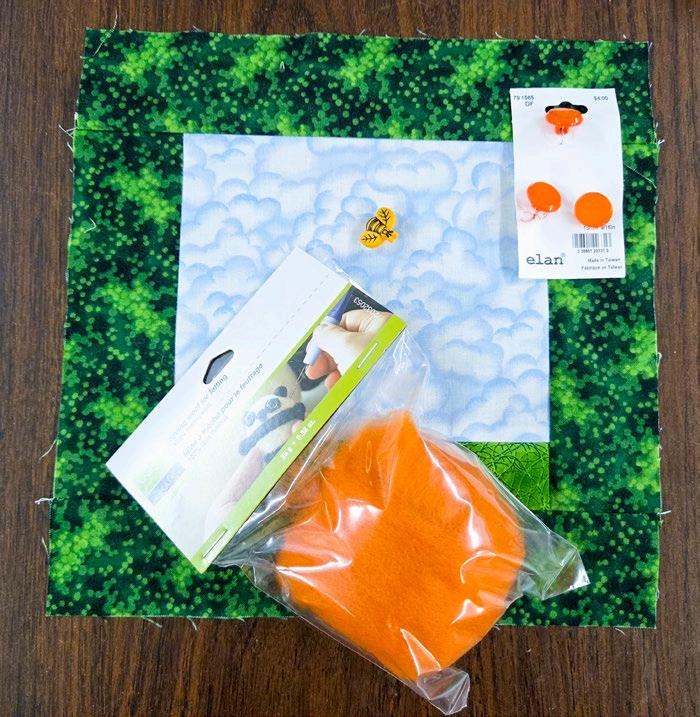
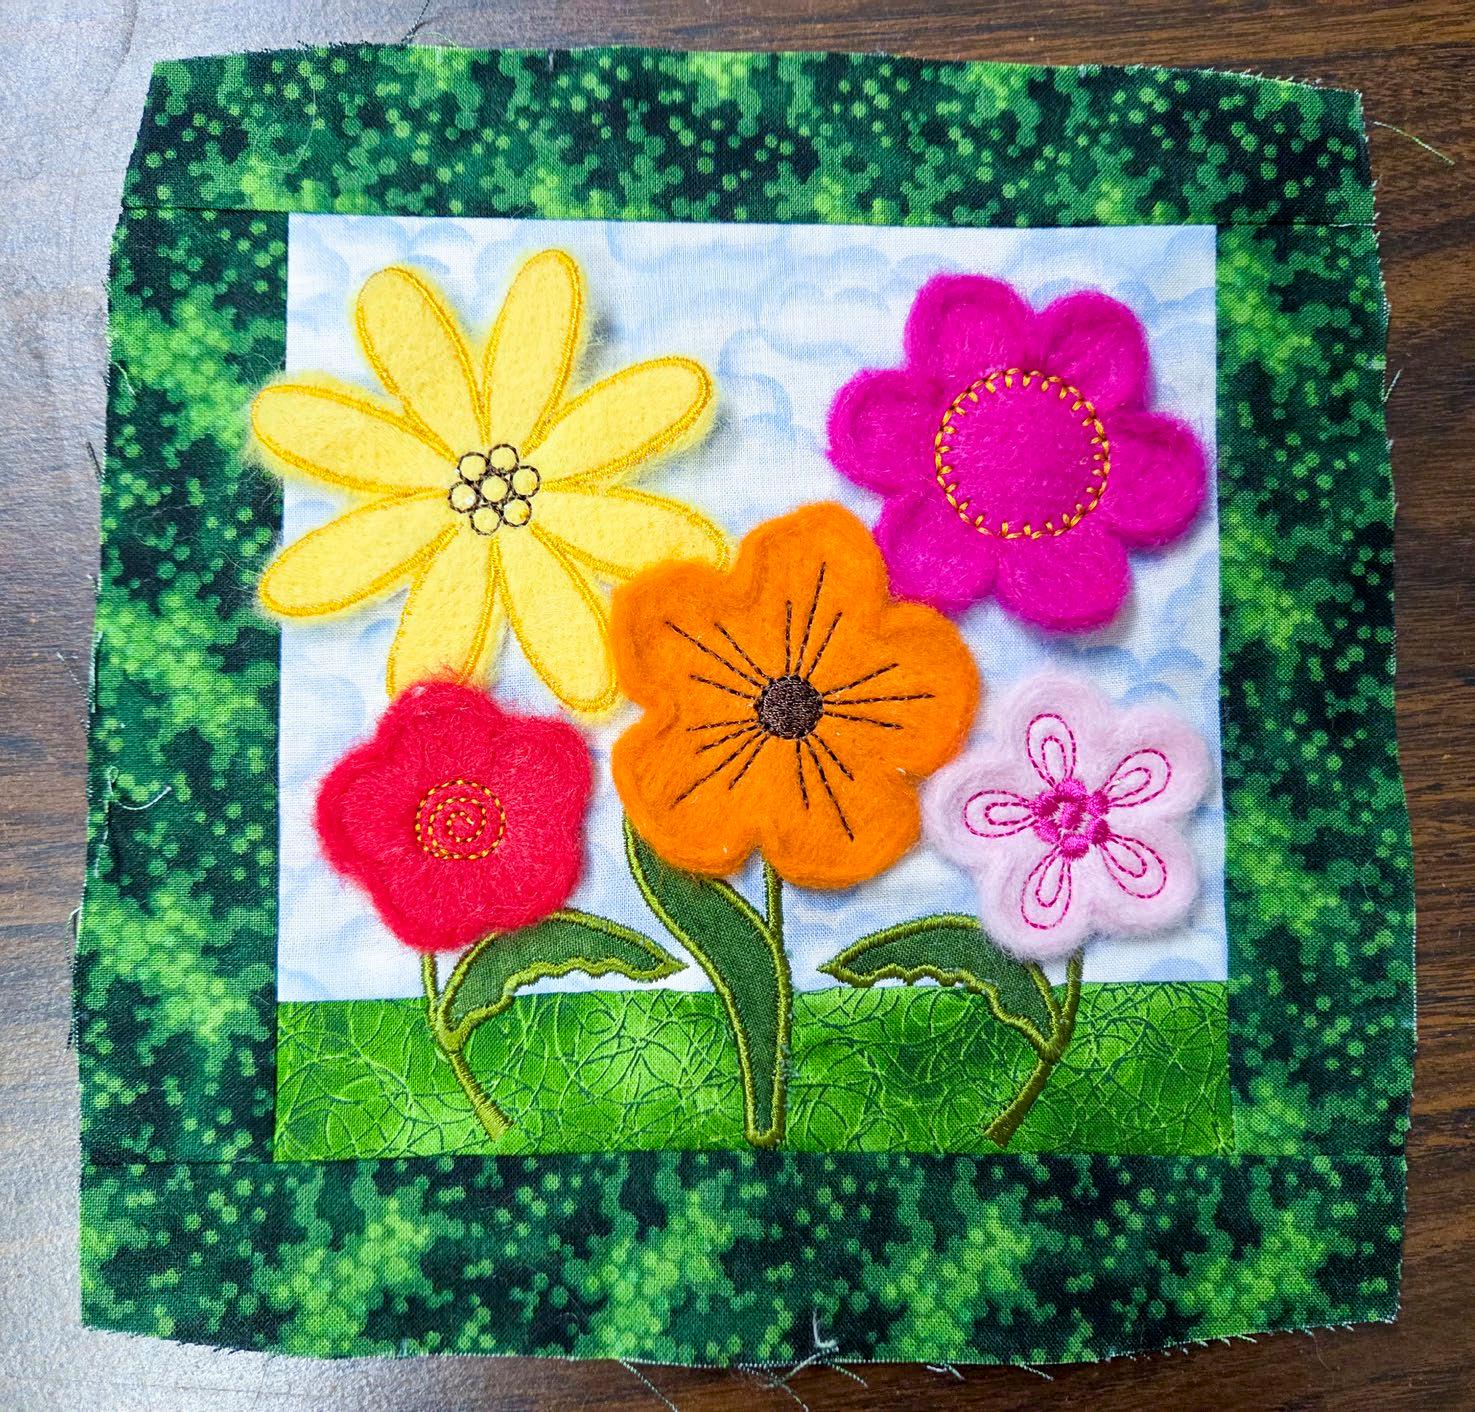
I'll be making felted flowers that I’ll stitch onto a small cushion! I've gathered some supplies, including five packages of the colored roving and two different button styles. The DRESS IT UP Larger bee buttons are adorable, and I can just see them buzzing amongst my flowers. The ELAN orange shank buttons will serve as the closure.
I found an 8" cushion form in my stash of cushion forms. There are many different sizes of cushion forms in squares or rectangles. If you can't find the right size, it's easy enough to make a cushion form and fill it with fiber fill!
I grabbed some fabric from my stash and made a 6½" square for the center with a strip of "grass" along the bottom, and the rest is sky. Then, I added an outer 2" border, which I'll trim down when I have completed the front of the cushion cover.
If you don't wish to make a cushion cover, consider a small wallhanging. Or how about putting the 3-D flowers into a shadow box? A pocket on a tote bag? Or maybe a fidget quilt? The possibilities are endless!
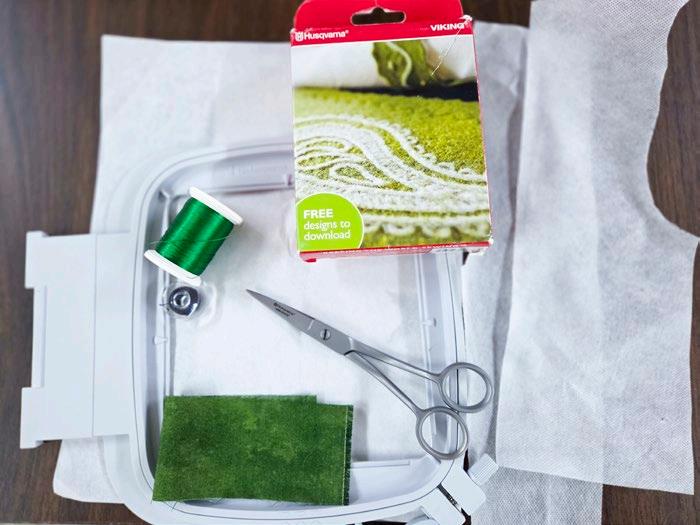
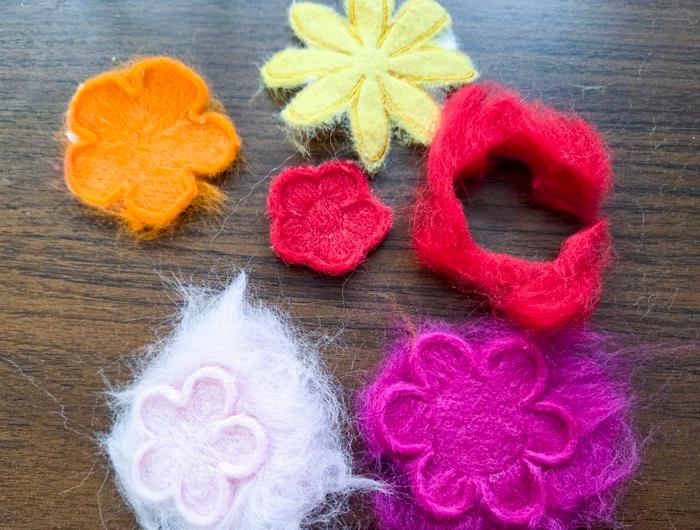
You know me, I have sewing and embroidery machines, and I love to test out ways to use them. PLUS, one of my 2026 goals was to explore felted embroidery, and this seemed like the perfect opportunity to get started. I gathered some supplies for the machine embroidery: the Husqvarna VIKING Felting Embroidery Set, an embroidery hoop, stabilizers (watersoluble for felting and a tear-away stabilizer for the final assembly), thread, applique scissors, and fabric for the applique.
Alternatively, you can do the felting by hand. You'll have way more freedom in the shapes. You'll need a felting needle (available in 1-, 3-, or 7-needle formats) and a felting mat. Note, there are two sizes of felting mats. While the mat and the 7-needle are great for 2-D felting, the 1 and 3 needles are excellent for 3-D felting. Something you can't do on an embroidery machine!
UNIQUE CRAFT roving in neutral colors
UNIQUE CRAFT wool roving in vibrant colors
Supplies to make a small cushion with felted flowers
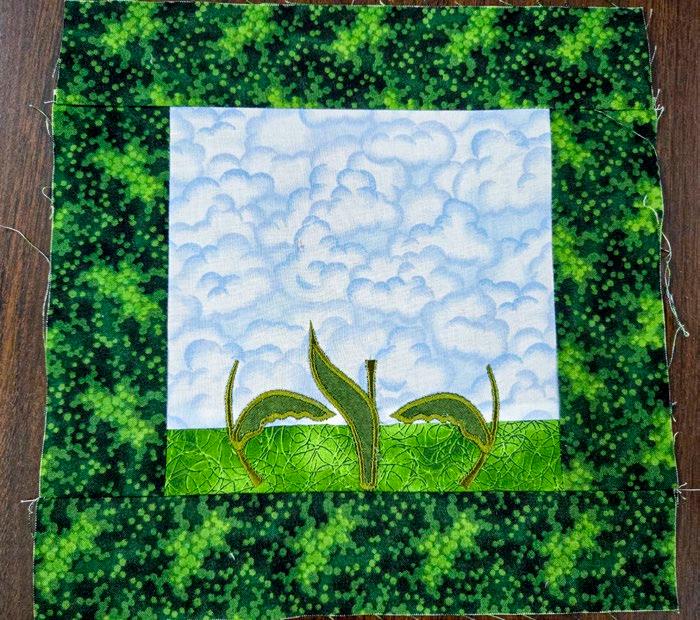
I started by designing the picture in the Creativate Embroidery Software. I found some applique flowers and removed the flowers, keeping only the stems. I brought the felted flower designs into the software to get an idea of how many and what size were needed. The next step was to use machine embroidery to appliqué the stems onto my background. That was easy!
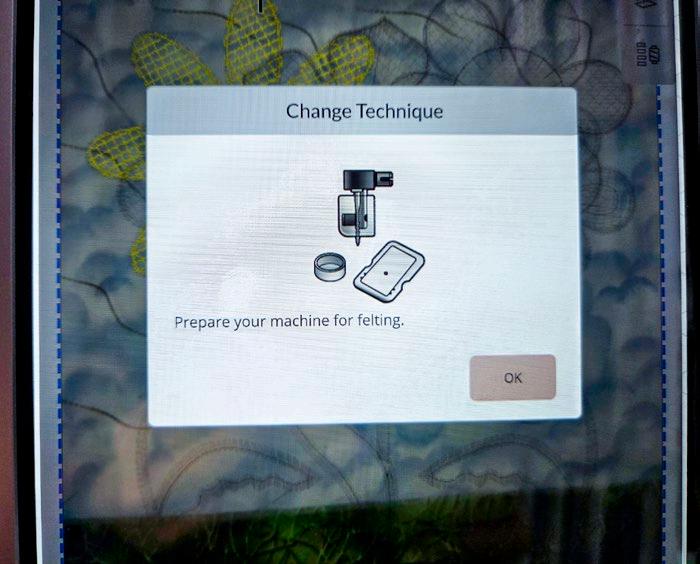
I love it when embroidering the felt flowers, a clear message pops up to alert me to install the felting set.
Let's talk about the roving and how to prepare it. The wool roving comes in a long, multi-strand skein. I want a consistent thickness in the roving bundle to create the felted flowers. I decided that rather than pulling the roving, I would cut it into a length more or less equal to the width of my flower. As I needed a visual of the size, I had printed the flowers out on paper, making it easier to visualize the size.
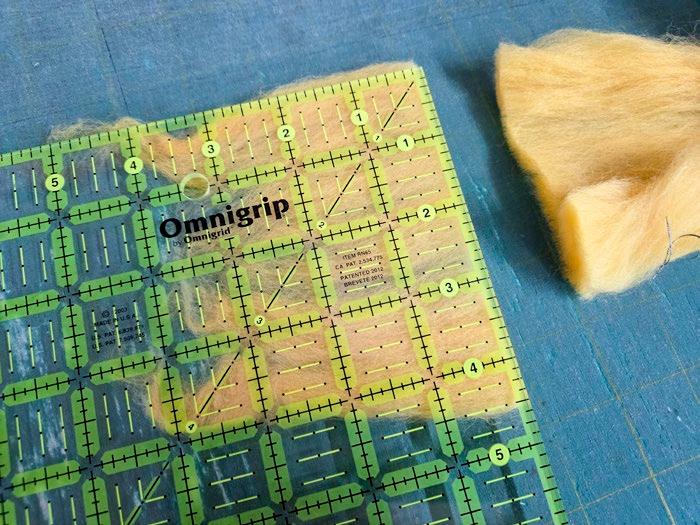
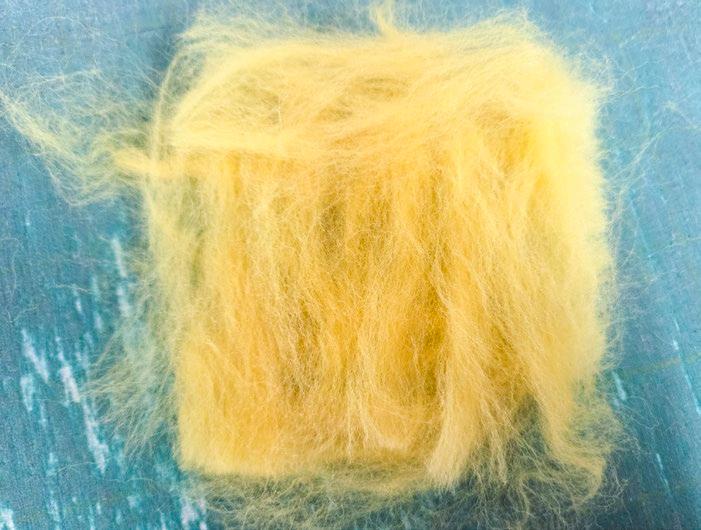
Then I separated small sections and spread them apart. I started with one layer all in the same direction. Then another thin layer in the opposite direction, and so on, until I used up that entire piece of roving I had cut off. You don't want a lump in the middle with nothing on the edges, so take some time to even out the layers and ensure equal thickness (as best you can) throughout the entire piece. The more I did, the more I got the hang of it!
You don’t want the bundle to be too thick, or you can’t embroider through it. It’s hard to describe, but it’s about ½” thick, which, of course, will be compressed under the needle.
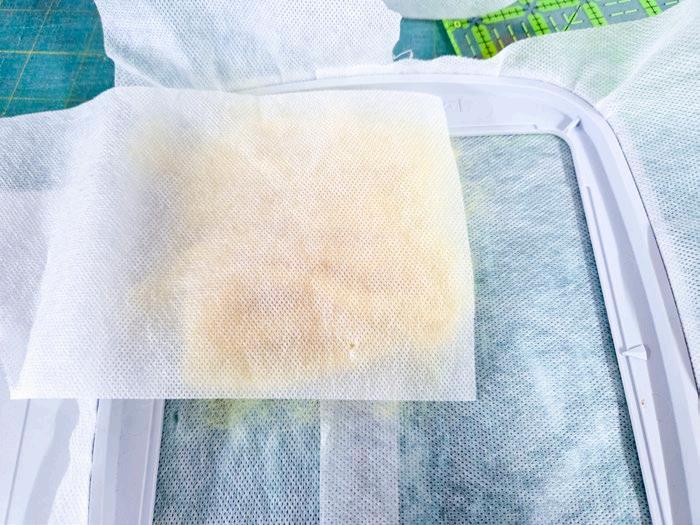
Then I put a piece of water-soluble stabilizer in the hoop and placed the roving on it. To prevent the wool from getting caught in the felting needle, I placed a small scrap of water-soluble stabilizer on top of the roving.
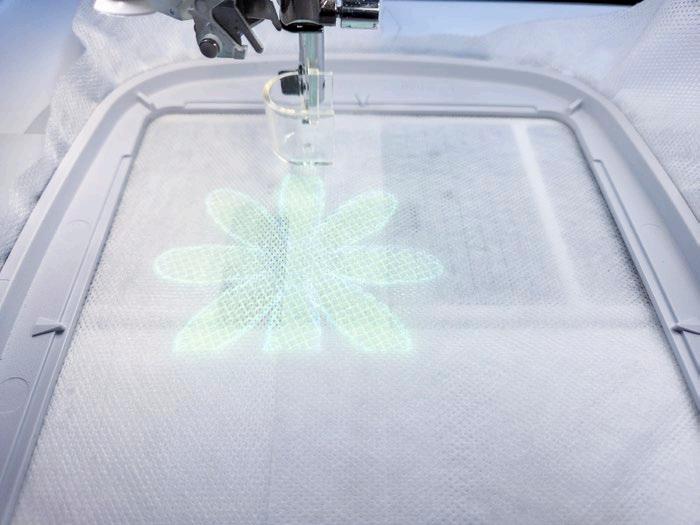
I used the placement tools (Exact Positioning and the Projection System) in the Designer Epic 3 to assist with where the roving needed to go.
Once I had the roving lined up with the projected design, I pressed START, sat back, and watched the felting process.
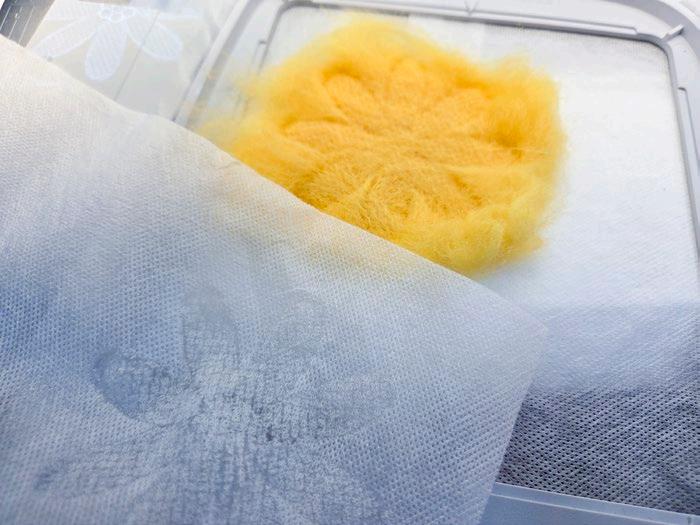
While it’s hard to see, the flower's shape is taking form as the felting needle meshes the layers of roving beneath the water-soluble stabilizer.
A pop-up message to install the felting kit
Cutting a small section of the roving
A bundle of roving
The top layer of water-soluble stabilizer prevents the roving from getting caught in the needle
The Projection System on the embroidery machine
The shape of the flower is becoming clear.
Supplies for felting with the embroidery machine
Applique flower stems on the background
The water-soluble stabilizer prevents the roving from getting caught. It’s NOT being punched into the roving and is easy to remove after the stitching is complete.
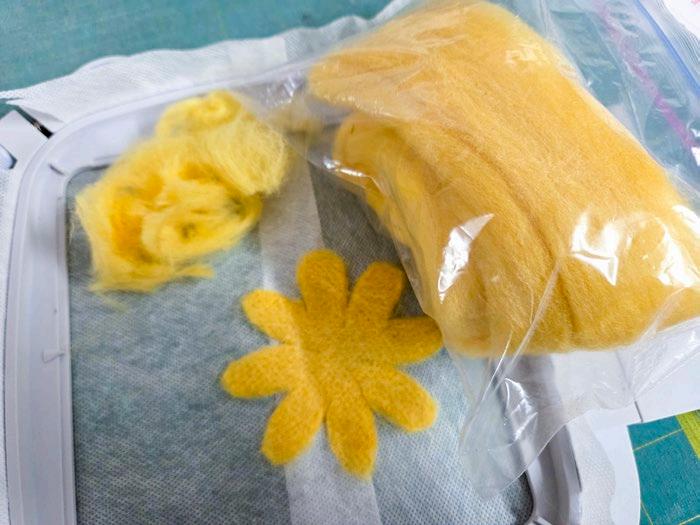
After felting the flower, I removed all excess roving and returned it to the bag, along with the remaining roving from the skein for the next project. Don't throw those bits away, they will be ready to use in the next felt project, and there will be another project!
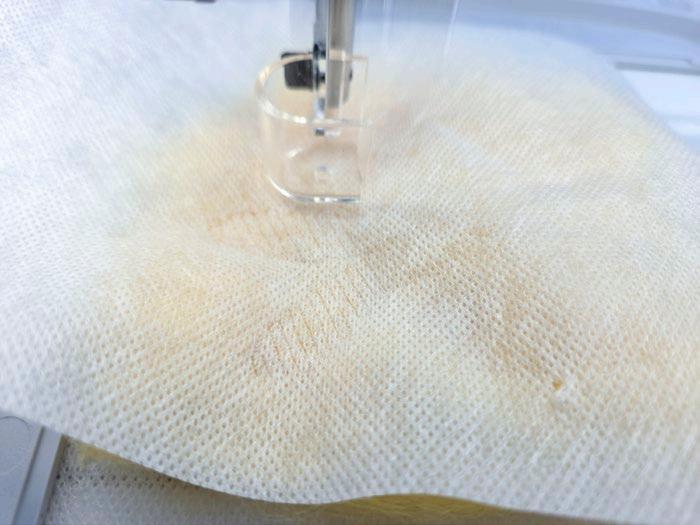
Here's something to keep in mind – if you’re felting by hand, the right side of the work will be facing up, and you’ll have a lot of flexibility to add little bits if one area is a bit thin. If you’re felting by the embroidery machine, the right side of the work is on the underside of the embroidery hoop!
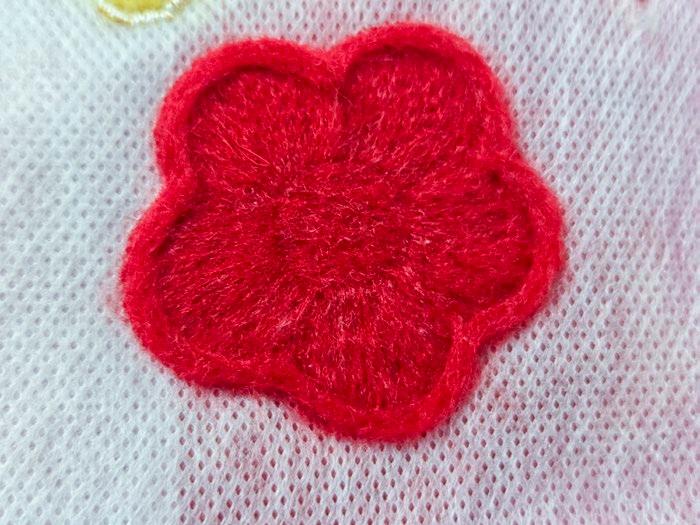
Look at the right side of another flower. It's super cute! The different patterns of the felting needle created the shapes and edges you see here. It's all programmed into the design, and all you have to do is press START!
Note: The embroidery design has to be digitized to work with felt – you can’t just switch to a felting needle for a design meant for threads.
Here are my five flowers in various stages of clean-up. A sharp pair of scissors makes it easy to cut away the excess roving from the flowers. I found a couple of petals that didn't have good coverage, so I added a bit more roving to that spot and redid some of the felting. I did that BEFORE I removed them from the embroidery hoop.
The more I did, the better I got at the process. It's always a good idea to experiment BEFORE you attempt your final project! And then the more you do, the easier it gets, and the more confidence and experience you have. And even more importantly, the more successful you are!
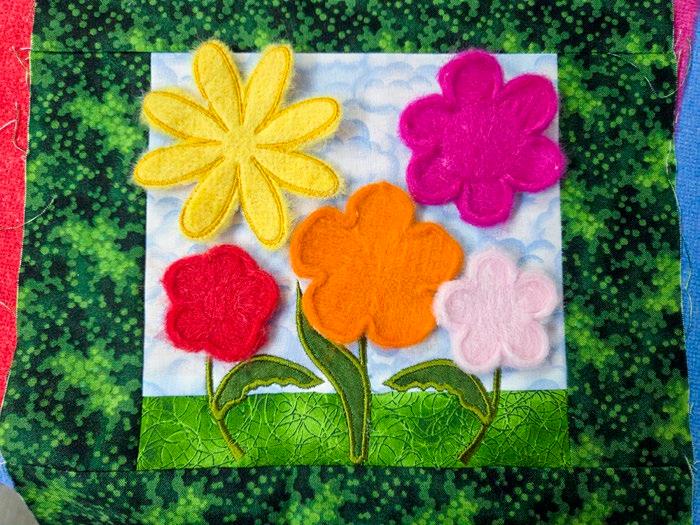
Next, I laid out the flowers on my background to see how they looked! OH MY --- this is so cute. I'm so impressed with the result!! I've done a couple of felted flowers in the past, but didn't have the roving well distributed, and I was determined to get better at the process! I think I succeeded, and I’m well on my way to accomplishing that 2026 goal of becoming more familiar with felted machine embroidery.
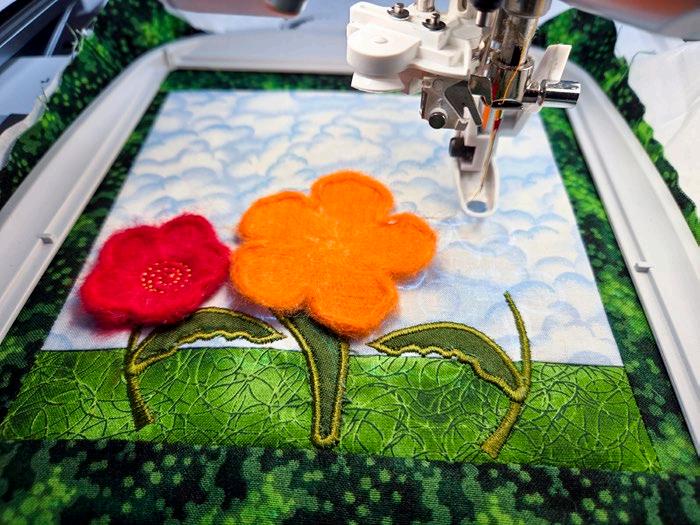
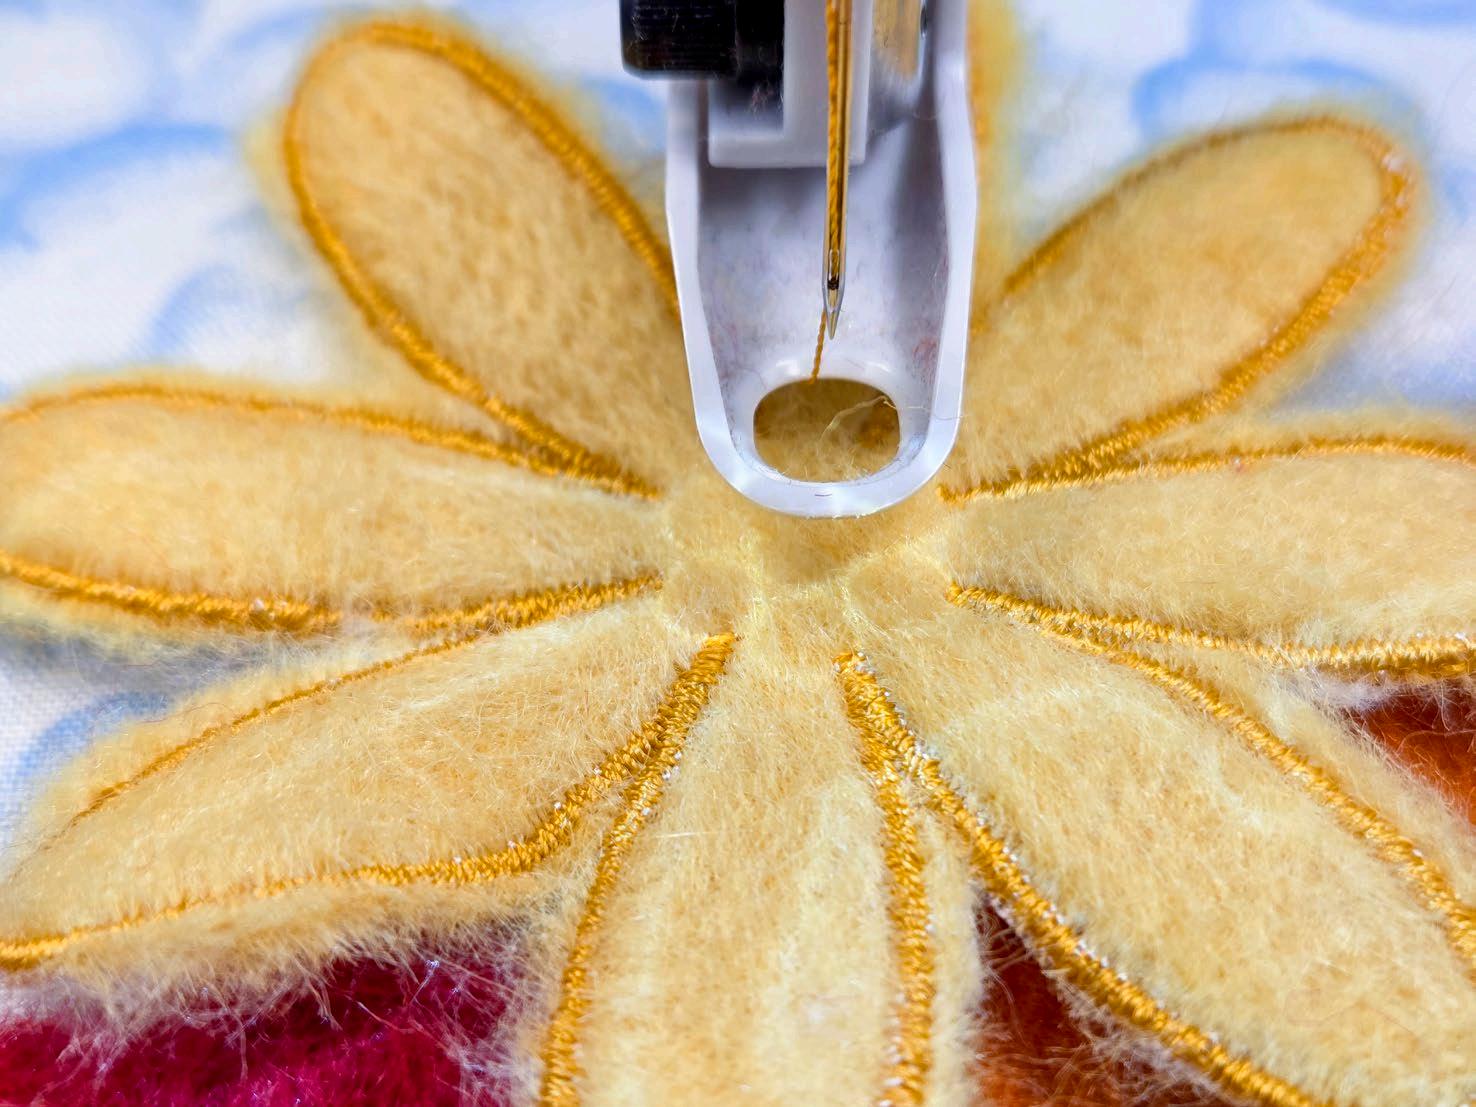
Each flower has a center stitched with thread. I kept that part to the very end so that I could embroider the flowers onto the background using that center stitching. Note that I ended up stitching each flower separately and used the Small Metal Hoop, which was much easier than the way shown below. In total, I hooped the fabric five times to attach the flowers. I tried a shortcut, and I wasn’t happy with the results. When I did the flowers one at a time, the results were much better.
Again, I used the excellent placement tools on the Husqvarna VIKING Designer Epic 3 (Projection, Scan the Hoop, and Exact Positioning) to get PRECISE placement of the flower centers. Doing one flower in a single hooping was so much easier than my original plan. And this just goes to show that there are multiple ways to achieve the same thing, and if one option doesn’t work, try another. My lesson to you is – don’t try a shortcut or a slapdash way! If it’s worth doing, it’s worth doing right –even if you make a mistake! I learned and fixed it!
Removing the water-soluble stabilizer
Removing the excess roving from the felted flower
The front of a felted flower
The five flowers are in various stages of completion
Testing the flowers for placement
Embroidering the flowers onto the background
And here's the top of my cushion cover with the felted flowers! OH MY! I LOVE THIS!!!! I'm so pleased with the result, and I know that I WANT all 24 colors of roving so I can make more flowers. They are adorable. OK – I have to brag – do you see how perfectly aligned the center stitches are? Learn to use your positioning tools in machine embroidery! Note that the corners are trimmed to prevent dog ears when the cushion is complete.
Whether you use an embroidery machine or hand needles to felt your flowers or other shapes, imagine the freedom you'll have to express your creativity. You could mix and match techniques – make machineembroidered flowers and handembroider the centers. Mix up the colors of roving to create two-toned flowers, and well, the possibilities are endless.
I LOVE working with the UNIQUE CRAFT roving, and did I mention that I now want the rest of the colors to make more flowers!
I'll finish off the cushion next and share my second roving project (totally different style).
Get your thinking cap on and see what you can come up with, using wool roving!
The flowers on the cushion cover
Using Projection to position the embroidery stitches
Free Form Felting with Wool Roving Using Machine Embroidery
The machine-embroidered felted flowers are so pretty, and I can't wait to work with more of the UNIQUE CRAFT roving! I'll share my second project first, and then I'll show you how I finished off the cushion. My second project is to emulate free-form felting using machine embroidery. Using the Husqvarna VIKING Embroidery Felt Set. I'll be "stitching" a tight overall pattern on the embroidery machine to do the felting,
Before I begin this project, I want to note that I have never attempted this technique before. That means there's plenty of room to experiment, and that's how I learn, so I'm excited.
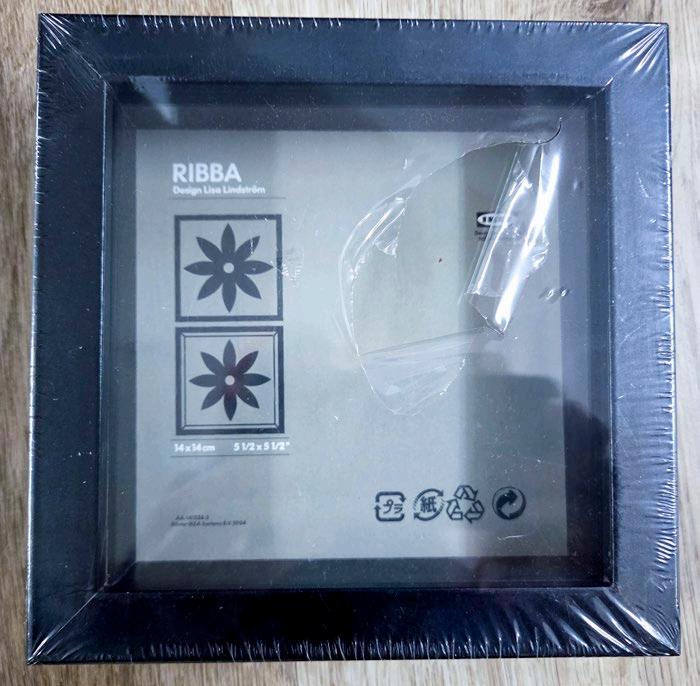
I happened to find a 5" square shadow box in my frame stash (we are NOT going there), and I thought it would be great to make something to fit in the shadow box. While I had visions of creating an elaborate landscape, I opted instead for a simple flower to test the technique.
Step one was to sort through the amazing colors of the UNIQUE CRAFT roving and pick colors for my flower.
Here's my shadow box, but you could use any frame to insert the felted piece, stitch it onto a tote bag, use it as an insert in a fidget quilt, add it to a wall hanging, attach it to the side of a zippered pouch, or in many other projects.
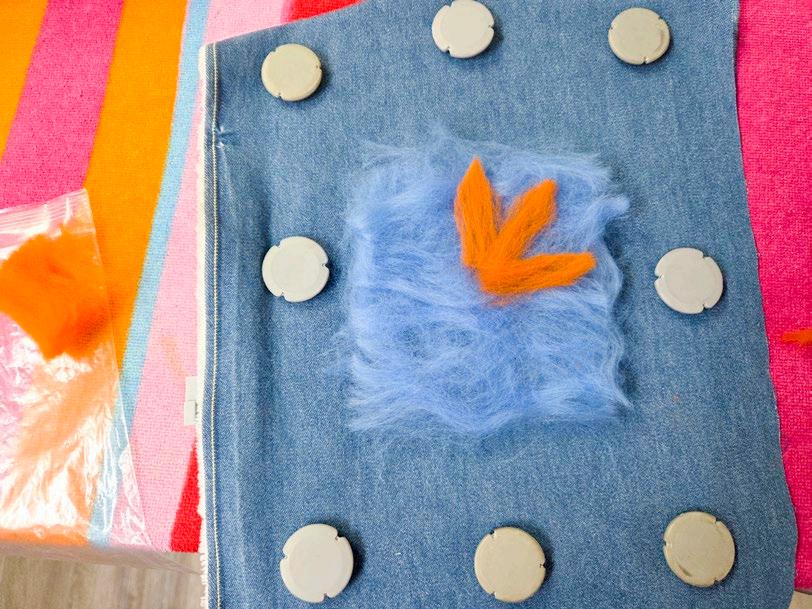
I hooped my fabric into a metal hoop with a piece of Stitch n Tear stabilizer behind it. It was then easy to layer the roving on the hoop. Alternatively, I could have layered the roving and then placed it on the hoop. As I did before, I cut small lengths of roving off the skein and laid it out in thin layers. I started with blue as the background for the flower.
I chose denim as my base layer because it was blue, forgetting that it can be stretchy due to its bias weave. Next time, I'll simply use a water-soluble stabilizer in the hoop.
My design needs to be five inches square to fit in the frame, so I laid out the base layer (blue) in a roughly 5" square. I wasn't too worried about the thickness of the base layer or whether it completely covered the denim. Then I started creating the petals with small bits of roving.
I may need to work out a better shaping method, but petals are organic, so I wasn’t too worried. However, my roving did get somewhat distorted during the felting process. As I mentioned, this is a learning curve!
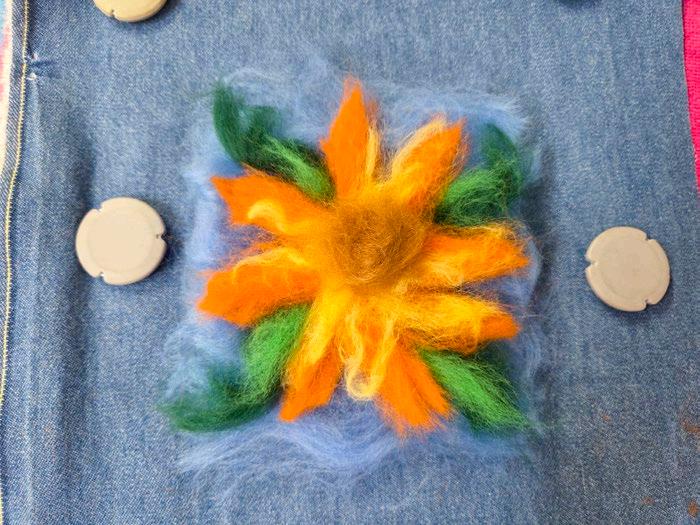
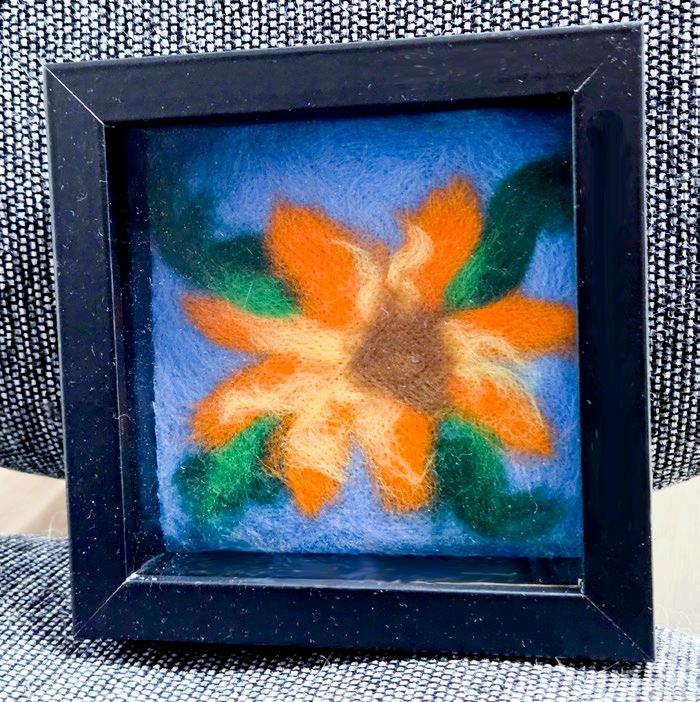
I used two different greens for the leaves, which I inserted under the flower petals. In the future, I'd work from the bottom up. I added some yellow to the flower petals to give them a bit of shading. Next time, I’ll be a bit more careful in the placement of any roving for shading. The center is small bits of brown roving. I kept it all within the 5" square and tried to keep the layers somewhat even by not putting the orange, yellow, and green into the center, although the center was thicker than the outer edges.
If I were felting this by hand, I would use the 7-needle felting tool and the large felting mat. I wanted to use the embroidery machine, so in the Creativate Embroidery Software, I used the Quilt Block Wizard to create a five-inch-square "grid quilting" design. I used a diamond pattern with a 1 mm gap, so the "stitches" are very close together. Not so great for quilting, but perfect for felting!
Wool roving for my flower
A 5” shadow box
Layering the roving
The free-form flower made from layers of roving
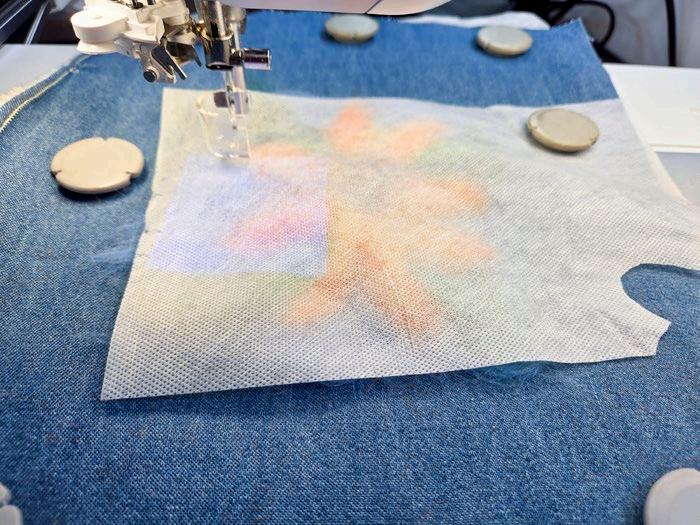
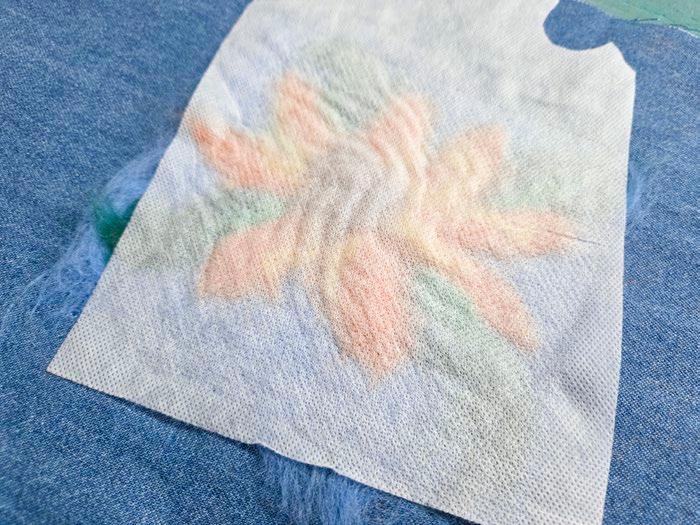
I installed the Embroidery Felt Set and placed a layer of water-soluble stabilizer over the roving. Now I was ready to stitch!
I should have basted around the hoop before putting the embroidery Felt Set on the machine because I now had to babysit that loose piece of stabilizer! Between the slight stretch in the denim, the thickness of the roving in the middle, and the loose stabilizer, some of the felt got distorted. Like I said – I was winging this – that's how I learn. Next time – use a water-soluble stabilizer as a base, aim for more even layers of roving, and secure the stabilizer on top.
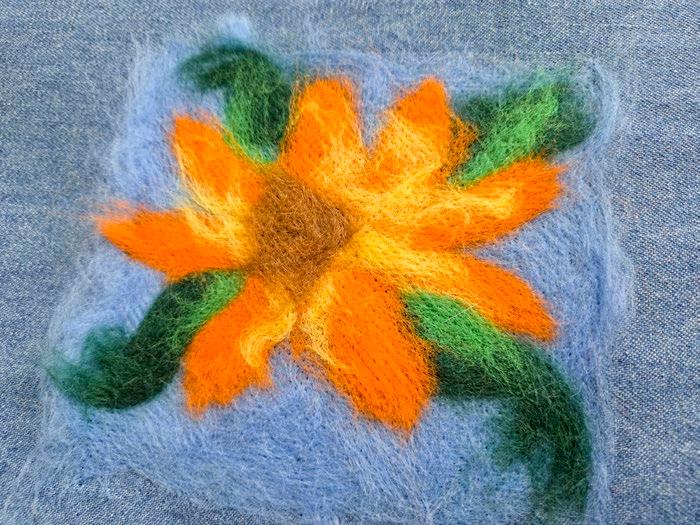
I simply pulled the water-soluble stabilizer away and VOILÀ – there's my felted flower. For a first attempt, I’m thrilled! Learning is so much fun, and I didn't use much roving to make the design, so there’s plenty to make something else! Perhaps I'll even get that large landscape together!
This method replicates felting by hand. There’s NO distinct pattern in the felting, as we saw, created by the various directions in which the felting needle went. My pattern was simply very tight crosshatching.
Then I trimmed the piece and inserted it into my shadow box! It didn't take very long to make, and what a neat project.
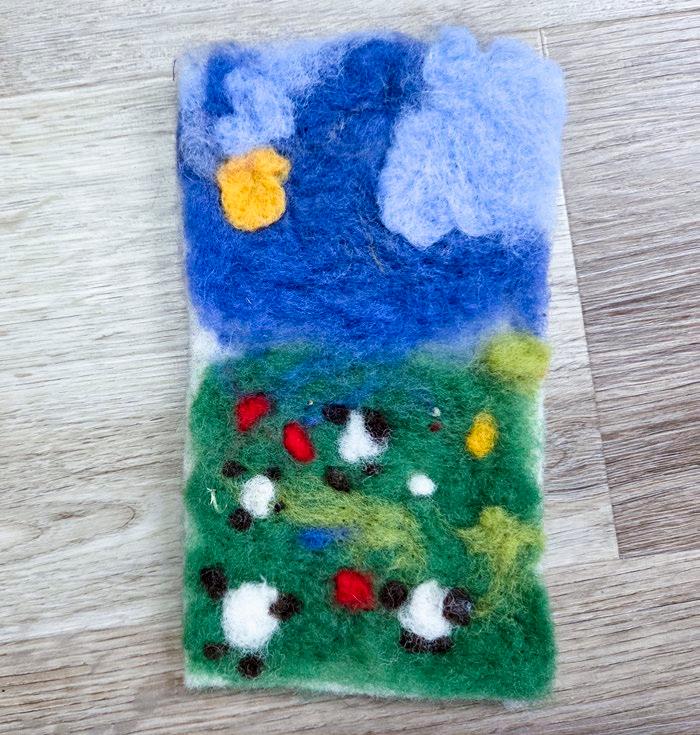
I thought I'd share this felted wool project with you. It's a small piece of felting my daughter made when she was about 10. It was done by felting with a single needle. Perhaps I should try to replicate that for my next project!
Here's a recap of a few things I'll do differently for the next machine embroidery felted project:
1. Use a water-soluble stabilizer for the base.
2. Felt the background first. I'm not sure this will make a difference, and it definitely adds to the time, but it'll reduce the thickness of the layers and prevent distortion. If I decided to quilt the background first, I’d use a grid pattern with a much wider gap – let’s say 5mm, so that the process would be faster. That would be similar to basting quilt layers together!
Then add the flowers, leaves, and other elements, and use the grid pattern with the 1 mm gap. Obviously, you want to keep your project in the embroidery hoop.
3. Secure the stabilizer so it can’t shift.
4. Select the floating foot option for machine embroidery and raise the foot height to accommodate the thickness, thereby reducing drag on the roving layers.
Of course, if you’re felting by hand, it’s easy to add small bits here and there, using the various sizes of felting tools. You could also stitch the main parts using the embroidery machine and add small details by hand.
So many possibilities and so little time, but I want to get my hands on all 24 colors of that roving!
Now, let's finish off that cushion top I started before. Please note – this is NOT a tutorial, but you should have enough information to finish your cushion!
Water-soluble stabilizer on the roving
After all the "stitching", my design looked like this
My felted free-form flower
The finished flower in the shadow box
Landscape felted by hand
Machine-embroidered felt flowers
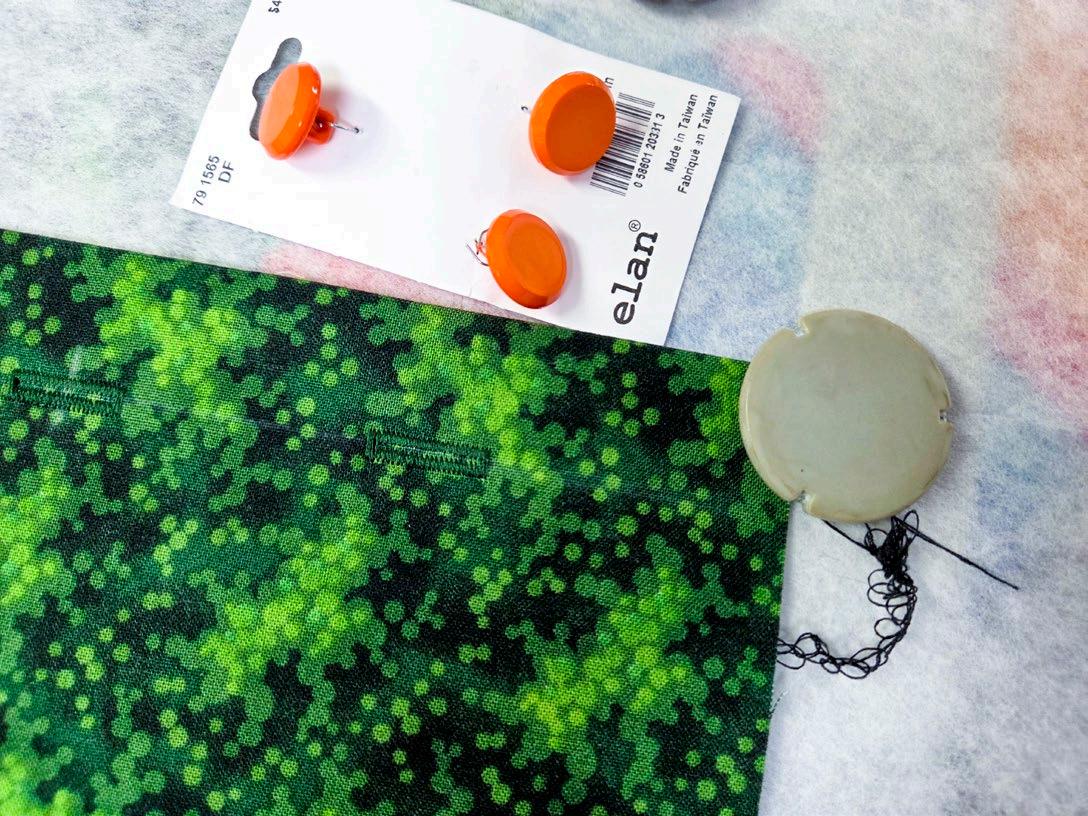
I decided to use buttons for the closure, but I wanted to try making buttonholes on the embroidery machine to ensure even spacing. It's not that I'm against handwork, but if I have a machine that will make life easier or give me something new to learn, then I'm all for it.
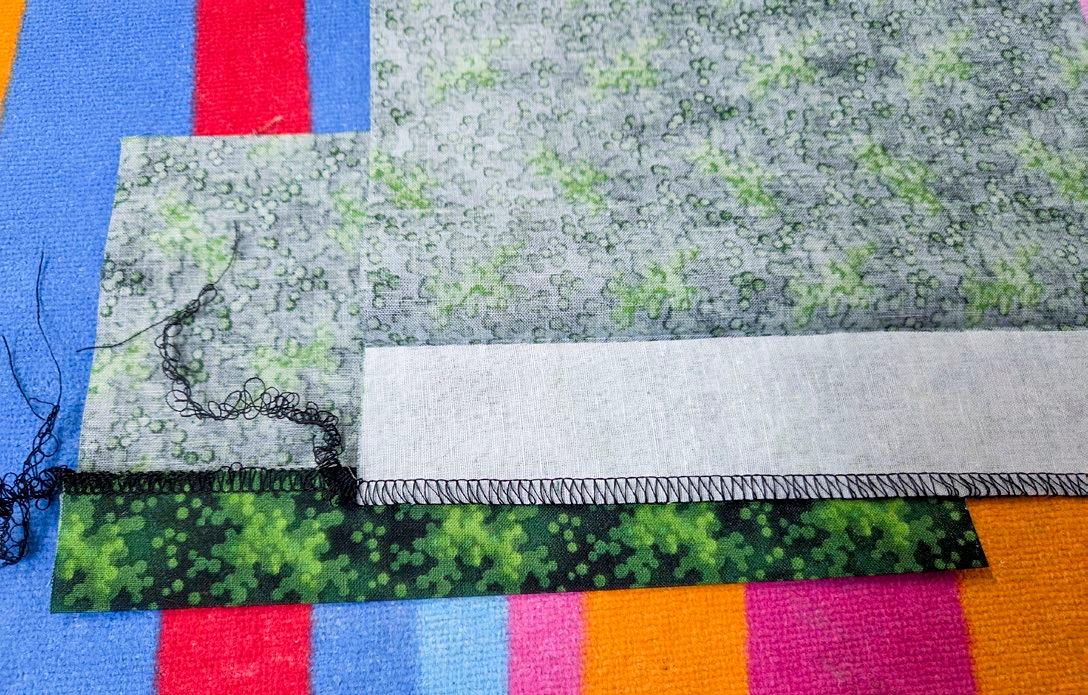
I started by cutting two pieces of fabric the same width as the cushion top, but generous in length, with enough extra to turn under an edge and have those edges overlap. I went with a 2-inch turned-under edge for the buttonholes and a 1-inch turned-under edge for the buttons, which I'll interface and turn under. I applied a strip of fusible interfacing to the two flaps and serged the raw edges. Then I pressed the flaps under along the edge of the interfacing.
In this photo, the piece on the right shows the interfacing fused in place but not yet folded back, while the piece on the left has the interfacing fused and pressed in place. Once the buttonholes are complete, baste the two pieces together along the sides at the overlap. Ensure the pieces overlap sufficiently for the buttons to work, and that, when overlapped, the two pieces are large enough to match the front. You can always trim the excess.
I used the Create Shape tool in Embroidery Edit to space the three buttonholes evenly. The shape I selected was a straight line, and I added three buttonholes to that line. I selected a buttonhole stitch from the Utility Menu and rotated the buttonholes so they were parallel to the folded edge.
I used a metal hoop to stitch them, and within a few minutes, I had three beautiful and perfectly aligned buttonholes. I've never used the embroidery machine to make buttonholes before, but you can be sure that I'll do it again!
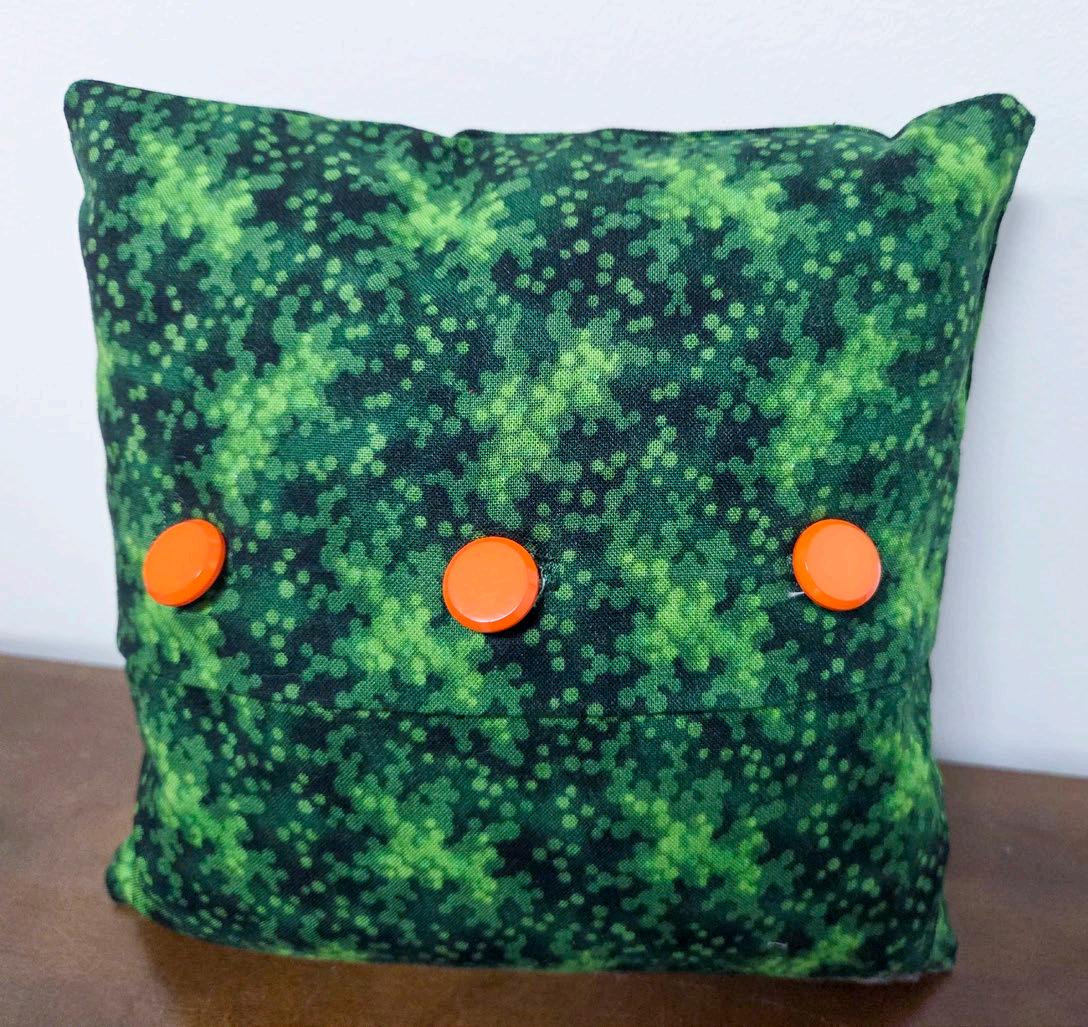
I hand-stitched the Elan Orange Shank buttons after sewing the cover together. Here's what they look like. I LOVE the buttons. I think I've developed a fetish for buttons. There are so many amazing buttons out there, and well, I want them all!
Honestly, buttons can dress up anything, and I chose the orange one because they look amazing on this dark green fabric, and should I ever tire of looking at the flowers, I'd be delighted to look at this side!
Note: Where you place the opening on the back is up to you. Mine is about in the middle, but it could be closer to the top or the bottom. You choose.
The two flaps for the back of the cushion
Embroidered buttonholes
The button closure on the cushion
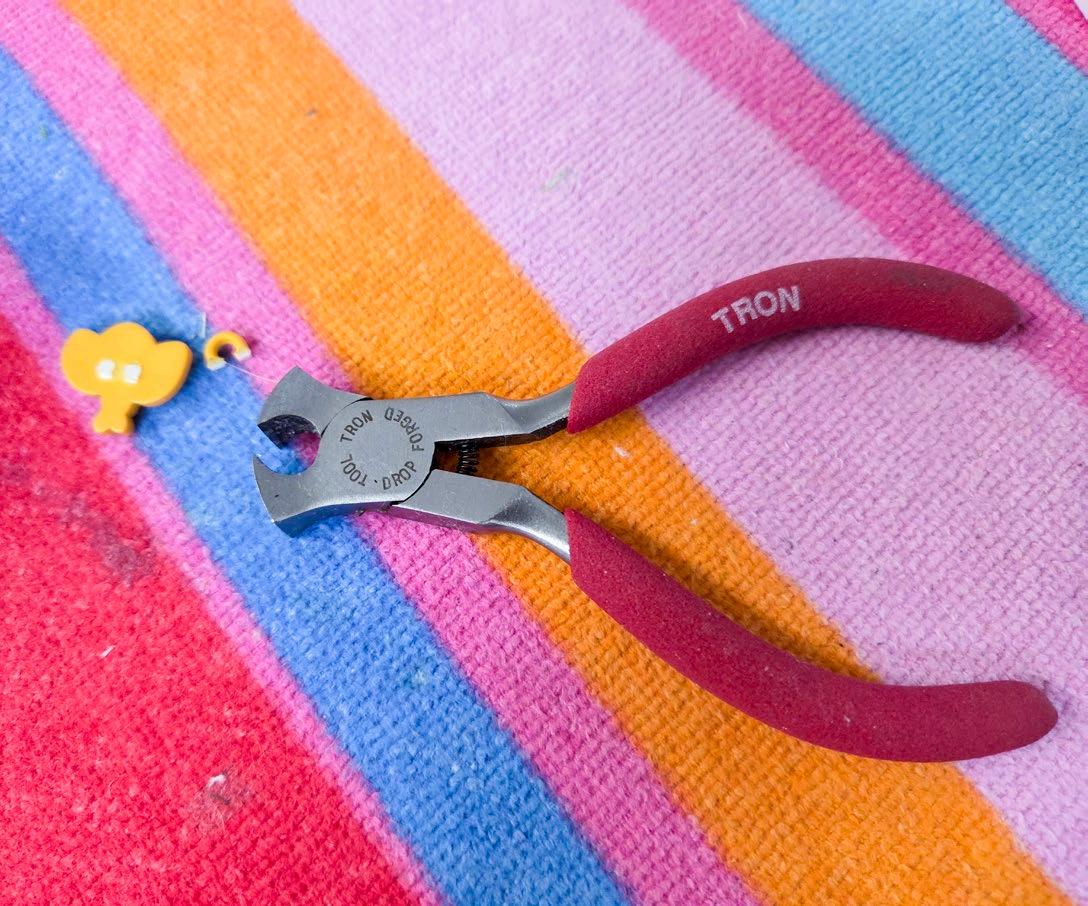
Speaking of buttons, remember the Dress It Up Large Bee buttons I had set aside? Well, those are shank buttons as well, and they wouldn't have sat well on the single thickness of the background of my cushion. I have a small pair of cutters that will cut the shank off cleanly. Now it's easy to use the hot glue gun to glue them in place.
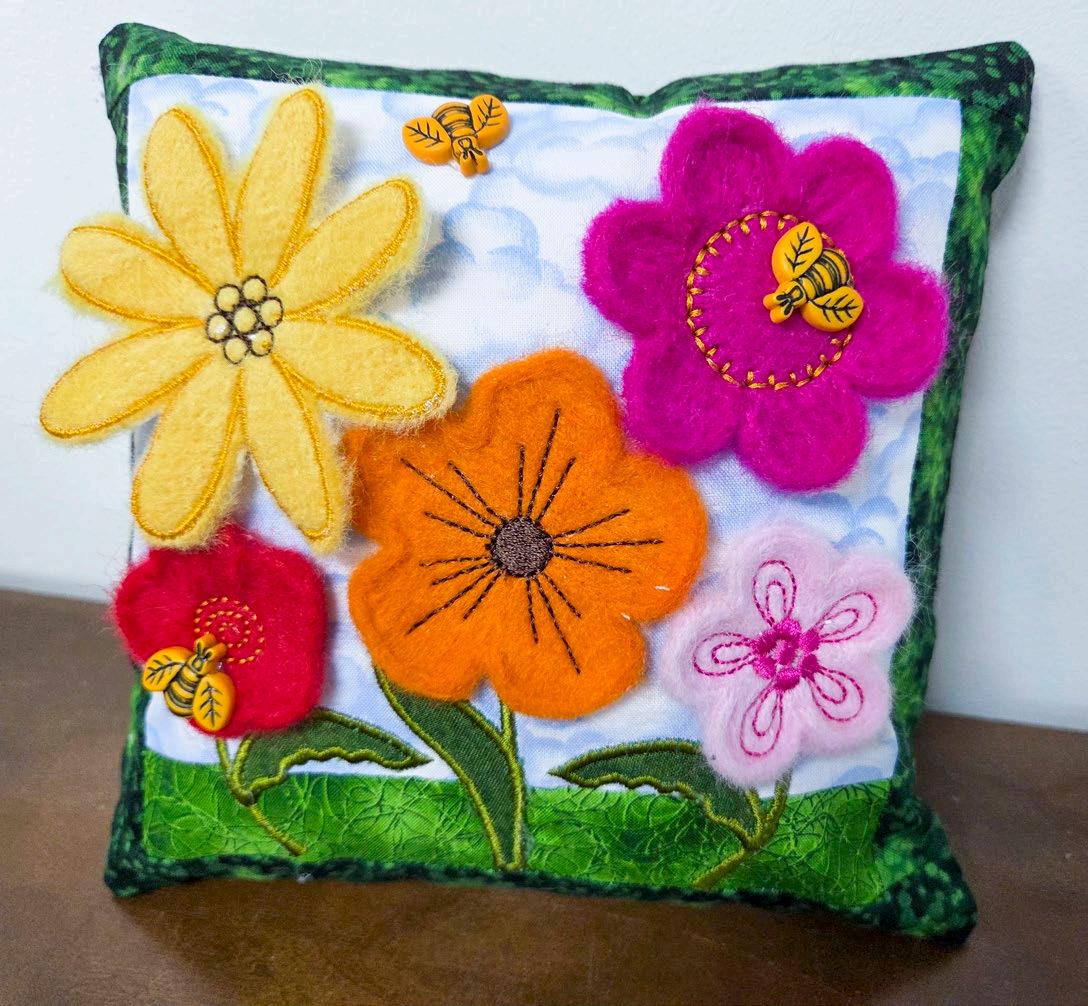
I glued three bee buttons onto the front before assembling the front and back. The last thing was to serge the front to the back, turn it inside out, hand-stitch the buttons in place, and button up the back! Notice how shaving a wee bit off the corners doesn't change the shape of the cushion and helps to eliminate dog ears! You can learn how to eliminate dog ears in this article.
Oh MY!!!! I love this cushion – it's adorable!
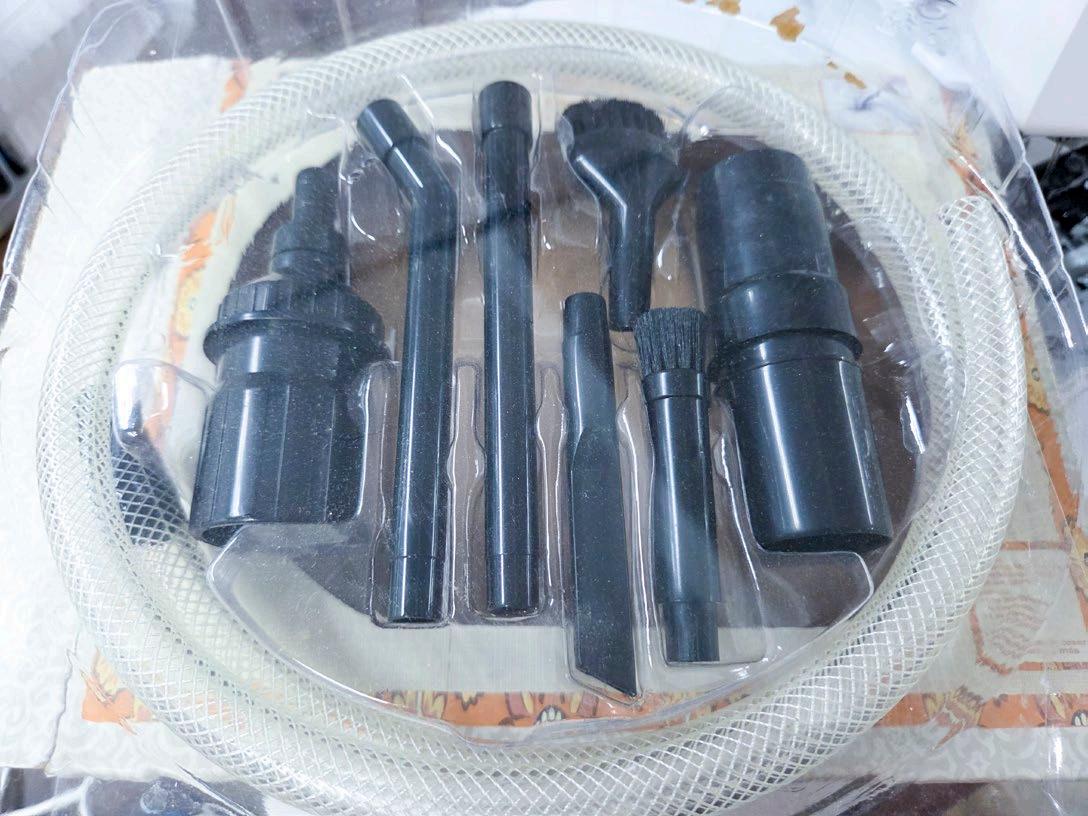
After all that felting on the embroidery machine, there’s one last important step. A lot of wool felt has likely accumulated in the bobbin area, so be sure to get out your mini-vacuum attachment to remove all the lint. Your machine will love you!
And there you have it – two amazing projects made with the UNIQUE CRAFT Wool Roving! What's fun about these projects is that anyone can make them, especially if you're felting by hand. Whether you choose to do free-form by hand or machine, use digitized embroidery motifs, or any combination of those methods, there are endless ideas you can create! I've only scratched the surface and can't wait to try other ideas. And I need to shop for more of that wool roving in all 24 colors! Let's not forget the exciting options for buttons!
The cushion with machine-embroidered felted flowers
The mini-vacuum attachment
Removing the shank from the button
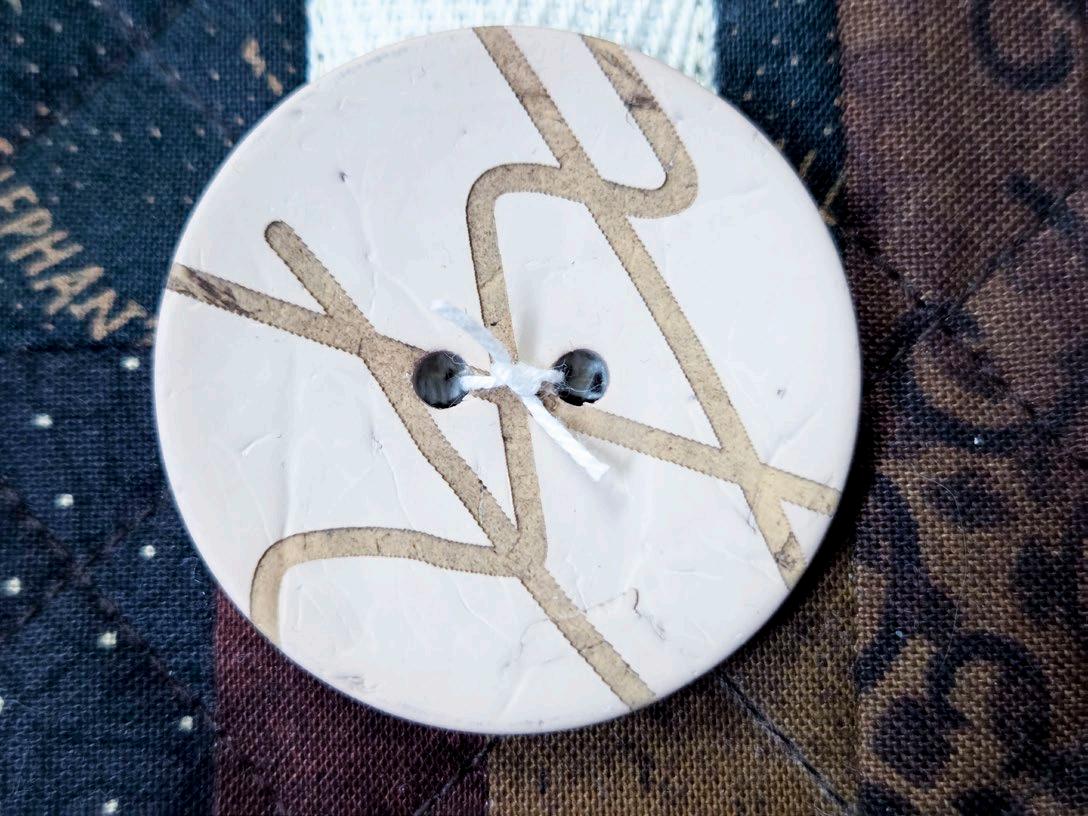
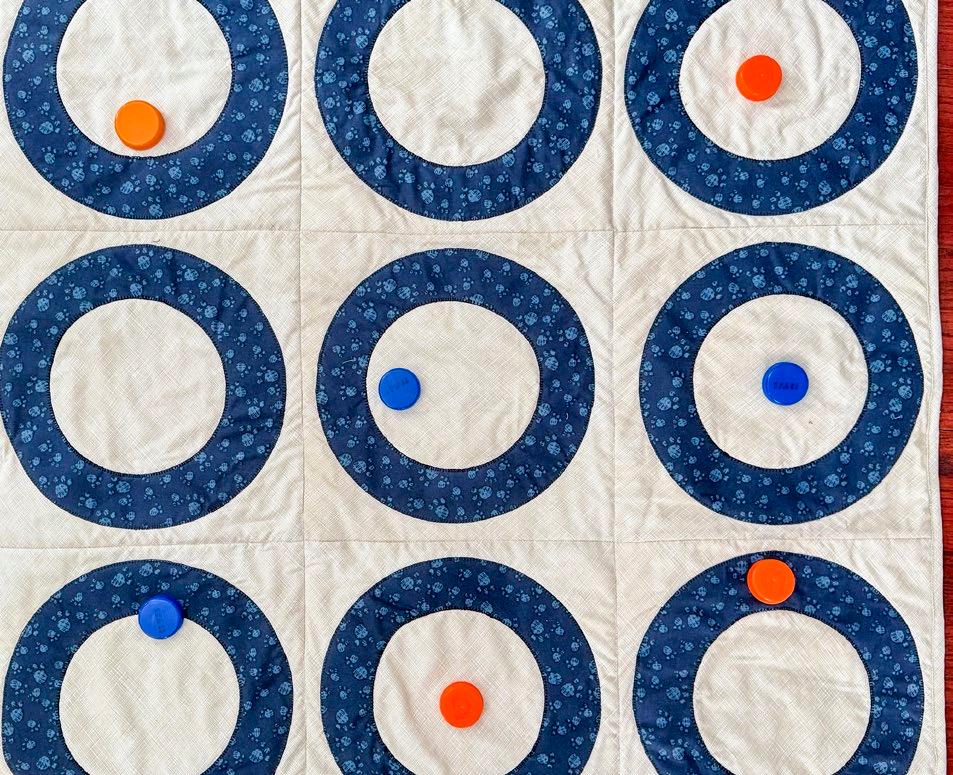
Button-Inspired Art Quilts with Applique and Free Motion Quilting
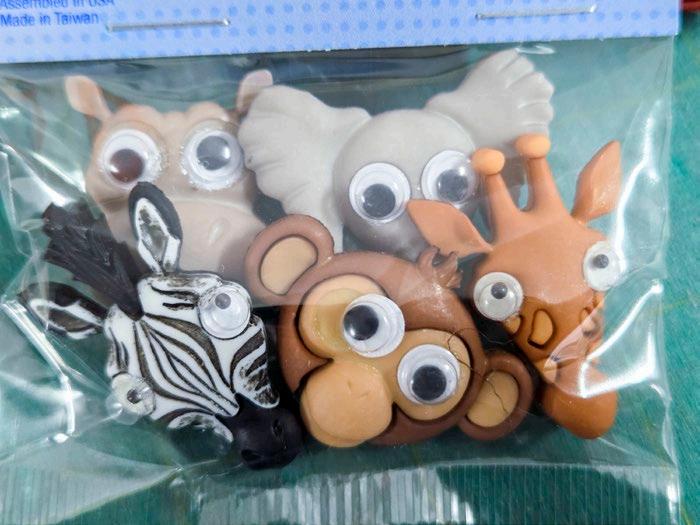
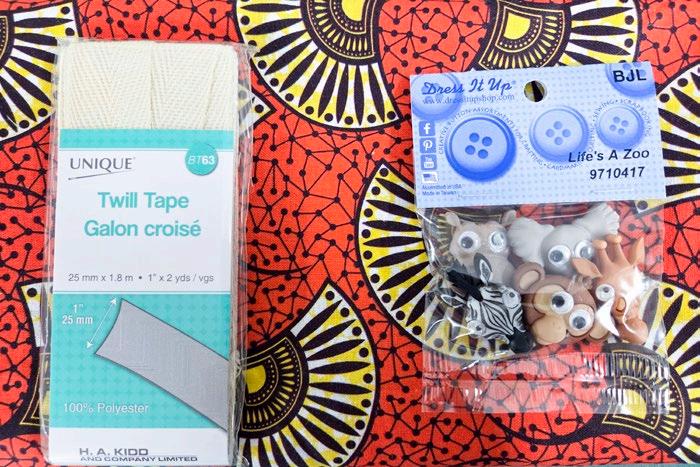
I mentioned that I'm developing a fetish for buttons! In fact, the inspiration for this project came from a pack of buttons called Life's a Zoo by Dress It Up.
I was recently in Africa, and had the good fortune to see all the animals in person that were in the package. OH MY! That gives me an idea! I could make a small art quilt to remind me of the trip! And the rest is history!
I put my thinking cap on to see how I could incorporate the buttons into my project. I don't use patterns for this type of project, and often I don't even know what it'll look like until the end! It's so much fun to have total freedom to play with supplies and let the piece grow on its own.
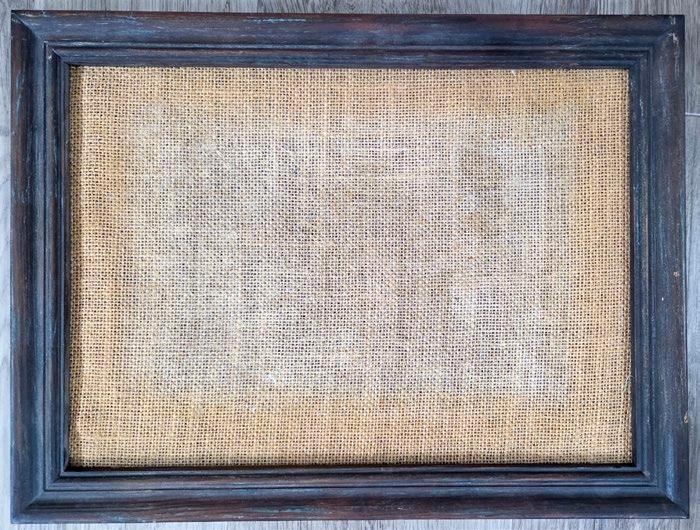
I'll walk you through some of the steps I took to show you how I work. I found this frame at the thrift store and thought it would be perfect as a base. However, I had to abandon that idea because it turned out to be too small. And I'm glad because I like my quilt even better. And QUILTsocial is a quilting blog, afterall!
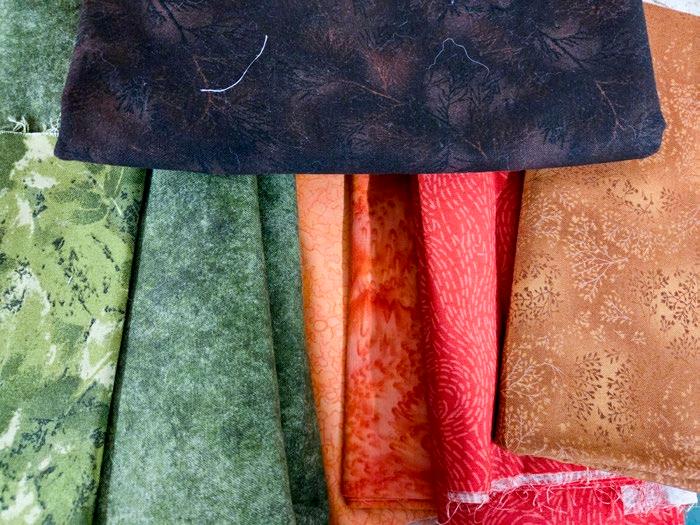
Plan B was to search my fabric stash for fabrics that would make a good "Serengeti" landscape. Notice, these are nothing special – just a range of blenders!
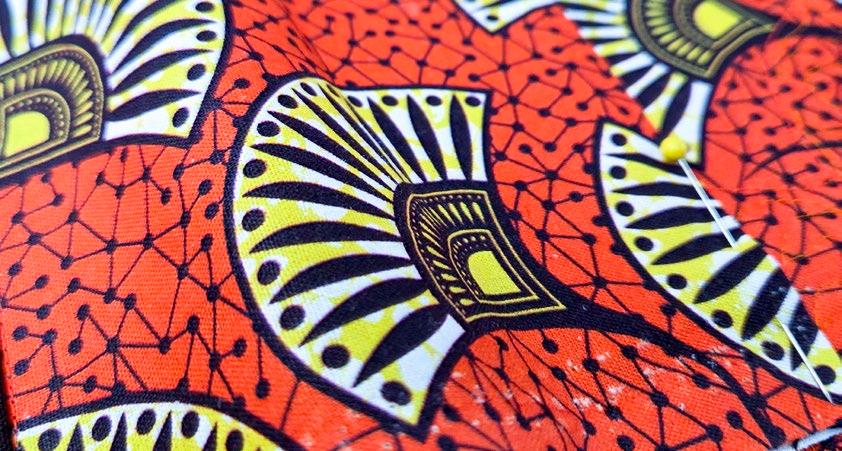
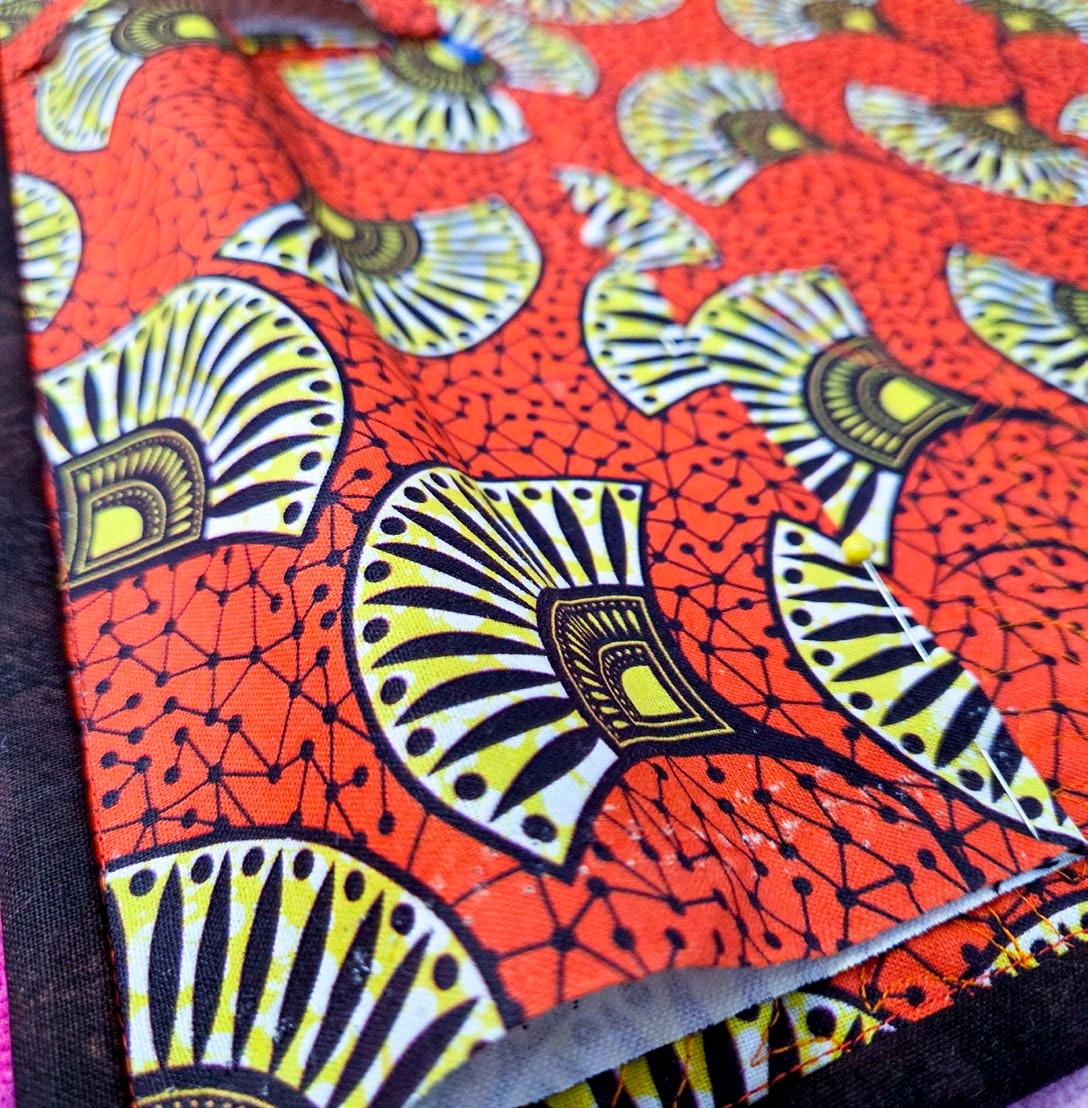
I happened to be browsing in a fabric shop and lucked out by finding this African-themed fabric. Oh my!! How can I incorporate this into my project? I bought this fabric way before I pulled the other fabrics from my stash. I bought one meter, just in case!
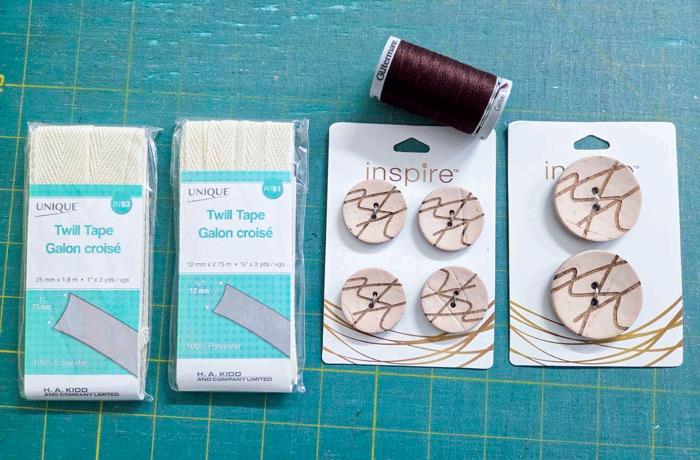
I ended up not using the Twill Tape, as sometimes less is more.
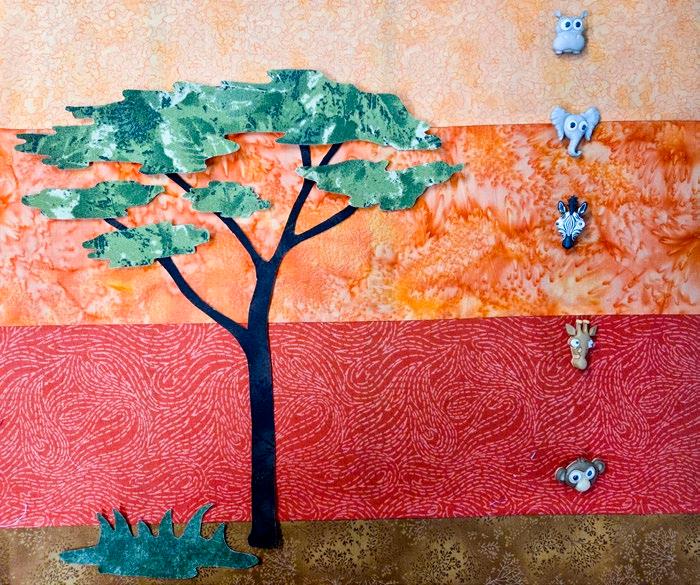
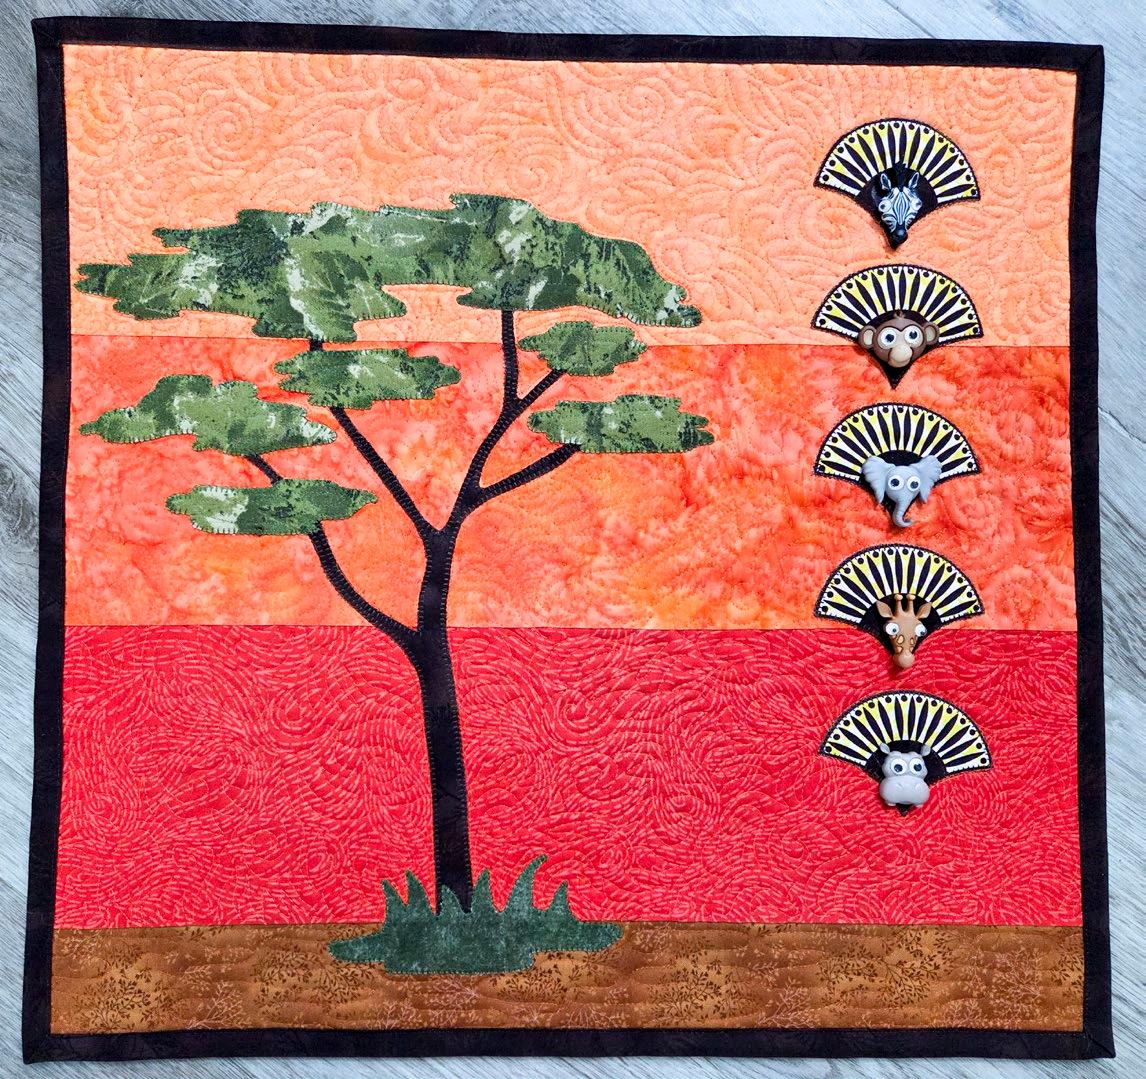
I found a pattern for the tree and reduced it to fit my wall hanging. If I reduced it even further to fit in the frame, it wouldn't have worked. To get the background, I just used three strips for the sky and one for the ground.
I laid out the buttons to see how the scale worked, and everything looks good. The piece is approximately 18" square. How do I come up with this? I used the tree as my reference point. I laid the tree out on the cutting mat, then got out a ruler and measured to see how deep and wide a background I needed. I literally trust my gut, and it's mostly right on!
I used a HeatnBond Lite fusible web on the back of the tree and other elements in the wall hanging.
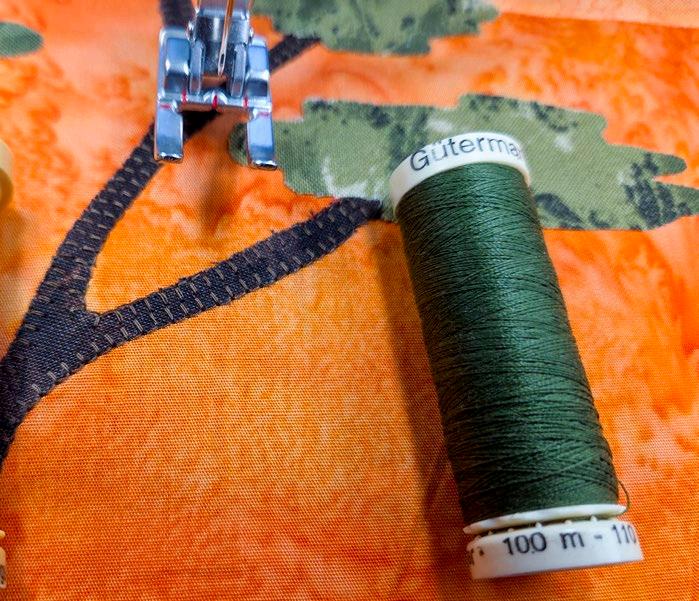
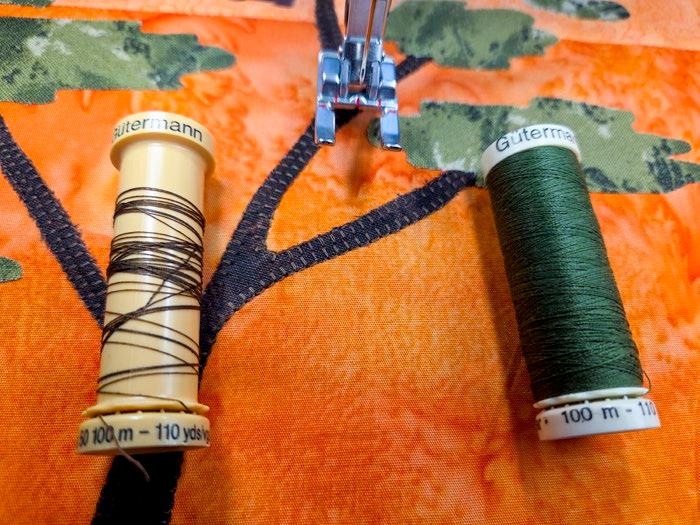
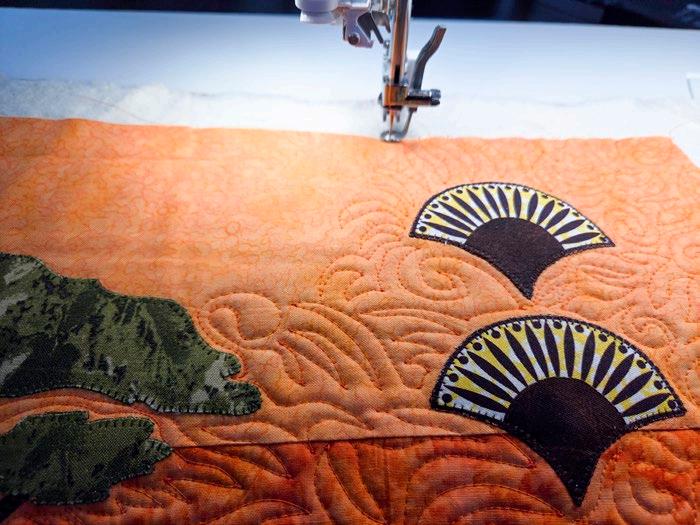
The next step was to do some appliqué stitching. I love using fusible web for appliqué, but am not a fan of leaving the edges raw. I used a small buttonhole (blanket) stitch. And I got out my assortment of Gütermann Thread to find matching thread colors.
It looks like it's time to replace the one on the left, which is cotton. I chatted about thread types earlier in this feature. The one on the right is polyester thread, and I have many spools of it as well. When I do appliqué, I pick based on color, not on the thread type. Both work equally well, and it gives me a lot of variety. I like using matte thread for the blanket stitch rather than the shiny thread I use for satin stitch.
Inspiration for this project
The frame was too small
Fabrics pulled for the Serengeti quilt
An African-themed fabric with the zoo animals
Getting a feel for the placement of the design elements
Remember to use your open-toe appliqué foot! You can see so much better, and before I knew it, the appliqué was complete!
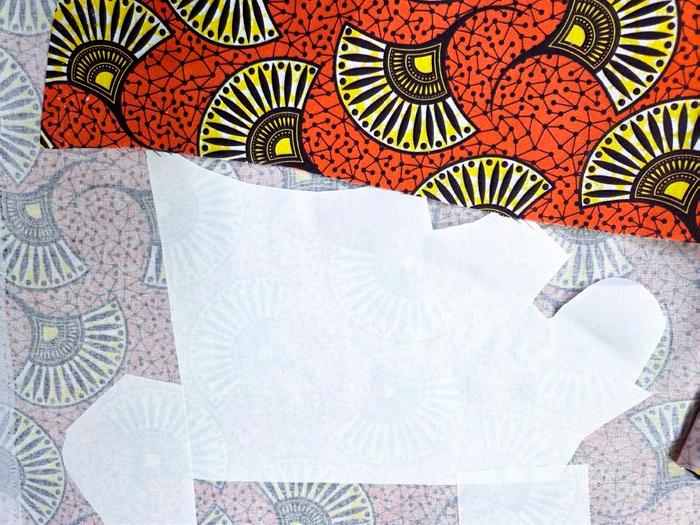
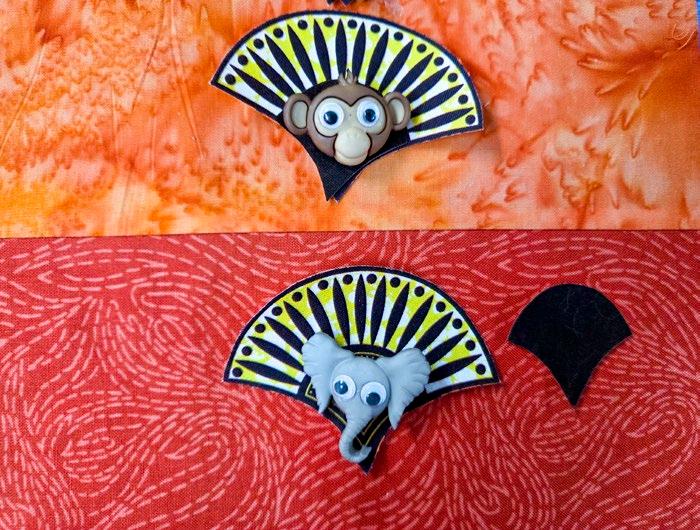
I wanted to use the African-themed fabric as a background for the buttons by fussy-cutting the fan shape.
I placed a piece of fusible web on the back of the fabric, covering five complete shapes. Then I took my applique scissors and cut the fans out.
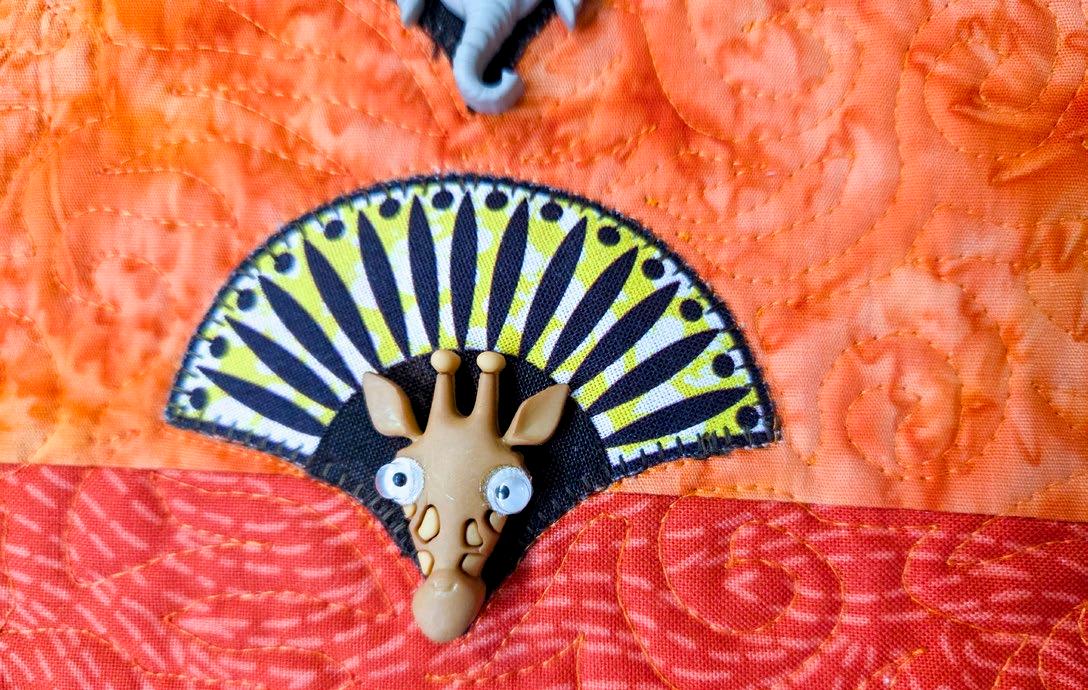
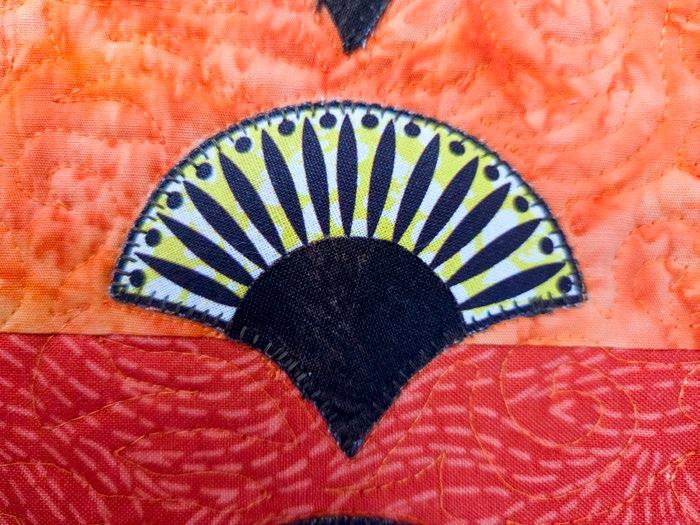
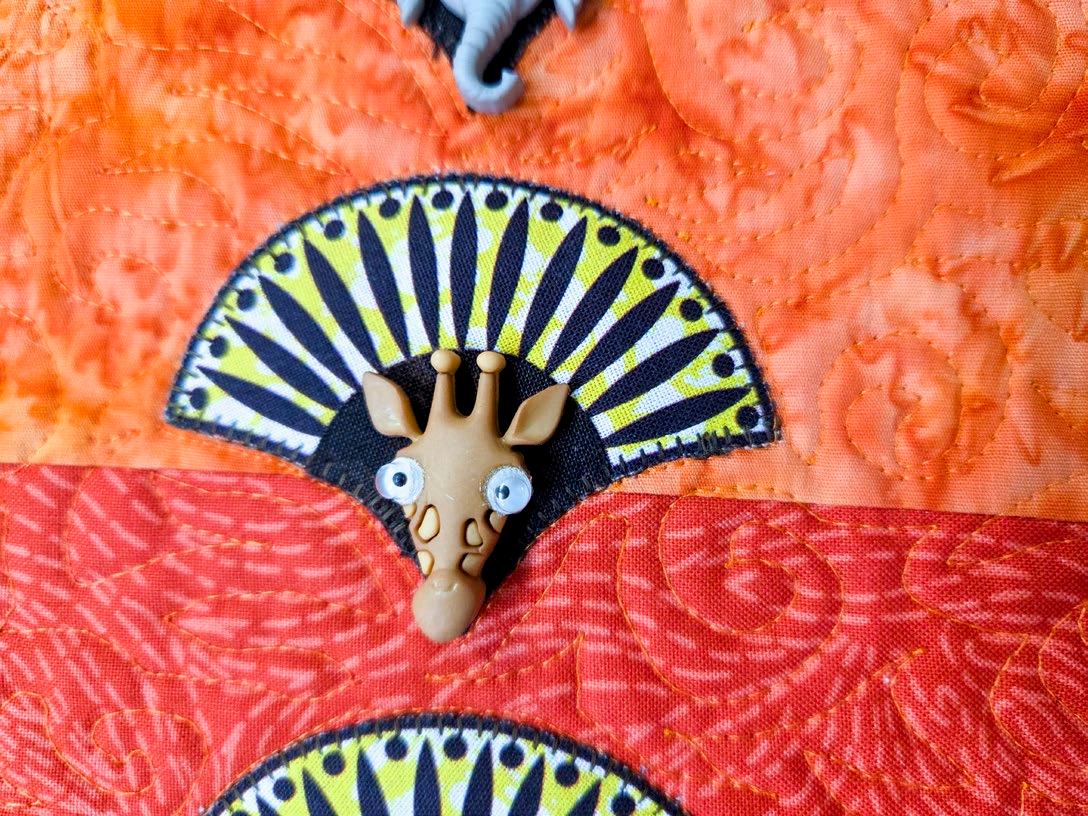
The center part of the motif was a bit busy for showcasing the animal buttons, so I added a piece of brown to ide the busy print. You can see that the fan behind the monkey has a brown backing, while the elephant does not. Was it necessary? Perhaps not, but since it's my piece, I can do what I want with it!
I positioned the shapes on the background, eyeballed the location, and fused them in place. A ruler helped ensure the shapes were straight, but, as I mentioned earlier, trust your gut! If you don't like it, then find a new position for the shapes!
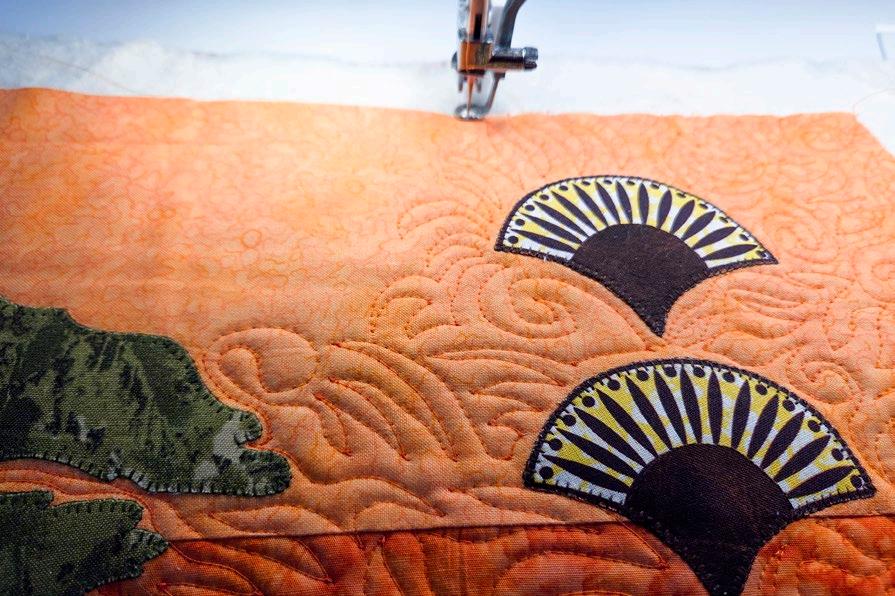
Once the shapes were fused, I used the blanket stitch to appliqué them in place. I LOVE the look!
I grabbed some batting scraps (Quilter's 80/20 Quilting Batting) left over from a previous project. Keep those scraps in the bag, or at least label them by size, because when you want small pieces, it's so easy to find them.
Since this is a wall hanging, some quilting was necessary. I'm a bit rusty with quilting on the domestic machine, so I got out some paper and doodled to warm up and test a design.
YES, for this type of background fill, I start at the BOTTOM and work my way up. Why? Because then it's easy to see where I've quilted, because it's in front of the needle, not behind, as would happen if I started at the top and worked down. The doodling helped limber me up, and I was off.
I set up the machine for free-motion quilting by attaching the appropriate foot and selecting FREE-MOTION on the PFAFF creative icon 2. I got out my quilting gloves and used the extension table, and I was good to go.
Make sure you leave a little extra backing and batting on all four sides, so you have something to hang onto as you approach the edges.
The animal buttons on the appliqué
The fan shape appliquéd to the background
Quilt batting
Doodling on paper to warm up the brain!
Free-motion quilting
Matte threads used for blanket stitching
Fusible web on the back
Next, I trimmed the quilt so I could add a hanging sleeve to the back. If you need a refresher on adding a hanging sleeve, check out this blog post, 2 questions before you sew binding by machine Then I bound the quilt and used the sewing machine to sew the entire binding on. Here's a link to help if you need it, Binding a Quilt
The hanging sleeve
The final step was to add the buttons. These are shank buttons, as we saw with the bee buttons earlier. I debated sewing or gluing the buttons on, but I liked the idea of the buttons lying flat on the fan shape, so hot glue it was! They are adorable!!! Using my little cutting tool, I removed the shank and hot-glued them on.
The animal buttons on the fan shape And here is the final project! Oh MY!!!!! I LOVE IT! And to think that this came about because of a small pack of buttons! Sometimes we overthink things. At other times, we are paralyzed by choices or by the need for direction. I like to make things up as I go and let my creativity guide me. Don't listen to others or your internal voice! Just let your hands create!
I hope you enjoyed this little trip down inspiration lane. I now have a fabulous wall hanging as a reminder of my vacation. And those googly eyes on the Dress It Up – Life's A Zoo animal buttons add a touch of whimsy that's so much fun!
My Serengeti quilt
Creating an Abstract Quiltlet with Buttons, Twill Tape, and Decorative Stitches
This next project also starts with buttons. I'm working with these Inspire buttons in two sizes. Aren't they inspiring?! Additionally, I added a 12-weight Gütermann Cotton Thread and two widths of UNIQUE Twill Tape (25mm and 12mm)
I LOVE making small abstract art quilts, also called quiltlets. Why? They're a great way to learn a new technique, get comfortable with "winging it," and grow as a quilter because you're playing with color, value, shapes, embellishments, and, overall, it's a great learning experience. The best news is that there's no right or wrong with the quiltlets. You make the design up as you go. While I appreciate that this can be a challenge for some quilters, just let the quilt happen. Don't overthink the process, don't get caught up in what is right or wrong, just do it!!!!
One of the first things I love to do when I start an abstract quilt is to make the background fabric from scraps.
In this instance, I grabbed scraps from my brown scrap box in various sizes, which is one reason I don't cut my scraps into predefined shapes. I love creating fabric from "nothing." I randomly join the pieces until I have a section large enough to sew to another section. Trim any wonky edges so they join easily. There's no rhyme or reason, and you certainly won’t "match" the colors. The more, the merrier, and the better the colors blend.
I've used these scrappy backgrounds for lap quilts (I use larger scrap pieces), wall hangings where the scraps create a fantastic background for applique, journal covers, or quiltlets like the one I'm making.
How did I determine the size? I had a scrap of batting left from the quilt project, and that became my reference as I made the scrappy fabric to fit it. It eventually got trimmed to 8½" x 11", a perfect size to try new techniques; if you don't like it, you haven't wasted much, and it doesn't take much time to finish. The batting was longer than the fabric, so I kept the leftover to use for another small project, like a mug rug or another scrappy piece.
Once you have the scrappy background, it's time to see how the embellishments work. When choosing embellishments, find one thing that you’re excited about.
I always have that special embellishment BEFORE I start the background. A misplaced key to our mailbox was the starting point for one project. In this case, I found those amazing Inspire buttons and built the project around them. Shop at your local fabric shop, or dig into your stash, but there are loads of things that can inspire these projects. I had a tough time choosing these particular buttons because there were so many amazing options!
I LOVE using diagonal lines instead of straight ones; they feel more dynamic, but horizontal and vertical lines work well, too. Or you may not want to be linear at all and just wing the background pieces. The beauty is that there's no right or wrong, and there are certainly no quilt police to harass you.
Getting a feel for the embellishments
The first step to completing the quiltlet was to quilt it, and I decided to quilt it with a 1" diagonal grid. I marked the first line with the Clover Chaco Liner. I mostly use the white, as this chalk is extremely easy to remove by wiping it gently with a damp cloth or brushing it with your hand. And the fact that it stays until you finish is a bonus. You can never have enough of these Clover Chaco Liners (white), and you can get refills, too.
Twill tape, Inspire buttons, and a spool of brown thread
Making fabric from scraps
The scrappy fabric background
I used a Gütermann 100% polyester thread in the top and the bobbin. I have many spools of Gütermann thread, and I find it easy to use and very reliable for quilting, whether free-motion or straight-line. It's my go-to thread. As I mentioned earlier, I love it because it's readily available, comes in many different spool sizes and colors, so there’s always one that meets my needs. And for quilting or most things I do, it really doesn't matter if I use polyester or cotton.
And in case anyone is wondering about that colorful background, I started using an old beach towel on my ironing surface, and I LOVE it. It gives me a nice grip to hold things in place and a bit of cushion when pressing textured items.
I've also mentioned numerous times that I'm a lazy quilter, and if I can get the sewing machine to do the work for me, I let it. I'm working on the PFAFF creative icon 2, and I used the projection system to assist in stitching the subsequent lines. In this photo, the stitch guide is white, and the projection line is red. I can quickly move that projection line to the right or left of the needle by up to 30 mm. That's way faster than marking and removing lines! You need to mark the first line as I did, but then let the sewing machine do the rest!
Here’s the quiltlet after the quilting is complete. At this point, I trimmed it to 8½" x 11".
Now it's time to work on the fun stuff –the embellishments, and this is where you can go crazy! Do what you want, and if you can’t sew or embellish with the sewing machine, there are loads of options for attaching items by hand or with glue. The items you add do not need to be fabric; think buttons, buckles, paper, mementos, and so much more.
I'm modifying the twill tape with decorative stitches to create my own ribbon. I used the Gütermann 12-weight thread. This thread is quite thick, but it went through my needle without a hitch, and I stitched out all the decorative ribbon I needed without a single issue. As I said, Gütermann thread is reliable, and that's what I want when I'm working. By the way, I used the 100% polyester thread in the bobbin.
The twill tape is not stable due to its weave, so I placed it on a layer of watersoluble stabilizer, and it worked like a charm.
I chose a decorative stitch for creative icon 2 and ensured the width was appropriate for the twill tape. The tape is 12 mm wide, and I used an 8.4 mm wide decorative stitch.
It was super easy: instead of using the foot pedal, I used the Start/Stop function, and when I wanted to end a motif on the twill tape, I selected the Scissors function to have creative icon 2 end the current stitch and cut the threads.
I precut the ribbon to the lengths I needed (plus some extra) and made five separate pieces. You'll see them in a minute on the finished project. Remember, you can use the Stitch Preview in projection mode on the creative icon 2 to see how the stitch looks on the twill tape BEFORE you start stitching.
I trimmed away the excess stabilizer and rinsed the ribbon in warm water, which quickly dissolved the stabilizer. What is nice about the stabilizer is that it gave the ribbon some body. If I didn't want that body, I could have rinsed it more. I used a straight stitch and a matching thread on top to topstitch the ribbons in place.
Marking the quilting line with a Chacoliner
Brown thread for quilting
Using projection lines to quilt grid patterns
The quilting on the quiltlet
Stitching a decorative stitch on twill tape
The decorative stitches on the twill tape
I used the wider twill tape to create a design in the top left (sorry – no picture, but you’ll see it on the finished project) and stitched it in place as well. Once the twill tape was secure, I trimmed the edges and then bound the quilt, adding two squares to the top corners to serve as hangers.
The
To attach the Inspire buttons, which I had in two sizes, I used crochet cotton, threaded it through, tied a knot in front, and cut the ends.
And here is the finished quiltlet. I LOVE it. If I were to change anything, I might eliminate the three small buttons, as you know what I always say – less is more! But look how dressed up that twill tape is with the Gütermann 12-weight thread and the decorative stitch. Imagine the possibilities for creating decorative ribbons of any kind.
What gets me excited about this kind of quilt is its small size and the freedom to do anything I want without worrying about making a mistake or whether others will like it. Experimentation and learning – that makes me happy!
The other advantage of small projects like this is that you learn about color and design without even realizing it! And for those that say, why would I make something that I don't know what to do with. Hmmm --- think about how many essays or school projects you did that meant absolutely nothing, but you learned a lot from writing them! Sometimes, we need to remember how fun it was as children to play with no rules!
Those Inspire buttons, in two sizes, started it all, and I found so many other Inspire buttons that just made my heart sing! Check out your local fabric shop or online, or dig into your button stash and see what you can come up with. Try something even smaller if you wish. Don’t forget the excellent Gütermann thread, and think of all the possibilities with that UNIQUE Twill Tape.
Thanks for following my adventures, as I explored some new (to me) products and techniques. Now it's your turn to go, have fun, and see what you can come up with!!!
Have a great day!
Ciao!!
Elaine Theriault crazyquilteronabike.blogspot.com
The buttons are secure with crochet cotton
abstract quiltlet
Two fabric squares create the hanger
Exclusive Ribbon Stitch Techniques on the PFAFF creative icon 2
We’re diving into one of the most unique and delightful features of the PFAFF creative icon 2, the Exclusive Ribbon Stitches. These stitches aren’t just decorative, they’re dimensional, eyecatching, and oh-so-fun to sew. Whether you're adding elegance to a garment, detail to a project, or just playing with texture, ribbon stitches bring something truly special to your creative toolbox.
So, what makes ribbon stitches so exciting? This exclusive technique allows you to guide narrow ribbon or lace through specially programmed stitch movements that fold, twist, and shape the ribbon right into the fabric. And the result? Raised, textured designs that add movement and flair to your sewing like nothing else.
We’ll be exploring all three main techniques: Single, Double, and Triple Ribbon Stitches, plus a bonus on how to stitch ribbon in the hoop.
Before we dive into the creative side of Ribbon Stitches, we need to cover a few technical details. This technique differs significantly from standard decorative stitching. It’s essential to understand what’s required and how the machine will interact with the ribbon.
If you’re trying Ribbon Stitches for the first time, or even just need a quick refresher, the built-in Help Center on the PFAFF creative icon 2 is your go-to resource. Just tap the Help icon on the main screen and navigate to:
Sewing Techniques > Exclusive Stitch Techniques > Ribbon Stitches (they’re the first three options in the category).
You’ll find step-by-step visual tutorials that walk you through everything from material prep and stabilizing, to foot selection and stitch setup. The Techniques and Tutorials section also lets you preview how each stitch interacts with the ribbon before you even start stitching.
The PFAFF creative icon 2 embroidery machine sewing and embroidery machine 10.1-inch capacitive touchscreen
The PFAFF creative icon 2 Exclusive Ribbon Stitches samples: single ribbon stitch, double ribbon stitch, triple ribbon stitch, single ribbon stitch in the hoop
Close-up of the 10.1-inch capacitive touchscreen on the PFAFF Creative Icon 2 sewing and embroidery machine showing the Techniques and Tutorials section under Sewing Techniques.
The screen of the PFAFF creative icon 2 sewing and embroidery machine displays the Exclusive Stitch Techniques under the “Techniques and Tutorials section
Olesya Lebedenko
Photos by Olesya Lebedenko
Close-up of the PFAFF 2A Fancy Stitch Foot attached to the machine, sewing on denim fabric with IDT system disengaged.
Each stitch is programmed to interact with the ribbon in its own unique way, some create gentle zigzags or elegant waves, while others form loops, braids, or even laced textures. The machine guides the stitch flow beautifully while your ribbon becomes the star of the show, adding graceful folds and dimensional shapes right into your fabric.
This isn’t standard sewing; some critical setup steps ensure your project turns out clean and professional.
• Foot: You’ll need the 2A Fancy Stitch Foot. It’s specifically designed for dimensional techniques like ribbon work.
• PFAFF IDT System: Disengage it. The Ribbon Stitch technique requires the fabric to move in directions incompatible with the IDT system.
• Fabric: Use stabilized cotton or denim. The fabric must be firm enough to handle ribbon manipulation without stretching or puckering.
• Ribbon or Lace: Choose lightweight ribbon or lace between 5 mm (¼") and 10 mm (3/8") wide. Satin ribbon is a great starting point.
• Needle Position: Set your machine to Needle Down for consistent placement and cleaner results during start/stop points.
Close-up of the 10.1-inch capacitive touchscreen on the PFAFF Creative Icon 2 sewing and embroidery machine with active recommendations and features.
Now that we’re set up, let’s find and load our stitches.
From the Welcome screen, tap Sewing Mode. Then click the Load Stitch icon and scroll to Category #8, Techniques. You’ll notice we have seven different options, and ribbon stitches are right at the top. You’ll find:
• Single Ribbon Stitches #8.1
• Double Ribbon Stitches #8.2
• Triple Ribbon Stitches #8.3
Ribbon stitches bring true depth to your projects: no extra steps, no handwork, and no extra embellishments required after stitching. They’re perfect for garment accents and decorative panels, bags and accessories, art quilting details and crazy quilt blocks, statement borders and trims
Time to get our ribbons ready! We’ll have a lot of fun exploring these beautiful stitches.
Close-up of the PFAFF creative icon 2 screen displaying on-screen instructions for Single Ribbon Stitches.
Close-up of the PFAFF creative icon 2 screen displaying on-screen Single Ribbon Stitches Menu 8.1 open under Category 8: Techniques.
Exclusive SINGLE Ribbon Stitch Techniques on the PFAFF creative icon 2
We’ll take our first step into the world of dimensional embellishment using Single Ribbon Stitches.
What You’ll Need
• Foot 2A Fancy Stitch Foot
• Fabric A 10” x 2½” strip of stabilized cotton or denim
• Ribbon or Lace 15” length
TIP For single ribbon stitches, add about 5" to your fabric length to estimate how much ribbon you’ll need.
Let’s set up the machine. From the Welcome Screen, tap Sewing Mode, then click the Load Stitch icon. Scroll to Category #8 – Techniques, and select 8.1 – Single Ribbon Stitches. To load a stitch, simply double-tap on the one you’d like to use.
For this sample, I picked Stitch #8.
Attach the 2A Fancy Stitch Foot, and make sure the “Needle Down” feature is activated and IDT system is disengaged. You can check your active features and recommendations in the upper-left corner of the screen.
And here’s one more brilliant thing I have to highlight, something I absolutely love about the PFAFF creative icon 2. When planning your project and wondering about the best stitch width or setup, you don’t need to open a manual or search the Help Center. Just tap the stitch, then tap the “?” icon in the top right corner, and tap the stitch again. A pop-up window will appear with all the essential recommendations right there on the screen!
Ribbon stitches work a little differently than regular decorative stitches: you’ll guide the ribbon manually into place as the machine stops, and then continue stitching in short steps.
To help keep your stitching straight and centered, draw a guideline on your fabric using chalk or a water-soluble marker.
Another helpful tip: use the built-in ruler on the PFAFF accessory tray to double-check the width of your ribbon or lace. Make sure it fits within the recommended range for your selected stitch, this helps ensure smooth movement and beautiful, even results.
Exclusive ribbon single stitch #8 with 5 mm lace and Stitch #2 samples on denim using PFAFF creative icon 2.
Close-up of the PFAFF creative icon 2 screen showing selected Stitch 8 from Category 8.1 –Single Ribbon Stitches, with recommendations for Foot 2A and active features like Needle Down and Tie-Off Beginning.
Close-up of the 10.1-inch capacitive touchscreen on the PFAFF Creative Icon 2 sewing and embroidery machine with Single Ribbon Stitch instructions pop-up help window
Presser foot 2A aligned with a marked chalk line on denim fabric, preparing for single ribbon stitch on the PFAFF creative icon 2 sewing machine.
Guiding the ribbon in place during the pause between stitch sections. The PFAFF creative icon 2 is shown stitching on denim using the 2A Fancy Stitch Foot, with a lace ribbon being manually positioned at the correct angle for the next step.
When it stops a second time, fold the ribbon over the previous stitching, firmly but gently, making sure it sits directly in front of the needle. Press Start and continue.
We’re all set and ready. Now just let the PFAFF creative icon 2 work its magic! One more fantastic feature of these exclusive stitches—you don’t even need to touch the foot pedal. Simply press the Start/Stop button and follow the prompts on screen.
The machine will sew a short section and then automatically pause. That’s your cue to guide the ribbon: place it in front of the needle at the same angle as the initial part of the stitch. Press Start again to continue.
Close-up of PFAFF Creative Icon 2 sewing 2A Fancy Stitch Foot after the first segment of ribbon stitch is sewn, with the machine paused for the next step.
Repeat this process, placing and folding the ribbon as the machine pauses, until you reach the end of your design.
The 2A Fancy Stitch Foot gives you a clear view of each step, and as seen in the last photo, from behind the foot you can admire how beautifully the ribbon is shaped with each repeat.
That’s a wrap for this ribbon stitching session! You’ve just added a beautiful layer of dimension using the Single Ribbon Stitch—and all without ever touching the foot pedal. The PFAFF creative icon 2 takes care of the movement while you guide the ribbon into place, one graceful fold at a time. It’s a great moment to explore a few other stitches in this category. Each one has its own rhythm and flow. For those “dancing” designs like Stitch #2 or #15, a simple satin ribbon highlights the beauty of the stitch path. If you’re drawn to using fancy lace instead, go with a narrower one—nothing wider than 3 mm. That way, the lace adds charm without hiding the elegant curves of the stitch.
Decorative lace trim positioned on PFAFF creative icon 2 ruler plate before stitching, measured to approx. 5 mm width.
PFAFF creative icon 2 paused with a stitch line showing the angle to guide ribbon placement before folding.
Folding ribbon over previous stitching under the 2A Fancy Stitch Foot on the PFAFF creative icon 2 for the next pass of the Single Ribbon Stitch
Back view of 2A Fancy Stitch Foot showing shaped ribbon formed by the repeated Single Ribbon Stitch # 8.1.8 pattern on denim.
Exclusive DOUBLE Ribbon Stitch Techniques on the PFAFF creative icon 2
Think of it as going from a solo performance to a graceful duet, two ribbons dancing together across your fabric, crossing, folding, and layering to create a beautifully intertwined effect.
of
Single ribbon stitches are all about flow and rhythm following the stitch path with one ribbon, folding it back and forth to form elegant loops or zigzags. It’s perfect when you want a clean, structured look, or when working with a standout ribbon that deserves the spotlight.
Double ribbon stitching, on the other hand, brings in a second ribbon, and with it, a whole new layer of creativity. The second ribbon is placed over the first and then both are manipulated in an alternating pattern as the stitch repeats. The result? A braided or woven illusion, often resembling lace or trim that looks far more intricate than it is to create.
How to set up for Double Ribbon Stitches
The machine settings stay the same as before, so no extra setup is needed to move from single to double ribbon stitches. From the Welcome Screen, go to Sewing Mode, tap the Load Stitch icon, and scroll to Category 8, Techniques. Select 8.2, Double Ribbon Stitches, then double-tap the stitch you want to use. For this project, I chose Stitch #10.
Attach the 2A Fancy Stitch Foot, make sure the IDT system is disengaged, and activate the Needle Down feature. You can always confirm which features are currently active and what’s recommended for your stitch by checking the top left corner of the screen.
And here’s what makes this technique so user-friendly: the PFAFF creative icon 2 pauses automatically at just the right points so you can position and fold your ribbons with confidence, no guessing required. Simply press the Start/Stop button and follow the rhythm of the stitch as the machine does the guiding.
What You’ll Need
• Foot: 2A Fancy Stitch Foot
• Fabric: One 10” x 2½” strip of stabilized cotton or denim, with a guideline drawn using chalk or a water-soluble marker.
• 2 Ribbons: 3/16” x 16” each, same or contrasting, depending on your design
TIP For double ribbon stitches, it’s a good idea to add about 6” more than your fabric length for each ribbon. That gives you more flexibility and comfort while folding the ribbons into place.
Let’s take a quick look at what our stitch settings show us for Double Ribbon. Tap on the stitch number, then hit the question mark (?) at the top right corner. Tap the stitch again, and up comes the same handy pop-up with all the details, ribbon width, placement notes, and step by step suggestions. It’s the same simple check-in, but now tailored to our new technique.
Close-up of the PFAFF creative icon 2 screen showing selected Stitch 8 from Category 8.2, Double Ribbon Stitches, with recommendations for Foot 2A and active features like Needle Down and Tie-Off Beginning.
Close-up
PFAFF Creative Icon 2 sewing 2A Two samples of Exclusive Double Ribbon Stitches on denim using the PFAFF creative icon 2. The left shows a crisscrossed yellow ribbon stitch #5 with decorative built-in accents, and the right features ribbon stitch #3 pink and white sheer ribbons.
Close-up of the 10.1-inch capacitive touchscreen on the PFAFF Creative Icon 2 sewing and embroidery machine with Double Ribbon Stitch instructions pop-up help window
We’re ready to go, and yes, we’re still enjoying the luxury of stitching without the foot pedal! Just press the Start/Stop button and follow the on-screen pauses. The machine will sew the first section and pause. That’s your cue to place the first ribbon in front of the needle, aligned at the same angle as the initial part of the stitch. Press Start to continue.
When the machine stops again, place the second ribbon in front of the needle, crossing it over the first. Press the Start button again.
Next pause: fold the second ribbon over itself so it lies in front of the needle. Keep going by pressing Start.
the
From here on, the machine will continue to alternate pauses for ribbon placement. Each time it stops, fold the back ribbon over to the opposite side so it lies in front of the needle and press Start to sew. The ribbons take turns crossing over, forming a mirrored, dimensional pattern, one fold at a time. Repeat this process, folding and stitching as prompted, until your design is complete.
The 2A Fancy Stitch Foot offers a clear view of every step. And as you can see from the photo taken from behind the foot, you get a perfect look at how beautifully the ribbons are shaped with each repeat.
Close-up of PFAFF Creative Icon 2 sewing 2A Fancy Stitch Foot after the first segment of double ribbon stitch is sewn, with the machine paused for the next step.
Guiding the ribbon in place during the pause between stitch sections. The PFAFF creative icon 2 is shown stitching on denim using the 2A Fancy Stitch Foot, with the first red ribbon being manually positioned at the correct angle for the next step.
Placing
second ribbon across the first under the 2A Fancy Stitch Foot, ready to continue the Double Ribbon Stitch on denim.
Machine pause after stitching the second ribbon, showing ribbon placement before folding in the Double Ribbon Stitch.
Folding the second ribbon over itself and positioning it in front of the needle under the 2A Fancy Stitch Foot on denim.
That brings us to the end of the double ribbon stitch demo!
You’ve just added another layer of dimension to your sewing, using the Exclusive Double Ribbon Stitch and you did it all without touching the foot pedal! The PFAFF creative icon 2 handled the stitch path while you simply guided the ribbons, one fold at a time.
It’s a great moment to check out a few more stitches in this category. Each one has its own rhythm and motion. For the more ornamental movement stitches like Stitch #5 or #6, try using two ribbons in the same color and contrast thread to highlight the stitch path. If you’re leaning toward using fancy laces instead, keep them under 6 mm wide and try Stitch #8 or #11. This way, you let the lace complement, not cover, the curves and twists of the stitch design.
Folding the red ribbon across to the opposite side during the double ribbon stitch with the PFAFF creative icon 2.
Side view of 2A Fancy Stitch Foot in up position showing folding the ribbon to form the repeated Double Ribbon Stitch # 8.2.10 pattern on denim.
Back view of 2A Fancy Stitch Foot showing shaped ribbon formed by the repeated Double Ribbon Stitch # 8.2.10 pattern on denim.
Exclusive TRIPLE Ribbon Stitch Techniques on the creative icon 2
We’re stepping up both the complexity, and the texture with the PFAFF creative icon 2 Exclusive Triple Ribbon Stitches. This category introduces a third ribbon, adding more room for creativity in color, layering, and dimension.
But here’s what really sets it apart: unlike previous categories, Triple Ribbon Stitches are matched to specific ribbon widths. Depending on the stitch you select, you can use ribbons ranging from 1/8" [3mm] all the way to 3/8" [10mm]. It’s a perfect chance to dive into that drawer of ribbons you’ve been saving and finally put them to use!
Before we begin, a quick setup reminder: it’s just slightly different from before, but still easy to follow.
From the Home Screen, tap Sewing Mode, then select the Load Stitch icon. Navigate to Category 8: Techniques, and scroll to section 8.3, Triple Ribbon Stitches. For thi’s demo, I chose Stitch 8.3.8.
What You’ll Need
• Foot: 2A Fancy Stitch Foot
• Fabric Strip: 10" x 2½" of stabilized cotton or denim, with a guideline marked using chalk or a watersoluble marker to keep your stitching straight.
• Ribbons: Three ribbons, each 5/16" [8mm] wide and about 17" long.
Before stitching, attach the 2A Fancy Stitch Foot, engage Needle Down, and disengage the IDT system. These settings give you full visibility and control as you place and fold each ribbon.
If you need a refresher or details for your selected stitch, tap the question mark (?) icon in the top-right corner. You’ll get instant, on-screen recommendations tailored to the stitch, including ribbon size, stitch path, and setup notes.
Close-up of the PFAFF creative icon 2 screen showing selected Stitch 8 from Category 8.3 –Triple Ribbon Stitches, with recommendations for Foot 2A and active features like Needle Down and Tie-Off Beginning.
Close-up of the 10.1-inch capacitive touchscreen on the PFAFF Creative Icon 2 sewing and embroidery machine with Triple Ribbon Stitch instructions pop-up help window
We’re ready to stitch, and once again, we get to enjoy one of the best parts of these exclusive stitches: no foot pedal needed. Simply press the Start/Stop button and let the machine guide the process with perfectly timed pauses.
The machine will sew the first short section and then stop. This pause is your cue to place the first (brown) ribbon in front of the needle, aligning it with the angle of the stitched path you see on the fabric. Press Start to continue.
After the next pause, you’ll add the second (teal) ribbon, placing it in front of the needle and crossing it over the first. This sets the base for the layering effect. Press Start again.
Three samples Triple Ribbon Stitch 8.3 #4, #8 and #10 sewn on denim using the PFAFF creative icon 2, shown with sewing tools on a white wood background.
Here’s a small but important TIP to keep in mind: with the Needle Down feature activated, the presser foot automatically lifts slightly at each pause. This gives you just enough space to guide the ribbons into place cleanly and precisely. But if you’re working with textured ribbons like velvet or thicker trims like gimp braids, you might need a bit more room. That’s where one of my favorite PFAFF creative icon 2 features comes in, tap the Foot Up button, and the foot will raise halfway, while the needle stays down. This extra lift helps you position your ribbon with better control and visibility.
Just be careful not to press the Start/ Stop button twice in a row, doing so will lift both the foot and the needle, and that might shift your ribbon out of place.
PFAFF creative icon 2 paused with a stitch line showing the angle to guide second ribbon placement.
When the machine pauses a third time, it’s time to bring in the final element: your third (pink) ribbon. Position it crossing over the second ribbon, keeping it neat and angled just right in front of the needle. This completes the initial placement. Press Start to continue. Now the folding sequence begins. The machine will pause after stitching. Start by folding the first (brown) ribbon (the one furthest back) across to the opposite side. Press Start.
Next, fold the second (teal) ribbon over in the same manner. Press Start again. Fold the third (pink) ribbon across and continue. This completes one cycle of the fold sequence.
Pressing the presser foot button to activate the half-lift presser foot on the PFAFF creative icon 2 control panel for better ribbon placement.
Placing the second ribbon across the first under the 2A Fancy Stitch Foot, ready to continue the Triple Ribbon Stitch on denim.
Placing the third ribbon (pink) across the second (teal) and parallel the first (brown) ribbon under the 2A Fancy Stitch Foot, ready to continue the Triple Ribbon Stitch on denim.
Folding the first (brown) ribbon over the third (pink) and positioning it in front of the needle and parallel the third (teal) ribbon under the 2A Fancy Stitch Foot on denim.
Folding the third (teal) ribbon over the first (brown) and positioning it in front of the needle and parallel the second (pink) ribbon to complete one cycle of the fold sequence under the 2A Fancy Stitch Foot on denim.
As you continue, the folding sequence follows a simple rule that keeps everything tidy and controlled: always fold the back ribbon on the side with two ribbons. You should never have all three ribbons lying on the same side at once. This rhythm of place, cross, and fold keeps the stitch balanced and ensures the ribbons form a clean, dimensional braid pattern as the machine progresses.
The 2A Fancy Stitch Foot offers a clear view of every step. You can always peek behind the foot to see how beautifully each set of ribbons is shaped as the stitch repeats, creating a neat, dimensional ribbon braid.
That wraps up our exploration of Exclusive Triple Ribbon Stitches. You’ve now seen how three ribbons work together to create bold, dimensional texture, all guided step by step by The PFAFF creative icon 2. Take a moment to try different ribbon widths and combinations; even small changes can significantly alter the stitch's appearance.
Close-up of PFAFF Creative Icon 2 sewing 2A Fancy Stitch Foot after the first segment of triple ribbon stitch is sewn, with the machine paused for the next step.
Folding the third (teal) ribbon over the first (brown) and positioning it in front of the needle, parallel to the second (pink) ribbon, under the 2A Fancy Stitch Foot on the PFAFF creative icon 2, sets up the next step in the Triple Ribbon Stitch on denim.
Side view of 2A Fancy Stitch Foot in up position showing folding the ribbon to form the repeated Triple Ribbon Stitch # 8.3.8 braid pattern on denim.
Ribbon Stitching in the Hoop on the PFAFF creative icon 2
So far, the folded ribbon textures we’ve explored were created by gently guiding the fabric by hand in Sewing Mode, one careful move at a time. But what if I told you that with the PFAFF creative icon 2, you can let the machine take care of the stitching path and spacing, while you focus fully on folding the ribbon?
That’s the beauty of stitching in the hoop. Manual guiding often introduces small shifts; even the steadiest hands can produce a wobbly line when trying to stitch long borders. By hooping the fabric and programming the stitch sequence in Embroidery Mode, the fabric stays in place, and the embroidery unit stitches a perfectly straight row. Fold the ribbon into place when prompted. No more dancing stitch lines, just consistent spacing and smooth flow from start to finish.
In this article, we’ll explore how to turn a single ribbon stitch motif into a full decorative row using the Sequence Creator on the PFAFF creative icon 2.
What You’ll Need
• Foot 6D The Dynamic Spring Foot
• Stabilizer 12” x 17½” PFAFF Cut-A-Way Light soft and comfortable to leave inside the garment
• Hoop Elite Hoop 260 x 200 mm
• Fabric One 12” x 2½” strip of prestabilized cotton or denim
• Ribbon 3/16” wide and about 18" long
• Pins or Adhesive spray To secure the fabric strip to the stabilizer, use pins or Odif 505 Temporary Adhesive Spray for a smooth, no-shift hold
Let’s begin by attaching the embroidery unit and switching on the PFAFF creative icon 2. On the welcome screen, click Embroidery Mode
Once the machine recognizes the embroidery unit, a message will appear prompting you to clear the embroidery arm and, if the hoop is already attached, remove it. Click OK, and the machine will calibrate itself, gently moving the arm into position.
Next, attach the 6D The Dynamic Spring Foot.
Just a gentle reminder—it’s recommended to use the straight stitch plate for embroidery. But if it slips your mind, no worries. The machine will quietly guide you with helpful prompts before stitching begins.
For our demo, I’m using the Elite Hoop 260 x 200 mm. Take a piece of stabilizer measuring 12" x 17½" and hoop it securely. Place the denim strip in the middle and secure it with pins.
Click to select the needed hoop size 260 x 200 mm. Then click Start Hoop Scan You’ll see a pop-up message asking you to attach the hoop. To do that, slide the hoop connector into the hoop attachment from front to back until it clicks into place. Click OK on the screen.
The hoop scan won’t take long, and you’ll be ready to move on to stitching.
Single Ribbon Stitch 8.1.6 on denim stitched in the Elite Hoop 260 x 200 mm using PFAFF creative icon 2, shown with sewing tools and ribbon on a white wooden background.
Embroidery Stitch-Out setup screen on the PFAFF creative icon 2 with Elite Hoop 260x200 and Dynamic Spring Foot 6D selected, showing ActivStitch Technology enabled.
Denim strip pinned over stabilizer and hooped in the Elite Hoop 260 x 200 mm, ready for ribbon stitch embroidery on the PFAFF creative icon 2.
Close up of the PFAFF creative icon 2 screen displaying hoop options with the creative Elite Hoop 260x200 selected and various customization controls including grid settings, background color wheel, and scan hoop function.
We’re all set to begin programming our ribbon stitch right in the hoop.
Tap the Sequence Creator icon. Next, click the Load Stitch icon. Scroll to Category #8 Techniques, and select 8.1 – Single Ribbon Stitches. To load a stitch, simply double-tap on the one you’d like to use. For my sample, I picked Stitch #6.
Duplicate your selected stitch multiple times. The PFAFF creative icon 2 makes this easy by automatically snapping the motifs together into a straight row.
Use the length information displayed in the upper-left corner of the screen to check the total size of your sequence. Make sure it fits within your hoop’s stitching area—for example, stay under 260mm when using the 260x200 hoop. My row with the selected stitch is 240mm long. Each stitch unit measures 24mm, so I’ve duplicated it ten times to create the full line.
I usually check before stitching if my design is in the correct position. For this example, it’s easy, I just need to check that the stitch row is centered. To check, tap the Edit Design icon and tap the Center icon if needed.
Close-up of the PFAFF creative icon 2 Embroidery Edit screen displaying a centered 240 mm row of Single Ribbon Stitch #8.1.6 motifs within the 260 x 200 mm Elite Hoop. Edit Design interface open with centering tool active.
We’re all set. Now tap the Go icon and let the PFAFF creative icon 2 work its magic! One of the best parts? There’s no need to touch the foot pedal at all.
The machine will start by stitching a short section, then pause automatically twice at the beginning: first, to cut the thread, and second, to let you place the ribbon. Each pause will be followed by a pop-up window with the notification “Stop command in design.” When the second pause happens, that’s your cue to place the ribbon in front of the needle, matching the same angle as the first part of the stitch.
Press the Start button, cut the thread, then press Start again to continue.
The machine will now sew a straight placement guide followed by the first part of the stitch motif, then stop once more. Lay the ribbon over the guideline, making sure it’s straight and fully covers the line. Press Start again to continue stitching.
Sequence Creator screen on the PFAFF creative icon 2 showing Single Ribbon Stitch #8.1.6 selected from Category #8 Techniques, with a 24 mm width setting and interface for building custom decorative sequences.
Sequence Creator screen on the PFAFF creative icon 2 showing Single Ribbon Stitch #8.1.6 duplicated into a 240 mm sequence using the on-screen editing tools, with the Category 8 Techniques stitch library visible on the right panel.
Close-up of the PFAFF creative icon 2 Embroidery Stitch-Out screen with Elite Hoop 260 x 200 mm showing stop command notification during stitch sequence using Single Ribbon Stitch #8.1.6; 6D feature enabled, stitch alignment preview visible on display with a stitch progress.
of
Ribbon placement on denim under the PFAFF 6D Dynamic Spring Foot, with a 4 mm burgundy satin ribbon aligned over a yellow guide stitch, ready for embroidery continuation on the PFAFF creative icon 2 using the Elite Hoop 260 x 200 mm.
of ribbon
during
with
Close-up of the PFAFF creative icon 2 Embroidery Stitch-Out screen showing Single Ribbon Stitch #8.1.6 in progress with a stop command alert and Stitch-Out Progress at 136 of 1898 stitches; 260 x 200 mm hoop selected and 6D Active Feature enabled.
Close-up
heart-shaped Single Ribbon Stitch #8.1.6 being sewn with yellow thread on denim in Elite Hoop 260 x 200 mm using the 6D Dynamic Spring Foot.
Close-up
folding
embroidery
Single Ribbon Stitch #8.1.6 on denim using PFAFF creative icon 2, showing yellow thread forming a heart motif over burgundy satin ribbon with the 6D Dynamic Spring Foot.
Here’s one more fabulous feature of Embroidery Mode: tap the Stitch-Out Progress icon to see exactly where you are in the design. It’s easy to track the process, and if anything goes wrong— such as a thread break—you can return to the required spot and make any necessary changes.
When it stops next time, fold the ribbon over the previous stitching, firmly but gently, making sure it lays over the line between the motifs. Press Start and continue.
Repeat this process, folding the ribbon each time the machine pauses, until your full decorative row is complete.
The embroidery arm keeps everything perfectly straight, so your stitches land exactly where they should. All you need to do is follow the rhythm: stop, fold, start again. It’s precise, satisfying, and just a little bit magical.
The in-the-hoop ribbon stitching and the Sequence Creator really shows how the PFAFF creative icon 2 turns thoughtful details into beautiful results without the guesswork. This isn’t just about perfect lines; it’s about unlocking new ways to play with texture, shape, and detail.
This technique opens up a wide range of creative ideas:
• Add decorative borders to hems and sleeves
• Frame quilt blocks or highlight centerpieces with texture
• Create playful or elegant accents on totes and pillows
• Incorporate lace, velvet, or sheer ribbons in mixed-media art
• Experiment with double or triple ribbon stitches for extra depth And just like that, our ribbon journey doesn’t end but it opens the door to even more creative paths. I can’t wait to keep exploring and sharing how this incredible machine adds both joy and flexibility to every technique.
Sincerely, Olesya
Olesya Lebedenko
olesya-l-design.com
Side view of the PFAFF creative icon 2 embroidering a row of decorative ribbon heart motifs of the Single Ribbon Stitch #8.1.6 on denim, showing the 6D Dynamic Spring Foot in action over a stabilized and hooped sample.
Full front view of the PFAFF creative icon 2 with embroidery unit attached in Embroidery Stitch-Out mode, stitching a Single Ribbon Stitch 8.1.6 with heart motif on denim secured in the 260 x 200 mm Elite Hoop. The full-color touchscreen displays the active design with precise stitch tracking enabled.
BUSINESS DIRECTORY
Bytowne Threads - Ottawa, ON
1.888.831.4095 bytownethreads.com
mlj@bytownethreads.com
To list your business please email
Featuring Aurifil thread from Italy. Long staple Egyptian cotton threads - 270 colours in 12, 28, 40 and 50 wt; 88 colours in 80 wt. Polyester Aurilux - 240 high sheen colours. Wool threads - 192 colours. Many kits available. Check our website!
El Cajon Sew & Vac 1077 Broadway, El Cajon, CA 92021
619.442.2585, sewezr.com
Gitta's
271 Lakeshore Rd E, Mississauga, ON L5G 1G8
905.274.7198 gittas.com
questions@gittas.com
Nestled in the east village of Port Credit, Gitta's is the place where stitchers meet with their stitching friends, shop for stitching supplies and see the new stitching designs from Europe and the United States. Haus of Stitches
626 Main Street, Humboldt, SK S0K 2A0
306.682.0772 or toll-free 1.800.344.6024
hausofstitches.ca
Our one of a kind store offers everything you need for sewing, quilting, knitting, rug hooking and needlework. Authorized dealers for Janome and Elna.
Kelly's Creative Sewing
804 Main St, Dartmouth, NS B2W 3V1
902.435.7380 kellyscreativesewing.ca
kellyscreativesewing@gmail.com
We offer sales and on-site service of high-end domestic embroidery, sewing machines and sergers, as well as a variety of educational programs.
Ottawa Sewing Centre
1390 Clyde Ave, #107, Ottawa, ON K2G 3H9
613.695.1386 ottawasewing.com
ottawasewing@gmail.com
Authorized Dealers for Brother, BabyLock, Elna, Q'nique & Grace quilting frames. Specialize in sales, parts & servicing for all makes & models of quilting/embroidery/sewing/serger/overlock machines & cabinets by Sylvia Design.
Sew Productive
47 Mill St E, Acton, ON
519.853.0007 sewproductive.ca
melinda@sewproductive.ca
Classes, clubs, fabric, thread, notions, crafting. Certified sales, service, and repair for Husqvarna VIKING®, PFAFF®, Singer®, and HandiQuilter®.
The Quilt Store / Evelyn's Sewing Centre
17817 Leslie St, Unit 40, Newmarket, ON L3Y 8C6
905.853.7001 or toll-free 1.888.853.7001
The Quilt Store West
695 Plains Rd E, Unit 6, Burlington, ON L7T 2E8
905.631.0894 or toll-free 1.877.367.7070
thequiltstore.ca
Now with 2 locations to serve you, we are your Quilt Store Destination! The staff here at The Quilt Store is always on hand to provide Quilt Wisdom, Quilt Inspiration and most of all we pride ourselves as the place to make... All Your Quilt Dreams Come True!
The Stitcher's Muse Needleart #101 - 890 Crace St, Nanaimo, BC V9R 2T3
250.591.6873 thestitchersmuse.com
info@thestitchersmuse.com
A divine little shop with supplies for all your hand stitching needs! Friendly, knowledgeable, helpful staff. Cross stitch, canvaswork, needlepoint, embroidery, counted thread, lace making & more. Books, patterns, fabric, threads, tools.
The Yarn Guy
15 Gower St, Toronto, ON M4B 1E3 416.752.1828 or toll-free 1.800.836.6536
theyarnguy.com info@sewknit.ca
See us on Facebook, follow us on Twitter! Knitting machines, sewing machines, repairs, parts for Passap, Studio, Singer, Silver Reed, Superba, White. Sewing notions and supplies, books, ball yarns, coned yarns, TAMM yarns, Paton's yarns, Bernat yarns, Phentex yarns, Bernat kits & crafts.
Upper Canada Quiltworks – Quiltworks Studio PO Box 64, Brockville, ON K6V 5T7 613.865.7299 uppercanadaquiltworks.com
uppercanadaquiltworksstudio@gmail.com
Quilt patterns and books, fabric and notions, felted wool, wool kits, punchneedle patterns and supplies and Valdani embroidery floss. Workshops in quilting, punchneedle, wool applique, rughooking, sewing, sign painting & more!