3 minute read
Creating your virtual tour pag


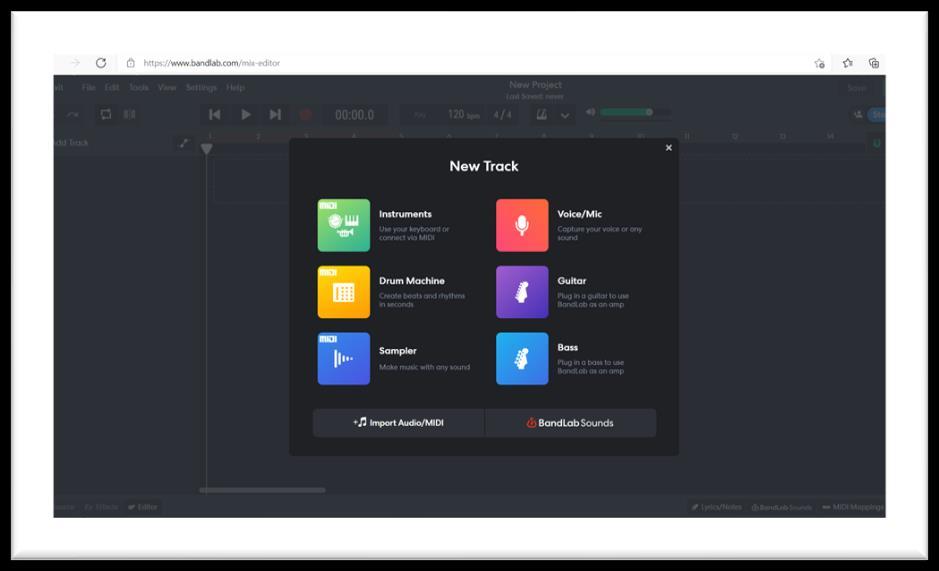
Choose New Track
Advertisement

Good luck creating your music!
http://www.vtility.net/
Vtility is an online virtual tour software for creating online virtual tours. You can design your virtual tours online, for education without any special equipment or software packages. This app offers virtual tours on mobile and tablet friendly and based on cloud. In order to use the app, you need to have pictures of your school, and upload them to create your virtual tour. Follow the steps given. Add the arrows.
The virtual tour of a school frame by frame:
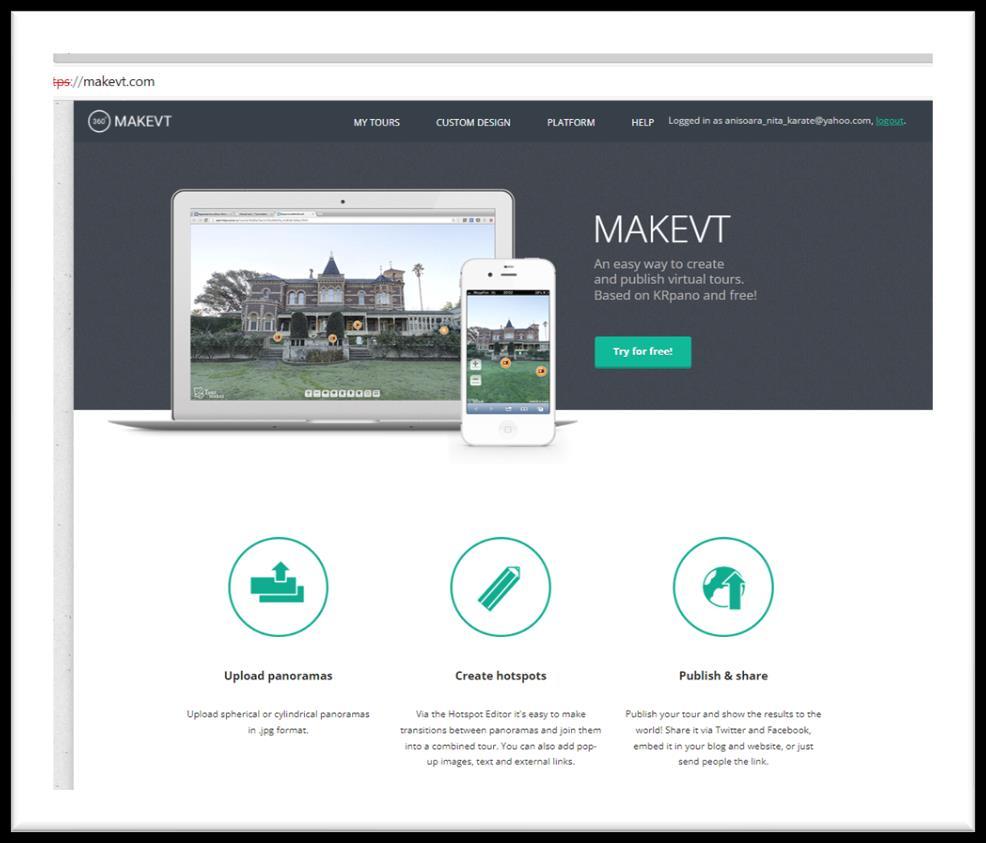
http://www.makevt.com/
An easy way to create and publish virtual tours. Based on KRpano and free.
A. Recording Your Tour
1. You'll need a camera which can shoot 360° panoramic footage, and a tripod for the camera.
2. The camera must be able to work remotely, controlled via a remote or an app on your smartphone so as to avoid capturing you in the shot.
3. Position your camera. Place the camera in the first room that you want to shoot, making sure to position it in the best location to capture the largest part of the room.
4. Make sure your tripod is level.
5. Turn on and connect to the camera. (Bluetooth. Wi-Fi).
6. Take a panoramic shot. Step out of the room in which you're shooting, then use the remote control or the app to record a 360° take of your selected room.
7. Shoot the rest of the scene, a maximum of 25 photos.
8. Move the photos from the camera to your computer.
B. Creating Your Tour
1. Open the MakeVT site. Go to https://makevt.com/ in your computer's web browser.
2. Click Try for free!. This blue button is in the middle of the page.
3. Create an account and sign in.
4. Click CREATE NEW TOUR. You'll find this option on the left side of the page.
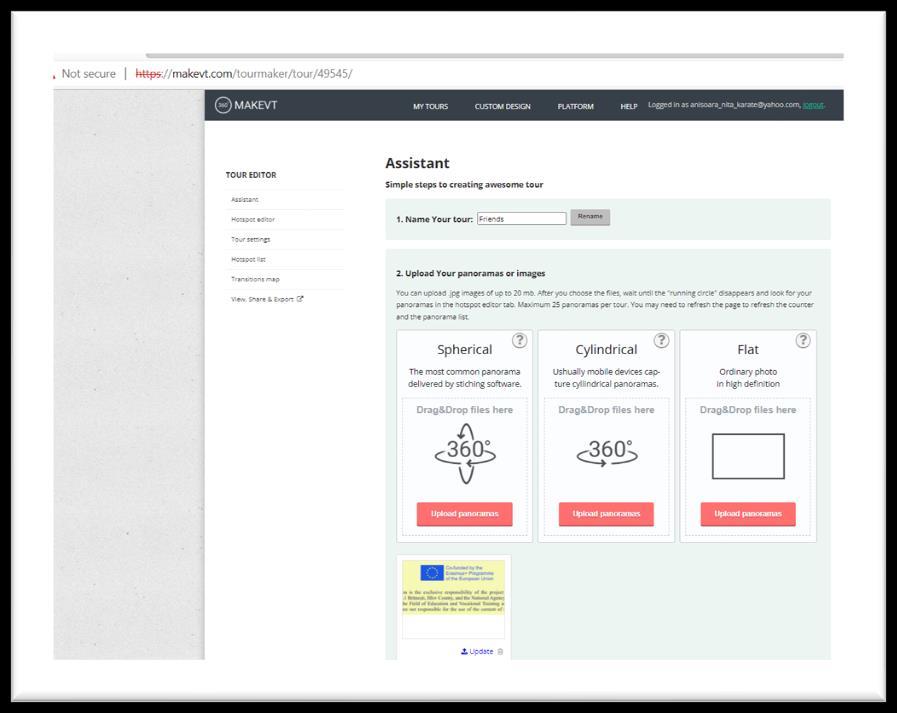
5. Enter a name for your tour. In the "Name Your Tour" text box, type in whatever you want to name your virtual tour, then click Rename to the right of the text box.

• Click Upload panoramas under either the "Spherical" or "Cylindrical" heading.
• Hold down Ctrl (Windows) or ⌘ Command (Mac) while clicking each photo you want to upload.
• You can upload a maximum of 25 photos at 20 megabytes apiece.
• Click Open.
• Wait for the photos to finish uploading.
7. Scroll down and click Go to the Hotspot Editor. This blue button is near the middle of the page.
8. Select the first scene's panorama. Click the panorama from the first room you shot on the left side of the page. This will open it in the middle of the page.
9. Create a link to the next scene. In order to create a link to transition from the first room into the
next one, do the following:
Click +. Click once the panorama. Click ✓
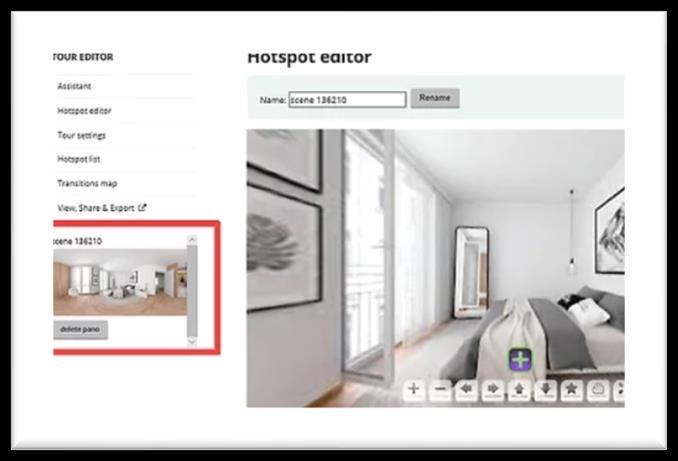
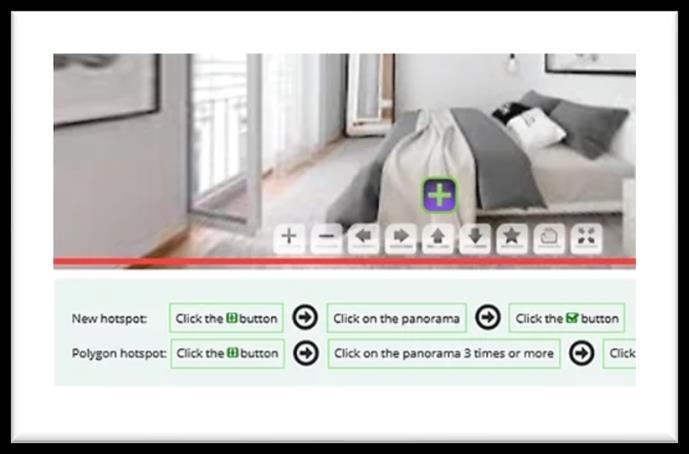
Click the "Select type of hotspot" text box, then click Transition in the drop-down menu.
Click the next scene's panorama in the "Select the destination panorama" section.
Scroll down and click Save.
10. Link the rest of your scenes. You'll do this in the same way in which you built the link from the first room to the second one. Once you've completed this process, you can proceed.
C. Publishing the Tour
1. Click View, Share, & Export. It's a link on the left side of the page.
2. Click Publish and view the tour. This blue button is in the middle of the page.
3. Open the virtual tour. When it appears, click the click on this link link in the text below the button.
4. Run through your tour.
5. Add the virtual tour's link to other pages.