19 minute read
GREEN HOUSE

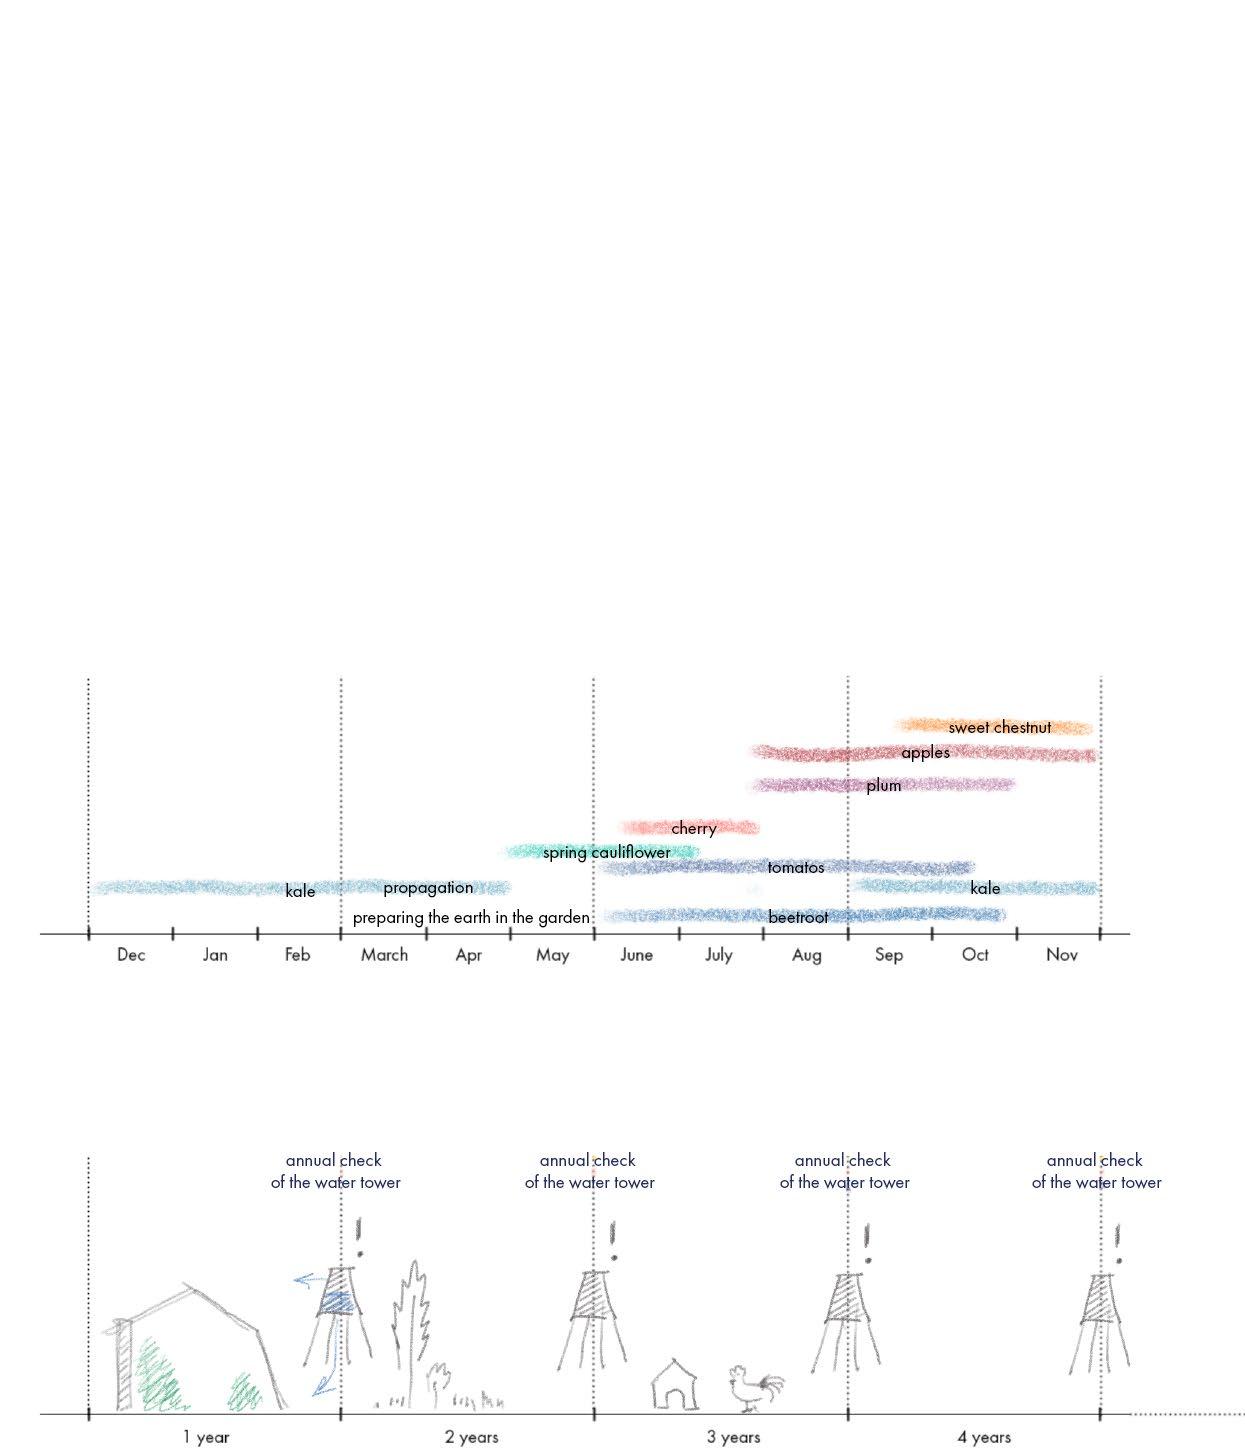
from Hooke Garden
The second element which we developed was the greenhouse. Looking at the areas we had cleared, as well as our ambitions with the boundary condition, we decided that a greenhouse that blends and becomes an operating boundary is the ideal structure to occupy the garden; it becomes an extension of the functionality of the garden.

Advertisement


ELEMENTS OF THE GREENHOUSE
The greenhouse has three main elements - the thick rammed earth wall, the spanning structure that sits on the wall and the ground and the cladding.

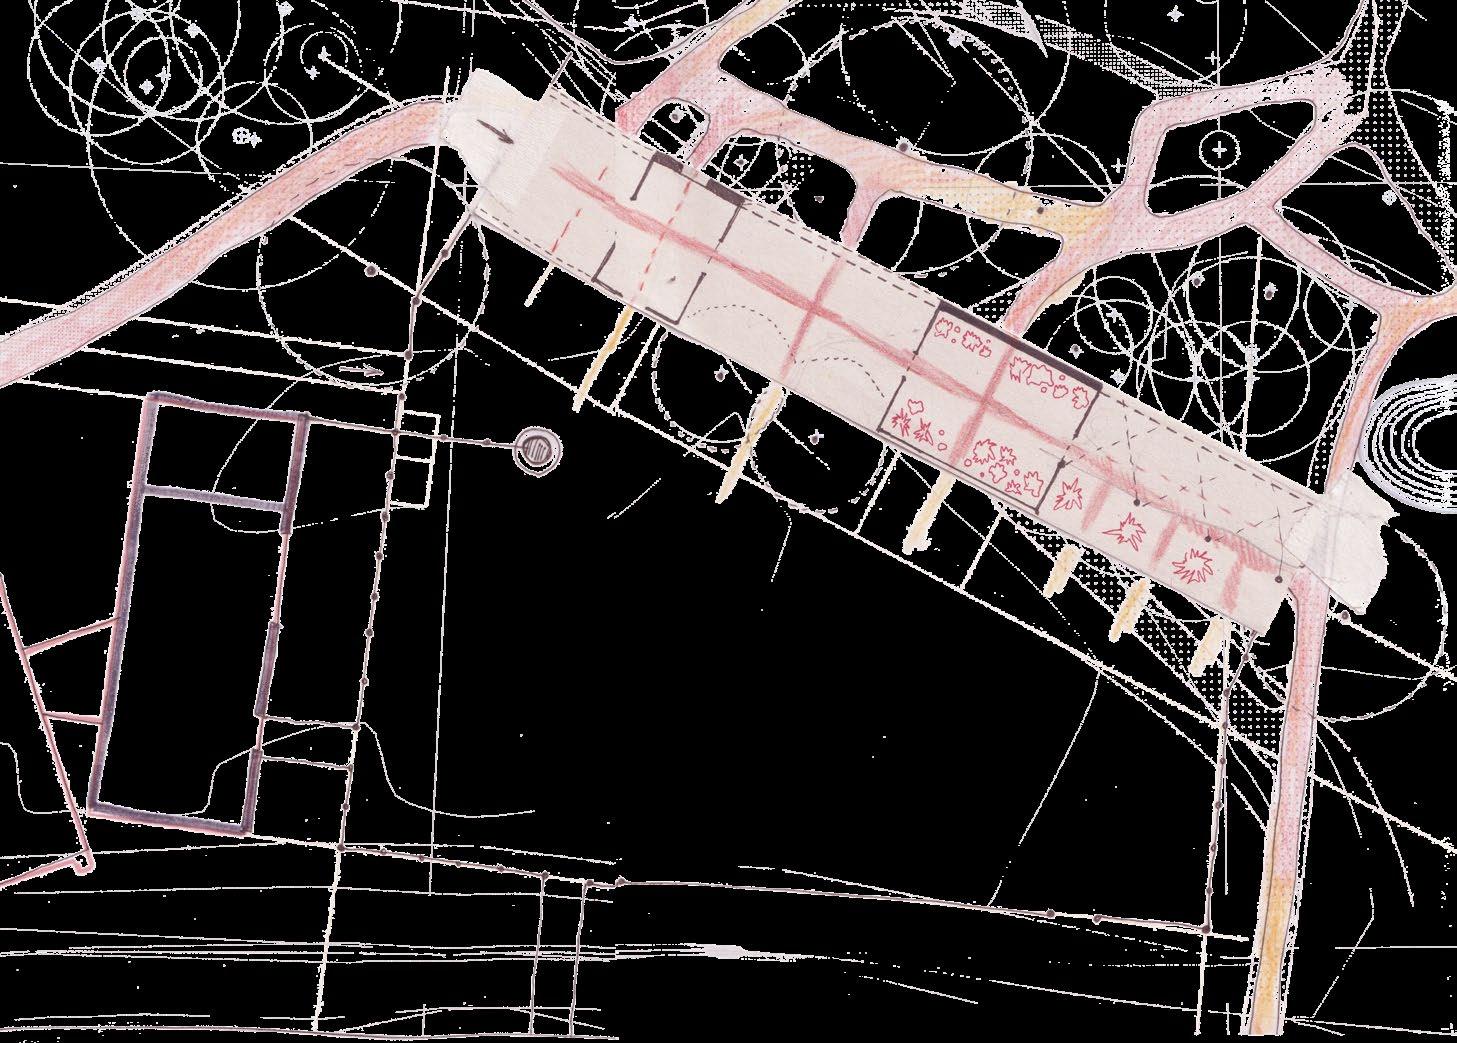
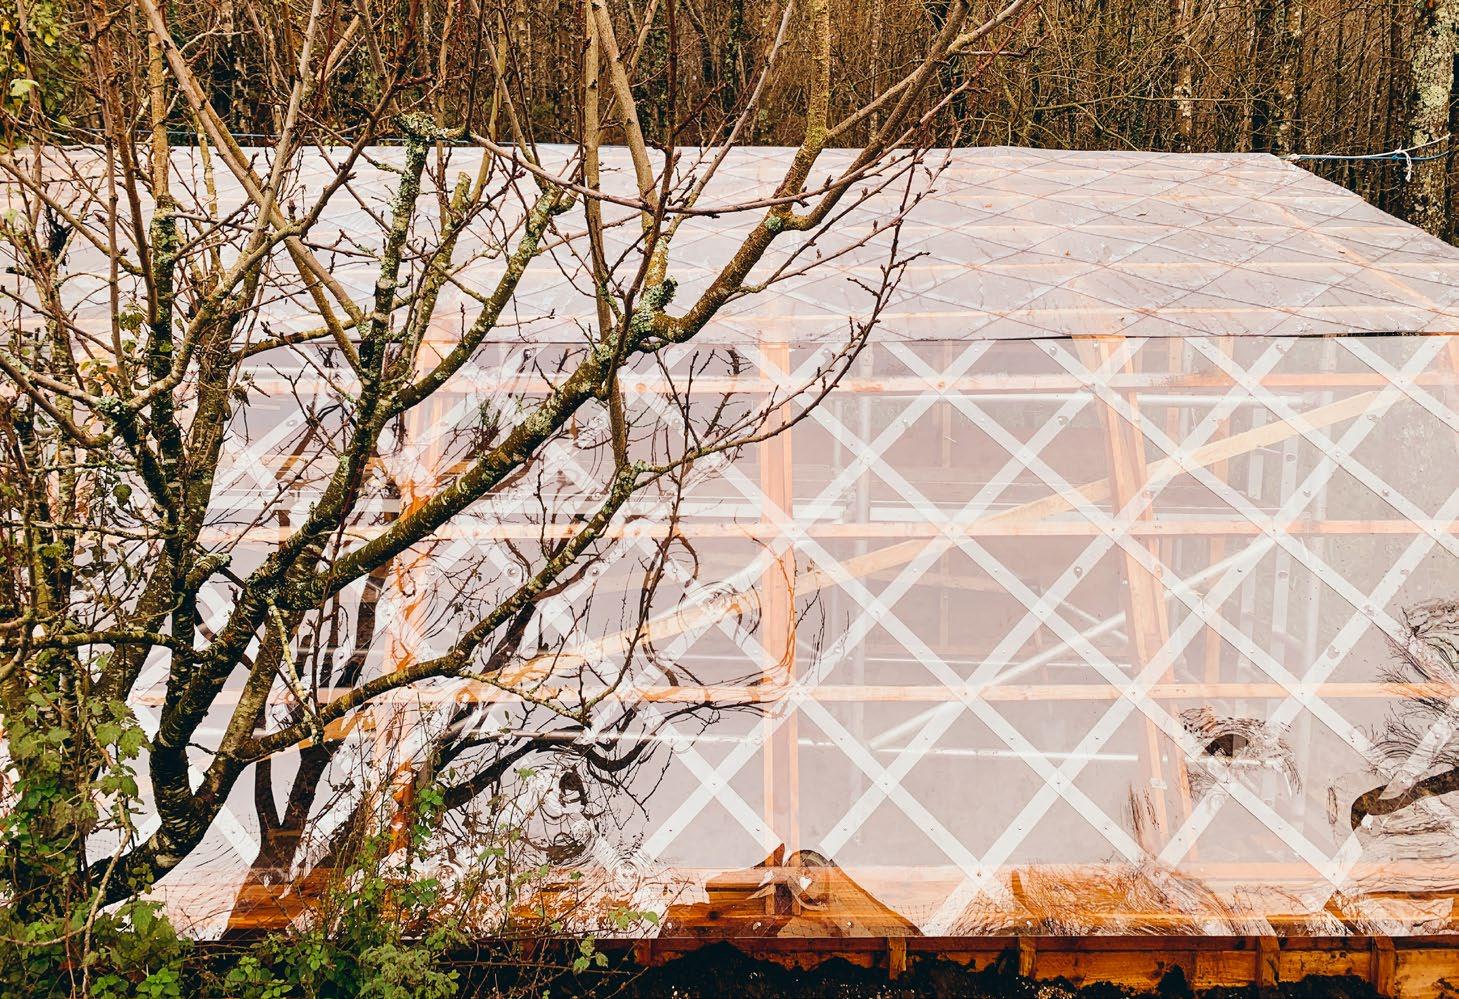
Scheme of the trees that would influence the design around the kitchen garden
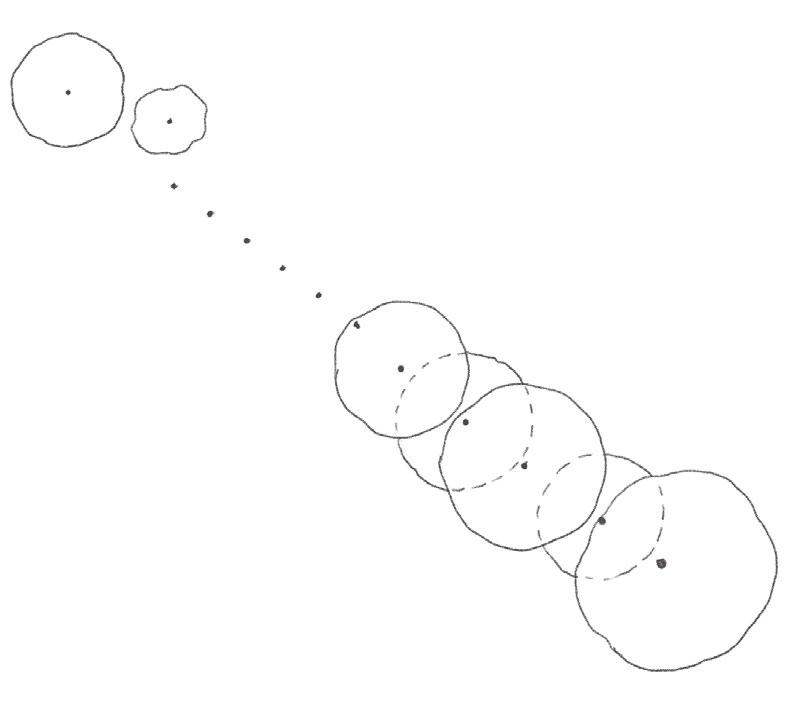
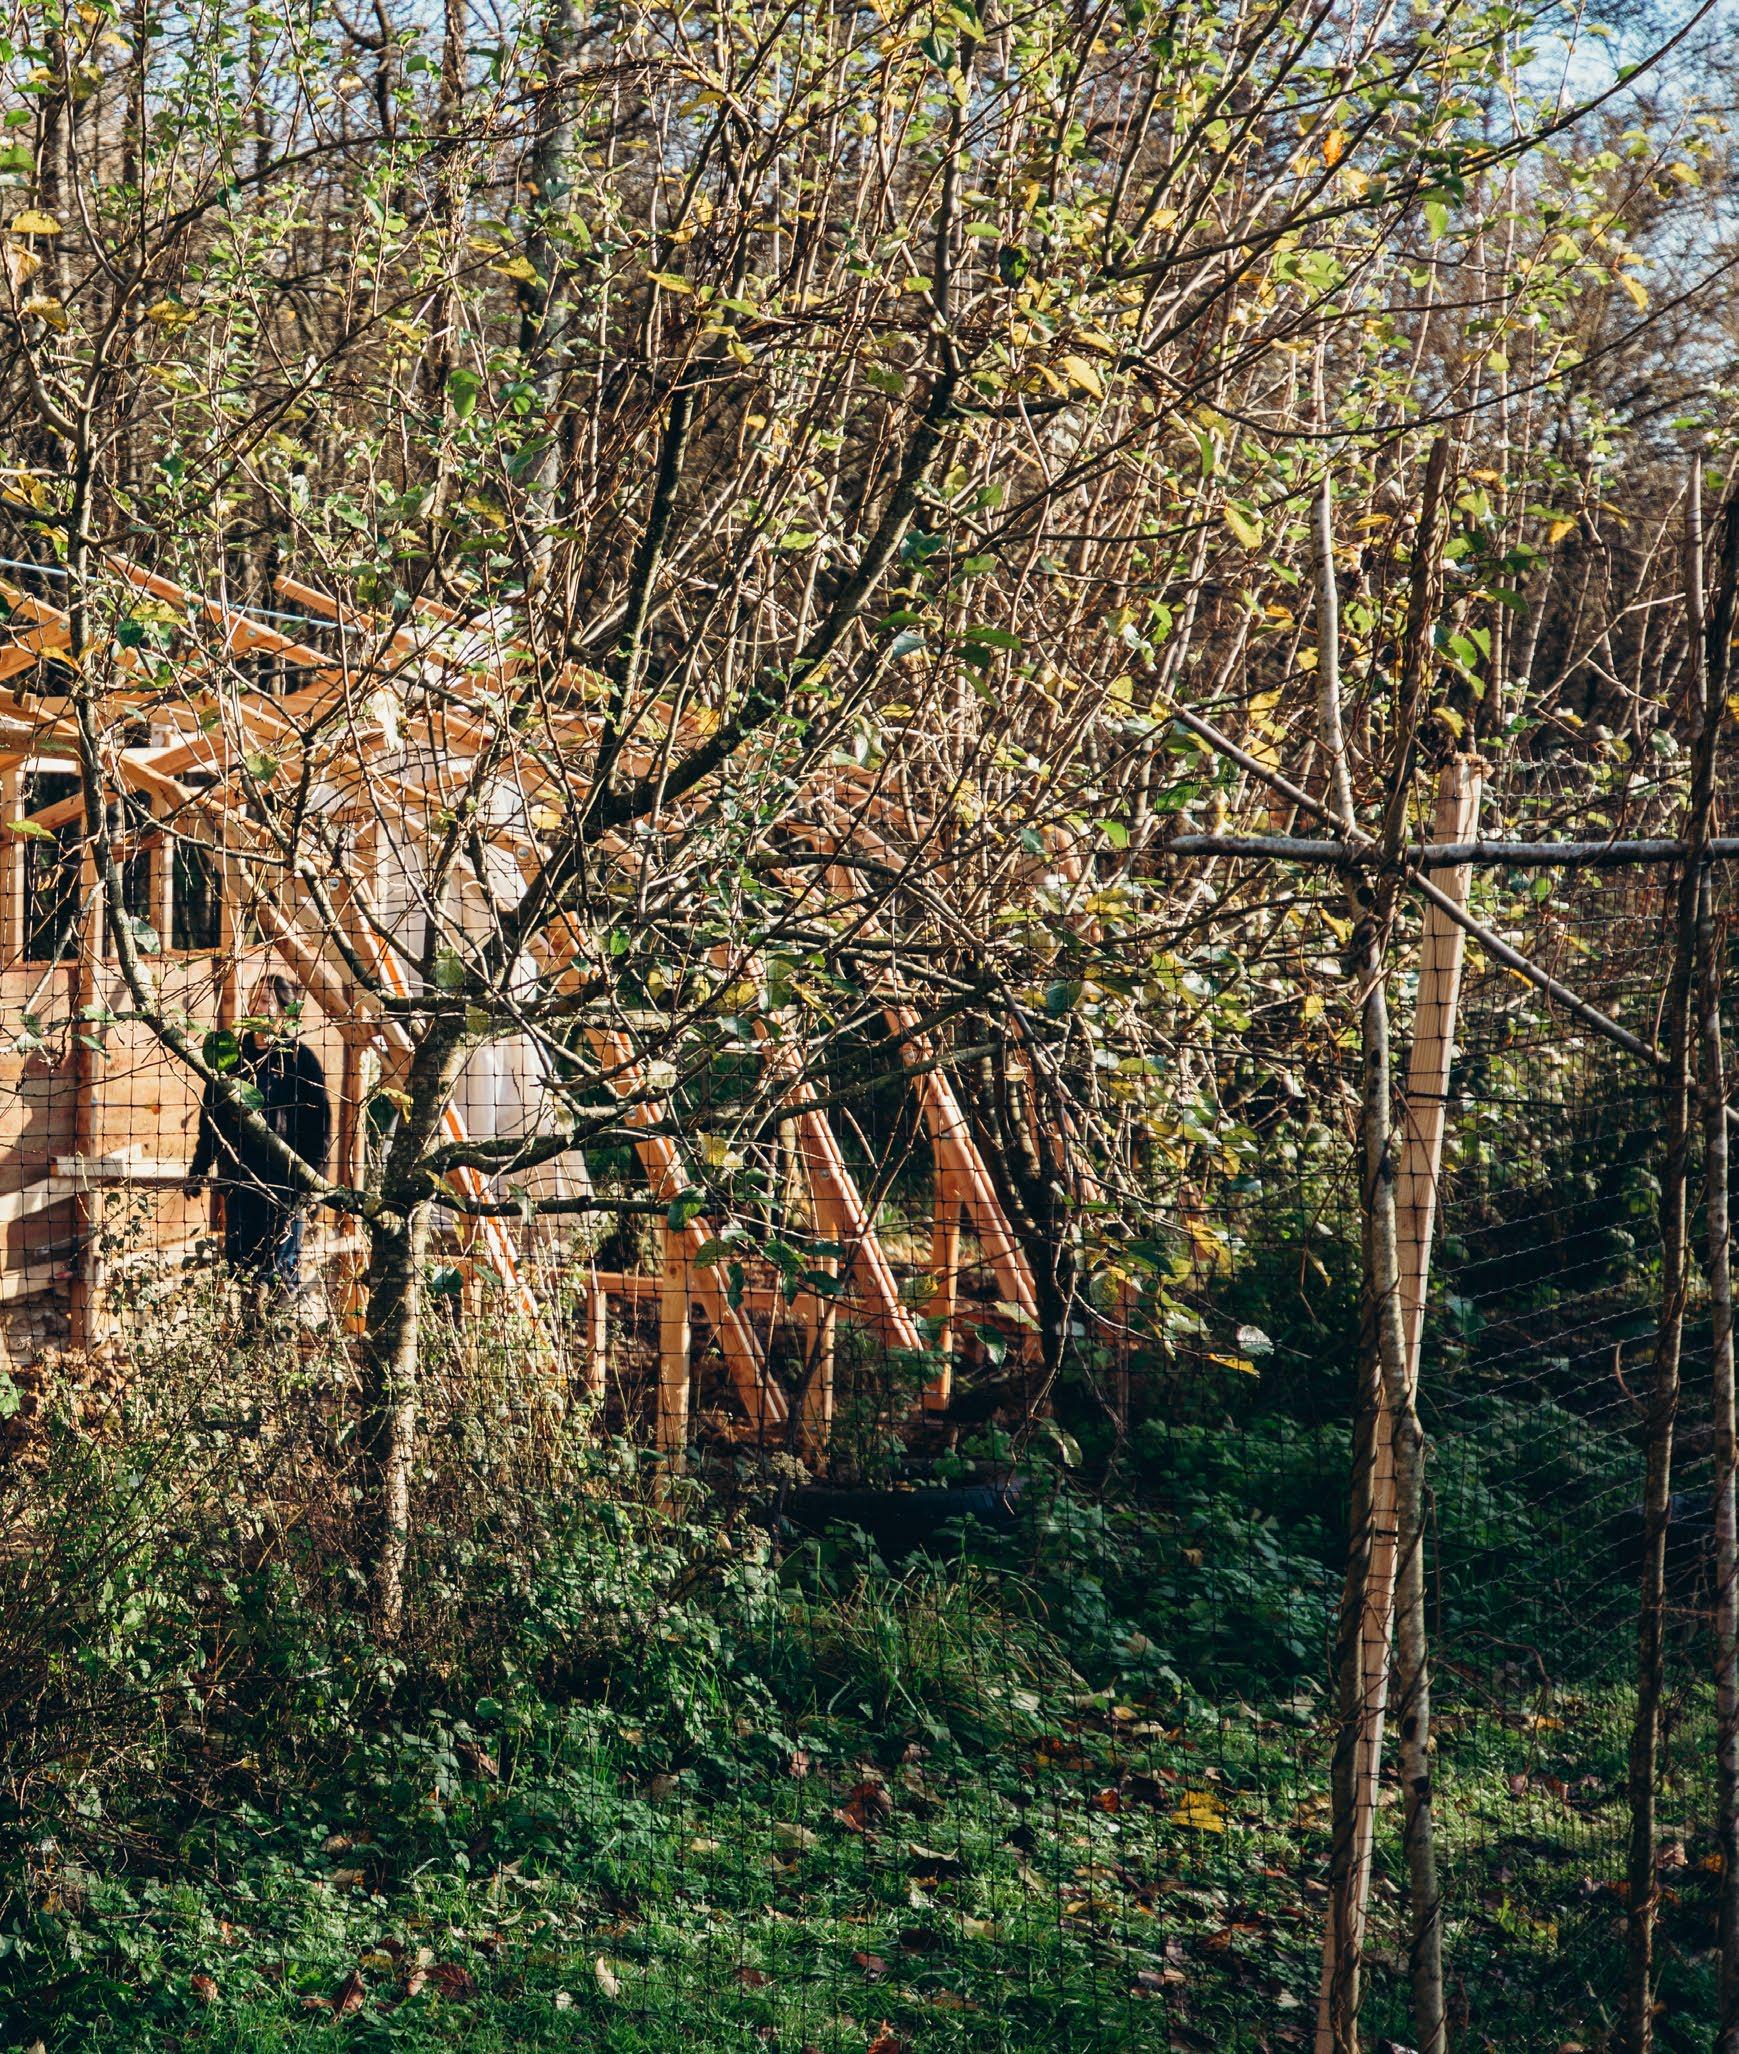
The scale of the trees - row of the trees continued by the elements of the structure To integrate the man-made objects softly into the context, the scale of the existing elements of the site was carefully observed and documented. .

The green house sits on the edge of the northern boundary of the kitchen garden between open space of the site and the part that is covered with the trees. The trees on the edge form a line which is continued by the structural elements of the greenhouse, the rhythm of the trees is repeated by the rhythm of the posts of the green house.

When we started working with the Northern boundary of the kitchen garden we came across references of greenhouses that preceded the modern glass-box design. Those walled gardens looked like mazes. The walls were thick and could store the heat during the day and release it during the night, so that the micro-climate inside the mazes would be warm enough to grow fruit trees. The first greenhouse with glass was basically glass leaning on a thick wall. We decided to use this combination of a thick wall with a transparent structure leaning on it.


Walled gardens in Paris


Index of thermal mass for various materials Capability of a thick wall to store heat
The thick wall of the green house is the heaviest element in the composition of the Northern boundary. Other elements are smaller in scale - existing tool shed, proposed fence, trees on the other side of the greenhouse. We were trying to integrate the green house softly into the context, approaching it not as a self-standing building, but as a part of a composition presented by a set of elements - both man-made and natural. Circulation goes through the greenhouse - it becomes a buffer space into the forest through the garden. With a proposed entrance from the side of South Lodge, new circulation activates that part of the site with more projects to follow in that area.

Nortern boundary as a set of different rooms
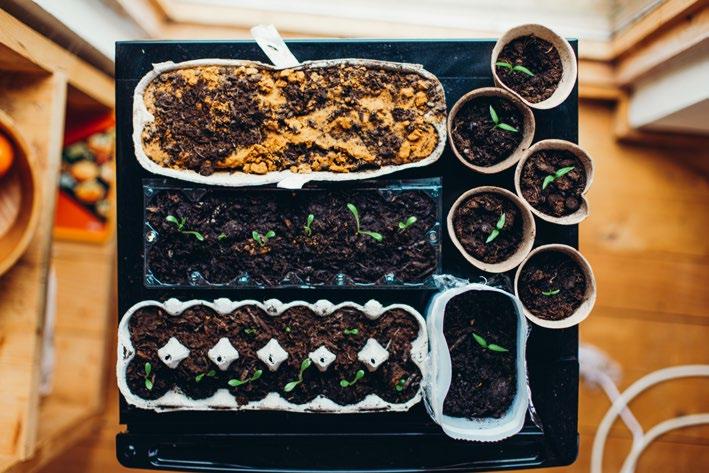
RAMMED EARTH TESTS
There were two dominant sources for us to extract earth from. The first was a small mound next to South Lodge. The earth here was quite loamy, making it ideal for planting. We had spent some time previously working with this earth for some planting activities, so we had a general idea about its properties. The second source was earth that, throughout the course of multiple weekends, had been dug from the dried-up pond near North Lodge. This earth was heavily infused with clay, as well as it being populated by twigs and branches that had fallen into the pond over time. We knew that the composition of local earth is intrinsic to the quality of rammed earth, and that earth dug almost anywhere in Hooke Park is heavy with clay. Because of this, we had to spend a lot of time testing multitudes of recipes to find one ideal for the earth within our site.

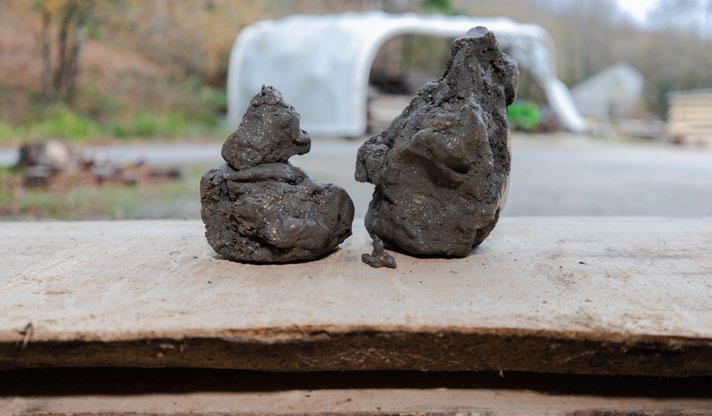
First experiment with rammed earth
Rammed earth is a fascinating material to work with. It has properties of heat absorption and reflection. Despite its difficulty of construction, having it as a part of our built greenhouse was very important to us.
The exercises we performed on a small scale allowed us to move on to working at a larger scale. Multiple cubes of rammed earth were made. These represented a section of our final wall, taking its thickness as a factor for their dimensions.

Test 1 7:2:1 of earth:sand:cement. The earth was taken from the pond on site. In this sample, the earth proved to have inadequate proportions of clay:dirt, causing is to break.

Test 3 7:2:1 of earth:sand:cement. In this sample, the earth was a 50/50 mix of the pond and South Lodge mound. After this sample was made, it was put in the oven for ~20 hours, which caused it to be very dry. It seemed very solid at first, however, very slight pressure to it caused it to collapse.

Test 5 7:2:1 of earth:sand:cement, This test was made to attempt shaping the rammed earth by using a negative mold. Test 2 7:2:1 of earth:sand:cement. Nails we used at the bottom of the board acting as rebars in full scale construction of rammed earth. The sample contained no clay at all, and it snapped in half from the point where the nails’ length ended.


Test 4 7:2:1 of earth:sand:cement. In this sample, the earth contained a very accurate amount of clay and dirt. 25% pure clay extracted near a water stream, and 75% dirt from the mound near South Lodge.

Test 6 7:2:1 being earth:sand:cement This test was made to connect timber elements through the volume of the wall, representing our design approach for the final wall.
COB TESTS

Verncaular techniques and materials in the UK

Cob is another type of earthern material. It is a simpler material to work with than rammed earth. To understand better the technology of working with cob, we made some tests.
Cob is easier to make and work with because it is less sensitive to the composition of the earth and mistakes in the proportions. With rammed earth, the proportions of the elements are recalculated accroding to the composition of the soil. With cob the proportions can vary significantly. But it is also weaker - we could not strain the cob wall with the spanning structure of the greenhouse. Cob is a vernacular material for the UK. Earth in Hooke Park is heavy with clay and a cob wall would make sense. But it has different aesthetic characteristic from the rammed earth and we also wished to challenge the previously failed rammed earth projects within Hooke Park, as well as to entertain our fascination with the elegant quality that rammed earth walls possess, that’s why we chose rammed earth as a material for the thick wall instead.

Clay from a pocket from the river bed broken into small pieces for easier processing
This clay was prepared by other students for a different project and contains plastificators for thermal processing.
Different samples of cob. In Hooke Park we work more with a transformation of a tree into material, but there are also other materials that can be treated that way. For example, clay. There is a clay pocket in the river bed in the forest where we could get some blocks of clay and process it.

As cob does not require thermal processing, clay can be left in its pure state. Other compoinents besides the clay are sand, straw and a little bit of water.
We made different tests with different proportions of clay, sand and straw, and because cob is a very forgiving material, all samples worked well, though the proportions of the components varied significantly.


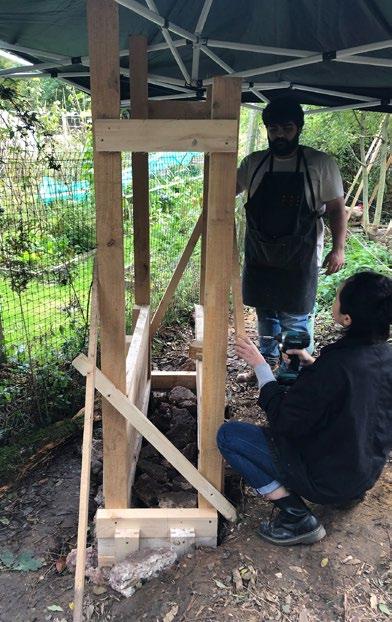
Rammed earth wall prototype
The prototype was an essential step final step leading to the wall’s construction. The experiences gained from all previous steps culminated into this prototype at a full scale, allowing a seamless transition into the final build.
We eventually moved to building a section of our wall as a 1:1 prototype to act as part of our fence. The techniques we acquired through previous tests were now to be erected at a full scale. This prototype gathered within it many layers of complexity. The formwork we made to mold this wall was to be used for the final wall. We also had to expand our reach beyond Hooke Park’s resources to make this prototype. Sand, gravel, and hydraulic lime needed to be sourced from local suppliers. Through this prototype we also finalized our recipe for rammed earth. Given the properties of the earth we used, our recipe was composed of 45% earth, 30% sand, 20% gravel, and 5% lime.

Rammed earth wall prototype

Dry stack for foundations of the rammed earth prototype. The most interesting learning we had during each testing phase was the introduction of new challenges with each scale we experimented with. At a small scale, we virtually had no challenges, at the cube phase, clearing the earth of rubble and twigs proved to take a significant amount of time, and within the 1:1 prototype, the introduction of foundation work as well as leveling and ensuring the posts were plumb amounted to many hours that we had to invest. This prototype unfortunately collapsed as we wanted to experiment with a dry-stack foundation, which proved inefficient in handling the significant weight of the rammed earth, a learning which we carried onto the building of the final wall.

Process of ramming earth
posts of the final structure, used to slide up the formwork The construction of the final wall of the greenhouse began with digging a trench to establish a powerful foundation. This foundation was made up of layers of stones rammed into the earth to stabilize it. This step also allowed for the water that was heavily concentrated on our site to begin draining. On top of the prepared trench, we began the process of laying stone masonry. This support piece was essential to the survival of our rammed earth which was to be erected on top of it.

We made form work for three units and divided the wall accroding to that

Rammed earth divided into units for constrauction
The process of constructing the rammed earth wall involved a repetitious process of mounting the formwork beginning at the surface level of the stone masonry. The formworks were fastened to place using clamps and opposing formworks were connected via threaded rods, this method proved to be durable enough to withstand the force of ramming. Once a layer was completed, the formworks were removed, washed, and then remounted on top of the previously completed layer, utilizing the threaded rods to ensure the wall was being constructed to be plumb. Throughout the build, we utilized iron-oxide to add color to alternating layers, adding an aesthetic effect to the wall.
First level Second level Third level

Two types of earth condition


Making trench under the greenhouse
We manipulated the earth by adapting a cut and fill process. We dig the earth out to make a trench, we fill it back with stone masonry and rammed earth. It is as if the earth is growing and evolving into a wall; it is the same earth, just in a different form.

The idea of the thick solid wall is to pursue the idea of how we integrate ourselves to nature without becoming the same, our object should help forming the surroundings, to amplify them in a way. The rammed earth wall allows us to get closer to nature even if it is an opaque object, our eyes can still see through the window but our body cannot. It invites us to go into the woods and explores things by our body.


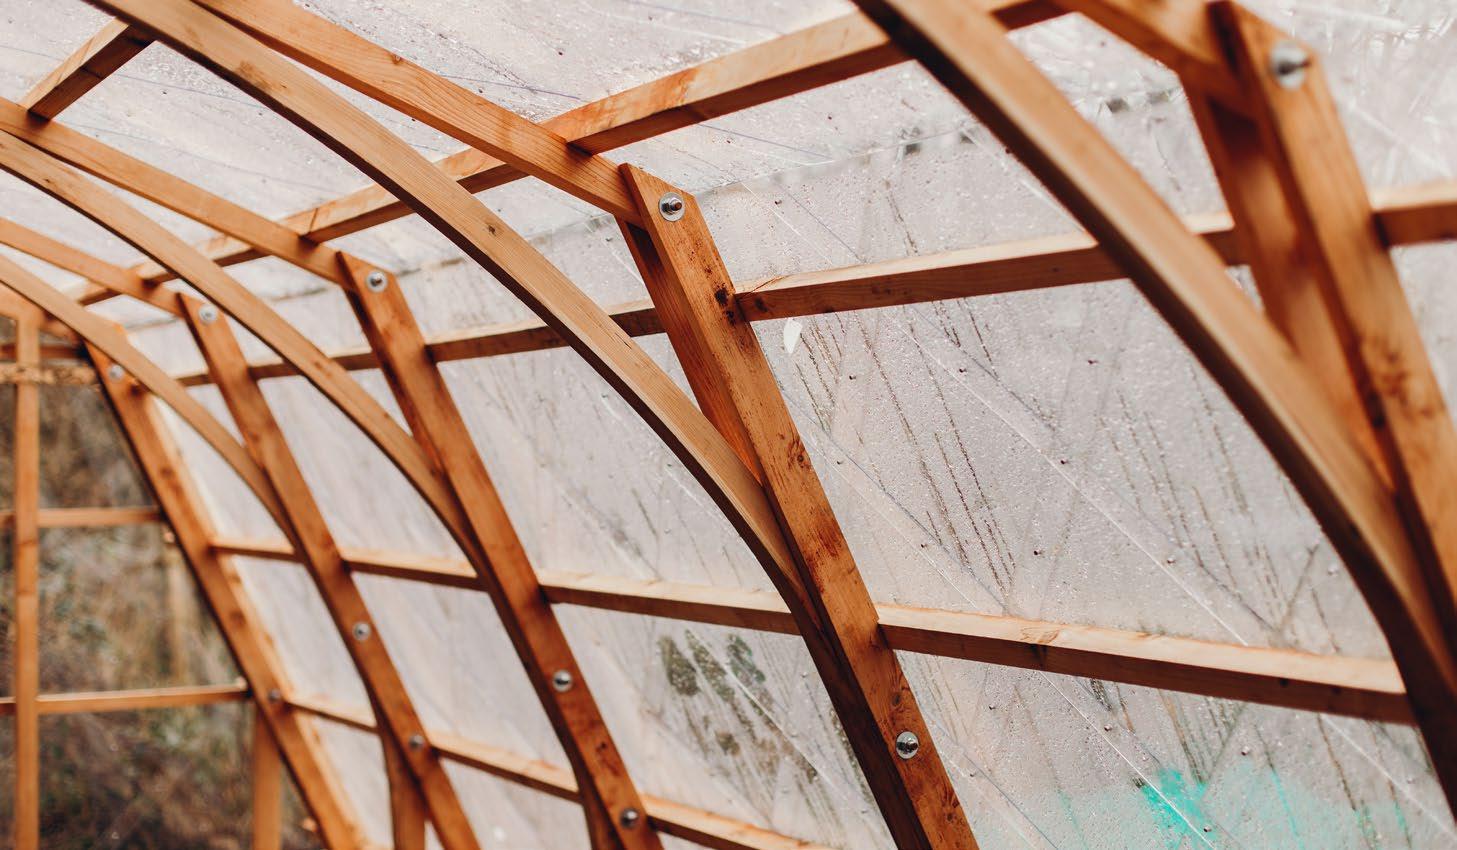
From the heavy rammed earth wall, our trusses span as extruded elements. The design for the truss aimed for it to act as both the roof and wall. The spanning lightweight elements utilize Western Red Cedar as a primary building material. The truss also uses a connection technique between single elements sandwiched together by double elements, all of which are supported by a glue-laminated curved element.


Greenhouse trusses 3D
We developed a variety of options of the design of the truss within the greenhouse. Inspired by the idea of glass learning on a thick wall, we attempted to achieve an effect resembling a heavy elements from which thin and light elemnts extrude.


The truss is made up of a series of single and double elements. The bent, glue-laminated element acts as a support piece for the rest of the truss. The connection between the single and double pieces is established via a clamping approach where the double element sandwiches the single ones. Utilizing this approach allowed us the flexibility of designing a rigid structure whilst being lightweight and elegant. This also achieved a middle ground between what we wanted to do, what the timber itself wanted to do, and how the cladding was to be positioned on the truss.
Single & double element joining methods explorations

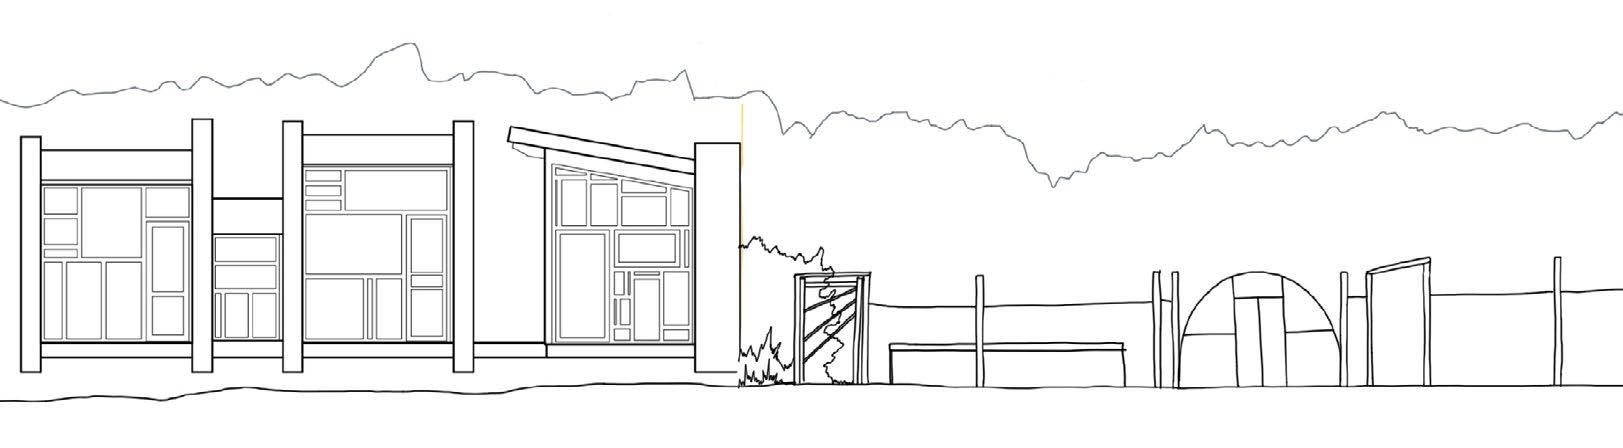
Greenhouse Section
The final design of the truss defines the section. Through it, the truss acts as the roof and wall. It’s angle responds efficiently to the rotation of the sun through different seasons.
Efficiency of a greenhouse by insulation of a northen part Studying the angles of the sun throughout different seasons created a design constraint that we utilized to establish the section of the greenhouse. The roof and wall are oriented in their angles to maximize sunlight coming through.


1:2 models exploring dry-bending roundwood


Glue-Lamination jig for the bent element of the truss
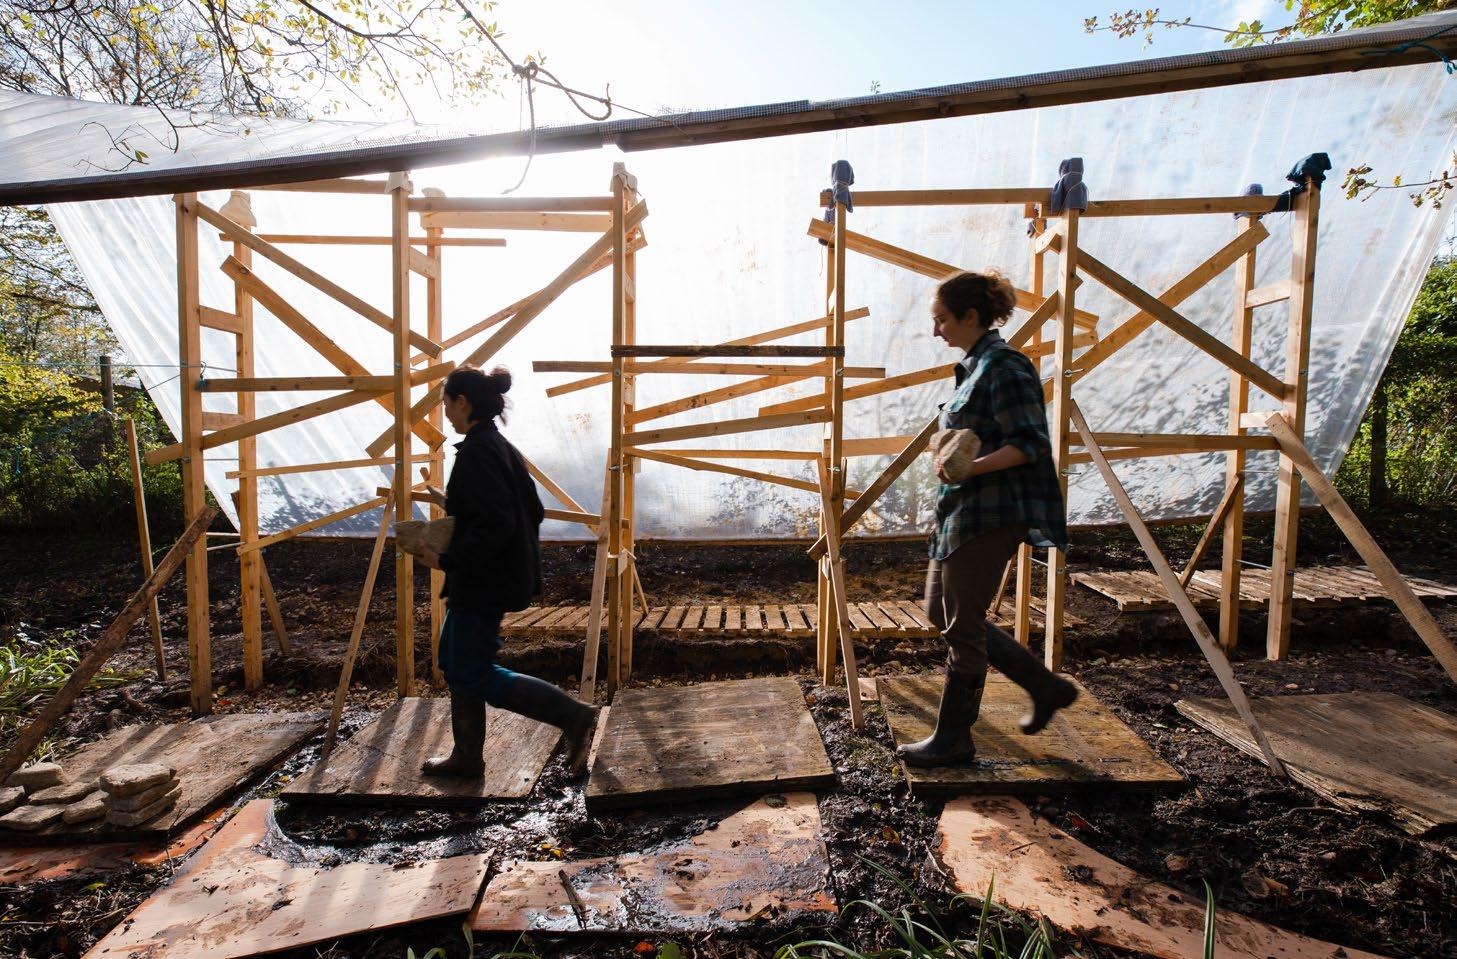
A privilege we enjoy here in Hooke Park is the ability to test any and all of our ideas at a full-scale. We manifest our paper drawings into physical artifacts, allowing us to experience their scale and materiality.
1:2 prototypes in round wood were carried out to test which geometry we want to develop. We tried passive bending green roundwood, which springs back quite significantly after some time, but it does create a particular softness to the timber structure which we liked. The glue-laminated truss we made looks quite simple but the layers of processes that accumulate in its making add significant value to it. For example, type of wood, the right thickness, the type of glue, how we make a jig to accommodate the desired shape, how we clamp it to keep it in place, how we plane it, and the degree it springs back from. The experiments and tests we conducted, in addition to the sun path studies that we analyzed came together to shape the truss of the greenhouse. Which essentially became the section of the structure, defining the geometry of the greenhouse through its use of thin, lightweight structures the span from the rammed earth wall. Scale and materiality were important aspects which we were only able to fully realize through building our 1:2 and 1:1 prototypes. It was always difficult for us to realize the true scale of the building through drawings alone. That, along with our decision to use Wester Red Cedar as material of choice were only confirmed through the prototyping phases.


The process of assembly was one of the most significant moments in the project. All the layers that had been individually developed for some time were now ready to be put together. The combination and overlap of the elements coming together created one, cohesive artifact.


Process of installing the shingles
CLADDING We were inspired by the project of the Garden Room by Indra Janda, where they use opaque polycarbonate for shingles. We decided to develop plastic shingles too for the cladding of our spanning structure. We calculated the size of the shingles in a way that we would have as little waste as possible from CNC-ing a standard polycarbonate sheet.

By making various tests we defined the overlap that would suit us aesthetically. We
Shingles of the greenhouse
were using 2mm polycarbonate which is quite thin and the overlaps were creating the stiffness we required for structural stability. For the connections between shingles we used rivets that would fix each shingle in 8 points.
Transparent polycarbonate keeps the space of the greenhouse dry and warm but does not create a boundary between the space of the garden in front of the greenhouse and the inner space.

The pattern of shingles adds layer of smaller scale to the volume of the greenhouse.

Process of fixing the shingles with the rivets
DIVERSITY OF SCALES

A diagram of variety of scales in different levels from “Another Scale of Architecture” by Junya Ishigami
“Different forms and systems, different degrees of diversity, and different time. While there are differences of all kinds, the most fundamental of them all is scale.” Junya Ishigami
“As the boundary between these environments, natural and artificial, has grown steadily more ambiguous, a new environment is taking shape.” (Junya Ishigami). We tried to respond to the diversity of the rich scales within the natural environment we were working in. Our structure attempted to have layers ranging from larger elements to smallers ones, so that the overlap between the natural and architectural would be further enriched: truss of the greenhouse can be decomposed into elements of very different dimensions, the solid surface of the cladding is formed by pattern of the shingles.

Difference in scales between people in the group
Diversity presents itself within our group as well. As 3 people of different sizes, our individual approaches serve to augment the environment instead of simplifying it. All scales overlap and create one solid system


Details of the greenhouse