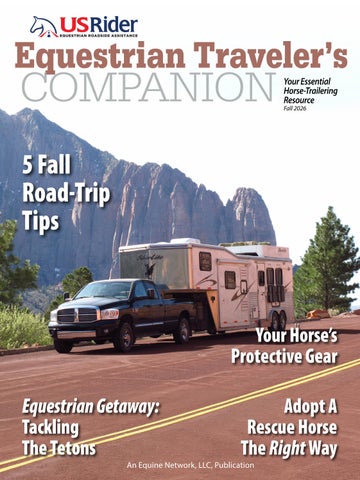
Your Essential Horse-Trailering Resource Fall 2026
5 Fall Road-Trip Tips
Your Horse’s Protective Gear Equestrian Getaway: Tackling The Tetons
Adopt A Rescue Horse The Right Way
An Equine Network, LLC, Publication
Equestrian Traveler’s COMPANION FEATURES 8 Tack Talk
Your Essential HorseTrailering Resource
Fall 2026
Saddle-Pad Care
10 Hauling Hints Fall Road Trips
14 Safe Travels Equine Protective Gear
18 Your Healthy Horse Leg-Wrapping Basics
22 Getaways Tackling the Tetons
26 From the Heart Adopt a Rescue Horse
28 USRider Member Story Back on Track
DEPARTMENTS 4 Trip Tips
Expert Advice for Equestrian Travelers
6 Skill Set How to Change a Trailer Tire
30 Equine Essentials Ride Into Fall
32 USRider Member Discounts Equestrian-Travel Benefits
34 Handy Checklist COVER PHOTO BY KENT AND CHARLENE KRONE
8 Leaf-Peeping Tips
USRider General Manager: Bill Riss Editor: René E. Riley Art Director: Abby McDougall Contact USRider: (800) 844-1409 1079 S. Hover St., Ste. 200, Longmont, CO 80501 memberservice@usrider.org • www.usrider.org USRider® Equestrian Traveler’s Companion
Equine Network, LLC, is the producer of award-winning magazines, including EQUUS, Horse&Rider, Practical Horseman, and The Team Roping Journal.
2
Fall 2026
What Members Are Saying About Recent Services
REAL MEMBERS. READ ROADS. REAL PEACE OF MIND.
Members Travel Further with Confidence SUPPORTING EQUINE TRAVELERS EVERY MILE.
PHOTO COURTESY OF USRIDER
“Help arrived in 20 min! The person they sent was efficient, nice, and so helpful. They got me back on the road quickly with my horse in the trailer. I recommend USRider to all my horse friends. The member specialist checked back in with me twice to make sure someone arrived quickly and that I was taken care of."
Nancy M., WA August 2026
"Rick took time to understand the issue and called back several times to keep me informed. I had service within 30 minutes of calling!"
“Jessica listened, gave us good information, and QUICKLY found a roadside mechanic… He arrived in about 10 minutes! … He had us back on the road in about an hour.”
"Jaime was great with communication. She made sure I knew what was happening via text and phone calls. She explained my options and what my plan covered. I am so grateful to have USRider!"
- Jean L., MD, August 2026
- Shauna B., NY, August 2026
- Suzanne R., MN, August 2026
"Tiffany was exceptional—if 10 is the highest, she is 110! Had 4 horses in nearly 100 degree weather on the side of the road and not only was she fast, she was extremely competent and calmed my over-the-top stress level."
"It could not have been any better! From John taking care of me on the phone to the guy who came out. I felt safe since I was alone. Everything was quick and easy! Thank you so much!"
- Grace Z., KY, July 2026
- Holly S., NC, July 2026
Travel with confidence knowing USRider will get you back on the road safely and efficiently, should unexpected vehicle or trailer problems occur.
www.usrider.org (800) 844-1409
Covers you, your trailer, and your horses. Any vehicle. Anywhere in the US and Canada.
USRider® Equestrian Traveler’s Companion
Our 24/7 nationwide plan covers everything from lockouts and jump starts to towing your vehicles, trucks, and trailers.
3
Fall 2026
------------ TRIPTIPS-----------TRAILERINGTIP
Mirror, Mirror With your horses safely loaded into the trailer, you want to keep them safe throughout your road trip. Make sure you keep track of cars around you on the road—especially drivers in your rig’s blind spots. Follow these guidelines to outfit your truck with the best mirrors and adjust them so that you can keep an eye on everyone who drives near your trailer. Beware of blind spots. You’ll have areas around your trailer where you can’t see approaching cars or cars. Depending on the size of your hauling rig, it may be difficult to see directly in front, directly behind, and along each side of the trailer. Be especially cautious of approaching cars on the right side of your truck and trailer. Be sure to check both side mirrors before changing lanes and always keep ample space between your truck and the traffic in front of you. Upgrade your mirrors. Most newer trucks come PHOTO BY JARED MELOCCO with tall and wide mirrors ready for trailering. On the road, use your mirrors to keep track of the vehicles However, many SUVs and smaller trucks have around you, especially drivers who may be in your rig’s blind car-size mirrors not intended for trailering. If your spots. current mirrors don’t extend out far enough side to see the back of your trailer, buy new ones, or add extenders to the mirror arm. You may also purchase “fisheye” mirrors, where curvature provides a wider viewing area than normal. After-market mirrors are available at auto-supply stores and online. You can also custom-order trailering mirrors from your local dealer. Take time to adjust. Adjust your mirrors so that you can see your trailer’s back end. Then you’ll know when there’s enough clearance when pulling in front of another vehicle. Also, aim your mirrors down so you can see the road edge behind your trailer. Keep in mind that passenger-side mirrors don’t give accurate distance measurements. — Heidi Melocco
USRIDERMEMBER TIP
Find an Equine Vet Traveling with your horse is hard enough. But imagine you’re traveling with your horse in an unfamiliar area and he becomes sick or injured. Your trusted veterinarian is miles away. Relax. If you’re a USRider Member, you have access to its DVM Directory, an electronic database of qualified equine practitioners. This directory contains contact information for large-animal veterinarians throughout USRider’s service area in the 48 contiguous United States, Alaska, and Canada. This directory is available to USRider Member Care Specialists to make referrals when USRider Members need veterinary services while traveling. To reach a USRider Member Care Specialist, dial the emergency toll-free number on the back of your Membership ID Card. USRider® Equestrian Traveler’s Companion
4
PHOTO BY HEIDI MELOCCO
Fall 2026
SEASONALTIP
HEALTHTIP
Evacuation Prep
Fall Thrush-Busting
Fall can be a peak evacuation season due to natural and manmade disasters. In the West, wildfire danger is still high. In Atlantic and Gulf states, hurricanes threaten. Prepare to trailer out your horse with these tips.
Fall’s wet conditions can increase your traveling horse’s risk for getting thrush at home and on the road. But wet conditions alone won’t cause the infection. Here’s a rundown of thrush’s causes, symptoms, treatment, and troubleshooting tips. Causes:Thrush is caused by an anaerobic bacterium, meaning that it can live without oxygen. Poorly cleaned stalls, urinesoaked and manure-packed footing, and wet, muddy conditions are major factors that predispose your horse’s hoof to thrush. Poorly trimmed feet—hooves with contracted heels or overly high heels that trap debris inside the foot and around the frog—also contribute to your horse’s chances of contracting thrush. But the primary cause of thrush is inadequately cleaning your horse’s feet. If you allow your horse’s foot to become a dark, wet, unsanitary sanctuary for the bacteria, they’ll move in and multiply, even feeding on the frog tissue itself. Symptoms: Thrush is characterized by a dark, sticky discharge and a foul, rotting smell. The frog may be covered with this discharge, or it may only build up deep in the frog’s grooves. Thrush is usually associated with poor frog growth and disintegration of the frog tissue. Treatment: If your horse gets thrush, first ask you farrier to trim your horse’s hooves. They can leave the crevices beside the frog wide open, while paring away any obviously infected tissue. Then pick out your horse’s feet every day, paying particular attention to the frog crevices, until the thrush has cleared up. Troubleshooting: If thrush persists, you can treat it with dilute bleach (about 50:50 bleach and water) or hydrogen peroxide. There are also several commercial applications for thrush, but ask your veterinarian for advice—sometimes these chemicals can be too harsh on the tissues. — Eleanor M. Kellon, VMD
Fall can be a peak evacuation season due to natural and manmade disasters, such as wildfires and hurricanes. Ready your rig. Keep your truck fueled and your trailer hitched during imminent disaster season. Park your rig so it faces your predetermined exit. Plan transportation. How many trailer spaces do you have available? If you pack that four-horse gooseneck trailer with your four horses, where will you put your dogs, cats, and human family members? Would you have to make two trips to get the other four horses you own? Teach the horses to load. Teach all the horses on your property to load into the trailer, no matter what. Practice loading each horse alone. Practice at night, and when it’s raining, windy, dark, and generally miserable. Develop an escape route. Drive through every road in your neighborhood to identify escape routes. Keep in mind that officials may close off many roads to enforce the evacuation. Do you have more than one way out by the roads to safety? Keep maps in every vehicle for reference in an emergency. Decide where to meet. Choose in advance a place where everyone involved in your household and horsehold will be meeting off-site, if you’re evacuated. Arrange in advance a trusted person with whom to leave messages, in case you’re unable to use your cellphone. — Rebecca (Gimenez) Husted, PhD USRider® Equestrian Traveler’s Companion
Fall’s wet conditions can increase your horse’s risk for getting thrush, but wet conditions alone won’t cause the infection
5
Fall 2026
------------ SKILLSET------------
How to Change a Trailer Tire BY REBECCA (GIMENEZ) HUSTED, PhD
PHOTO BY SAVANNAH MELOCCO
Your trailer tires take your precious cargo down miles on the road—and sometimes off road. Know how to change a trailer tire in an emergency.
A
s an equestrian traveler, you should know how to change a trailer tire in an emergency. Here’s how. Safety note: If you find complications, such as multiple blowouts, or destruction of wiring or brake lines—and/or if you don’t have the proper tools or knowledge to safely get back on the road—call USRider for emergency roadside assistance.
Tire-Changing Kit Two spare tires. Carry two good-quality spare tires in case more than one tire fails during your trip. 8-10 emergency flares. Flares help
others see your rig when you’re stopped to change a tire. Use a minimum of three flares. Place one flare behind your rig, one at least 100 steps (300 feet) down the road behind your trailer, and one halfway back from that flare to the back of your trailer. 6-8 reflector triangles or cones. If you choose to use triangles or cones instead of flares, place at least three very close to your stopped rig. Then place one at least 100 steps (300 feet) down the road behind your trailer, and one halfway back from that triangle or cone to the back of your trailer. Flathead screwdriver. If your wheels
USRider® Equestrian Traveler’s Companion
6
have hubcaps, you’ll need a standard, large, flathead screwdriver or wheel-cover-removal tool to remove them. Lug wrench. Carry a lug wrench that fits your tires’ particular lug nuts. Or, find a four-way universal lug wrench. Drive-on jack. A drive-on jack can be made from plastic (such as Trailer Aid), wood, or steel. It should be at least five inches high, with a ramp. Use this simple tool if you’re replacing one tire at a time. Jack and jack stand. Use a jack and jack stand if you’re replacing more than one tire at a time. To choose the Fall 2026
PHOTO BY REBECCA (GIMENEZ) HUSTED, PHD
Use a drive-on jack when changing one tire. This one is made from two four-inch-by-six-inch treated pieces and beveled to allow drive-on ease. The good tire will support your trailer while you change the damaged one.
correct models, consult the trailer manufacturer’s recommendations. Using the wrong number or type to support your trailer is dangerous. 6 Chocks. A chock is a heavy piece of metal, rubber, or wood you tuck under a tire to keep it from rolling. Use chocks on both sides of the tires to prevent your trailer from rolling while jacked up off the ground. Carry at least six chocks. Lubricant. Use WD-40 or other penetrant, graphite, or silicone lubricant to loosen the lug nuts, dissolve rust, and ensure the lug nuts don’t [I] cross-thread[I] (cross over each other, stripping the lug nuts and studs). Never use a hammer on lug studs— you can destroy the threads.
How to Change a Tire Step 1. Remove the hubcap. Remove the hubcap using a screwdriver or a hubcap-removal tool. You’ll then be able to see the hub and lug nuts on the wheel. Step 2. Start to loosen the lug nuts. You’ll have better leverage if you loosen the lug nuts before driving your trailer onto the drive-on jack. Spray lubricant onto the base of each lug nut until the lubricant gets down to the lug stud. (Avoid getting lubricant on your fingers—it’ll make them slip-
PHOTO BY REBECCA (GIMENEZ) HUSTED, PHD
Use the lug wrench to loosen the lug nuts before driving your trailer onto the drive-on jack.
pery.) Loosen the lug nuts about four turns until you can loosen them with your fingers, then stop. Step 3. Drive onto the jack. Drive your trailer’s good tire on the same side as the damaged tire onto the drive-on jack. (If you’re using a jack and jack stand, lift the trailer on the same side as the damaged tire.) When the good tire is solidly parked on top of the drive-on jack (or safely balanced on the jack and jack stand), apply the emergency brake, put your truck in Park, and pull the keys out of the ignition. Step 4. Apply chocks. To prevent your trailer from rolling, move to the side of your trailer opposite the damaged tire, and push chocks under the tire facing downhill (both front and back). For added security, chock the other tire on that side of your trailer. Then chock the undamaged tire on the drive-on jack (both front and back). Step 5. Remove the lug nuts. Finish removing the lug nuts, and lubricate the lug studs again. Tip: Use the hubcap to contain the lug nuts. Step 6. Remove the damaged tire. Carefully slide the tire toward you, off the lug studs, without putting any body part under the trailer or tire. Step 7. Inspect the wheel well. In-
USRider® Equestrian Traveler’s Companion
7
spect the wheel well for any damage to the electrical lines, brake lines, or even the spindle, especially if the tire was destroyed. Inspect the lug studs for thread damage. Step 8. Lift the spare tire into place. Check to ensure that the tire is correctly facing the lug studs, then lift it into place, carefully setting it onto the studs. Step 9. Replace the lug nuts. Replace the lug nuts, and tighten them with your fingers. Then tighten them lightly with the lug wrench in a star pattern or by opposites. This process tightens the tire evenly and avoids cross-threading the lug nuts on the studs. Step 10. Roll trailer off the jack. Remove the chocks. Using your tow vehicle, slowly roll your trailer backward off the drive-up jack. (Or, carefully remove the jack and jack stand.) Step 11. Tighten the lug nuts. Tighten the lug nuts with the wrench again, as tight as is comfortable for you. Step 12. Retighten the lug nuts. After you travel 50 miles, or the next day, retighten the lug nuts with a torque wrench to set the amount of torque applied to the tightened nut. — Rebecca (Gimenez) Husted, PhD Fall 2026
O
------------ TACKTALK------------
Saddle-Pad Care
I
f you take care of your saddle pad or blanket, it’ll provide optimal protection and comfort for your horse, spreading pressure, and preventing friction and rubbing that might create a sore. Here are some general cleaning guidelines for English pads, Western synthetic-fleece pads, wool blankets, wool felt pads, sheepskin pads, and synthetic pads, plus leather trim. English pads. Many English pads are cotton quilted or fleece and are either machine- or hand-washable. If you do wash the pad in a machine, use cool water and a cool dryer setting to avoid shrinkage and corner curling. English fleece pads can often be machine-washed on gentle cycle and tumble dried on low heat. Most English quilted pads are also machine-washable and safe to dry in your dryer. However, some English quilted pads are made of materials designed to wick away moisture, so need to be line-dried. If your English pad has a gel insert, remove it before you wash the outer covering. Western synthetic-fleece pads. Shake a Western pad to remove the dirt, dried sweat and horsehair, then follow up by vacuuming or brushing. Brush off dried salt and dirt every time you ride, because a buildup will wear on the fibers. You can also machine-wash these pads on gentle cycle and tumble dry them on low heat. Another option is to pressure-wash these pads. In that case, you won’t need soap, because the water under pressure lifts out dirt and hair. Water won’t hurt most pads, as long as you allow them to dry properly afterward. If the fleece pad has a
Take time to clean saddle pads and blankets to prolong their life and help keep your horse comfortable. By Heather Smith Thomas
PHOTO BY CLIXPHOTO.COM
Most English fleece pads are easy to clean by using the gentle cycle on your washing machine, then tumble drying on low heat. fabric top and felt interior, do [I]not[I] machine-wash or pressure-wash it. Simply brush it off, rinse away dirt on the exterior, and hang dry. Wool blankets. Wool blankets can be
USRider® Equestrian Traveler’s Companion
8
kept fairly clean after daily use just by snapping them against a fence, door, pipe, or other solid surface. Follow up by brushing with a medium- to stiff-bristled horse brush (no Fall 2026
You can keep saddle pads cleaner between washings by brushing off dirt and debris. Also, brush a damp pad after washing to fluff the fibers. metal) to remove any hair or dander left on the surface. A blanket you use regularly can be washed every 60 to 90 days. Let the blanket soak in a tub of cold water for at least an hour. (Avoid soap, as a blanket can retain soap after washing and irritate your horse’s back.) Gently wring the blanket while it’s still in the water, then lift it out, and wring it again. Lay it flat, or hang it on a rail. Brush the damp blanket on both sides with a soft- to medium-bristled horse brush. Let the blanket air-dry. Wool felt pads. You can vacuum a wool felt pad between washings to keep it cleaner and reduce the amount of washings needed. You can also use a rubber grooming mitt to curry the felt. Some wool felt pads may be washed; follow the manufacturer’s instructions. If you do wash the pad, be sure to rinse off all the soap with clean water, and allow the pad to air-dry. Don’t machine-wash these pads often; the twisting action can be hard on wool. And if you use soap, it may take several rinses to eliminate residue. That extra agitation time tears out fibers and shortens the life of the pad. Sheepskin pads. A sheepskin pad is a hide with the wool still on. The leather side goes next to the saddle and
the fleece next to the horse. The quality and durability of a sheepskin pad depend on how it was tanned; many are washable, even in a washing machine. Genuine sheepskin pads rarely need washing, because the wool is springy and generally traps the sweat and dirt near the ends of the fleece fibers, away from the skin. Use a pet or poodle brush (with a few rows of teeth) to lift and brush out material. Don’t use strong detergents when washing sheepskin, because they can damage the leather and wool fibers. Instead, use a mild hair shampoo, such as Pert. Dry a sheepskin pad without heat, preferably on your dryer’s lowest setting of air fluff. Better still, hang it, which can take a couple of days. Check with the manufacturer to see if you should apply a conditioner on the leather side. Synthetic pads. Synthetic pads include those made from synthetic “rubber,” smooth Neoprene pads, and slick-surface pads. You can clean most of these pads just by hosing them off, but check the manufacturer’s instructions. Some recommend that you merely wipe the pad down. Once clean, a synthetic pad can be left to drip dry. Clean a neoprene or PVC foam pad after every ride, because the salt from your horse’s sweat
USRider® Equestrian Traveler’s Companion
9
Synthetic “rubber” pads may only need to be sponged or hosed off, but check the manufacturer’s instructions. eats at these materials, and the grit wears them down. Excessive salt and sweat on a pad’s underside or excessive exposure to sun on the topside can cause these pads to disintegrate and crack down the middle. Leather trim. Wipe the leather trim on pads and blankets clean with a damp cloth, then apply a leather conditioner. Avoid heat, especially in a dryer. You can wash or hose off the leather along with the pad, as long as you recondition the leather. USR Fall 2026
------------HAULINGHINTS-----------
Fall Road Trips
On long road trips, you need to consider your horse, your trailer, and your goals once you arrive. Here are expert tips from top trainer/clinician Julie Goodnight. By Julie Goodnight With Heidi Melocco
F
all is a busy show and equestrian-adventure season, which can mean hours of traveling time for your horse. I’ve learned a lot of things to do (and not to do) over a lifetime of hauling horses. On long trips, you need to consider your horse, your trailer, and your goals once you arrive. Overall, you’ll feel more prepared when you make a plan that feels right for you. Here are five things to consider.
1. Observe Your Horse First, observe how your horse travels in the trailer. If he’s nervous and tends to fidget and shake, he’ll use more energy, get himself hot, and need frequent breaks. Some horses are anxious when you’re not moving, but they do okay once you’re in motion. ConsidUSRider® Equestrian Traveler’s Companion
10
er hauling with a riding friend. A horse will always travel better with a buddy, and you’ll have driving help. I can tell when one of my horses is comfortable in the trailer, because he stands still. There are few hoofprints in the shavings when we travel long distances. When trailering a seasoned traveler, you can drive on a bit farther than with a nervous horse. How your horse feels in the trailer may impact how you dress him up. If he’s new to trailering or you feel he may lose his balance, protect his legs with standing wraps. I like these wraps, because they stay in place during travel. I might not wrap a horse if it’s a hot day or we’re going a short distance, and I’m fairly certain he’ll stand still and relax. Fall 2026
Add only a thin layer of shavings to absorb any urine and help prevent slips and falls. If you use too much, they’ll blow around and affect your horse’s air quality.
2. Prep Your Trailer Next, prepare your trailer. The more comfortable it is, the longer you’ll be able to drive without taking a break. If you have a slant-load with padded sides that your horse can lean against, he’ll be able to take a break from the stress of balancing. If you have an open stock-type trailer, he won’t have a chance to lean and may tire more quickly. Think about how you’ll access your horse while on the road. Is it comfortable for him to eat in the trailer? If you can access your horse’s head from a window, you can give him water and feed on the road without offloading, shortening your breaks. Here are a few more trailer-prep tips. • Invest in a trailer cam. I suggest that you invest in a wireless trailer camera that you can monitor from your truck’s cab. Then you can check in on your horse along the way to see how he’s doing. • Go light on shavings. Add only a thin layer of shavings to absorb any urine and help prevent slips
Tie your horse with enough length in the rope that he can relax his head, but not so long that he can turn his head back behind him. He can catch a hoof in a too-long lead rope, which can lead to a serious injury.
and falls. If you use too much, they’ll blow around and affect your horse’s air quality. Shavings can also become slippery, so keep them at a minimum. • Check ventilation. Make sure your trailer has adequate ventilation to support your horse’s lung health and overall comfort. Make sure the roof vents are open and that air can circulate inside the trailer without the windows being open all the way. You want airflow, but you don’t want your horse to be able to stick his head out the window. • To tie or not to tie? There are advocates on both sides of this debate. I always tie my horse in the trailer, so I know where his head is. If I feel the trailer moving and feel him moving around, I know that there’s something wrong. I also like to know that I can get to my horse’s head to feed and water him, if needed. I want him to stay how I put him. Of course, if you tie your horse, use only a halter designed to break away in an emergency. A rope or nylon
USRider® Equestrian Traveler’s Companion
11
PHOTOS BY HEIDI MELOCCO
If you’ll be gaining altitude, your horse will need at least 48 hours to rest and acclimate, especially if you’re going on a mountain trail ride.
halter likely won’t break if your horse pulls back, which can lead to injury or worse. Tie your horse with enough length in the rope that he can relax his head, but not so long that he can turn his head back behind him. He can catch a hoof in a too-long lead rope, which can lead to a serious injury.
3. Plan Your Drive Time Before you go, decide whether you’ll push to drive straight through or stop to rest and board along the route. From my place in Central Colorado, I have to trailer three hours just to get out of the mountains. My horses and I are used to a moderately long trailer ride. Plan ahead for a long trip. Schedule rest stops, water breaks, and feeding times. Keep in mind that you’ll need to stop more often if your horse is nervous. Decide how many days you’ll be on the road, and arrange overnight stabling in advance. Consider what you’ll ask of your horse when you arrive at your destination. Will you be arriving the Fall 2026
night before a performance class or grueling trail ride, requiring him to work hard as soon as he arrives? If so, build in some downtime. Don’t push through and drive all at once, then ask your horse to immediately carry you over jumps or up a mountain. Note that if you’ll be gaining altitude, your horse will need at least 48 hours to rest and acclimate, especially if you’ll be going on a mountain trail ride. On the road, keep your horse in the trailer. During breaks along the route, park in a safe place, open the window, check on him, then sit down and rest for a half hour. You and your horse will both get a break from balancing while the trailer is in motion. When you stop for the day, offload your horse at your destination. Bring your own feed and water buckets to avoid contamination risk. Optimally, I’d travel no more than eight hours per day. That allows me time to arrive early at the overnight accommodations I booked ahead of time. Only push through longer than this if your horse has time to rest when you arrive at your destination, he travels well, and your trailer is comfortable. When I arrived, I’d make sure to take my horse on a nice leisurely walk to help his digestion and muscles. Horses aren’t made to stand still all day, so walking can help them relax. With that plan, I’d stop every two hours, even if it’s only for 20 minutes. I’d open the windows and make sure the ventilation is okay. I’d feel his chest to see whether my horse is too hot or cold, then make any necessary changes.
4. Consider Feed and Water If your trailer allows you to access your horse’s head, hang a haybag and water bucket when you stop to rest.
into the trailer with a full belly, he won’t be thinking about food for an hour or two. Give your horse hay and water as soon as you arrive. This also means he’ll have more room to move in the trailer without a space-limiting haybag.
5. Offload Safely
Avoid offloading your horse onto concrete or asphalt, where he can easily slip. And only offload him if you know he’ll load up again easily. If you can’t get to your horse’s head, you’ll be able to feed and water him only when you offload. Hydration is vital to your horse’s health when you’re hauling a long distance. Bring a few five-gallon buckets with lids so your horse has some water from home that he’ll recognize and drink. You’ll also need hay from home. Your horse’s digestive system is designed to have food moving through his system throughout the day. He’ll tend to be healthy and relaxed when he has access to feed. However, make sure that there’s adequate room in the trailer for your horse and the haybag. If you stuff a full hay bag in a slant-load, there will be little room for your horse to move. He won’t be able to relax his neck. Short-trip tip: When you haul shorter distances (less than three hours), make sure your horse has eaten well before you start. If he gets
USRider® Equestrian Traveler’s Companion
12
Offloading along your route may seem like a good break for your horse, but it’s tough to find a safe place to unload and load safely if you’re not traveling a familiar route. Avoid offloading your horse onto concrete or asphalt, where he can easily slip. And only offload him if you know he’ll load up again easily. If there’s any question about your horse’s intent to get back onboard, wait until you reach the overnight-stabling facility to unload him. Don’t do a trailer-loading training session along a busy highway. If you plan to offload your horse, make sure that you have as many people with you as you do horses, so you have enough help managing your traveling herd. If I’m by myself, I want to get there as fast as I can and make sure I don’t have any incidents along the way. USR Heidi Melocco is a lifelong horsewoman, equine journalist, and photographer based in Mead, Colorado. Julie Goodnight trains horses and coaches horse owners to be ready for any event, on the trail or in the performance arena. After producing the popular RFD-TV series,Horse Master with Julie Goodnight, for 11 years, Goodnight now shares the world of horses through 2Horse Productions, and through appearances at clinics and horse expos throughout the United States. She also hosts her monthly horse training podcast, Ride On with Julie Goodnight. Fall 2026
When AAA says no,
USRider says yes! USRider’s roadside assistance program provies 24/7 roadside assistance for any vehicle our members are traveling in, including tow vehicles and trailers carrying horses. If the unexpected happens, our members know they can call us anytime, day or night. *Applies to passenger vehicles or light-duty trucks maximum GVWR 14,000 lbs.
AAA
USRIDER CLASSIC
USRIDER PREMIER
LOCKOUT BATTERY ASSISTANCE ROADSIDE SERVICE: FLAT TIRE ASSISTANCE, JUMPSTARTS, FUEL DELIVERY HORSE TRAILER SERVICE & TOWING EMERGENCY STABLING, VETERINARY & FARRIER REFERRALS WINCH-OUT COVERAGE ON DUAL-WHEELED VEHICLES $5,000 THEFT REWARD FOR TOW VEHICLE & TRAILER WINNER’S CIRCLE ADVANTAGE DISCOUNTS ONE FREE ASSOCIATE EMERGENCY DISABLEMENT EXPENSE REIMBURSEMENT 24-HOUR CONCIERGE SERVICE
Join Today Join Today SAVE 15% WITH DISCOUNT CODE: HRM15
VISIT: https://usrider.org/hrm15/ WWW.USRIDER.ORG | 800-844-1409 Discount applied to new memberships only
------------SAFETRAVELS-----------
Equine Protective Gear Here’s a rundown of gear designed to help keep your horse safe and comfortable during travel. By Rebecca (Gimenez) Husted, PhD
PHOTO BY HEIDI MELOCCO
Protective gear, such as shipping boots, can help keep your horse safe in the trailer. Here’s a rundown of common protective gear, including expert recommendations.
S
hould you use protective gear when you trailer your horse? One could argue that no safety gear will prevent your horse from hitting steel or aluminum in an accident. You’d have to add air bags, safety padding, and slings, or perhaps yards of bubble wrap. However, protective gear can help keep your horse safe during the occasional kicks, constant road debris, usual bumps, slips, and cold weather during transport. Here’s a rundown of common equine protective gear, including what I recommend in each category.
Shipping Boots/Leg Wraps PHOTO COURTESY OF KENSINGTON PROTECT PRODUCTS
“I recommend shipping boots over leg wraps— ease of use means you’ll be more likely to apply them every time you trailer your horse,” says Rebecca (Gimenez) Husted, PhD. Shown are shipping boots from Kensington Protective Products. USRider® Equestrian Traveler’s Companion
What they are: Shipping boots with hook-and-loop fasteners run from knee to ground, and are easy to apply and remove. Leg wraps are elastic wraps/bandages you carefully wrap around your horse’s lower legs; these take longer to apply and require skilled application to avoid placing too much pressure on your horse’s tendons. You’ll also need to make sure you don’t leave the wraps on for extended periods of time. (For more on leg wraps, see page 18.)
14
Fall 2026
What they do: Boots and wraps help protect your horse’s lower legs as he gets in and out of the trailer, if he falls or is kicked by another horse en route, and even in an accident. Recommended? I highly recommend leg protection when you trailer your horse. I recommend shipping boots over leg wraps— ease of use means you’ll be more likely to apply them every time you trailer your horse.
Fly Mask What it is: A see-through mesh mask that secures to your horse’s face (and sometimes ears) to protect him from flies and other pests. What it does: When you haul your horse in a trailer that’s open to outside elements, a fly mask protects your horse’s eyes and ears from insects and dust that whip by. Recommended? I strongly recommend using a fly mask when you trailer your horse, especially if you use an open stock trailer.
“I strongly recommend using a fly mask when you trailer your horse, especially if you use an open stock trailer,” advises Rebecca (Gimenez) Husted, PhD. Shown is Shires Fly Mask with Ears. PHOTO COURTESY OF SHIRES EQUESTRIAN, INC.
“Protective gear can help keep your horse safe during the occasional kicks, bumps, slips, and cold weather.” PHOTO COURTESY OF CASHEL COMPANY
Head Bumper What it is: A nylon or leather pad with cushioning material that’s shaped to fit on your horse’s crown. What it does: A head bumper will help protect your horse’s head from injury if he should hit it during the loading/unloading process or during transport. Recommended? I recommend that you use a head bumper if your horse is tall or fractious, or if your trailer is a little too short to accommodate his height. Head bumpers aren’t usually needed for all horses, and can make their heads hot and itchy.
“I recommend that you use a head bumper if your horse is tall or fractious, or if your trailer is a little too short to accommodate his height,” says Rebecca (Gimenez) Husted, PhD. Shown is a head bumper from Cashel Company.
Temporary Hoof Boots What they are: Rubber boots designed to go over the hooves of barefoot horses to protect the hooves. They’re designed to be easily applied and removed. What they do: In the trailer, temporary hoof boots can provide traction, as well as a layer of shock absorption to help cushion your horse’s joints. Recommended: See what works best for your horse. Barefoot horses can be trailered safely. Note that in very hot weather, boots may contribute to heat stress. USRider® Equestrian Traveler’s Companion
15
PHOTO COURTESY OF EASYCARE INC.
In the trailer, temporary hoof boots can provide traction, as well as a layer of shock absorption to help cushion your horse’s joints. Shown is an Easyboot from EasyCare Inc. Fall 2026
Trailering-Safety Tips
PHOTO BY CLIXPHOTO.COM
Normally, horses don’t need to be blanketed for transport, because they generate plenty of their own heat,” notes Rebecca (Gimenez) Husted, PhD. “But older or compromised horses might need a light sheet.”
Blanket/Sheet
PHOTO BY CLIXPHOTO.COM
Consider a rear-facing stall configuration, which tends to allow horses to better balance their weight than do forward-facing models, especially during braking.
What it is: A blanket or sheet covers your horse from withers to tailhead. These products come in a wide variety of materials (usually nylon or cotton) and offer varying degrees of insulation. What it does: During transport, a blanket or sheet provides warmth/wind protection in cold months, and can offer some protection in the event of a bump, bite/kick, or an accident. Recommended? Normally, horses don’t need to be blanketed for transport, because they generate plenty of their own heat. But older or compromised horses might need a light sheet. Watch for heat stress; trailers are often poorly ventilated. USR
In addition to protective gear, your choice of trailer and attention to safety when hauling will also help keep your horse injury-free. Here are my top three trailering-safety tips. • Consider a rear-facing trailer. Trailer cameras tell us that rear-facing trailer models tend to allow horses to better balance their weight than do forward-facing trailers, especially during braking. And in the event of an accident, your horse’s strong hindquarters will absorb an impact much better than his face and head. • Consider a stock trailer. A stock trailer is also a good choice, because it allows your horse to find his own comfortable space and hauling angle. • Keep horses separated. If you’re hauling more than one horse, make sure the animals can’t bite or kick each other in transport.
Rebecca (Gimenez) Husted, PhD (animal physiology), is president and a primary instructor for Technical Large Animal Emergency Rescue. A Major in the United States Army Reserve, she’s a decorated Iraq War veteran and a past Logistics Officer for the American Veterinary Medical Association’s Veterinary Medical Assistance Team. She’s an invited lecturer on animal-rescue topics around the world and a noted equine journalist.
16
Fall 2026
USRider® Equestrian Traveler’s Companion
------------YOURHEALTHYHORSE-----------
Leg-Wrapping Basics Learn how to properly wrap your horse’s legs with these expert guidelines. By Eleanor M. Kellon, VMD
PHOTO BY CLIXPHOTO.COM
Leg wraps—such as polo wraps (shown)—can be useful, but improperly applied wraps can damage your horse’s legs. Learn leg-wrap basics with this expert guide.
O
ne way to protect your horse’s legs in the trailer is by wrapping his legs. Leg wraps are also called for to protect and cover an injured area; provide warmth to stiff/old tendons, ligaments, or fetlocks; and control acute-injury swelling and movement. Leg wraps can be useful, but improperly applied wraps can damage your horse’s legs.
USRider® Equestrian Traveler’s Companion
18
The blood supply to the tendons in the back of his lower leg is compromised if the wrap is too tight, is applied with uneven pressure, or if it slips down and bunches up. How much tension to use when applying a wrap depends on the leg-wrap materials you choose. A properly applied bandage will stay in place without slipping and will lie snug against your horse’s skin, but not snug Fall 2026
Step 1. When you bandage a leg, use an inner layer of cotton or fleece.
Step 2. Apply the inner layer so that it lies smoothly along the leg.
enough to indent it. You should be able to slide a fingertip between the bandage and your horse’s leg. Here, I’ll first go over wrap materials and leg-wrap lingo. Then I’ll give you an overview of three common types of leg wraps: Stall wraps; shipping wraps; and wound/injury wraps.
Leg-Wrap Materials Here’s a rundown of common leg-wrap materials. Cottons: Cottons are used for the inside layer of stable bandages, and sometimes work bandages. This term may refer to either disposable cotton sheets or reusable and washable wraps of cotton or synthetic materials. Quilts: Quilts are cottons with a quilt pattern. Pillow wraps: Pillow wraps are extra-thick cotton wraps. Fleeces: Fleeces are lamb’s wool wraps used in place of cottons.
Leg-Wrap Lingo
Step 3. Always start the wrap over bone, not the tendons.
Step 4. Each layer should overlap the one before by half the width of the bandage.
Step 5. Wrap down to cover the fetlock joint and then back up, ending on bone, not tendon.
USRider® Equestrian Traveler’s Companion
Here’s a rundown of useful leg-wrap lingo. Polo wraps: Polo wraps are typically made from fleece or nylon, and are 2 to 6 inches wide. These are used as the outer layer of a stall wrap or shipping wrap, or during exercise. Polo wraps are available in varying amounts of stretch. Stall/stable/standing wrap: Wraps your horse wears when in the barn. A regular stall wrap (also called a stable wrap or standing wrap) has an inner layer of cotton, fleece, or nylon and an outer bandage to hold that layer in place. Note: Most horsepeople use standing wrap synonymously with stable wrap, while others mean a wrap that comes down to cover the pastern and coronary band, like a shipping wrap (below). Stall/stable/standing bandage: This is the wrap’s outer layer. It may be made from no-stretch cotton, fleece, or nylon. Shipping wraps: Shipping wraps are those worn in the trailer. Shipping wraps should be long enough to cover the pastern, heel bulbs, and coronary band.
Stall Wraps A regular stall wrap (also called a stable wrap or standing wrap) has an inner layer of cotton or fleece and an outer bandage to hold that in place. For full-size horses, the inner cottons are available in 12- and 14-inch lengths. The 12-inch cottons are for your horse’s front legs; his front-leg cannon bones are likely shorter than those of his hind legs. Look for an outer bandage that’s between 9 and 12 feet in length and 4 to 6 inches wide. Here are three rules of thumb when bandaging: 1. Always start the wrap over bone, not the tendons. 2. Bring the wrap around the front of the cannon bone first. 3. End the wrap along the cannon bone. Stretchy materials are easier to work with than cotton-flannel bandages, but can also be pulled too tight. As a rule of thumb, never
19
Fall 2026
stretch to more than 1.5 times the resting length of the fabric, and never, ever stretch as tight as it can go. To get an idea of how much pull/force this requires, first unravel a 4- to 6-inch length of bandage, hold it in front of you and gradually stretch until it is 1.5 times the original length. Before you begin, clean the leg where the bandage will lie. Brush the hair so that it is lying smoothly. Start at the cannon bone. If you’re right-handed, start the wrap on the left leg on the outside of the cannon bone, wrapping clockwise. On the right leg, start the wrap on the inside of the cannon bone, again going clockwise, to come across the front of the cannon bone first. If you’re left-handed, reverse this. Apply the cotton so that it lies smoothly along the leg, with no wrinkles. While holding the cotton in place lightly with one hand, begin the outer bandage by tucking it under the end of the cotton for a short distance, then wrapping in the same direction, first down to cover the fetlock joint, then back up again to end at the top of the leg. Each layer should overlap the one before by about half the width of the bandage. One of the trickiest things to learn is where to start the outer bandage so that you finish wrapping at the top of the leg without too much bandage left over, or not enough left. This will depend on bandage length (9 or 12 feet), the width (between 4 and 6 inches), and how much stretch it has, as well as how long your horse’s cannon bone is. Experiment with bandaging materials to find out what works best. In general, the outer bandage is started anywhere from halfway up the cannon bone to just above the fetlock joint, worked down to take in the fetlock, then brought back up again.
Shipping Wraps
PHOTO BY CLIXPHOTO.COM
A shipping boot or wrap must cover your horse’s pastern, coronary band, and heel bulbs. The easiest route is to invest in one-piece shipping boots designed for trailering (shown). USRider® Equestrian Traveler’s Companion
20
When your trailer your horse, sudden stops and sharp turns can throw him off balance. In the scramble to regain his balance, he could step on himself, usually along the lower leg or coronary band. This can result in serious injury. Shipping boots and wraps help protect Fall 2026
his legs from such injuries. A shipping boot or wrap must cover your horse’s pastern, coronary band, and heel bulb. The easiest route is to invest in one-piece shipping boots designed for trailering. These are easy to apply and are typically secured with a hook-and-loop closure. If you opt to wrap your horse’s legs for travel, 14-inch cottons and long polos are usually sufficient for horses with fairly short cannon bones. For longer cannon bones, you might need to go with regular stall wraps and a pair of bell boots or use shipping boots—or simply use shipping boots.
Wound/Injury Wrap Whether it’s a pulled tendon, a wrenched ankle or a nasty wound, wrapping can improve your horse’s
comfort by controlling swelling and, in the case of wounds, keeping the injuries clean. Wrapping over a wound, whether sutured or open, can be tricky. You don’t want the cotton in direct contact with the wound, because of lint. It’s less of a problem with the disposable sheet cottons, but these can end up sticking to wound drainage. Your best bet is to cover the wound with regular gauze sponges that have been lathered with plain petroleum jelly, a skin rejuvenator (such as Veterinus Derma Gel), or an antibiotic cream. (Don’t use Telfa dressing, as it won’t adhere well.) Smooth out the
gauze so that all edges are well stuck to the skin before you begin wrapping. When wrapping injured legs, be careful with pressure. Too much pressure is painful and can cause additional damage when combined with swelling. Wrap just tightly enough to ensure that the bandage doesn’t slip down. Check the wrap every few hours to make sure no swelling appears above or below the bandage. USR
“Wrap just tightly enough to ensure that the bandage doesn’t slip down.”
THE
Eleanor M. Kellon, VMD, is a staff veterinarian for Uckele Health and Nutrition, Inc., and is the owner of Equine Nutritional Solutions, a nutritional consulting firm.
APP:
THE ROPER’S ULTIMATE STREAMING EXPERIENCE
Stream videos on your device or cast to your TV.
Download videos and create a personal playlist to watch offline in the app—anywhere.
ROPING.COM/PAGES/APP
USRider® Equestrian Traveler’s Companion
21
Fall 2026
------------ GETAWAYS ------------
Tackling the Tetons
Grand Teton National Park offers spectacular scenery, especially in the fall. Story and Photos by Kent and Charlene Krone
Traveling equestrians would be hard pressed to find more spectacular scenery than Wyoming’s Grand Teton National Park, especially in the fall. Here, Mount Moran, 12,605 feet above sea level, is festooned in fall colors.
T
raveling equestrians would be hard pressed to find more spectacular scenery than Wyoming’s Grand Teton National Park, especially in the fall. The Teton Mountain Range
USRider® Equestrian Traveler’s Companion
22
rises gracefully 7,200 vertical feet from a lush valley floor to a height of 13,770 feet above sea level. Covered in white lace mantillas, graceful mountains admire their reflection in mirrored lakes below. Fall 2026
One hundred million years ago, slow-moving glaciers sculpted large moraines and formed lakes. Wind and water erosion added finishing touches to this sublime masterpiece. Five distinct natural communities exist in this area: alpine; forest; sagebrush flats; wet meadows; and lakes and ponds. Each region has its own unique plant and animal life.
Fairground Camping We arrived in the nearby town of Jackson and made the Teton Fairgrounds our temporary home, since there are no equestrian campgrounds in Grand Teton National Park. Here, our horses had stalls, and we had electricity and a convenient camp. Fairground policy allows you to exercise your horses in the large arena as long as you stay with them. A word of caution: When we turned out our Missouri Fox Trotter geldings, Nate and Cowboy, they spied an obscure open gate and charged out of the arena, heading for a night on the town. Fortunately, they stopped to munch alfalfa in the parking lot, and we were able to squash their foray.
Entering Grand Teton National Park. Note that the park has no equestrian campgrounds, so the Krones stayed at the Teton Fairgrounds in the nearby town of Jackson. “Our horses had stalls, and we had electricity and a convenient camp,” they report.
Inspiration Point On a crisp September morning, we trailered our horses to the String Lake trailhead. To get there from the fairgrounds, we drove north on Highway 191 and into Grand Teton National Park, a distance of roughly 22 miles. We turned left on Teton Park Rd. past Jenny Lake, then turned left at North Jenny Lake Junction. The parking lot at the String Lake Trailhead is divided into three sections. The first two parking lots are small, but the spacious third lot easily accommodates horse trailers and even has hitching rails. Tangled ribbons of sunlight crossed our path as we began our journey to Inspiration Point and Cascade Canyon. The air held a little nip to remind us that winter wasn’t too far away. From the trailhead, we rode by a bridge and crossed a crystal-clear stream. After about three miles along Jenny Lake, we came to the trail that led to Inspiration Point, a high bluff that extends out into Jenny Lake. Inspiration Point is well-named! Its visual beauty is enhanced by the wind whispering across the lake, fragrant pines, and clean, fresh air. Here, you know you’re in a special place.
“On a crisp September morning, we trailered our horses to the String Lake trailhead,” note the Krones. Here, they cross the stream below String Lake on the way to Inspiration Point aboard their seasoned mounts, Cowboy and Nate.
Cascade Canyon We then backtracked a short distance and headed up Cascade Canyon, also well-named. A short portion of this trail is rocky and gains elevation, but soon levels out as it follows the canyon floor. As we headed up the trail, we took time to enjoy our surroundings. Across the meadow, a quilt of scarlet and gold, a silver stream danced merrily along. From quiet pools, fish leaped USRider® Equestrian Traveler’s Companion
23
Charlene Krone rides Nate along Jenny Lake on the way to Inspiration Point and Cascade Canyon. Fall 2026
for bugs. Towering mountains hemmed the meadow’s edge, their massive faces glistening with tears from melting glaciers that became sparkling waterfalls. We continued up Cascade Canyon, following the stream as it wound its way in and out of several long meadows. Three miles later, we could see Mount Owens, a glacier hanging on its shoulder. This is one beautiful ride!
Lake Rides
Kent Krone rides Cowboy on the way to Cascade Canyon. “A short portion of this trail is rocky and gains elevation, but soon levels out as it follows the canyon floor,” the Krones report.
Kent and Charlene Krone riding in Cascade Canyon. “This is one beautiful ride!” they effuse.
Our next ride, also from the String Lake Trailhead, was to Leigh Lake along a mostly level soft-dirt trail. In this large, shallow lake, three picturesque islands appeared; one had a lonely, solitary tree. Across the wide expanse of water, the Teton Range watched us in haughty silence. We continued about five miles up this trail, eventually passing Bear Paw Lake and continuing on to Trapper Lake. Both have primitive campsites. Trapper Lake was dramatic, surrounded by a swirl of fiery colors with Mount Moran looming behind. On the way back, we encountered a group of young folks packing in supplies for a canoe trip, lugging food and equipment. For our third ride, we parked at the Taggart Lake Trailhead. (If this one is full, go north to the smaller trailhead on the right with a dirt road and parking area.) This ride was in the alpine region, at a higher altitude than our two earlier rides. Intersections are well-marked. Our trail gently climbed; when it forked, we turned right. We rode past Taggart Lake and climbed up to Bradley Lake. We rode through alpine forests, yet we could see the majestic Tetons. When we got to Bradley Lake, we rode for a while, then backtracked to Taggart Lake. We followed the lakeshore, then crossed a bridge over the lake’s outlet stream, completing an easy loop back to the trailhead. There are a couple of other rides in the park worth mentioning. The ride to Hermitage Point, a peninsula that juts into Jackson Lake, is a comfortable, 10-mile loop. Start from the Colter Bay Lodge and trailhead at the park’s north end. You’ll work your way through several interconnecting loops to Hermitage Point. Jackson Lake is the largest lake in the park. Its turquoise-blue water provides a stunning setting for the Tetons rising in the distance. Take time on the return to stop at Herron Pond. This lily-pad-covered pond is home to local moose.
Death Canyon Nate gets a drink of water at Leigh Lake. Charlene Krone and Nate are on the trail to Trapper Lake.
Another knockout ride is up Death Canyon. Many consider it one of the most beautiful rides in the park. To get there, journey past Phelps Lake, then start climbing into the canyon. Be
USRider® Equestrian Traveler’s Companion
24
Fall 2026
careful going through the rocky portions of the trail. After entering the canyon, you’ll find walls of solid granite punctuated with waterfalls. Until recently, riders could park at the Death Canyon Trailhead. But the National Park Service has closed road access to trailers, so you’ll need to park at the Taggart Lake Trailhead, a good distance away from Death Canyon. Check with the NPS for current road-access conditions.
Jenny Lake Lodge After our ride to Trapper Lake, we rode to Jenny Lake Lodge and tied our horses at the lodge’s hitching rails. We enjoyed sitting on the lodge deck and watching guests from around the world visit with Cowboy and Nate. For Western luxury inside the park, Jenny Lake Lodge is the place to go. Horseback rides through beautiful scenery are provided free of charge to lodge guests. We rode past the stables and visited with the wranglers. Horse use has always been a part of the history of Grand Teton National Park. In 1922, Tony Grace homesteaded 160 acres in the Jenny Lake area and started a dude ranch. He built the first five structures that remain a part of Jenny Lake Lodge. The dining room is part of the original lodge Grace built. Today, you can enjoy the same ambiance and trails early guests used nearly a century ago. Cabins have been modernized, yielding comfortable quarters after a long ride. Award-winning cuisine awaits the hungry diner.
Triangle X Ranch Another historical ranch is the Triangle X Ranch, an authentic dude ranch completely surrounded by Grand Teton National Park. Located in the heart of Jackson Hole country and with the Tetons as a backdrop, the Triangle X offers mountain scenery, abundant wildlife, horseback riding, and a quiet, relaxed pace. The Triangle X offers approximately 200 horses and 50 mules for guest use. Rides feature changing vistas of the Teton Range and Snake River Valley. You may choose scenic, slow rides, or advanced rides that cover longer distances. You may ride along the river (where elk, moose, and bison roam), over sagebrush flats, through green foothills filled with colorful wildflowers, and finally to the tops of timbered mountains. USR Seasoned equestrian travelers Kent and Charlene Krone combine their interest in photojournalism with a passion for horses. They enjoy sharing their horseback adventures and equestrian-travel tips with fellow enthusiasts. USRider® Equestrian Traveler’s Companion
25
Charlene Krone and Nate at Trapper Lake with Mount Moran behind.
The Krones’ rig and horses at the Taggart Lake Trailhead.
Fall colors on the Taggart and Bradley Lakes trail. Shown is Charlene Krone aboard Nate. Fall 2026
------------FROMTHEHEART------------
Adopt a Rescue Horse Learn the right way to adopt a rescue horse with these 10 tips. By Cate Lamm
PHOTO BY HEIDI MELOCCO
Horse rescues can be great place for you to find a special equine partner for your equestrian travels. Plus, you’ll be giving your adopted horse a second chance at life.
H Well-run rescues will want to send an agent to visit the location you plan to keep your horse to verify that you have a safe, suitable facility. USRider® Equestrian Traveler’s Companion
orse rescues can be great place for you to find a special equine partner for your equestrian travels. Plus, you’ll be giving your adopted horse a second chance at life. Thinking of adopting a rescue horse? Here are 10 tips to help you through the adoption process. 1. Consider all costs. The adoption fees may be low, but the cost of owning and caring for a horse is ongoing. Before you adopt, create a budget that includes all horse-related expenses. To determine your expenses, talk to local horse owners, farriers, and veterinarians. 2. Be prepared. Well-run rescues will want to send an agent to visit the location you plan to keep your horse to verify that you have a safe, suitable facility. 3. Find a reputable rescue organization. A reliable rescue will take good care of the horses, and be honest with you about their health and training. You can find approved
26
Fall 2026
A reputable horse rescue will expect you to demonstrate your riding ability at two adoption appointments. Wear appropriate riding pants and boots, and don’t forget your ASTM-approved, SEI-certified riding helmet. horse rescues through the Global Federation of Animal Sanctuaries. Equine Network’s A Home for Every Horse helps rescue organizations find forever homes for adoptable horses. (If your 501(c) (3) rescue organization would like to join the A Home for Every Horse network of rescue facilities, click here.) 4. Don’t fall for a pretty face. Choose the horse that matches your skill level, even if he doesn’t look like what you imagined. Better to have a horse that you feel safe with than one that looks great standing in the pasture. The rescue staff can help you make this decision. 5. Rely on an experienced horseperson. If you’re a beginner or intermediate rider, employ the help of a trained equine professional or knowledgeable horseperson. This person and the rescue staff will be able to help you decide if a horse is a good fit for your rid-
Keep in mind that rescue horses may’ve experienced some kind of neglect and/ or abuse. It takes patience, perseverance, and confidence to rehabilitate a horse that has lost trust in humans.
Spend time bonding with your new equine partner through grooming, ground work, treats, and pats. Give him several weeks to adjust to his new home and routine.
ing ability and personality. 6. Be ready to ride. A reputable horse rescue will expect you to demonstrate your riding ability at two adoption appointments. This enables the staff to make sure you and the horse are suitable for each other. So, be sure to wear appropriate riding pants and boots, and don’t forget your ASTM-approved, SEI-certified riding helmet. 7. Schedule a prepurchase exam. When you’ve found a horse you think you’d like to adopt, schedule a prepurchase examination with an equine veterinarian. The scheduling and cost are your responsibility. If the horse passes the exam, continue with the adoption process, and take the horse home. 8. Be patient. Keep in mind that rescue horses may’ve experienced some kind of neglect and/or abuse. It takes patience, perseverance, and confidence to rehabilitate a horse that has lost trust in humans.
USRider® Equestrian Traveler’s Companion
27
Give your horse plenty of time to learn new things. Stay calm, and remember to breathe. 9. Bond. Spend time bonding with your new equine partner through grooming, ground work, treats, and pats. Give him several weeks to adjust to his new home and routine. His past experiences may cause him to be on edge in a new environment, and he needs your confidence to help him through. 10. Stay flexible. Keep in mind that horse rescues often retain ownership of the adopted horse for a certain period of time. This allows the organization to take the horse back if you, or the rescue, decide things aren’t working out. Expect a follow-up visit a few months after you’ve adopted your horse to make sure you’re both thriving. Take this opportunity to ask the rescue agent any health or behavioral questions you might have. USR Fall 2026
------------ USRIDERMEMBERSTORY------------
Back on Track
PHOTO BY ANDREA CAUDILL
USRider member Linda R. and her Quarter Horse, Whiskey, at the Indian Territory Competitive Trail Ride.
When this NATRC competitor’s truck broke down, she turned to USRider to keep her on the road. By Linda R. USRider® Equestrian Traveler’s Companion
A
s a member of the North American Trail Riders Conference, Region IV, I volunteer and compete throughout our four-state region of Arkansas, Louisiana, Oklahoma, and Texas. One late September, my Quarter Horse, Whiskey, was recovering from an illness, so competition was out. Instead, I’d volunteered to deliver some saddle-rack awards to the Wilburton, Oklahoma, race, about two hours away from my
28
home in Lamar, Arkansas. This would also give me an excuse to watch one of the Quarter Horses that I bred and raised for competition (Brandy) in his first race with his new rider, Kate. Early Sunday morning, I headed out in my truck. Driving along, I noticed a fog bank seemed to following me. Then I realized it wasn’t fog—it was steam coming from my truck! With my eye on the temperature gage, I got off the Fall 2026
USRider member Linda R. during a competitive trail ride aboard Brandy, a Quarter Horse she bred and raised.
USRider member Linda R. with Brandy, a Quarter Horse she bred and raised for competitive trail riding. highway. All sorts of things went through my mind: I’ve busted a radiator hose. Thank goodness I’m not hauling a horse. How am I going to get this fixed on a Sunday morning? Several years ago, I’d investigated emergency roadside services
for those of us who trailer horses. A NATRC friend suggested USRider, so I enrolled. Now, I grabbed my card and dialed the 800 number. Thankfully, help was on the way. Lisa from USRider told me that Robert would look at the truck and could fix it on the spot. I thought, a new water hose, and I’ll be on my way! Wrong! Robert arrived, assessed the situation, and promptly pronounced my whole water pump dead. After a quick trip to the auto-parts store and a call for reinforcements (a mechanic named Jim), repairs began. I stayed out of the way while they efficiently did the job. Every hour or so, a USRider representative called to make sure I was okay and that repairs were underway. I assured them that Robert and Jim
USRider® Equestrian Traveler’s Companion
were taking good care of me and my truck. I learned that Robert and Jim do this for a living—go into the field and repair big rigs—so fixing my truck was no big deal for them. I was back on the road by 1:30 p.m. Figuring I could still make the awards, I headed out with an eye on the temperature gage. It never faltered. I arrived in time to hand over the saddle racks, get the latest gossip, and visit my boy Brandy. He and Kate placed first in their class! If not for USRider saving the day, I wouldn’t have been there to share the event. Whiskey and I are now back in competition. The truck hasn’t faltered since Robert and Jim fixed it. And Kate and Brandy continue to place well in races. USR
“If not for USRider saving the day, I wouldn’t have been there to share the event.”
29
Fall 2026
------------EQUESTRIANESSENTIALS------------
Ride Into Fall Reflective Riding Gear As the days become shorter, visibility horseback becomes more critical, both at home and on the road. High Visibility Sportswear, from the British manufacturer Equisafety, helps you and your horse stand out in varying light conditions, as well as under headlights and street lights. Styles include a waterproof, windproof, breathable jacket; a breathable waistcoat; and waterproof equine leg boots (one size fits all). Some apparel items offer an optional back sign for roadside riding that read “Please Pass Wide and Slow.” The products are available in bright yellow, orange, and pink, and feature reflective and fluorescent properties.
PHOTOS BY SUSHIL DULAI WENHOLZ
Grooming Bucket
Horse-Chore Boots
World Class Equine’s Deluxe Grooming Tote includes four interior pockets to hold all your necessities. Made from 600 denier polyester fabric with vinyl backing, the lightweight tote features four interior pockets to hold your grooming tools at home and on the road. sizes. Perfect for the traveling equestrian.
Tired of the mud and muck ruining your leather boots? The rubber Quatro® Boots from Bag Man LLC are ideal for horse chores while traveling with your horse, as well as at home, as you clean stalls and work around the barn. The boots feature the company’s multilayered Quatro Comfort System orthotic footbed, along with a tapered mud-releasing outsole. Available in insulated, non-insulated, and extreme insulated models.
Waterless Shine What do you do when you desperately want to clean your mudstained horse, but you can’t give him a bath? Try Miracle Groom from Absorbine, a spray-on formula that removes spots and stains while conditioning, detangling, deodorizing, and shining your horse’s coat — no soap or water necessary. USRider® Equestrian Traveler’s Companion
Barn & Trailer Stall Refresher Sweet PDZ Horse Stall Refresher Granules, available from Smart Pak Equine, keeps barn and trailer stalls fresh and clean while supporting your horse’s respiratory health. This formula works quickly to remove ammonia from the air by absorption, and it dries as it deodorizes. The granules are unscented so the product does not mask odors. Made from 100% natural Zeolite that is nontoxic and OMRI approved.
30
Fall 2026
EVERYTHING YOU LOVE ABOUT HORSES ALL IN ONE PLACE
Discover Ride TV, the ultimate equine streaming platform. Whether you want to watch the biggest events in equestrian sport, bingewatch your favorite series, or learn from top pros, Ride TV makes it easy to watch your favorite videos anywhere, anytime, all in one place.
Start your 7-DAY FREE TRIAL! SUBSCRIBE TODAY
------------ USRIDERBENEFITS------------
Access Discounts on Barn & Stable Products As a Member of USRider, you can enjoy money-saving discounts from our nationally recognized equine-industry partners. You’ll find exclusive deals on items for you and your horse, including trailering products, tack and equipment, apparel, veterinary supplies, equestrian gifts and jewelry, equine publications, services,
and more! If you’re a USRider Member, please log in to access exclusive discount codes. Not a Member? Join today! This issue, we spotlight discounts on Barn & Stable Products. For more information on products from each of these companies, and for more Members-only discounts, click here.
FireHorse Rescue Kits New! FireHorse Rescue Kits are designed to aid equine evacuation in case of a fire emergency. Selected by career firefighters and lifelong equestrians, each Rescue Kit’s contents include simple tools to for anyone, from grooms to first responders, to use in the event of an emergency: two handheld extinguishers, five FireHorse equine blindfolds, one pair of heat-resistant fire gloves, a 2000 lumens flashlight, one fire blanket, one hay thermometer, one handheld glass breaker, one smoke mask, one 31-foot rescue rope, and a heavy-duty hook to mount the kit in your barn. The case itself is ultra-durable, weather-resistant, and easy to carry. Also available is a Mini Rescue Pack designed for one to two horses in a boarding or individual living situation. USRider Members receive a 10% discount on all product offerings.
EZSignsOnline.com EZSignsOnline.com The company also offers personalized farm signs, an excellent, affordable way to enhance your farm or barn entrance. Use the company’s easy-to-navigate, secure website to “build” your sign online. The company also offers long-lasting, maintenance-free Pet Memorial Markers to honor the memory of a beloved horse or pet. USRider Members receive a 10% discount on all sign orders, plus free shipping.
Hey Box, Inc. Hey Box, an organizer box from Hey Box, Inc., is the perfect gift for stable managers, horse owners, and pet owners in the barn or in any environment. It offers a central location for drop-offs and pickups for on-the-go equestrians, as well as temporary storage for personal belongings and horse gear. The box features durable hooks to hang reins, bridles, jackets, hats, purses, leashes, harnesses, and more. Made in the U.S.A. USRider Members receive a 25% discount.
Spalding Labs’ Bye Bye Odor Odor and potentially harmful fumes, especially ammonia, can build up in your trailer, your home barn, show barns, and overnight-stabling facilities. Bye Bye Odor, by Spalding Laboratories, contains four microbes that consume odors’ elements, then convert them into odor-free, harmless elements. The natural, nontoxic microbial solution is specially formulated to substantially reduce or eliminate ammonia levels from equine urine and manure. USRider Members a 15% discount on a 32-ounce bottle of Bye Bye Odor Concentrate (treats 40 stalls for one month). USRider® Equestrian Traveler’s Companion
32
Fall 2026
START STRONG WITH
Feel confident, not confused. Everything you need to care for your first horse is in one place.
PRESENTED BY
MYNEWHORSE.COM
------------HANDY CHECKLIST------------
8 Leaf-Peeping Tips To catch colorful fall foliage from the back of your horse, find an area where deciduous trees grow in large numbers. Find trees leaves turn yellow, orange, or red before they drop off, instead of just turning brown. The duration of time between when a leaf turns color and when it drops off the tree is relatively brief. Most trees don’t hold their colorful leaves for more than two weeks, at the most. Peak-color dates depend upon several factors, including the current temperature, and the previous seasons’ weather patterns. A warm, wet spring; a moderate summer; and a fall with warm, sunny days and cool nights make for the best fall colors. Drought can seriously affect the colors’ timing and vibrancy. A general rule: The higher the latitude, the earlier fall leaves change color. Here are eight tips to keep in mind as you embark on a fall-foliage riding tour.
PHOTO BY CLIXPHOTO.COM
Invest in fall riding wear. Fall weather can vacillate from warm to chilly, or dry to wet, depending on where you are and the time of day. USRider® Equestrian Traveler’s Companion
34
■ Plan your dates. In New England and the upper Midwest, the leaves are typically at their peak color in middle to late September or early October, depending on the weather. In the mountains of the West, peak color is typically in September and October. In the central Midwest and Northeast, the middle of October usually shows the best colors. In the South and Southeast, the best colors are in early November. ■ Invest in fall riding wear. Fall weather can vacillate from warm to chilly, or dry to wet, depending on where you are and the time of day.
Fall 2026
Watch for trail hazards. Fall can bring seasonal trail hazards, including frost, slippery leaves, deep puddles, and thick mud.
PHOTO BY CLIXPHOTO.COM
Trailer safely. Cool, fall days are perfect for trailering, but check road conditions before you leave. Dress in layers. Tie a duster or rain slicker on your saddle’s cantle for sudden downpours. ■ Prepare your horse. Fall is a great time to ride, because the air is cool, making trail trekking easy on your horse. If the summer heat has kept you from riding much, slowly build up your horse’s condition over a few weeks before you take him on a long fall ride. ■ Pack your saddlebag. Carry a rain cover for your helmet, a jacket, gloves, lip balm, and sunscreen. Invest in a waterproof cover for your cellphone so it doesn’t get wet in fall rains and mists. Also pack a small thermos filled with a warm beverage. ■ Trailer safely. Cool, fall days are perfect for trailering, but check road conditions before you leave; fall hailstorms and snowstorms aren’t uncommon
in certain parts of the country. At your destination, park your trailer in a dry area so your horse doesn’t slip during unloading and loading. ■ Watch for trail hazards. Trails in the fall can be a real joy. But fall can also bring seasonal trail hazards, including frost, slippery leaves, deep puddles, and thick mud. If it’s been raining, bridges can be wet and even icy, making it hard for your horse to keep his footing. Be aware of trail conditions, and ride slowly over slick terrain. ■ Watch for wildlife. Fall can be a busy time for wildlife. Autumn is mating season for deer, moose, and elk; males can be more aggressive than usual. If you come across one of these animals on the trail, keep your distance. Bears are also more active in the fall as they prepare for winter hibernation in colder areas. Don’t let bears or any wildlife feel cornered. Most wild animals will run away from a horse unless they feel like they can’t get away. ■ Watch for hunting hazards. Fall is hunting season in many areas of the country. Avoid riding in areas that are popular hunting spots. If you do ride where hunting is allowed, wear a bright-orange vest, and apply bright-orange wraps to your horse’s head and legs. Avoid white tack, clothing, or gloves since a hunter may mistake a flash of white for a deer’s tail. — Audrey Pavia
“Fall is a great time to ride, because the air is cool, making trail trekking easy on your horse.”
USRider® Equestrian Traveler’s Companion
35
Fall 2026