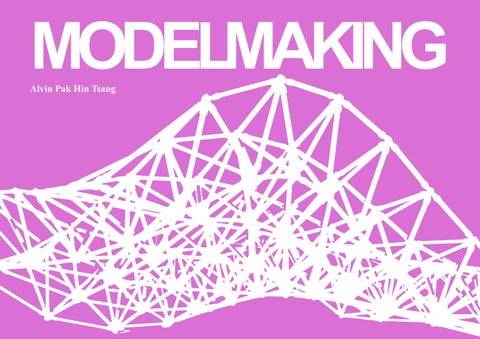
MODELMAKING Alvin Pak Hin Tsang
MARKET HALL Module: Stage 1 Architectural Design Duration: January – April 2018 (4 months) Site: Claremont Quad, Newcastle University
Revolving around a diagonal cut-through, my market hall encourages pedestrains to populate the courtyard and enjoy shopping and alfresco dining experience. The physical modelling (1:100) began on SketchUp, where hand sketches of the building form were developed into 3-D model. Hence on AutoCAD, floor plates and balustrade were laser cut, and assembled by hand. The structural elements where detailed with screwwork and spray-painted in black to propose an industrial aesthetics.
2
SELFBUILD, SELFGROW Module: Stage 2 Architectural Design Duration: September 2018 – January 2019 (5 months) Site: 20 Constitution Street, Leith, Edinburgh
Home to six farmers’ families, the project makes use of Edinburgh’s constant rainfall to supplies agriculture for income generation. Rainwater is harvested and stored in a fountain. It supplies vegetable growing on the rooftop greenhouse and in the farmers’ square. The vegetable crop supplies the six families and is merchandised in a Sunday market around the fountain. The 1:200 model was made of paper and acrylic sheets by handcraft. During the modelmaking, façade openings were determined in relation to the steel frame. The fountain were hand-painted with markers. In the 1:20 detail model, the primary steel frame were bolted. Secondary and tertiary structure, including insulation and gutters, were handcrafted.
3
DURHAM BOAT CENTRE Module: Stage 2 Exploring Engineering Duration: January – April 2019 (4 months) Site: The Count’s House, Durham
Rounded by River Wear, Durham Boat Centre is a museum which celebrates the boating heritage in Durham. Pairs of masts cantilever the grand gangway entrance and the clerestory roofs – mimicking boat architecture. The 1:500 physical model was made of cardboard, foam, and paper. First, on SketchUp, a 3-D terrain was created. With the approximate topography, massing and landscaping were designed. Hence, the 3-D terrain was sliced to achieve contour lines, scaled to the thickness of the cardboard. Meanwhile, topographic OS data – including waterline and pathways – was integrated in the SketchUp model. On AutoCAD, OS and contour lines were imported from SketchUp in 2-D. They were laser cut from cardboard materials. Water and pathways were
4
spray-painted, before the cardboards were glued to achieve the topography. Due to inappropriate scale, the boat-like tectonics was modelled in limited details. However, the mastsuspended roofs were created by passing thin metal wires through polycarbonate sheets. The rest of the building was represented by hot-wire foam cut at massing scale.
FLOOD -ABLE
ARCHITECTURE Module: Stage 3 Architectural Dissertation Duration: September 2019 – April 2020 (8 months) Tutor: Dr. Josep Maria Garcia-Fuentes
As part of the dissertation, this 1:50 model illustrated the rationale of amphibius architecture — composed of a living unit sitting on a buoyant hull. While existing amphibius buildings tends to be small-scale detached houses, my dissertation proposed that a collective village, even a whole city, can be constructed in flood-risked areas based on the amphibius design. To encourage buoyancy, the hull was made of CNC-carved foam with a round edge. It was designed on Rhino. The living unit was also designed on Rhinoceros 3D. It was laser cut.
5
ST. JAMES ART CENTRE Module: Stage 3 Architectural Design Duration: September 2019 – April 2020 (8 months) Tutors: Harriet Sutcliffe and Jack Mutton
On Rhino, the 1:20 model was first designed. Concrete columns were casted in 3-D printed moulds, and wooden beams were created by carpentry. The cardboard cladding were chalk-brushed, and windows were created by laser cutting. The column skirtings and human figures were created by SLA resin 3-D printing.
86
The façade exploration (n.t.s.) was created in Think Through Making week. The casted concrete tiles were reinforced with wires and mesh. The wires extend so that the tiles attach to the laser-cut MPF.
7
8
THE REFUGEEHOME PHARMACY Module: Stage 5 Architectural Thesis Duration: September 2023 – April 2024 (8 months) Tutor: Laurence Wood
Emergency Prescriptions was part of my thesis ‘Refugee Home Pharmacy’. The idea was to ‘consult’ the cultural, psychological, and family needs of refugees, thus ‘prescribe’ adaptive housing materials based on the consultation. The 1:11/3 prototype is the foundation-to-column connection of refugee homes. Local timber are connected by screw-in modular components to form the primary structure. On Rhino, the prototype was first modelled. SubD technique was used to achieve ergonomic handles of the screw-in connectors. Moving on to UltiMaker Cura, the build quality settings was carefully refined to print the screw threads successfully and timely within project deadline. Made of PET-G material, the threads had to be very strong to hold up the heavy timber. Also, the threads had to allow for tolerance to screw smoothly. This was achieved by repetitive and micro adjustments on both Rhinoceros 3D and Cura. Using workshop machinery, including the bandsaw, pillar drill, and belt sander and disc sander, C24 timber was trimmed, drilled, and polished. A PVC pipe was trimmed and detailed to embed the 3-D printed threads, forming the main ‘axis’ of the structural connection. The 3-D printed components are glued with superglue and G clamps, polished with sandpaper. Petroleum jelly was applied to the threads for smooth screwing.
9
10
The 1:500 site model was created by laser cutting, based on OS data and 3D modelling. Its contextual buildings were first 3D printed. ‘Negative’ molds were then created by silicon casting. Finally, concrete was casted into the silicon molds.
11
PROJECT X-X Type: Self-directed study Duration: November 2020 – July 2021 (9 months)
In ‘Project X-X’, the ‘X’ stands for one coordinate, and ‘X-X’ stands for from one coordinate to another. On Rhino and Grasshopper, a truss model was first modelled. On Grasshopper, the trusses were laid out on a 2-D CAD file and assigned with incremental labels, for example, “A0-B0” horizontally and “A0-A1” vertically. The drawing was laser cut using plywood material. The truss connectors were designed on Rhinoceros 3-D and generated on Grasshopper. They were assigned with 3-D labels for identification, before 3D printing. Using the SLA resin 3-D printing, the connectors were printed. On slicer software Chitubox, settings and supports were carefully tested and refined. The prints were cleaned with alcohol and toohbrush, cured by sunlight, and polished with sandpaper. By fine handcraft, the trusses and connectors were attached and glued based on incremental labels.
12
13
14