www.pellini.net
Manuale di installazione e uso Installation and operation guide Installations- und Betriebs-Anweisungen Notice installation et emploi
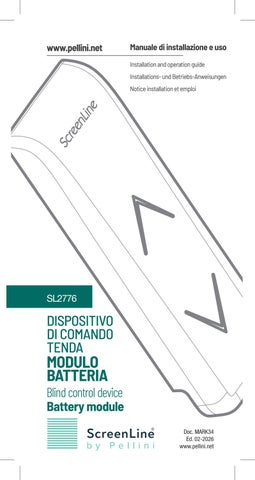
SL2776
DISPOSITIVO DI COMANDO TENDA
MODULO BATTERIA
Blind control device Battery module Doc. MARK34 Ed. 02-2026 www.pellini.net
EN
BATTERY MODULE SL2776 The battery module SL2776 supplies power to the ScreenLine ‘W’ system motorised blind. The battery module must be recharged by means of battery charger SL2405 (option) or equivalent power supplier. The optional solar panel SL1084B160 can also be used to help charge the battery module. Wiring and installation must be performed by skilled staff only. Pellini SpA shall not be liable for any damage resulting from improper installation. INSTALLATION ON THE WINDOW FRAME
See page 63
!
!
18
STAZIONE METEOROLOGICA THEBEN METEODATA 140 S GPS KNX 1. Utilizzo conforme La stazione meteorologica rileva la temperatura, la luminosità e la velocità del vento. Inoltre sulla parte superiore è installato un sensore pioggia. L’apparecchio va installato sul tetto degli edifici; va posizionato in orizzontale, con i sensori di luminosità di colore azzurro rivolti a sud, ed esposto al sole per l’intero arco della giornata in tutte le stagioni, compresi i periodi in cui il sole è molto alto o molto basso sull’orizzonte. Mediante un modulo GPS integrato è possibile ricevere ora/data e posizione.
2. Indicazioni di sicurezza AVVERTENZA Pericolo di morte per scosse elettriche o incendio! Il montaggio deve essere eseguito esclusivamente da elettroinstallatori specializzati!
Per un’installazione corretta delle linee bus e la messa in funzione degli apparecchi, rispettare le indicazioni della norma EN 50428 per interruttori e materiale di installazione analogo da impiegare nel sistema di controllo degli edifici! Qualsiasi intervento o modifica all’apparecchio comporta la cessazione del diritto di garanzia.
INSTALLATION ON GLASS WARNING! Make sure the installation on glass does not subject the battery module to temperatures out of the admissible range (P.32) or put it in contact with areas of the glass or window frames subject to condensation. Durante il funzionamento il sensore pioggia diventa bollente! Non toccare il sensore pioggia.
• La pioggia viene riconosciuta solo se il sensore pioggia è sufficientemente bagnato. E’ possibile che tra la prima goccia di un temporale e il momento in cui la pioggia viene rilevata si verifichi un ritardo. • Al termine della pioggia nonostante il riscaldamento possono passare alcuni minuti, finché il sensore ritorni di nuovo asciutto e l’apparecchio lo rilevi correttamente. • Attenzione: in presenza di una schermatura solare esterna, l’ingresso del vento richiede tempo. Parametrare le soglie del vento al di sotto del valore indicato dal produttore della tenda o veneziana. N.B. E’ vietato effettuare collegamenti diversi da quelli indicati nello schema elettrico allegato alla fornitura.
3. Descrizione
1 Sensore pioggia con riscaldamento
2 Tre sensori di luce (anteriore, destro e sinistro)
3 Tasto di programmazione e LED di
programmazione per l’indirizzo fisico
4 Girante eolica
!
!
!
5 Sensore temperatura 6 Supporto a parete con collegamento per tensione di rete e collegamento bus (KNX)
FLUSH EDGE GASKET SENZA GUARNIZIONE SENZA GUARNIZIONE
10
WITH CON GUARNIZIONE CONGASKET GUARNIZIONE
10
!
3
3
19
3a
0.35 mm²
7 mm
3c
0.3
1 mm²
3a
3c
ATTENZIONE - WARNING motore SINISTRO/LEFT motor
grigio • grey
0.35 mm²
grigio • grey
1 mm²
arancio • orange
arancio • orange
1
Collegare arancio-arancio e grigio-grigio Connect orange-orange and grey-grey 7 mm
grigio • grey
grigio • grey
motore DESTRO - RIGHT motor
arancio • orange
arancio • orange
Collegare arancio-grigio e grigio-arancio Connect orange-grey and grey-orange
0.35 mm²
1
7 mm SL_Cartoncino supporto modulo batteria SL2775.indd 1
1 mm²
2 30/08/19 13:47
MOTOR CONNECTION THROUGH INSULATED CRIMP WIRE CONNECTORS It is possible to use other types of connection (e.g. screw block terminals, insulated crimps, insulated heat shrinkable wire connectors, etc.), provided that they ensure 2 a stable contact and wire insulation. We recommend the wires coming out of the blinds be shortened as much as possible in order for the blind to react more quickly to commands and reduce its energy consumption. 20 3b
0.35 mm²
1
3a
7 mm
1
0.35 mm²
3a
Strip one wire only
1 mm²
1 7 mm 1 mm²
2
2
2
3b
3a 1
3a
3c
3b
3b
3c 3c
3a
2
3b
21 3b
3c
SL2776 BATTERY MODULE Activation The device is equipped with two push buttons sensitive areas, marked by two with LED arrow controls, programmed to perform all functions; it contains no mechanical button. WARNING: for proper operation, contact between finger and sensitive area must cover a sufficiently large surface.
Micro USB
RAISING/LOWERING/TILTING To tilt the blinds: the battery module tilts the slats of Venetian blinds by steps, namely each touch of the UP or DOWN arrow generates a slat movement in either direction. To perform more movements, tap the arrows repeatedly. Tilting accuracy is improved when the type of Venetian blind is defined, or tilting is replaced by full raising or lowering when the base plate is programmed for Pleated-Roller-Wave blinds (see paragraph “Programming Functions” hereinafter). To raise/lower the blind: touch the UP or DOWN arrow for more than 3 seconds. The blind will move until reaching the upper or lower end limit, without the need to keep the arrow pressed. To stop movement at any time just tap either arrow once. N.B.: Depending on the state of charge, size of the blind, and time in stand-by status, the blind may respond more or less readily to the battery module commands, or not tilt correctly. The quantity of taps needed to take a blind to a certain position may vary and the position of the slats may not be consistent with App control via Wise HUB Premium. In some cas22
es, at the beginning you may notice a “jerky” movement of the blind, which shall be considered as normal and acceptable. RECHARGING THE BATTERY The module is delivered with the battery partially charged: it is therefore necessary to put it through at least one complete charge cycle. When supplied with a solar panel (option): during the normal operating cycle, the solar panel helps keep the battery module charged. In certain cases, e.g. solar panel positioned on the north side of the building or in a shady area, intense use, or very low temperatures, it may nonetheless be necessary to recharge the battery also by means of the charger SL2405, if provided. If the battery needs recharging, the arrows will flash red following an up or down command, or the module will turn off. N.B.: If the module is not used for about 3 months, the battery discharges completely and needs to be recharged. Should it lay on a base plate that has been programmed with a radio channel, this time might become 1 month. To recharge the battery: 1. Detach the battery module from the base plate; 2. Plug the battery charger into a mains socket; 3. Wait for the LED arrows of the battery module to turn off and plug the micro-USB connector into the port provided on the module. When the charger is connected, the LED will indicate the following conditions: • LEDs flashing: charging underway • LEDs steadily lit: charging completed After charging (in any case no sooner than 4 hours), unplug the cable and fit the module back onto its base plate. In case of a new battery, 2-3 full charging/discharging cycles may be necessary to bring the battery to its full capacity. PROGRAMMING FUNCTIONS Logic inversion: If the blind moves in the opposite direction following touch button and remote control commands, it is possible that an error has occurred when wiring the blind. This malfunction can be solved following the instructions in the paragraph “Function 23
Programming and Activation” (hereinafter). Venetian or Pleated/Roller/Wave blind function: The SL2776 battery module has native behaviour suitable for controlling Venetian blinds, namely it performs a low speed (step) slat tilting movement and, if pressed for 3 seconds, it raises/lowers the blind completely. However, it is possible to programme the SL2776 battery module so that it raises/lowers the blind at high speed from the first touch, thus avoiding tilting. This feature is useful for Pleated, Roller or Wave blinds and in case of replacement of SL1082/SL1083 battery modules, and can be programmed following the instructions in the paragraph “Function Programming and Activation” (hereinafter). Blind model SL20-22 or SL27-29-32: The SL2776 battery module tilts Venetian blinds by steps: tilting Venetian blinds will therefore require one or several touches to carry out one or several movement steps. The movement steps consider the distinctive traits of the hardware, in order to make the degree of inclination across different blind models consistent. The same degree of inclination across different blind models. To improve the user experience and adapt the behaviour of the battery module to the blind model, we suggest the appropriate setting of this parameter be checked based on the correct blind model: SL20-22 (identified by 12.5-mm wide slats) or SL27-29-32 (identified by 16-mm wide slats). This function can be programmed following the instructions in the paragraph “Function Programming and Activation” (hereinafter). Note: setting of this function will be disregarded in case the Pleated/Roller/Wave function is programmed. Tilt-only mode with blind provided completely raised: For manufacturing/feasibility reasons or following the customer’s request, some Venetian blinds may not raise, being able to simply tilt the slats. Programming this function allows the blind to be lowered following its installation, and then perform a tilting movement exclusively. This function can be programmed following the instructions in the paragraph “Function Programming and Activation” (hereinafter). Touch button operation mode: The versions of the SL2776 battery modules prior to firmware release 2.0 had a different management of the touch buttons. Those versions had a “push & retain” behaviour, 24
whereby the slat position was determined by pressing and releasing the touch button once the slats reached the desired position. In the latest firmware versions, this behaviour has been replaced by a “step” operation; nonetheless, the “push & retain” function can be restored by following the instructions in the paragraph “Function Programming and Activation” (hereinafter). Note: The “push & retain” operation will be set automatically provided that the battery module base plate is already programmed to respond to a remote control SL2392. It is not compatible with the Pleated/Roller/ Wave function or type of Venetian blind programming. Tilting speed management: to compensate for mechanical friction due to different weights/dimensions, this function will adjust the tilting speed of the slats. Recommended procedure: from the vertical position of the slats, count the number of tilts (“steps”) required to reach the horizontal position; if the number is more or less than 5, the user can adjust the tilting speed, decreasing or increasing it. Programmable values: -3 / +6 (see colour chart). Function Programming and Activation The SL2776 battery module has some functions that can be activated during installation to fit the product or ensure a better user experience. To programme the different functions, the following procedure needs to be implemented: 1. Detach the battery module from its base plate 2. Press the programming button repeatedly until reaching the colour of the desired function (see instructions for the various functions below), both LED arrows will light up 3. Hook the battery module on the base plate you want to programme 4. The battery module will read the memory in the base plate and will respond with a lit arrow pointing upwards or downwards (see table below) 5. Press the desired arrow according to the function to
25
programme 6. Wait for the LED arrows to turn off to complete the operation.
Function
Down arrow ON
White colour Logic inversion
Deactivated
Up arrow ON Activated: the blind moves in the opposite direction
Pleated-Roller-Wave: one tap is enough to move the blind; the blind also reaches high speed immediately. Orange colour blind: the When replacing SL1082/ Venetian-Pleated- Venetian SL1083 battery modules blind tilts slowly Roller-Wave mode associated with a Venetian blind, press once to tilt the blind and a second time to stop it. Green colour Venetian blind
12.5-mm slats (model SL20-22)
16-mm slats (model SL2729-32)
Blue colour Tilt-only mode
Deactivated: the blind tilts and raises
Activated: the the blind tilts but does not raise
Pink colour pink colour Button operation mode
Step Mode: One tap will move the slats one step. After 3 seconds, power is retained
Push & retain: tilting is carried out by holding down the button and releasing it to stop
Orange/Blue colour Tilting speed management
One tap will tap will decrease increase speed by One speed by one step one step
N.B.: The above functions are also valid when using the SL2776 battery module instead of the SL2380 version. Tilting speed management colour chart Speed -3 -2 -1 0 (default) +1 +2 +3 26
Colour (RED, BLUE) (GREEN, BLUE) (BLUE, BLUE) (WHITE, WHITE) (BLUE, GREEN) (GREEN, GREEN) (RED, GREEN)
+4 (YELLOW, GREEN) +5 (ORANGE, GREEN) +6 (PINK, GREEN) The program features 10 speeds, from -3 to +6; the default speed is 0. Switching between speeds is achieved through: - the Tilting speed management function, or - by pressing the Stop button at least 20 times on a remote control associated with the blind. When the Stop button is recognised, the colour of the saved setting appears on the arrows. It is possible to change the speed by one step (one for each reprogramming) using the remote control tilt buttons: press /// to speed up or press \\\ to slow down. RADIO CHANNEL STORAGE AND OPERATING MODES The SL2776 battery module can be associated with two types of remote controls, each with a different communication technology. Simultaneous use of both SL3192 and SL2392 remote controls is not supported. The information relating to the radio channels and the operating mode of the blind is saved on a memory card housed in the battery module base plate (namely, the fixed part attached to the glass or the window frame, which is connected to the blind). N.B.: if several blinds and several battery modules are installed, it is not necessary to always reposition each battery module onto its corresponding base plate, since the remote controls and channels are associated with the base plate and not with the battery module. Once positioned on the base plate, the battery module will read the information from the latter. Likewise, when a battery module is replaced, it does not need to be programmed once again, as the necessary information will be automatically provided by the base plate. PROGRAMMING THE SL3192 RADIO REMOTE CONTROL (OPTION) The remote control can manage up to 32 different channels, readable on the display. The “ALL” channel is the main channel, to which all channels of the connected SL2776 battery modules are automatically associated. 27
Storing a channel: The SL2776 battery module can store up to 6 different remote controls, with up to 6 channels per remote control. To pair the remote control with an SL2776 battery module follow the steps here below: 1) Select the channel on the remote control that you want to associate with the SL2776 battery module 2) Hook the SL2776 battery module onto its base plate 3) Tap the down arrow 15 times until you see the arrow pointing up light up green (if the green arrow does not light up, try again tapping the down arrow faster) 4) Press the “” and “” buttons of the remote control simultaneously (in case of successful pairing, both green arrows in the SL2776 battery module will flash). To improve the user experience, see the paragraph on SL20-22 or SL27-29-32 blind model programming. Note: If you want to create a group of SL2776 battery modules responding to the same channel, you can perform steps 2 and 3 on different SL2776 battery modules and, within 30 seconds, perform step 4 only once. Note 2: Make sure the battery module is fully charged and hooked on its base plate before starting pairing. Furthermore, since the activation buttons of the SL2776 battery module are touch-based, it is important that your finger be lifted a few centimetres after each tap to mark it has been pulled off. PROGRAMMING THE SL2392 RADIO REMOTE CONTROL (OPTION) The remote control can manage up to 99 different channels, which can be associated through one or several SL2776 battery modules. Channel “00” is the main channel, to which all channels of the connected SL2776 battery modules are automatically associated. The SL2776 battery module can store up to 26 different channels, coming from one or several SL2392 remote controls. Storing a channel 1. Detach the battery module from its base plate; 2. View the requested channel on the remote control 28
display, by pressing the +/- buttons; 3. Press the programming button 5 seconds, until both arrows light up green; 4. Hook the battery module onto the base plate that you want to programme; 5. The downward arrow LED remains lit to indicate waiting for pairing with the SL2392 remote control; the association command needs to be sent within 20 seconds by simultaneously pressing the up and down buttons on Programming button the remote control, until both arrows flash green, indicating that the battery module pairing procedure has been achieved. Resetting stored channels (VALID FOR SL3192 AND SL2392 REMOTE CONTROLS) This procedure will cancel the storage of any radio channel on the SL2776 battery module, including that of other remote controls, and any associations with Wise HUB. 1. Detach the battery module from its base plate; 2. Press the programming button 15 seconds, until both arrows light up yellow; 3. Within 10 seconds hook the battery module onto the base plate you want to reset; The yellow LED arrows will flash to indicate that the radio channel cancellation procedure has been achieved. Factory reset This procedure, besides deleting all radio channels, also deletes from the SL2776 battery module base plate any other settings made during installation (cable inversion, button operating mode, blind model, etc.) 1. Detach the battery module from its base plate; 2. Press the programming button 60 seconds, until both arrows light up red; 3. Within 10 seconds hook the battery module onto the base plate you want to reset; 4. The red LED arrows will flash to indicate that the factory reset procedure has been achieved. RESTARTING THE BATTERY MODULE In case of irregular operation of the battery module, it can 29
be restarted through the following procedure: 1. Detach the battery module from its base plate; 2. Plug the micro-USB power adapter into a mains socket; 3. Plug the micro-USB connector of the battery charger into the port provided on the SL2776 battery module; 4. Pull out the connector. The restart of the battery module is acknowledged by the yellow LED on the up arrow turning on. MAINTENANCE Over time, the contacts on the SL2776 battery module base plate may become dirty or oxidised; in this case, the battery module may not respond to touch or radio control commands. We recommend the contact surface be cleaned with non-corrosive products specifically designed for electrical contacts. The SL2776 battery module requires no maintenance, except for recharging via a USB charger, if necessary. Any repairs must be carried out by a technician authorised by Pellini SpA. N.B.: any failure to follow the instructions or tampering with the battery module will invalidate the warranty. CLEANING Clean the product using a clean, dry, soft cloth that does not leave any residues. To remove stubborn dirt, you can slightly moisten the cloth with warm water. Do not use solvent-containing detergents. Do not clean the gold-plated contacts with alcohol or other substances. REPLACING THE BATTERY The battery can only be replaced by a technician authorized by Pellini SpA. DISPOSAL OF THE DEVICE According to the provisions of Directive 2012/19/EU, the battery module is to be considered as belonging to the category of WEEE (Waste Electrical and Electronic Equipment), thus it cannot be disposed of as unsorted municipal waste. At the end of its lifetime, the device must be taken to one of the separate waste collection centres for waste electrical and electronic equipment from households. Make reference to the collection centres in your town or city, which assures that suitable, accessible, functional separate collection systems are set up to enable end users and retailers to dispose of the waste produced within the municipal territory free of charge. 30
Do not try to remove the battery, which can be replaced exclusively by a technician authorized by Pellini SpA INFORMATION ABOUT PROPER USE The battery module is supplied for the purpose of operating Pellini “W” blinds. For indoor use only. Any use for other than the intended purpose is to be considered improper use. In case of installation on glass, the battery module must not be subjected to temperatures outside the admissible range or be in contact with areas of the glass or the window frame subject to condensation. The manufacturer accepts no liability for possible damage caused by improper use. SAFETY INFORMATION WARNING! It is essential to keep and follow the following instructions to ensure people’s safety! The device must not be used by children or individuals with physical, sensory or mental impairments. The device must also not be used by individuals who have no experience or knowledge about how it is used without the supervision of a person responsible for their safety. The device is not a toy: keep it out of children’s reach and make sure they do not play with the (remote) controls! DO NOT force the device to work if any repairs or adjustments are needed. DO NOT attempt any do-it-yourself repairs: repairs must be carried out by authorized personnel only. DO NOT leave the module unattended while the batteries are charging. DO NOT expose the device to direct sunlight or temperatures outside the admissible range: risk of battery explosion! DO NOT throw spent batteries into a fire: they could explode. DO NOT open or perforate or short circuit the batteries.
31
Technical data Battery module SL2776 Battery: Lithium-ion Polymer 3.7Vdc, 2700mAh. Radio transmission frequency: 433-434 MHz Output power: 10 dBm Sensitivity: -110 dBm Maximum use and storage temperature: 45° C Minimum use and storage temperature: 0° C Maximum operating relative humidity: 80% (non-condensing) IP protection degree: 30 Battery charger: Recharge the device only with a battery charger with the following characteristics: Voltage: 5V 2A dc AT DK HU LV SE
32
BE EE IE MT SI
BG EL IS NL SK
CH ES IT NO TR
CY FI LI PL UK
CZ FR LT PT
DE HR LU RO
DIMA DI FORATURA DRILLING TEMPLATE BOHRSCHABLONE GABARIT DE PERÇAGE
63
Ed. 02-2026
www.pellini.net
Inquadra il codice per guardare tutti i Video tutorial Scan the code to watch all the tutorials QR-Code scannen und alle Erklär-Videos ansehen! Scannez le QR code pour visionner les tutoriels vidéos
Pellini SpA Via Fusari, 19 • 26845 Codogno • Lo • Italia T. +39 0377 466411 • F. +39 0377 436001 info@pellini.net - www.pellini.net