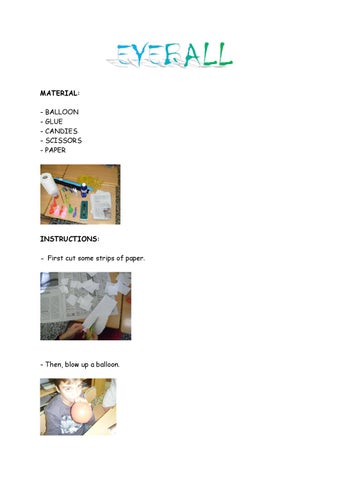
MATERIAL: -
BALLOON GLUE CANDIES SCISSORS PAPER
INSTRUCTIONS: - First cut some strips of paper.
- Then, blow up a balloon.
- Glue the balloon.
- Stick the papers and glue again. Repeat this action 3 or 4 times.
- Wait till the balloon gets dry. - Later, cut a blue onion paper circle for the eye and a smaller black circle to stick in the eye.
- Then cut the balloon.
- Put candies in the balloon.
- Cover the hole with a white piece of paper.
- And the eyeball is finished.
MATERIAL: Black cardboard 2 white gloves Glue Red paint Black marker Black wool Scissors
INSTRUCTIONS: First collect all the material.
Then draw the gloves with red paint.
Later stick the black wool on the gloves for the hair.
Put more glue and stick the wool on the arm. Then cut black cardboard triangles for the nails and stick.
Leave the gloves dry up 30 minutes. When it is dry take the gloves and add more red paint on the fingers. Leave the gloves dry another 20 minutes. Draw spiders and scars with a black marker.
The gloves are ready to scare people.
PAPER BAG BAT MATERIALS: A paper lunch bag Black cardboard A printer Some crayons Scissors Paintbrush Glue Black paint
INSTRUCTIONS: 1. If you don t have a black paper bag, cover it with black cardboard.
2. The bag should be closed and flat.
3. Then one side will be the back, the flippy tap will be the head.
4. Look at the front of the bag. This will be the body. 5. Stick the wings at the sides.
6. Prit the templates (eyes ,teeth ,nose ,ears ,feet)
7. Colour the different parts of the body , cut them and stick on the body.
PAPER HALLOWEEN PUMPKIN MATERIAL: Orange cardboard Long ruler Pencil Green cardboard Glue Paper fasteners
INSTRUCTIONS: First, draw the orange cardboard stripes and then, cut them.
Draw the stalks and cut them. Draw the leaves and cut them.
Make holes.
Put the paper fasteners to the stripes.
Open the stripes.
Curly the stalks.
Glue the leaves.
The pumpkin is finished.
MATERIAL: - Black, yellow, pink, white and yellow cardboard. - Water colour (black and red). - A little “Nesquik” pot. - Scissors. - Pencil. - Glue. - Black plasticine. - Black tape.
INSTRUCTIONS: -
First, cover the “Nesquik” pot with black tape.
-
Then, paint the inside of the nesquik pot with in black.
-
Take the black, yellow, pink and white cardboard and draw the eyes, ears, whiskers and scars.
-
Later take the plasticine and make the tail.
-
Then take the glue and stick the eyes, ears, whiskers, scar and tail.
-
Finally, put your markers inside the pot.
-
YOUR CRAFT IS READY!!!!
PUMPKIN MATERIALS
Knife Candle
Pumpkin Spoon Black marker
HOW TO MAKE IT 1. First cut the top part .Take
the spoon and take off the filler of the pumpkin. 2. Then take the black marker and paint a mouth,a nose and 2 eyes. 3. With the knife, cut the marks painted with the black marker.
4. Finally put the candle inside the pumpkin.
Autors:Pablo,Irati,Julen and
MAGIC CANDLE MATERIALS: Small paper
Scissors
Orange
Glue
Long
lighter
INSTRUCTIONS: 1. First, cut the paper between 15 cm y 20cm.
2. Second, cut paper in these ways with scissors.
candle
3. Third, stick with glue corners and cutting a circle of diameter 6cm .
6 cm
4. Fourth stick with the tube we have done before, and put the candle inside and switch it on with the lighter,
JUST!!!
AUTHORS: Maialen Ugena, Cristel Corrales and Manex Agirregomezkorta.
CANDY PUPMKIN MATERIALS
A balloon A newspaper Scissors Glue Brush Water Candies A thread A bowl
INSTRUCTIONS
1st. Cut the newspaper in pieces and put it in the bowl with the water and the glue.
2nd. Inflate the balloon, put there the newspaper pieces and let it dry.
3rd. Paint the newspaper with colours, do two holes in the corners and tie a piece of thread at the end.
Finally you can put candies inside the pumpkin.
Authors: Sara, Naroa, Julen and Unai
CARDBOARD DOLLS
Mate rials:
- Cardboard - Scissors (or cutter ) - Brush - Watercolours - Dried flowers petals - Liquid glue Instructions: 1.-First of all, put the flowers petals drying.
2.-Then, take the cardboard and cut it in the way what you want.
3.-Now, take the brush and the watercolours and painted the dolls as the colour you want.
4.-When finished drying, you take the glue and stick the dried petals in the doll corners.
YOU’LL BEE SUPERNICE!!! END
Authors: - Manex Gonzalez.
- Bingen Zatika. - Oihane Escribano.
The scary ghost MATERIAL: MATERIAL:
Treat a balloon a White cloth a black pen scissors
INSTRUCCIONS: 1. First inflate inflate a balloon and tie.
2. Then tie tie the treat to the balloon.
3. After, draw draw with the pen a ghost face in the cloth.
4. With scissors, cut a circle in the cloth. cloth.
5. Pass Pass the treat throw the hole. hole.
6. Finally hang to a wall. wall.
AUTHORS: MARKELMARKEL-MARTAMARTA-LANDER