VOLUME 77, No. 1 OCTOBER 2022 IN THIS ARTICLES:ISSUE 5 Ways to Use Canva More Storytime! Sequential Essentials: Band Region Jazz Band/Jazz Choir Info Popular Music in the Classroom Books for Driving Personal Growth and much more! The Official Magazine of the New Jersey Music Educators Association a federated state accociation of the National Association for Music Education
We welcome the greater NJ area community to join us for our second annual reimagined professional residency program at the John J. Cali School of Music at Montclair State University. The seven week-long residencies include a rotation of top rated artists and ensembles. Each residency will contribute to an on-going exploration of the ever-changing landscape of music today, introducing students and the community at large to amazing events of today and to a future that will be, at times, less traditional.

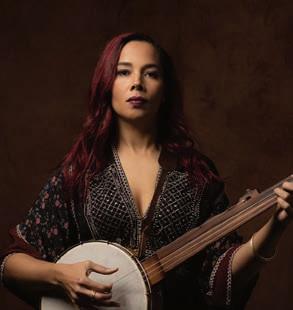
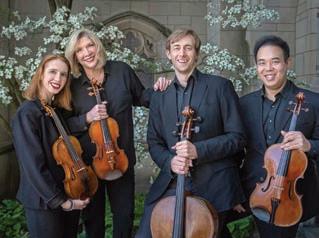
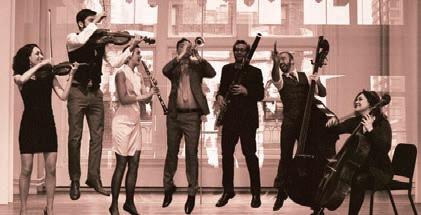
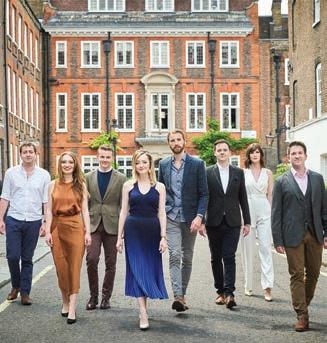
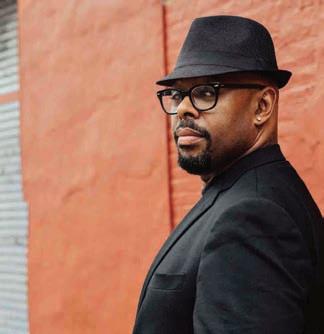
TEMPO 2 OCTOBER 2022 MusicPerformanceEducationCompositionMusicTherapyJazzStudies NEW: Recording Arts + Production MONTCLAIR.EDU/MUSIC ROB KAPILOW DEGREES Bachelor of Music, Bachelor of Arts, Master of Music, Master of Arts, Artist’s Diploma Music Education, Performance, Jazz Studies, Music richesMentorshipGraduateTheory/CompositionTherapy,StringQuartetResidencyProgramAnexceptionalartisticandacademiceducationbyinternationallyacclaimedartists,educatorsandscholarsInspirationandpreparationtoservethecommunityandenrichsocietyusingthetransformativepowerofmusicDevelopingmusicianshipandprofessionalskillsinensembles,masterclasses,clinicalexperiences,internships,andteachingExperiencingtheculturalofNewYorkCitynearby TRAINING THE CREATIVE LEADERS OF TOMORROW CALI IMMERSIVE RESIDENCY PROGRAM AT MONTCLAIR STATE UNIVERSITY CHRISTIAN MCBRIDEVOCES8 JONRAHZELB. RHIANNON GIDDENSCAVANI CAROLINEQUARTETSHAW
DECODA
The New Jersey Music Educators Association is a state unit of the National Association for Music Education and an affiliate of the New Jersey Education Association. It is a nonprofit membership organization.
TEMPO (ISSN 0040-3016) is published four times during the school year: October, January, March and May. It is the official publication of the New Jersey Music Educators Association.
The subscription rate for non-members is $20.00 per year. The subscription for members is included in the annual dues.
A copy of dues receipts (Subscriptions) is retained by the NJMEA Treasurer. Inquiries regarding advertising rate, closing dates, and the publication of original articles should be sent to the Editor.
Volume
TEMPO Editor - William McDevitt NJMEA, 300 W Somerdale Rd, STE C, Voorhees NJ 08043 Postage Paid at Lakewood, NJ 08701 and additional POSTMASTER:entriesPlease forward address changes to: NAfME 1806 Robert Fulton Drive Reston, VA 20191 record email
Volume 77, No. 1 http://www.njmea.org OCTOBER 2022 4 President's Message - Wayne Mallette 5 Past President Updates - Patrick O'Keefe 8 NJMEA Annual Report - William McDevitt 14 News from Our Board of Directors 26 Using Books to Drive Your Professional and Personal Growth - Shawna Longo 28 Sequential Essentials: Band - Keith Hodgson 32 5 Ways to use the Free Canva - Amy M. Burns 34 Using Popular Music in the Classroom- John Anthony 36 Yay Storytime: Even More Adventures- Tom Amoriello 38 Queer Representation in Schools and Music Education - Tatyana C. Louis-Jacques 42 Text Questioning Techniques Classwork for Choir - Joseph DeRosa 44 Do You Have the Gift? - Kyle Oberhauser 46 Snapshots from Around the World at the ISME World Conference 2022 - Maureen Butler Advertisers Index & Web Addresses ...70 All-State Band Solo List ......................53 Board of Directors ...............................66 Crescendo Foundation .........................10 Editorial Policy & Advertising Rates ..67 Educational Grant Report ....................48 In Memoriam ................................. 61-62 NJMEA Awards ...................................65 NJMEA Annual Financial Statement .....9 NJMEA Past-Presidents.......................67 Opera Festival Information ..................17 Region/State Jazz Info .........................50 Resource Personnel ............................ 59 Round the Regions ........................ 55-57 TRI-M Chapter Spotlight ....................49 FEATURES DEPARTMENTS AND NJMEA APPLICATIONSFORMSBUSINESSANDPleasegotonjmea.org Click on the desired activity for downloadable copies of all their forms & applications TEMPO Editor - William McDevitt 300 W. Somerdale Road, STE C Voorhees, NJ 08043 Phone: 856-433-8512 e-mail:NAfME,JanuaryOctoberwmcdevittnjmea[at]gmail.comDeadlinesIssue-August1Issue-November1MarchIssue-January15MayIssue-March15Allmembersshouldsendaddresschangesto:mbrserv[at]nafme.orgor1806RobertFultonDriveReston,VA22091Printedby:Mt.RoyalPrinting1-717-569-3200
77, No. 1, OCTOBER 2022
C/O
Periodicals
EMAIL/ADDRESSCHANGESPleasegotonafme.org to
and address changes.
President'sMessage
Wayne Mallette Scotch Plains - Fanwood School mallette.njmea[at]gmail.comDistrict
Happy New School Year! It is my pleasure to serve you as your NJMEA President. As we embark upon the 2022-2023 school year, I am excited about the possibilities of a new school year. There will be new students who walk through our doors who may experience the joy of collective music making, maybe for the first time. There will be new songs that will challenge our students and us to become even greater musicians. And there will even be new obstacles in our path that will call upon our problem-solving skills in ways we have not experienced. Let the excitement of the new year inspire you to make this memorable for you and your students.
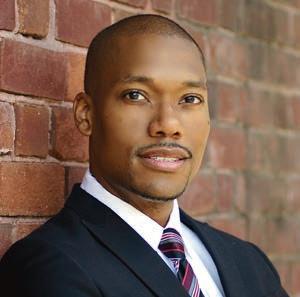
I am extremely sensitive to the fact that the past 2 years have been extremely trying for music educa tors. We are seeing the ripple effects of the pandemic and the extreme politicalization of almost every facet of life. Teacher morale is at an all time low, and the teacher shortage is starting to push the educational system to the brink. With these challenges, I hope that you can lean upon NJMEA and NAfME as a support system. Teach ing can be very isolating, and music teaching even more so. Often, we are the only vocal or instrumental teachers in the building. With that being said, NJMEA is a great organization that can connect you to a larger network of music teachers. These are teachers you can call upon when making tough decisions or when needing that morale boost in the tension points of the school year.
I also hope you take advantage of the resources NJMEA can provide for you. Whether it is our new teacher mentor program or our state convention in Feb ruary, NJMEA is here for you! I urge you to get involved in NJMEA is some way. Consider coming to the con vention or even presenting a session. Maybe you’ve se cretly thought of getting involved with the state board, or managing a region or All-State ensemble. Whatever it may be, make this year the year you start getting in
volved. I can still remember talking to Kathy Spadafino at a region event about getting more involved. Little did I know, a few years later, it would lead to me being on the state board of directors. We need all of you to make this organization as strong as possible.
This past June, I had the privilege of attending the NAfME National Assembly in Washington DC. While there, it was great to connect with state executives from around the country. On the last day, it was announced that New Jersey was one of three states to receive the CMA Advocacy Grant. This process was spearheaded by our Advocacy Chair, Libby Gopal. This grant will allow us to provide professional development in the area of advocacy and create more pathways for those from marginalized communities. I look forward to sharing with you all the great things that will happen because of this grant. Thank you, Libby, for all your hard work, and congratulations!
I want to also take this moment to thank Jodie Addes sa and Casey Goryeb for their leadership in organizing the NJMEA Summer Virtual Conference. The sessions were informative and timely. I also want to thank Rachel Nicastro and MusicFirst for the use of their digital platform.Oneof the greatest benefits of serving in leadership in NJMEA is the potential to grow and learn. As President, I have learned so much from the membership and each of the board members. I’ve enjoyed hearing from you. Whether it was at a conference or from emails, your vast knowledge of music education and love for your stu dents continue motivate and educate me.
I hope this year is a year of exponential growth for all of you. Remember, NJMEA is here for you!
TEMPO 4 OCTOBER 2022
Wayne
PastUpdatesPresident
Patrick O'Keefe Absegami High patrickaokeefe[at]gmail.comSchool
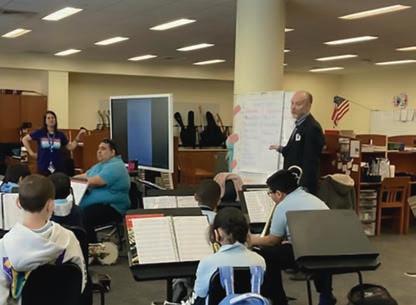
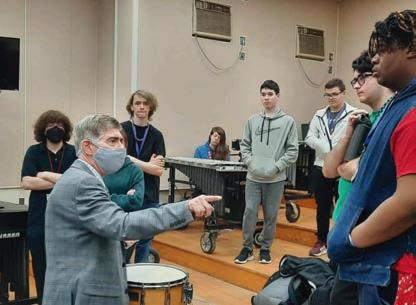
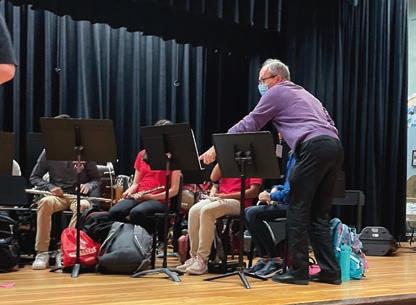
This past spring, schools throughout our state were able to welcome members of the New Jersey Sympho ny into their classrooms and rehearsal spaces to work with their student musicians thanks to the partnership forged between NJMEA and the Symphony. Depend ing on the program needs, some visits were structured like a clinic on rehearsal repertoire, while some schools had the specialists gear their time more like an instru mental masterclass. Any level was encouraged to take part, whether it be high school or younger, band or orchestra.Thank
you to all of the schools that were willing to participate in this new venture, and we look forward to building on and expanding it in the future. Keep in mind that this is at no cost to the teacher or school district, as NJMEA’s partnership offers this as a membership benefit. Look for messages via Tempo Express and our social media platforms for the chance to par ticipate in this 2022 - 2023 school year. As always, if there is anything you think would benefit the educa
tors and students of our state, please don’t hesitate to reach out, as we are always seeking new opportunities for our 4/11/22:members.
Triton Regional High School (band) 4/20/22: Passaic Gifted and Talented (band) 4/25/22: Lawrence Intermediate School (orchestra) 5/2/22: Mainland Regional High School (band) 5/13/22: Hopewell Valley Central (band)
5/17/22: Pitman High School (band)
5/18/22: Passaic Gifted and Talented (orchestra) 5/24/22: Elmwood Park Middle School (band) 6/2/22: Elmwood Park Middle School (band) 6/7/22: Cedar Creek High School (band) 6/14/22: West Orange High School (band) 6/14/22: Mount Olive Middle School (orchestra) 6/14/22: White Rock Elementary (band) 6/15/22: White Rock Elementary (band) 6/16/22: West Orange High School (band)
OCTOBER 2022 5 TEMPO











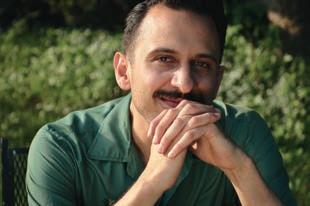
6 OCTOBER 2022 The New Jersey Association for Jazz Education presents the 18th Annual New Jersey State Jazz ConferenceFriday,November18,2022NJPACCenterforArtsEd ~ Free to all NJAJE Members Non members: $75 includes 1 year NJAJE membership and Downbeat Magazine ~ Join us for the All State Jazz Choir and Jazz Band at 7:00 PM (Tickets available from NJPAC) With special guest Christian McBride Register by Monday, November 7 at www.njaje.org or contact Conference Chair Jeffrey Haas (201) Professionaljhaas.njaje@gmail.com207-6736DevelopmentCreditIssued the industry's best New Jazz Band Music Reading Session with Joseph Verderese ~ New Vocal Music Reading Session! with Randy White Featuring these renowned clinicians: Dr. David Demsey Dr. Jeffrey Kunkel GREATER THAN THE SUM OF ITS PARTS: Creating a cohesive rhythm section with students of varied experience Please join us as at the luncheon as we honor the 2022 NJ Jazz Education Achievement Award recipient Randy White William Paterson MontclairRetired,UniversityStateUniversity ENLIVENING VOCAL JAZZ LITERATURE Dylan Pramuk Montclair State University The Royal Bopsters
Music Education at Westminster Choir College of Rider University
GROW AS A MUSIC EDUCATOR
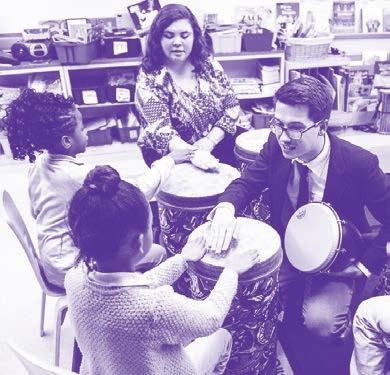
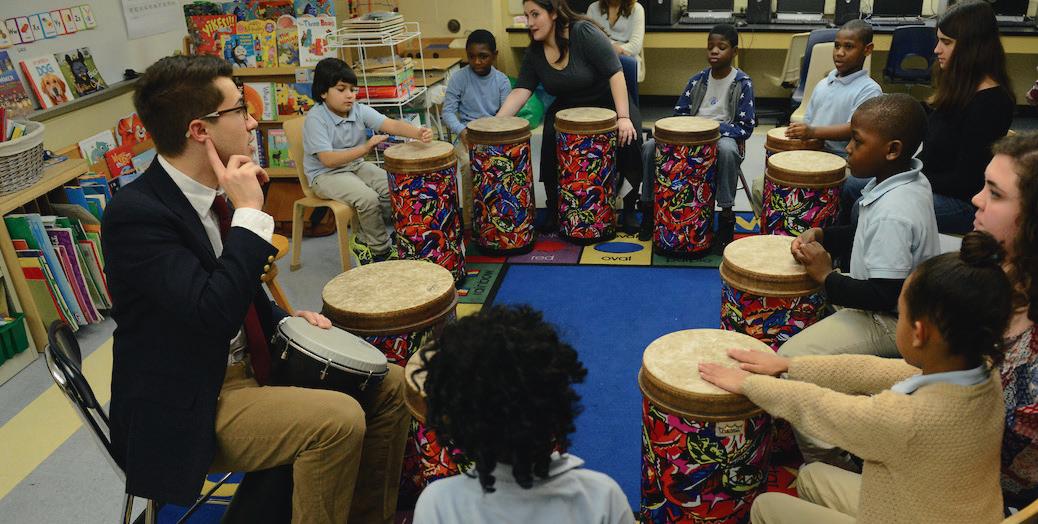
Westminster’s music education programs have a reputation for excellence in the field and a long track record for successful job placement. Our programs aim to develop teachers who are reflective, who acknowledge the connections music has to the child’s world and who seek to promote an understanding of those connections in a social context.
Bachelor of Music in Music Education
» undergraduate
» Students teaching vocal instrumental
Master of Music Education
» For licensed music educators who want to improve music teaching and student learning
» Completed part-time through online classes and summer study

TEMPO
For more information, visit: RIDER.EDU/WCC-MUSIC-EDUCATION
A four-year
program for aspiring teachers
will be certified for
and
music at all levels
AnnualNJMEAReport
 William wmcdevittnjmea[at]gmail.comMcDevitt
Since the last school year ended, the NJMEA Board of Directors has been working very hard to prepare for a full year of in-person events for our members and their stu dents. Before we charge forward, I would like to take a moment to look back. The past year has been a difficult one for everyone and NJMEA has seen its share of chal lenges. The good thing thatI can report is that the chal lenges were met and the organization remains strong.
If you look at the Financial Statement you will notice that we operated at a deficit just over $2000. Compared to the deficit at this point last year, at the height of the pandemic, we are doing much better.
The NJMEA Executive Board is working very hard to maintain the level of service that our members expect and keep cost increases at a minimum. To that end, you will notice some small changes this year.
TEMPO Magazine works on the premise that advertis ing pays for printing and mailing all four issues. While the statement looks like we did that with a little to spare we actually came out at a slight deficit. We appreciate everyone that advertises with us but businesses are feel ing the pain of the pandemic. You will notice that some of the advertisers that were in every issue several years ago are not advertising with us recently. Some are taking smaller ads or advertising in grayscale. They are all trying to stretch their budgets and still provide a certain level of service.Youwill notice in this issue that we have also scaled back our use of color. This will bring the costs down in proportion to the revenue. We have also offered an optout for those of you that would like to stop receiving the
paper edition of the magazine. We know that many of you like to keep it on your desk for handy reference do we will continue to have it available in print, but we also offer it online for those that wish to be ecologically conscious. We will reevaluate these moves at the end of the 22-23 fiscal year to see how we did with our initiative.
We are also trying to keep costs down on our All-State experience. We have kept the fee the same but are ab sorbing the rate hikes that we are experiencing when it comes to housing and meals. While it may now seem like much as an individual consider this . . . if every meal that each All-State participant received went up just $5, that amounts to $35 for about 900 people or over $35,000.00. When determining a rate for our students, this all has to beWeconsidered.runinto the same situation with our February Conference. We try our best to not pass on price increases to our members, but sometimes certain costs are non-nego tiable and there is no alternative funding source to cover increases. That could mean a registration increase or a reduction in some of the services that we have provided in the past. At the time of this writing, the Executive Board has not set the fee for registration, but by the time that the issue is in your hands, registration will be open. Please understand that they are trying their best to maintain the level of service that you expect and keep costs down at the same time.
As we continue to navigate these uncharted waters, I would like to thank you for your patience and under standing. I hope that you have an amazing year and that the light at the end of the tunnel becomes brighter!
TEMPO 8 OCTOBER 2022
INCOMEAdvertising in TEMPO
NJMEA Year-End Financial Statement
ORDINARY INCOME/EXPENSE
July 2021 - June 2022
EXPENSE - Continued
38,450.00
AS Ch/Bands-Hou/Meal/Trans 0
AS Inermediate Orchestra 4,438.50
AS Bands 24,748.45
AS Chorus - SATB 8,925.20
AS Chorus - SSA 8,925.30
AS Coordinator 0
AS Jazz 2,697.56
AS Orchestra 17,659.44
Composer Competition 400.00
Elementary Honors Choir Festival 7,857.68
February Workshop 150,842.03
Grant 10,000.00
Guitar Festival 990.00
Marching Band Festival 5,174.50
Middle School Band Festival 450.00
Middle School Choral Festival 1,500.00
Middle School Orchestra Festival 0
Miscellaneous Income 278.95
NAfME Rebates 46,190.01
Smile Donation - Amazon 5.00
Summer Workshop 867.69
Tech Expo 1,590.00
TOTAL INCOME 331,990.31
EXPENSEASBands
12,063.29
AS Chorus 13,210.44
AS - COJ 14,971.14
AS - SSA/Bands 0
AS Jazz 2,663.00
AS Orchestra 2,679.10
AS Intermediate Orchestra 1,766.47
Bank Fees 3,956.42
Board Meeting Meals 2,078.94
Board Mileage 2,289.00
Board of Directors 27,474.43
Eastern Division Planning Mtg 0
Elementary Honors Choirs 8,722.38
Governors Awards 200.00
Grants 0
Guitar Festival 496.00
Marching Band Festival 4,052.18
Middle School Band Festival 750.06
Middle School Choral Festival 1,488.17
Middle School Orchestra Festival 0 Miscellaneous Expenses 154.00
NAfME Summer Leadership 0
NJRMEA 304.39
November NJEA Convention 567.50
Office Space 11,846.92
Orchestra Festival Middle School 0 Payroll Tax Expense 3,745.56
Reconciliation/Discrepancies 0
Salaries and Wages 26,916.61
State Conference 154,092.25
Tech Expo 1,750.00
TEMPO 37,490.17
Uncategorized Expenses 0 Workshops 0
TOTAL EXPENSE 335,728.42
Net Ordinary Income -3,738.11
Other Income - Interest 8,820.78
Other Expense - CC Fees/Fed Witholdings 7,131.32
NET INCOME -2,048.65
OCTOBER 2022 9 TEMPO
The Crescendo Foundation is a Not For Profit Corporation initially formed by leadership of the New Jersey Music Educators Association, who serves as the registered agent. The Association’s mission includes the advancement of music instruction in New Jersey’s educational institutions at all levels that provide in-service and enrichment opportunities for music educators, as well as sponsoring various festivals and All-State performing groups for K-12 students. As a result, the Foundation’s goal is to provide financial support to underserved students and communities to create access to the aforementioned festivals and performing groups. In this first phase of giving, funds will go to a scholarship model geared towards students aspiring to participate in All-State ensembles.
The Scholarship Framework
Through data assessment, it has been identified that All-State ensemble participation is not reflective of statewide total population demographics when comparing race and socio-economic status. The scholarship opportunities from the Crescendo Foundation gifts will allow students to apply for financial support to assist with any or all of the fees associated with participation including:
• Audition Fee - $25
• Participation Fee - $35
• Housing - $315
As part of the All-State experience and upon acceptance, students are housed together throughout the performance weekend. Scholarship opportunities would be available to cover the entire cost of this invaluable experience. In subsidizing these costs for qualified students and easing the burden of financial access, it is the hope of the Foundation that our All-State programming will become more inclusive, diverse and equitable.
We Need Your Help
We acknowledge that the Foundation’s ability to realize the plans outlined in the Scholarship program will require the generous support of the community. The initial phase of the program will require $50,000 which aims to assist 150 students over the course of the next three years in the areas of All-State Orchestra, Choir, Band and Jazz. All-State ensembles contribute to a total of 6 concerts annually in both Atlantic City and Newark. The vision for the Foundation is to eventually go beyond the scope of All-State ensembles to positively support several aspects of music education programming both at the State and Region levels, making this an important first step.
All gifts are tax deductible and there are many ways and opportunities to support this important effort. We thank you in advance for your support of our state’s students and providing transformative experiences outside of their school programs.
TEMPO 10 OCTOBER 2022
Giving Opportunities
Large Ensemble Concert Sponsorship - $5,000
• All State Orchestra and Mixed Chorus, Atlantic City
• All State Orchestra and Mixed Chorus, New Jersey Performing Arts Center, Newark
• All State Symphonic Band, Wind Ensemble and Treble Chorus, Atlantic City
• All State Symphonic Band, Wind Ensemble and Treble Chorus, NJPAC, Newark
Concert Sponsorship - $2,500
• All State Jazz, Atlantic City
• All State Jazz, New Jersey Performing Arts Center, Newark
Crescendo Giving Level - $1,000
Sforzando Giving Level - $500
Arts Advocate - $250
Friends - $100
All gifts and giving levels will be recognized in programs for that school year and program cycle, including concerts listed above, as well as NJMEA conference materials.
All gifts are tax deductible. Checks should be made payable and sent to:
The Crescendo Foundation 300 W Somerdale Road, Suite C Voorhees, 08043-2236NJ
Please include information appropriate name listing for program printing.
OCTOBER 2022 11 TEMPO
of the Arts
Other $_____________
contact
and

TEMPO Sunday 01/22/23 Saturday 02/18/23 Saturday 03/04/23 MORE INFORMATION Go.Rowan.edu/Music
News From the Board of Directors
 Administration Dennis dennisargul[at]gmail.comArgul
The New Jersey Music Administrators Association is excited for the 2022-2023 academic year! The NJMAA is committed to supporting and encouraging excellence in music education in the State of New Jersey by:
• Demonstrating leadership in promoting the highest standards of music education
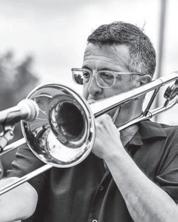
• Providing a forum for continuous study of the problems facing leaders of music education programs
• Establishing closer communication and cooperation among music administrators on matters of mutual interest and concern
• Cooperating with other organizations in promoting effective music education and arts advocacy
To continue in our mission, the NJMAA Executive Board has designed a series of topics which we hope you all find relevant and helpful in reaching your goals as a district. Here are this year’s proposed meeting topics and dates: 10/7/22 Supporting and Retaining New Teachers in the Post-Covid Classroom 12/2/22 Striking a Balance: In-Person Performance Classroom and Music Technology Integration 2/10/23 CRAE Part 1 - What does culturally responsive arts education look like in a K-12 music classroom?
3/31/23 CRAE Part 2- Connecting music from the home to music in the classroom 6/2/23 Year End Reflections on Best Practices - Roundtable Please visit our website at: www.njmaa.org for more information regarding the Association, and please share with your district Super visor/Director to be sure they join us in our efforts to advocate for our programs throughout the state. For further information or assistance, contact our Treasurer, Lou Quagliato: lquagliato[at]westorangeschools.org (973)-669-5400 ext. 20570.
Advocacy
The Country Music Association has partnered with NAfME to administer the State Music Education Asso ciation Advocacy Grants. Thanks to the collaboration and support of Katie Brodhead Cullen, Wayne Mallette, Bill McDevitt, Bobby Hamm, and Isaiah Mason, I was able to secure a $4,000 advocacy grant for NJMEA. This grant will support the work of our state to augment existing advocacy initiatives and create new advocacy opportunities. Through this grant, I am committed to launching 3 initiatives:
(1) Honors Ensemble Academies
(2) NJMEA Advocacy Survey
(3) Performances and Advocacy Success Stories at our first Music In Our Schools Month (MIOSM) Hill Day
The Honors Ensembles Academy is focused on engaging our students on free or reduced lunch (or from Title 1 school districts) in an exciting ensemble experience with a dynamic guest clinician. These free experiences will take place in various locations throughout the state starting in late October. The goal of these academies is to get our elementary, middle school, and high school choir, string, and band students excited about participating in our school and NJMEA Honors Ensembles. Detailed information will be released via Tempo Express.
The NJMEA Advocacy Survey is to track the recovery of our arts programs post-pandemic, diagnose the current needs of our music
TEMPO 14 OCTOBER 2022
Libby libby.gopal[at]eastorange.k12.nj.usGopal
News From the Board of Directors
programs, and guide school districts in supporting music program implementations. The advocacy survey was originally created by our SJBODA President Lori Ludewig and released as 3 separate surveys for multiple grade levels on March 1, 2022 to all South Jersey superintendents. 87 school districts out of a possible 200 responded, with a total of 189 respondents. The NJMEA Advocacy Survey will now be released to Central and North Jersey during the Honors Ensembles Academy, the February Conference, professional development sessions, and through Tempo Express.
Lastly, I’m excited for our first MIOSM Hill Day in March. Our hope is to:
1. Have Governor Phil Murphy sign the MIOSM Proclamation.
2. Partner with NJEA and have a variety of school ensembles perform at the capitol.
3. Exhibit art at the capitol from diverse student populations.
4. Promote NJMEA Advocacy Success Stories at the event and post event pictures on the Advocacy website. My hope is that through the work of these advocacy grant initiatives we reach a wider array of students and teachers across the state of New Jersey. By diversifying the demographic of students participating in NJMEA events, our organization will finally be able to more equitably represent districts at the regional and state level.
Band Performance
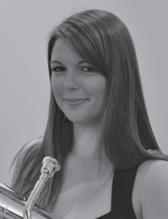
Megan meganalexander160[at]gmail.comAlexander
I hope your school year is off to a positive start! My name is Megan Alexander and I am happy to intro duce myself as the new Band Performance Chair. I am excited to have this opportunity to collaborate with some of the finest professionals and educators in serving the needs of the New Jersey band community. I have served as a high school, middle school, and elementary school band teacher in both New Jersey and the United Kingdom, have been involved in both CJMEA and NJMEA for many years, and am an active performer. I am looking forward to continuing to elevate both the teacher and student band experience. Please feel free to reach out with any questions, inquiries, requests, or concerns!
The All-State Band Committee has been hard at work planning the return to the overnight All-State Band weekend model, which has not occurred since before the pandemic. We are looking forward to improving the student experience and are discussing ways for educators to benefit from the All-State Band weekend. Auditions are scheduled for January 21st at JP Stevens High School. Reading rehearsals and the All-State Band weekend will occur through February and culminate with a performance at the New Jersey Perform ing Arts Center (NJPAC).
You may expect to receive updates from the NJMEA website and TEMPO Express emails, our two main outlets for communica tion, as we move forward towards these events and for all other band-related communications.
As we continue to return to a sense of normalcy, I hope that you are able to make wonderful music with your students this school year. While there will surely continue to be challenges, educators have been through so much with their students over the past couple years. Let us not forget what we have overcome together and celebrate our accomplishments through music. Best of luck to you and your students this school year!
OCTOBER 2022 15 TEMPO
News From the Board of Directors
Choral Festivals
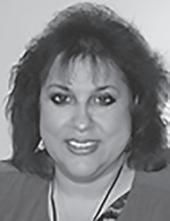
Donna Marie firesongwed[at]gmail.comBerchtold
The 68th AnnualAnnual NJMEA Middle School – Junior High Choral Festival dates are scheduled for the spring of 2023. The Festivals are currently scheduled to be held at two separate locations.
- The first event (South Site) will take place at Rowan University on Thurs. March 16, 2023. The deadline for applications is Febru ary 9, 2023. (Event time: 9:00 AM – 1:30 PM). A SNOWDATE has been scheduled for Fri. March 17, 2023.
- The second event (North Site) will be held at Rutgers University on Tues. May 23, 2023. The deadline for applications is Tues. April 11, 2023. (Event time: 9:00 AM – 1:30 PM).
The application forms will be on the NJMEA web site, however, they can also be found in the January edition of TEMPO Magazine. A maximum of ten (10) registrations will be accepted at each site. The Registration Fee per school group is $150.00 for either site. Each participating choral group will receive written and aural evaluations by the adjudicators, along with a plaque from NJMEA which recognizes the commitment and involvement by the school, its chorus, and the director(s).
Any schools interested in participating in either of these events next year should be sure to complete the application form in the January issue of TEMPO magazine, or online at www.njmea.org. Anyone with questions or concerns may contact Donna Marie at: firesongwed[at]gmail.com, or 609-226-7751 (cell)
NJMEA Opera Festival is back!
A wonderful team of volunteers stepped forward to prepare, plan, and rebuild the Opera Festival. Thank you, Anne Paynter (Festival Chair), Brenda Pillari, Dan Marshall (Metropolitan Opera – NYC, NY), Rick Camacho, Kyong Parker, Cathy Cook, Jan ice Johannessen, and John Leonard. Flyers regarding the October Auditions and November Opera Festival were distributed at the All-State Chorus Rehearsal in June. Jason Tramm will be the Festival Host at Seton Hall University, South Orange, NJ this year. Colleen Sears will be the Festival Host at the College of New Jersey, Ewing, NJ, in 2023. The plan is to alternate between these two Festival sites each year.
Set aside: Saturday, November 5, 2022, for the Opera Festiva l
Students will:
• Attend a workshop/clinic on stage performance practice
• Watch and/or participate in a masterclass with a Metropolitan Opera Guest Artist/Clinician
• Rehearse and perform opera choruses with the Festival Choir
• Have the Opportunity for feedback and scores from opera professionals and to perform on the Festival Concert (for auditioning •students)Auditions will be done virtually
• Application deadline – October 15, 2022
• Deadline for Virtual Solo/Ensemble Video Audition Submissions – October 22, 2022
• Non-auditioning students may attend workshops & participate in the Festival Chorus performance in the closing concert.
See the flyer on the facing page and check the NJMEA Website page for the application forms.
TEMPO 16 OCTOBER 2022
News From the Board of Directors
Choral Performance
Brian williams.brian[at]robbinsville.k12.nj.usWilliams
Here we are once again navigating a new school year and finally on the other side of the pandemic, where all signs point to a mostly normal year ahead. As we collectively breathe a sigh of relief and release, I believe we owe it to ourselves to take a moment to stop and ask, What can I do differently this year that will nourish and inspire me as a musician and educator?
We need to find those items and events that will foster and create inspiration in us and our work. My hope as I write this is that everyone will approach their music, classroom, and life with a new found love and appreciation for what we do; possessing a real desire to try new things and at the same time appreciate those things we consider staples to our musical menu. I know I am not alone in saying these last several years have been draining as a musician and educator. But here we are now finding ourselves at another precipice in our creative journey. How exciting would it be for us to try new things that not only challenge our students, but ourselves? Whether you are at the beginning, end, or somewhere in the middle of your career, take the moments you are given this year and expand your musical menu. Ultimately when our menu is full, so are our student's and those we interact with.
Thankfully we have no shortage of opportunities this year that can help in nourishing us in and out of the classroom on a local, state, and national level. Mixed and Treble All State rehearsals are already underway and sounding amazing. This November our Mixed Chorus will welcome the brilliant Dr. Amanda Quist of Miami University to the stage for their performances at the NJEA conference in Atlantic City on November 11th and NJPAC on November 20th. In February we will welcome the incredible Argine Safari of Pascack Valley High School to the helm to direct our Treble Chorus for their performance at NJPAC on February 26th. On February 23rd-25th we will also come together to be inspired and nourished at our NJMEA state conference in Atlantic City and our NAfME Eastern Division Conference in Rochester, NY on April 13th-16th. All this and so much more, including County, Region, and All-Eastern Choirs throughout the year. We encourage everyone to promote these opportunities to your students. If you have never participated in an honor choir before, now is your time. Also don't forget to stay up-to-date on your ACDA and NAfME memberships.Asalwaysan
immense thank you goes out to the many individuals who work tirelessly behind the scenes to make everything we do on the state level run so effortlessly. It is through expert leadership and passionate people that we are able to accomplish so much for so many, most importantly our students. I would like to thank Wayne Mallette for his continued leadership; the incomparable Choral Procedures Committee for all their amazing work (Historian - Barbara Retzko, Region I - Libby Gopal, Viraj Lal, Kristen Markowski, Region II - Hillary Colton, Matt Lee, Arielle Siegel, Region III - Cheryl Breitzman, Kahlil Gunther, Rich Tinsley); our Chorus Managers (Mixed Chorus) Matt Lee and Matt Wolf, (Treble Chorus) Amanda Blutner and Alex Minter; our gracious rehearsal hosts Kyle Casem, Susan Croggon, Michael Reca, David Taylor, and Jason Vodicka; All State Housing Manager Nancy Dickinson, and Joe Cantaffa our All State Event Coordinator. Our success would not be possible without all of these people and so many more. Also a final thank you to Mike Doheny for his service as our outgoing Choral Procedures Chair.
Finally, it is my honor to be serving as the new Chair of Choral Procedures. I look forward to meeting everyone over the next several months. Please feel free to reach out via email at kennethbryson[at]gmail.com to say hi or if there is anything I can help with.
Best wishes to all for an exciting and healthy year ahead.
TEMPO 18 OCTOBER 2022
News From the Board of Directors
Guitar and Expanded Ensembles Jayson Jmarti37[at]webmail.essex.eduMartinez

New music video? Check! A trifecta of GuitarFests? Check! What’s next..? How about performing with a Grammy® Award win ning classical guitarist!
The 2021-22 school year was, in my opinion, the apogee of NJMEA Honors Guitar Ensemble performance and achievement. First, the talented guitar ensemble collaborated with the NJGO to record another music video: Sailing Home , by Mark Houghton. The composer was so enamored by the wonderful rendition that he is showing his gratitude with a new commission. This new work, spe cifically dedicated to the NJMEA Honors Guitar Ensemble, is expected to premiere in late 2023-24. Special thanks to the Augustine Foundation and the Virtual Guitar Orchestra (VGO) team for their ongoing support of our projects.
Secondly, our NJMEA Honors Guitar Ensemble made history by performing in a trifecta of GuitarFests , both in and out of NJ. This past April, the ensemble, along with the NJGO, performed at William Paterson’s annual GuitarFest, hosted by renowned guitar ist and educator Seth Himmelhoch. In May, both groups performed at the Long Island Guitar Festival, which highlighted various high school guitar ensembles from across the country. The LIGF also featured international soloists, whom presented workshops and recitals. Additionally, it gave prominence to a new world-premiere commission, Air and Lamentations , performed by the NJGO. Needless to say, our students were fortunate and excited to perform at this historical event and meet their classical guitar heroes. A few weeks later, the NJMEA had the distinct honor of kicking Kean University’s inaugural GuitarFest. It was very exciting to expe rience the student performances from various NJ high schools, local music establishments, colleges and universities. These perfor mances led up to a fantastic set by our NJMEA Guitarists.
Finally, we rounded off our season by opening for the United States Guitar Orchestra at the illustrious Merkin Hall at the Kaufman Center in NYC. This event was graciously hosted by the Aaron Shearer Foundation. The concert featured new works by Michael Hedges and Mark Charles Smith. Conductor, Dr. Kami Rowan, led the USGO on a tour through Spain following the successful Merkin Hall premiere. Many of our NJMEA HS Honors Guitar students plan to audition for the USGO next season, in the hopes that they can further their talents and perform internationally.
So what’s next for the guitar students for this new school year? I am honored to announce that the NJMEA Honors Guitar En semble and the NJGO will perform a concerto on June 17th, 2023 at Enlow Hall. This monumental event will feature the Grammy Award winning classical guitarist William Kanengiser as the star soloist! So, save the date and we hope to see you there!
Inclusion/Diversity/Equity/Access
Katy Brodhead njmea.idea[at]gmail.comCullen
With the start of the new school year, the IDEA Committee is kicking off new offerings and opportunities for involvement. First, we are looking to expand our team with the addition of a college student representa tive! We meet monthly to support the implementation of Inclusion, Diversity, Equity, and Access throughout our organization. Email njmea.idea@gmail.com to get involved! Also, a special welcome to Jordan Peters, the new Diversity and Inclusion Chair for NJSMA! NJSMA is spearheading a new middle school guitar festival to take place in the spring of 2023. Join the planning team by emailing Jordan at diversity[at]njsma.org.
OCTOBER 2022 19 TEMPO
News From the Board of Directors

This year, the IDEA Committee is hosting a series of professional development sessions that focus on selecting, teaching, and performing diverse repertoire. Details and registration for upcoming workshops can be found on our website at https://njmea.org/ professional-resources/idea-committee/. We know that finding time to research new repertoire selections can be challenging, so we're also forming the NJMEA Repertoire and Resources Committee. This committee will compile a list of recommended repertoire across many aspects of diversity. Register here: https://forms.gle/fFprbDKkUoWMS43k9.
Finally, we are excited to announce the creation of a statewide student conference to encourage student leadership and provide opportunities for students to engage in diverse musical experiences. This high school event will debut in the fall of 2023 and include components like leadership, music technology, non-standard performing ensembles, and more. Help us design this conference by completing a short survey https://forms.gle/gBNckfCwZPh96jAM7ator scanning the QR code.
We are looking forward to a great year ahead! Email NJMEA.IDEA[at]gmail.com to share your ideas or challenges, or to join us in our work!
Jazz Education Miguel mbolivar.njaje[at]gmail.comBolivar
NJAJE is once again happy to be presenting a full year of in-person jazz performances beginning with our All State Jazz Band and Jazz Choir in Atlantic City and NJPAC, alongside our other NJMEA All State ensembles. Conductors for these ensembles are Gunnar Mossblad (Jazz Band) and Amy London (Jazz Choir), who will team up at NJPAC with our guest artist, Christian McBride. This coming year we continue with our November Jazz Education Conference at NJPAC, our regional jazz band, choir, and combo experiences, and our state jazz festivals for high school jazz bands and jazz choirs. Under new leadership from Tim Hayward, we are looking to grow our middle school festival this year. The middle school festival is a great opportunity for younger ensembles to receive feedback from amazing clinicians for your growing ensembles in a low stress, educational, and positive environment. If you would like more information on any of these events, please visit the NJAJE website at www.njaje.org or email the appropriate board member listed at that site.
Lastly, we are proud to have made additions to our board of directors. These new team members will help us to continue to pro vide the best possible jazz education experiences for our students in New Jersey. On behalf of NJAJE, we wish you all a healthy and happy start to the 22-23 school year!
K-12 Ed Tech & Innovation Shawna shawnalongo[at]gmail.comLongo
Hello and welcome to another new school year! On the tech side of NJMEA, we are off and running planning for another amazing Music Technology Expo which will happen in mid-late May. The planning committee will be sending out information periodically via TEMPO Express. If you haven’t ever checked it out, I encourage you to join us - with or without your students. We overhauled the experience last year to give it a more authentic professional experience in multiple facets of music production and it was well-received by all who attended!
TEMPO 20 OCTOBER 2022
News From the Board of Directors
If you’re looking for some relevant, timely, and on-demand music-centered PD, I encourage you to get certified! Many, if not most, music technology companies offer FREE certifications or academies for music educators. Some will even offer you graduate credits through an accredited university (for a fee). This could be a productive way to fulfill your PDP this year, boost your resume, and/or just continue learning! Here are a few to get you started:
Music First Academy - offers 4 courses for ensemble directors, general music & theory, MusicFirst Junior for Elementary Music Teachers, and Technology Integration for the Music Classroom: Curriculum Development (also offers Soundtrap & Noteflight Learn courses) - https://www.musicfirst.com/support/certification
Hal Leonard Music Education Certification Courses - offers 6 courses for Noteflight Learn, Soundcheck, Essential Elements Music Class, Essential Elements Interactive, Soundtrap, and Teaching Composition & Creativity with Eric Whitacre’s Virtual School - https://edu.halleonard.com/certification-courses
Soundtrap Academy - offers 5 leveled courses for Level 1, Level 2 Music, Level 2 Podcast, Level 3 Music, and Level 3 Podcasthttps://academy.soundtrap.com/Pleasedonoteverhesitateto reach out with questions or to share an amazing experience that you are having in your classroom! I plan to continue to push out ideas and examples of innovative teaching practices regularly through my TEMPO articles as well as through NJMEA’s social media outlets and TEMPO Express. If you have an innovative or technology-driven event coming up, I’d love to know about it and help you with promotion!
Orchestra Performance/Festivals
Susan susanmeuse[at]gmail.comMeuse
As we are moving back to more in person events, I’m happy to say that the All State Intermediate Orchestra had a wonderful concert back on May 14. The conductor, Dr. Arvin Gopal did a fantastic job working with the talented students on a very challenging program. On behalf of the Procedures Committee, I would like to congratulate Dr. Gopal as well as thank Jennifer Curran for managing and Bob Peterson for hosting the concert at West Windsor-Plainsboro HS South. Thank you also to Penny Montana for hosting two of the rehearsals at John Adams MS.
On June 4, the All State Orchestra had their first rehearsal with conductor Jim Millar. The students prepared their music ahead of time, and are already sounding great. Look for the program information in this issue of Tempo! The concerts will be on November 11 at Boardwalk Hall in Atlantic City and November 20 at NJPAC.
The Orchestra Procedures Committee has been hard at work making sure that all of these events are running smoothly. We are always looking for help and input from NJMEA members, so if you are interested in getting involved, please email me or the Procedures Chairs, Liz Sato and Craig Stanton (ASOProcedures[at]gmail.com). We hope you have a great school year!
OCTOBER 2022 21 TEMPO
News From the Board of Directors
Retired Members/Mentorship
Kathleen kspadeb[at]aol.comSpadafino
Happy new school year everyone! For us retired folks, it’s just another page on our calendar. And fall is the BEST time for travel, now that the world is opening up again.
Although we are retired, NJRMEA is still very involved in music education in New Jersey, and in music making as well. Many of us retirees are performing, teaching and helping with schools in some way. As part of NJMEA, we are part of the mentorship program as well as the IDEA and Advocacy committees. We will also participate in more discussions at the NJMEA convention in February, which will involve parents and administrators. And of course, we observe teachers who have been nominated for Master Music Teacher and choose one each year. We have 2 General Membership meetings this year, which anyone is invited to: Friday, Feb ruary 24, 2023 at the NJMEA Convention in Atlantic City and Wednesday, May 10, 2023 - place TBD. Please stop by and check us out! If you would like more information, please email me at kspadeb@aol.com or our president, Ron Dolce at rdolce561[at]aol.com. We would love to have you join us!
Special Learners Maureen maureenbutlermusic[at]gmail.comButler
By now the school year is in full swing and you’ve become acquainted with all your students, including those who receive special ed services. Some of them you may have known already, and some may be new to you this year. If you’re looking for strategies to more successfully include them in your classes, here are some options for you to consider:
* Network with the related services specialists in your building or district, including speech/language, physical and occupational therapists, special services teachers, fellow allied arts teachers, and the school counselor/psychologist.
* Contact the state Special Learners committee, at my email address. We are fortunate to have teachers who have expertise in this area, and are willing to give advice and answer questions. They include: Steve Braun from the Center of Lifelong Learning and the Academy Learning Center, Lucia Marone from Vineland, Trina McCarthy from Holmdel, Krysta Mirsik from Passaic, Glennis Patterson from Roxbury, Sarah Perry from Westminster Choir College, Lauren Shanahan from the Ellisburg Campus of Y.A.L.E. Schools Inc, Brian Wagner-Yeung from Cuny Brooklyn College and Barbara Weiner from Saddle Brook.
• Start planning now to attend the annual conference in February, where there will be a variety of informative sessions on this topic. As we network and learn, we can provide more successful music experiences for all our students!
TEMPO 22 OCTOBER 2022
SAVE THE DATE! 2023 NJMEA STATE CONFERENCE
February 23-25, 2023
Atlantic City Convention Center
Conference Hotel - Sheraton Atlantic City Special Conference Rate!
Friday Night Gala Concert NATURALLY 7
NEW! - EXHIBIT BINGO
NEW! - COLLEGIATE SUMMIT
More that 120 sessions
Concerts by Student and Professional Ensembles All- State Band and Treble Chorus Rehearsals Exhibit Hall Full of Music Vendors!
Registration and Hotel Information available at: https://www.eventsquid.com/event/17559
Keep checking the NJMEA website for updated information
OCTOBER 2022 23 TEMPO

TEMPO 24 OCTOBER 2022 For more information, please contact: (215)204-6810 or boyer@temple.edu boyer.temple.edu FACULTY Alison Reynolds, Chair Beth ElizabethMikeSuzanneRolloDeborahDustinNathanBoltonBuonviriCatesConfredoDilworthHallNorrisCassidyParker MUSIC EDUCATION AT BOYER COLLEGE Support your continued discoveries, engagement and opportunities as a musician, teacher and scholar in one of our seven outstanding undergraduate and graduate music education programs. Study with world-class, dynamic music faculty, and cultivate professional relationships in the Boyer College, at Temple University and in the broader community. PROGRAMS: BM, BM (jazz), MM, MM+Certification, MM Online, PhD, Graduate Certificate in Music Teaching Boyer College of Music and Dance @boyercollege
Using Books to Drive Your Professional and Personal Growth
Shawna Longo Durban Avenue School, Hopatcong, NJ shawnalongo[at]gmail.com
Some people love to read, while others, not so much. Whether reading is your thing or not, you could utilize it to expand your knowl edge and skills in the classroom. A book study is one often overlooked way to work towards fulfilling your PDP (Professional Development Plan) requirement for the school year. Reading books related to your professional or personal growth/reflection is also one way to rest and re charge, or build your resilience. The American Psychology Association defines resilience as, “...the process of adapting well in the face of adversi ty, trauma, tragedy, threats, or significant sources of stress - such as family and relationship problems, serious health problems or workplace and fi nancial stressors.” “It means ‘bouncing back’ from difficult experiences.”
Even if it’s not your way to rest and recharge, maybe one of these books will pique your interest and help you continue to move your prac tice forward through your PDP. As I was assembling this list of titles, six themes emerged: Music Technology, Creativity, Advocacy, Building Resilience, IDEA (Inclusion, Diversity, Equity, Access), and SEL (social emotional learning). These are prevalent themes in education and within our society today. And honestly, I would recommend any book written by these authors! They are all forward-thinking creatives, whom I hope will resonate with you as much as they have with me!
Music Technology
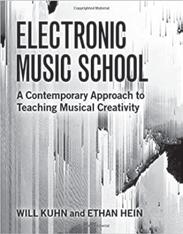
1) Electronic Music School: A Contemporary Approach to Teaching Musical Creativity - by Will Kuhn and Ethan Hein - A blueprint for teaching music technology in secondary schools.
bend, Kodály, Orff Schulwerk, and project-based learning.
4) Music Technology 101: The Basics of Music Production in the Technology Lab or Home Studio - by Heath Jones - Presents music cre ation through technology from an approachable angle and includes ac cess to video tutorials.
5) Technology for Unleashing Creativity: Practical Tips and Tools for Music Educators - by Steve Giddings - Using practical tips, visual guides, and lesson plan ideas, this book offers a guide to increasing creativity and technology in any K-12 music classroom.
Creativity
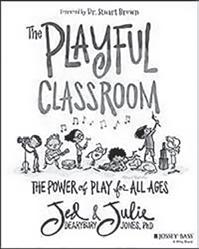
1) The Playful Classroom - by Jed Dearybury & Dr. Julie Jones - Fo cuses on building a creative culture in every classroom through play.
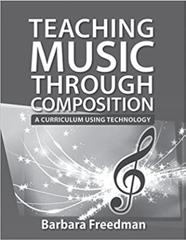
2) Teaching Music Through Composition: A Curriculum Using Tech nology - by Dr. Barbara Freedman - Presents a secondary music curricu lum designed to teach basic music concepts through the creative process of music composition.
3) Using Technology with Elementary Music Approaches - by Amy Burns and various contributors - Presents practical lessons and ideas writ ten to further enhance classrooms that utilize the approaches of Feiera
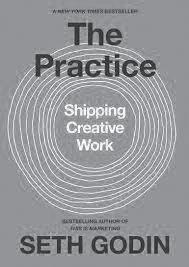
2) The Practice: Shipping Creative Work - by Seth Godin - Focuses on creativity, passion and purpose.
3) Out of Our Minds: The Power of Being Creative - by Sir Ken Rob inson - Addresses three vital questions: Why is it essential to promote creativity? What is the problem? What can be done about it?
4) Ignore Everybody and 39 Other Keys to Creativity - Hugh Ma cLeod - discusses how to maximize creativity in a world that doesn’t al ways support it.
5) The Rise: Creativity, the Gift of Failure, & the Search for Masteryby Sarah Lewis - Leads on a discovery of the process of creativity through stories from past and present inventors, explorers, entrepreneurs, artists, and more.
Advocacy
1) Imagine If…Creating a Future for Us All - by Sir Ken Robinson & Kate Robinson - A powerful call to action using Sir Ken Robinson’s key messages and philosophies.
TEMPO 26 OCTOBER 2022
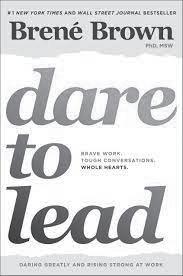
2) Dare to Lead: Brave Work. Tough Conversations. Whole Hearts.by Brene Brown - Shifts the idea and culture of leadership towards asking more questions, recognizing the potential in people and ideas, and devel oping and/or cultivating that potential.
Building Resilience
1) Burnout: The Secret to Unlocking the Stress Cycle - by Emily Na goski & Amelia Nagoski - Written for women by two sisters and will give you simple, science-based strategies to help minimize stress, manage our emotions, and live a more joyful life.
2) Culturally Relevant Pedagogy: Asking a Different Question - by Gloria Ladson-Billings - a powerful compilation of 10 research-based es says that will push your thinking and practice to start asking “What’s right with Black students and what happens in classrooms where teachers, par ents and students get it right?” instead of “What’s wrong with those kids?.
3) Culturally Responsive Teaching & The Brain - by Zaretta Ham mond - Uses neuroscience research to approach designing brain compat ible culturally responsive instruction.
4) The Dreamkeepers: Successful Teachers of African American Chil dren - by Gloria Ladson-Billings - Discusses the issues of race and educa tion through a mix of scholarship and storytelling.
5) Coaching for Equity: Conversations that Change Practice - by Elena Aguilar - Offers effective strategies for talking about race, power, and sys tems of oppression.
Social Emotional Learning
1) Music Education and Social Emotional Learning: The Heart of Teaching Music - by Dr. Scott Edgar - Discusses how to effectively inte grate social emotional learning into any music classroom across all grade
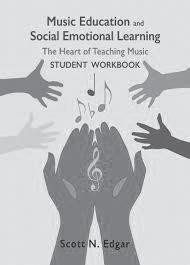
levels.2)Music
2) Onward: Cultivating Emotional Resilience in Educators - by Elena Aguilar - Written with the option that it can be used as a year-long book study (one chapter per month), this book will guide your personal and professional growth through self-reflective activities and prompts.
3) Keep Going: 10 Ways to Stay Creative in Good Times and Bad - by Austin Kleon - This book could also be included in the creativity category. It gives you ten simple rules for how to stay creative, focused, and true to yourself.
IDEA (Inclusion, Diversity, Equity, Access)
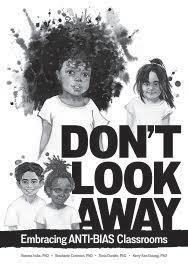
1) Don’t Look Away: Embracing Anti-Bias Classrooms - by Iheoma Iruka, Stephanie Curenton, & Tonia Durden - Explores and addresses the issues of bias, equity, low expectations, and family engagement with strate gies, tools, and information to assist you in the classroom.
Education and Social Emotional Learning: The Heart of Teaching Music, Student Workbook - by Dr. Scott Edgar - Workbook containing thirty activities to integrate SEL in music classrooms.
3) Portraits of Music Education and Social Emotional Learning: Teach ing Music with Heart - by Dr. Scott Edgar and numerous contributors - A collection of stories and implementation ideas from music teachers across all grade levels and music content areas.
Shawna E. Longo is the General Music (Music Technology) teacher and Arts Integra tion Specialist at Durban Avenue School, Hopatcong, NJ. She is also a published author with her book, "Integrating STEM with Music," with Oxford University Press. Additionally, she serves as a Practice Advisory Board Member for The Center for Arts Education & Social Emotional Learning, K-12 Educational Technology & Innova tion Through Music Chair for the NJMEA Board of Directors, the Arts Integration & STEAM Specialist for TMI Education; Lead Consultant for Essential Elements Music Class (Hal Leonard); and an Ambassador/Consultant for The Rock and Roll Forever Foundation, Music First and Jamstik. She is an internationally recognized clinician and consultant for music education, music technology, social emotional learning, arts integration, and STEAM. She is also a recipient of the 2021-2022 Sussex County Teacher of the Year, 2021 New Jersey Arts Educator of the Year, 2021 Governor’s Edu cator of the Year for Durban Avenue School, 2019 Mike Kovins Ti:ME Music Technol ogy Teacher of the Year, 2019 New Jersey Governor’s Award in Arts Education, 2019 Teach Rock Star Teacher Award from The Rock and Roll Forever Foundation, 2018 NJMEA Master Music Teacher Award, and 2016 Governor’s Educator of the Year for Hopatcong Middle School. Mrs. Longo also serves on the Morris Plains Board of Education.
OCTOBER 2022 27 TEMPO
Sequential Essentials: Band Crafting a Creative Mindset for Band
INTRODUCTION
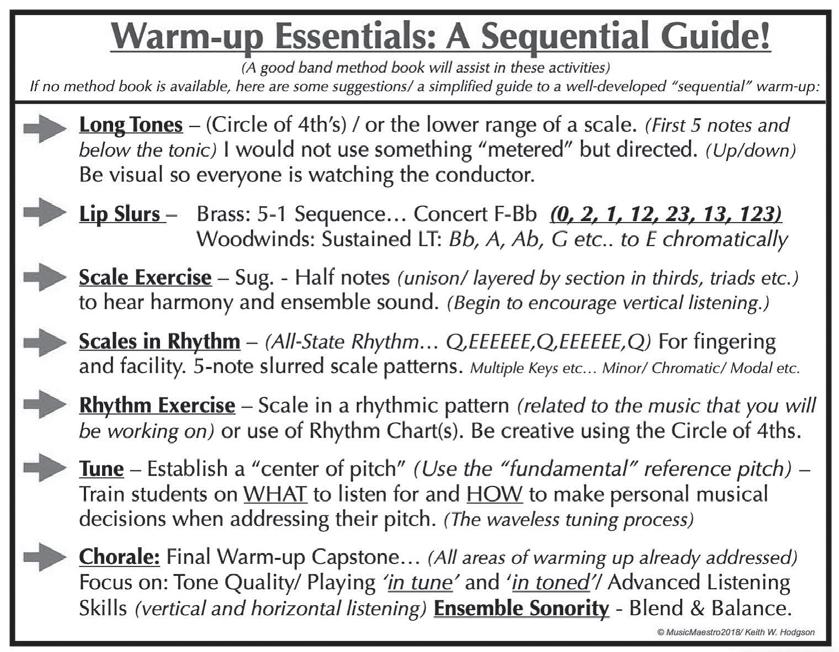
What tools do instrumental musicians need to be successful in rehears al? What ‘best practice’ routines should directors establish with brass, woodwind, and percussion players? Why is it important to plan the ap proach sequentially and with creativity? The concepts recommended in this article are not only for high school bands but should be implemented in the early stages of instrumental habits and development as well as best practice habits for collegiate instrumentalist and adult community band musicians. It is critical to the success of developing musicians that direc tors are conscious about their logical and sequential needs.
INVOLVING PERCUSSIONISTS
Consideration for percussionists is purposely being addressed first so that they do not become an afterthought. Directors often begin a full band warm-up without giving thought to the percussion section. It is imperative to keep your percussionists involved, engaged, and challenged for many reasons. The most effective way to handle behavior and class room management issues when it comes to the percussion section is to be proactive in your planning, intentional in your expectations, and pur poseful in the development of training well-rounded percussionists with outstanding ensemble skills and positive habits.
Percussion students should continually expand and develop their skill set. Unlike the wind players in the band, percussionists must become fluent in reading both bass and treble clef as well as the unique percus sion notation often specific for individual instruments. The technique required to perform at a high level on each instrument can be practiced and demonstrated as a part of the rehearsal preparation time; however, it requires a creative and artful approach.
It is essential to organize job assignments or plan a scheduled rotation for the section to set-up and prepare all the equipment needed for the rehearsal. If organized and working collaboratively as a section, this can be accomplished quickly at the same time all wind players are getting setup. It is a recommended best practice that all percussionists participate with the wind exercises on mallets instruments with yarn or soft rub ber mallets for more blended sounds. Marimbas can serve three players, and vibraphone and xylophone can serve two. It is important to have less percussive sounds during full ensemble playing. Timpani should be utilized specifically to develop ear training and tuning skills. A planned rotation schedule can have one student each day assigned to working on their timpani technique. If you have a large section, the rotation schedule can have a couple students’ warm-up with rudiments on drum pads (not drums). Most importantly, do not let them become ‘the forgotten ones’ at the back the room.
FIRST THINGS FIRST FOR WINDS: LONG TONES! Out of the case, wind musicians need to play long tones in their in struments before anything else. This establishes a set and steady embou chure; engages the lips with the vibrations needed to produce a sound on a mouthpiece and reed; and expands the lungs and open airway in consistent breath intake, output, and control. It is recommended that these long tones begin in the middle range for all instruments and not be rushed. Make a conscious effort to take in more air each time, ex panding the lungs, and providing pitch and dynamic support. Instead of ‘mindlessly’ sustaining a note, have the students focus on their individual tone quality, a consistent centered ensemble pitch, and giving ‘forward direction’ and shape to each note. Finally, consider not measuring the long tones in a steady tempo or with the same number of counts per note. (And PLEASE do not use a metronome over the sound system for this) Instead, conduct the long tones at slow various tempos and in various meters. This will establish eye contact, engage students in responding to the conductor’s gestures, and will develop ensemble cohesiveness and awareness.
THE CIRCLE OF 4th’s
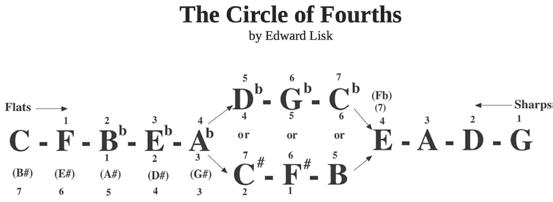
Why use the Circle of Fourths? Unlike the Circle of 5th’s or only us ing ascending and descending scales, the Circle of 4th’s instills hearing dominant to tonic relationship, requires forward thinking, and engages musicians in active listening and ear training. For example, the ensemble begins on a union concert F, when directed, the ensemble moves together to a Bb. This movement of a perfect fourth will audibly establish the V-I relationship. Each subsequent movement will continue the V-I cadence in each key. Instead of ‘mindlessly’ moving to the next step of the scale, students are engaged in active decision-making as they consider each perfect fourth interval, octave choices, and pitch adjustments when ‘in toning’ chords. Finally, musicians will be naturally training their ‘innerear’ to hear the next tone before they play it. By engaging musicians in this process, musicians will instinctively focus their listening on center of pitch, tone quality, chordal resonance, and individual balance within the ensemble sound.
Author and Educator, Edward Lisk (1991) developed this fantastic Circle of Fourths visual model in his Creative Director: Alternative Rehears al Techniques Series that has become one of most enjoyed and proven teaching tools in the band world.

TEMPO 28 OCTOBER 2022
Keith W. UniversityHodgsonoftheArts, Philadelphia, PA khodgson[at]uarts.edu
Consider using the Circle of Fourths consistently for unison long tones, scale practice logically moving to related keys, for three- and four-part chord ‘intoning,’ and for attack/ release and dynamic shaping exercises. Musicians will develop an ear for tuning and intonation, chordal relation ships, blend and balance, and a higher level of musical understanding and engagement. Most importantly, be creative in designing exercises, progres sions, and interactive communication between conductor and musicians. Be a creative director!
LIP SLURS
All wind players, but especially brass players need to establish lip flex ibility as part of their daily routine. Beginning with a simple 2-note (5↓1) half note slur in Concert Bb and proceeding through each of the seven fingering combinations on all brass instruments (0-2-1-12-23-13-123) is a great way to start. Woodwinds can also play 5-1 or can sustain one tone (1- tonic) and descend chromatically from concert Bb to E while the brass plays each sequence. Numerous variations of descending and ascending lip slur exercises in the ’Overtone Series’ can be explored as next steps such as: (1 ↓ 5 ↓ 1); (1 ↓ 3 ↓ 1 ↓ 5 ↓ 1); (1 ↓ 3 ↓ 5 ↓ 3 ↓ 1 ↓ 5 ↓ 1) and many more. A good band method book will hopefully outline some lip slur flexibility exercises.
SCALE AND INTERVAL EXERCISES
Scales are a significantly important part of warming up and improving the facility development of the fingers, tongue, and for teaching musical literacy. One of the challenges all wind plays face is getting the fingers and tongue to work together seamlessly. Be sure that to vary the articulations that are applied (staccato, legato marcato and combined patterns such as ‘slur 2, tongue 2’, ‘slur 3, tongue 1’ etc.). Be sure to communicate the under standing of individual scale degrees and tendencies on each instrument in context to each individual key. It is also essential to engage students in a culture of continuous learning and development of all keys; major, minor, chromatic, modal scales; interval sequencing, and chord studies. It would be a disservice to students to restrict warm-ups to two to three keys and a sure way to instill boredom and mindlessness to ‘warm-ups.’ (You knew the soapbox was coming, didn’t you?)
Performing scales in rhythm (ie: Q,E,E,E,E,E,E,Q) is a common re quirement for auditioned honor ensembles. Making this a daily practice in ensembles will assist in building key fluency, finger facility, and muscle memory. All forms of scales (not just major) should be explored in all keys of the ensemble’s curriculum. Scales do not always need to be played fast; however, a conscious effort to improve the tempo of each key will improve the overall ensemble’s technique around the circle of keys.
RHYTHMIC AND ARTICULATION EXPERCISES
In addition to applying various articulations to scales as previously mentioned, it is a common best practice to apply a rhythmic pattern to a scale or the circle of fourths. In planning this approach, new rhythm
concepts, fragments of rhythms, or combining rhythmic elements can be repeated on scale or circle tones to establish ensemble consistency and un derstanding. Another suggested planning approach is to extract a rhyth mic challenge from the music for study and incorporate it in the ensemble preparation time.
TUNING
Tuning is and has always been a widely discussed and argued topic and many directors and programs across the country have their philosophies and established routines. As far as tuners go, they are an excellent tool for individual practice and checking pitch tendencies your instrument, and when putting it together to make sure the instrument is closely in-tune with itself. However, we know that just because you tune your instru ment, that does not guarantee that all notes will be in tune or that your in strument will stay in tune. In fact, it was very purposeful to place ‘tuning’ in this sequential order of this article. To tune earlier in the process would be a waste of time as it will change as the musician and the instrument warm-up. Consider that the real tuner… ‘the mind’s ear,” must actively work on tuning and intoning throughout a rehearsal or performance. The ensemble preparation process must train and focus this skill as each musi cian learns to adjust to the ensemble’s established center of pitch. Develop ing this musicianship skill is critical!
The concept of tuning to the ‘fundamental’ pitch (the lowest ensemble voice) is a common best practice. This encourages listening down and building the sound in balance to the bass voice, intoned to the tonic when placing intervals above, and structuring chords. This article will not get into the more technical approaches for triad adjustments; however, it is es sential that advanced ensembles engage in teaching and practice achieving true chord ‘resonance.’
A basic approach to tuning a unison pitch is the “waveless-tuning pro cess.” Composer and teacher Stephen Melillo (1980) in his Function Chorales method shared the analogy of listening to the sound waves and responding to the sound like focusing a camera lens. The best-practice is in having the musicians ask themselves if they are above or below the center of pitch being provided and making their own decision to make an adjust ment. This is how they will learn best. Being told they are “sharp or flat,” or to “push-in or pull-out” will not teach the musical skill. This should be developed through individual trial and error, and the experience when the sound is correct.
The importance of having musicians make their own musical decisions cannot be understated. Musicians must be encouraged to adopt this ‘mu sicianship mindset’ and taught how to apply to decisions about dynam ics, balance and blend, melodic phrasing, note direction, articulations, rhythmic interpretations, and much more. In The Artistry of Teaching and Making Music, Richard Floyd (2015) stated, “Engaging students in the deci sion-making process, defining the musical reasons for making the adjustments, and empowering the students to use this acquired knowledge in future musical settings is music education of the highest order (p.24).”
CHORALES
Why do we play chorales? Chorales provide an ensemble the opportu nity to put into performance and practice all the musicianship skills previ ously addressed in this article. This element of preparing an instrumental ensemble for rehearsal or performance has also purposely been placed in this sequential planning recommendation. A chorale should serve as the final demonstration of a rich, balanced, and intoned ensemble sound. Through this lens, playing a chorale before addressing each of the ele ments prior would be pointless and a waste of time.
OCTOBER 2022 29 TEMPO
Consider some of the qualities of a chorale. They are a simple fourvoice (SATB) structure with clearly established phrases, contain longer note values, performed at slow tempos, and establish a logical, tonal pro gression with musical elements of tension and resolution. It is critical that musicians understand these qualities and that they require active listening horizontally for pitch and vertically for intonement (intonation) while re sponding to the conducting gestures to shape the musical performance.
One of the best teaching tools I have used in my career with high school ensembles are the Function Chorales by Stephen Melillo (1980). These 22 chorales provide a visual representation using scale degree numbers that allow musicians to know what step of the scale and part of the chord they are playing so they can perform its ‘function;’ and the ability to SEE all four voices and how they are moving and functioning. Because notes and traditional notation are not used, each chorale can and should be explored and studied in every key. An additional best practice recommendation is to have the ensemble SING as well as play each chorale. (Note: Ensembles will perform the chorale to a higher level after singing it.)
aspects of technical musical preparation that I have discussed. The best aspect of these two methods is that they teach IN ALL KEYS! It is very important to teach your students to play in all keys and understand the relationships between key centers.
IN CONCLUSION
I purposefully tried not use the term “warm-up” in this article. Although warming up physically is one of the outcomes of the activity that musi cians engage in at the beginning of a rehearsal, I prefer to address this time with a more mindful approach. I have found this time to be critical for TEACHING. Time not to be rushed through to get to the music, but instead to “sharpen the axe” as Abraham Lincoln would say.
In addition to accomplishing the obvious physical and technical out comes, this precious rehearsal time can be the focus of developing listen ing skills and ear training, musical decision-making, understanding mu sic theory, establishing individual performance habits, and responding to gesture and non-verbal communication. However, it requires the musical mindfulness of A CREATIVE DIRECTOR and a musically conscious sequential daily approach. Finally, consider every moment of a rehearsal a teachable moment. Whether verbal, musical, or silent communication through gesture and facial expression, remember that the most critical aspect of making music together is how you make people feel. Happy music making!
Resources
Floyd, R. (2015). The Artistry of teaching and making music. GIA.
I Recommend. (n.d.). United States: Byron-Douglas Publications.
Lisk, E. (1991). The creative director. GIA.
RECOMMENDATIONS FOR PLANNING
Routines are an important and necessary aspect of ensemble rehears als. Logistical routines are important for classroom management and organization of large groups. However, be careful that musical routines don’t become ‘mindless’ exercises. It is highly recommended to vary the daily warm-up activities for variety, active engagement, and be intentional about the logical and sequential needs of the musicians.
Planning should be a result of reflection. Reflection on previous rehears als, the curriculum, challenges in the music for study, and most impor tantly… reflection on the development of each musician of the ensemble, not just the ensemble as a whole. The focus on differentiated instruction can and must be addressed in full ensemble rehearsals. The attention on individuals should also inform and drive decisions in choosing literature.
A band method book that addresses the sequential elements outlined above is highly recommended to assist in the development of a quality band program. Among the many methods available, two that I used dur ing my teaching career were the Foundations for Superior Performance (King & Williams) and an older method, but still among my favorites… I Recommend by James Ployhar. Both methods have wonderful facility and technical exercises for all instruments and address all of the sequential
Melillo, S.L. (1980). The function chorales. Stormworks. Williams,www.stormworld.comR.S.,King,
J. T. (1997). Foundations for superior performance: Warm-ups and technique for band. United States: Neil A. Kjos Music Company.
Keith Hodgson is an Assistant Professor of music education at the University of the Arts in Philadelphia. He is a Past President of NJMEA and NAfME’s Eastern Division and currently serves on the National Executive Board and co-chairs NAfME’s Professional Learning and Partnerships Committee.
Mr. Hodgson was a high school band director and music educator in New Jersey for twenty-six years, is the founding conductor of the South Jersey Area Wind Ensemble and leads the American Music Abroad Gold Tour of Europe each summer. Mr. Hodgson is currently pursuing his Doctorate in Organiza tional Leadership at Aspen University. Contact: khodgson@uarts.edu
Chorale sample: THE FUNCTION CHORALES by Stephen Melillo
TEMPO 30 OCTOBER 2022
Function Chorales... by © Stephen Melillo 1980... Page 14 AnalysisI IV I6/4 VI I IV ii7 V7 I #2"BasicChange"byStephenMelillo RHYTHM , Chords in B B E B FB B E Cm F B 1(8)1(8)1(8)17(8)6655 5 33 5444 6555 3334211171 42 555 143 S111A T B 4 4 4 4
®
Strengthen your school’s Music. Honor. And Society.
Starting a Tri-M ® Music Honor Society chapter will help show the value of your music program to the school. It will also benefit your students by allowing them to:
•Build an impressive record for •Growcollegeas leaders in music
•Serve their community
Ready to start a chapter?

OCTOBER 2022 31 TEMPO
it's time TO START A Tri-M MUSIC SOCIETY CHAPTER honor
Visit Tri-M@nafme.orgMusicHonors.com | 1-800-336-3768
5 Ways to use the Free Canva for Education in the Elementary Classroom
Amy M. Burns Far Hills Country Day School aburns[at]fhcds.org
Canva for Education is a free tool for K-12 teachers and their students where one can create and personalize their own original designs, post ers, videos, manipulatives, badges, certificates, or choose from thousands of high-quality, copyright-free educational templates. To access the free Canva for Education program, go to https://www.canva.com/educa tion/, sign up using your education email address, or upload proof of your employment. Once you are approved, you will receive a verification notice via email. There is also a free version, but the educational free ver sion gives you more access to the program. Many educators start out with the free version and then get upgraded to the educational version once they’re verified.
Why use Canva?
There are many times throughout the school year that I need to create a program or a poster or a manipulative so that I can hand them out for a concert, or place them as a QR code, or post them in learning manage ment systems (LMS). I tell my students often that I am not an artist like our talented art educator. For this reason alone, I dove into Canva as the copyright-free images, templates, videos, audio, and more gave me the opportunity to create beautiful manipulatives. Ones that I could not create by hand.
Canva also saves you a lot of time because you do not have to create programs, posters, and other promotional items from scratch. You can create your own template so that you can reuse them from year-to-year, improving on them with other wonderful tools included in the program.
Canva is a One-Stop Shop!
I know that I am dating myself when I speak of once having to search multiple websites to find images, videos, elements, and more, to create one poster or one presentation. For example, creating a recorder fingering chart meant that I first searched for an empty recorder chart through a Google Image Search. However, if I was going to use this chart through the students’ LMS, I needed to search for images with Google’s Creative Commons Licenses checked or Commercial and Other Licenses checked. Once I found the image, I downloaded it or saved it to my Google Drive. I then needed to remove the background, so I would up load it to a site like remove.bg to remove the background. I would then download it or save it back to my Google Drive.
Now, I either need some sort of drawing tool to cover in the holes for each fingering or a shapes tool to create circles to cover the fingering holes of the recorder chart. Therefore, I would place the image in Google Draw or Microsoft Word, or some sort of design program and create the chart, adding colors, elements, and other items to make it look more pleasing to the students’ eyes. If I wanted to add another image, I was back in the
Google Images search tool. Once finished I had to export it so I could print it or place it in their LMS or project it onto a screen during class.
This process takes time and energy. However, with Canva, everything is included in the program. And the amount of choices you have to share it, makes it intuitive for you and saves you a lot of time. Here are five ways to use this free education version of Canva in the elementary music classroom.
5. Create a Program
There are many times a year where we have to create a program for a concert, informance, musical, and more. In Canva, if you search for pro grams in templates, you come up with seven categories. From there, you can find numerous templates where you can change the text to feature your program, the font, and the images. I have done this for our conser vatory recitals.
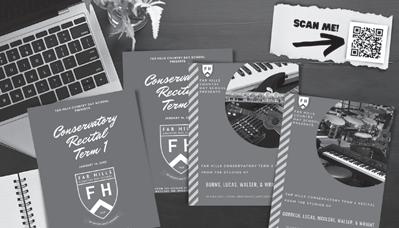
I have also cre ated a program for our musicals, shared the program as a pdf to my drive, changed the permissions of the pdf to “anyone with a link” can view, cop ied that link to input into https://www.qr-code-generator.com/, and created a QR code for the families and caregivers to scan at the beginning of the musical. They could now read the program on their devices. This saved us a lot of paper as parents could print the program if they wanted when they got home, but we no longer had crumpled-up programs on the floor or in the trash.
4. Create a Chart as a Resource for the Students as well as Certificates or Badges
As stated in the opening, I had taken painstaking measures to create a recorder chart over the years. With Canva, you can do it all within in the app. Start with a poster template. Then search the “Elements” for “recorder instrument”. You will find a Yamaha ivory recorder. Since the thumb hole is not there, I will use the “Elements”>”Circle” tool to add a thumb hole and the “Text” tool to add the word “Thumb”. With Canva, it is good to use a filled in circle shape and then click on the color tab to make it clear. You will then need to click on the outline tool to make it appear. This gives you an empty hole that you can fill in when you need to. I can also resize the items by clicking on the dots at the edge of the image or text to resize them.
TEMPO 32 OCTOBER 2022
I then use the text tool again to create the letter “B” and use the shapes tool to fill in the thumb hole and to cover up the first hole on the recorder chart. I duplicate the page to add another circle and change “B” to “A”. I continue until I have made a page for each note we will use or might use that school year.
To share this with the stu dents, I could print out the charts and place them in the classroom. I could also ex port them as png or pdf files and share them in the LMS. Or, I could create empty charts with note names and share them as editable files in the LMS. The students can create a copy of the Canva file and fill in the tone holes. This would require your IT to give permis sion for students to use Canva in their classrooms and that the students know how to save as a copy so that they do not edit the original Canva file.
Finally, you can upload images of the notes on the staff. If you are associ ating the notes with Boomwhacker colors, you can change the note name and the colors of the tone holes to match the Boomwhacker colors. If you are creating a ukulele chart, you can find images of ukuleles in Canva, use the “Elements” tool to create a chart or grid, and use the shapes tool to cre ate circles so that you can have a ukulele fingering chart available. To access this recorder fingering chart, you can click on this link: medium=link&utm_source=publishsharelinkcontent=DAFIBg6I3R4&utm_campaign=designshare&utm_com/design/DAFIBg6I3R4/ImIuvlq6PnHX_iuRXYEQSA/view?utm_https://www.canva.
Bonus: Use Canva templates for certificates and badges to motivate the students to earn them as they progress in their learning. You can place these certificates and badges in their LMS, or email them to their caregiv ers, or print them out to give to the students at the end of class.
Tip: A Canva tip for when you are trying to move a small object on the screen, click out of the object first, and then click back in. This will make it easier to move and will not inadvertently resize it.
3. Create a Google Classroom Header
Many schools use Google Classroom (GC) as their LMS and Canva has a template for that. If you search for “google classroom music” you will find numerous templates to spice up your GC header. Click on the one that appeals to you, adjust the fonts, pictures, and colors, if needed. Download the header by clicking on “Share”>”Download”>png file.
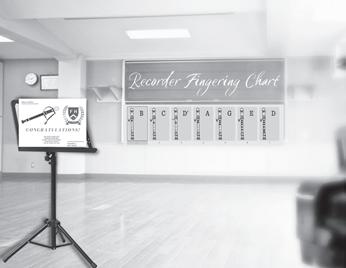
Open your GC, click on the set tings tool, click on “Customize” then “Upload”. Drag the png file into the upload window and click on “Select class theme”. Click “Save” and your GC has a new look.
2. Create a Manipulative
You can create amazing digital, printable, or shareable manipulatives for your lessons. This past summer, I made it a goal to create rhythm play-along videos to simple songs found in the Kodály approach. I always started with Canva so that I could begin the play-along with a video and so that the notes and body percussion would have a fantastic background.
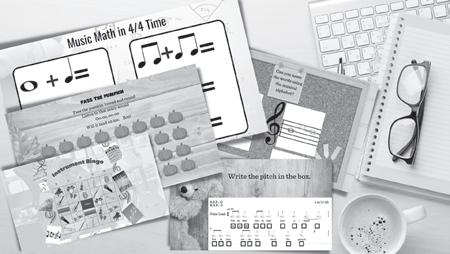
In the example found in “We Are Playing/Dancing in the Forest”, all of the background images and videos were created in Canva. I imported the musical notation by using Flat.io for education where I can create the songs using Boomwhacker notation and then screen record them being played.Canva has videos and audio files that you can use to enhance your teaching manipu latives. You can also record yourself sing ing or playing an in strument through the “Upload” tool. When downloading a video or a slide that includes audio, you would change the sharing settings to “Download”>”MP4 Video”. To visit an example of one of the play-along videos I created using many of Canva’s tools, click here: https://youtu.be/ hCwj2SRlunY
1. Create a Worksheet or Game
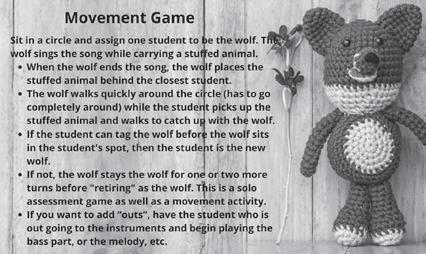
Canva can be used to create worksheets and games to use for retrieval practice, assessments, as an activity right before a holiday break, or when you have a sub in your classroom.
Retrieval Practice - Create a worksheet with text, boxes, and columns to promote the practice of note names, solfege, music math and more.
Beat Practice - Create a sheet with hearts, pumpkins, stars, pennies, or an object that is sung about in a song and have your young elementary students use markers, pencils, stamps, pennies, etc., to keep the beat as the song plays.
Compose a rhyme - Create a simple worksheet where the students compose a rhyme or Haiku to use as a B section to a song or to use as a poem that has accented words played on classroom instruments.
Bingo - Create a bingo game by finding the instruments in the image library. Begin with a chart and then add the instrument images. Duplicate the page so that you can change the images to sit in different squares of the chart. Create 6-10 charts, print them, and leave them for the sub with an answer key with the name of the instruments.
To access the examples here, click here:
NJMEAsistentlyupgradedforementary1Wp7z3iwytrPgovdzBdh61OtzeRY8I3iu/view?usp=sharinghttps://drive.google.com/file/d/Canvaisanamazingtoolforanymusicclassroom,especiallyanelmusicclassroom.IfyouhavenotyetusedCanva,tryitoutfreewiththefreeversion.IfyouhavethefreeversionandhavenottoCanvaforEducation,trythefreeupgrade.AndifyouconuseCanvainyourclassroom,sharesomeofyourideasonourFacebookpage!
OCTOBER 2022 33 TEMPO
Using
When I began my undergraduate career, I was thrilled to begin the quest to become a music educator. I was a budding guitarist who was extremely passionate about rock and pop music and I was easy to spot in every class; I sat in the back wearing a circulating wardrobe of heavy metal t-shirts with hair resembling Eddie Van Halen’s circa 1984
As I progressed through various classes within my major, I quickly no ticed that the music I was most passionate about was strictly taboo. In later history classes, popular music was seen as a footnote that was typed with rolled eyes and the attitude was “it happened” while pages and pages of the textbook had the reader on the edge of their seat learning about serialism of the 1900s.
In method courses, popular music was mentioned to make the stu dents “happy” by playing a pop song at the end of the spring concert. Generally, these pop arrangements were seen as throw-away pieces with rhythms that were either too complicated for a middle school student to grasp or they never truly lined up with how the vocalist sang them. Ul timately, it caused more headache to my band director because we were interpreting the rhythms as we heard them from the recording rather than what was written on the page. What is the educational value in this? Are music educators inadvertently showing negative perceptions of pop music to their students?
In my ten years of teaching, I have noticed that the tide is turning in music education. History of Popular Music classes and “Rock Ensembles” have been flooding public schools and universities throughout the coun try. Further, teachers are being thrown into situations that I like to call “by the way” classes. These classes are the ones where at the beginning of the year an administrator approaches you and says: “Oh by the way, you’ll be teaching this brand new class!” This very situation may end up with you teaching something similar to a History of Rock and Roll class. At this point, it would be easy to become jaded because this may justifiably be out of your wheelhouse and something you never learned in method courses. However, there are many resources that exist that will make your life and your students’ lives much more enjoyable. I have provided several resources to help you survive if you are in need of guidance in this area.
Tried and True Can Not Be Accomplished Anymore…
In terms of popular music, we as educators need to be aware that musi cal groups we find to be important in the pop music echelon, such as The Beatles, are further removed than ever before from our students’ daily awareness. Consider this: the Get Back documentary released on Disney Plus over the holidays is like a student in 1969 watching a documen tary about a group recording music in 1917. Also, if you have not had
a student call a band like Nirvana or blink-182, “Classic Rock,” it’s an absolute thrill and horrifying at the same time. When Target stops selling the beloved rock band shirts, these bands will likely begin to fade faster than Marty McFly at the end of the first Back to the Future movie, but this time with a much sadder ending.
Many times when we present history, especially when trying to con nect the students to a piece of music that reflects a time period, we pro vide them little relevance to their everyday life. Consider any protest song from Crosby, Stills, Nash & Young’s “Ohio” or “Say It Loud - I’m Black and I’m Proud” by James Brown. Our students are so far removed from these events that the ultimate question should be “how can we connect the dots effectively?” A few years ago, I sat in on a presentation with music journalist Greil Marcus at the Rock and Roll Hall of Fame and a similar question was brought up. His recommendation was that we begin to introduce music history backwards to our students, rather than start ing from the beginning.
In my own teaching, I have witnessed that when trying to get students to discover older influential artists, it is much easier to start on ‘their side of the court’ and slowly bring them to where you want them to be. A few years ago, I taught a student named Marino, who was a phenomenal rock drummer obsessed with Dave Grohl. But, he had no experience playing jazz. By connecting his influence backwards up the “musical influence family tree,” he learned that Grohl’s main influence was John Bonham of Led Zeppelin, but after that point was stumped. We connected the dots backwards one more musical branch to find that John Bonham’s main influence was jazz drummer Max Roach.
I gave Marino a copy of the Clifford Brown and Max Roach album Study In Brown and a metaphorical light bulb turned on. While listening to the album, he was able to hear a wide range of drum patterns, espe cially shuffles, which were similar to ones Bonham, and later Grohl, used on recordings. In his own way, he was also able to connect how Roach played to the same way that a rock drummer would play. Hearing Roach attack the drums, the way he incorporated fills, and how the spirit of his drumming was the essence of “going for it in the moment,” Marino was able to find a love and appreciation for jazz drumming.
But, I Just Don’t Know What To Teach…
Today, numerous educational resources are available for music educa tors to access with many of them being free to educators. My absolutely favorite resource for any music teacher is TeachRock (www.TeachRock. org). TeachRock was founded by Steven Van Zandt, guitarist for Bruce Springsteen’s E Street Band. It is a free educational resource for teachers,
TEMPO 34 OCTOBER 2022
Popular Music in the Classroom A user's guide on how not to look awkward teaching it John YoungstownAnthonyState anthony.johnj[at]yahoo.comUniversity
designed around the time of the No Child Left Behind Act. Van Zandt’s forward-thinking about how the arts would negatively be impacted by NCLB created a wonderful resource that promotes cross-curricular learn ing including general music, social studies, STEAM, language arts, and science.There are a plethora of lessons found on the website, include a section called “Core Lessons.” These lessons are divided into virtual “Books” (vol umes 1 through 5) which give the teacher a detailed plan for teaching the history of rock, blues, and hip-hop. These lessons are set up to be versatile so that any teacher can move in sequential order, jump around, or even plot various lessons to travel backwards in time. There are also targeted “Unit Plans” that help to create various lessons centered on topics in cluding Civic Environmentalism and Mathematics. TeachRock has also partnered with recent documentaries including The Beatles: Eight Days A Week - The Touring Years, Rumble: The Indians Who Rocked the World and Long Strange Trip: The Untold Story of the Grateful Dead. Incidentally, I have the honor of having two lessons I created included on the website, respectively focused on Social Emotional Learning and Music Business. TeachRock has also partnered with Little Kids Rock (littlekidsrock.org) to create lessons specifically for learning to play easy-to-read pop charts in any general music classroom.
The best part of TeachRock is how user-friendly each lesson is. The les sons give you step by step instructions on executing it in your classroom and contains all of the handouts needed. The site also provides videos, pictures, and audio appropriate for classrooms, which is a life saver, espe cially when trying to frantically find a video appropriate to show in class. Don’t know much about a topic? Each lesson provides a brief narrative for the teacher to better understand what they are about to teach. This gives teaching authenticity in classes when students may be a hard sell on a topic or they don’t believe you know anything on the topic.
Have You Heard The One Podcast Not About True Crime?
Podcasts are everywhere and free! The best thing about podcasts is that anyone can make them. The worst thing about podcasts is that anyone can make them. So many have been recorded that it can be hard to sift through what is good, valid, or engaging to an audience. Similar to my experiences with Netflix or any other streaming service, I have stopped more podcasts minutes into an episode than I have actually completed one. Podcasts can be fantastic to incorporate into varied classrooms such as music history, theory, or can serve as an alternative to a “paper and pen” student project. The following serves as the ‘tip of the iceberg’ with regard to excellent popular music podcasts:
The Ongoing History of New Music by Alan Cross is a wonderful radio syndication turned podcast, that focuses its attention primarily on the last 35 years of rock and alternative music. Cross’s program has been on the air in Canada since 1993. What I enjoy so much about his programs are how Cross is able to break down the information in a way that engages the audience and gives you the meat and potatoes of the influence of the artist, why they're important, and one or two tracks that stand out. As an educator, this is a perfect way to supplement your lessons with a differ ent style of teaching. Whether you have the kids listen to the program or incorporate the information into your own lessons, you can’t go wrong with his programs.
Switched On Pop is a podcast, created by musicologist Nate Sloan and multi-instrumentalist and songwriter Charlie Harding, that focuses
mostly on the last two decades of popular music and also discusses how music works. It also dives into a bit of music theory as well. Another great resource is a book published last year entitled Switched On Pop: How Pop ular Music Works, and Why It Matters. Without a doubt, when teaching music theory, it’s so important to use musical references that students will understand versus ones that we believe they should know. Again, I am not saying that we shouldn’t mention the great composers, but we need to find ways to connect to our students on a level they can relate. From discussing modulation using Beyoncé to introducing counterpoint melo dies in Britney Spears’ “Oops!...I Did It Again,” this book is a perfect way to supplement materials to help your students understand music theory.
Dissect is a unique serialized podcast that, over the course of the season, dives specifically into one album and gives each song their own episode. In recent seasons, the podcast has examined albums by Kendrick Lamar, Kanye West, Mac Miller and Tyler, the Creator. This is such an awesome launch point for a class project. Consider taking an album discussed in class and put the students into groups to create a serialized podcast. How ever, consider strengths of the students in your class when determining episode focus. Students who are involved in your instrumental and vocal classes could touch more on the musicianship of a track whereas a student who has no musical training but is involved in every AP English class, could focus on the lyrics of a certain song. At the completion of this proj ect, you will win “Cross-Curricular Teacher of the Year!”
Now What?
I hope that this article serves as a launching point for your classroom and helps you to find ways to implement new styles of teaching in your various classes. At this point, you may be posing the same hypothetical question Axl Rose poses night after night: “Where do we go now?” Take small bits of ideas and develop them over time and see what resonates with your students’ and the demographic that you teach. The most im portant thing to remember is that we fell in love with music in our own weird way. Embrace what the students love, open more doors for them, and you will always have a packed classroom of students ready to connect Kanye West to Shakespeare.
Described for his “lead guitar dazzlement” in Music Connection Magazine and “guitar virtuosity” in The Repository, John Anthony is a freelance guitar ist playing with regional and national touring acts including The Vindys and Saved by the 90s. Currently, he is endorsed by EarthQuaker Devices and Ultimate Ears Pro. John is an adjunct professor at Youngstown State Univer sity where he leads the Contemporary Ensemble and teaches Guitar Methods. Recently, John has contributed cross-curricular lessons focused on The Grateful Dead to the nationwide curriculum TeachRock.org. When he is not busy, he teaches elementary general music at McDonald Local Schools in McDonald, Ohio.
OCTOBER 2022 35 TEMPO
Yay Storytime! Amoriello, Jr.
The Yay Storytime! Musical Adventures with Children's Picture Books series continues as we focus on work by author-musicians Chari Smith (www.charismith.com The Piano mixes imagination and inspiration to connect with young minds instrumentally. The mixing of literature with music and art is a recipe for student engagement. Chari studied at Berk lee College of Music and has been a writer/composer/pianist most of her life. She is also a published playwright -- Extraordinary Women from U.S. History: Readers Theatre for Grades 4-8 (Teacher Ideas Press/ Librar ies Unlimited, 2003) and Little Plays for Little People (Teacher Ideas Press/ Libraries Unlimited, 1996). Her mini-musical “Book Club” was a part of the Portland Mini Musical Festival 2020. She is currently working on a musical, Freedom, based on the life of Moses. Elle is an award-winning artist, and enjoys writing music, cooking, and dancing. They live in Port land, Oregon, and enjoy spending time with family. Please feel free to leave comments on social media for open dialog or reach out to me at thomasamoriello@gmail.com to share which music themed children's picture books have been a success in your classroom. On behalf of the NJMEA, I would like to thank Ms. Smith for sharing her thoughts with the membership.
The cycle of music student trans forming to teacher is evident in your story. When did the transi tion from student to teacher hap pen for you?
It happened when I was 23, and purely by accident. I was living in Boulder, Colorado, and teaching improvisational theater workshops at summer camps. Then, when the summer was coming to a close I re alized I wanted a way to continue to teach. I handed out flyers (this was pre-internet days) about jazz piano lessons for kids, and got my first nine students.
Please tell NAfME members about your collaboration with your daughter Elle as illustrator?
It was a truly amazing experience. The best part of writing this book was doing it with her. I wrote the original story in the late 1990s, before Elle was even born. She was always an artist, and took her hand at illus trating the story when she was 8 years old. We talked on and off for years about doing the book together.
In March 2020, as COVID-19 ripped across the globe, in Portland, Oregon, schools, businesses, and nearly everything shut down. It felt sur real. In the uncertainty, we immersed ourselves in this creative project.
I flattened boxes across the dining room table to create a makeshift storyboard space. We cut up the story lines, placed them across the 32 squares, and pondered how to use this quiet, unsettling time to create. Elle said, “Mom, there are too many words for each page.” And she was right. I did a lot of revising, including rewriting the story to be from the point of view of the piano. When that happened, her illustrations just fell out. We did weekly meetings and set goals of what to complete each week. It was creative, collaborative, and a wonderful experience.
And, now, she’s off to college this fall to study art!
What advice do you care to share with other musicians interested in venturing into the world of children's picture book writing?
Write. Write. Write.
In the 1990s, I was a member of the Society of Book Writers and Illus trators (SCBWI). Great organization, with a lot of support for published and aspiring authors. I highly recommend this group to learn, network, and understand the process from your first word to publication.
What age group and what may serve as a lesson plan that could benefit an elementary music educator?
I recently did a guest blog post for Unleashing Readers on how to bring songwriting into the classroom. Essentially, using established songs that students know with new lyrics that they write individually or to gether. For example, the song “Wheels on the Bus” and write new lyrics using a topic such as the different types of instruments.

Example:
Song: Lots of different instruments
Age: First or Second grade students Sung to the tune of “Wheels on the Bus”
The piano has 88 keys, 88 keys, it’s a breeze. The piano has 88 keys and you can play them all day long.
The guitar has six long strings, plays lots of different things on six long strings The guitar has six long strings and you can play them all day long.
This is just an example. Ideally, you pick the topic, and the familiar song. Then, walk the students through creating lyrics together. Songwrit ing in the classroom is a great way to build team skills and encourage creativity. If you try it, let me know!
TEMPO 36 OCTOBER 2022
Even More Adventures with Music Themed Children's Picture Books Thomas
Flemington Raritan School thomasamoriello[at]gmail.comDistrict
Are there any other musical themed children's picture books that have struck a chord with you?
I love this play on words…struck a chord. Yes, let me share the progres sion of books with you:
“Because” by Mo Williems
“The Bear and the Piano” by David Litchfield “Trombone Shorty” by Troy Andrews
If your piano could talk, what story would it tell us?

Chari and I met when she was 8 years old, and we’ve been pals ever since. Some days she plays a lot, mostly writing songs. She is fiery, deter mined and loves to sing. Other times days go by without any interaction at all. That’s okay. We have the type of friendship where we can pick right up where we left off.
When she first started, it was hours and hours of running scales, plunk ing out simple tunes, and of course singing! When she discovered the bold and beautiful blues scale, her playing completely changed. Modes, tri-tones, trying to reach beyond her actual skill set, playing as if she could play bebop until she could actually play bebop.
She left me for a keyboard, and that’s okay because she came back. Hundreds of sticky tiny fingers moved across my keys when she became a teacher. She taught them to play jazz by writing their own songs. Lots of giggles, while a furry friend lay at her feet.




Now, married with two kids, she hardly says hello until just a few years ago. She is writing songs again, with the same zest, determination, and passion she had as a girl. You see, I’m always here in the same place. The same 88 keys ready whenever she’s ready to sit down, take a breath, and just
Theplay.Piano
 reviewed by https://www.youtube.com/watch?v=a5ZDI7Hhl40&t=21sZola:
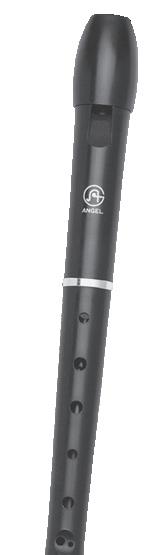

Thomas Amoriello Jr. is the Past Chair of the NAfME Council for Guitar Educa tion and is also the former Guitar Chairperson for the New Jersey Music Education Association. Tom has taught guitar classes for the Flemington Raritan School District in Flemington, New Jersey, since 2005 and also teaches at Hunterdon Academy of the Arts. He has earned a Master of Music Degree in Classical Guitar Performance from Shenandoah Conservatory and a Bachelor of Arts in Music from Rowan University. Currently he is pursuing a Doctor of Music Education degree from Liberty University. Tom is the author of the children’s picture books A Journey to Guitarland with Mae stro Armadillo and Ukulele Sam Strums in the Sand. He recently released his third neoclassical heavy metal recording entitled Phantom Sounds which is available from Shredguy Records. Visit thomasamoriello.com for more information.

OCTOBER 2022
EDUCATOR DISCOUNTS AVAILABLE 800.443.3592PERIPOLE.COM PARTNERS IN MUSIC EDUCATION® Exclusive Direct Distributors: PERCUSSION Orff Instruments RecordersHalo®
Queer Representation in Schools and Music Education
 Tatyana C. Louis-Jacques Watchung Hills Regional High School tatyclj[at]gamil.com
As music educators, we have the unique opportunity to work with our students in a variety of formal and informal learning environments. We also have the responsibility of ensuring that our spaces are open and inclusive for all but creating these safe spaces can be incredibly challeng ing and many people are unsure of where to start. My goal in writing this article is to bring light to some of the struggles faced by people who iden tify as members of the LGBTQIA+ community in the realm of public education and encourage my fellow music educators to explore ways of better supporting the students in their care.
In 2011, California passed the FAIR Education Act which required “the roles and contributions of LGBTQ+ people and people with disabil ities” to be included in history and social sciences curriculum along with other ethnic and cultural groups (Equity California, 2017). In doing so California became the first state in the United State to mandate any level of LGBTQ+ education. Unfortunately, it took the state board of educa tion six years to finally approve LGBTQ-inclusive textbooks.
In 2019, New Jersey became the second state in the United States to require LGBTQ-inclusive education. The bill mandated that every school in the state teach students about "the political, economic, and social contributions" of LGBTQ+ people and people with disabilities (Knox, 2020). It also specifically required that all boards of education for middle and high schools ensure that instructional materials, such as textbooks, include accurate portrayals of the contributions made by LG BTQ+ people and those with disabilities.
Advocates in New Jersey were determined to learn from California’s mistakes and one year later, 12 school districts began a pilot program designed by Garden State Equality and Make It Better for Youth, two nonprofit organizations (Knox, 2020). Some celebrated this move, such as Christian Fuscarino, the executive director of Garden State Equality who said, “it’s critical that our classrooms highlight the achievements of LGBTQ+ people throughout history,” and that “our youth deserve to see how diverse American history truly is — and how they can be a part of it one day, too” (Knox, 2020). Some people, however, were displeased with this new legislation. The mayor of Barnegat, a town on the Jersey Shore, called the bill “an affront to god” and the Family Policy Alliance of New Jersey, a Cchristian organization, sponsored a petition to prevent what they see as “radical LGBT sexual indoctrination” (Family Policy Alliance, 2020).
What these anti-LGBTQ+ parties do not acknowledge is that a failure to recognize and validate a portion of our school population, nearly 15% according to the Center for Disease Control, may have lasting negative effects on students and teachers alike (Centers for Disease Control and Prevention, 2020). From the student perspective, GLSEN (formally the
Gay, Lesbian and Straight Education Network) reports that more than half of respondents who participated in the 2019 School Climate survey reported feeling unsafe at school due to their sexual orientation (GLSEN, 2019). One-third of those surveyed had chosen to miss class rather than risk harm and nearly one-fifth had changed schools because they were experiencing harassment. In addition, those who did attend school still avoided school functions and participating in extracurricular activities.
These students may be dealing with homophobic slurs, experiencing verbal, physical, and sexual harassment, and yet schools provide uneven support. 72.7% of students who reported experiencing harassment did not think that their school would do anything about it. 48.4% expressed concern that they would be blamed or punished for reporting an incident and 27.7% stated that their school staff was openly homophobic and transphobic. How can we as educators expect our students to learn if they are worried about their safety?
In a similar way, how can we expect educators to successfully do their jobs if they do not feel safe and supported in their work environment? Bergonzi (2009) describes several inherent privileges that heterosexual members of the school community have that queer members do not, including: (1) Being able to speak openly about relationship status and significant others; (2) Not worrying about dress codes and formal attire for school functions; (3) Using stories from your personal experiences in the classroom; (4) Having your world view supported by the majority of media presented in school; (5) Not being stereotyped based on personal preferences and interests. For queer educators however, being themselves and opening up at work can have serious consequences. In interviews with six queer teachers, Mayo (2020) reports that there are frequent feelings of discomfort and intimidation around their administrators, co workers, and adults due to the possibility of being judged, stereotyped, or even fired due to their sexuality. Like students, queer educators battle the desire to be themselves, and fear potential backlash. The strain of working in potentially hostile environments and need to compartmen talize their identities drives many queer educators to leave the profession (Taylor, 2018).
In their efforts to improve the quality of education being provided in their districts, administrators should first be committed to providing a safe and equitable learning environment. Once the school leadership has addressed the basic inequalities present in their buildings, they can then focus on including LGBTQ+-inclusive materials at all grade levels. The 2019 GLSEN report shows that barely a fifth of students experienced any LGBTQ related topics in their textbooks and assigned readings and those who went searching were only able to access LGBTQ+ materials, either in the school library or on school devices, about 50% of the time.
TEMPO 38 OCTOBER 2022
To make such tasks easier, a number of organizations have already done the work of collecting resources and writing curriculum. The Human Rights Campaign has compiled lists of picture and middle grade books that primary school teachers can draw from. GLSEN, the Illinois Civics Club and even the California Department of Education all have resources for schools looking to include LGBTQ+ voices in their curriculum.
From the music educator’s perspective, the desire to provide an inclu sive environment for their queer students provides unique difficulties. Broadly speaking, music educators can start by committing to teaching from a gender-complex perspective. Rands (2009) describes this perspec tive as “constantly [questioning] the ways in which gender is operating and what the consequences are”, taking into consideration the “complex sets of privilege and oppression that students and teachers experience based on their gender categories, gender expressions, and the gender at tributions others make of them” and being aware of how the “gender oppression matrix and heterosexism work in tandem to privilege certain groups of people and oppress others and take action to challenge the gen der oppression matrix and heterosexism”. In order to successfully imple ment gender-complex pedagogy, educators must first examine how they see gender and what types of gender education have shaped that view. From there they can begin to observe the ways gender plays a role in their classrooms and if any students are being harmed by the gender roles present.Inthe ensemble classroom, steps must be taken that do not apply in the general music classroom. The most impactful issue is likely what voice types to include in vocal ensembles. Fortunately, this topic has been heavily discussed and the consensus seems to be that students should be placed in alignment with their gender identity. On a purely instructional level, respecting a student means they are more likely to trust you and engage in the instruction you are providing (Graham, 2018). When look ing through the lens of being a good teacher, “a student's emotional and mental health is paramount”, not what voice part they are singing in the honor choir (Sauerland, 2018, p.99).
And while progress is certainly being made in some areas, other is sues have yet to be decided. When traveling, rooms are often assigned by gender. What does that mean for trans or non-binary members of the ensemble? Does the repertoire being performed enforce harmful gender stereotypes? What do you put in the program, a student's birth name or their chosen name? What are your concert attire options and are they too based on gender? These questions and more must all be addressed in order to provide the best learning opportunity for our students.
I readily admit that I do not yet have all the answers to making music education a safe and equitable learning environment for queer educators and students, nor do I think I ever will. I have shared this information and posed these questions in the hopes that they give readers a place to start on their journey to better supporting their queer identifying stu dents and colleagues. We have an incredible privilege as music educators, and it would be a shame to waste it by not working towards the fulfill ment of all in our care.
References
The American LGBTQ+ Museum. (n.d.). Our Plan. The American LGBTQ+ Museum. https://thelgbtqplusmuseum.org/our-vision/.
Bergonzi, L. (2009). Sexual Orientation and Music Education. Music Educators Journal, 96(2), Centershttps://doi.org/10.1177/002743210935092921–25.forDiseaseControlandPrevention.(2020, August 20). 2019
Number and percentage of students, by sexual identity. Centers for Disease Control and Prevention.
Taylor,Sauerland,Rands,Mayo,Knox,Graham,GLSEN.FamilyEqualitydata/yrbs/2019_tables/students_by_sexual_identity.htm.https://www.cdc.gov/healthyyouth/California.(2017,November14).CaliforniaStateBoardofEducationApprovesLGBTQInclusiveTextbooks.EqualityCalifornia.https://www.eqca.org/sbelgbtqtextbooks/.PolicyAlliance.(2020,January10).SigntheLGBTCurriculumPetitiontoProtectStudentsinNJ.FamilyPolicyAlliance.https://familypolicyalliance.com/issues/2019/10/25/the-governor-and-legislature-have-gone-too-far/.(n.d.).SchoolClimateSurvey.GLSEN.https://www.glsen.org/school-climate-survey.F.(n.d.).HeSaid,SheSaid,THEYSAID:MakingtheCaseforaGender-NeutralPedagogy.JournaloftheNewYorkSingingTeachers'Association,15(5),87–91.L.(2020,February12).12NewJerseyschoolsrolloutLGBTQcurriculumpilotprogram.NBCNews.com.https://www.nbcnews.com/feature/nbc-out/12-new-jersey-schools-roll-out-lgbtq-curriculum-pilot-program-n1134436.J.B.(2020).Queerteachertoqueerteacher:reflections,questions,andhopesfromcurrentandaspiringeducators.TeachingEducation,31(1),32–44.https://doi.org/10.1080/10476210.2019.1709813K.E.(2009).ConsideringTransgenderPeopleEducation.JournalofTeacherEducation,60(4),419–431.https://doi.org/10.1177/0022487109341475W.(2018).TransSingersMatter:GenderInclusiveConsiderationsforChoirs.JournaloftheNewYorkSingingTeachers'Association,15(5),95`-105.D.M.(2018).LGBTQMusicEducators:ExternalMentoringBetweenStudentTeachersandIn-ServiceTeachers.BulletinoftheCouncilforResearchinMusicEducation,(216),65–86.https://doi.org/10.5406/bulcouresmusedu.216.0065
OCTOBER 2022 39 TEMPO
AT SUSQUEHANNA BACHELOR OF MUSIC Music CompositionPerformanceEducation BACHELOR OF ARTS IN MUSIC Offering doubleopportunitiesconvenienttomajor. SELINSGROVE, SUSQU.EDU/MUSICPENNSYLVANIA We are pleased to welcome Dr. Zachary Levi, Director of Orchestras, cellist and string music education specialist.
Riverwalk Plaza 34 Ridgedale Avenue East Hanover, NJ 07936 (973)428-0405
Riverwalk Plaza 34 Ridgedale Avenue East Hanover, NJ 07936 (973) 428-0405
276 Morris Avenue Springfield, NJ 07081 (973)476-4888
276 Morris Avenue Springfield, NJ 07081 (973) 476-4888
OCTOBER 2022 41 TEMPO TEMPO 54 JANUARY 2022
Text Questioning Techniques Classwork for Choir
Let’s face it: Most music educators don’t like creating worksheets, but it is a requirement that we all must fulfill. In my elementary (K-5) school, all teachers are required to make billboards and hang up student work samples each month. As a result, I always have to create classwork that I could give to my students, and the classwork must help them learn the music for their choir concert. Here are some text questioning techniques that I use for my students. While creating these worksheets, I used Mi crosoft Word and KG Primary Dots Font.
True or False Text Test
The most basic assessment I have created to see if my students are memorizing a song is by creating a True or False Text Test. In this assess ment, the students read a phrase and write true or false to show if the phrase is written correctly. The best part about using this assessment is that we can write down frequent mistakes that we hear while the students are singing, and this technique will help us figure out which students have been singing the text incorrectly.
Picture Knowledge Worksheet
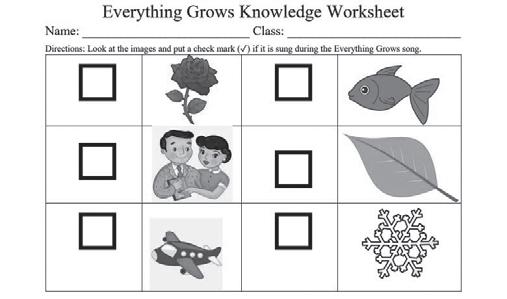
Another text memorization technique I use is creating a picture knowl edge worksheet. In this assessment, the students must look at the pictures on the worksheet, think about the text of the song, and put a checkmark next to each picture if we sing about the image. I only use this technique for kindergarten and first grade since it doesn’t require a lot of writing. It also helps ELL students learn to match images with words, and the students enjoy looking at the pictures.
Text Unscramble Worksheet
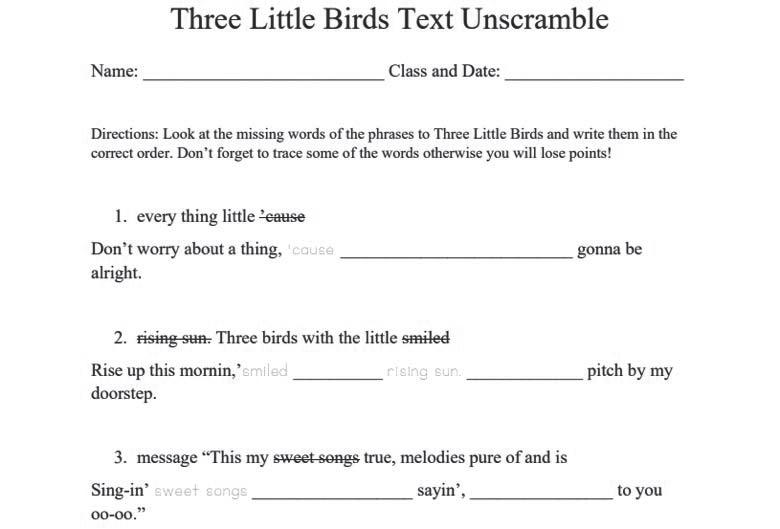
The next technique I have created is the most challenging assessment and that is the text unscramble worksheet. In this assessment, the stu dents must look for the missing words of the phrases and write them in the correct order in the blank spaces. Each of the missing words are written next to a number, and they are out of order. Since some students may find the assignment confusing, I added an example which includes a traceable font that the students must write over and crossed out a word to help the students understand how to complete the worksheet. This form of assessment is best used for fifth graders or higher.
TEMPO 42 OCTOBER 2022
Joseph DeRosa Grove Street jderosa[at]irvington.k12.nj.usElementary
Text/Action Order Worksheet

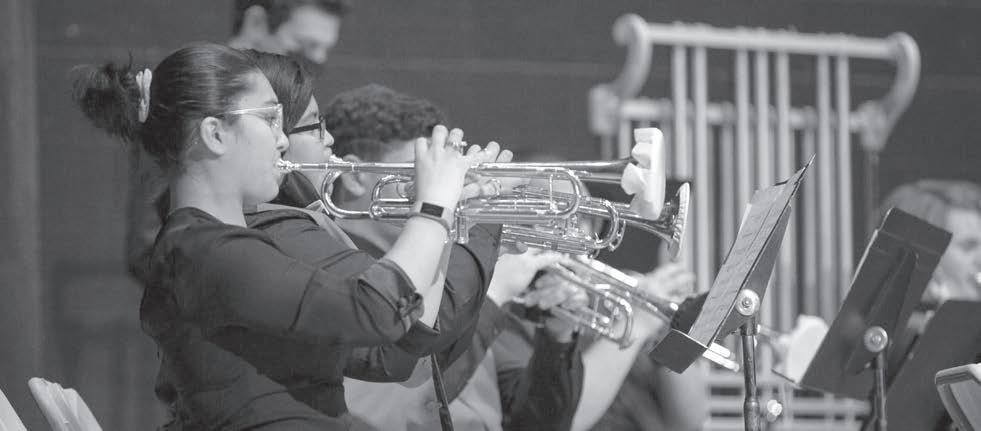
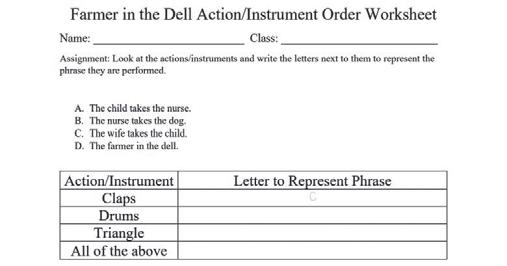
My favorite technique to help my students memorize the text of the song is by having them write the order of the phrasing. For this assessment, the students must read the phrases, look at the phrase numbers, and write the letter down next to the number of each phrase. I have used this assessment for grades 1-5, and they were all able to complete this assignment. In addition to having the student show the phrasing of this song, I can also ask the students to show me the order of the actions or instruments we use throughout our song as well. While recreating this assignment, I recommend writing some traceable font in the answers, so the students don’t assume that all the answers are in alphabetical order.
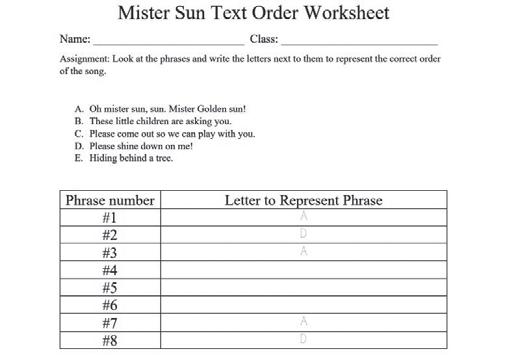
OCTOBER 2022 43 TEMPO
B.A. IN MUSIC B.A. IN MUSIC WITH K-12 CERTIFICATION • Outstanding Liberal Arts Program • Accredited by Middle States Association • Performance Opportunities – Wind Ensemble – Jazz Ensemble – Chorale – Marching Band – Opera and Musical Theatre Workshop – Chamber Ensembles: Brass, Woodwinds, Percussion, Strings & Popular Music INSPIRED TO BE HEARD 2023 AUDITION DATES SATURDAY MARCH 4 • APRIL 1 Scholarships available to majors and non-majors OPEN OCTOBERHOUSE15•NOVEMBER 19 DECEMBERWithCHRISTMAScaldwell.edu/visitSPECTACULAR!HighSchoolHonorBand9•7PM Contact Rebecca Vega for more information. Email: Rvega@caldwell.edu • Phone: 973-618-3446
Do Have the Gift? Misconceptions of Talent in Musicians Oberhauser
One of the most discouraging things to hear as a music educator is par ents and students insisting they, or their child, does not possess the innate music gift or talent to play an instrument, or advance on their current instrument. In Talent is Overrated, Geoff Colvin references a study where educators were asked if they thought certain fields of expertise required a special gift or talent (Colvin, 2019). Over 75% of the sample said sing ing, composing, and playing an instrument required this innate gift. This is frustrating for music educators to hear because we know many musi cians and educators who have put thousands of hours into their craft and hate to see their skills be chalked up to something they were born with. This common misunderstanding also quickly puts up a wall on the ability to share how fulfilling a life as a musician can be. If people believe musical talent is an innate gift, and they were not born with it, they don’t even try. This article will explore why this misconception is so common, share studies that show where talent really comes from, and provide guid ance on how to carefully communicate the truth about talent to parents and students.

A study with a sample of 257 young musicians set out to search for evidence of an inherent musical gift (Colvin, 2019). These musicians were split into groups ranging from total instrumental beginners, to ad vanced students. Parents and students were interviewed and asked ques tions such as how often the students practiced their instruments, how much music was played in the household, and the age at which their child could first sing a recognizable tune. How much time they spent practicing was the only factor that was found to explain the differing musical abilities of these musicians. “By age twelve, the researchers found, the students in the most elite group were practicing an average of two hours a day versus about fifteen minutes a day for the students in the low est group, an 800% difference.” Most people would say the elite group was more musically gifted and acquired these skills more easily than the others, but they simply could not get to this level without putting in the hours. Thousands of hours of practice for a musician results in a brain that has become highly efficient at firing specific neural patterns. Most people cannot imagine dedicating such a large amount of time and effort into building such a specific skill, which is why the innate talent miscon ception is so prevalent for musicians.
In Genius Explained, Dr. Michael Howe estimates that by the age of 6, Wolfgang Mozart had built up around 3,500 hours of study time with his father (Howe, 2001). When reading further into how musical prodi gies emerge without innate talent, the early days of Mozart, who is said to be able to transcribe entire symphonies by ear in one sitting, is often referenced. Colvin (2019) discusses this in Talent is Overrated:
Mozart’s father was of course Leopold Mozart, a famous composer and performer in his own right. He was also a domineering parent who started his son on a program of intensive training in composi tion and performing at age three. Leopold was well qualified for his role as little Wolfgang’s teacher by more than just his own emi nence; he was deeply interested in how music was taught to chil dren. While Leopold was only so-so as a musician, he was highly accomplished as a pedagogue. (p. 25)
Beginning this type of intense training at such a young age could create an expert out of anyone, however it is rare that these circumstances would all align, and that the student, Wolfgang, would have the motivation to continue with intense training throughout his life. Once again, it is much easier to say Mozart was born with a special gift than to imagine all of these pieces falling into place, but we can see that there is always more to the story of any virtuoso.
It is not that expert musicians who excel more quickly than others are born with a gift, but rather they are exposed to music at a very young age and become obsessed with it (Colvin, 2019). The homes of advanced musicians were child-oriented, with parents modeling a strong work ethic where work comes first and new goals are constantly created and accomplished. Anders Ericsson, the psychologist who came up with the 10,000 hour rule, explains that if any promise is seen in a subject at a young age, it can lead to the start of early training (Ericsson, Krampe, Tesch-Romer, 1993). Training at a young age is particularly beneficial because the brain is more susceptible to new information. There is also more time to be dedicated to a subject, compared to those who start later in life. Ericsson thinks the obsession with any subject at an early age may be the only innate characteristics of creating a prodigy. Beyond this early obsession, the road to becoming a master musician requires maintaining deliberate practice and strong motivation for decades.
Deliberately practicing as a musician is a very low reward which can lead to low motivation to continue (Colvin, 2019). Talented outliers have a strong inner drive which Colvin thinks stems from the home en vironment. These musicians have been taught from the very beginning to be the best, set goals for themselves, surround themselves with their craft and dedicate large, unimaginable amounts of time and energy to succeed. After the initial foundation has been laid, and progress has been made, some musicians find motivation in the struggle of deliberate practice, because they know it will lead to accomplishing their goals.
A more recent study of good, better, and best violin players at the Mu sic Academy of West Berlin was done to see how each ability level differed in their practice routines (Colvin, 2019). All violin players began playing
TEMPO 44 OCTOBER 2022
You
Kyle
East Amwell Township koberhauser[at]eastamwell.orgSchool
around age 8 and had been playing for over a decade. These violin players were asked to keep a journal of their daily activities and the outcome was exactly what the researchers expected. The good violin players practiced an average of 9 hours per week, but the better and best groups both accu mulated a weekly average of 24 hours of practice. If practice time was the same, does this mean the best violin group had the innate musical gift? The difference ended up being the practice hours accumulated before they entered music school. After all hours were accounted for, practice time for the good group totaled 3,420 hours, 5,301 for the better group and 7,410 for the best group. Once again there is always more to the sto ry, and unfortunately, after being dedicated musicians for over 10 years, the good and better group had simply not accumulated enough practice hours to become one of the next prodigies of their instrument.
As music educators we cannot ask for this much time and effort from parents and students, or expect every student to become a master. In fact, we could end up discouraging future musicians if the above facts on how to become a top tier musician are communicated to them in the incorrect way. If we mention that playing an instrument requires twenty four hours of deliberate practice every week from our students, this could turn kids away from the music program. We can however, use this information for ourselves, and realize that the amount of interest created in the subject, and the motivation to succeed is what will help reach our educational goals, not natural born talent. When communicating with parents and students who are convinced that becoming a musician is not in their fu ture, we should share the findings of these studies in a way that is exciting and inviting. Unfortunately, it is not as simple as explaining that with time and effort, they will meet their musical goals with ease and be on their way to a joyful life with music. As we know some individuals could have a multi-year head start from having music in their home during prime developmental years. This could be in the form of parents sing ing to them, always listening to different styles of music in the home, or starting lessons at a very young age. Even if these children are moving
much quicker than others of the same age, this does not prove that they were born with a musical gift, it only means they have stronger practice routines or their musical journey had begun sooner than others. Starting the journey to become a musician can be very difficult with many ups and downs along the way but we cannot let the talent misconception hold us back from sharing a life of music with students, parents, friends and family.
References
Colvin, G. (2019). Talent is Overrated: What really separates World-Class performers from everyone else. Nicholas Brealey Publishing. Coyle, D. (2009). The Talent Code: Greatness isn't born, it's grown. Random House Business.
Ericsson, A., Krampe, R., & Tesch-Romer, C. (1993). The Role of Deliberate Practice in the Acquisition of Expert Performance. American Psychological Foundation, 100(3), 363–406. Howe, M. J. A. (2001). Genius explained. Cambridge University Press.
NAfME member Kyle Oberhauser is an instrumental music educator in New Jersey where he teaches string orchestra, concert band, and jazz band at beginning, elemen tary and middle school levels. Kyle also directs a music club where students explore singing and songwriting techniques on ukulele and guitar. As a multi-instrumentalist, Kyle has performed professionally on woodwinds, brass, strings, keys, guitar, bass, per cussion, and drums. He instills his passion for practice and holds high standards for proper practice techniques in all of his students. Kyle attended The University of the Arts in Philadelphia where he received his Bachelor’s Degree in Jazz Studies with a focus on drumset performance, as well as a Master of Arts Degree in Music Education. He continues to develop his music education in all areas from brass, woodwind and string studies, to music technology, instrument repair, and songwriting.
OCTOBER 2022 45 TEMPO
This summer I was thrilled to co-present a session at an amazing vir tual gathering that included presenters and participants from around the world. It was a wonderful opportunity to connect with music educators in the United States and in other countries. It was fascinating to see what so many are doing to address the needs of their students with differing abilities in all age groups, and to see how cultural issues affect how music is used to enrich and enhance student lives.
The International Society for Music Educators (ISME) is an organiza tion dedicated to music educators, and includes members from eighty different countries. According to the mission statement on its website, ISME is based on the “belief that lived experiences of music, in all their many aspects, are a vital part of the life of all people.” ISME's mission is to enhance those experiences by:
• “Building and maintaining a worldwide community of music educators characterized by mutual respect and support
• Fostering global intercultural understanding and cooperation among the world's music educators
• Promoting music education for people of all ages in all relevant situa tions throughout the world"
The world conference is held every two years in different locations, but was presented virtually in 2022 due to the Covid pandemic. Lead ing up to the conference are several pre-conference seminars that focus on specific fields within music education, including the Special Music Education and Music Therapy Commission pre-conference seminar that I was a part of. Presentations had to be submitted and approved. Most were research-based (including doctoral dissertations), some described classroom projects, and others highlighted concert experiences. Professor Robert Rocco, formerly of Kean University, and I had decided to submit a proposal for a presentation that highlighted our collaboration as we worked with Deaf and hard of hearing children, and we were delight ed to have been accepted. Our work involved using the Radio Baton, a unique electronic instrument, to help teach various musical elements to my students at the Lake Drive School for Deaf and Hard of Hearing students in Mountain Lakes, NJ. (See my article in the May 2015 edition of TEMPO for more details.) We were excited to show video clips of our students, to explain the good results we saw, and to discuss our project withPre-recordedothers.
videos were available online prior to the conference, and virtual discussions were scheduled so that participants could enjoy a thir ty-minute question and answer period with presenters. This turned out
to be an enlightening and enjoyable aspect of the conference, as partici pants shared thoughts and ideas.
The first thing that stood out for me was that there are universal themes that seem to apply to all of us who work with students who receive spe cial education services. These include: focusing on the person, not the disability; focusing on each student’s strength, while adapting for their disability; and the belief that music is vital and indeed possible for all.
There were over thirty sessions; here are only a few of the highlights for me that I’d like to share with you:
Using Fixed Do Solfege, Manipulatives, and Visual Aids to Support Pitch Learning in Students with Autism, presented by Erin Parkes of the Lotus Centre for Special Music Education in Ontario, Canada.
Erin Parkes highlighted the need for a multi-modal approach when teaching concepts related to pitch, citing how deficits in visual spatial working memory, imitation ability, and abstract thinking can make it difficult for students with autism to decode notation. She developed and utilizes a system that is simpler than Kodaly’s hand symbols to help stu dents kinesthetically understand the notes of a scale, e.g. placing hands on knees for “do”, on stomach for “re,” and chest for “mi.” For me this is a good example of how we music teachers can modify existing strate gies to reach our students. She also remarked upon the high incidence of perfect pitch among students with autism, compared to the general population. If you work with children with autism, you may have no ticed this yourself.
Tears in the Key of E: Supporting Siblings of Autism with Music, pre sented by Meghan Wald and Elaine Bernstof, both of Wichita University.
This poignant session highlighted an often overlooked population and offered suggestions about how to support brothers and sisters of students with a disability. The presenters noted that these students may have a mild disability themselves that is overlooked, since the family’s energies may be focused on the sibling with a more obvious disability. Care must be taken to ensure that appropriate testing is provided for them as well. Wald and Bernstof also remarked on how siblings may be “parentalized”; that is, they are often cast in the role of caregiver, and this may affect their own behaviors at school and in social settings, as they continue to live out this role. This session really affected me as I consider students in my classes for whom life can be quite challenging as they navigate living with a child with autism or another serious disability. Music teachers typically see students over the span of several years, and this insight can help us be a positive force in these students’ lives.
TEMPO 46 OCTOBER 2022
Snapshots from Around the World at the ISME World Conference 2022 Maureen Butler NJMEA Special Learners maureenbutlermusic[at]gmail.comChair
Everyone Has Potential to Learn Music, presented by Markku Kaikkonen from Music Centre Resonaari, Finland.
From this session I was moved by two powerful statements: “We have one task, to make music for all,” and “Music allows people who are often on the margins of life, to be in the center.” The video clips Kaikkonen shared demonstrated both these points of view. His students learned to perform in rock music bands and exhibited the skills that they had de veloped over time - the results were quite impressive! To me, this session exhibited the significant influence that we have in the lives of our students. Moreover, Kaikkonen’s belief that the best music teachers are needed for special education, that is, people who are open-minded, flexible, and will ing to learn and develop new solutions, highlights the importance of our work.
Heritage Roots Singers Clinic for Essential/Soft Skills Development in Uganda, presented by Milton Myanobi, Makerere University, Uganda.
The presenter demonstrated how he combines classical music, rock music, and traditional Ugandan folk music to improve what he referred to as “soft skills” of students in choirs. As an example, he mentioned the need for more punctuality in Ugandan society, and how music activities such as being responsible for coming in on the beat can help with that. I loved how he stressed the “humanity of music” and how the cooperative spirit in music ensembles - students relating to each other as musicianscan help them grow in empathy. I think that as teachers we can encourage that and be a model for empathy, as well.
Exploring the Japanese Tradition of “Kuchishoga” as an Intercultural Music Pedagogy for People with Vision Impairment and Intellectual Disability, presented by Takako Haggarty, Queensland University of Technol ogy, Australia.
Kuchishoga is a system that uses onomatopoeic syllables that represent simple melodies, types of stroke, register, pitch, and rests. This system was developed in Japan in the 12th century to teach blind students how to play the koto. Haggarty demonstrated how she uses it for students with vision impairment and for those with intellectual disabilities. She also ex plored how the koto could be a bridge between disabled and non-disabled people of all cultures. I enjoyed hearing about the progress her students made as they played this historical musical instrument, and was amazed with the history of its use.
Where Would We Be Without Our Buddies: An Arts Experience for Students with Dis/Abiliites, presented by Jacqueline C. Smith, Boston Uni versity, and Vanessa L. Bond, Rowan University.
This session described an arts experience where college students teamed up with students with disabilities and their parents. This endeavor, in ad dition to benefiting students, gave valuable insight to music education students as they went forward into their teaching career. As we know, not every music education program prepares pre-service students in this way.
A profound statement came from a parent, who shared that “this activ ity enabled their child to be an actual participant, rather than observers pressed up against the window of life.” Wow, what an impact! For me, everything we do to include students with disabilities in our music lessons helps them take a more active role in their lives, our classrooms, and in society.
Assessment at the Intersection of Music Education, Special Education and Disability Studies, presented by Rhoda Bernard, Berklee College of Music.
This session was full of information about how to assess our students, and provided ways to measure not only musical skill, but independence as well. Bernard stressed that a “one size fits all” approach will not work with special learners. I enjoyed hearing about Drake Music Scotland, which lists these abilities that can be assessed: development of musical skills, development of confidence and self belief, development of social skills, and independence. Even in a setting that includes all types of learners, it’s important to know that the acquisition of these traits are valuable, and if musical skills do not progress as much as we hope, the music room gives ample opportunities to grow in these other skills. As Richard Michael, Kingdom of Fife, Scotland passionately stated, “I don’t teach music, I teach confidence.”
As music teachers, we are always learning and developing. It occurs to me that having a teaching certificate is just the beginning of lifelong re finement and expansion of our skills. Little did I know that when I agreed to collaborate with Robert Rocco over ten years ago, that it would lead me to this worldwide gathering, which gave me such valuable insight. A profound lesson here is that being open to new opportunities can lead to unexpected places!
If you have any questions about ISME or the conference proceedings, please contact me at maureenbutlermusic[at]gmail.com. If you want to join ISME, head over to ISME.org, and see the many benefits you’ll gain by being a member.
OCTOBER 2022 47 TEMPO
NJMEA Educational Grant 2021 Report
Shawna Longo Durban Avenue
An NJMEA Educational Grant was provided to Shawna Longo at Dur ban Avenue School in Hopatcong, NJ. The grant provided an additional 12 sets of desk bells from Prodigies for the PreK-Grade 1 General Music classes. This award has had a huge impact on the general music educa tion program at Durban Avenue School. These 12 desk bell sets, plus the addition of two additional sets of Boomwhackers through school/PTO funding, have provided students access to individual pitched instruments to play during music class with minimal sharing or redundancy while giving each student a chance to play. The students are extremely excited at the opportunity to use these instruments. There has also been measur able growth in self confidence, fine and gross motor skills, pitch recogni tion (solfege), pitch reading, rhythm reading, and performance.
The students performed 2 songs using the desk bells during the Spring Showcase: I’m a Nut performed by two 1st Grade classes and Pease Por ridge performed by a Kindergarten class. During each performance, stu dents sang the lyrics while signing the solfege during one verse and sang the solfege while they played the deskbells.
I’m a Nut Performance - https://bit.ly/3PpxXIm Pease Porridge Performance - https://bit.ly/3lddpoi
Program Goals of the Grant: Teacher Goals:
• Integrate pitched instruments into performance opportunities (con certs, etc) in addition to singing and moving.
• Expand opportunities to use pitched instruments within the curric ulum to teach pitch (melody and harmony), rhythm, meter, form, timbre, and expressive elements (tempo, dynamics, articulation).
• Utilize Primary Prodigies program to increase the students sightsinging and performance abilities.
• Increase student’s self confidence through performance.
Student Goals based on the 2020 NJ General Music Standards:
• 1.3A.2.Cr1a. - Explore, create and improvise musical ideas using rhythmic and melodic patterns in various meters and tonalities.
• 1.3A.2.Pr5c. - Demonstrate knowledge of basic music concepts (e.g. tonality and meter) in music from a variety of cultures selected for performance.
• 1.3A.2.Pr5d. - When analyzing selected music, read and perform rhythmic and melodic patterns using iconic or standard notation and melodic patterns using iconic or standard notation.
• 1.3A.2.Pr6a. - Perform music for a specific purpose with expression
and technical accuracy.
• 1.3A.2.Pr6b. - Perform appropriately for the audience and purpose.
• 1.3A.2.Re8a. - Demonstrate basic knowledge of music concepts and how they support creators’/performers’ expressive intent.
• SEL Competency - Recognize the importance of self-confidence in handling daily tasks and challenges.
Budget:
12 - C Major Deskbell Sets (8 notes, Core Instrument) = $880.00
2 – Chromatic Deskbell Expansion Sets (5 Chromatics) = $120.00
TOTAL COST = $1,000.00
Written Report Assessing the Outcome of the Project:
The addition of 12 sets of desk bells has had a huge impact on the general music education program at Durban Avenue School. These 12 desk bell sets, plus the addition of two additional sets of Boomwhackers through school/PTO funding, have provided students access to individ ual pitched instruments to play during music class with minimal sharing or redundancy while giving each student a chance to play. The students are extremely excited at the opportunity to use these instruments. I have also seen measurable growth in self confidence, fine and gross motor skills, pitch recognition (solfege), pitch reading, rhythm reading, and performance.Thestudents performed 2 songs using the desk bells during our Spring Showcase: I’m a Nut performed by two 1st Grade classes and Pease Por ridge performed by a Kindergarten class. During each performance, stu dents sang the lyrics while signing the solfege during one verse and sang the solfege while they played the deskbells.
Mid-Year Performance:
Dreidelzwqvt88SmBC7/view?usp=sharinghttps://drive.google.com/file/d/1ukgZhzSuMespyfZwXMFf
End of Year Performances:
I’m a Nut - https://bit.ly/3PpxXIm
Pease Porridge - https://bit.ly/3lddpoi
Information on NJMEA Educational Grants can be found under the "Quick Links" section of the NJMEA website: www.njmea.org
TEMPO 48 OCTOBER 2022
shawnalongo[at]gmail.comSchool
SPOTLIGHTCHAPTER
Chapter - Ranney School
Ranney School Jr. TRI-M chapter 4410 has served our community since our charter was issued from NAfME during the 2003-04 school year. The mission of the chapter is the application of the TRI-M oath that our new members recite at the induction ceremony:

We, the members of the Ranney School music department, in order to foster a greater continued interest and a desire for excellence in music performance; to encourage appreciation and awareness in listening to music; to promote wider opportunities for sharing joy through music and service both within our school and within our community; and to advance the spirit of good music and musical knowledge; and to enhance the reputation of our school as a center for musical enrichment and service; accept the honor now granted to us
This middle school honor society consists of seventh and eighth grad ers who met the criteria set during the previous academic year. These criteria include GPA, ensemble directors’ recommendation (All members of Chapter 4410 must be enrolled in either band, chorus, orchestra), and a good citizen check. For continuing members, the requirements also include service hours. The students are sorted by membership status: one-year (new) members (7th and 8th graders) and two-year (continu ing) members (8th graders).
For the 2021-22 school year, the GPA requirement was 3.7, and the service hour requirement was 30 hours. The current members can gain service hours in various ways, including attending meetings, working at Jr. TRI-M-sponsored events, and contributing to service projects. Each service opportunity is open to every Jr. TRI-M member.
During the initial weeks of the school year, the chapter nominates and elects its executive board, which consists of the President, Secretary, Trea surer, Historian, Media Officer, and Event Coordinator. The require ments of each board position are reviewed with the members during the first meeting, and then nominations are requested for each post; after the candidates accept the nominations, the chapter votes to determine the
Theroles.executive board members commit to doing their best to follow their job descriptions and furthering the chapter's mission. These stu dents lead the way for the chapter, but every member is encouraged to find ways to contribute.
During bi-weekly meetings, Jr. TRI-M chapter 4410 organizes and leads service projects on campus and in surrounding communities. Dur ing the 2021-22 school year, the members planned fundraising events to
benefit Lunch Break of Red Bank, The Opportunity Music Project of NYC, and The Greater Shore Concert Band of Eatontown.
During the annual “Penny Wars,” three bins are placed in the middle school lobby, and each grade (6th, 7th, and 8th) collects funds. The three grades compete for prizes, and the bins fill up with change and bills. The donations from this event are donated to the local community. During the 2021-22 school year, Jr. TRI-M Chapter 4410 was able to donate $1400.00 in gift cards to the local organization “Lunch Break” (lunch break.org). These gift cards benefitted local families' needs for the up coming holiday season.
The Jr. TRI-M members also plan and execute annual coffee house performances highlighting our community's talents through the night of the performance. Jr. TRI-M students write a script, host the event, set up the tables, decorate the stage, clean up, work at the bake sale, and coordinate fundraisers for the night.
For the 21-22 school year, the proceeds from this event were donated to The Greater Shore Concert Band (greatershoreconcertband.org). The money goes towards the operations cost of this ensemble, whose mem bers are volunteers. They are a community concert band that has served Monmouth and Ocean counties since 1967.
Through funds accrued over the past few years, chapter 4410 was able to sponsor twenty-three music students in New York City through dona tions made to the Opportunity Music Project (opportunitymusicproject. org). These students received lessons from professional musicians and the structure to succeed through OPM’s educational standards. Stu dents from chapter 4410 also wrote inspirational letters to the sponsored students and were delighted when videos featuring their progress were shared. Chapter 4410 is looking forward to continuing their relationship with OPM through further donations and collaborations.
The candidates who have met the criteria are inducted into the honor society near the end of the school year in a school-wide ceremony. The ceremony is run by the executive board members. The new members are awarded a membership certificate and recite the TRI-M oath. Members who have gone above and beyond in their service requirements are also recognized.Jr.TRI-M
chapter 4410 has been a way for leaders to emerge from the performing arts department at Ranney School through service. These honor students look forward to carrying on the tradition throughout this school year.
The Ranney School was honored by NAfME for achieving Second Runner-up for 2021-2022 Tri-M Junior Chapter of the Year.
OCTOBER 2022 49 TEMPO
4410
John Propper, Advisor, jpropper[at]ranneyschool.org
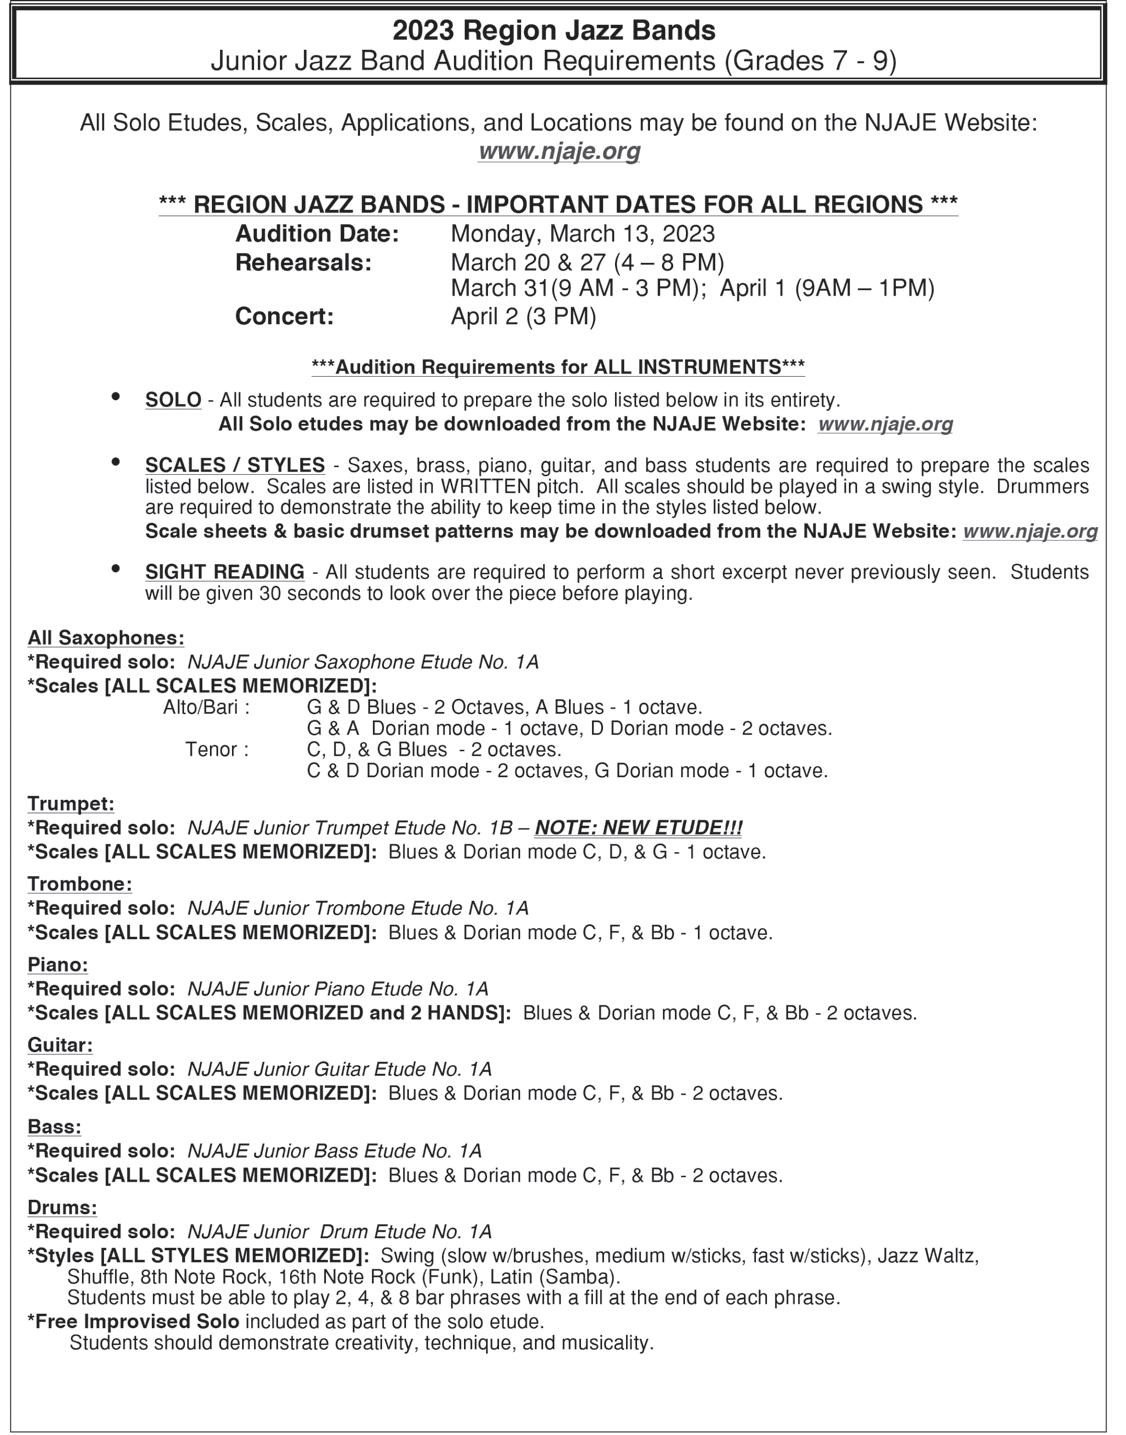
TEMPO 50 OCTOBER 2022
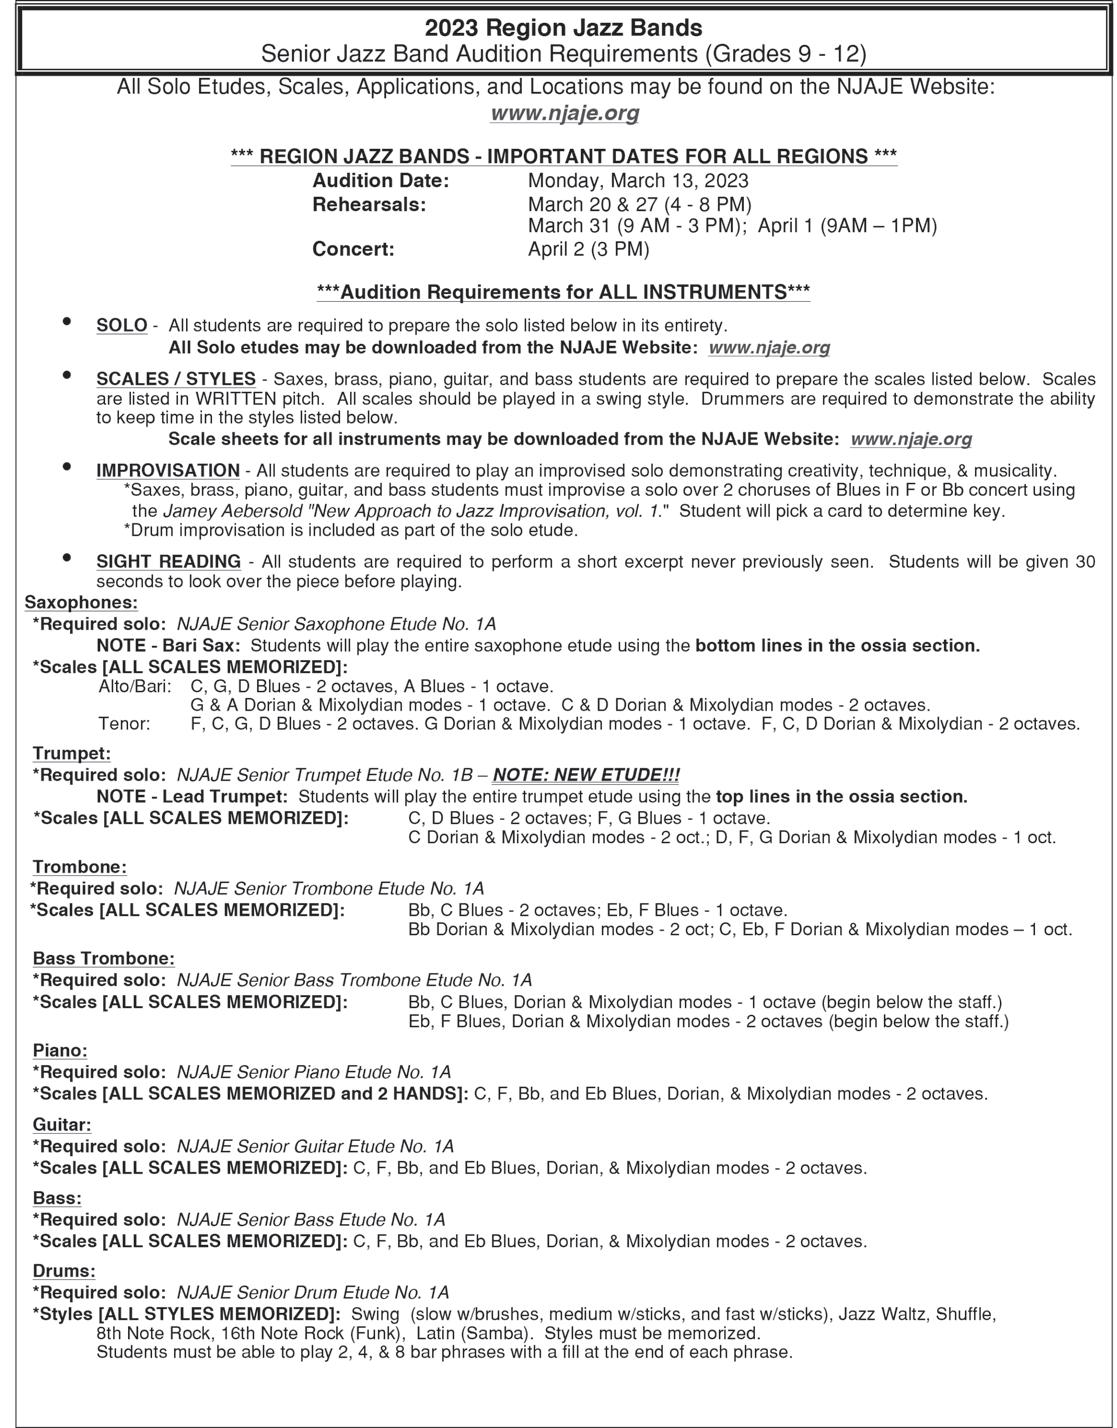
OCTOBER 2022 51 TEMPO
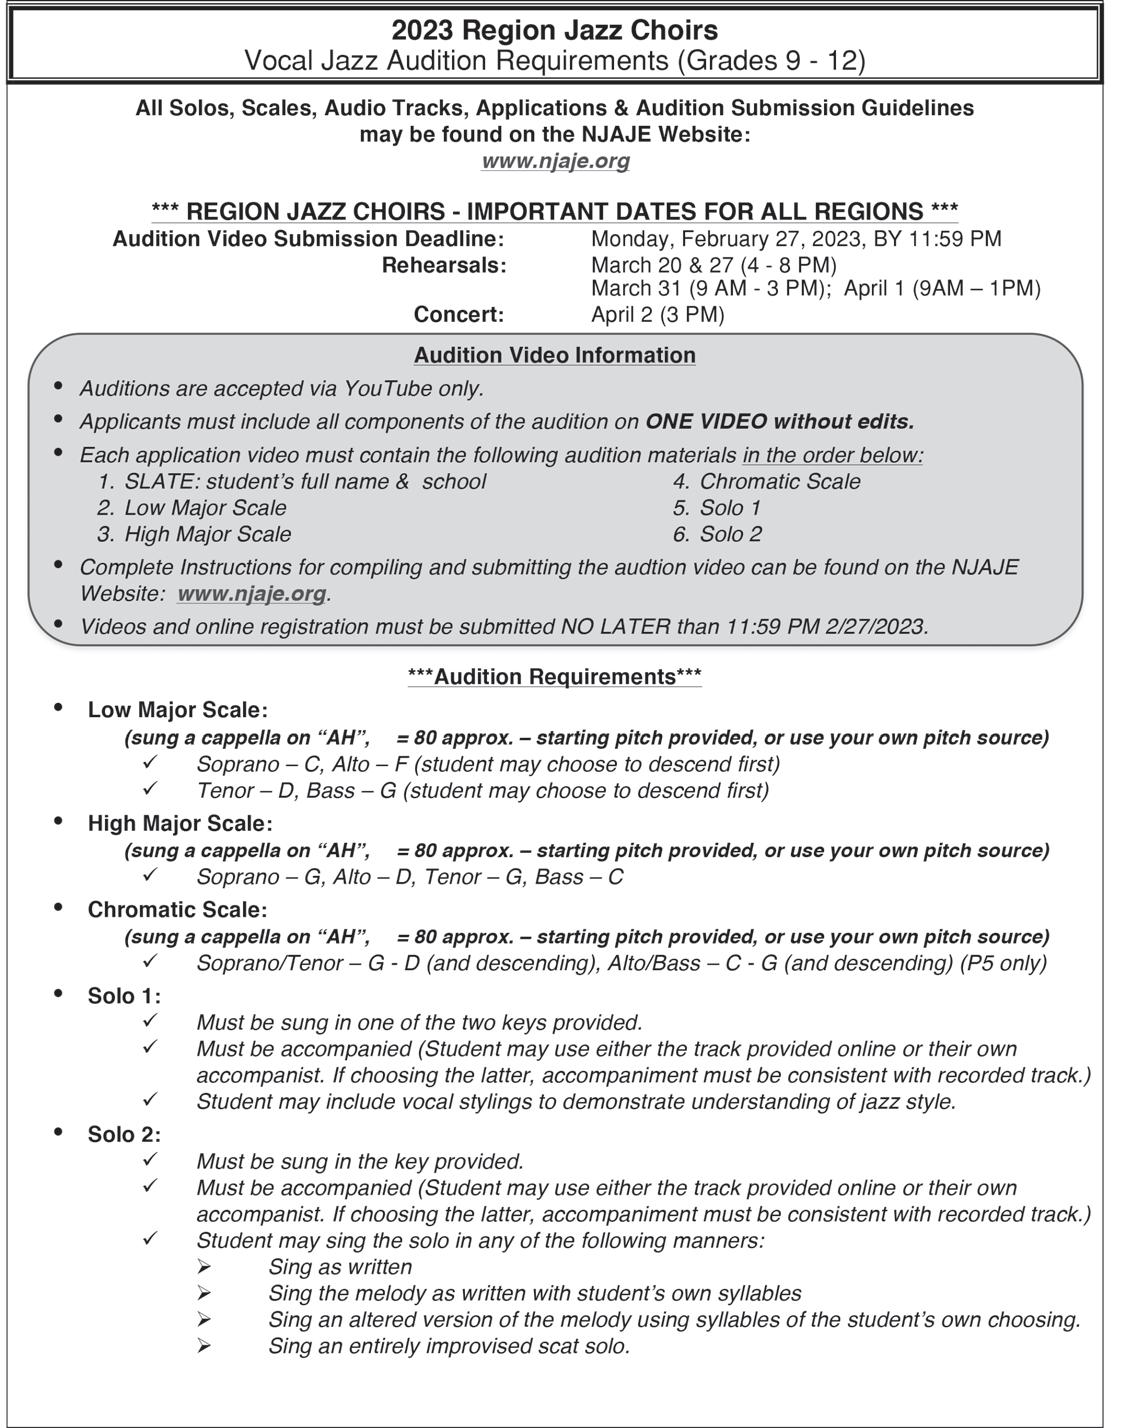
TEMPO 52 OCTOBER 2022
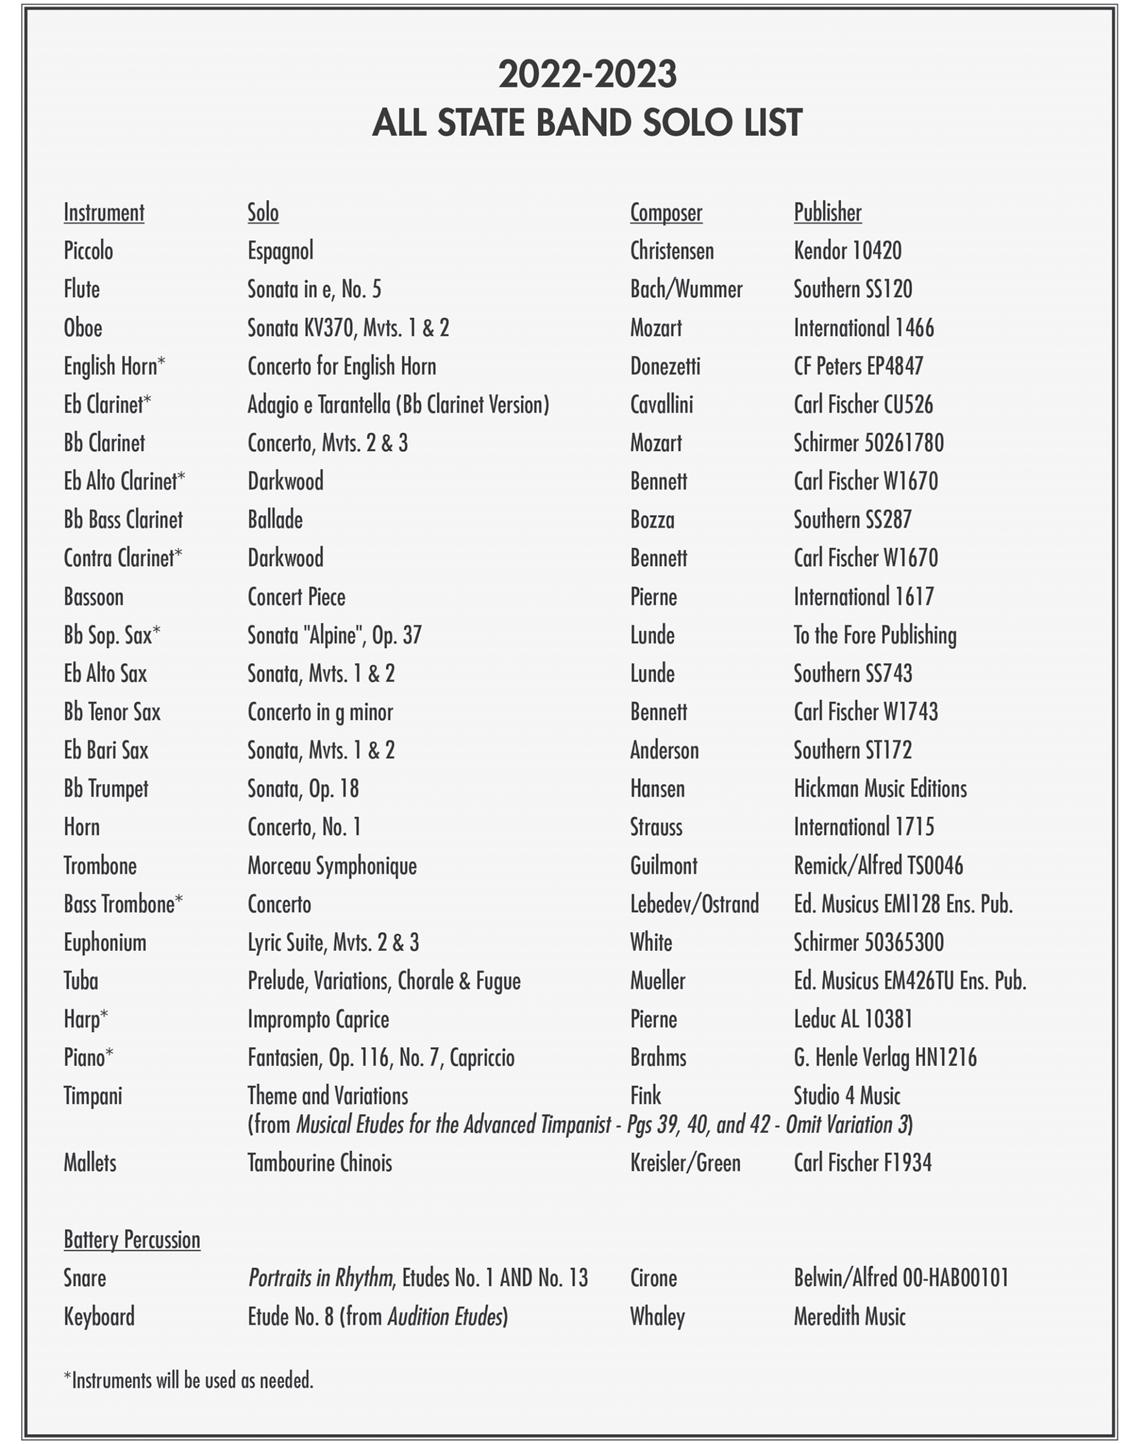
OCTOBER 2022 53 TEMPO

TEMPO 54 OCTOBER 2022
come. Although not a new board member, I would like to introduce Jordan Peters as our new Diversity & Inclusion chairperson. Jordan previously served as an orchestra division chairperson and he is very excited to hit the ground running in his new position. He already got a head start by presenting at the NJMEA Summer Conference IDEA session.
As we look ahead, our elementary music division has a great slate of PD planned. The first one will be coming up on Monday, October 10th featuring guest presenter Amy Ab bott. You can still register for this event by using this link (https://forms.gle/ahZ9t7rhaookh9AF8). In addition to the fall workshop, the following are also scheduled:
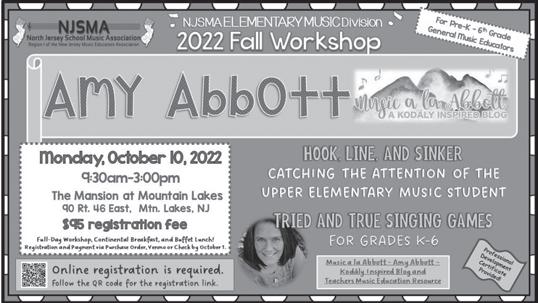
Saturday, April 1: "It's Elementary, My Dear" workshop, co-sponsored with NJYC
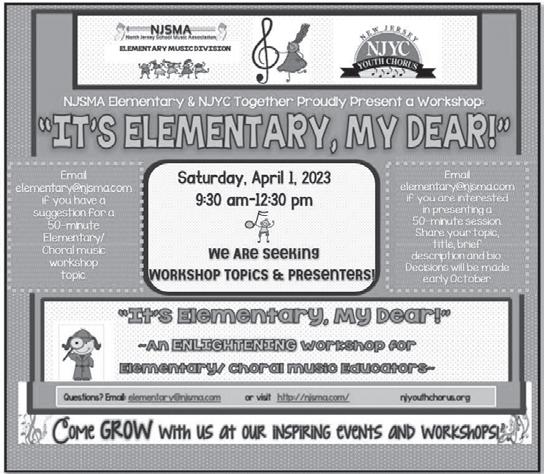
Wednesday, May 31: Elementary Choral Celebration (morning and afternoon sessions offered)
NJSMA
North Jersey School Music www.njsma.comAssociation
Greetings to all of our colleagues! I hope your 2022-23 school year is off to a terrific start and you are renewed with energy. Our executive board met at the end of July for our annual summer meeting. All region events are scheduled to run as normal (pre-pandemic) and we are excited to be work ing on some new opportunities for both students and direc tors.Iwould
like to thank Katy Brodhead, Nick McGill and Caitlin Shroyer who served as board members and have moved on to other endeavors. Your dedication and expertise were valuable and will always be appreciated. It is my pleasure to welcome our newest board members Natalie Kerr (publicity/corresponding secretary) from Bloomfield Public Schools and Justin Louie (orchestra division chairperson) from Clifton Public Schools. We look forward to working with them and being able to collaborate for many years to
None of our events run without many hands behind the scenes. We are always looking for volunteers with any level of experience to serve as site host, audition chair, manager and executive board member (just to name a few). If you want to be involved, we have a spot and will work alongside you throughout the entire process. At this time, we are still searching for an intermediate orchestra audition chairperson. Please reach out to our orchestra division (orchestra[at]njsma. org) if you are interested.
As mentioned earlier, we are planning to run a full slate of ensembles and festivals for the band, chorus and orchestra di visions. Thanks to the collaboration of our band and orches tra division, we are glad to welcome back the intermediate symphonic orchestra (including winds, brass & percussion). Our Diversity and Inclusion division is also excited to be hosting the first ever NJSMA Guitar Festival on May 13th. Are you interested in conducting a region ensemble? Please fill out the form on our website. Once completed, it will be
OCTOBER 2022 55 TEMPO
immediately sent to your respective division. Info regarding auditions for all ensembles will be posted as per our normal schedule and updates will be posted on the website. Please be aware that high school orchestra will be using symphonic rep ertoire and not the normal solo rotation. PDF versions are available in the high school orchestra section of the website. We are actively trying to connect with the new teachers in our region and those who have not been active as an NJSMA member. If you are reading this or know someone, please have them reach out to our corresponding secretary (public ity@njsma.org) or fill out the contact form on our website. All relevant information about our region is on the website (njsma.org). The calendar section is up to date with all of our confirmed events as of this publication. Contact info for all executive board members/divisions is listed under the officers section. We are all here to help and are looking forward to another successful year.
Christopher DeWilde NJSMA president[at]njsma.comPresident
CJMEA
Central Jersey Music Educators Association www.cjmea.org
I hope everyone had a wonderful summer and a great start to the school year! The CJMEA Board has been working tirelessly throughout the summer months in preparing a very exciting year ahead for all of our students in Region 2. We have top-notch educators from all over the country lined up who are thrilled to be coming in to work with our ensembles and they have prepared first rate programs of music that we know all will enjoy. We will kick off our season with the HS Band, Orchestra, Percussion, and Chorus auditions on December 10, 2022 followed by our Intermediate Auditions on January 28, 2023. Our Division Chairs will be working through the Fall and Winter to ensure that all goes smoothly, and we are excited to welcome all our directors and students. Each Division is always in need of our members to become involved. If you are interested in managing or hosting a rehearsal, please reach out to the appropriate division chair which can be found on our website. Getting involved in this fashion can be an excellent opportunity for any educator to watch and learn from some of the best in our field, and host ing in your district can do some great things for your own school program!
Our Diversity and Inclusion Division will continue to provide PD Sessions, both online and in person throughout
the year. The sessions will be open to all CJMEA members and we hope you will take advantage of these opportunities. Please stay tuned to our website and Facebook page for information on these events which will be released this Fall.
As we look forward to a great year ahead, one of my goals as President is to see new schools from around our region tak ing part in our many events. Our Honors Ensembles have really taken off and we are thrilled to now have them in all divisions from Elementary-High School. These ensembles are by teacher nominations and are open to all school districts in the region. Every school that nominates students will be guaranteed to have a portion accepted. I think this is a won derful way for teachers that may be new to CJMEA to get involved and the events have proven to be not only a fantastic experience, but also a great deal of fun!
I look forward to seeing everyone throughout the year. If anyone ever has any questions or ideas, please always feel free to reach out. It is truly a pleasure and honor to serve as your CJMEA President for another year. I wish each of you a wonderful and successful school year!
Yale percussion[at]cjmea.orgCJMEASnyderPresident
SJCDA
South Jersey Choral Directors Association www.sjcda.net
The South Jersey Choral Directors Association (SJCDA) Board of Directors worked throughout the summer to plan our activities for the 2022 - 2023 school year and we are look ing forward to a successful year of choral activities in Region
III.We
kicked off the year with our annual General Member ship Meeting and Reception at: White Horse Winery on September 12th, 2022. Conductors for our honors choirs presented their programs and the executive board shared updates, new members and helpful general information for all SJCDA members in attendance. In addition, our member ship will get the opportunity to network with their colleagues and share ideas about the upcoming school year.
Our 65th Annual South Jersey High School Choral Fes tival will be held at Republic Bank Performing Arts Center at Washington Township High School on January 28th and 29th, 2023. Our Senior High conductor is Joe Zachowski from Washington Twp High School. Our Junior High con ductor is Charles Hartung of Collingswood Middle School. Auditions for these choirs will be held on Saturday, Novem
TEMPO 56 OCTOBER 2022
ber 19th at Clearview Regional High School. We will be hav ing this years auditions in person.
Our 40th Annual South Jersey Elementary Festival Choral Concert will be held at Republic Bank Performing Arts Center at Washington Township High School on March 4th, 2023; the choir will be conducted by Polly Murray from Cen tral Middle School in Haddonfield, NJ.
Full concert programs for all three honors choirs as well as bios of our conductors are available on our SJCDA website.
The South Jersey Choral Directors Association offers many opportunities for choral music teachers to participate, and in doing so, expand their knowledge as music educators. We encourage all music teachers to get involved with the honor choirs and take advantage of the professional development opportunities offered. We look forward to another exciting year working with the teachers and students of vocal music throughout South Jersey and encourage you to check our website for the latest updates. www.sjcda.net
David dtaylor[at]nburlington.comSJCDATaylorPresident
SJBODA
South Jersey Band and Orchestra Directorswww.sjboda.orgAssociation
Welcome Back! Our first membership meeting for this school year will be held on Wednesday, October 12, 2022. This breakfast meeting will take place at Seven Star Diner in Sewell at 9:00 AM. There is no fee to attend the meeting. Please notify Lori Ludewig 609-457-0590 or sjbodapresident[at]gmail.com) if you are able to attend. Au dition information and our online registration process will be explained. Our modified junior high band and junior high string audition requirements for this year will be discussed in detail.Auditions
for the 2023 All South Jersey Orchestra, Wind Ensemble, Symphonic Band and Junior High String Ensem ble will take place on Saturday, December 10, 2022 at Abse gami HS. Patrick O’Keefe will host this event. Applications and directions are available on our website. The first rehears al for these ensembles will take place on Saturday, December 17th at Cinnaminson HS. Nick DiSalvio will be our host. Our 2023 Orchestra conductor is Jiannan Cheng (Rowan University). Sue On (Rowan Community School) will con duct our Junior High String Ensemble. The Wind Ensemble will be conducted by Todd Nichols (Rutgers University) and
Patrick O’Keefe (Absegami HS) will conduct the Symphonic Band. Amanda Lakits Porco (Hamilton Twp. Schools) is our High School Band Coordinator.
The Junior High Band auditions will take place on Satur day, January 28th at Southern Regional Middle School. Jen nifer Hodgson and Andrew Wright will be our hosts. Au dition information is available on our website. Joe Jacobs (Ventnor MS, retired) and Jon Porco (Deptford Twp. MS) are the Junior High auditions co-chairs. Joe Brausum (Mill Pond ES) is our Junior High Band Coordinator. The conductors for the Junior High Bands will be Bethany Wiberg (Richard M. Teitelman MS) and Pamela Turowski (Burlington County Institute of Technology – Medford).
The South Jersey Band and Orchestra Directors Association offers many opportunities for instrumental music teachers to expand their involvement and expertise as music educators. We provide excellent vehicles for professional development including conducting and managing our ensembles. Many teachers have gained wonderful ideas and strategies by observ ing rehearsals and meeting with colleagues. You can enhance your school music program to include excellent performing opportunities for your students and ensembles. We encour age all music teachers to take advantage of the wonderful re sources offered by SJBODA this year. Please contact Lori Ludewig at sjbodapresident[at]gmail.com or 609-457-0590 for additional information.
We encourage you to check our website, which is main tained by Derek Rohaly, (Mainland Regional HS) for the lat est SJBODA updates. www.sjboda.org
We wish everyone an exciting and successful year.
Lori sjbodapresident[at]gmail.comSJBODALudewigPresident
OCTOBER 2022 57 TEMPO

NJMEA RESOURCE PERSONNEL
Area of Responsibility
Administrative Matters
Name Email Address
Wayne Mallette mallette.njmea[at]gmail.com
All-State Coordinator Joseph Cantaffa jcantaffa[at]rocknrollchorus.com Association Business William McDevitt wmcdevittnjmea[at]gmail.com
Band Performance Chair
Megan Alexander meganalexander160[at]gmail.com
Band Procedures Chair Tyler Wiernusz twiernusz[at]clearviewregional.edu
Choral Performance Chair
Brian Williams williams.brian[at]robbinsville.k12.nj.us
Choral Procedures Chair Ken Bryson kennethbryson[at]gmail.com Composition Contest Andrew Lesser andrew.lesser[at]yahoo.com
Inclusion/Diversity/Equity/Access
Katy Brodhead-Cullen njmea.idea[at]gmail.com Jazz Procedures Chair Miguel Bolivar mbolivar.njaje[at]gmail.com
Marching Band Festival Chair Nancy Clasen nancyclasen[at]gmail.com Membership William McDevitt wmcdevittnjmea[at]gmail.com
Middle/Junior High Band Festival Manuel Martinez manuelmartinez[at]gehrhsd.net
Middle/Junior High Choral Festival
Donna Marie Berchtold firesongwed[at]gmail.com
NJMEA Historian Nicholas Santoro n31b13[at]gmail.com
NJMEA State Conference Exhibits Chair Nancy Clasen nancyclasen[at]gmail.com NJMEA State Conference Manager Marie Malara malara97[at]aol.com
NJMEA Summer Conference Jodie Adessa jodieadessa[at]gmail.com NJMEA Summer Conference Casey Goryeb casey.goryeb71[at]gmail.com NJMEA/ACDA Honors Choir Kaitlyn Reiser kreiser[at]spfk12.org November Convention – NJEA Nancy Clasen nancyclasen[at]gmail.com Opera Festival Chair
Donna Marie Berchtold firesongwed[at]gmail.com Orchestra Performance Chair Susan Meuse susanmeuse[at]gmail.com Orchestra Procedures Chair Craig Stanton & Elisabeth Sato asoprocedures[at]gmail.com Research Colleen Sears quinnc1[at]tcnj.edu
Maureen Butler maureenbutlermusic[at]gmail.com
Patrick O’Keefe patrickaokeefe[at]gmail.com Tri-M
NJ
NAfME
NJ
NJ
NJ
David Westawski westawski.njmea[at]gmail.com
REPRESENTATIVES/LIAISONS Kaitlyn Reiser
kreiser[at]spfk12.org
Patrick O'Keefe patrickaokeefe[at]gmail.com
Miguel Bolivar mbolivar.njaje[at]gmail.com
William McDevitt
Jonathan Harris harrisj[at]nvnet.org
Ronald Dolce rdolce561[at]aol.com
Andrew Lesser andrew.lesser[at]yahoo.com
Joe Bergen
COMMUNICATION SERVICES/PUBLIC RELATIONS
William McDevitt
wmcdevittnjmea[at]gmail.com Andrew Lesser andrew.lesser[at]yahoo.com
OCTOBER 2022 59 TEMPO
.....................................................
...........................................
......................................................
......................................
.................................................
...........................
.........................................................
...........................................
..........................................
................................................
..................................
......................................
.........................
................................................
.........................................................
.............................................
..................................................
..........................................
................................................
.............................................
................................................
Students with Special Needs ............................................
..................................
Supervisor of Performing Groups
...............................................................................
......................................
TO AFFILIATED, ASSOCIATED AND RELATED ORGANIZATIONS NJ American Choral Directors Association.......................
Governor’s Award for Arts Education ..............................
...........................................
Association for Jazz Education
...........................................................................
......................................wmcdevittnjmea[at]gmail.com
Music Administrators Association
Retired Music Educators Association
TI:ME ..........................................................................
...........................................
Percussive Arts Society
................................................joe[at]mantrapercussion.org
Executive Director/TEMPO Editor
TEMPO Express ................................................................
...........................................
TEMPO 60 OCTOBER 2022
Stephen Milburn Clarke
Stephen Milburn Clarke of Madison, NJ died peace fully surrounded by his loving family at Morristown Medical Center on Monday, June 6, 2022 at the age of 95.He

was born in Scranton, PA in 1926 with his great aunt, Dr. Anna C. Clarke, DO serving as attending phy sician. With his parents, brother and sister, Stephen moved to Plumstead Township, PA in the early 1930’s, attending the one room school house, Southwestern School, for grades 1-8. He achieved the highest score on the 8th grade, “All Township Exam” and moved on to Doylestown High School, graduating in 1944. In high school he was an excellent student and he learned to play the clarinet, alto saxophone and tuba, participating in all band and choral ensembles. At home he was responsible for his daily chores before and after school on his family’s 22-acre
Stephenfarm.graduated
in 1947 from West Chester State Teacher’s College, West Chester, PA with a BS in Music Education, and in 1954 from The Ohio State University, Columbus, Ohio with a PhD in Music Education. He was an Assistant Professor at Capital University, Bexley, Ohio. In 1962 he was elected Vice President of the Ohio Music Education Association.
While visiting his family in Doylestown, Stephen met the love of his life, Mary Louise Gardy. They were married in 1958 and lived in Bexley, Ohio until 1964. In 1967 Mary Louise, Stephen and their daughter, Anne Carter, moved to Westfield, NJ. In Westfield, Stephen was active with St. Paul’s Episcopal Church, serving on the Vestry and as an Usher, and with The Sons of the American Revolution, serving as President of the West Fields Chapter and Treasurer of the State Chapter.
In 2000, after a 37-year career, Stephen retired as Pro
fessor Emeritus, Professor of Music and former Chairman of the Music Department, from The New Jersey City University, formerly Jersey City State College, Jersey City, NJ. He was active on the Executive Board of the New Jersey Music Educators Association(NJMEA), serv ing as President from 1973-1975. Stephen was also active in the Music Educators National Conference(MENC) serving on the Research Committee and Government Relations Committee.
Mary Louise and Stephen were happily married for 58 years until Mary Louise’s passing in 2016. During their marriage they enjoyed going to New York City to attend the Metropolitan Opera, New York Philharmonic and New York City Ballet in Lincoln Center, Broadway The atre, and view exhibits at The Metropolitan Museum of Art and other regional museums. They traveled throughout the United States, Canada, Europe and Asia to view art, architecture, and absorb the culture.
Stephen is survived by his daughter and son-in-law, Anne and Bill Meyer of Madison, NJ, his twin grand daughters Mary Ward Meyer and her fiancé Alexander Wilfong of Philadelphia, PA and Kathryn Carter Meyer Phakey and her husband, Rajan Phakey of Princeton, NJ.
Patricia Evans
On Saturday, July 9, 2022, Patricia Evans, loving wife and mother, passed away at the age of 62. Patricia was born on October 30, 1959 in West Orange, New Jersey to William R. and Eileen (Wintermute) Oswin. Patricia spent her childhood and school-age years in Succasunna, New Jersey. She received her Bachelor of Music degree in music education from Westminster Choir College in Princeton, NJ. Patricia taught music for over 30 years in the public-school districts of Long Valley, Roxbury, Bed minster, and Montague. From 1997 through 2001, Pa
This column salutes the lives and careers of recently departed colleagues. It is the way NJMEA and NJRMEA can express appreciation for the work that they have done and the lives that they have touched. We mourn their passing and salute their contributions, which are the basis for music education in the state of New Jersey.
OCTOBER 2022 61 TEMPO
tricia worked in the Concert Artist division of Steinway & Sons of Philadelphia, facilitating legendary concert artist's performances in the greater Philadelphia market. Most recently, Patricia's passion to foster love through music was most realized as she became the Music & Arts Developer for Abilities of Northwest Jersey, a non-profit organization serving the needs of adults with disabilities. Here she had the great privilege of creating, developing, and introducing music and arts curriculum to this im portant organization. Patricia's love transformed the lives of everyone she encountered. She brought a bounty of beauty to everything she did…with her music, her smile and unbounded love. She had a remarkable ability to connect with people, share herself and evoke that same spirit of love in each person she knew.
She is survived by her husband Christian Evans, her daughter Holly Eileen Hill, her beloved bonus son, Tay lor Christian Evans, and her bonus daughter Adison Jean Evans. Her extended family includes her brother Eric Os win and his wife Debra Oswin, her brother William R. Oswin II and his wife Terri Oswin and her beloved nieces
and nephew; Doug Oswin, Katie Oswin McConnel, Eric Oswin II, William R. Oswin III and Christopher Oswin.
Melinda Jo Hoppe
Melinda Jo Hoppe, 69, of Plainsboro, passed away on Friday, June 24, 2022, at JFK Hartwyck in Edison, NJ. Born in Cleveland, OH, Melinda was a loving and caring wife, mother, grandmother, and sister. She loved cooking with her husband, singing, and playing her violin. She was employed as a Music teacher for 25 years in the West Windsor-Plainsboro School District before her retire ment in 2015 and enjoyed teaching string instruments to upper elementary-aged students. She is survived by her loving husband of 47 years, Craig Hoppe; her sons Andrew R. Hoppe and Ian C. Hoppe and his wife Ta mara; her grandsons Connor R. and Kevin L. Hoppe; her brother Scott W. Reed, her sister-in-law Barbara A. Reed; and her brothers-in-law Robert B. Hoppe and Richard T. Hoppe.

TEMPO 62 OCTOBER 2022
NAfME BACKPACK Visit: bit.ly/NAfMEBackpackBereadytomeet your students where they are with NAfME in your backpack!

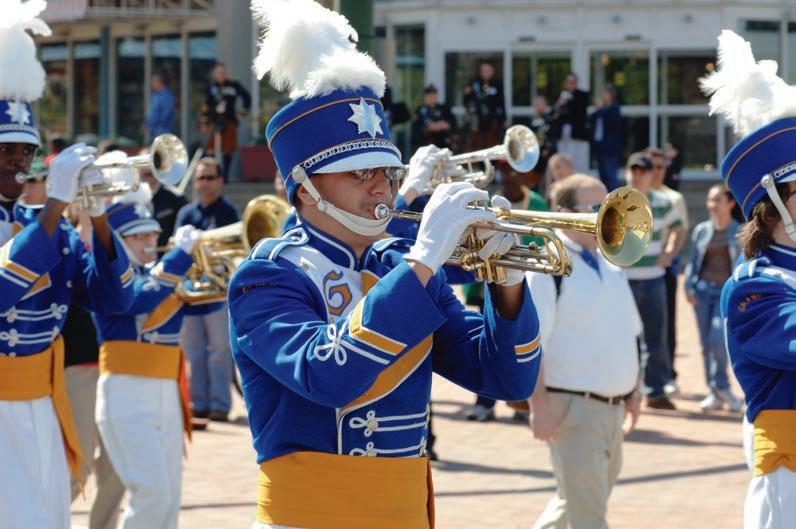
OCTOBER 2022 63 TEMPO Let us put our 38+ years of student music travel experience to work for you! Contact us Today: 800-872-3378 | www.USAfest.org 807 Mantoloking Road, Suite 100, Brick, NJ 08723 PERFORMANCECRUISESSAILINGTO: EuropeBermudaMexicoKeyHawaiiCaribbeanBahamasWestAlaska Travel is BACK! Plan your next trip today! T OP 2023 DES TINATIONS: NEW YORK, NY NORFOLK, VA VIRGINIA BEACH, VA WASHINGTON, DC TORONTO, CANADA ORLANDO, FL AND MORE... ATLANTA, CHARLESTON,GA SC CHICAGO, GATLINBURG,IL TN NASHVILLE, TN NEW ORLEANS, LA 20 23 PARADE PROGRAMS : MACY'S THANKSGIVING DAY PARADE New York, NY PARADE OF NATIONS Norfolk, VA DISNEY PARADES Orlando, FL & Anaheim, CA TOURNAMENT OF ROSES PARADE Pasadena, CA AMERICA'S HOMETOWN THANKSGIVING CELEBRATION Plymouth, MA As a leader in the student travel industry for over 38 years, Performing Arts Consultants exceeds expectations for student and performance group Wetravel.will work with you to plan an exceptional, worry-free experience and provide impeccable customer service from start to finish. Learn more at www.usafest.org.NOW BOOKING for 2023
NJMEA Awards
all Award applications available at https://njmea.org/awards
SCHOOL ADMINISTRATOR AWARD
Awards are presented annually to outstanding school Principals and/or Superintendents who demonstrate support for and commitment to high-quality arts edu cation programs in their schools. The influence of such administrators is a major factor in improving music ed ucation in school systems across the state.
One Elementary School Principal, one Secondary School Principal, and one School District Superinten dent may be selected to receive this award. Individuals holding titles as Assistant Principal and Assistant or As sociate Superintendent also qualify.
Administrators receiving awards will be notified by NJMEA and a presentation honoring them will take place at the NJMEA February State Conference.
DISTINGUISHED SERVICE AWARD
The NJMEA Board of Directors has initiated a Distin guished Service Award for those members who have honored themselves with faithful service to music edu cation in public, private, and parochial schools in New PastJersey.and
present members of the NJMEA Board of Di rectors are also eligible for this award since they have dedicated much time and effort toward state projects re lated to music education.
Additional award categories include individuals and or ganizations outside the field of professional music ed ucation and NAfME officers on both the National and Regional levels.
Award recipients will be honored at a mutually agree able occasion such as state workshops, region meetings, concerts or festivals, and retirement affairs.
OUTSTANDING SCHOOL BOARD AWARD
Awards are presented annually to outstanding Boards of Education who exemplify superior support and com mitment to quality music programs throughout all of the grades and schools of their school district.
Criteria for this award include support of superior pro grams of sequential, curriculum-based music educa tion; advocacy for music education within the district; and financial support commensurate to support superi or programs of general, choral, and instrumental pro grams within the district.
Boards of Education receiving awards will be notified by NJMEA and a presentation honoring them will take place at the NJMEA February State Conference.
MASTER MUSIC TEACHER AWARD
Master Music Teacher Awards are presented annually to members of NJMEA based on the following:
- completion of a minimum of ten years of teaching in the schools of New Jersey (public, private, parochial, or collegiate).
- currenty actively teaching and a member of NJMEA and NAfME for at least ten years.
- display of teaching excellence.
Members of the NJ Retired Music Educators Associa tion will visit candidates during their teaching day to conduct interviews and observe the programs and meth ods of selected candidates. Nominees for this award are then presented to NJMEA Board of Directors for approval.
DavidPresident-ElectWestawski




















TEMPO 66 OCTOBER 2022 NJMEA 2021-2023 Board of Directors Past PatrickPresidentO’Keefe Absegami High patrickaokeefe[at]gmail.comSchool
West Windsor-Plainsboro High School South westawski.njmea[at]gmail.com Executive Director William McDevitt wmcdevittnjmea[at]gmail.comRetiredNJSMA, ChristopherPresidentDeWilde Anthony Wayne Middle president[at]njsma.comSchool CJMEA, President Yale Snyder Monroe Township percussion[at]cjmea.orgSchools SJCDA, President David Taylor Northern Burlington Reg dtaylor[at]nburlington.comHS SJBODA, President Lori Ludewig Collingswood/Oaklyn sjbodapresident[at]gmail.comSchools Administration Dennis Argul dennisargul[at]gmail.comRetired Band Festivals/NJEA Liaison Nancy ThomasClasenJefferson Middle School nancyclasen[at]gmail.com Band Performance Megan meganalexander160[at]gmail.comAlexander Choral Festivals Donna Marie Berchtold firesongwed[at]gmail.comRetired Choral Performance Brian RobbinsvilleWilliamsHigh williams.brian[at]robbinsville.k12.nj.usSchool Chorus/Orchestra/Jazz Joseph jcantaffa[at]rocknrollchorus.comHowellCantaffaHighSchool Higher Ed./Research/Collegiate Colleen Sears The College of New Jersey quinnc1[at]tcnj.edu Conferences Marie malara97[at]aol.comRetiredMalara Music Industry James jim[at]musicfirst.comFrankel PreK-8 General Music Amy Burns Far Hills Country Day School aburns[at]fhcds.org Guitar/Expanded Ensembles Jayson NewarkMartinezArtsHigh jmarti37[at]webmail.essex.eduSchool K-12 Ed Tech and Innovation Shawna Longo Durban Avenue shawnalongo[at]gmail.comSchool Retired Members/Mentorship Kathy kspadeb[at]aol.comRetiredSpadafino Orchestra Performance/Festivals Susan HammarskjoldMeuse Middle susanmeuse[at]gmail.comSchool Special Learners Maureen Butler maureenbutlermusic[at]gmail.comRetired Advocacy Libby Gopal East Orange Campus libby.gopal[at]eastorange.k12.nj.usHS Executive Board NJMEA Board of Directors - Appointed Members WaynePresidentMallette Scotch Palins-Fanwood mallette.njmea[at]gmail.comDistrict
GENERAL ADVERTISING RATES
Note: Additional fees will apply if metal plates are required. Ads which exceed the specified sizes will be charged at next ad size.
All Measurements In Inches
1color or black/white 4 color
Full Page (7.5 x 10) $350.00 $800.00
Two Thirds Page (7.125 x 6.66 or 4.625 x 10) $290.00 $790.00
Half Page Horizontal (7.5 x 5) $235.00 $735.00
One Third Page (2.5 x 10 or 4.625 x 5 or 7.125 x 3.33) $175.00 $675.00
One Sixth Page (2.25 x 5 or 4.625 x 2.5) $120.00 $620.00
EDITORIAL POLICY
Articles may be submitted to the editor of this magazine by anyone who wishes to write about topics related to music or music education. All articles which are selected for publication will be proof read for content, spelling and grammatical errors.
Authors who submit an article to TEMPO Magazine for publication agree to all of the following
1. the editor may edit all articles for content, spelling and grammar.
2. the printing of the article in TEMPO Magazine, the printing date, and placement are at the discretion of the editor.
3. permission is granted to reprint the same article in any National or State Music Education Association magazine on the condition that the author’s name and TEMPO Magazine are to be mentioned in all reprinted articles.
4. no exceptions will be made regarding items 1 through 3 above.
5. the author of the article may submit his/her article to additional magazines for publication.
NJMEA Past Presidents
1924 - 1926 Josephine Duke
1926 - 1930 R.W. Laslett Smith
1930 - Jay W. Fay
1930 - 1931 Wilbert B. Hitchner
1931 - 1933 Thomas Wilson
1933 - 1935 John H. Jaquish
1935 - 1936 Clifford Demarest
1936 - 1938 Mable E. Bray
1938 - 1939 Paul H. Oliver
1939 - 1941 K. Elizabeth Ingles
1941 - 1942 Arthur E. Ward
1942 - 1944 John T. Nicholson
1944 - 1945 Frances Allan-Allen
1945 - 1947 Philip Gordon
1947 - 1949 Violet Johnson
1949 - 1951 Samuel W. Peck
1951 - 1953 Janet G. Gleason
1953 - 1955 Henry Zimmerman 1955 - 1957 Agnes B. Gordown
1957 - 1959 Leroy B. Lenox
1959 - 1961 Elizabeth R. Wood 1961 - 1963 Harold A. Brown 1963 - 1965 E. Brock Griffith 1965 - 1967 Robert C. Heath
1967 - 1969 Edward Brown 1969 - 1971 Rudolph Kreutzer
1971 - 1973 Charles Wertman
1973 - 1975 Stephen M. Clarke
1975 - 1977 Herman L. Dash
1977 - 1979 Buddy S. Ajalat
1979 - 1981 Alyn J. Heim
1981 - 1983 Robert Marince
1983 - 1985 Anthony Guerere
1985 - 1987 Joan Policastro
1987 - 1989 Joseph Mello
1989 - 1991 Dorian Parreott
1991 - 1993 David S. Jones
1993 - 1995 Anthony Guerere
1995 - 1997 Sharon Strack
1997 - 1999 Chic Hansen
1999 - 2001 Joseph Mello
2001 - 2003 Nicholas Santoro
2003 - 2005 Frank Phillips
2005 - 2007 Joseph Akinskas
2007 - 2009 Robert Frampton
2009 - 2011 William McDevitt
2011 - 2013 Keith Hodgson
2013 - 2015 Joseph Jacobs
2015 - 2017 William McDevitt
2017 - 2019 Jeffrey Santoro
2019 - 2021 Patrick O'Keefe
OCTOBER 2022 67 TEMPO
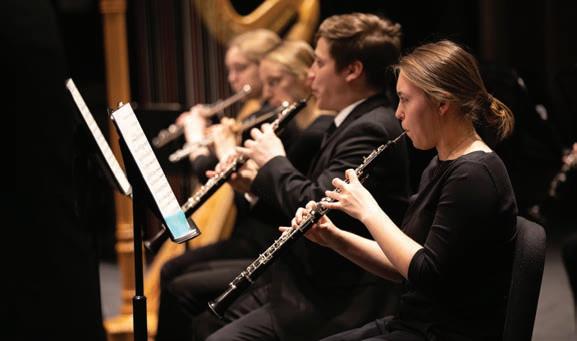
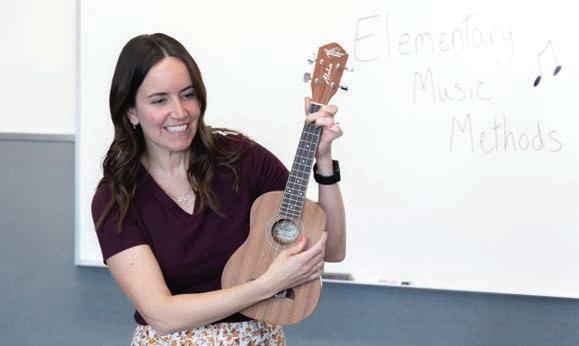
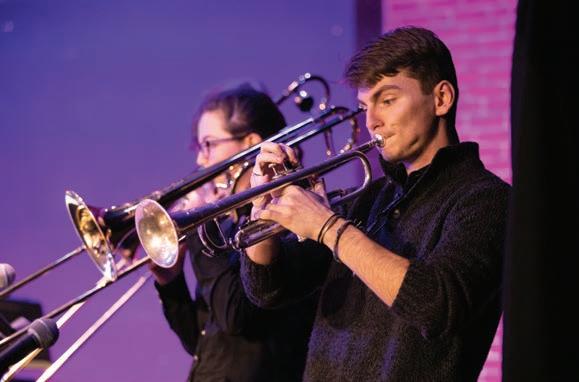
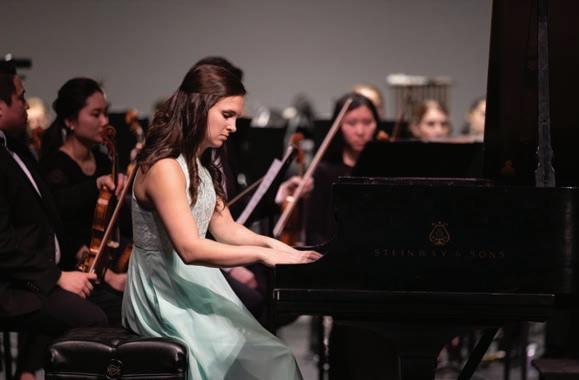
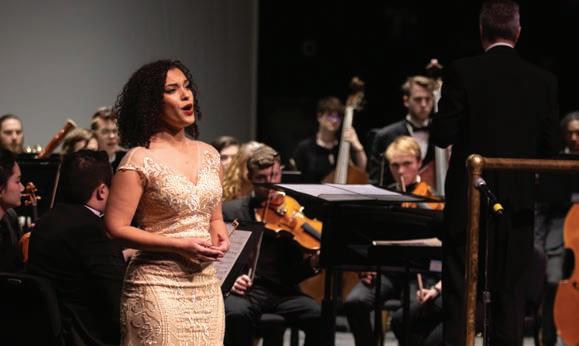
TEMPO 68 OCTOBER 2022 SUPPORTIVE INCLUSIVE EXCEPTIONAL Learn MOre
Rowan University o ers a new Online Master of Music Education for busy music educators who want to go deeper into their practice as both musicians and teachers. With a focus on diversity, equity, inclusion, and access, the program prepares educators to be change makers who think critically, engage in responsive teaching, and connect theory to practice.
• Online classes allow students to study from anywhere in the country asynchronous classes practicing music educators flexibility music-making OF MUSIC EDUCATION
OCTOBER 2022 69 TEMPO
• A core of
give
the
they need • Courses explore emerging trends in music and education • Summer intensive session includes active
workshops and discussion-based seminars with guest lectures from prominent music education scholars • Capstone project or thesis options • Program completion in as little as 22 months or longer if needed • Up to 6 graduate transfer credits accepted • No audition or GRE required APPLY TODAY! go.rowan.edu/musiceducation THE HEART
GO DEEPER INTO
ADVERTISER WEB ADDRESS
Calderone School of Music calderoneschoolofmusic.com 41
Caldwell University caldwell.edu 43
The College of New Jersey music.tcnj.edu 64
Gettysburg University - Sunderman Cons www.gettysburg.edu 45
Montclair State University, Cali School of Music montclair.edu/music
Inside Front Cover New Jersey Symphony njsymphony.org 13
NJAJE State Jazz Conference njaje.org 6
Performing Arts Consultants www.usafest.org 63
Peripole www.peripole.com 37
Rider University - Westminster www.rider.edu 7
Rowan University Department of Music go.rowan.edu/music 12
Rowan University Masters Program go.rowan.edu/musiceducation 69
Susquehanna University susqu.edu/music 40
Temple University - Boyer School boyer.temple.edu 24
West Chester University wcupa.edu/music 68
William Paterson University wpunj.edu/music
Inside Back Cover
TEMPO 70 OCTOBER 2022
ADVERTISERS INDEX Please Support Our TEMPO Advertisers
PAGE
973.720.2315 | WPUNJ.EDU/MUSIC | WAYNE, NEW JERSEY Pursue Your Career in MUSIC Undergraduate and Graduate Degree Programs Classical Performance, Jazz Studies, Music Education, Music and Entertainment Industries, Popular Music, Sound Engineering NEW Graduate Certificates in Jazz Pedagogy and Orff Schulwerk • World-Renowned Faculty • Beautiful Campus • Close Proximity to New York City Be a Music Major for a Day! November 17 February 16 March 9 April 20 Register: wpunj.edu/music To Schedule Your Tour or 973.720.3466musicadmissions@wpunj.eduAudition @WPMusicDept/WPUMusicDepartment@WPMusicDeptWPUNJ.EDU/Music AT
TEMPO 72 OCTOBER 2022 2023 NJMEA State Conference Atlantic City, NJ February 23-25 Register https://www.eventsquid.com/event/17559Online Conference Justification Toolkit available on the NJMEA website