
INSTALLATION GUIDE
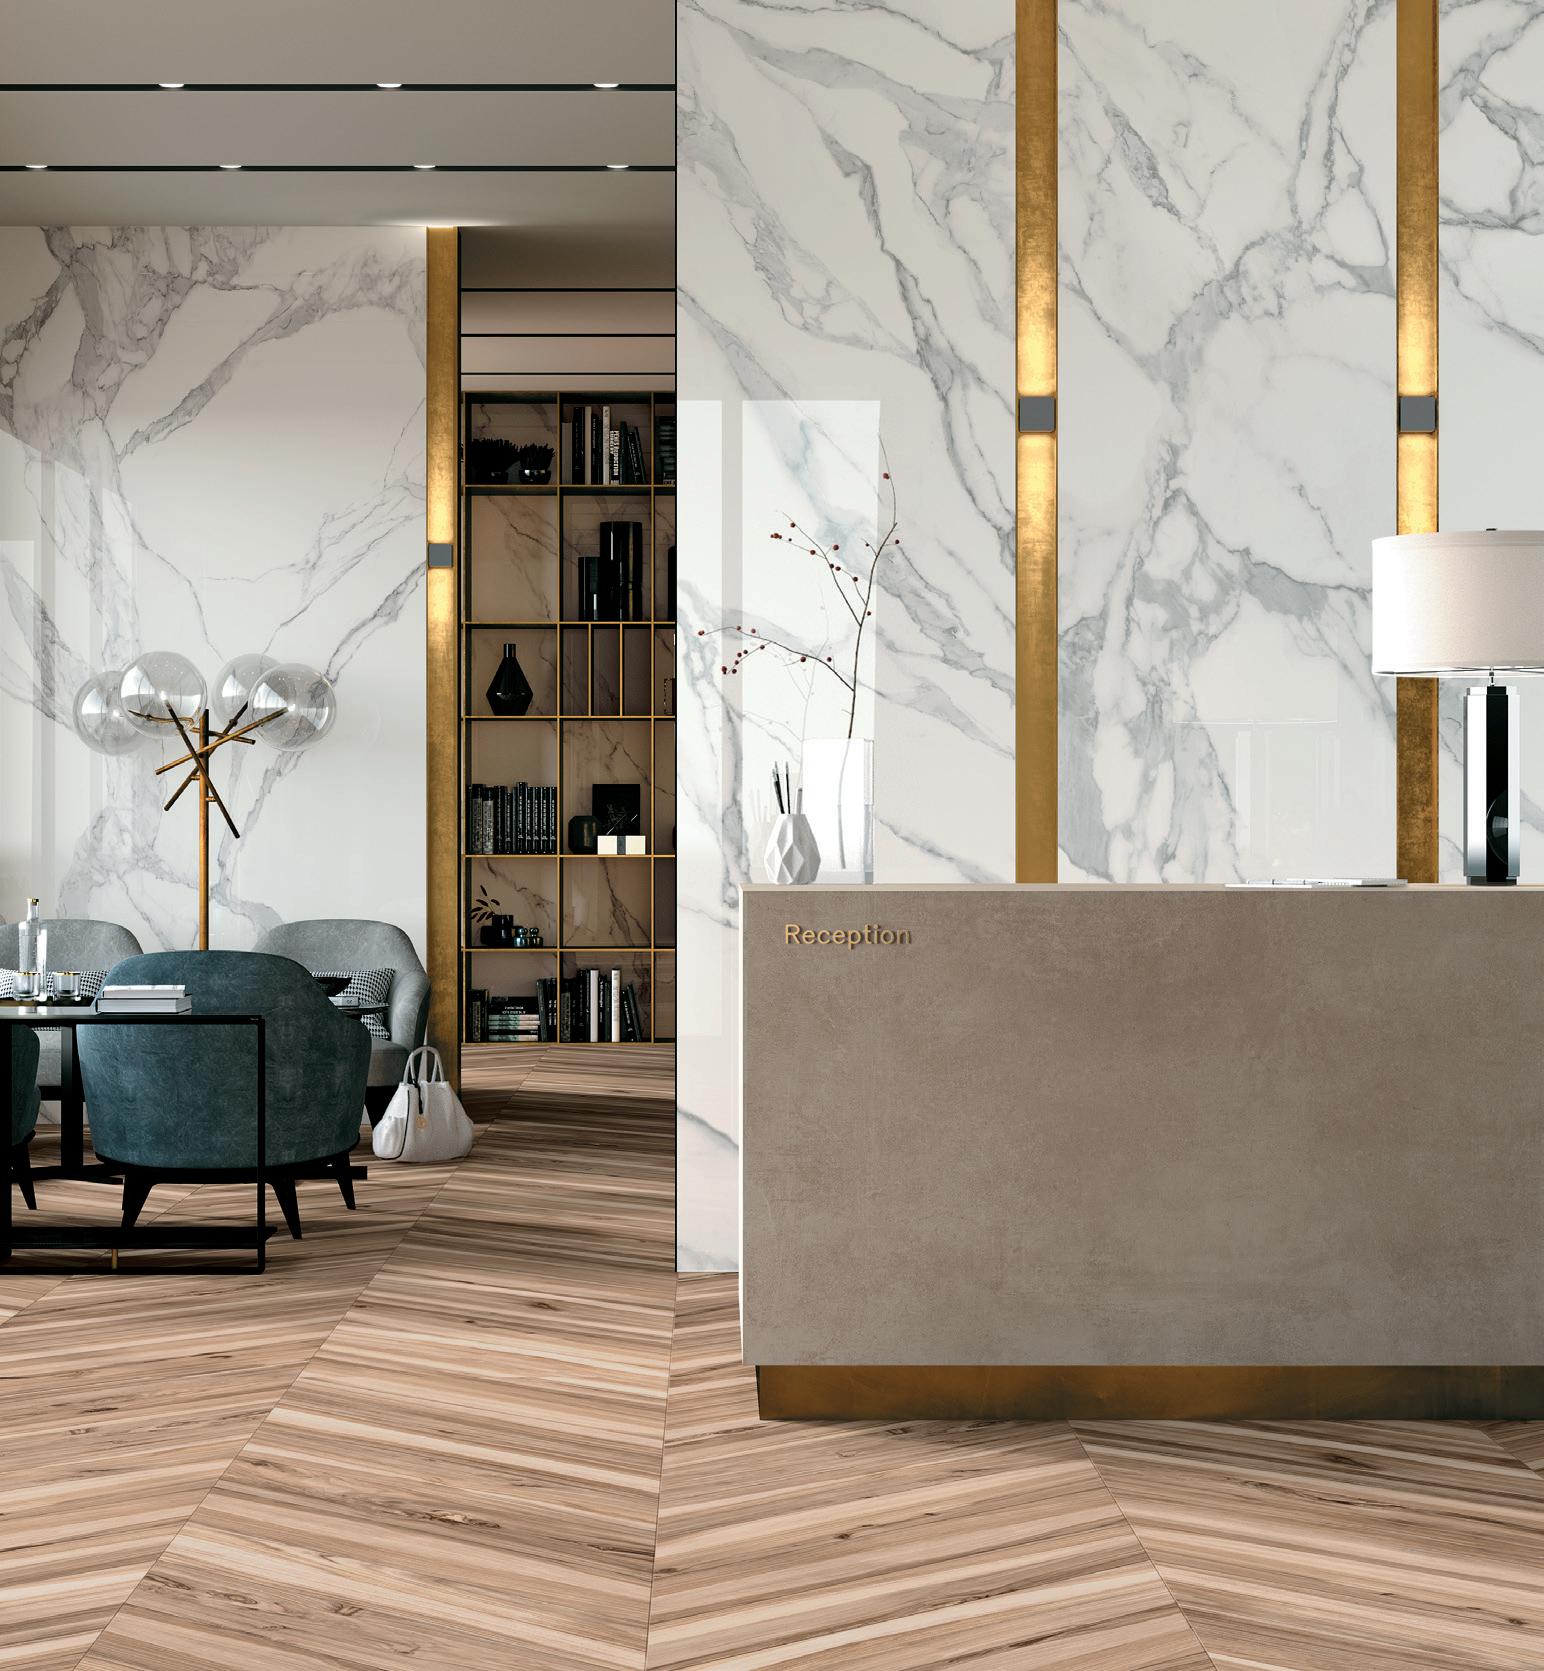
This manual aims to indicate the correct techniques preparation, processing and laying of large format tiles. The latter in fact vary both in thickness, 3.5 and 12mm and in size such as 120x240cm, 300x100cm, 160cmx320cm etc. Because of the particular dimensions of the tiles it is necessary to take special measures for the correct installation, in recent years Sigma is committed to oering a range of equipment specifiations to facilitate this.
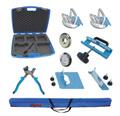
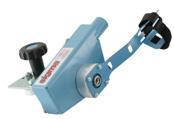
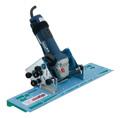
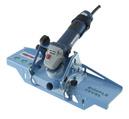
Substrate Control
Laying large format tile can be performed on the normal supports present in buildings such as, for example concrete, cementitious screeds, pre-existing radiators ceramic floors, tc.
It is of fundamental importance to know the composition of the substrate before proceeding to laying.
The suitability for laying on the supports must be verified adance;
As presecribed by the regulations in force, the supports must always be:
• intact and without cracks;
• seasoned and dimensionally stable;
• mechanically resistant;
• dry;
• clean and free of removable parts;
• perfectly flt;
Regardless of the type of substrate, at the moment of the laying: The plaster must have a tensile cohesive strength (tear) and an adhesion to the underlaying loadbearing layer less than 1 N / mm2 (10 kg / cm2).
The screeds must have the following mechanical strengths compression:
• for residential environments: > 15-20 N / mm2;
• for industrial environments: > 30-40 N / mm2;
According to the ISO 7976-1:1989 method, the truth of the planarity can be carried out with a stagger of at least 2 mt in length, resting it on the support in all directions, the recommended tolerance is approximately +/-3mm.
In case the screed is not within tolerance indicated it will be necessary to regularize it with appropriate leveling products.
Stagger
Substrate
Stagger 3mm max > 3mm
Substrate
Handling of Large Format
For the handling of large format tiles it is necessary to have at least two operators to use the specific ools.
Wear the personal protective equipment:
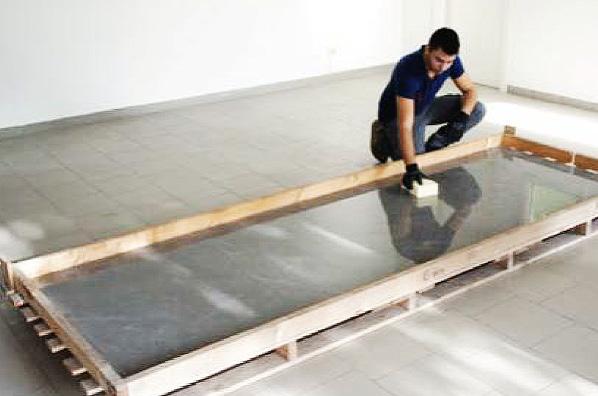
1. Before lifting the tile, it needs to be clean.
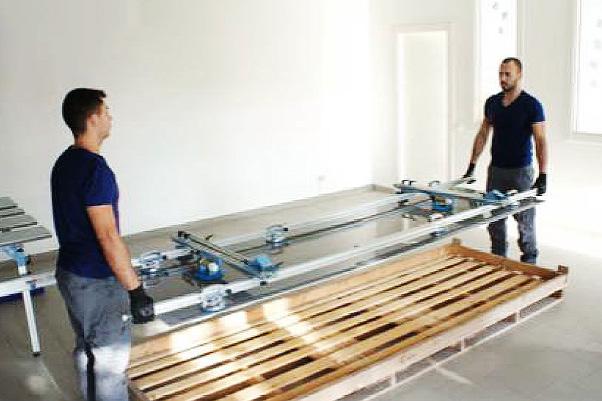
both in the extraction phase from the packaging and during the processing and installation phases. This is because large format tiles can become deformed and break if raised or moved incorrectly.
The recommended equipment for handling is the “KERA-LIFT” (certified CE , modular aluminum frame that is fited with powerful suction caps making it possible to handle the slabs safely.
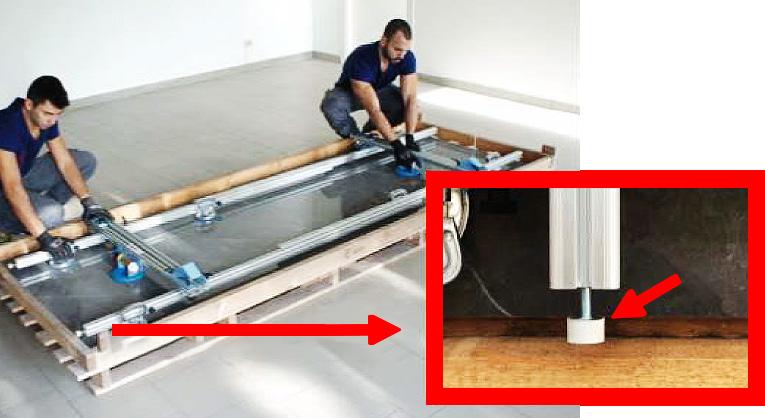
2. Adapt the frame to the tile and distribute the suction cups evenly, firm pessure downards whilst closing the cup. Place the rubber feet out of the tile.
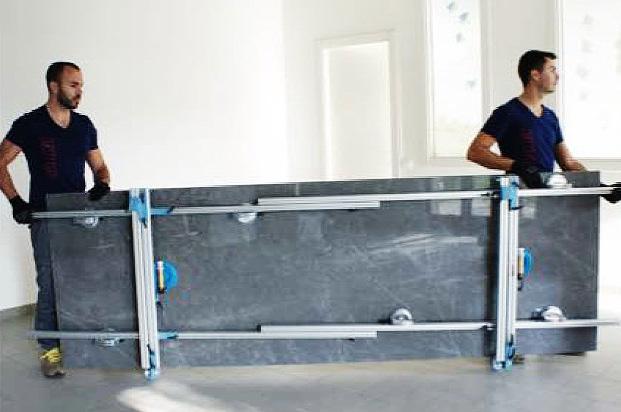
4. Transport the tile (with CARRIAGE KIT if available).
In case a cut or a processing has been made on the tile adapt the frame so follow the new geometry as much as possible.
3. Lift the tile.
Cutting and Drilling of Tiles
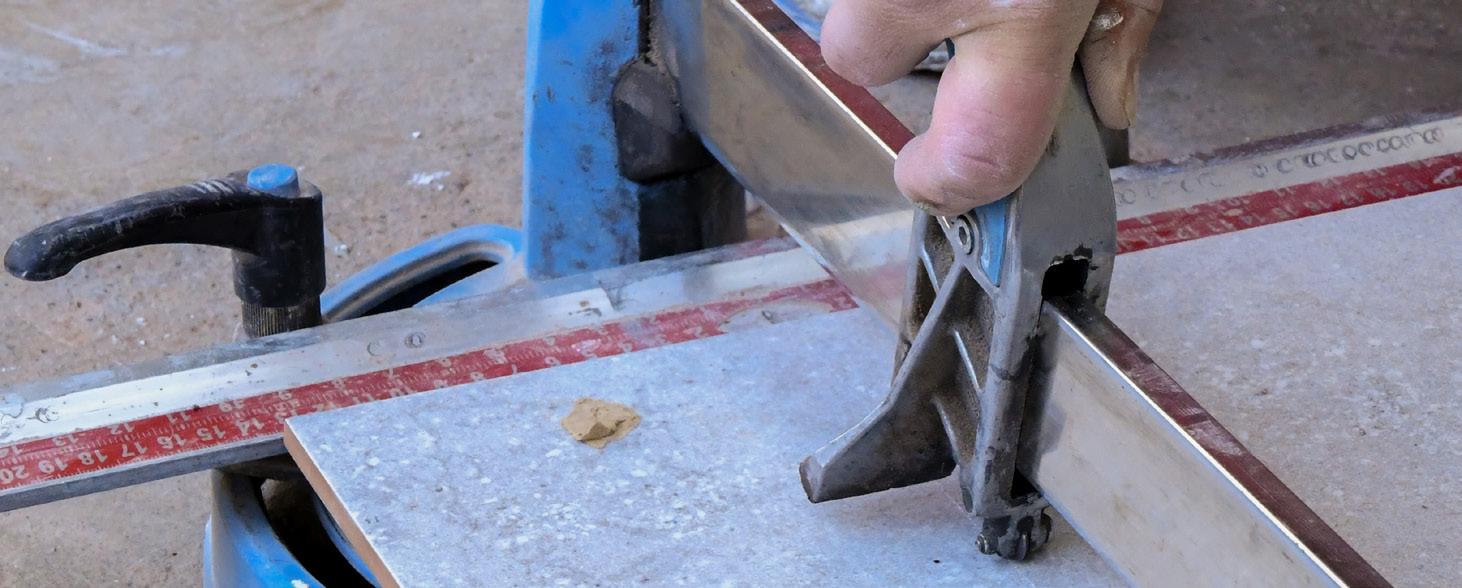
For the correct success of linear cuts it is necessary to support the tile with a solid worktop like the Sigma WORKBENCH.
For work safely, use the following personal protective equipment:
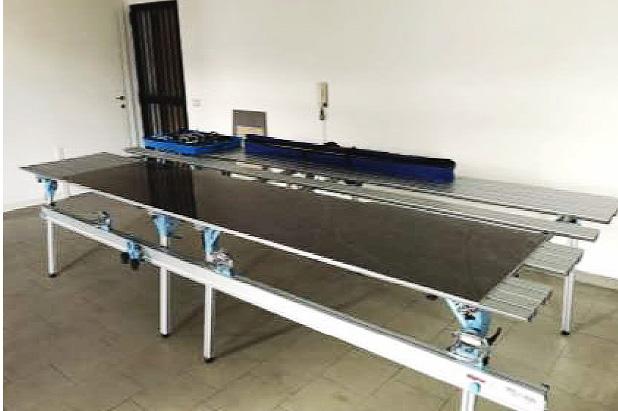
1. Place the tile on the workbench.
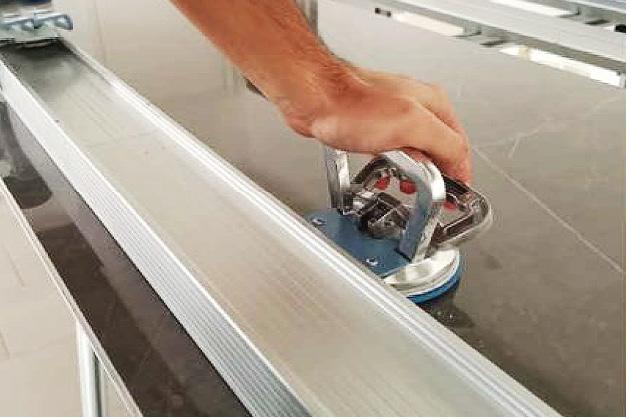
3. Fix the cutting rail on the tile clamping the suctions cups.
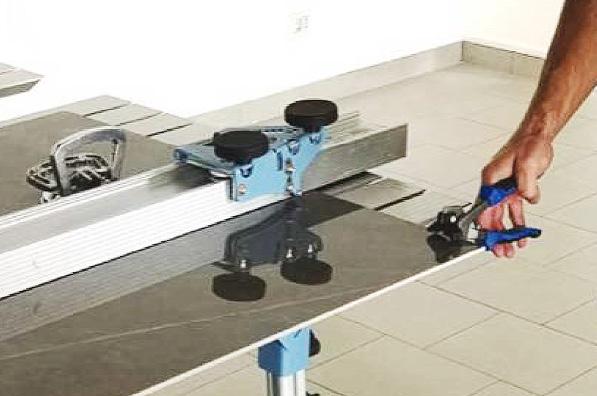
5. For snapping the tile you simply move the scored line to the edge of the table, then snap the tile with the appropriate nipper.
CUTTING: SCORING/SNAPPING
For linear cuts: scoring / snapping use the KERA-CUT cutting rail.
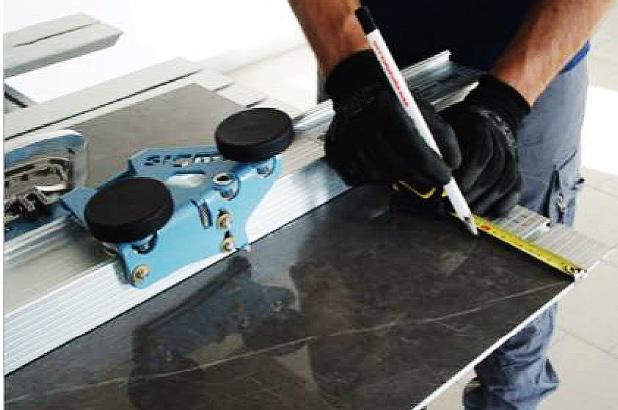
2. Mark with a pencil where the cut should come on both sides of the tile.
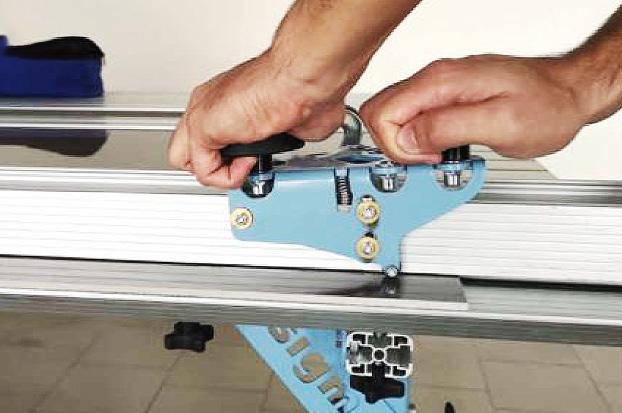
4. Score the end of the tile 3/4cm back from the inside to outside, then score it along its entire length while maintaining a constant pressure.
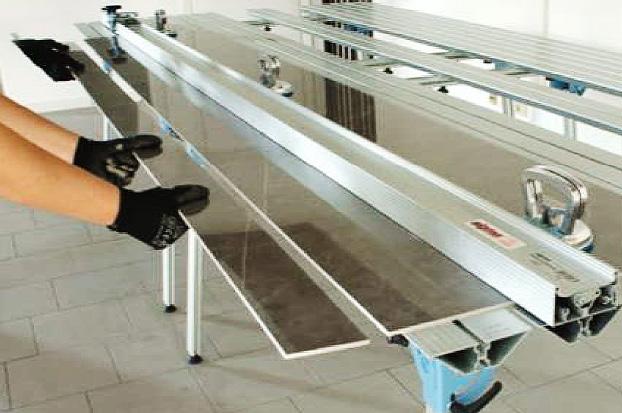
6. Complete the snap by pressing gently downards.
SAWED CUTTING:
For linear saw cuts it is sufficit to use the cutting system
KERA-FLEX which sliding on the cutting guide
KERA-CUT allows cutting (even partial) of the tile up to a maximum thickness of 30mm
KERA-FLEX is also suitable for creating large pockets or opening in the tile.
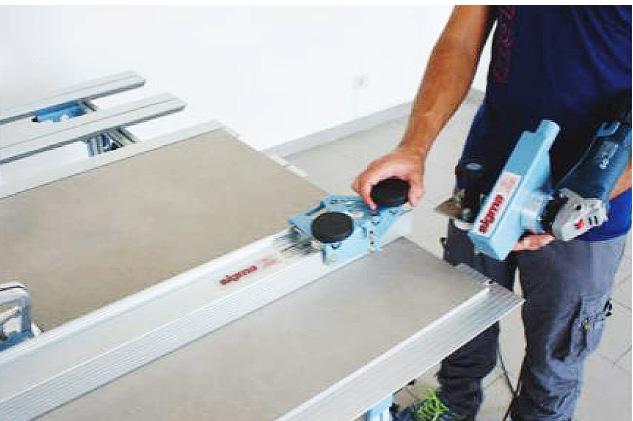
1. Place the KERA-CUT rail on the tile, remove the scoring carriage and replace it with the KERA-FLEX.
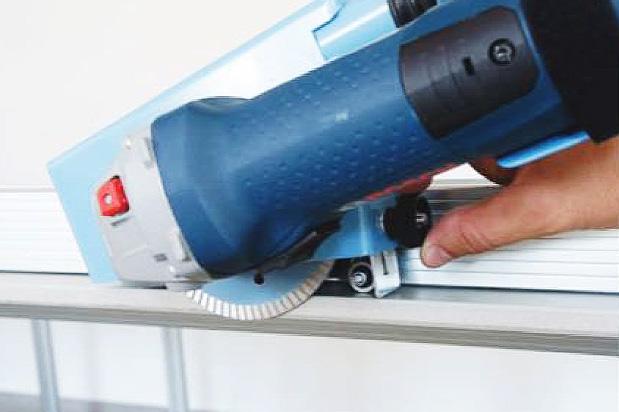
3. Adjust the cutting depth stop.
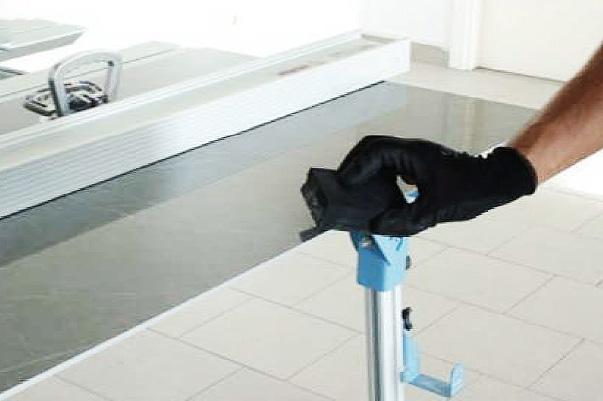
5. At the end of the process it is possible to clean the cut edge with a finishing diamond pad
For tile thickness up to 6mm it is recommended to use a continuous row disc, over 6mm is recommended a turbo disk.
Use personal protective equipment:
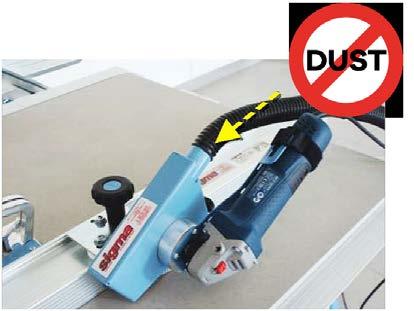
2. Insert the vacuum cleaner pipe for the total dust extraction.
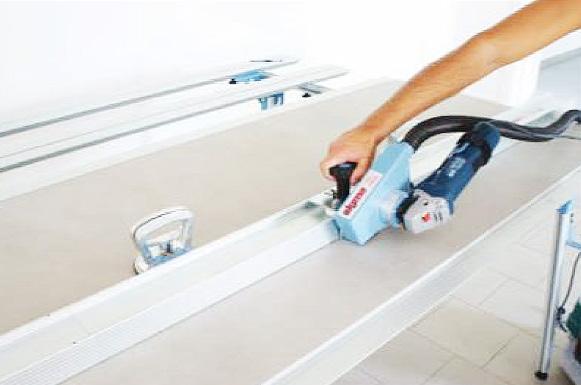
4. Proceed with cutting the tile.
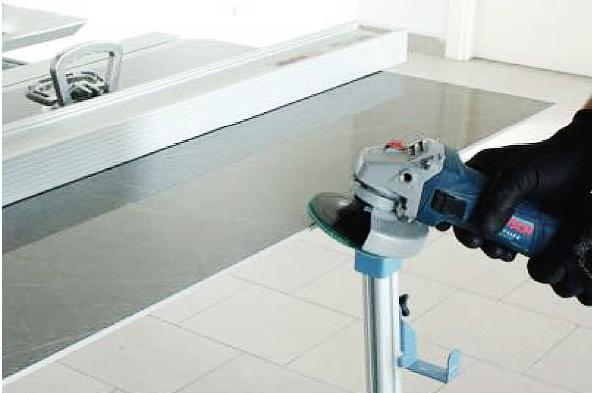
6. At the end of the process it is possible to clean the cut edge with a finishing diamond grinding wheel.
DRILLING:
For the execution of rectangular holes or pockets it is important to make four holes (ø minimum 8mm) in each corner to avoid excessive tension to use the Sigma drill bit.
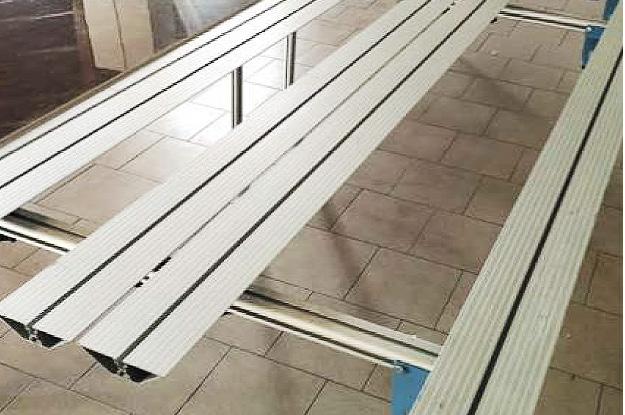
1. Adapt the workbench by moving the planks and create an empty space for drilling holes.
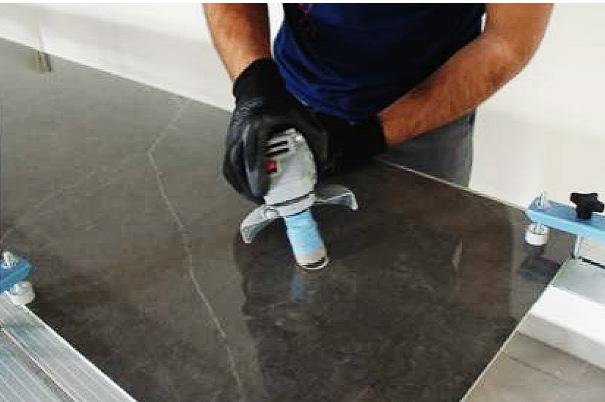
3. Start the hole by tilting the drill bit.
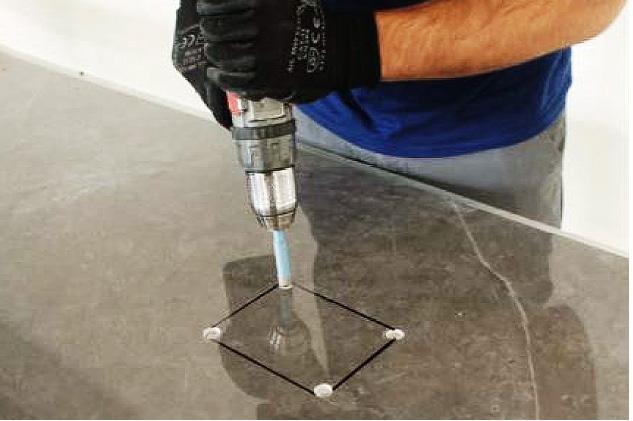
5. For the execution of rectangular holes or pockets is important to make four holes (ø minimum 8mm) in each corner to avoid excessive tension.
Use personal protective equipment:
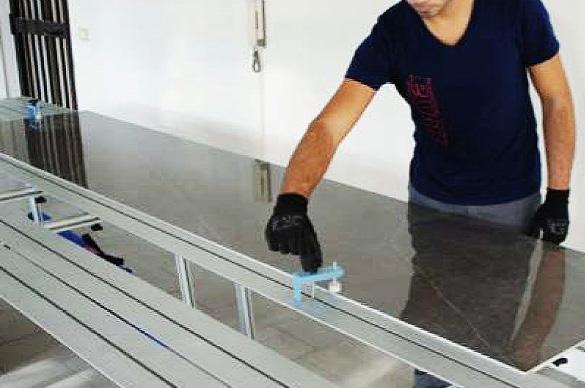
2. Fix the tile with the clamps by positioning the area to be worked in the empty space of the workbench.
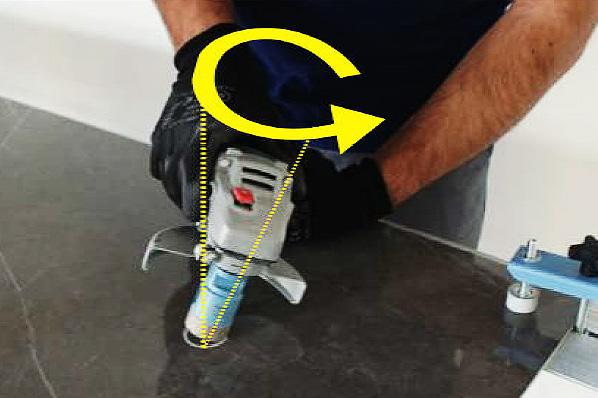
4. Continue drilling with oscillating movement without pushing excessively, cooling the drill bit with water if necessary.
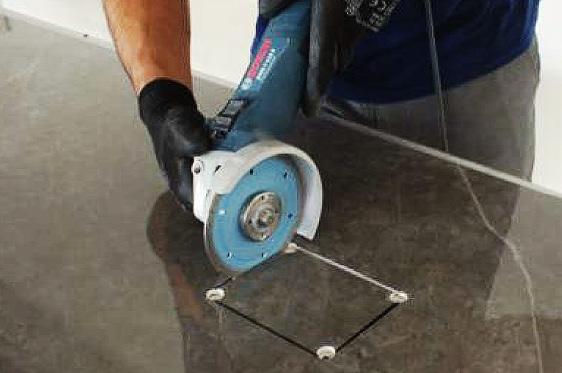
6. Then use a continous crown disc for cutting the sides.
TYPES OF CUTTING:
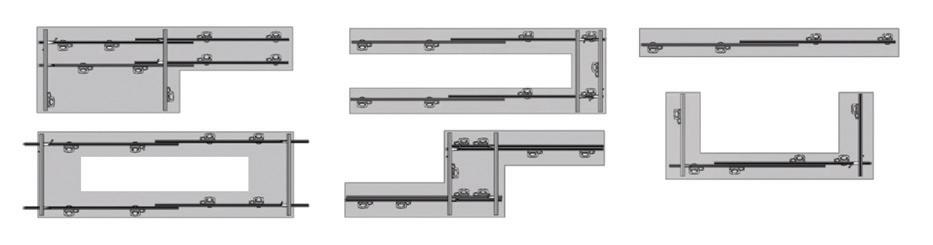
During the processing of the tiles we will be in front of various processes, including linear cuts, “L” cuts, rectangular holes etc.
The cuts can be done thanks:
- Sawn cut (obtained through KERA-FLEX or manually)
- score/snap cut (obtained through KERACUT)
For every processing there can be many solutions, it is up to the operator to choose which operator, here are some examples.
In case of realizing an “L” shape of the tile is to be made, proceed as follows:
Option 1 1o Hole 2o Sawn cut -
Score / snap cut _________
Option 2
In case of realizing an “U” shape of the tile is to be made, proceed as follows:
In case of realizing an rectangular pocket on the tiles is to be made, proceed as follows:
Option 2
2o Electric cut - - - -
Score / snap cut _________
Edge Profiling f Tiles
For aesthetic or functional reasons, you can achieve finishes such as mier, bevels or half bullnose. These are easily achieve with the Sigma machines JOLLY-EDGE or SIMPLEBEVEL that slides along on the edge of the tile and guarantee the uniformity of the
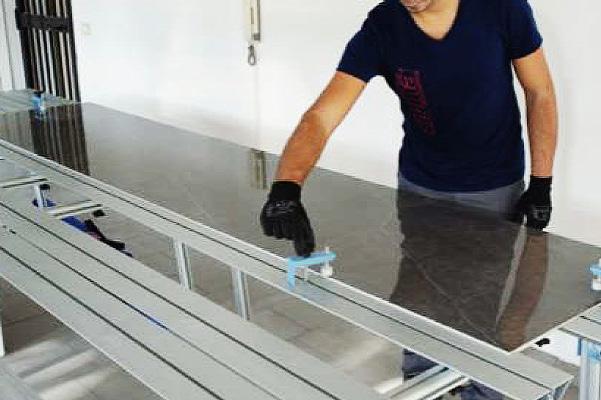
1. For the correct execution of the edge profiling, place the tile on the Sigma WORKBENCH and fix it with the special clamps making it potude 1/2cm from the edge of the bench.
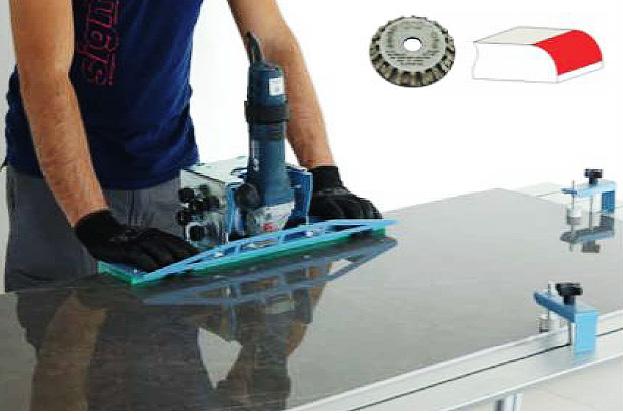
3. For the half bullnosing, move the machine JOLLY-EDGE (in “bullnose” configuation with the shape grinding wheel) from left to right, keeping it well pressed on the edge of the tile.
cut/bevel along its length (even if this last is slightly curved), by to the vacuum cleaner pipe they do not generate dust.
Use the individual protective devices:
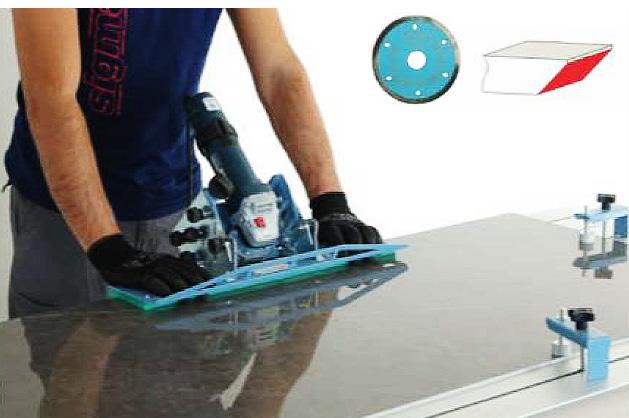
2. For the mitering, move the machine JOLLY-EDGE (in cutting configuation) from right to the left, keeping it well pressed on the edge of the tile. It can work thicknesses from 5 to 20mm. Thickness 5/7mm with continuous crown disk. 8/20mm thickness with turbo disc.
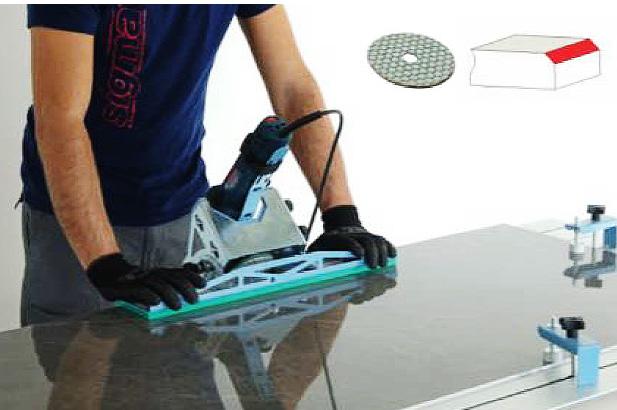
4. To achieve bevels/miters on 3.5mm thicknesses, move the SIMPLE-BEVEL machine sideways, keeping it well pressed on the edge of the tile. It is possible to carry out several steps on depth and/or dierent angles.
Laying of Large Format Tiles
In addition to the substrate control as described in chapter 1, the choice of the adhesive depends on the type of support, the tile size and place of installation.
The UNI EN 12004 standard shows how for the tiles with side equal to or bigger than 60cm is necessary to use an adhesive of class C2, with class of deformability S1 in case the tile has a side equal to or less than 120cm, and with class S2 if bigger than 120cm.
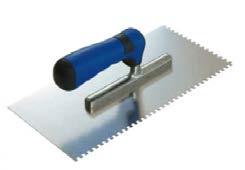
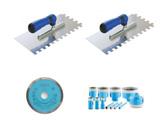
For thinset coverage on the back of the tile is recommended the use of 4x4mm notch trowel.
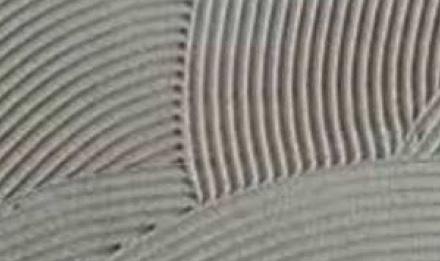
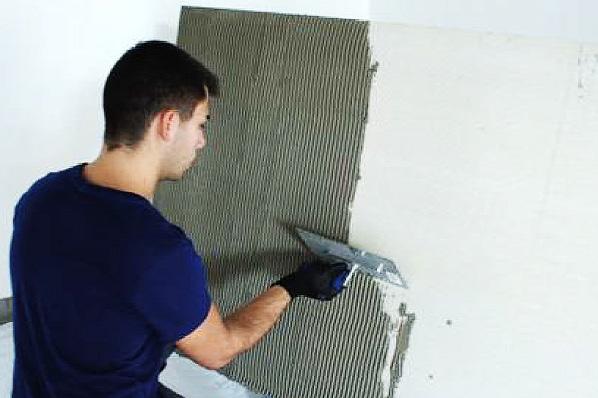
The application of the adhesive on the tile must take place with direction parallel to its short side, to facilitate the air outflw.
Depending on the temperature, it is possible to use Classified adhesies “E” (extended open time) in case of hot climates or ventilated environments, or “F” class adhesives (quick drying) in cold environments. During the wall laying it is recommended to use stickers with limited vertical slip “T” class.
For tiles with side equal to or bigger than 60cm it is necessary to use the double thinnest coverage technique for guarantee no air between support and tile.
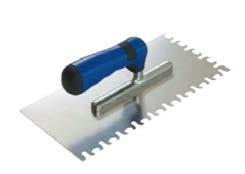
For thinset coverage on the back of the support is recommended the use of “NOAIR” trowel that is specifially designed.
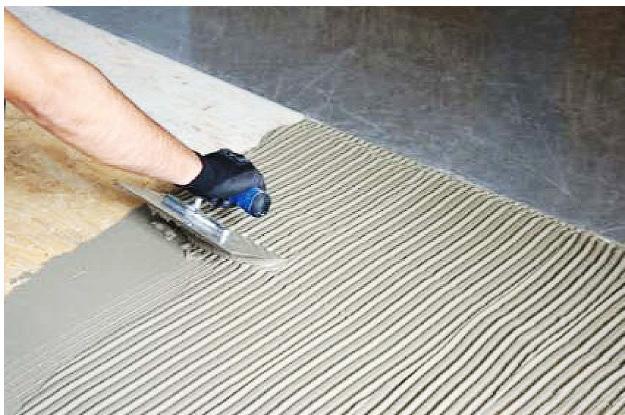
The application of the adhesive on the substrate must have the same direction of the adhesive on the tile.
To faciliate the installation of thet ile it is necessary to use the KERA-LIFT handling frame and the following personal protective equipment:
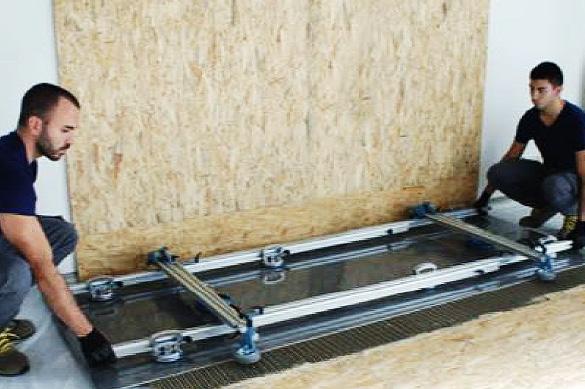
1. Tiling the floor with the handlin frame KERA-LIFT.
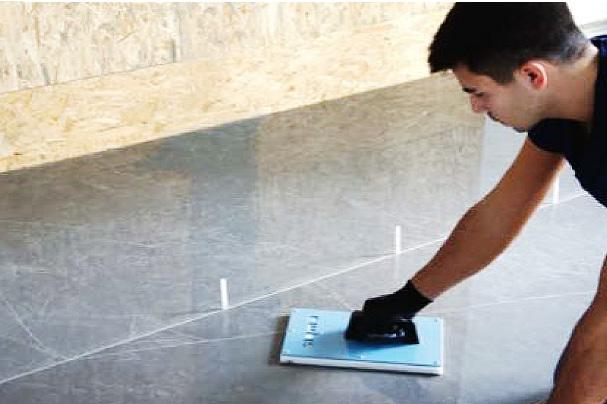
3. Distribute the levelers and manually hammer the tile using the special “BEAT TILE TROWEL” to ensure complete discharge of air, starting from the center to the sides in the same direction of the thinset.
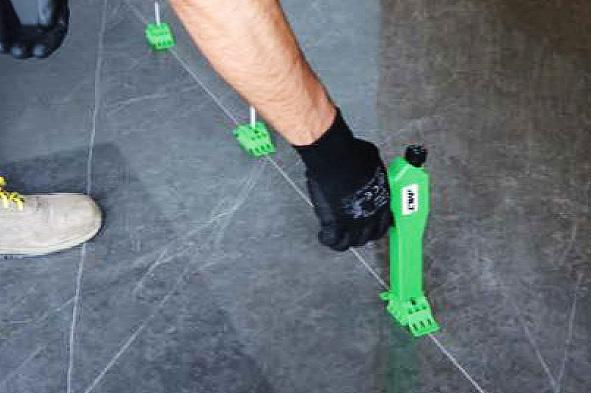
5. Tighten the levellers and remove them only after the adhesive has completely cured or set.
The width of the joints between the slabs is in function of the support, the dimensions of the tile, the laying destination, etc., but in any case it must not be less than 2mm. It is necessary to use leveling system, positioning about 1 every 50cm.
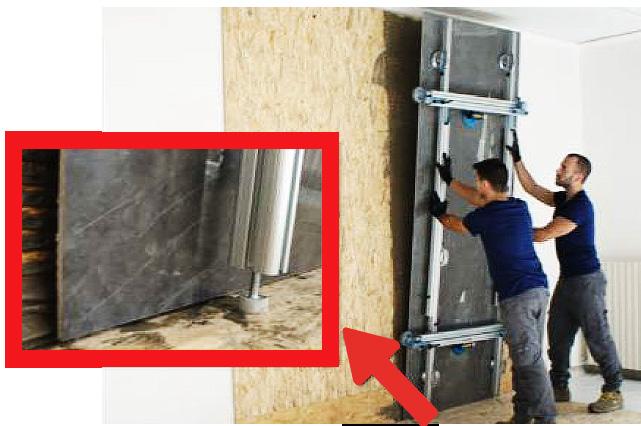
2. During the fixing on the all the support feet of the KERA-LIFT will avoid damage to the tile.
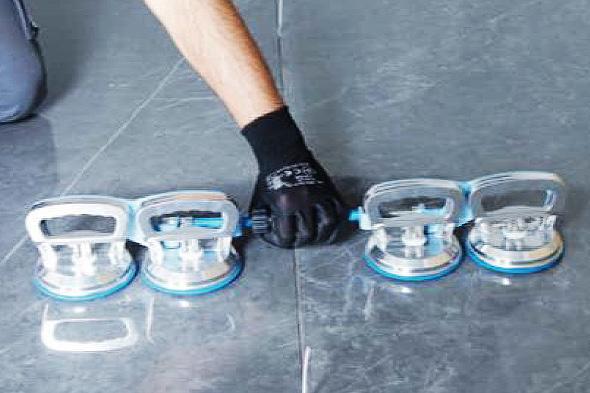
4. Use the “MOVE” to adjust any joint dierence between the tiles.
Kera-Lift
“KERA-LIFT” frame with suction cups for lifting, handling and laying of large format tiles.
Freely adjustable without the use of tools, it is composed from sliding guides to each other to adapt to any shape of the tile.
The usction cups can slide along the profil to adapt to any need.
All models are CE certified
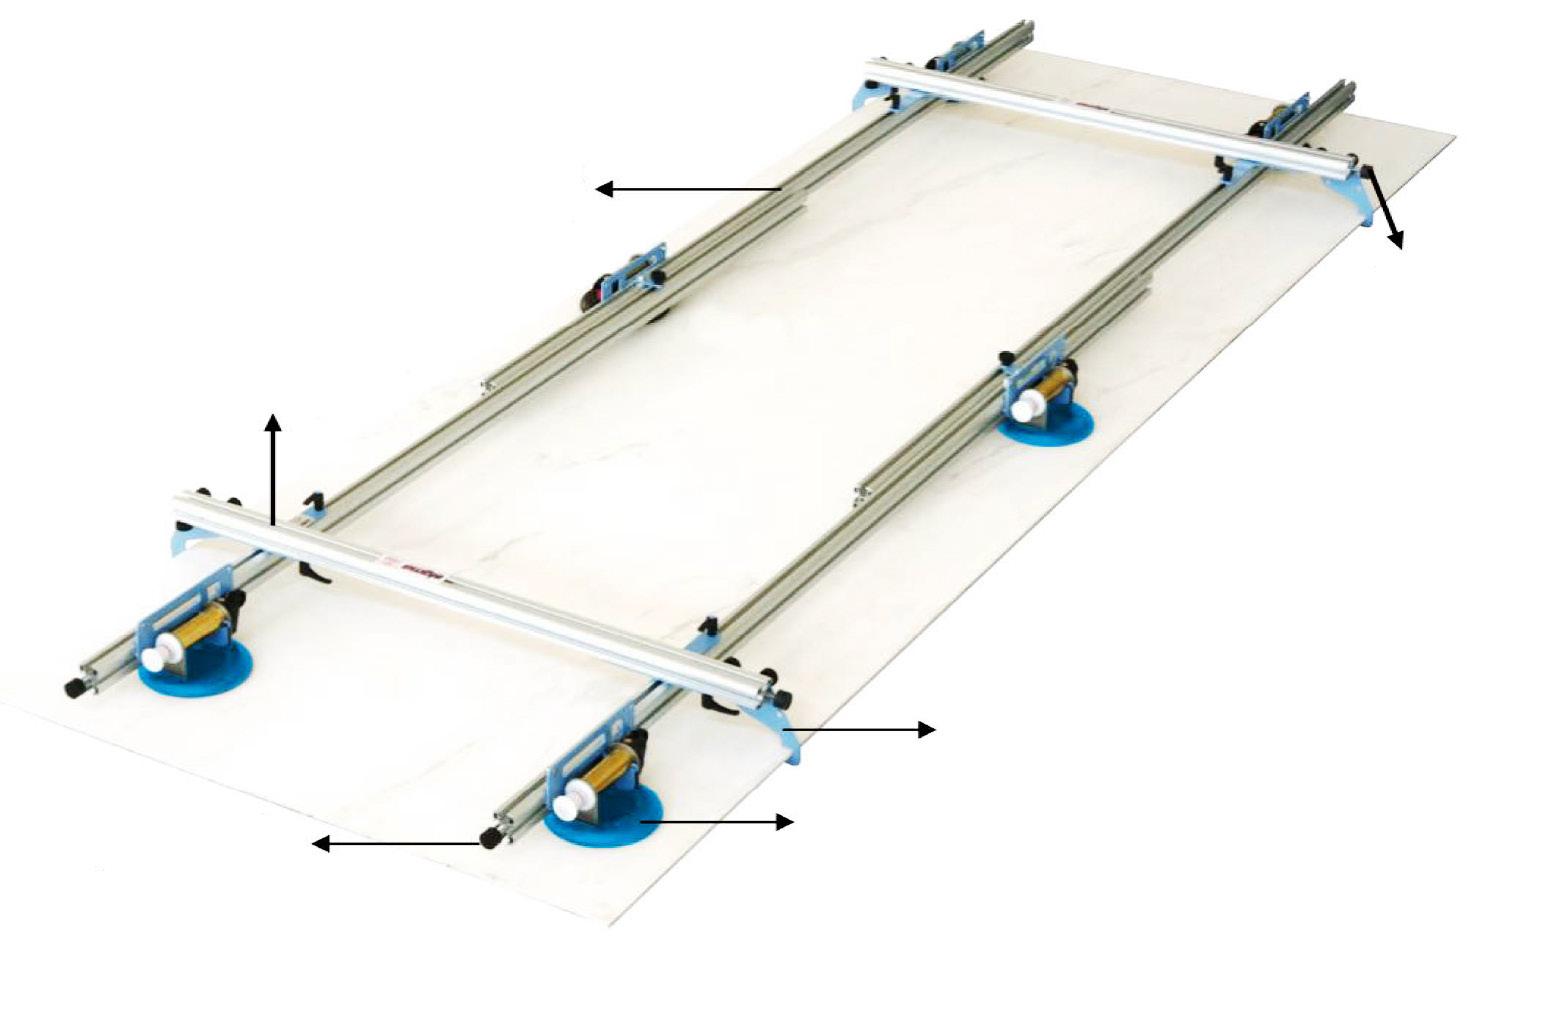
Connection crosspieces
Sliding guides
Safety fall brackets
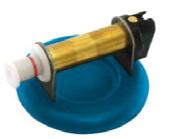
Pump suction cups
Feet support
Feet support
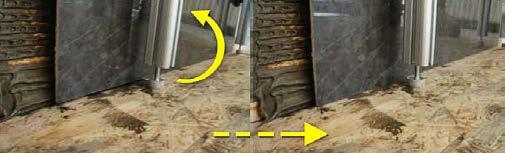
The feet support of the KERA-LIFT avoid damage to the tile.
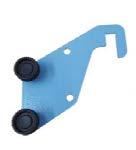
The safety fall brackets can be positioned both on the long side and the short side of the KERA-LIFT, and they are indispensable for working safely in all situations.
The pump suction cups, stain free and tilting with flw indicator, also for rough materials. Maximum load 90kg (45kg according to CE standard)

Carriage Kit 6
The KERA-LIFT can be equipped with accessories, completely removable, which extend the functionality.
The “CARRIAGE KIT” consists of two wheels, two tile supports to be used during the transport, and two openable pedestral for the thinest of the tile.
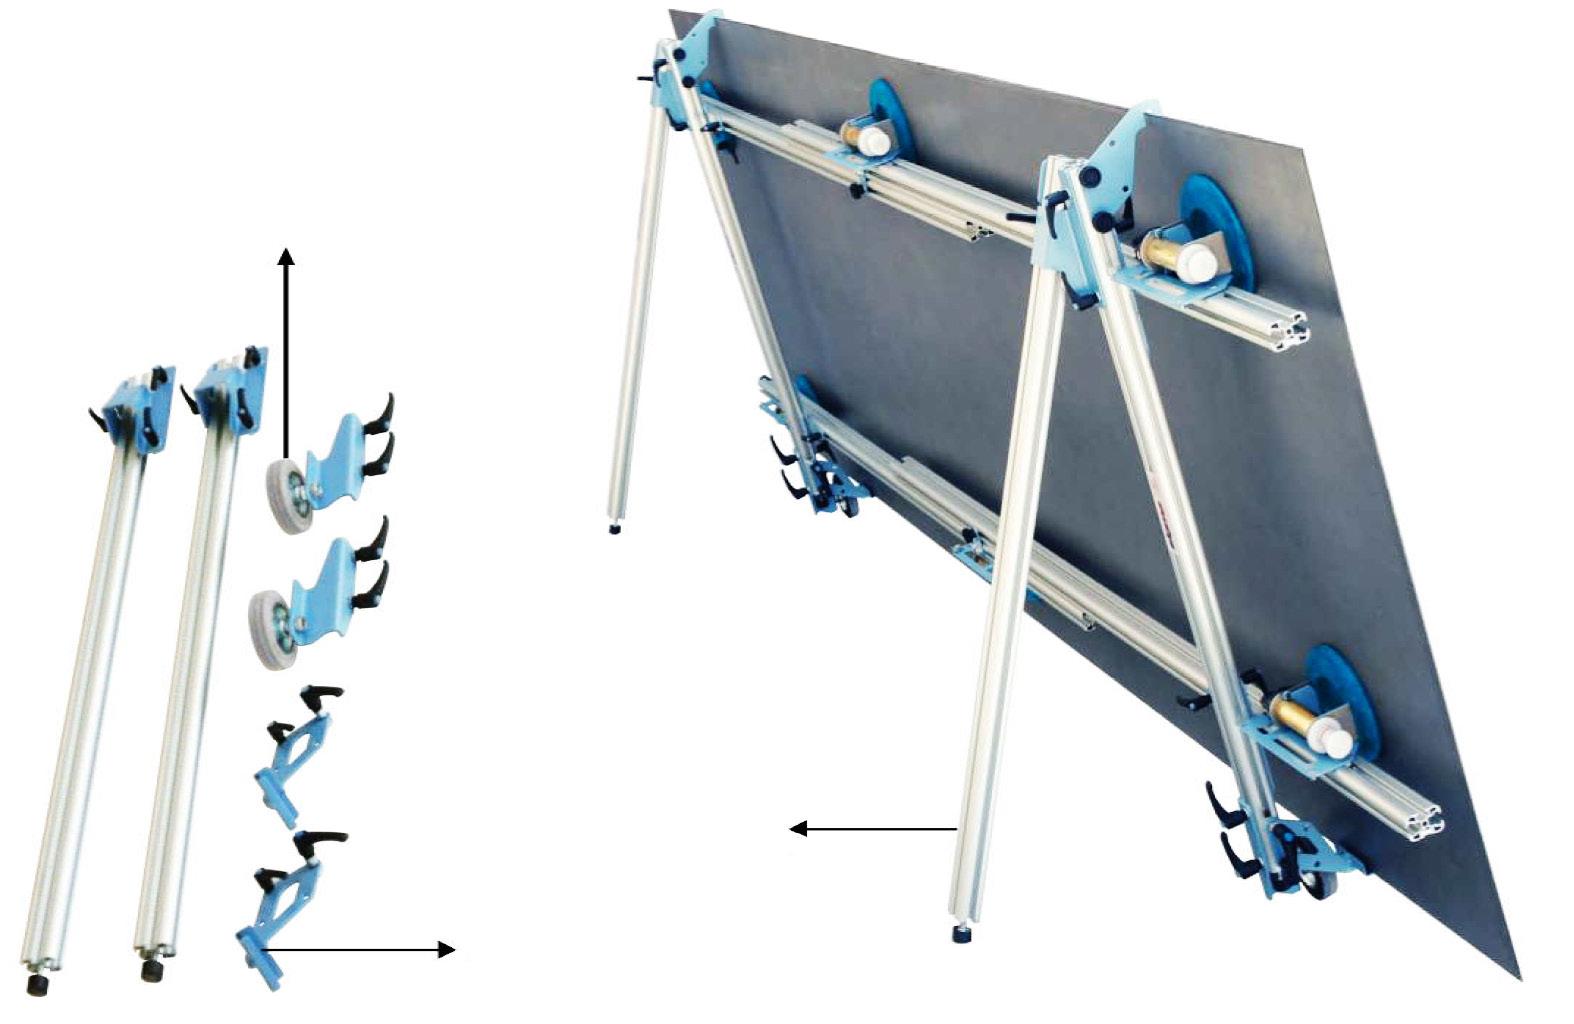
Stain free wheels
Openable pedestral
Tile supports

The CARRIAGE-KIT is fited before the lifting of the tile.
Transport with the CARRIAGE KIT
Applying the thinset with the CARRIAGE KIT
Workbench 6
Demountable and modular “WORKBENCH”, suitable as a support for working large format tiles and ceramic tiles.
Thanks to its aluminum structure, light and sturdy which guarantees excellent support of large format tiles.
The WORKBENCHES can be connected to each other to obtain a single worktop 360cm long.
Aluminum planks freely positionable
It is easy to fold in its legs for easy transport minimizing the space.
You can easily fit on the orkbench various equipment, such as the KERA-CUT cutting guide, table fixing kit SIMPLE-BEVEL and JOLLY-EDGE etc...
Accessories are available as clamps, hooks to support the KERA-CUT cutting guide, tile rise spacer
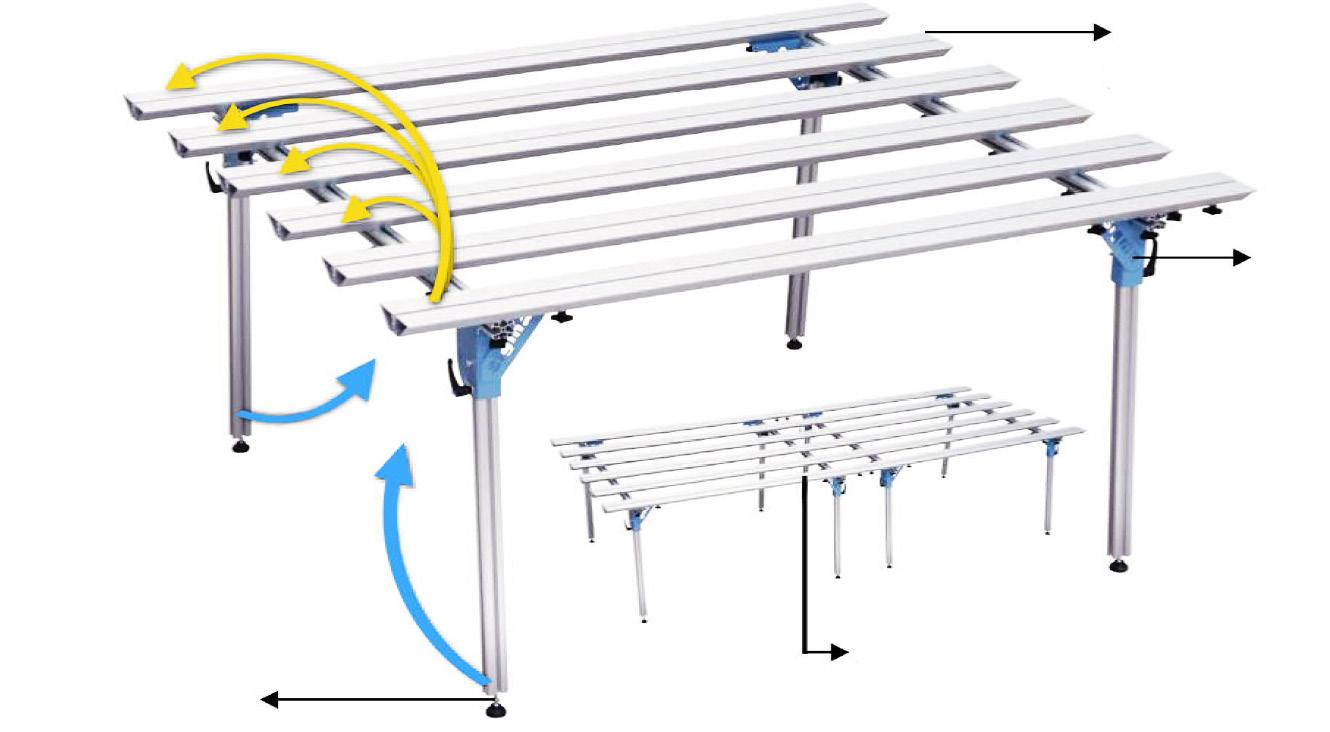
Automatic locking of the leg
Foldable legs
Adjustable feet
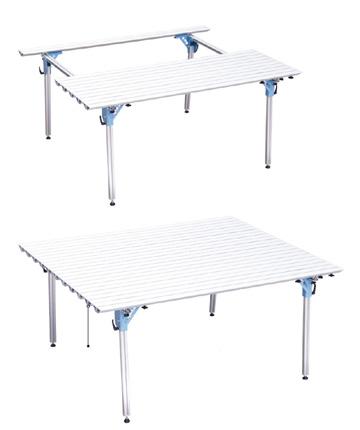
With its easily positionable plank it is possible to create empty areas, to carry out work that will pass through the tile (holes or pockets); Or add or move the planks to create a continuous worktop.
The WORKBENCHES can be connected without the use of tools
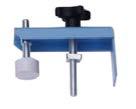
Clamps for fixing the tile on the workbench.
Tile rise spacers for make transversal cuts with diamond disc.
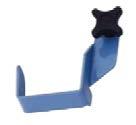
Hooks to support the KERA-CUT cutting guide.
Large planks 130mm
Kera-Cut 6
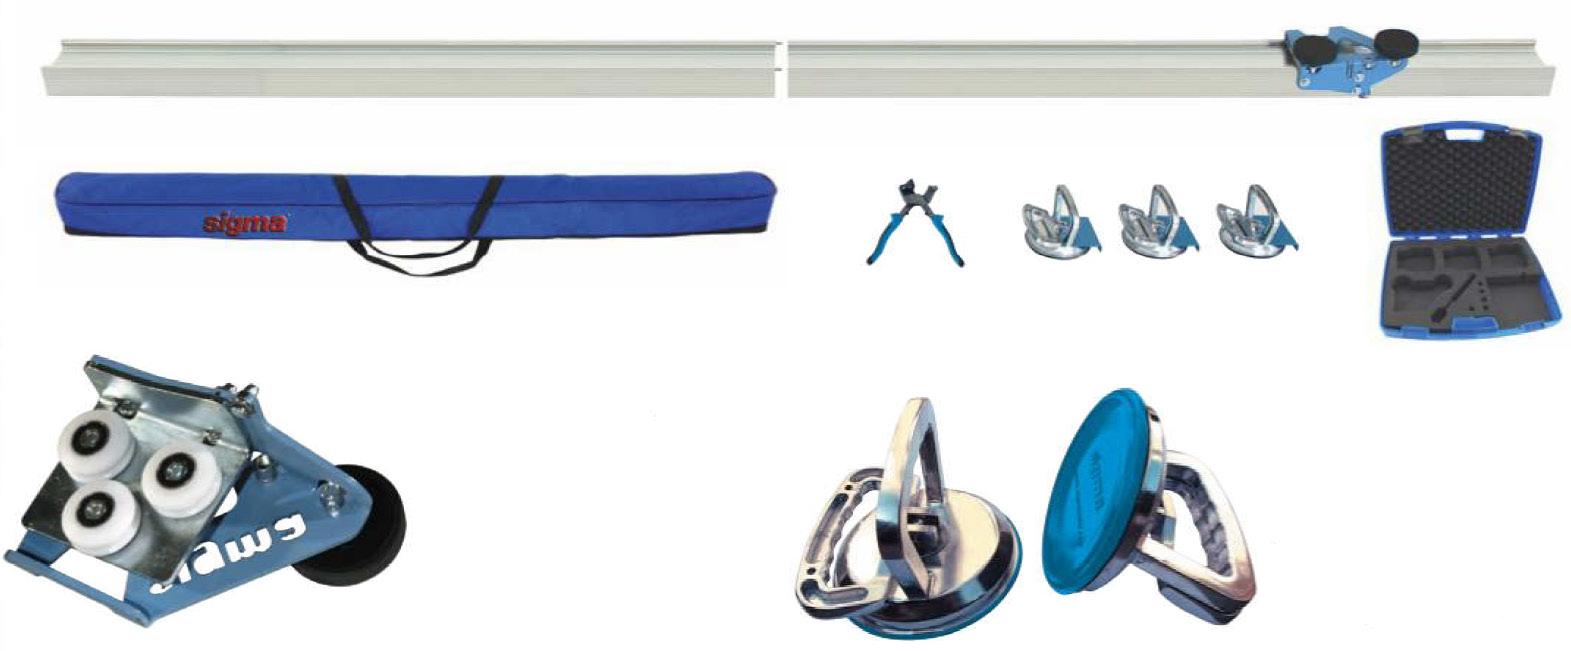
The KERA-CUT cutting equipment allows the cutting of large format tiles.
The divisible aluminum guide, fied on the tile by stain-free suction cups, allows at the carriage to slide with an scoring wheel; then the separation is carried out with the supplied nipper (max 7mm).
For transport, the guides and all accessories are contained in two suitcase supplied.
Sliding carriage with coated wheels, with double ball bearings.
The guides in the lower part are covered with non-slip and stain-free rubber.
Accessory sold separately
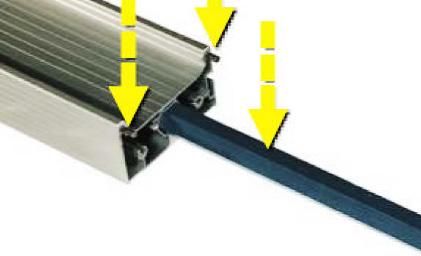
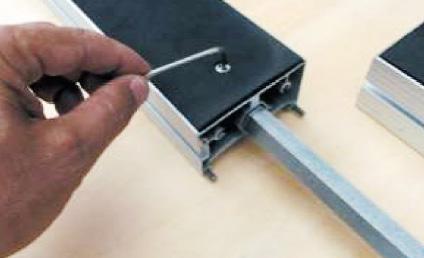
Connection of the guides wiht three high precision steel connection joints.
Fixing on the tile with anti-stain suction cups, freely positioned.
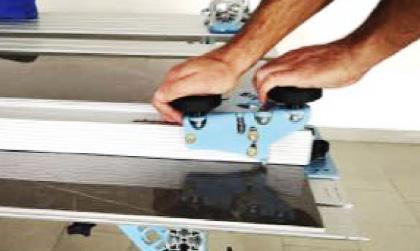
The push with two-handed lever allows a very deep incision.
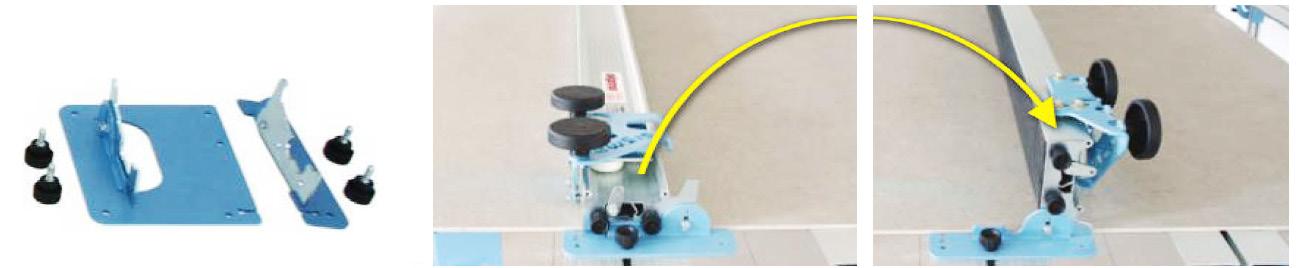
Fixing to the working table with swivel support.
Kera-Flex
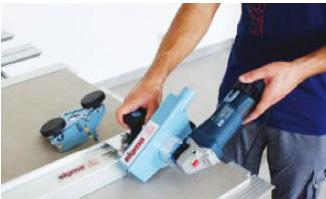
The KERA-FLEX mounted on the KERA-CUT guide allows sawn cut, with diamond blade of up to 30mm.
Universal vacuum cleaner attachment.
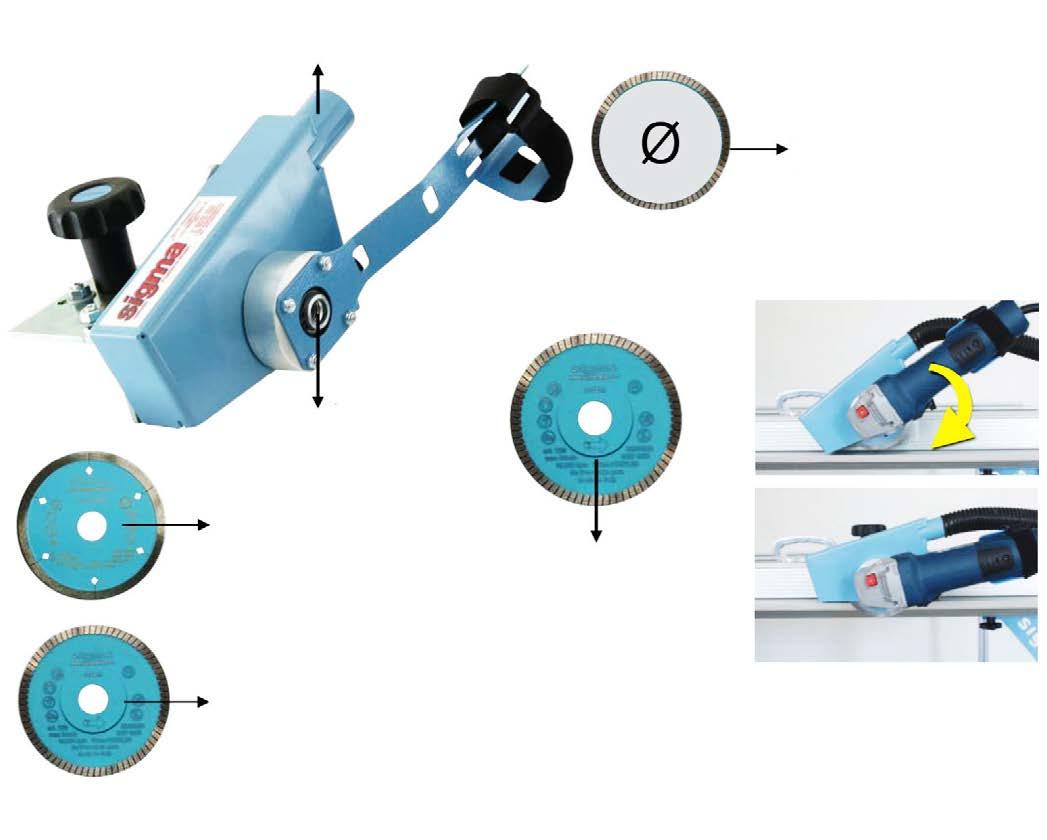
Universal attachment M14 or 5/8-11 UNC.
Continuous crown disc ø 115 for thicknesses from 3 to 6mm.
Turbo disk ø 115 for thicknesses from 7 to 25mm.
Maximum supported disc ø 125mm
Turbo disk ø 125 for thicknesses from 7 to 30mm. Cutting
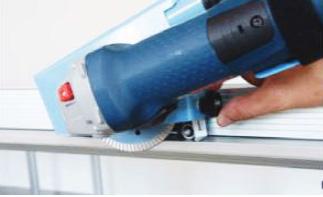
Insertion on the KERA-CUT guide. Easy adjustment of the depth stop.
Accessory sold separately
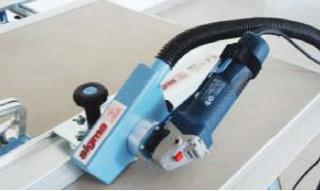
Universal vacuum cleaner attachment.
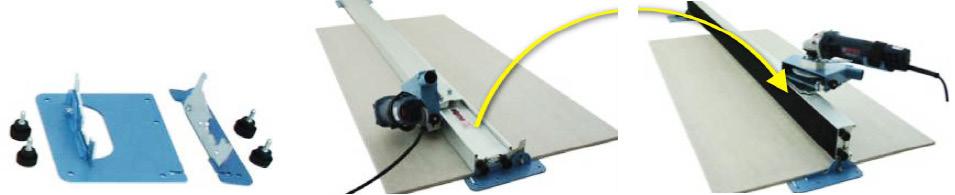
Fixing to the working table with swivel support.
Jolly-Edge 6
JOLLY-EDGE machine for cutting and processing of tiles/slabs, sliding on the edge of the tile (porcelain stoneware, marble, granite, etc.) guarantees the uniformity of the working along the entire length of the edge, copying exactly the natural curves of the tile.
It can work in a single pass tile with a thickness of 5 < 20mm and size from 30cm to infinit.
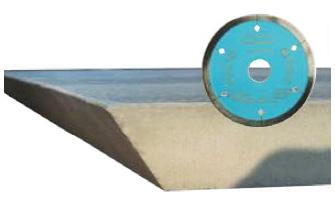
In the configuation with diamond disc, allows the execution of miter at any angle between 40O and 50O In the configuation with diamond grinding wheel, it allows the execution half bullnose with radius 6-8-10mm.
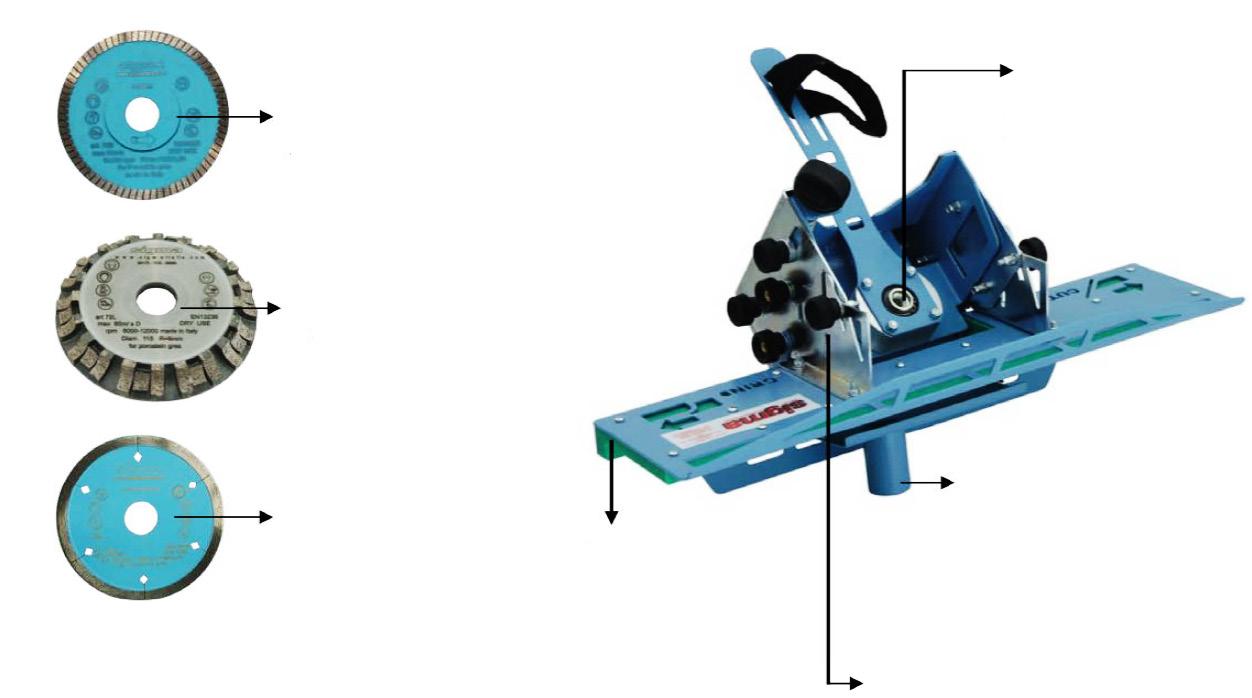
Turbo disk ø 115 for thicknesses from 10 to 25mm.
Universal attachment M14 or 5/8-11 UNC.
Diamond grinding wheel for half bullnose (radius 6/8/10).
Continuous crown disc ø 115 for thicknesses from 5 to 9mm.
Sliding surface milled for the maximum precision, in Anti-friction material.
Universal vacuum cleaner attachment.
Adjustment of inclination of profiling
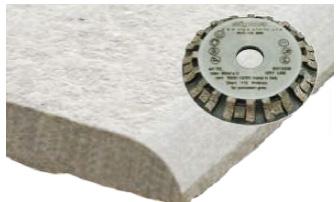

Example of processing.
Miter processing with blade. Half Bullnose processing with grinding wheel.
Simple-Bevel 6
SIMPLE-BEVEL, precision bevel machine of tiles/slabs (porcelain stoneware, granite, marble, glass).
Sliding on the edge of the tile, guarantees the uniformity of the bevel along its entire length, copying exactly the curves of the plate.
Chamfer from 0 <12mm (0 <6mm on porcelain tiles) and size from 30mm to infinit.
Adjustable to any angle from 22O to 90O
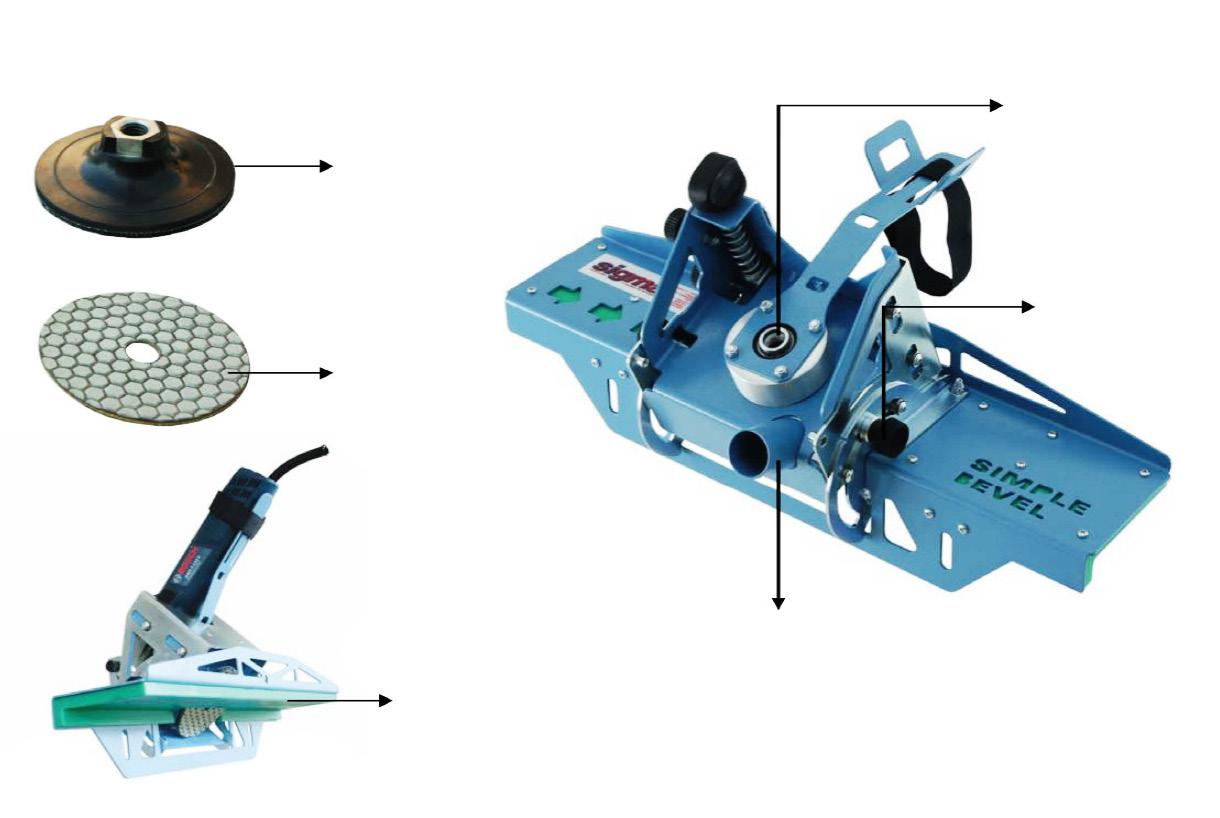
Universal attachment M14 or 5/8-11 UNC.
Pad with Velcro.
Adjustment inclination of beveling. Diamond grinding wheel.
Sliding surface milled for the maximum precision, in Anti-friction material.
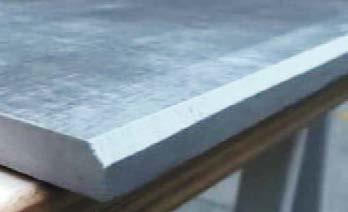
tile.
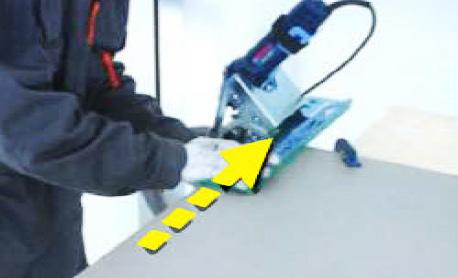
Universal vacuum clear attachment.
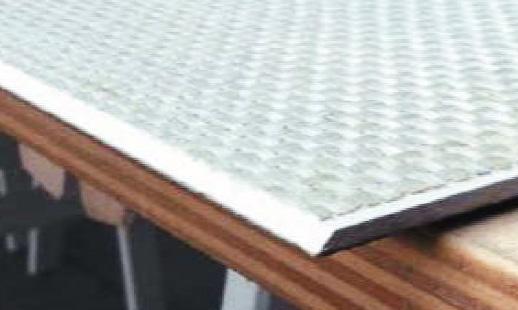
on a 3mm tile.
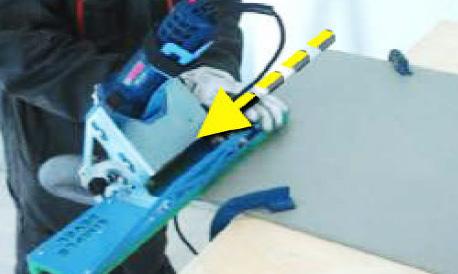
Processing on tile 1. beginning 2. end
Bevel finishing and polishing of tile edge, cut with blade. Angle 220 ÷ 900 Back miter width 1 ÷ 4mm, on gres porcelain material. Using grinding cup art. 72E-72F-72G-72i.
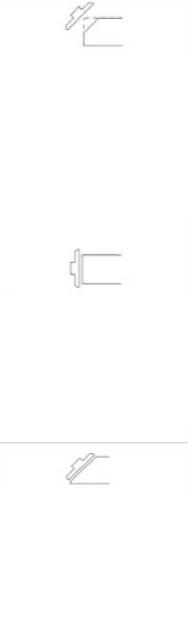
Finishing and polishing of lateral edge on tiles, cut with blade. 2 to 30mm thick tiles. Machining at 900 Using grinding cup art. 72E-72F-72G-72i.
Finishing and polishing of tiles edge, previously chamfered with blade. Angle 220 ÷ 900. Chamfer width: 1÷18mm on gres porcelain material. Using grinding cup art. 72E-72F-72G-72i.
Beveled
JOLLY
Accessories 6
Recommended accessories for processing on large tiles:
FAST DRILL BIT
For thinset coverage on the back of the tile is recommended the use of 4x4mm notch trowel.
Turbo blade disc d115 for thicknesses from 10 to 25mm.
Pad with velcro.
120 grit diamond pad for hand finishing
Diamond drill bit for dry or wet drilling on Gres Porcelain tile, Marble, Granite, etc... Hexagonal attach 9mm / threaded M14.
For thinset coverage on the back of the support is recommended the use of “NO-AIR” trowel that is specifially designed.
MOVE suction cups, indispensable for square approach of large format tiles, thanks to the four stain free cups a strong seal (even on rough materials).
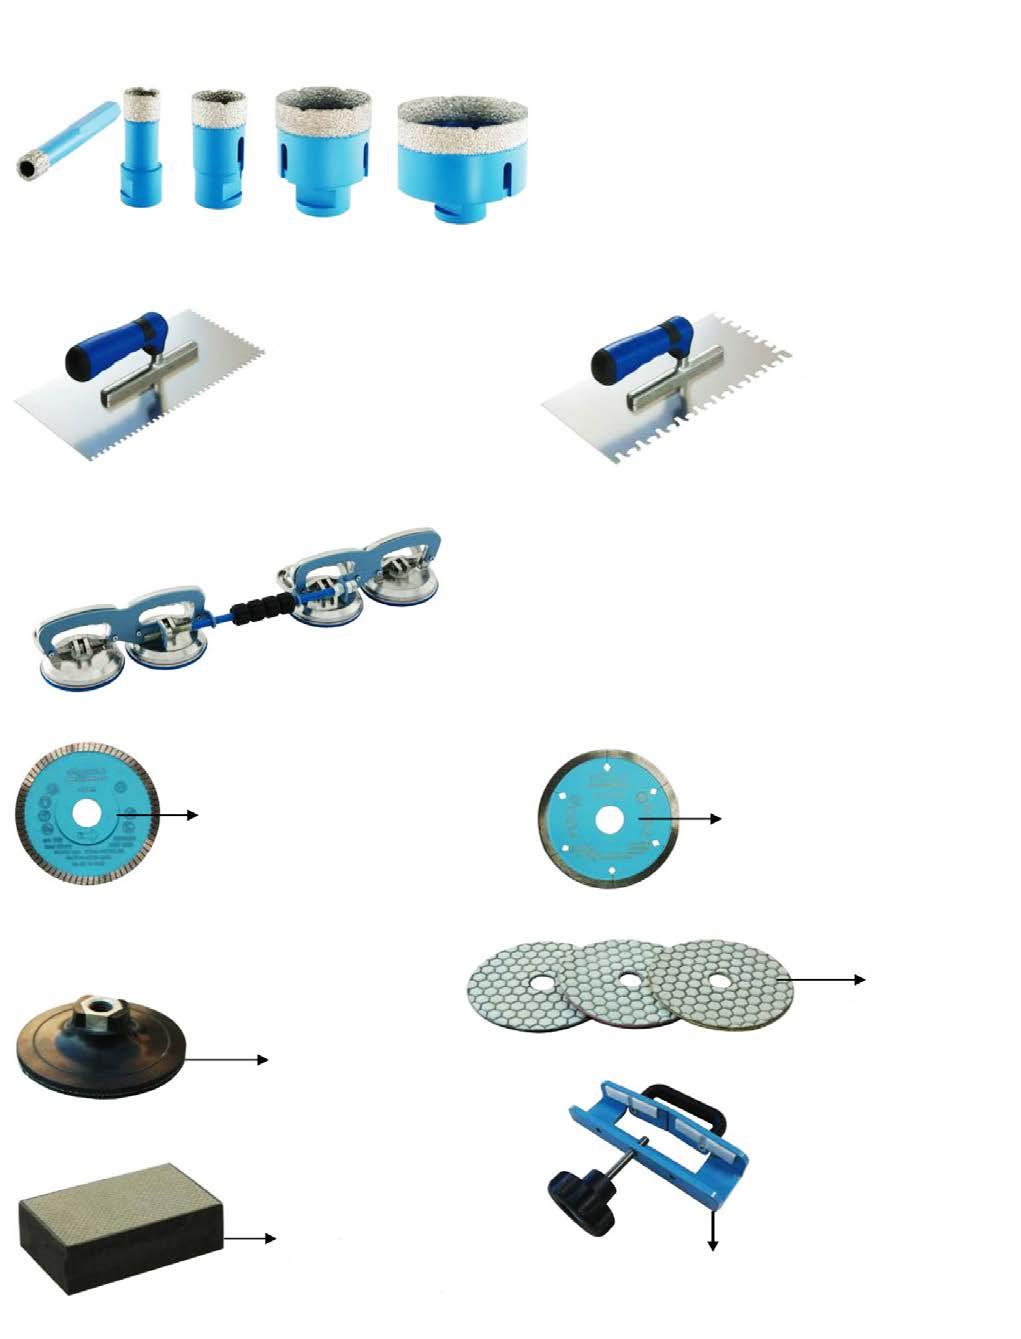
Continuous crown disc ø 115 for thicknesses from 3 to 9mm.
Diamond grinding wheels with velcro available in dierent grits:
50 roughing
200 finishin
800 semi-polishing
1500 polishing.
Separator for pre-scored tiles, recommended for thicknesses bigger than 8mm.
ART. 51G
ART. 49E
ART. 75B
ART. 72D
ART. 72H1
ART. 75C
ART. 49H