
Pathways Access Digital Edition Seepage4 Canada’s Lymphedema Magazine Empowering patients and professionals RESEARCH UPDATE • COMPRESSION FITTING • ASK THE EXPERT • CONFERENCE REPORTS • HINTS AND TIPS FALL 2023 Canadian Publications Mail Sales Product Agreement No. 40065546 See you in November! 2023 National Lymphedema Conference Climatic variation impact on edema Body image Lipedema diagnostic criteria
HELLO COLOUR!
COMPRESSION DOESN’T HAVE TO BE BORING!



Live life with VenoTrain® Curaflow! Fresh, vibrant and varied, these new colour options pair perfectly with any style this season. With curaflow, self-confidence is always in style!

Want to learn more? DEEP PETROL


BAUERFEIND.CA
Moving forward together
Thesummer of 2023 experienced several weather extremes around the world. Unusual heat and humidity can negatively affect people with damaged or dysfunctional lymphatic systems. Susan Witt and Neil Piller have summarized several papers about their group research exploring the effect of climate change and climate on edema and lymphedema, including seasonality and the connection between warmer temperatures and symptoms of lymphedema. We encourage you to read the original documents that support the summary.
(LE&RN) symposium held in Banff, Canada in June. He has also provided a summary of the lymphatic research his group is undertaking at the University of Alberta. We thank him for his research and contributions to the lymphedema community.

This year, the International Lymphedema Conference was held in Nottingham, England. Canadian representatives, Dr. David Keast and Dr. Margie McNeely, have brought us highlights from this event.


how various options are explored for each person with lymphedema.
Concerns about body image exist for many people with lymphedema – me included. I hope my personal story of how I overcame this aspect of living with lymphedema might help a reader that is still struggling. Compression is now my best friend. I wouldn’t dream of spending a day without it. I encourage you to do the same.
After a hiatus of several years, and with the severity of COVID behind us, it is refreshing to see people regain confidence to attend in-person conferences and events. For health professionals and patients eager to learn more about lymphedema, it is optimal to obtain the learning in person and network with colleagues and friends. We have brought you highlights of several lymphedema and lipedema related events that have already taken place this year. We hope you have registered for the 2023 National Lymphedema Conference in November.
Professor Spencer Gibson highlights the Lymphatic Education and Research Network
Dr. Anna Towers also attended the ILF conference and participated in a pre-conference Lipedema ILA Working Group session. This group of experts has been working since the fall of 2021, establishing diagnostic criteria for the lipedema syndrome. An internationally recognized diagnostic scheme for lipedema will facilitate further research, thus enhancing our understanding of this syndrome in all its aspects –ultimately refining the diagnostic process.

We expand on the last issue’s topic of garment fitting, with a team of six compression fitters from Winnipeg sharing their techniques and highlighting some learning. Compression is never a “one size fits all,” and their case studies showcase

We are pleased to announce that we have received another Aid to Publishers Grant from the Canadian Government Program, Heritage Canada, for the Pathways magazine. This funding helps ensure we can continue to publish the quality magazine our readers have become accustomed to. As this issue marks number 47 – let’s hope for another 47 to come! LP


Editor’s Message
Fall 2023 www.lymphedemapathways.ca 3 https://www.canadalymph.ca/conference/ Moving Forward Together Registration rates go up October 1 Register Now! canadalymph.ca/conference | November 3-4
Anna Kennedy
We hope you have registered for the 2023 National Lymphedema Conference in November!
Climate
Publisher
Pathways is published four times per year by BCS Communications Ltd. on behalf of the Canadian Lymphedema Framework.
Editorial Board
Mei Fu PhD RN FAAN
David Keast MD FCFP
Lori Radke PT CLT
Anna Towers MD FCFP
Editor
Anna Kennedy
Executive Director
Bonnie Baker
Editorial Assistant
Nicole Boulet
Advertising and Submissions

We welcome your ideas, contributions, letters and ad copy. While all material is subject to Editorial Board approval, inclusion does not constitute an endorsement or reflection of the views and opinions of the CLF and its Editorial Board. Contents may not be reproduced without written permission of the Canadian Lymphedema Framework.


Subscription Rates (1 year)
Canada - $30.
United States - $60.
International - $75.
Single copies and back issues - $8.
Subscriptions/return mail to Canadian Lymphedema Framework 4800 Dundas Street West, Suite 204
Toronto, Ontario M9A 1B1
Telephone: 647-693-1083
Email: pathways@canadalymph.ca www.canadalymph.ca

Photos: Diamond Athletic Medical Supplies, S.Gibson, A.Kennedy, N.Piller, A.Towers

All stock images are CanStock.
Canadian Publications Mail Agreement
40065546
ISSN 1929-1418 • Printed in Canada

We acknowledge the financial support of the Government of Canada.
How do we diagnose lipedema?

DEPARTMENTS:
The “science” of custom fitting
4 www.lymphedemapathways.ca Fall 2023 Contents
.............................................
research update. Investigating environmental stress that occurs in lymphatic tissue. .......................................................................
change and climatic variation impact on chronic edema and lymphedema. Understanding seasonality’s impact.
Lymphedema
....................................................
Body image challenges at any age Teaching an old dog new tricks.
....................................
Recommendation of the Diagnosis Working Group of the International Lipoedema Association.
.......................................................
Measuring and fitting compression garments, whether custom-made or ready-to-wear, can be challenging.
.......................................
Ask The Expert Questions about cortisone injections.
Report of ILF 2023 Conference Nottingham, UK The International Lymphedema Framework Conference.
Did You Know? 25 Letters to the Editor 26 Canadian and International Events 26 5 12 14 17 21 21 8
print subscriptio complimentary digita
PATHWAYS SUBSCRIBERS REQUEST ACCESS ONLINE OR BY EMAIL www tinyURL com/yes-digital pathways@canadalymph.ca
2023 n Volume 12 Issue 4
Your
FOR
Fall
CANADIAN LYMPHEDEMA FRAMEWORK Financé par le gouvernement du Canada Funded by the Government of Canada
PARTENARIAT CANADIEN DU LYMPHOEDÈME
Climate change and climatic variation impact on chronic edema and lymphedema
 By Susan Witt and Neil Piller
Followinga week of record-breaking heat in Europe and northern America linked to unusual wind patterns and the El Nino climate pattern, human-driven climate change’s growing influence is again brought into focus. We are experiencing increasing issues globally with temperature increases and associated changes in weather patterns, humidity, etc.2. Linked with this has been an increase in the death toll in Europe (and presumably elsewhere) associated with these increases in peak and average temperatures. Especially vulnerable are those with pre-existing cardiovascular and respiratory conditions3 and especially concerning is the potential spread of filarial types of lymphedemas.1
This article is based on three articles recently published in the Journal of Lymphoedema and Wounds International, relating to the impact of climate on those with chronic edemas and lymphedemas and the research being undertaken by Susan Witt, a Ph.D. student with Flinders University who is currently working at the Foeldi Clinic in Germany with Prof Thomas Dieterle. For full details of the findings and proposed activities, we suggest reading the original articles. This summary will give you an indication of where we are, what we know and what we (and you) might be able to do to make a difference!


For all of us, heat and humidity can be an issue, but when you have a damaged or dysfunctional lymphatic system, you can be particularly vulnerable to worsening edema or lymphedema. This could be from the subjective side of tension, pain, heaviness, etc., to the objective side of increased limb volume and size to functional issues determined by those mentioned above.
In a general sense, we ask why? Well, it can be broadly related to both an increased superficial vascular load associated with attempts of the body to maintain temperature homeostasis and an inability of the lymphatic system to deal with the load placed upon it. The result is the accumulation of not only fluid but also its contents, which can include bacteria and their wastes, inflammatory mediators and a range of other molecules, which may promote the development, or progression of lymphedema. Further, due to the slowed lymph flow, we may be at a higher risk of infection due to the inability of the lymphatic system to mount its normal defence against bacteria.
With the impact of climate and climate change predicted to bring increasing temperatures and ongoing adverse weather events, a greater awareness of what might be to come and of its likely impact, and more importantly, what we can all do to minimize the problems for those with conditions like chronic edema and lymphedema, will provide relief to patients in the years to come.

Let’s look at some of those articles and consider where they can lead us and future
research. Some sections of these articles are repeated below (with permission from Omnia Med). You can access the full findings in the original articles in the reference list.
Chronic edema is a significant problem worldwide and results in a substantial burden on health services and a major impact on individuals’ quality of life. As there is no cure, the primary goal of treatment is to manage the symptoms and prevent deterioration. The gold standard remains the ongoing use of compression therapy via compression garments and bandaging. Other treatments, such as manual lymphatic drainage, skincare, exercise,
Fall 2023 www.lymphedemapathways.ca 5
Research Advances
Susan Witt Ph.D. is a Ph.D. student and researcher at Flinders University Lymphoedema Clinical Research Unit, College of Medicine and Public Health, Flinders University and Foeldi Clinic, Hinterzarten, Germany.
Neil Piller Ph.D. is the Director of Flinders University Lymphoedema Clinical Research Unit, College of Medicine and Public Health, Flinders University in South Australia.
Future research investigating a variety of healthy populations and populations with lymphedema will contribute to a greater understanding of the effect of seasonal climate variation on upper-limb size, volume and fluid distribution.
and laser therapy, are also regularly applied. Rising temperature due to climate change is well documented, with scientists predicting a 1.5–2.5% increase in average temperatures across the globe by 2050. Further, on top of this is the increasing proportion of western populations with obesity and the likely links between weight, body surface area and thermoregulation. It is anticipated this will present significant challenges for the ongoing management of chronic edema. Higher temperatures and increased humidity result in additional discomfort and increased difficulty with compression garment use.
general population (adults and/or children) with chronic limb edema because of primary or secondary lymphedema, lipedema, elephantiasis, vascular insufficiency, trauma, or any other condition resulting in chronic edema. A total of 3,536 studies were identified and screened, but only five articles met the inclusion criteria.
Anatomical Circumferences being significantly greater in spring than during summer and winter. Also, most circumferential measures at anatomical landmarks were more significant in spring! This change, we believe, may identify that limb size increases when there is a change in climatic conditions and the temperatures and levels of humidity begin to rise.
This may result in reduced compliance with core treatment recommendations, resulting in increased swelling and poorly managed symptoms. In turn, this leads to an increased risk of infection.
In a preliminary study, Witt et al, (2021) searched a range of databases for evidence of the impact of climatic conditions on chronic edema using the PRISMA protocol. Studies were included that examined the
Articles fell into three broad categories: compression garment difficulties, physiological changes and seasonal filarial attacks. Despite the broad search terms relating to chronic edema, all included articles related to lymphedema. Populations included breast cancer-related lymphedema, lymphatic filariasis lymphedema, and specifically lower-limb lymphedema. The research results reported were conducted in temperate climates (Sydney, Australia, and Japan), tropical climates (Townsville, Australia, and Ghana) and continental climate (Alberta, Canada). The findings showed a connection between warmer temperatures and symptoms of lymphedema. However, the limited number of studies in this area makes it difficult to draw conclusions about the overall impact. While qualitative indications showed a clear correlation with warmer weather, their physiological measures did not clearly reflect the same. We concluded that there needs to be more quantitative and qualitative evidence relating to climatic variations and chronic edema. Further research in this area is strongly recommended. But what about the influence on people without chronic edema, lymphedema, or other cardiovascular issues? What is it like for the “normal” population? Matthews et al. (2021) undertook a specific study of a healthy population of women living in Townsville, Queensland, Australia. They found significant differences in limb size, with the Sum of the
No significant changes in limb volume or fluid distribution were identified when compared across three different discomfort levels according to Thom’s Discomfort Index.
Again, future research investigating a variety of healthy populations and populations with lymphedema will contribute to a greater understanding of the effect of seasonal climate variation on upper-limb size, volume and fluid distribution.
Further study
Another study was undertaken to test the often anecdotal reports, which suggested that heat and hot weather can cause an exacerbation of breast cancer-related lymphedema (BCRL)5 This study investigated the relationship between seasonal climate variation and limb size, volume, fluid distribution, and diagnosis in women following breast cancer treatment. Women older than the age of 35 years who had undergone treatment for breast cancer were invited to participate. Twenty-five women aged between 38 and 82 years were recruited. Seventy-two percent had received surgery, radiation therapy, and chemotherapy as part of their breast cancer treatment.
Participants completed anthropometric, circumferential, and bioimpedance measures and a survey on three occasions: November (Spring), February (summer), and June (Winter). Diagnostic criteria of >2 cm and >200 mL difference between the affected and unaffected arm and a positive bioimpedance ratio of >1.139 for the dominant arm and >1.066 for the nondominant arm were applied across the three measurement occasions.
Interestingly, no significant correlation between seasonal variation in climate and upper limb size, volume, or fluid distribution was found in women diagnosed with or at risk of developing BCRL.
So, we concluded there was no statistically significant variation in limb size, volume, or fluid distribution in this population across spring, summer, and winter, although there were linked trends in these values.
The diagnosis of lymphedema, however, varied between individual participants

6 www.lymphedemapathways.ca Fall 2023
Higher temperatures and increased humidity result in additional discomfort and increased difficulty with compression garment use. This may result in reduced compliance with core treatment recommendations, resulting in increased swelling and poorly managed symptoms.
throughout the year. This has important implications for the implementation/ commencement of treatment and management.
Again, further research with a larger population in different climates is required to explore the status of women with respect to BCRL. The use of common clinical diagnostic criteria in the study above did not result in consistent diagnostic classification of BCRL for the women involved in this study, so this too can be an issue. It’s one we should all try to address.
So, what’s now being done are further studies engaging not only the patients but also their support groups, lymphedema practitioners, climate change experts, spatial data experts and those from the fields of meteorology, biology, clinical and experimental medicine to utilize a sound methodological approach to study the interplay between climate
(and its changes), health and disease.

One of the first steps in the process is the assessment of patients with lymphedema over a year on multiple occasions in each identified season, using a range of subjective tools such as the LYMQOL and objective assessments of fluids using Sozo (a form of bioimpedance measurement), and of fibrous tissues using Indurometry/Fibronometry in a range of countries across the world including Germany, UK, and tropical and temperate Australia. Another of the first steps is to sit down in focus groups with patients affected by lymphedemas and learn more about their personal experiences and the pros and cons of climate concerning their life of living with lymphedema and chronic edemas so we together can help all those with it or at risk of these conditions live better!
All of what we gain can help us better adapt and apply lymphedema management


approaches, make us think more about how we can develop new fabrics that provide better ventilation and evaporation and opportunities to educate patients and professionals better, the importance of which was recognized by the award of finalist by the Premiers climate change council in South Australia6 LP
A full set of references can be found at http://www.canadalymph.ca/ pathways-references/


Fall 2023 www.lymphedemapathways.ca 7
https://www.vodderschool.com/ happy. healthy. skin. Dr. Vodder SchoolTM INTERNATIONAL Member of Dr. Vodder Academy International Train in Canada with certified instructors www.vodderschool.com info@vodderschool.com | 800-522-9862 PROFESSIONAL TRAINING IN MANUAL LYMPH DRAINAGE AND COMBINED DECONGESTIVE THERAPY Lymphedema management ONLINE Level 1 Theory Available ~ Evidence-based ~ Easy learning modules with small class sizes ~ Interactive, live classroom instruction with physicians ~ Learn precise manual skills with expert, accredited instructors ~ ISO 29990: 2010 certified training ~ CE credit available Visit our website for classes: Calgary Halifax London Montreal Ottawa Saskatoon Toronto Vancouver Winnipeg
The diagnosis of lymphedema, however, varied between individual participants throughout the year. This has important implications for the implementation/ commencement of treatment and management.
Lymphedema research update

 By Professor Spencer Gibson
Twoyears ago, I was appointed as the Dianne and Irving Kipnes Endowed Chair in Lymphatic Disorders. I established a basic/ translational research laboratory at the University of Alberta in the Department of Oncology and currently have a laboratory of seven researchers ranging from four graduate students, a postdoctoral fellow, a clinical coordinator, and a lab manager. The focus of our research is to understand the mechanisms in the microenvironment that allows some patients to develop secondary lymphedema after surgery, radiation and/or chemotherapy. In contrast, others repair the damage to their lymphatic system with no swelling or tissue changes in their legs or arms. Specifically, we are investigating environmental stress that occurs in lymphatic tissue, such as oxidative stress or hypoxia and how lymphatic endothelial cells respond to this stress. In our preliminary findings, growth factors significantly alter lymphatic cell response to microenvironmental stress, which could weaken their ability to repair the damage. We are developing an animal model of lymphedema to evaluate further these microenvironmental stresses and factors that could alter lymphatic cell response to stress, thus leading to lymphedema (Figure 1).
Beyond the laboratory studies, we have also established a secondary lymphedema biobank where we process and store lymphedema patient blood samples and collect their clinical information. We are collecting blood samples from four sites: a cancer centre, a lymphedema
Spencer
a
Research Program:
In secondary lymphedema, microenvironmental stress and microenvironmental factors might have a potential role in inducing lymphatic vessel dysfunction that causes the progression of lymphedema. Created in BioRender.

rehabilitation clinic, a clinical studies laboratory at U of A, and a private clinic. We currently have over 30 blood samples stored and five blood samples collected before and after compression therapy. The patients range from cancer patients to patients suffering from injury-related lymphedema. Unfortunately, we miss many patients, as lymphedema is not usually identified in the medical record. We are working to solve these challenges and hope to expand this biobank so we can capture the entire lymphedema patient population in the future.
To understand lymphedema, we teamed up with researchers at the University of Calgary (Dr. von der Weid and Dr. Liao). Their studies focus on inflammation-associated changes in the lymphatic system in the skin, gut and brain. We have established joint lab meetings and meet in person once a year to exchange results and ideas on how the lymphatic system works. It has been invaluable to my trainees and has given direction to the research projects. Indeed, Dr. von der Weid shared the primary lymphatic cells his lab generated to help us in our research projects. In the future, we hope to develop collaborative projects that will further our understanding of the lymphatic system.
Dr. von der Weid was the organizer of a Lymphatic forum meeting held in Banff in June 2023. He was gracious enough to invite me as a member of the organizing committee for the conference. It was an opportunity to review scientific abstracts for oral presentations and judge posters for awards. In addition, it allowed me to get to know the international community that researches the lymphatic system and gain knowledge about the research field. Here is my perspective on lymphatic research.
8 www.lymphedemapathways.ca Fall 2023 Research Update
Gibson, Ph.D is
Professor at the University of Alberta, Department of Oncology and the first Dianne and Irving Kipnes Endowed Chair in Lymphatic Disorders. He is a Board Director of the Canadian Lymphedema Framework Board of Directors.
FIGURE 1
Caring for lymphedema means supporting patients every step of the way. At Essity, we provide highly adaptable therapy options to cater to patients’ needs, making their life with lymphedema more manageable.


DECONGESTION
JOBST® FARROWWRAP®
Short stretch compression wraps
• Easy-to-use adjustable bands
• Easy to don
• For patients requiring independence
DAYTIME MAINTENANCE
JOBST® ELVAREX® JOBST® CONFIDENCE
Custom-made compression garments
• Gold standard in lymphedema management
• Unique features for better comfort and fit (Functional Zones and SoftFit™ Technology)
JOBST® COMPRI2
2-layer short stretch compression systems
• Sustained compression for 7 days
• Simple application with visual compression indicators
COMPRILAN®
Short stretch compression bandages
• Simple and cost-effective solution
• Ideal when frequent applications are required
NIGHTTIME MAINTENANCE
Next generation of flat-knit compression garments
• Innovative contour fit knitting
• Advanced moisture management system
• A dedicated knitting pattern for both lymphedema and lipedema patients.
JOBST® RELAXJOBST® JOVIPAK®


Custom-made compression garments
• Unique flat-knitting technology for nighttime wear
• Textured surface to stimulate lymph flow
• CoolMax® yarns for a cooling effect
Ready-to-Wear and Custom Nighttime lymphedema management
• 4 blend foam mix and stitched channels
• Stimulates lymphatic drainage
• Comfort and control from head to toe
https://www.essity.com/
brands/?country=ca Integrated Therapy Solutions
jobstcanada.com 1-877-978-5526
regulating self-antigen recognition, transporting antigens and cytokines, and activating neutrophil. In the gut, the intestines’ bacteria (microbiome) seem to influence the lymphatic system regulating immune system function.
The lymphatic system’s role in regulating disease is becoming more of a focus. In kidney disease, there is altered renal lymphatic function resulting in reduced lymphatic pumping and leakiness. In liver disease, lipoproteins drive dysfunction in the lymphatic system that could be targeted for treatment. Lymphatic dysfunction also involves activation of the Notch signalling pathway that seems to involve liver damage.
Lymphatic systems affect every major organ in the human body. Not so long ago, researchers would ignore lymphatic vessels in organs, as they did not know their function. This is no longer the case as the lymphatics are now found to play a role in the eye, skin, kidney, liver, heart, gut, lung, bone, brain, and many other organs. I will focus on two organs that interest me the most, the eye and the brain. The eye is one of the organs where the lymphatic system plays an important role in intraocular pressure. When this is dysfunctional, congenital glaucoma can occur. Researchers have found alterations in developmental factors in lymphatics lead to glaucoma.
The brain is the second organ where the lymphatic system plays an important role. The lymphatic system of the brain is giving new insights into how fluid and immune cells drain out of the brain. This has huge implications for brain diseases as diverse as cancer, Alzheimer’s, Parkinson’s disease, and dementia. Researchers are beginning to understand how the brain lymphatic system normally functions and impacts these diseases.
The lymphatic system regulates the immune system. It is important in healing from infections,

In cancer, lymphatics play an important role in immune suppression and metastasis through the lymph nodes. These events are not mutually exclusive, and researchers have shown that cancer cells in the lymph node lead to immune suppression in animal models. Furthermore, induction of lymphangiogenesis leads to fewer T cells and higher immune checkpoint receptor expression in tumours. Taken together, lymphatic systems impact many diseases.
Finally, there was progress in understanding, detecting, and treating lymphedema. During lymphedema, the skin layer thickens and
hardens. Researchers have found that keratinocytes (skin cells) proliferate when exposed to lymphedema fluid and induce inflammatory responses through the release of cytokines. This regulates the development of secondary lymphedema. Inhibition of keratinocytes proliferation using the drug teriflunomide reduced lymphedema in animal models. In addition, lymphedema is associated with leaky vessels. Researchers found that a receptor orchestrates tighter junctions between lymphatic cells preventing vessel leakage and leading to attenuation of lymphedema. This suggests that drug treatments for lymphedema are possible. In addition, imaging lymphedema is difficult. Researchers using an isotype of sodium (23Na) that can be imaged by MR lymphangiography, found sodium levels increased in lymphedema limbs even at the early stages of lymphedema. Furthermore, sodium channels responsible for smooth muscle contractions are being identified and shown to be altered in lymphedema. This illustrates that new insight into the regulation of lymphedema development, new detection methods, and new treatment targets are being developed.
The Lymphatic Forum ended with a dinner where the head of the Lymphatic Education and Research Network (LE&RN) gave an inspiring speech about patient advocacy, new funding opportunities and a growing research community focused on lymphatics. With our new research program and linkage to the greater lymphatic research community, the future is bright. We hope to contribute to new detection and treatments for lymphedema through translation from the bench side to the bedside. This will be the new frontier in lymphatic research moving forward. LP
A full set of references can be found at http://www.canadalymph.ca/ pathways-references/

10 www.lymphedemapathways.ca Fall 2023
The lymphatic system’s role in regulating disease is becoming more of a focus. In kidney disease, there is altered renal lymphatic function resulting in reduced lymphatic pumping and leakiness. In liver disease, lipoproteins drive dysfunction in the lymphatic system that could be targeted for treatment.


Fall 2023 www.lymphedemapathways.ca 11 https://www.clt-lana.org/ Look for the CLT-LANA credential because it matters! For more information, visit www.CLT-LANA.org.
Body image challenges at any age Teaching an old dog new tricks

 By Anna Kennedy
During the awkward teenage years, many girls are overly conscious and critical of their body. Their perception of what they see in the mirror can be much different than how others actually see them. Thankfully, for many of us, this consciousness disappears as we mature into adulthood. However for others, regardless of their body size or shape, it remains on their mind.
For those living with lymphedema, body image can be a life-long challenge. Studies have shown that the psychological aspect of living with lymphedema can have a significant impact on a patient’s quality of life.1-3 It certainly had an impact on me, even though I had always considered myself to have a healthy acceptance of my body.
the shopping mall with tears when seeing pretty heels or short dresses. I reluctantly transitioned to long dresses, gave away my shorts, skirts and heels. I was happy when maxi dresses came back into style, along with wide-legged and bell-bottomed jeans. Both options provided opportunities to hide my leg. It was the ugly compression stockings more than the swollen leg and ankle that I was conscious about. I worried about people staring, wondering what kind of thick stocking I was wearing on just one leg - and why.
I was diagnosed with lymphedema in 2005, exactly five years after completing treatment for cervical cancer. I remember my reaction to the diagnosis of lymphedema; shock at being told I would need to wear compression on my leg for the rest of my life. I thought my life was altered forever; no more bathing suits, shorts, skinny jeans, short dresses and high-heeled shoes. For someone who enjoyed dressing stylishly, I thought I was resigned to living the rest of my life in ugly and unfashionable clothing.
The lymphedema diagnosis was depressing and devastating to me. I recall first wandering
While attending or planning lymphedema conferences in Canada, USA and Europe, Australia, I would still hide my lymphedema. I became an expert at choosing outfits that were fashionable but hid my leg. I wore wide pants and long skirts. It was at one of those conferences where I listened to a beautiful, young 16-year-old guest speaker named Isa-Bella LeClair (see 2023 Spring Pathways). She shared her journey as a teenager living with both Parker-Weber syndrome and primary lymphedema. On stage, in front of the large audience, she proudly wore a short dress with her large leg and thick, beige compression stocking clearly visible to all. Watching and listening to her, I felt both enlightened and humbled. How vain was I to think that people were even looking at me, at my age, and noticing my legs? Listening to this positive and confident young woman was the catalyst in changing my attitude completely.
It was around the same time that I took up playing tennis. Club and league dress codes dictated that I had to wear a tennis skirt on the courts. Of course, now the compression stocking became impossible to hide. Wearing a short skirt during tennis slowly built my confidence to wear short skirts and dresses off the court as well. I felt liberated and didn’t care what people thought anymore. I welcomed the questions about my stockings to inform and educate people about lymphedema. Sometimes it was a doctor I was playing tennis with, who was curious to learn more. Sometimes it was someone who knew a wife, mother, or neighbor who could benefit from the information I gave them. I knew I could influence someone’s life in a positive way just by wearing my compression proudly.

So what has this important lesson taught me?
• I am thankful that there is a scientific and evidence-based solution like compression to manage my lymphedema.

12 www.lymphedemapathways.ca Fall 2023
Personal Perspective
Anna Kennedy is the Editor of Pathways and a Founding Member of the Canadian Lymphedema Framework. She was awarded the Queens Diamond Jubilee award in 2012 for her contributions to the lives of Canadians.
Listening to this positive and confident young woman was the catalyst in changing my attitude completely.
• Compression is highly effective, non-evasive


• For times when someone does notice my compression stocking, it’s an opportunity for me to educate him or her about lymphedema and the work of charities like the Canadian Lymphedema Framework.


• You CAN teach an old dog (me) new tricks! LP
References
1. Fu MR, Ridner SH, Hu SH, Stewart BR, Cormier JN, Armer JM. Psychosocial impact of lymphedema: a systematic review of literature from 2004 to 2011. Psychooncology. 2013;22(7):14661484. doi:10.1002/pon.3201.


2. Winch CJ, Sherman KA, Smith KM, Koelmeyer LA, Mackie H, Boyages J. “You’re naked, you’re vulnerable”: Sexual well-being and body image of women with lower limb lymphedema. Body Image. 2016;18:123-134. doi:10.1016/j. bodyim.2016.06.002.





Carter J, Huang HQ, Armer J, et al. GOG 244The Lymphedema and Gynecologic cancer (LeG) study: The impact of lower-extremity lymphedema on quality of life, psychological adjustment, Gynecol 2021;160(1):244-251. doi:10.1016/j.

www.lymphedemapathways.ca 13
UPF 50+ SUN PROTECTION 866.251.0076 wearease.com
For those living with lymphedema, body image can be a lifelong challenge. Studies have shown that the psychological aspect of living with lymphedema can have a significant impact on a patient’s quality of life.
How do we diagnose lipedema?
Recommendation of the Diagnosis Working Group of the International Lipoedema Association
 By Anna Towers
Researchon lipedema is in its infancy, and there is, as yet, no internationally recognized diagnostic scheme for the syndrome. This leads to a vicious circle. How can patients be recruited for research into this poorly understood condition if we cannot define inclusion criteria and diagnose it in a way that is accepted worldwide?
To advance knowledge of this condition, the International Lipoedema Association (ILA – theila.net) was founded in 2021 by 60 multidisciplinary healthcare providers from 22 countries. Working in partnership with the International Lymphoedema Framework, the mission of the ILA is to improve our understanding of lipedema and to raise standards of care based on clinical evidence, long-standing experience, and a passion for improved therapy outcomes.
ILA Diagnosis Working Group members
To start dealing with the important issue of diagnosis, in November 2021, the ILA created a Diagnosis Working Group consisting of seven experts. Using existing scientific reviews, their role was to reach a consensus about what criteria should form the basis for a lipedema diagnosis.
Current understanding of lipedema
As stated on the ILA website, LipoedemaSyndrome is a chronic condition in women characterized by two main criteria:
1 Disproportionate increase in adipose tissue in the legs (sometimes in the arms) plus
2 Pain and/or tender to touch skin (allodynia) in the adipose tissue. This means that adipose legs without at least the abnormal pain cannot be diagnosed as lipedema.
However, how do we better define the pain associated with lipedema? Are there other symptoms that can help determine the diagnosis?
Many co-existing conditions have been described in lipedema patients. In addition to abnormal sensitivity to pain, most patients with lipoedema also suffer from:
• Overweight and obesity (which is a chronic disease independent of lipedema)
• Reduced physical fitness
• Mental issues such as chronic anxiety, depression, or eating disorders
• Lack of self-acceptance because of the current beauty ideal
• Psychosocial issues (financial, health insurance coverage for treatments etc.)
These co-existing conditions may make diagnosis challenging and will impact management.
Working towards diagnostic criteria for the lipedema syndrome
The physicians and surgeon members of the Diagnosis Working Group met extensively via remote video-conferencing during 2022. These meetings were recorded and transcribed. Members then reviewed the transcriptions and added comments or questions that were carried over to future meetings. Using the PICO investigative model1, the Working Group assessed each potential diagnostic element, referred to the existing literature, plus their combined clinical experiences, and reached a consensus regarding a recommended Diagnostic Scheme that was subsequently reviewed and supported by the ILA Board. In a parallel process, the group carefully examined the useful diagnostic criteria from the Dutch Guidelines for Lipedema2 and evaluated which elements do and do not have a significant scientific basis at this time.

Some of the broad questions that the Working Group discussed over the course of their meetings and deliberations:
1 What are the challenges in making a lipedema diagnosis?
2 How can a clinician diagnose lipedema using easily available and non-invasive methods?
3 Which elements should be considered, and which should be excluded?
4 How should the retained elements be weighted in the final diagnostic scheme or guide?
5 What do we know about the prevalence of lipedema, acknowledging the serious lack of knowledge among general healthcare providers, and the lack of formal diagnostic criteria?
14 www.lymphedemapathways.ca Fall 2023 Work Group Report
Håkan Brorson MD, PhD (Sweden) Leif Perbeck MD, PhD (Sweden)
Domenico Corda MD (Italy) Cristhian Pomata MD (Spain)
Francesco Greco MD, PhD (Italy) Anna Towers MD (Canada)
Christian Ure MD (Austria)
FIGURE 1
Anna Towers, MD is Director of the Lymphedema Program at the McGill University Health Centre (Montreal, Canada) and sits on the Editorial Board of Pathways
ILA Diagnosis Group members (left to right, top to bottom): C. Ure, A. Towers, H. Brorson, D. Corda, C. Pomata, F. Greco, L. Perbeck.
Effective compression.
Sustained, therapeutic compression for up to seven days, with less slippage and increased comfort means more time worn. Clinically proven to be more effective at managing edema.1

Focus on living life.
The thin, lightweight materials create a breathable sleeve, allowing patients to wear their own shoes and clothing. The increased comfort helps mobility leading to more effective treatment.
Designed with comfort in mind.
72% of patients prefer two-layer compression over alternative options.¹ Treatment is more effective when their comfort is prioritized.
Trust the 3M
Coban™
System to
life back
track. Engineered for comfort. Designed for real life. 3M™ Coban™ 2 Two-Layer Compression System Learn more at www.3M.ca/lymphedema
™
2 Two-Layer Compression
get
on
1. Moffat C et al (2012) ‘A preliminary randomized controlled study to determine the application frequency of a new lymphoedema bandaging system.’ British Journal of Dermatology 166.3: 624-632. 3M, 3M Science. Applied to Life., and Coban are trademarks of 3M. Used under license in Canada. Please recycle. © 2021, 3M. All rights reserved. 2107-21114-E This material is intended for healthcare professionals. Please refer to the full product instructions and indications for use and for a full list of contraindications, general considerations and warnings, cautions and notices. If applicable, refer also to your facility policy for detailed information and recommendations. 3M Deutschland GmbH Health Care Business Carl-Schurz-Str. 1 41453 Neuss Germany Available in Canada from: Medical Solutions Divison 3M Canada 300 Tartan Drive London, Ontario N5V 4M9 Canada 1-800-364-3577 3M.ca/Medical
The Diagnostic Scheme that the Working Group recommended
Diagnosis of lipoedema may be made when all the following major criteria are present:
A1, A2, A3
A 1 Disproportionate subcutaneous fatty tissue distribution between upper and lower body, which is symmetrical
2 Reported enhanced sensitivity to touch in the affected areas with objective allodynia (elicited pain) on a pinch test
3 Normal hands and feet (in the absence of obesity or lymphedema complications)
B1 is a minor criterion that may be present or absent. It serves to reinforce the diagnosis.
B 1 Significantly thickened subcutaneous fat in lower or/and upper extremity with sudden stop at the joints (“cuff sign” at ankle, elbow or wrist)
Many sub-questions were also discussed, including:
1 How do we define lipohypertrophy as opposed to normal fat distribution?
2 What is normal versus abnormal pain in patients with suspected lipedema? What is the specific type of pain found in lipedema, and how should we assess it in reaching a diagnosis?
3 Is lymphedema a complication of lipedema and/or part of the diagnosis and progression of lipedema?
4 Does ‘pure’ lipedema, as such, progress? Can lipedema be staged, and if so, how?
5 What is the link between lipedema and obesity?
6 Is there edema in lipedema?
7 In those with obesity, what is the impact of weight loss on lipedema limbs?
Many of the above questions are answered in the excellent Consensus Document3 published in 2020, which the Working Group reviewed, and which we recommend all involved health care providers use as a reference. This publication is available on the International Lipoedema Association website, along with other very useful references.
The Diagnosis Working Group members kept the following important considerations in mind during their deliberations:
1 High-level research evidence is lacking. The main sources consulted were existing consensus documents and guidelines that are based on previously conducted critical reviews of the literature.
2 At this time, for lipedema diagnostic criteria to be most useful to clinicians, diagnosis needs to be made using simple, non-interventionist medical history and physical examination, avoiding expensive and less available imagery or other diagnostic interventions.
There are also important socioeconomic considerations that impact lipedema patients. The Working Group members, clinicians and clinical scientists, understand the reality of the clinical world in terms of socioeconomic factors and resources available. One important problem raised by lipedema patients concerns insurance coverage for decongestive lymphatic therapy and surgical treatments – for which patients come seeking a medical diagnosis that the insurance provider will accept. Finally, there is a critical research consideration. Future research will further clarify the effectiveness of available treatments for lipedema. However, the problem of how to diagnosis lipedema in the first place remains central to clinical and research development. Internationally accepted diagnostic criteria are of course, essential in choosing patients for clinical trials.
How do we clinically assess the pain associated with lipedema?
The particular type of pain that defines lipedema is allodynia (pain due to a stimulus that does not normally provoke pain; for example, light touch). The question of how a clinician should test for allodynia is important. Many patients with lipedema features will
complain of pain that could be due to many factors and related disorders. Therefore, the clinician cannot rely on the anamnesis (patient reported medical history) or clinical history. The Working Group at the time suggested that the assessment for allodynia be done with a “pinch test” in the involved areas at the time of the physical examination. Further discussions that I have personally had with colleagues have led to ethical questions and considerations about trying to provoke pain on examination while a patient is distracted! A colleague has suggested that we test for allodynia as we test for pitting edema, which in the case of potential co-existing lymphedema, should involve pressure over the site (usually thigh or calf) for up to one minute. In the case of suspected lipedema, this will provoke allodynia.
Conclusion
Research is urgently required regarding the lipedema syndrome. The Working Group of the ILA produced a recommended diagnostic scheme that was supported by the ILA Board in December 2022. An internationally recognized diagnostic scheme for lipedema will facilitate further research, thus enhancing our understanding of this syndrome in all its aspects – ultimately refining the diagnostic process itself.
Anyone with a special interest in this disorder is invited to join the ILA. Membership is open to physicians, specialized nurses, psychologists, physiotherapists, dieticians, and researchers in the field of lipedema as well as other healthcare professionals with a specific interest in lipedema, including professionals employed by the medical device and pharmaceutical industry. LP
The full text of the Working Group report is available on the member section of the International Lipoedema Association website (theila.net).
References
1. PICO model: https://researchguides.uic.edu/c. php?g=252338&p=3954402. Accessed 202306-20.
2. Halk AB, Damstra RJ. First Dutch guidelines on lipedema using the international classification of functioning, disability and health. Phlebology 2017, Vol. 32(3) 152–159.
3. International Consensus document, “Lipoedema: a paradigm shift and consensus.” Journal of Wound Care, Vol 29, Supp 2(11), 2020.
16 www.lymphedemapathways.ca Fall 2023
TABLE 1
Recommended Diagnostic Criteria for Lipedema - ILA Working Group on Diagnosis, supported by the ILA Board, Dec 2022.
The “science” of custom fitting
By Jessica Diamond, Megan Diamond, Claire Ann Deighton, Kim Radford, Dayna Ricard and Jenny Whitlaw

Measuring and fitting compression garments, whether custom-made or ready-to-wear, can be challenging. Learning often comes from experiencing garments that don’t fit and need to be revised.
Throughoutthis article, we will discuss measuring techniques that we use, and we will share specific case studies highlighting what we have learned.
We have a group of six garment fitters in our retail store, which allows us to collaborate and provide continuity of care. We record measuring techniques, past issues and garment modifications on all customer files, allowing the customer to be served seamlessly if their particular fitter is away.
Different fabrics, styles and measuring techniques are used depending on the client’s circumstances. We have over 65 years of experience between us to draw on and use standard protocols for assessing a new or returning client to ensure quality of fitting
Assessment
To begin, we determine the appropriate time for the client to be measured for a compression garment. If the patient first needs their limb volume to be reduced, we discuss Manual Lymph Drainage (MLD) and compression bandaging. We provide a letter for clients to share with their physician explaining MLD and short-stretch bandaging and why we suggest this treatment. Other options for reduction are alternative compression systems, kinesio taping and compression pumps.
There are two challenges that we often face when measuring after the client has completed compression bandaging.


A) Creases in the leg – Our solution: take measurements above or below the crease.
Measuring & choosing garments
After the limb has been appropriately reduced in volume, we are ready to measure, taking into consideration compression level, material type and style.
Material type
Example of compression bandaging incorrectly applied (too tight & not high enough).
B) Bulging – Our solutions include pulling tight at our last measurement below the knee, or occasionally we reduce by a few cm depending on the severity. We also may add an inside silicone band to help hold the garment in place if the leg has a cone shape.

Example of bulging from compression bandaging that has slipped down.


If the client requires any lymphedema treatment, we try to communicate with their lymphedema therapist regularly. This communication can help us understand the client’s needs and when they are ready to be measured.
Flat-knit versus circular-knit (ready-to-wear) options are based on patient history, fluctuation of swelling, and shape of the limb. In some cases, a flat-knit garment is not required and we may choose ready-made garments if the customer is new to compression, has arterial vascular disease, has potential donning issues, financial constraints or is in stage 1 lymphedema, and they fit well into a ready-made product. Below is an example of an individual in a custom circular-knit versus a custom flat-knit garment. It is evident that this customer requires flat-knit compression since the circular-knit is causing a tourniquet effect and binding at the ankles.
Choosing the manufacturer
If the individual is in the acute reduction phase and continuing with treatment while waiting for their garments, we may choose a company with a quicker turnaround time. Some suppliers produce garments within a week, while others take several weeks. We also may choose manufacturers based on their specific options, materials and warranties.
Fall 2023 www.lymphedemapathways.ca 17
Same patient: custom circular-knit (left) versus custom flat-knit (right).
Garment Fitting
Jessica Diamond, Megan Diamond, Claire Ann Deighton, Kim Radford, Dayna Ricard and Jenny Whitlaw are all custom fitters at Diamond Athletic Medical Supplies Inc. in Winnipeg, Manitoba. Between the six fitters, they have over 65 years of experience helping clients with the proper compression garments.
Style of garment
The style of a garment will vary for each individual, but we use certain options on most garments. These include; slant foot, steep oblique/scoop for knee-high, t-heel/yknitting when there is a cuff at the ankle, and double silicone on thigh-high stockings: a 3 cm inside band and a 5 cm top band.
CASE STUDY 1
Age: 54 year-old female.
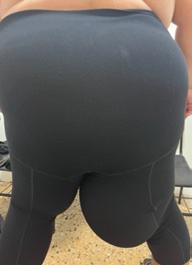
Medical history: Diagnosed in 1997 with melanoma and had surgery to remove the lesion. Left leg groin dissection in 2001. In 2013-2014 began presenting with lymphedema. 2015 had surgery and radiation for metastatic lesions. Currently has tumours in right and left groin. Lymphedema is managed and stable.
CASE STUDY 2
Age: 78-year-old female.
Medical history: Breast cancer. Right upper limb lymphedema has been stable for ten years.


Obesity became a big factor. In 2016 he noticed swelling starting in his feet. The swelling progressively worsened, involving his legs and abdomen. In 2018 he had his first cellulitis bout. Currently, his lymphedema is not controlled. He struggles donning garments and has limited access to treatment.


Garment:
First garments were a thigh to ankle garment with separate knee-high stockings and toecaps. The second garments were biker shorts with knee-highs and toecaps. However bike shorts flared out and did not contain the lobule above the knee. To address this issue, we made a male-style capri. Due to the size of the leg, one manufacturer could not make the flat-knit garment, and all vendors could not accommodate the size for Velcro wraps. Current issues with the garment include donning and heat rash. Due to fluid fluctuation, the panty portion doesn’t stay in place. We are still working with the client to figure out how we can improve his garments.
CASE STUDY 4
Garment: Has been wearing custom seamed arm sleeve and glove since 2009. She did not want to try flat-knit due to the thickness of the material. In 2023 was struggling to don the custom seamed (old style burn garment) arm sleeve. Tried a ready-to-wear circular-knit arm sleeve. This new garment she could don more easily and still manage her lymphedema. Next, we will order a custom circular-knit to improve the overall fit (length in particular).
CASE STUDY 3
Age: 47-year-old male.
Age: 62-year-old male.
Medical history: Workplace injury leading to amputation of left foot. Lymphedema resulted.


Garment: First garments were thigh-high ready-to-wear and chap-style ready-to-wear. These garments began to cause fibrosis at the surgery site and led to fluid build-up in the abdomen. Moved to flat-knit 1½ leg panty, Class 1 on the unaffected leg and on the panty portion, and Class 2 on the affected leg. Subsequently, we increased compression to Class 2 in the unaffected leg and panty portion and Class 3 on the affected leg. The customer also uses Velcro wraps and a night garment.
Medical history: Injured his back in 2008, which limited his mobility significantly.
Garment: Initial garment was a specialized flat-knit foot cap and knee-high stocking. Over time he was able to transition to a flat-knit closed-toe knee-high for patient comfort.

18 www.lymphedemapathways.ca Fall 2023
Above: Fibrotic surgery site.
Left: Flat-knit 1 1/2 leg garment.
To begin, we determine the appropriate time for the client to be measured for a compression garment. If the patient first needs their limb volume to be reduced, we discuss Manual Lymph Drainage (MLD) and compression bandaging.
Ready-to-wear circular-knit arm sleeve.
Custom seamed arm sleeve and glove (old-style burn garment).
Capri garment.
Above: Initial garment. Left: Current garment.
medi Therapy Concept Lymphology
Effective lymphedema solutions for all stages of treatment.


Great reduction results during the decongestion phase.
Effective compression device throughout the transition phase.
Compression devices for maintaining best therapy results.

https://www.medicanada.ca/ circaid reduction kit circaid juxtafit mediven 550 leg Reduction Phase Phase Phase Transition Phase Phase Phase Maintenance Phase Phase Phase circaid juxtafit essentials arm 3 PHASE 1 PHASE 2 PHASE Decongestion Decongestion •circaid reduction kit Transition • circaid juxtafit • circaid� profile (new) Maintenance • mediven flat knit • circaid juxtafit • circaid� profile (new)
medi Canada inc. T 1 800 361 3153 F 1 888 583 6827 service@medicanada.ca medicanada.ca
Continuous reassessment
Lymphedema is becoming more known in the healthcare community, leading to earlier diagnosis. Treatment and therapies are becoming more readily available to patients. As fitters, we recognize the importance of reassessing garment styles, compression levels and materials each


time we replace the garment. Individual lifestyles and needs change over time, so we may need to adjust their garments. We encourage our customers to continue with their Complex Decongestive Therapy (skin care, exercise, compression, manual lymphatic drainage) and see a certified lymphedema therapist regularly.
Their therapists can detect changes in the tissue much sooner than we can visually.
We are continually revising our measuring techniques, and garment choices. What works for one customer may not work for the next. “Custom fitting” is definitely not an exact science. LP
Circular-knit vs Flat-knit Garments – What is the difference?
Circular-knit
• Made from a single tube on a circular knit machine and are seamless
• Different circumferences from the ankle to the thigh are produced with the same number of stitches
• The anatomical shape is created by changing the stitch size and yarn tension which is limited
• The material is usually less stiff and appears smoother
Flat-knit
• Made from an open piece of fabric on flat-knit machines and then seamed
• The machine can be programmed to vary the number of needles; therefore, varying the number of stitches, guaranteeing an individual fit and optimal compression
Circular-knit technique
Schematic representation of a circular knitted fabric. Changes in shape due to different mesh heights and thread tension.


• The material is more prone to cut or settle into skin folds, eventually causing skin lesions
• Available for compression classes 15-20mmHg, 2030mmHg, 30-40mmHg
• Available for both custom-made and ready-to- wear garments.
• Best used for vascular issues or in milder cases of primary or secondary lymphedema

• The sizing is applicable for patients with average and proportionate sized limbs
• All ready-to-wear garments are circular-knit
• The fabric is knitted flat, no fabric tension, no tendency to curl or cut in when fitting irregular shaped limbs
• The material offers more containment
• Made for individual shapes and sizes
Flat-knit technique
Schematic representation of flat knited fabric. Changes in shape by increasing or decreasing stitches.
• Less likely to dig into your skin, depending on the softness of the material
• Available in different compression classes
• Custom-measure only.
Source: Diamond Athletic Supplies Inc.
n Elastic inlay yarn n Knitting yarn
20 www.lymphedemapathways.ca Fall 2023
Ask the Expert Questions regarding cortisone injections


QI have moderate lymphedema in my left arm, with some flare ups last year, due to a lymph node dissection for breast cancer staging back in 1990. Now I’m developing painful arthritis in both my wrists. Are there newer developments regarding the question of getting cortisone injections in the affected arm to relieve the discomfort?
AOne thing that will make lymphedema worse in an affected limb is being unable to move it or to use it normally. Movement is essential for lymphatic drainage. Therefore, if you have arthritis, tendinitis or
other inflammatory problem that is preventing you from using the limb normally, and if conservative measures like rest, braces and anti-inflammatory medication have not helped, then a cortisone injection would be reasonable and helpful. The same applies to people who need orthopaedic surgery to joints in an affected limb. It is important to maintain mobility, range of motion, and function.
QThank you kindly for your reply. In response, I am very active, fit and use my lymphedema arm normally. I use a mild compression sleeve when necessary. But
 By Anna Towers, MD
here’s my concern: If I get a cortisone injection in my wrist to alleviate arthritic discomfort, should I (and perhaps my physician) take any precautions against a possible lymphedema flare up? Would it be wise for the physician to administer a preventative antibiotic injection, or should I take antibiotics by mouth? This concern is driven by the reality that I’ve had two flare ups last year that were intense – requiring intense bandaging as well as urgent care injections of antibiotics. I’d really like to avoid that if possible! Please let me know your thoughts on preventing a flare-up.
AThe involved physician would judge if a prophylactic antibiotic would be required, however this is usually not necessary when receiving an injection, but might be considered if having orthopaedic surgery. LP

Fall 2023 www.lymphedemapathways.ca 21
Clinical Advice
Amoena is a registered trademark of Amoena Medizin-Orthopädie-Technik GmbH. © 2023 All rights reserved Amoena Canada Inc. amoena.ca Linda CuraLymph Comfort Bra Medical Device Classification according to MDR 2017/745: Class 1 New Lymph Care by amoena the global leader in post breast cancer care solutions Now available for stage 1 to 3 truncal lymphedema
Anna Towers, MD is Director of the Lymphedema Program at the McGill University Health Centre (Montreal, Canada) and sits on the Editorial Board of Pathways
Report of ILF 2023 Conference
Nottingham, UK
By David Keast and Margie McNeely
The International Lymphedema Framework Conference was held June 13-15 in the Conference Centre in the beautiful park-like setting of the University of Nottingham. The conference was attended by 532 participants from 36 countries and included a special patient day on the final day. The International Lipedema Association co-conferenced with the ILF.
Frameworks
The conference was preceded by an International Frameworks Day, in which thirteen of the current 15 frameworks attended in person and one by video. Dr. Margaret McNeely and Dr. David Keast represented the Canadian Framework. This working day was an opportunity to share current activities and to discuss the current ILF projects on Children with Lymphedema, Genital Lymphedema, Outcome Measures and the LIMPRINT project, an initiative that is now being extended in a modified version into resource-limited settings. Six more countries are in the process of becoming Frameworks. One Framework, Bulgaria, is entirely patient led.
The conference itself followed a unique format. All presentations were limited to 15 to 20 minutes in both the plenary room
and two breakout rooms. This allowed for broad exposure to ideas and topics. Over 100 speakers gave 147 presentations on 14 themes. The opportunity to present orally was given to all submitted abstracts.
Highlights of the conference
n The opening plenary session focused on cellulitis. Speakers addressed the differential diagnosis, appropriate use of antimicrobials, the financial burden and strategies for prevention.

n Compelling findings presented by Dr. Alphonse Taghian (USA) bring into question the long-held risk reduction recommendation of avoiding chemotherapy infusion in the ‘at risk arm’ of women with breast cancer.
n Dr. Nele Devoogdt (Belgium), presented findings on the effectiveness of fluoroscopy-

guided manual lymph drainage as part of Decongestive Lymphatic Therapy. She questioned the added value of fluoroscopy-guided MLD compared to traditional MLD or placebo MLD.
David Keast, MSc, MD, JCFP (LM) is the Medical Director of the Chronic Wound Management Clinic at the Parkwood Institute in London, Canada and Co-Chair of the Canadian Lymphedema Framework.

Margie McNeely PT, PhD is a Professor in the Department of Physical Therapy at the University of Alberta. She performs clinical research for Supportive Care Services, Cancer Care Alberta.

22 www.lymphedemapathways.ca Fall 2023
ILF Conference Highlights
Prof. Christine Moffatt; ILF Chair.
n Other sessions focused on presentations from resource-limited settings, including a significant contingent from Uganda. Dr. David Keast (Canada) explored what constitutes best practice in resourcelimited settings, including traditional healing methods.

n Sessions explored controversies surrounding the diagnosis and management of lipedema.
n An interesting presentation by Karen Bock (USA) explored sleep quality and lymphedema in breast cancer survivors. Sleep quality and quantity by self-report were significantly less than that determined by wearable motion sensors.
n Several sessions explored the link between obesity and lymphedema.

Among the 60 abstract presentations, Canada was well represented:
• Dr. Margaret McNeely (Alberta) presented the work to date on the Canadian best practice guidelines for breast cancer-related lymphedema.
• Marie-Eve Letellier (Quebec) – Independent prospective follow-up of lymphedema patients who have undergone lymphatic surgeries.
• Marize Ibrahim (Quebec) - Management of lymphedema related to head and neck cancer.
Exhibition hall
There were 24 exhibiting partners. A novel feature was five mini theatre setups called Skill Zones. These instructional sessions
LYMPHEDEMA THERAPY CERTIFICATION
TheKloseTrainingAdvantage:
• 135-hours of lymphedema education
75-hr engaging online home study module
60-hr (6 1/2) day classroom education
•Exclusive post-graduate resources
• Special pricing for Canadian Therapists; contact us for more information

ONLINE COURSES:
•Breast Cancer Rehabilitation
• Strength After Breast Cancer
• Wound Management for Lymphedema Therapists
•Head & Neck Lymphedema Management
•Add’l courses at klosetraining.com
mailto: info@klosetraining.com
https://klosetraining.com/
provided an ideal opportunity to learn tips from experts. It was wonderful to learn about Brylan’s Feat Foundation (BFF)the world’s first and only nonprofit specific to pediatric lymphedema!
Networking opportunities

The ILF conference presented an opportunity for networking among researchers and clinicians – learning about novel approaches to lymphedema management in other countries. We learned that cellulitis is a common issue across all countries. LP
A full set of references can be found at http://www.canadalymph.ca/ pathways-references/

Enhancing patient outcomes
Fall 2023 www.lymphedemapathways.ca 23
1-303-245-0333 info@klosetraining.com klosetraining.com updated in 2023 updated in 2023
For more information
Hints and Tips
Garment care
• The recommendation is to have two sets of garments: one to wear, while one is in the laundry.
Hand or machine wash in warm water

• Wash with a special washing solution or a mild soap/ detergent (no additives).
• Rinse well, roll in a towel to absorb excess water.
• Air dry or tumble dry (low setting); depending on manufacturer.
• Do not iron.
What’s the difference?
• There is often confusion about custommade vs. custom-fit among patients and health care professionals.

• Some companies often call ready-towear products custom-fit.

• Custom-made garments are left and right specific.

• Measurements are taken in circumference and length.

• There will be a name tag sewn inside the garment along with date of manufacturing
Source: Diamond Athletic Medical Supplies Inc.

Garment options
• There are many manufacturers and distributors who carry options for compression garments in many styles and colours.


Be willing to try them all to find what suits you best.
• Keep abreast of new compression fabrics, styles and manufacturers by subscribing to Pathways magazine.
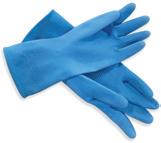
• Experiment with different donning aids to ease the task of getting your stockings or sleeves on and off. You might be able to handle it with just rubber gloves, but as flexibility and strength decline with age, you will want to be wearing these garments for life. LP
24 www.lymphedemapathways.ca Fall 2023 Helpful Suggestions www.Lohmann-Rauscher.ca 1-888-836-6726 · inquiries@ca.LRmed.com ReadyWrap® Foot CT NEW High containment and contoured fit in a fully adjustable design. 2730
2023 One Wish Awards of up to $10,000 To nominate a family caregiver or dedicated health professional go to canadianabilities.org Nominations close November 30, 2023 *For contest rules and regulations see website. plus recognition awards for amazing caregivers! SUPPORTING CAREGIVERS ACROSS CANADA Canada Cares is a charitable organization that supports, celebrates and recognizes family caregivers. TM INSPIRATION, INFORMATION AND OPPORTUNITY FOR CANADIANS WITH DISABILITIES Th e ar t of li vi n g TM INSPIRATION, INFORMATION AND OPPORTUNITY FOR CANADIANS WITH DISABILITIES Th e ar t of li vi n g INSPIRATION, INFORMATION AND OPPORTUNITY FOR CANADIANS WITH DISABILITIES Th e ar t of li vi n g Media partners:
Did You Know?
Potential therapeutic treatment
This review aims to summarize the current knowledge regarding the pharmacological interventions studied in both experimental and clinical trials for secondary lymphedema. Recent findings: Lymphedema is a progressive disease that results in tissue swelling, pain, and functional disability. The most common cause of secondary lymphedema in developed countries is an iatrogenic injury to the lymphatic system during cancer treatment. Despite its high incidence and severe sequelae, lymphedema is usually treated with palliative options such as compression and physical therapy. However, recent studies on the pathophysiology of lymphedema have explored pharmacological treatments in preclinical and early phase clinical trials. Summary: Many potential treatment options for lymphedema have been explored throughout the past two decades including systemic agents and topical approaches to decrease the potential toxicity of systemic treatment. Treatment strategies including lymphangiogenic factors, anti-inflammatory agents, and anti-fibrotic therapies may be used independently or in conjunction with surgical approaches.
Source: The Future of Lymphedema: Potential Therapeutic Targets for Treatment. Curr Breast Cancer Rep. 2023 Jun: PMC10233555

Pneumatic compression dosing
Optimal frequency and duration of pneumatic compression device (PCD) therapy for lymphedema is undetermined. This prospective, randomized preliminary study evaluated the impact of different PCD dosing protocols on physiological and patient-reported outcomes (PROs) to estimate treatment effects, assess the responsiveness of various measurement techniques, and identify endpoints for a definitive PCD dosing trial.
Methods/Results:
21 patients with lower extremity lymphedema were randomized into groups for treatment with the Flexitouch advanced PCD: (A) once per day for 1 hour, 12 consecutive days; (B) twice per day in 1-hour treatments, 5 consecutive days; or (C) twice per day in 2-hour treatments, 5 consecutive days. Outcomes measured were changes in limb volume (LV), tissue fluid, tissue tone, and PROs. Those in group A experienced mean (standard deviation) LV reductions of 109 (58) mL (p = 0.003) on day 1 and of 97 (86) mL (p = 0.024) on day 5. Group A also showed possible single-treatment decreases in extracellular fluid volume by bioimpedance

spectroscopy (BIS) on day 5. There were no consistent changes in groups B and C. Longterm assessment of LV and BIS showed no clear change. Tonometry, ultrasound, local tissue water, and PROs showed wide variation among participants. Conclusions: LV measurements showed potential benefit for 1-hour daily PCD treatment. A definitive dosing trial should include LV, BIS, and PROs in a comparison of 1- and 2-hour daily treatment protocols conducted over a study period of 4 weeks. These data may inform appropriate outcome measures for other intervention studies in lymphedema.
Source: A Prospective Preliminary Study Examining the Physiological Impact of Pneumatic Compression Dosing in the Treatment of Lower Extremity Lymphedema Lymphat Res Biol. 2023 May 4. PMID:37140559 | DOI:10.1089/lrb.2022.0087
Acupuncture for BCRL

Methods of conservative management for breast cancer-related lymphedema (BCRL) are burdensome in terms of time, cost, and convenience. In addition, many patients are not candidates for surgical treatment. Preliminary results have demonstrated possible beneficial effects of acupuncture for patients with BCRL. In this small pilot study, we examined the safety and feasibility of an acupuncture randomized control trial (RCT) in this patient cohort, utilizing standardized clinical and patient-centered outcome measures. Methods/Results: Patients with BCRL were randomized to the acupuncture (n = 10) or the control (n = 4) group. Patients received acupuncture to the unaffected extremity biweekly for 6 weeks. Feasibility was defined as enrollment ≥80%, completion of ≥9 of 12 acupuncture sessions per person, and ≥75% completion of 3 of 3 measurement visits. To inform a future adequately powered RCT, we describe within-group changes in patientcentered outcomes, including circumferential measurements, bioimpedance spectroscopy, perometry, cytokine levels, and patient quality of life. Adverse events were systematically tracked. 14 patients completed the study. Of those who received acupuncture (n = 10), 8 completed all 12 acupuncture sessions, and 2 patients completed 11 sessions. 93 percent of all participants completed all 3 measurement visits. There was no consistent improvement in arm volumes. Inflammatory marker levels had inconclusive fluctuations among both groups. All patients receiving acupuncture demonstrated an improvement in their functional quality-of-life
score. No severe adverse events occurred. Conclusions: A randomized controlled study of acupuncture for BCRL is feasible. The acupuncture intervention is acceptable in this population, without safety concerns in a small sample and warrants further investigation.
Source: Acupuncture Treatment for Breast Cancer-Related Lymphedema: A Randomized Pilot Study. Lymphat Res Biol. 2023 Apr 20. PMID:37083501 | DOI:10.1089/lrb.2022.0001
Tracking symptoms after PAL Lymphedema negatively impacts patients from a psychosocial standpoint and consequently affects patient’s quality of life. Debulking procedures using power-assisted liposuction (PAL) are currently deemed an effective treatment for fat-dominant lymphedema and improves anthropometric measurements as well as quality of life. However, there have been no studies specifically evaluating changes in symptoms related to lymphedema after PAL. An understanding of how symptoms change after this procedure would be valuable for preoperative counseling and to guide patient expectations. Methods: A cross-sectional study was performed in patients with extremity lymphedema who underwent PAL from Jan 2018 - Dec 2020 at a tertiary care facility. A retrospective chart review and follow-up phone survey were conducted to compare signs and symptoms related to lymphedema before and after PAL. Results: Of the 45 patients in the study, 60% underwent upper extremity PAL and 40% underwent lower extremity PAL. The mean follow-up time was 15.5±7.9 months. After PAL, patients with upper extremity lymphedema reported having resolved heaviness (44%), as well as improved achiness (79%) and swelling (78%). In patients with lower extremity lymphedema, they reported having improved all signs and symptoms, particularly swelling (78%), tightness (72%), and achiness (71%). Conclusions: In patients with fat-dominant lymphedema, PAL positively impacts patient-reported outcomes in a sustained fashion over time. Continuous surveillance of postoperative studies is required to elucidate factors independently associated with the outcomes found in our study. Moreover, further studies using a mixed method approach will help us better understand patient’s expectations to achieve informed decision and adequate treatment goals.
Source: Tracking Symptoms of Patients With Lymphedema Before and After Power-Assisted Liposuction Surgery. Ann Plast Surg. 2023 Feb 27. PMID:36881732 | DOI:10.1097/SAP.0000000000003430

Fall 2023 www.lymphedemapathways.ca 25
Research Advances
Canadian and International Events


September 17-21, 2023
The 37th AVLS Annual Congress will be combined with the Miami Beach, FLA 2023 UIP Congress for an international event.





USA https://www.myavls.org/annual-congress-2023.html


Sep 28-30, 2023
Wounds Canada - National Conference. Niagara Falls, ON https://www.woundscanada2023.ca/
Oct 2-3 2023
British Lymphology Society - The #BLS2023 Conference. Chester, UK https://www.theblsconference.com/


Good day, Editor – hoping this message reaches you in good health & spirits, I relay a few thoughts after having fully reviewed (& enjoyed) my latest issue (Summer 2023) of your magazine...I also appreciated the expressed thoughts at page 17 … re: the purchase of garments that are NOT covered (partially) by the respective provincial health plan.
Oct 4-8
National Lymphedema Network –Philadelphia, PA Lymphological Investigations and Exploration. USA https://nlnmembership.com/2023-conference/


Nov 3-4, 2023
Canadian Lymphedema Framework – National Conference. Toronto, ON Moving Forward Together. An educational event for health professionals, patients and caregivers. www.canadalymph.ca/conference
This is where an outstanding problem continues to present itself…. In this wearer’s experience, “seasonalization” needs or differences (in lymphedema) between cold/winter & hot/summer, should be further explored... (I am) disappointed by the reported study’s findings on Seasonal Variations (page 25)... One can hope that further study will someday reveal what most compression garment wearers know … heat and humidity DO make a difference in the edematous swelling, plus - by extension - the garments needed to comfortably control it!
Steve Kelland, Ottawa, Ontario
Thank you so much for the magazine information I found on-line (dating back to 2012) on “Managing Pain and Minimizing the Risks for Lymphedema” (Summer 2012). I appreciate the work you do and the education you offer to the public.


Carole Pertofsky, Berkeley, California

26 www.lymphedemapathways.ca Fall 2023 The CLF is an academic and patient collaboration, working to improve lymphedema management for lymphedema and related disorders in Canada The Canadian Lymphedema Framework (CLF) wishes to thank these partners for their support in making this magazine a reality ABOUT THE CLF: Charitable Registration 85160 1260 RR0001 Subscription information at www canadalymph ca/subscriptions ENROLL NOW: FALL COURSE BEGINS OCTOBER 16 Lymphedema and Chronic Edema Management Microcredential eClass - Learn Online www.tinyURL.com/CLF-CE-Info 35 education hours certificate Learn with leading experts Self-paced, 6-weeks 4 modules
Education Education
an collaboration, for disorders Canada Framework to reality CLF: RR0001 Subscription at __________________________________________________________________________________________________ __________________________________________________________________________________________________ __________________________________________________________________________________________________ __________________________________________________________________________________________________ __________________________________________________________________________________________________ __________________________________________________________________________________________________ __________________________________________________________________________________________________ __________________________________________________________________________________________________ __________________________________________________________________________________________________ __________________________________________________________________________________________________ __________________________________________________________________________________________________ __________________________________________________________________________________________________ __________________________________________________________________________________________________ __________________________________________________________________________________________________ __________________________________________________________________________________________________ __________________________________________________________________________________________________ __________________________________________________________________________________________________ __________________________________________________________________________________________________ __________________________________________________________________________________________________ __________________________________________________________________________________________________ __________________________________________________________________________________________________ __________________________________________________________________________________________________ __________________________________________________________________________________________________ __________________________________________________________________________________________________ __________________________________________________________________________________________________ __________________________________________________________________________________________________ __________________________________________________________________________________________________ __________________________________________________________________________________________________
_________________________________________________________ _________________________________________________________ _________________________________________________________ _________________________________________________________ _________________________________________________________ _________________________________________________________ _________________________________________________________ _________________________________________________________ _________________________________________________________ _________________________________________________________ _________________________________________________________ _________________________________________________________ _________________________________________________________ _________________________________________________________ _________________________________________________________
Letters to the Editor...
Lymphedema community contributions
Professor Hildegard Wittlinger (left) was acknowledged for her life’s work recently at Summer Lymphology Days in Walchsee, Austria. Robert Harris (right) was also acknowledged for his four decades of work with Vodder School.
Source: Dr. Vodder School International News (July 2023)
Nighttime
maintenance for e ective treatment of lymphedema Introducing Juzo

The wait is over!
Foam channels


Removable fasteners

Easy to put on and take o
Thumb guard

Keeps edema from shifting
Follow lymphatic pathways, promoting lymphatic drainage
Prevents bunching and skin irritation, protects pressure points
Cooling material
Wicks moisture, reduces sweating


https://www.juzo.ca/ emailto:support@juzo.ca
Juzo introduces Juzo Night, a lightweight, comfortable garment that helps prevent edema from rebounding during sleep or rest. Night Call or email us to learn more 1-844-229-4999 • support@juzo.ca • Juzo.ca • Juzo Canada Ltd.
Anatomical angle
