Lunds &


Recognized

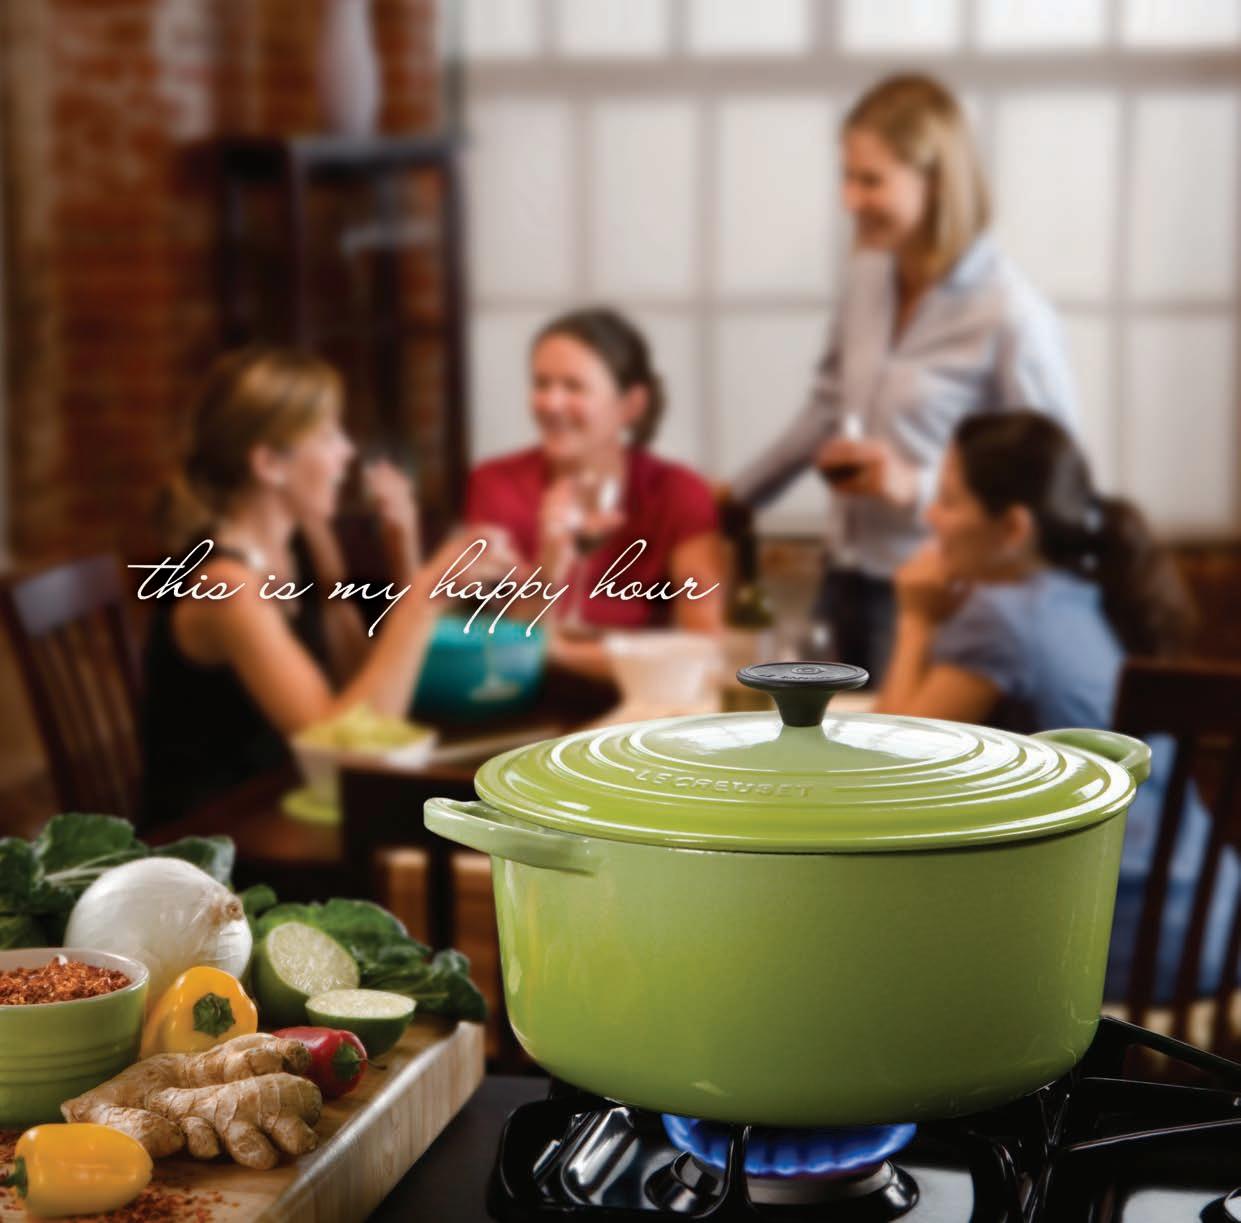
Those who love to cook make more than food in the kitchen. They make the most of every moment together—sharing stories, creating delicious flavors and simply enjoying the company of close friends. For more than 80 years, Le Creuset has been a part of these special times, and a colorful companion to all who savor food—and life—to the fullest. To learn more about Le Creuset’s classic French quality, and the joys of cooking with premium enameled cast iron, visit www.lecreuset.com.

A few twists elevate everyday ingredients into dinner party fare—plus potluck pointers for the host and guest
 BY KRISTIN DONNELLY
Delicious bread rolls from gooey treats to cheesy appetizers
BY ROBIN ASBELLTasty small bites and delicious wine come together for a fun and festive night RECIPES BY BARBARA SCOTT-GOODMAN
Embrace the relaxed pace of mountain life with warming recipes rooted in the peaks
 BY LIZZIE KAMENETZKY AND KELLEY EPSTEIN
Rick Martínez shares a glimpse into his epic journey throughout Mexico that resulted in his new cookbook BY QUINTON SKINNER
Discover the therapeutic comforts of baking
BY BENJAMINA EBUEHIKitchen Gadgets
BY JASON ROSSGlorious
BY KATHERINE LAWLESSVisual
Liquid Dessert:
BY MARY SUBIALKA


There’s a different type of banana bread or cake for every mood. Sometimes you need a firmer, slightly dense loaf that can be toasted and doubled up as breakfast. Other times, you might lean toward something with a softer, more cakey crumb, perhaps studded with chocolate. This banana cake feels very grown up and is perfect for when you’re feeling a little fancy. It’s spiked with dark rum and a generous glug of tahini for a more savory, nutty profile but is still just as easy to make as any other banana bread. All you need is a couple of bowls and a wooden spoon. –benjamina ebuehi
2 eggs
½ cup light brown sugar
½ cup dark brown sugar
⅓ cup tahini
10½ ounces (about 3 medium) bananas
3 tablespoons dark rum
1 cup plus 2 tablespoons all-purpose flour
¾ cup whole-wheat rye flour
2 teaspoons baking powder
¼ teaspoon baking soda
½ teaspoon ground cinnamon

Pinch of salt
Walnuts, for topping
½ cup (scant) powdered sugar
½ tablespoon dark rum
½ teaspoon tahini
1 teaspoon vanilla bean paste
1. Heat the oven to 350°F. Grease and line the base of an 8-inch springform cake pan.
Whether it was learning a new skill or honing a hobby, many of us resorted to something—anything—to keep our hands and minds busy during the pandemic. London-based baker, author, and “The Great British Bake Off” contestant Benjamina Ebuehi, of course, turned to baking—and wrote a book about it. “During a strange time of lockdowns and the world being flipped on its head, one small joy was seeing how many people picked up baking for the first time or returned to it after some time away,” Ebuehi says. “Whether it was baking just to pass the time, baking with kids to keep them busy while homeschooling, or providing homemade goodies to frontline workers, it was a sweet reminder of the way that food really does bring us together.”
In her book “A Good Day to Bake,” Ebuehi’s recipes encapsulate a natural, down-to-earth way of baking—one that is led by flavors such as tahini, matcha, cardamom, and almonds. Ebuehi reminds us that digging out the measuring cups, whisking the eggs, and stirring the batter are rituals that deserve to be enjoyed year-round. The recipes from the book highlighted here, for example, would be great treats for the holidays, but also anytime of year. “It can be so easy to get lost and caught up in the rhythms of the week, but let the kitchen—however big or small—be a space in which you let loose, slow down, and are present,” she says.
“Because every day is a good day to bake.”
2. In a large bowl, whisk the eggs and sugars together for 1 minute or so until combined and just a little bit paler. Mix in the tahini.
3. In a separate bowl, mash the bananas with the rum. Add the bananas to your egg mixture and stir to combine. Add both flours, the baking powder, baking soda, cinnamon, and salt. Stir until just combined.
4. Pour the batter into the prepared cake pan and bake for about 40 to 45 minutes or until a toothpick inserted into the middle of the cake comes out clean. Let cool slightly in the pan while you make the glaze.
5. To make the glaze, mix all the glaze ingredients until smooth and it’s a pourable consistency. If it is too thick, add 1 teaspoon of water at a time to loosen.
6. Pour the glaze over the warm cake, and let it set for 10 minutes before turning the cake out onto a serving plate. Top with walnuts, if desired, and let it cool completely before serving.
Flourless chocolate cakes can often lean into a deeply fudgy, almost sticky texture, but this version still retains a bit of a cakey crumb that stays eternally moist, thanks to all the ground almonds. It makes for a good celebration cake or something to serve after a cozy dinner party when only chocolate on chocolate on chocolate will do. Serve with a good splash of cold cream. –benjamina ebuehi
2½ ounces dark chocolate
1¼ cups granulated sugar
⅔ cup (scant) extra-virgin olive oil
3 eggs
1¾ cups ground almonds
1 cup (scant) cocoa powder


½ teaspoon baking soda
1. Start with the cake. Heat the oven to 350°F. Grease and line an 8-inch cake pan. Melt the chocolate in short bursts in the microwave or in a bowl set over a pan of simmering water. Set aside to cool.

2. In a large bowl, whisk together the sugar and oil. Add the eggs and beat until smooth, then mix in the melted chocolate.
3. In a separate bowl, mix the ground almonds, cocoa powder, baking soda, and
½ teaspoon salt
⅔ cup (scant) hot water
6 ounces dark chocolate, plus extra shavings to decorate
1 cup (scant) heavy cream
salt. Stir this mixture into the wet ingredients until fully combined. Pour in the hot water and give it a good stir before pouring the batter into the cake pan.
4. Bake for 40 to 50 minutes until a toothpick inserted into the middle of the cake comes out clean. Let the cake cool completely in the pan.
5. For the ganache, finely chop the chocolate and place it in a bowl. Heat the cream in
a small saucepan until steaming, just before it comes to the boil. Pour the cream onto the chocolate, and let it sit undisturbed for about 30 seconds.
6. Start stirring slowly from the middle, working your way outward until you have a smooth ganache. If there are still a few unmelted lumps, place the bowl over a pan of simmering water and stir until everything is melted.
7. Place the cooled cake on a wire rack and set the rack over a baking sheet or a sheet of baking paper to catch the chocolate. Pour the ganache over the cake, letting it drip down the sides. Use a palette knife to help the ganache drip to any uncovered areas. Let the cake set for 30 minutes before covering with some chocolate shavings.
■
Not every gadget deserves a spot in your kitchen: Cooking with your hands and a good chef’s knife can work for just about everything. But some gadgets ll their need—or even a few needs—so well that making room for them is worth it as they earn their spot with their usefulness.
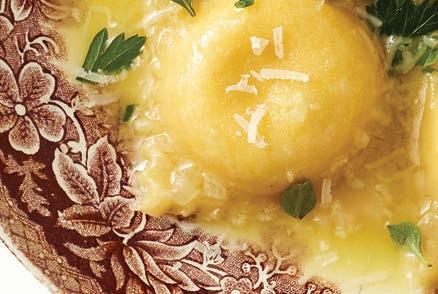
Check out the selection of gadgets on page 8. They could help in making pasta dough and the Ricotta Ravioli with Butter Sauce recipe here, not to mention add a little fun, along with function, to your cooking. These are just a few kitchen gadgets I love, and will make you, or the chef in your life, a little faster, a little ner, and maybe even a little happier in the kitchen.
PHOTOGRAPHY TERRY BRENNAN FOOD STYLING LARA MIKLASEVICS
Here is a good, easy-to-work-with pasta dough. It uses soft all-purpose and hard semolina flour for flexibility and a little bite.
½ pound all-purpose flour plus extra for dusting as needed ½ pound semolina flour
Pinch of salt
5 lightly whipped eggs 1 tablespoon olive oil
1. In a large mixing bowl, use a balloon whisk or fork to combine the flours and salt.
2. On a clean work surface, make a wide, shallow mound of flour, about 6 inches across, with walls of flour about 1 inch high.


3. Pour the eggs and olive oil into the well in the flour.
4. Use a fork to pull flour from the sides of the well, and gradually incorporate the flour into the eggs using the fork. Continue pulling flour into the eggs, working around the well and stirring the flour into the egg mixture with the fork, until dough begins to form, and becomes too thick to handle with a fork. As the dough forms, scrape it off the fork and mix the remaining flour and dough with your hands until the flour is fully incorporated into the dough.
5. On a clean work surface, knead the dough by folding and pushing it with the heels of your hands, rotating and repeating. If the dough is sticky and hard to handle, add a little extra flour. Knead for 10 to 15 minutes until the dough is silky smooth.
6. Wrap the dough in plastic wrap and let it sit at room temperature for 30 minutes. This will allow the dough to relax and make it easier to roll out without springing back.
7. The dough is now ready to roll and cook. It can be wrapped in plastic film, and refrigerated for up to 1 day, although it is best used on the same day. Longer time will result in greyish discoloration.
Use this ricotta mixture to fill ravioli—and if you have any left over, use it as a flavorful sandwich spread.
1 clove garlic
1 teaspoon salt
2 teaspoons lemon juice
¼ teaspoon black pepper

3 cups whole milk ricotta
¼ cup grated Parmesan cheese
1 tablespoon minced herbs (basil, parsley, or chives), optional
1. Use a silicone roller (like the one shown on page 8) to peel the garlic, then use a micro grater (also shown on page 8) to shave the garlic into fine mince. In a small mixing bowl, combine garlic, salt, and lemon juice. Let the mixture sit for a couple minutes to soften the flavor and texture.
2. Next, use a spoon to mix in the pepper, ricotta, Parmesan, and herbs, if using. Mix until well combined. Taste the cheese mixture and add salt or lemon juice, if desired.
3. Use immediately or transfer to a lidded container and refrigerate up to 1 week.

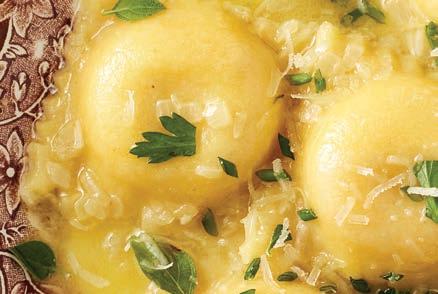

This recipe uses the Pasta Dough, Ricotta Ravioli Filling, and the ravioli mold, as well as the other gadgets covered on page 8.
Pasta Dough, rested (see recipe left)
Ricotta Filling (see recipe left)
Semolina flour, for dusting
1 gallon boiling water and pinch of salt for cooking pasta
Cooking spray
1 tablespoon olive oil

2 shallots, minced
4 tablespoons unsalted butter
Pinch of salt and pepper
Grated Parmesan cheese, for serving
1. After the dough has rested, cut it into four equal pieces with a kitchen knife.
Smaller pieces of dough are easier to roll. If using refrigerated dough, allow the wrapped dough to warm a bit at room temperature for about 30 minutes.
2. Either use a pasta machine or a rolling pin to roll the dough into noodles wide enough and long enough to fully cover the ravioli mold—like wide lasagna noodles. Roll the dough thin—nearly 1⁄8 to 1⁄16 inch—but not so thinly that it tears easily.
3. Spray the ravioli mold to help the dough to release and lay a noodle over the metal frame covering all the ravioli sections. Use the plastic form to press the dough gently and make little depressions in the dough for the filling.
4. Spoon about 1½ tablespoons of ricotta filling into each ravioli depression.
5. Use a pastry brush or your fingers to brush water onto the edges of the pasta around the


filling. This will help seal the pasta around it.
6. Lay another noodle over the filled ravioli form. Use a rolling pin and push the two sheets of pasta together. Be firm and press with some pressure so the ravioli maker cuts into the dough, leaving clean cut raviolis.
7. Invert the ravioli maker and let them fall out onto a tray. Use a dusting wand to sprinkle generously with semolina flour on all sides.
8. Repeat the process until the dough and filling are used. The ravioli could be stored covered on a tray overnight, but are better served the same day. They can also be frozen, wrapped on a tray, and then transferred to zip-top bags in the freezer for up to 6 months.
9. Cook the ravioli in salted boiling water until tender, about 3 to 5 minutes. While the ravioli cooks, add the olive oil to a large sauté pan and sweat the shallots on medium-low heat for about 2 to 3 minutes.
10. Use a slotted spoon or a kitchen strainer and add the cooked ravioli to the shallots and butter, along with about ½ cup of the pasta cooking water. Swirl in the butter, salt, and pepper, using a sauce whisk to incorporate the butter into the sauce. Try to push the pasta to the sides of the pan so you do not break the ravioli with the whisk. Whisk until all the butter is incorporated, and the sauce is thickened and shiny. If it gets too thick, add in another 1 or 2 tablespoons of the pasta water.
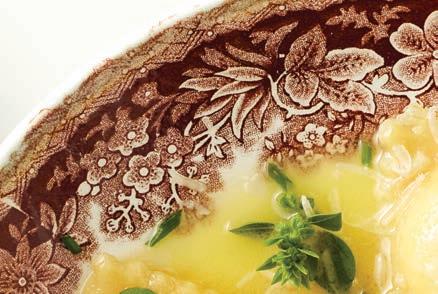
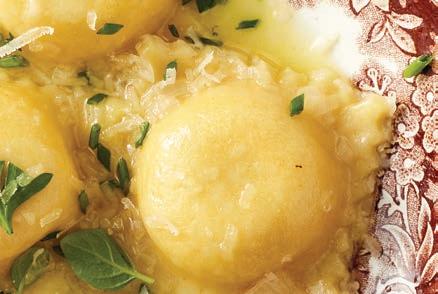
11. Serve the ravioli immediately in pasta bowls, making sure each piece is coated in a little sauce. Sprinkle with grated Parmesan.


Calories: 630, Fat: 30g (Sat: 15g), Cholesterol: 225mg, Sodium: 740mg, Carb: 67g, Fiber: 2g, Sugar: 1g, Protein: 24g
winter 2022 real food 7


Handmade stu ed pasta is impressive, wonderful, and yummy—and, unfortunately, time consuming. While a ravioli maker will not drastically change that, it will make shaping the ravioli much faster. If your maker has 10 or 12 slots, then bingo—you are now 10 or 12 times faster than you would have been had you made them without the press. The metal frame’s cutting feature does some of the work for you, sealing the “pillows” so there is no need to spend time pinching raviolis by hand. Also, each ravioli will be the same shape and weight, all cut to the exact same size. Use the ravioli maker for other lled doughs like pierogi, or dumplings and pot stickers.


This is such a sweet little gadget for dusting foods neatly and quickly. Instead of the alternative of a ne strainer and a spoon, this duster holds our in the end of the wand, in a capsule, and then when it is time for dusting, you just shake it a bit. Use it to dust breads, pasta, mu n tins or cake pans, or ll it with powdered sugar and garnish tarts, cakes, and all types of sweet treats.


Two things about a micro grater: Every chef has one, and no other tool can replicate what it does. There simply is no other tool that can shave and grate foods as nely and wispy as a micro grater. Use it for cheese, lemon zest, spices such as nutmeg, dark chocolate, garlic, and probably 20 other foods.


If you use fresh garlic at home with any frequency, then you know the di culty of peeling garlic, especially for dishes that require more than just a few cloves. Like magic, these tubes whisk away the peels from garlic with minimal e ort, and hands stay clean of garlic’s famous garlicky “perfume.”


A sauce whisk functions just like a balloon whisk except it’s better and smarter for warm sauces made in a pan, such as butter sauce or gravy. The at whisk lays against the bottom of at-sided pans and is able to bind and incorporate sauces faster and without as much movement, e ort, and splashing as a regular balloon-style whisk. ■


Robin Asbell spreads the word about delicious whole, real foods through her work as an author, cooking teacher, and private chef. She is the author of “Plant-Based Meats,” “Great Bowls of Food,” “Big Vegan,” “Gluten-Free Pasta,” and more.


Terry Brennan is a photographer based in Minneapolis, Minnesota. Clients include Target, General Mills, Land O’Lakes, and Hormel. “Working with Real Food is a highlight—I love working with the creative team and, of course, sampling the wonderful recipes.”
Kristin Donnelly is the author of “Modern Potluck” and the Substack subscription newsletter Mission: Dinner, which provides one easy recipe per week (each using about five ingredients and taking 30 minutes or less to prepare). She is also the cohost of the Everything Cookbooks podcast. She lives in New Hope, Pennsylvania, with her family. You can find her at kristindonnelly.com.
Lara Miklasevics began her food career on the other side of the camera, cooking at the renowned New French Café in Minneapolis. Today her work as a stylist is in demand at corporations including Heinz, Target, and General Mills, as well as with many magazines. Her experience as a chef helps her make food as appealing on the page as it is on the plate.
Jason Ross is a chef consultant for restaurants and hotels, developing menus and concepts for multiple high profile properties. He grew up and trained in New York City but now calls St. Paul, Minnesota, home. He currently teaches the next generation of chefs at Saint Paul College Culinary School.


Quinton Skinner is the author of fiction and nonfiction books, as well as work in numerous national publications including Glamour, Experience Life, Huffington Post, Delta Sky, and American Theatre. He was senior editor of Minnesota Monthly and METRO magazine, and is the co-founder of Logosphere Storysmiths.

Bloomington: 952-896-0092
Burnsville: 952-892-5600
Chanhassen: 952-474-1298
Eagan: 651-686-9669
Eden Prairie: 952-525-8000
Edina
50th Street: 952-926-6833
France Avenue: 952-831-3601

Golden Valley: 763-544-8846
Maple Grove: 763-416-1611
Minneapolis
Downtown: 612-379-5040
Nokomis: 612-729-4000
Northeast: 612-548-3820
Uptown: 612-825-2440
Minnetonka
Glen Lake: 952-512-7700
Highway 7: 952-935-0198
Ridgedale: 952-541-1414
Navarre: 952-471-8473
Plymouth: 763-268-1624
Prior Lake: 952-440-3900
Richfield: 612-861-1881
Roseville: 651-633-6949
St. Cloud: 320-252-4112
St. Louis Park: 952-929-2100
St. Paul
Downtown: 651-999-1600
Highland Bridge: 651-698-5845
Wayzata: 952-476-2222
White Bear Lake: 651-653-0000
Woodbury: 651-999-1200
LundsandByerlys.com/Catering 952-897-9800
Get extra o ers and tools to make shopping easier. LundsandByerlys.com/Extras
LundsandByerlys.com/Mobile
Follow us on social media and sign up for our e-newsletter. LundsandByerlys.com/StayConnected

Call our FoodE experts: 952-548-1400
Aaron Sorenson: 952-927-3663

n the most recent fall issue of Real Food, I had the pleasure
of sharing a story about my grandfather’s journey to building our company on a foundation of quality, compassion, and innovation. He left big shoes to fill, both literally and figuratively. Thankfully, we’ve been blessed throughout our more than 80 years in business to have such an amazingly talented team upholding these values.
As we welcome another holiday season, we are excited to introduce you to a couple of new holiday centerpieces—L&B Free Range Spatchcock Turkey and L&B Alderwood Beef Sirloin Roast. Executive Chef Anthony Leonhardi created these in our Product Innovation Center.
“Spatchcocking has become a popular way to prepare a chicken, but we haven’t seen it done much with a turkey,” Chef Leonhardi said. “We wanted to provide our customers with another excellent whole turkey option that is full of flavor and takes only about an hour to fully cook in the oven.”
This innovative creation features an all-natural, antibiotic-free turkey that is brined in pure maple sugar. “By using a small amount of maple sugar, it adds a tremendous flavor that is not overly sweet. And because the turkey is brined it is going to stay tender even if it’s slightly overcooked,” Chef Leonhardi said.
Our new Alderwood Beef Sirloin Roast is an approximately 2-pound sirloin that is marinated and aged with hand-selected ingredients including herbs, alderwood-smoked salt, and a touch of coffee.
“We’ve been perfecting this product for nearly two years, and the combination of alderwood-smoked salt and coffee proved to be the breakthrough in our aging process,” Chef Leonhardi said. “This roast is perfect for the center of the plate or sliced thin for salads and sandwiches.”
Inside our Product Innovation Center, our team of executive chefs, led by Michael Selby, is always in various stages of researching, developing, and taste-testing products. Their inspiration comes from travels, keeping current on food trends, and, most importantly, maintaining a high level of curiosity about how ingredients that are being used today could be used to create other unique offerings. Our executive chefs always have two key goals in mind—ensuring quality and flavor shine through while also bringing convenience to our customers.
“Every year our team is developing nearly 1,000 concepts, and around 100 of them will rise to the top and become products you can only find at Lunds & Byerlys,” said Chef Selby, who is also the mastermind behind our patented Reserve Aged Beef. “It is always so rewarding to think about these creations and how they will bring people together at the dinner table to create memorable moments.”
From our L&B family to yours, we wish you a wonderful holiday season.
Tres LundMinnesota winters are better with a cup of Swedish glögg in hand. Or perhaps a soothing Ginger Lemon Hot Toddy (with or without the whiskey) will stave off the winter blues. Whether you prefer a cocktail or a mocktail, our collection of winter beverages has something for everyone this season!
MAKES 2 SERVINGS
PREP TIME: 5 MINUTES; COOK TIME: 25 MINUTES
2 cups water
2 ginger tea bags
4 tablespoons freshly squeezed organic lemon juice
2½ teaspoons fresh ginger, finely grated
2 tablespoons raw honey
Pinch cayenne pepper
1. Bring water to a boil in a small saucepan. Turn off the heat, add the tea bags, and let steep for 10 minutes.
2. Remove the tea bags and bring back to a boil. Once it hits a rolling boil, turn off heat and add lemon juice, grated ginger, honey, and cayenne.
3. Divide between two mugs and enjoy!
CRANBERRY GREEN TEA MOCKTAIL

MAKES 4 SERVINGS | PREP TIME: 5 MINUTES; COOK TIME: 10 MINUTES
1 quart water

4 green tea bags

1 cup (8 ounces) unsweetened cranberry juice
½ cup (4 ounces) pomegranate Juice
4 teaspoons honey
4 teaspoons freshly squeezed lemon juice
3 mint leaves, plus more for garnish
8 ounces club soda
Fresh cranberries, sliced or whole, with mint sprig, for garnish
1. In a small saucepan, combine 1 quart water with green tea bags and bring to a rapid simmer. After 10 minutes, remove the tea bags, then continue simmering until the tea is reduced to 1 cup. Set aside to cool.
2. In a cocktail shaker filled halfway with ice, for each serving, combine 2 ounces green tea reduction, 2 ounces cranberry juice, 1 ounce pomegranate juice, 1 teaspoon honey, and 3 mint leaves. Shake for 15 seconds and double strain over ice.
3. Top with 2 ounces of club soda. Garnish with fresh cranberries and a sprig of mint on a skewer.

MAKES 8 SERVINGS | COOK TIME: 20 MINUTES; TOTAL TIME: 1 HOUR
For the Spiced Syrup
2 cups water
1 cup sugar
4 star anise pods
½ teaspoon black peppercorns
½ teaspoon whole cloves
2 cinnamon sticks
1 1-inch slice of fresh ginger
For the Sangria
1 (750 mL) bottle dry red wine, such as Chianti, Grenache, or Syrah
½ cup fresh orange juice
1. To make the Spiced Syrup: In a small saucepan, combine the water, sugar, star anise, peppercorns, cloves, cinnamon sticks, and ginger. Bring to a simmer over medium-high heat, stirring to dissolve the sugar.
2. Boil until reduced by half and thickened, about 15 minutes. Let the syrup cool, then strain into a glass jar.
3. To make the sangria: Pour the red wine into a 3-quart pitcher. Stir in the orange juice, rum, brandy, Cointreau, and ¼ cup of the Spiced Syrup.
½ cup light rum
¼ cup brandy
¼ cup Cointreau or Triple Sec
2 navel oranges, peeled, halved, seeded, and thinly sliced
1 lime, peeled, halved, seeded, and thinly sliced
1 Granny Smith apple, cored and thinly sliced
1 Bartlett pear, cored and thinly sliced
1½ cups club soda
Sliced fruit, for garnish
4. Taste and add more syrup if you prefer a sweeter sangria.
5. Add the sliced oranges, lime, apple, and pear, and refrigerate for 1 hour.
6. Stir in the club soda before serving.

Serve the sangria over ice. Garnish with the sliced fruit.


■ The Spiced Syrup can be refrigerated for up to 2 weeks.
■ The sangria can be refrigerated for up to 4 days.
SWEDISH GLÖGG PUNCHCOCKTAIL
MAKES 10 SERVINGS
PREPARATION TIME: 5 MINUTES; COOK TIME: 25 MINUTES
2 (750 mL) bottles dry red wine
1 (750 mL) bottle German Spätlese or Riesling
1 lemon
1 orange
10 L&B Whole Cloves
10 L&B Whole Cardamom Pods
3 L&B Whole Cinnamon Sticks
1 1-inch fresh ginger, peeled and thinly sliced
1 cup raisins
1 cup blanched sliced almonds
1 cup granulated sugar
1 tablespoon Angostura bitters
1 cup aquavit
1. Combine the wines in a large pot.
2. Using a vegetable peeler, zest the citrus fruits.
3. Tie up the lemon zest, orange zest, cloves, cardamom, cinnamon, and ginger in cheesecloth and add to the wine.
4. Juice the lemon and orange. Add the juices to the wine, along with the raisins, almonds, and sugar.
5. Bring wine mixture to a boil over medium-high heat.
Reduce heat and gently simmer for 15 minutes, or until flavors are well blended and almonds are soft. Skim wine occasionally to remove any foam.
6. Just before serving, remove the cheesecloth and aromatics, and add the bitters and aquavit. Ladle the glögg into mugs and serve with a spoon for eating the raisins and almonds.
Cook’s Note: Glögg can be stored in the refrigerator for up to 1 week and then reheated on the stove or served cold. ■
Whether you’re seeking menu inspiration for an upcoming holiday gathering or simply need help nding an item, we have FoodE Experts in our stores who have a passion for food and an eagerness to share it with you. Easy to spot in their green coats, our FoodE Experts have one mission—to make your time in our stores and your kitchen more enjoyable.

Are you planning an office holiday party or hosting a family gathering? The experts at Lunds & Byerlys Catering can help you turn your vision into a reality. Choose from a wide variety of menus in all price ranges and enjoy delicious food, e cient delivery, and exceptional service. To speak with a catering expert, call 952-897-9800 or visit Catering.LundsandByerlys.com.
Our gi baskets and gi cards are sure to please the food fanatics in your life. Need something special for that “hard-to-buy-for” per son? Pick up themed gi baskets and gi sets at our gi and basket shop at Lunds & Byerlys St. Louis Park. Baskets can be picked up from the shop or delivered to homes or businesses locally or nationally. And a Lunds & Byerlys gi card makes a great holiday gi . Browse our selection of gi baskets, gi sets, and gi cards at lbgi baskets.com
Our cheese specialists are a remarkable group of experts found in each of our stores. Whether you’re hosting a big soiree or an intimate dinner party, they can help you build an impressive cheese board or pick the perfect pairing. Visit any Lunds & Byerlys cheese counter and let our cheese specialists help you nd your new favorite cheese!


Our Wines & Spirits shops offer an impressive selection of wines, liquors, and beers from Minnesota and around the world. Our staff is eager to help make your next event memorable. Did you know we have a wine club? Become a member and take advantage of special discounts and invitations to tastings and private sales. Learn more at LundsandByerlys.com or visit us at Burnsville, Chanhassen, Downtown Minneapolis, Eagan, Golden Valley, Maple Grove, Plymouth, Ridgedale, St. Louis Park, White Bear Lake, and Woodbury.
Feeling the stress of the holiday hustle and bustle? Save time and shop online! Simply visit Shop.LundsandByerlys.com to quickly and easily place your order, and then our trained sta will shop the order and have it ready for you to pick up in store or deliver to the front door of your home or business.

Let Lunds & Byerlys take care of the mouthwatering main course for your holiday dinner.


Our Manhattan Strip Roast is cut from a tender section of Choice New York Strip and lightly marinated with an exclusive combination of olive oil, French sea salt, and spices, developed by our executive chef Michael Selby. It cooks in less than an hour and is boneless, so it’s easy to slice and serve. Available in November and December.


This is ham the way it should be—made using an old-fashioned smoking process perfected by a fourth-generation family-owned smokehouse. The hams have subtly smoky-sweet flavor that’s not too salty and a firm texture that’s never dry. Spiral sliced for easy serving. Available in November and December.


Go local this holiday season with turkey from family farm Ferndale Market in Cannon Falls. Succulent all-natural turkey breasts are brined in fresh-pressed apple cider made from Minnesota-grown apples and seasoned with herbs, shallots, and sea salt, resulting in a rich, clean flavor. Available in November.
A new take on a Thanksgiving classic! Our new Free Range Spatchcock Turkey is butterflied so it cooks faster and is easier to carve. Plus, the spatchcock method creates a crisp skin and moist, tender turkey. The all-natural antibiotic-free turkey is brined with maple sugar, sea salt, and savory herbs. It’s sure to be the star of your Thanksgiving feast. Available in November.
Our patented Reserve Aged Choice Beef is aged a minimum of 28 days to achieve optimal flavor and tenderness. Much as an oak barrel promotes aging wine, untreated cedar is used here to accentuate aromas and provide depth of flavor and unmatched tenderness. Available daily.

Our bone-in Royal Rib Roasts are the ideal pairing of premium choice beef and top-shelf local herbs and spices. The marinade is savory, not salty, and very aromatic. Plus, these royal roasts are incredibly easy to cook! Each cut—king, queen, or princess— is right-sized by the number of servings. Available in December.
Our Imperial Beef Tenderloin roasts are made using only premium white beef tenderloins that are hand trimmed and freshly marinated in a rich rosemary and thyme herb blend. Each tenderloin has been carefully netted and right-sized for ease of preparation. Available in December.


Our new Alderwood Beef Sirloin Roasts start with a tender sirloin roast that’s rubbed with a propriety seasoning and then tossed in a rich, smoky coffee marinade. The result is a succulent roast that’s perfect for family gatherings. Plus, the leftovers are delicious in sandwiches the next day. Available

Throughout Mexico, Totopos—or tortilla chips— began as a way to use fresh tortillas so as to not waste them. Vista Hermosa makes its totopos the same way you would find in the markets of Mexico. The fresh, organic tortillas are cut and carefully fried in sunflower oil and then dusted with salt and chile powder. Each variety—blue corn, sea salted, and spicy red corn—is thick, crunchy, and perfect for dipping. They’re non-GMO, gluten-free, and made without additives, too!


Meet your new dinnertime staple. These slowsimmered pasta sauces combine California Olive Ranch’s award-winning 100% California extra-virgin olive oil with California vine-ripened tomatoes and a handful of simple, fresh ingredients. The sauces were designed in partnership with California chefs to help capture the bright California flavors. The California-style marinara sauce combines a blend of tomatoes, onion, garlic, parsley, and oregano, while the garden basil sauce is a mix of sweet basil and onion. Just grab a box of pasta and some fresh Parmesan cheese and dinner is ready!

L&B Cocktail Sauces come in a variety of zesty flavors that are perfect for holiday entertaining! If you’re more of a traditionalist, try our original horseradish sauce, which is spiked with a dash of horseradish. Beyond shrimp cocktail, try it folded into an omelet or mix 1⁄3 cup with 8 ounces of softened cream cheese to create a simple, utterly delicious dip. If you prefer a bright, bold citrus flavor, try the Meyer lemon and shallot cocktail sauce. We love it with shrimp, of course, but it also makes an outstanding marinade for salmon and halibut.

For over 150 years, Martinelli’s has been familyowned and operated and producing 100% juices from apples grown in the Pajaro Valley in Watsonville, California. Their juices have been honored with more than 50 gold medals for excellence at state, national, and international expositions. Transform any moment into a celebration with Martinelli’s selection of non-alcoholic sparkling ciders and juice blends—and include the whole family! The sophisticated, refreshing beverages are made with pressed 100% U.S.-grown apples and just the right amount of bubbles. Varieties include sparkling blush, sparkling apple-grape, and sparkling cider.

Breakfast just got much, much sweeter thanks to the new L&B Mighty Glazed Apple Fritters! Our bakers start with a soft, sweet fritter dough with lots of cinnamon and then fold in large chunks of tart Granny Smith apples. Once golden brown, the fritters are topped with a delicious glaze. Want to up the indulgence even more? Try drizzling the fritters with a little caramel sauce and serve for dessert or an afternoon treat with coffee.
Veroni started as a small grocery shop run by five brothers in Correggio, a small town in Italy, in 1925. Their mission was to bring the best Italian cold cuts to your table. Today, the family’s fourth generation is still guided by the same love for good food, respect for tradition, and passion for quality. Veroni’s charcuterie meats are sliced thinly for the best taste and aroma. All varieties—soppressata Italiana, salame Milano, antipasto Italiana, mortadella with pistachios, and Italian prosciutto—are perfect on a cheese and charcuterie board, piled onto sandwiches, or folded onto crostini.


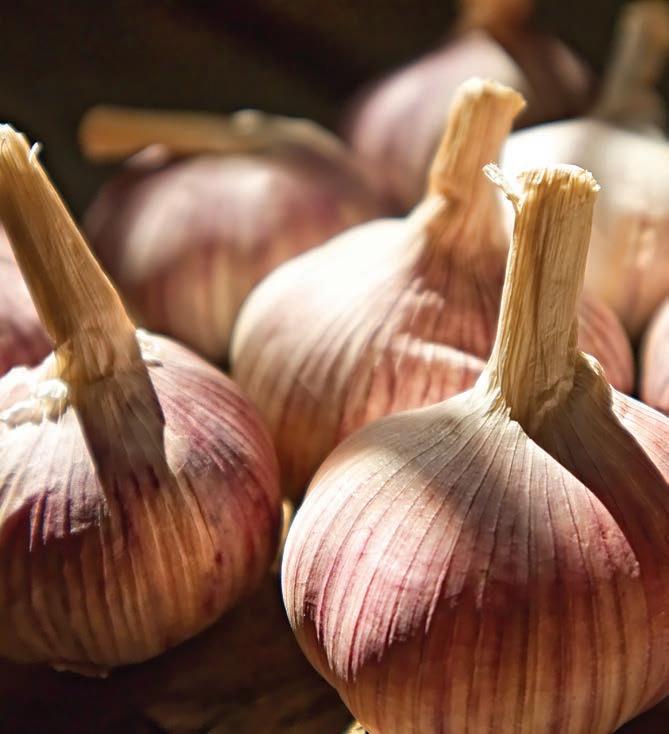
Garlic has certainly made an impact on cooking and culture. Most famously, Eastern Europeans have claimed it wards o vampires, but its spiritual significance dates back much further. Dr. Louis E. Grivetti, professor emeritus in the Department of Nutrition at the University of California, Davis, says there are records dating back to ancient Greece and Egypt showing garlic being used to protect against evil spirits, speci cally the “evil eye,” a curse believed to be cast through a malevolent or envious glare. Love for this ingredient has even inspired the Gilroy Garlic Festival in Gilroy, California (the state that produces 90% of the United States’ garlic crop), an annual event with live music, gol ng, and some of the best garlic in the world.
Garlic’s strong avor is incredibly versatile, making it a staple in most every kitchen. Fresh, raw garlic and garlic powder are used in countless dishes around the world, including Greek skordalia (garlic potato) spread, Spanish garlic soup, Mexican birria tacos, adobo from the Philippines, and toum Lebanese sauce and dip (see right).
Powerfully avored garlic is o en grouped into the herb family because it is used to season so many foods, but it’s actually a veg-
etable. Like onions, the raw garlic bulb you buy at the store grows in the ground and has a green stalk. Encased inside this bulb are eight to 20 cloves of garlic—the part that you peel and eat. Garlic can be eaten raw but is also often eaten sautéed or included in spreads for crackers and breads.
Garlic’s popularity as a healthy ingredient is well earned due to its high nutritional yield. Vitamins B6 and C, iron, and potassium are just a few of the nutrients packed in garlic’s bulbs. Garlic’s singular avor and health bene ts both stem from the same nutrient: allicin. According to the Cleveland Clinic, a few small studies have indicated that when allicin is crushed or cut, it releases both a strong flavor and maximizes its antioxidants that might boost immune health, improve blood pressure, and lower cholesterol. It’s far from a superfood, but it is a avorful additive with bene ts, making it popular with both amateur cooks and herbal medicine practitioners.
To best reap these benefits, first make sure your garlic bulbs are stored in a cool, dry place. When cooking, it is best to use crushed raw garlic that is allowed to sit before being sautéed or added raw to a meal. Generally, the longer you cook garlic (or if you cook it on too high of heat), the more bitter it becomes, so nding that balance is important.
Another popular way to maximize garlic’s flavor is by roasting it in the oven. Cut the bulb of garlic in half, then wrap it in aluminum foil and bake it in the oven at 400°F for 30 minutes. Remove from the oven and nd that the garlic cloves easily ooze out of their peels and have an intensi ed, creamy and nutty avor. Roasted garlic is an excellent addition to a charcuterie board or as a spread for your garlic bread. ■
This Lebanese garlic sauce is the holy grail of spreadable garlicky goodness. It is a simple mixture of garlic, neutral oil, lemon juice, and salt that is often drizzled over grilled chicken, shawarma, kebabs, and grilled vegetables and makes a great dip for bread, crackers, and raw vegetables.

1. Peel 1 cup (4 or 5 bulbs) garlic. (See Kitchen Skills on page 8 for a handy gadget.)
Add the garlic and a pinch of salt into a food processor and blend until well minced.
2. Slowly add 3 cups of olive oil, blending often to ensure the ingredients mix well. Once the sauce is looking creamy, you can mince more intensely. Slowly add another cup of oil and ½ cup lemon juice into the food processor and mix well until you have a light-colored, yet spreadable mayonnaise-like sauce.
3. Place toum in the fridge overnight, so ingredients mellow together and enjoy the next day. It will keep in an airtight container up to 1 month in the refrigerator.

Research has shown that people consistently eat more food when o ered larger portions. So, portion control is important when you’re trying to lose weight and keep it o .
A portion is the amount of food you put on your plate, while a serving is an exact amount of food. To get a better handle on what you’re eating, you could carry around measuring cups. Or you could use everyday objects as
reminders of appropriate serving sizes, which is what the Mayo Clinic Diet recommends.
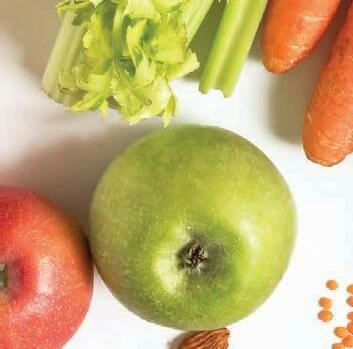
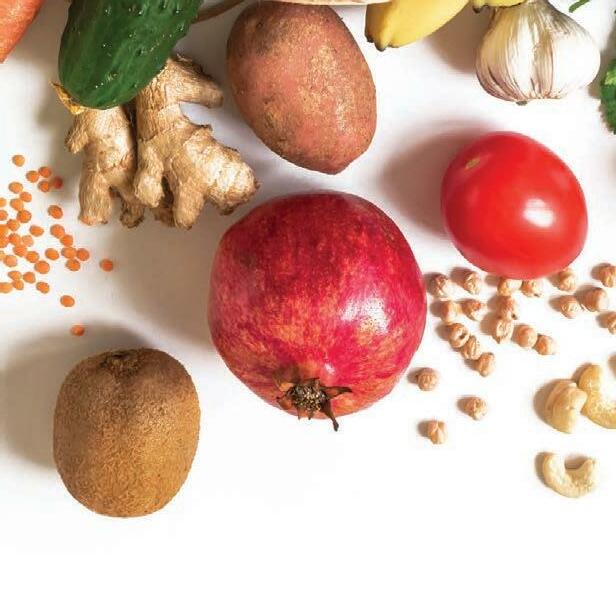
Many foods match up to everyday objects. For example, a medium pepper is about the size of a baseball and equals one vegetable serving. While not all foods match visual cues, this method can help you become better at gauging serving sizes and practicing portion control. Here are some visual cues to keep in mind.
Look to everyday objects to keep portion sizes in check.

One fruit serving is about the size of a tennis ball. For example, a small apple equals one serving, or about 60 calories. The same is true for a medium orange.


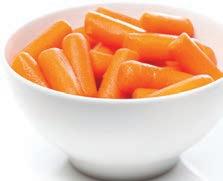
One vegetable serving is about the size of a baseball. A half cup of cooked carrots equals one serving, or about 25 calories. The same is true for a medium tomato or bell pepper.


One carbohydrate serving is about the size of a hockey puck. A half cup of whole-grain cooked pasta equals one serving, or about 70 calories. If pasta isn’t your thing, picture a slice of whole-grain bread instead.


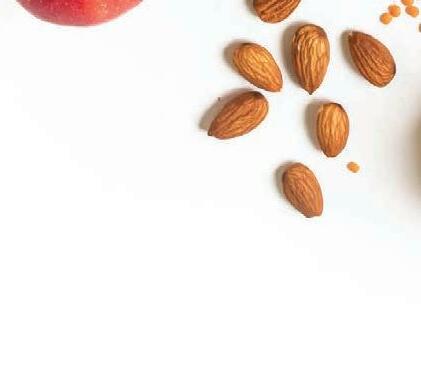
One protein serving is no bigger than a deck of cards. A piece of cooked skinless chicken (2 to 2½ ounces) equals one serving, or about 110 calories. The same goes for a 3-ounce vegetarian burger.


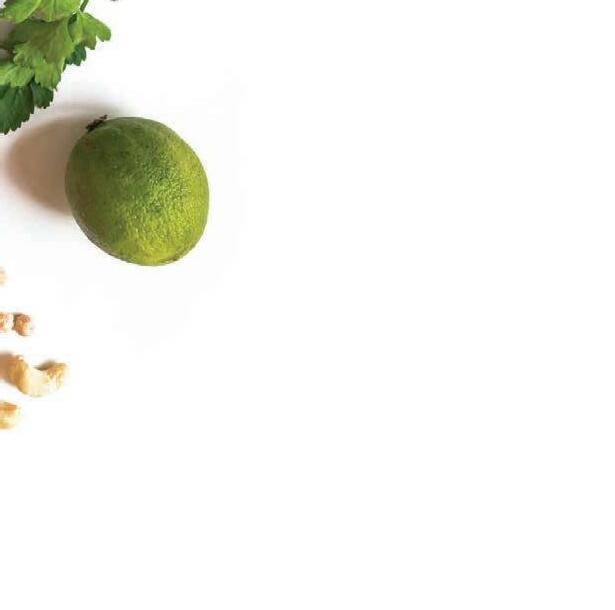
One fat serving is about the size of a pair of dice. For example, 2 teaspoons of regular mayonnaise equal one fat serving, or about 45 calories. Similarly, 2 teaspoons of trans fat-free margarine count as a serving, as does 1 teaspoon of butter.


It may take practice to become a better judge of serving sizes and portions, especially as you put entire meals together. But the more you practice, the more control you’ll have over how much you eat—and that’s key to weight loss and maintenance. ■
Always


Recipes to elevate your table and stretch your budget.
 BY KRISTIN DONNELLY
he holidays often call for dishes that are a little extra special, but that doesn’t have to mean more expensive. With a few little twists, it’s easy to elevate everyday ingredients into something worthy of a party.
Another way to keep holiday entertaining costs down?
Make it a potluck! This way, you can cook one fabulous dish and receive a whole meal in return while having a chance to try your friends’ and family’s favorite recipes.
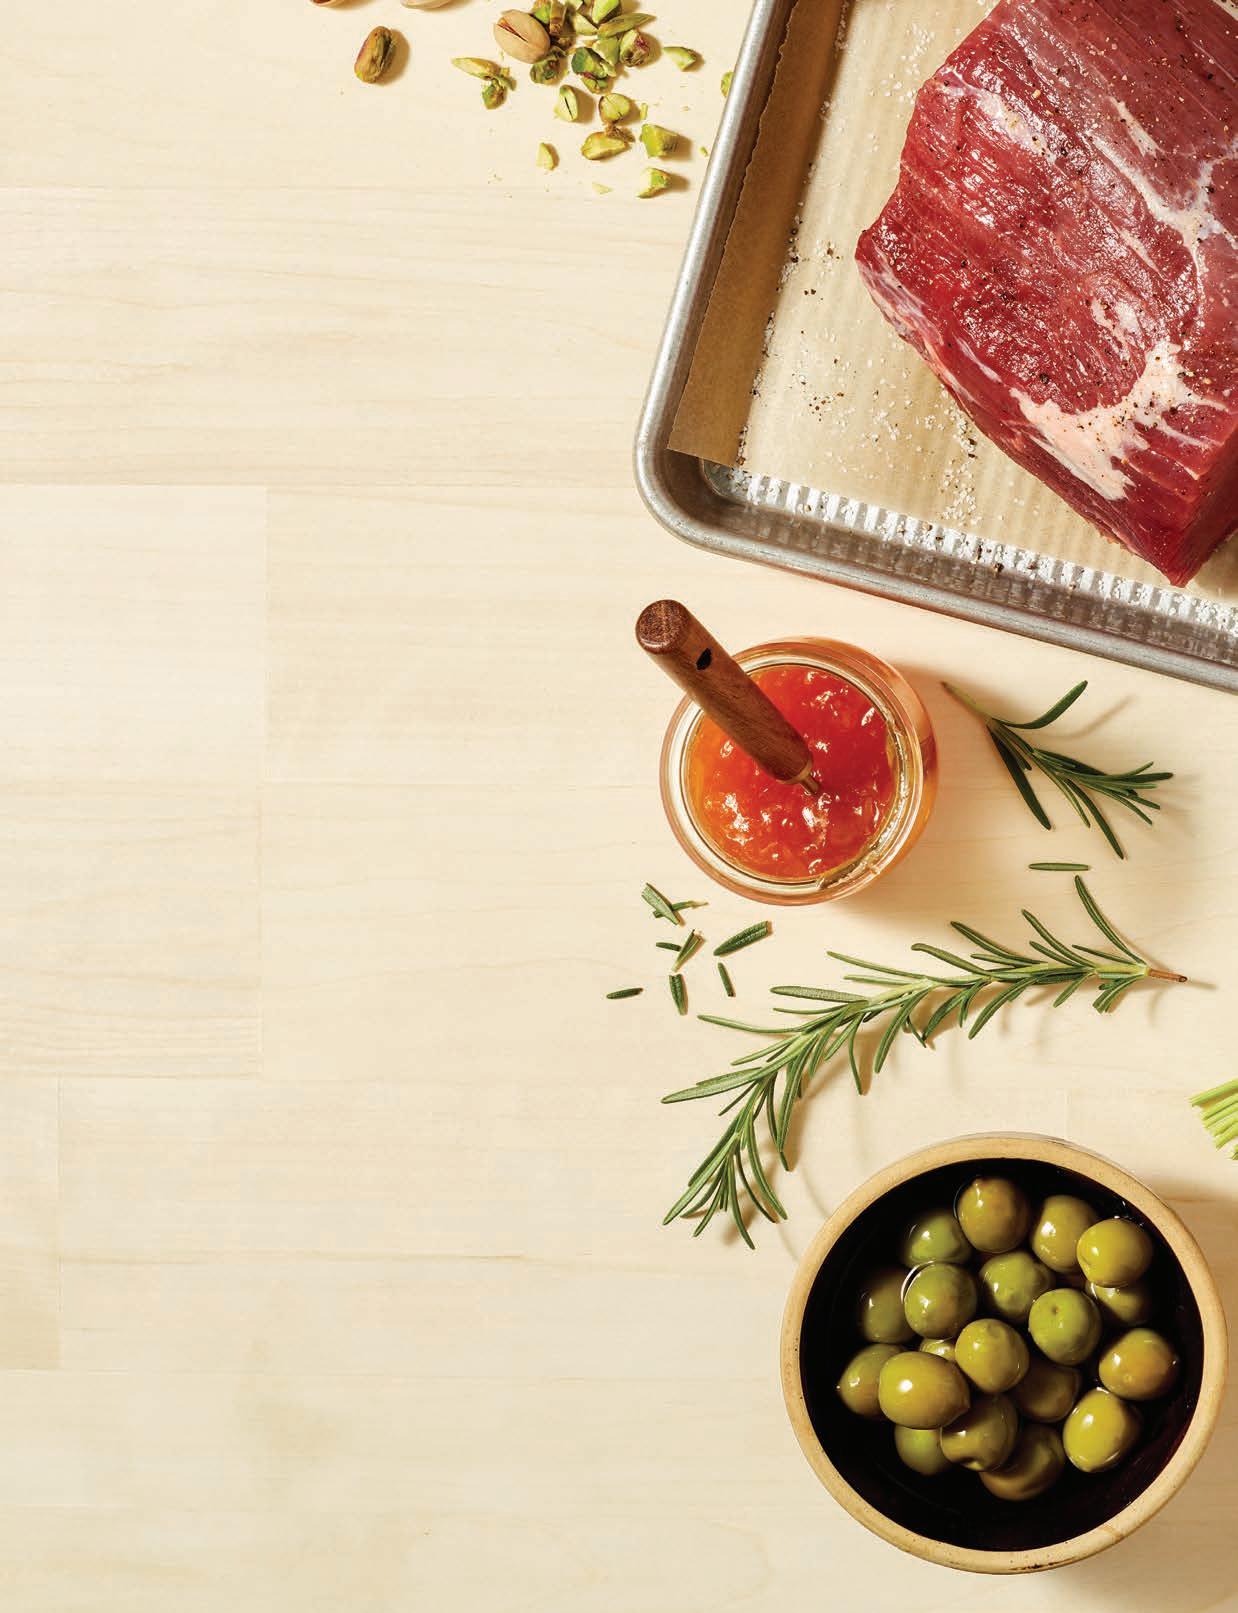
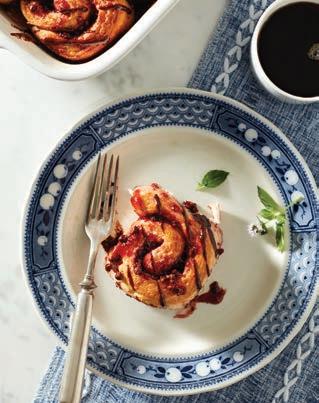
If you’re looking for something new to add to your table, these recipes take cues from crowd-pleasing holiday dishes—like roast beef, deviled eggs, and potato gratin— but pull in some fun (and maybe unexpected) flavors. They also travel well, so they’re perfect for a potluck.
Goat Cheese with Hot Pepper Jelly and Bacon
MAKES
Cream cheese with hot pepper jelly is a classic snack in the South. Here, a similar combination comes together with fresh goat cheese. (If you’re not a fan of goat cheese, you can use cream cheese, of course!) The holidays are a time to “gild the lily,” and bacon does just that.

8ounces bacon, preferably not thick-cut 1(8-ounce) log fresh goat cheese
1cup hot or sweet pepper jelly
Crackers or crostini, for serving
1. Thinly slice the bacon crosswise into ¼-inch-thick pieces. Spread them out in a skillet and set the skillet over medium-low heat. Cook the bacon, stirring occasionally, until a lot of the fat has rendered and the bacon is crisp, about 8 minutes. Using a slotted spoon, transfer the bacon pieces to a paper towel-lined plate to drain.
2. Arrange the goat cheese on a platter. Pour the hot pepper jelly over the top, allowing it to run and pool down the sides. (If the jelly is stiff and you’d like to loosen it, microwave it for 20 seconds.) Just before serving, sprinkle with bacon and serve with crackers.
■ You can cook the bacon a day in advance and refrigerate. Bring to room temperature before serving.
■ If you’d like to create a tidier presentation, you can press the goat cheese into a small dish and pour the jelly over, so it forms a layer on top.
Nutrition (per serving): Calories: 250, Fat: 13g (Sat: 6g), Cholesterol: 35mg, Sodium: 490mg, Carb: 20g, Fiber: 0g, Sugar: 20g, Protein: 12g
Inspired by the Mexican beer cocktail, these eggs are a punchy riff on classic deviled eggs. While the filling should be a bit spicy, you can always adjust the amount of hot sauce to your taste. That said, it’s the hot sauce that really makes these.

8large eggs
¼cup mayonnaise
Zest of ½ lime plus 1 tablespoon fresh lime juice
1½teaspoons Worcestershire sauce
1½teaspoons red Mexican hot sauce, plus more for serving
Small pinch of cayenne pepper
Salt and freshly ground black pepper, to taste
1. Bring a large pot of water to a boil over high heat. When it boils, reduce the heat to medium, so the water simmers, and carefully lower the eggs into the pot. Simmer the eggs uncovered for 11 minutes, then drain and return to the pot.
Immediately cover with ice water and let the eggs cool to room temperature, then carefully peel the eggs and cut them in half lengthwise.
2. Using a small spoon, pop the yolks out of the eggs into
a bowl or the bowl of a food processor. Using a fork or the food processor, blend the egg yolks with the mayonnaise, lime juice, Worcestershire, 1½ teaspoons hot sauce, and cayenne pepper. Season with salt and ground black pep per to taste.
3. Using a spoon or a piping bag, fill the egg whites with the filling. Add a dash of hot sauce to each and serve.
Cook’s Note: The filling can be made up to a day in advance and refrigerated separately from the whites. You can either fill the eggs just before you leave for a party and set them in muffin tins to transport or bring the eggs and filling separately and fill them at the party.
Nutrition (per serving): Calories: 90, Fat: 7g (Sat: 1.5g), Cholesterol: 140mg, Sodium: 140mg, Carb: 0g, Fiber: 0g, Sugar: 0g, Protein: 5g
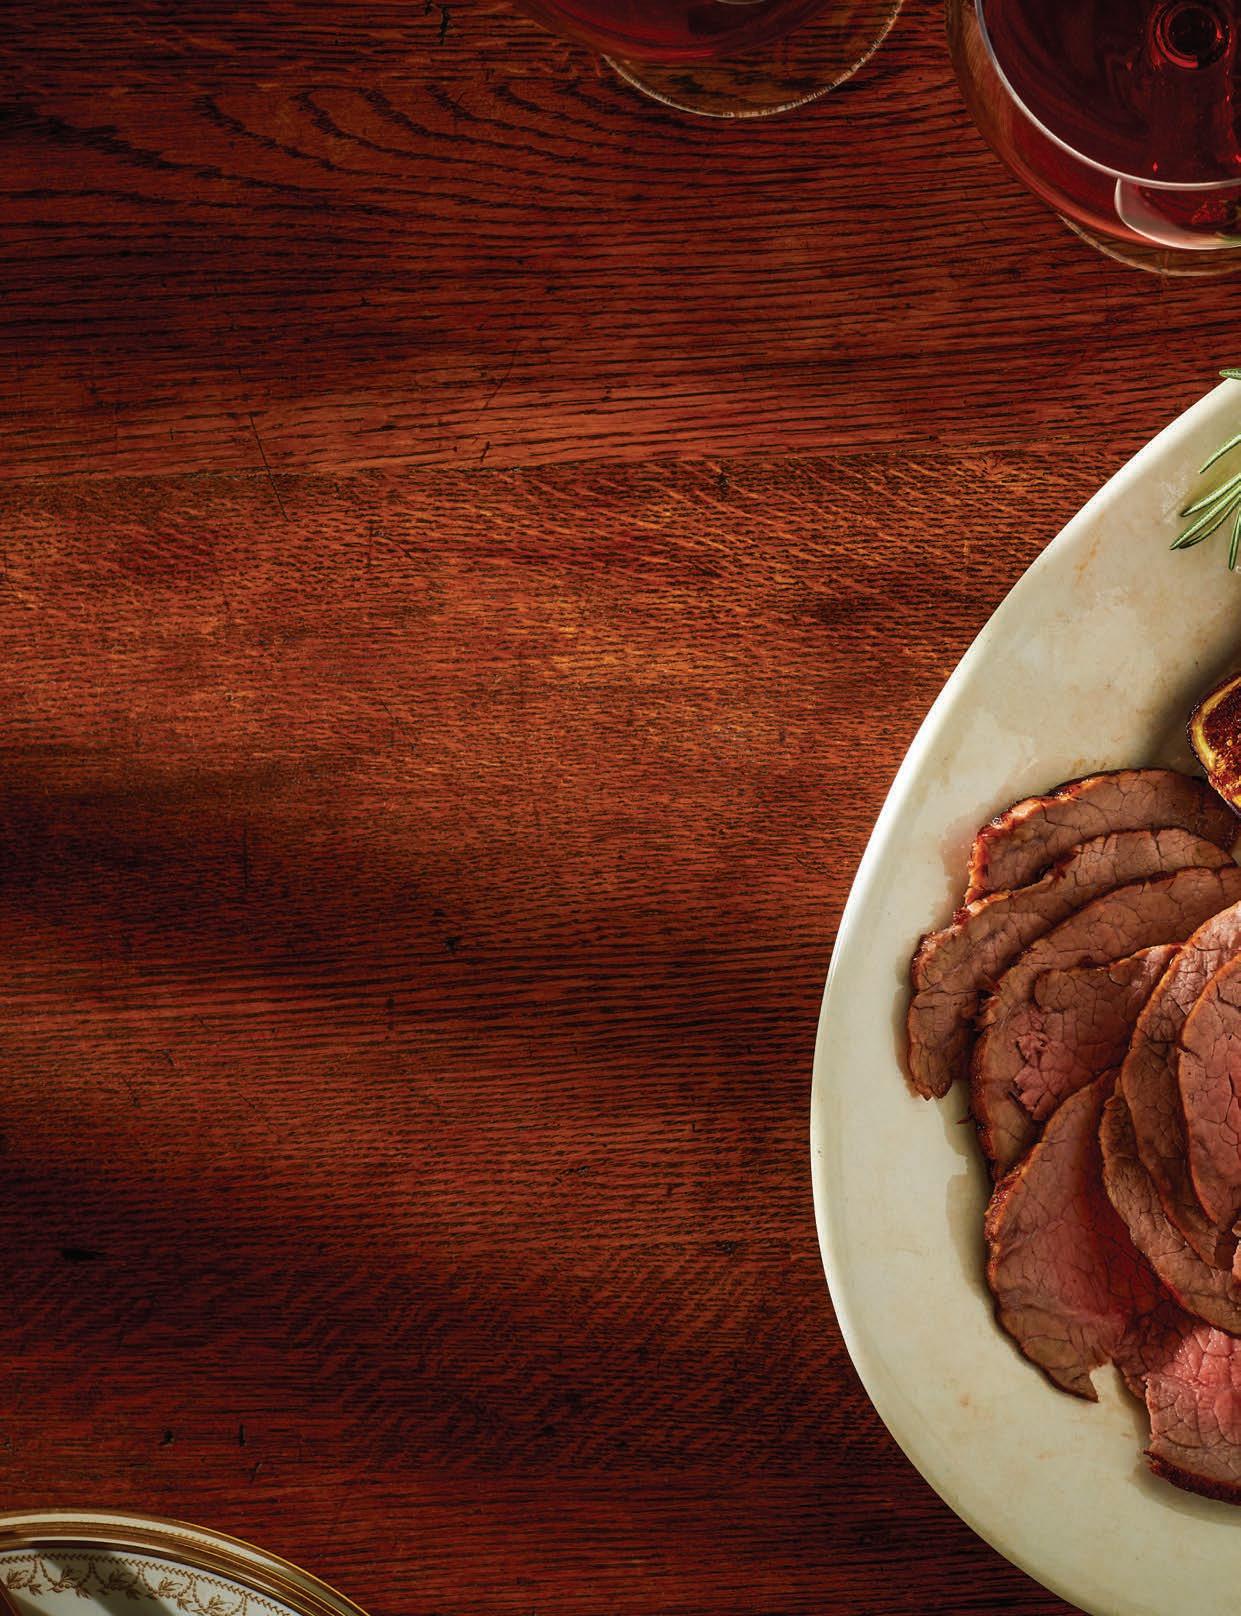
Eye of round is an often-overlooked cut of meat that can make a fabulous roast beef when thinly sliced and served medium-rare. When cooked longer, it can become tough, unless you braise it. It’s the kind of roast that tastes just as good at room temperature or even cold as it does hot. Here, the beef is served with another overlooked ingredient: brined green peppercorns, which get whisked into a balsamic vinegar dressing.
Salt and freshly ground pepper, to taste 1tablespoon plus ¼ cup extra-virgin olive oil, divided ¼cup balsamic vinegar
1tablespoon brined green peppercorns, plus 1 tablespoon of brine 1tablespoon Dijon mustard 2teaspoons honey
1. Season the meat generously with salt and lightly with pepper and refrigerate in a zip-top bag or covered con tainer for 8 hours or overnight.
2. Pull the meat out of the refrigerator and let stand at room temperature for about 1 hour. Pat the meat dry using paper towels.
3. Heat the oven to 350°F.
4. In a large ovenproof skillet, heat 1 tablespoon olive oil until shimmering. Add the roasts to the skillet and cook over moderately high heat, turning, until browned all over, about 8 to 10 minutes. Transfer the roasts to a plate.
Add ¼ cup of water to the skillet and cook, scraping up the browned bits on the bottom of the pan. Pour the pan juices into a large bowl.
5. Return the meat to the skillet and roast in the oven for about 30 minutes, until an instant-read thermome ter inserted in the thickest part registers 115°F for medi um-rare meat. Transfer the roast to a board and let stand for at least 5 minutes.
6. While the meat cooks, whisk the vinegar, peppercorns, brine, mustard, and honey into the meat juices. Gradually add the remaining ¼ cup oil while whisking to form an emulsified dressing.
7. Thinly slice the meat and serve warm or at room temperature with the dressing.
Cook’s Note: If you prefer, you can serve the roast beef cold. Simply refrigerate the cooked roasts, covered, over night, then slice thinly before serving.
Nutrition (per serving): Calories: 290, Fat: 12g (Sat: 3g), Cholesterol: 105mg, Sodium: 200mg, Carb: 3g, Fiber: 0g, Sugar: 3g, Protein: 40g
 ROAST BEEF WITH GREEN PEPPERCORN DRESSING

A turkey breast (instead of a whole turkey) is a great way to feed a small crowd. Plus, since you’re not worrying about waiting for the legs to cook, you can ensure it stays juicy. A jammy glaze creates an impressive presentation. And instead of a flour-thickened gravy, this turkey is served with its buttery pan juices, brightened with a bit of fresh citrus and chopped olives.
1 (9-10 pound) whole bone-in turkey breast
4-5 teaspoons salt
3⁄4 teaspoon freshly ground black pepper
1 stick unsalted butter, at room temperature
4 teaspoons chopped fresh rosemary leaves, divided
1. Dry the turkey breast very well with paper towels and season with salt and pepper. Let stand at room temperature for 1 hour.
2. In a small bowl, blend together the butter and 2 teaspoons of the rosemary. Rub the butter all over the turkey breast, including on the underside of the breast and under and on top of the skin.
3. Heat the oven to 350°F. Set the turkey breast in a roasting pan or on a baking sheet and transfer to the oven. Pour 1 cup water into the pan with the turkey. Close the oven door and roast until an instant-read thermometer inserted into the thickest part of the turkey (but not near the bone) reads 145°F, about 1 hour, 30 minutes. Rotate the pan halfway through roasting and add more water if the pan looks dry.
4. Meanwhile, in a small bowl, mix the apricot jam with the finely grated zest of the orange and the juice from half of the orange. Mix in the remaining 2 teaspoons rosemary.
5. Brush the turkey with the glaze and cook for 15 minutes, then brush with the glaze again. Cook until the skin is burnished and the thermometer reads 160°F, about 15 minutes longer.
6. Transfer the turkey breast to a work surface, leaving behind all the juices. To the pan, add the olives, juice from the remaining half of the orange, and the lemon juice to
¼ cup apricot jam
1 orange, zested and juiced, divided
1 cup pitted castelvetrano olives, roughly chopped
2 tablespoons fresh lemon juice
the juices and stir, scraping up any browned bits from the bottom and sides of the pan. Pour the turkey juices mixture into a bowl and allow to settle for 1 minute, then spoon off as much of the top layer of fat as you can. Carve the turkey breast and serve with the juice mixture.
Cook’s Note: If you prefer dark meat, swap in 4 turkey legs for the turkey breast and follow the recipe as written. (Or you can add 2 turkey legs to the pan with the turkey breast.) Cook the turkey legs until the internal temperature reaches 165°F.
Nutrition, whole recipe (per serving): Calories: 540, Fat: 28g (Sat: 12g), Cholesterol: 200mg, Sodium: 1480mg, Carb: 10g, Fiber: <1g, Sugar: 5g, Protein: 65g
Nutrition, just turkey and glaze (per serving): Calories: 510, Fat: 25g (Sat: 11g), Cholesterol: 200mg, Sodium: 1200mg, Carb: 9g, Fiber: 0g, Sugar: 4g, Protein: 65g
Nutrition, just sauce (per serving): Calories: 30, Fat: 3g (Sat: 0g), Cholesterol: 0mg, Sodium: 280mg, Carb: 2g, Fiber: <1g, Sugar: <1g, Protein: 0g
■ Organize the “menu” by asking people to sign up to make certain types of dishes, such as sides or desserts, so you will know what to expect. Use a tool like Google Docs or SignUpGenius to keep track.
■ Provide plates, cups, napkins, drinks, etc., unless you ask people to bring them.
■ Set up your space so it ows well and guests know exactly where to put the food when they arrive.
■ Make your oven available and keep your kitchen as clean as possible in case people need to warm or put nishing touches on their dishes.

■ Have labels and markers available so people can label their dishes.
■ Have resealable bags and containers on hand so people can pack up le overs.
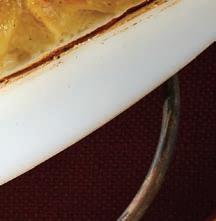
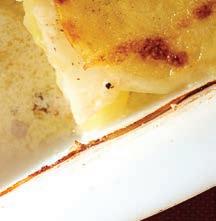
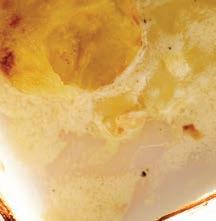
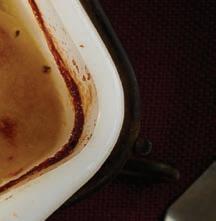
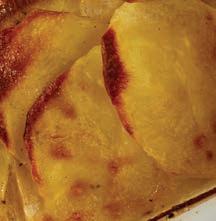
POTATOCELERY ROOT GRATIN WITH FENNEL CREAM
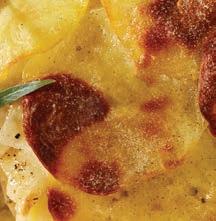
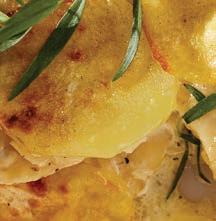
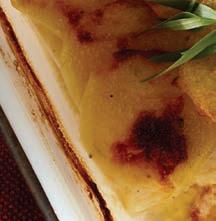

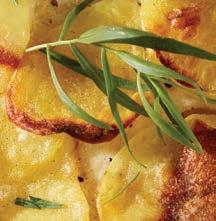
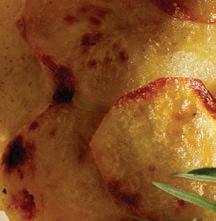
A potato gratin is holiday food at its best—lush, creamy, and crowd-pleasing. Here, the potatoes are layered with celery root, which brings a mellow herbal flavor, and the cream gets infused with toasted sweet fennel seeds before cooking.
For the Fennel Cream
1½ teaspoons fennel seeds

2½ cups heavy cream


1 fat garlic clove, smashed
Salt and white pepper, to taste

1. In a small skillet, toast the fennel seeds over medium heat until fragrant, about 20 seconds.

2. In a small saucepan, bring the cream just to a bare simmer, then remove from the heat. Add the fennel seeds and garlic clove and let stand for 15 minutes to allow the cream to infuse. Season lightly with salt and white pepper.
3. Using a mandoline or a very sharp knife, slice the potatoes into 1⁄8-inch-thick rounds. (Keep them in a bowl of water so they don’t discolor.) Cut the celery root into 1⁄8-inch-thick half-moon slices.
4. Heat the oven to 375°F. Butter a 9x13-inch glass or ceramic baking dish.


5. Arrange one-third of the potatoes in the dish, overlapping them slightly, and season with salt and pepper. Top with half the celery root, seasoning each layer. Repeat the layering, ending with a third layer of potatoes. Strain the
For the Potatoes and Celery Root
3 pounds Yukon Gold potatoes, peeled
1 large (2 pounds) celery root, peeled with a sharp knife and halved lengthwise
Unsalted butter, for the pan
Kosher salt and freshly ground black pepper, to taste
cream over and around the vegetables. Cover the baking dish tightly with foil.
6. Bake for about 45 minutes, until the vegetables are almost tender when pierced with a knife. Remove the foil and bake for about 30 minutes more, until the liquid has thickened and the top is browned. Remove the gratin from the oven and let stand for 10 minutes. Serve hot or warm.
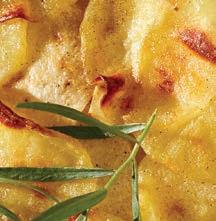
Cook’s Note: The assembled gratin can be refrigerated overnight, then baked before serving. Transport it hot in an insulated carrier.
Nutrition (per serving): Calories: 360, Fat: 23g (Sat: 15g), Cholesterol: 70mg, Sodium: 200mg, Carb: 34g, Fiber: 5g, Sugar: 4g, Protein: 6g
real food


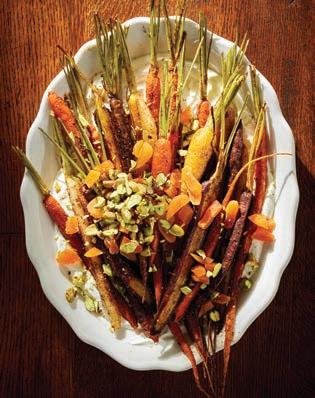
Roasted carrots get dressed up with a dusting of warm spices and sprinkles of plump apricots and crunchy pistachios. Spreading out the carrots on a bed of salted yogurt not only creates a gorgeous presentation but also provides a sauce that people can scoop onto their plates with the carrots. This is one of those substantial side dishes you could serve as more of a vegetarian main dish. Plus, it’s as good at room temperature as it is warm.
3pounds real baby carrots (not bagged) or other carrots cut into 5x1-inch lengths
3tablespoons extra-virgin olive oil
1teaspoon ground cumin
1teaspoon ground coriander ½teaspoon cinnamon ¼teaspoon cloves
Kosher salt and freshly ground black pepper, to taste ½lemon
¼cup dried apricots (or cherries) ½cup shelled pistachios, roughly chopped 1cup full-fat plain Greek yogurt ½cup flat-leaf parsley leaves, roughly chopped
1. Heat the oven to 425°F. Line two large baking sheets with parchment paper.
2. In a large bowl, toss the carrots with olive oil, cumin, coriander, cinnamon, and cloves, and season generously with salt and pepper. Spread carrots out on baking sheets.
3. Roast, rotating the baking sheets halfway through and shaking the carrots, for 20 to 30 minutes, until the carrots are nicely browned and tender. Remove the carrots from the oven, squeeze the lemon juice over the carrots, and toss. Let the carrots cool slightly.
4. Meanwhile, in a small bowl, cover the apricots (or cherries) with boiling water and let stand until plumped and cool enough to handle, about 10 minutes. Remove the fruit from the hot water and roughly chop.
5. In another small bowl, whisk the yogurt to loosen it and season with salt to taste.
6. Spread the yogurt on a platter and arrange the carrots on top. Scatter the sliced fruit and chopped pistachios on top, sprinkle with parsley, and serve.
Nutrition (per serving): Calories: 170, Fat: 9g (Sat: 1.5g), Cholesterol: <5mg, Sodium: 170mg, Carb: 19g, Fiber: 5g, Sugar: 10g, Protein: 5g ■
■ Ask in advance if you can use the oven if you need to rewarm a dish.
■ If you have dietary restrictions, tell the host—if you’re comfortable—so you can make sure you will have food that is safe for you to eat.

■ Think about how you’ll transport your dish. (You can keep hot food hot in insulated carriers.)
■ Bring your own serving utensils, if you can.
■ Take your dish with you. (Don’t leave it for the host to clean up.)
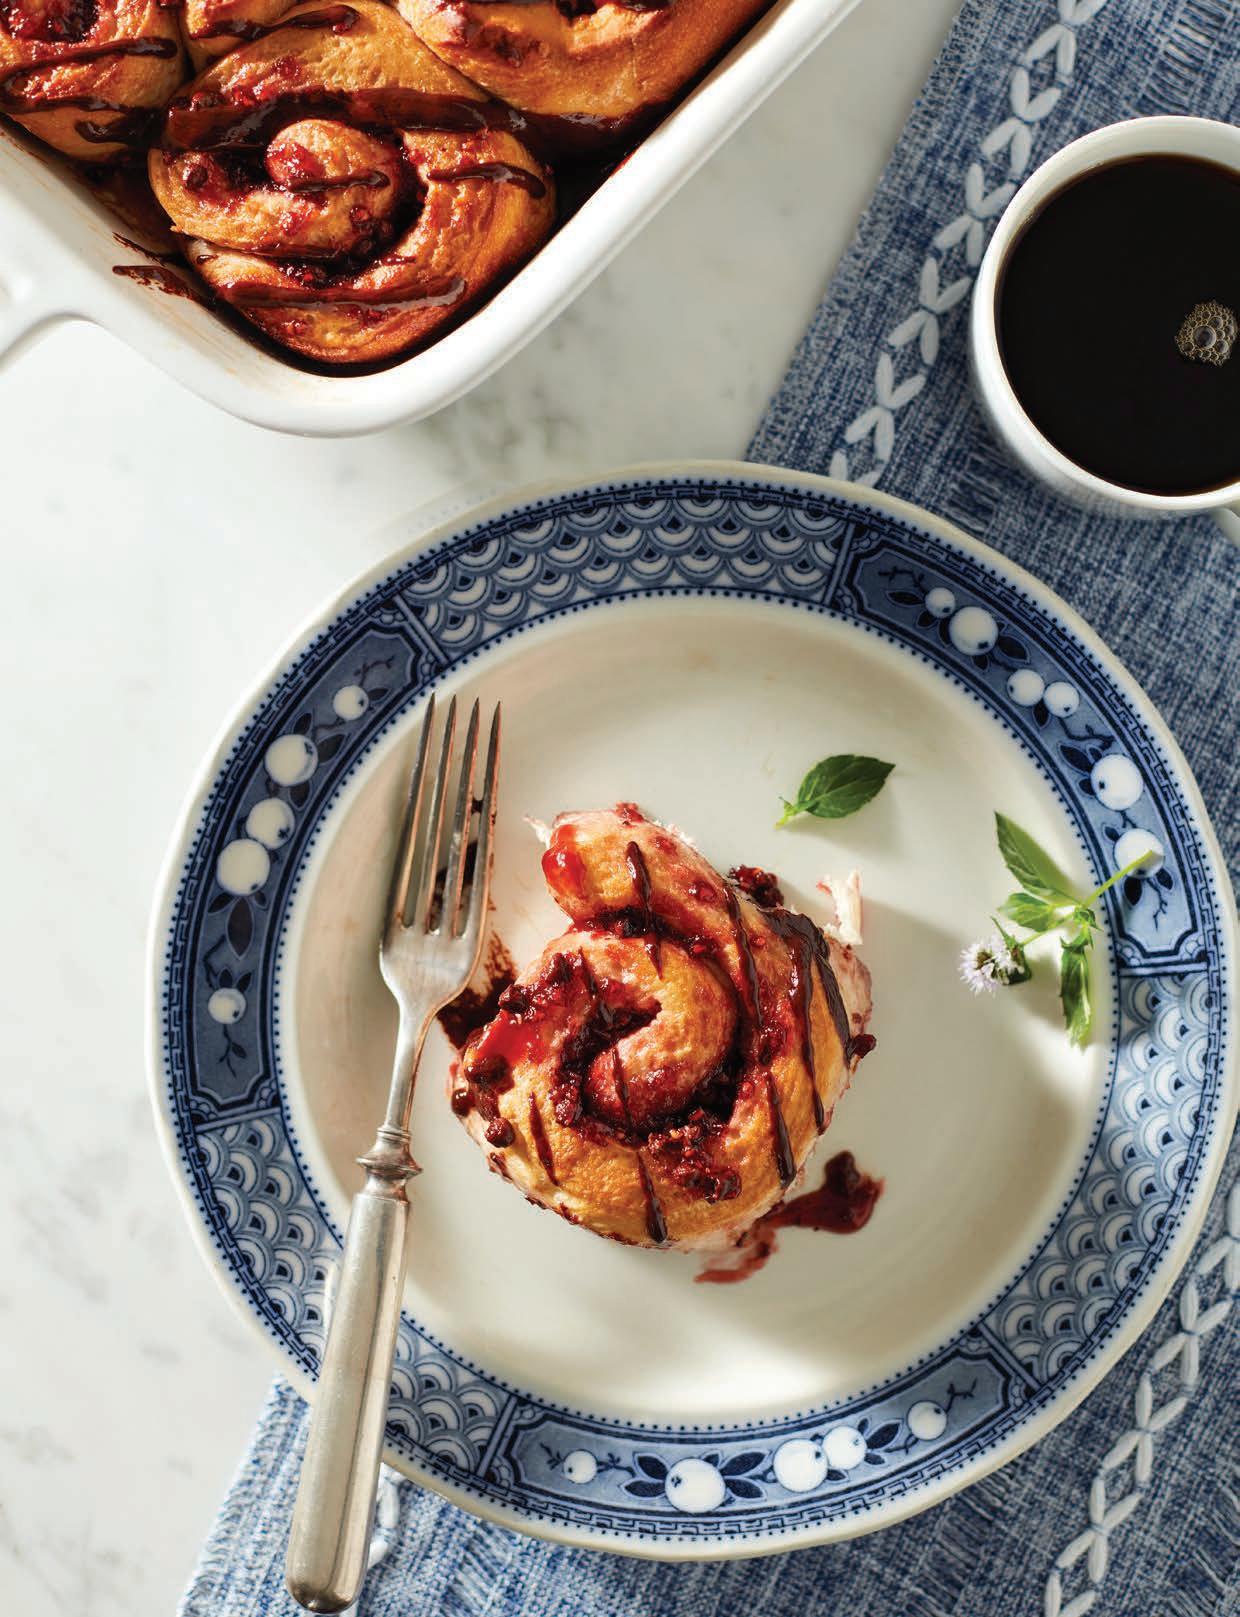


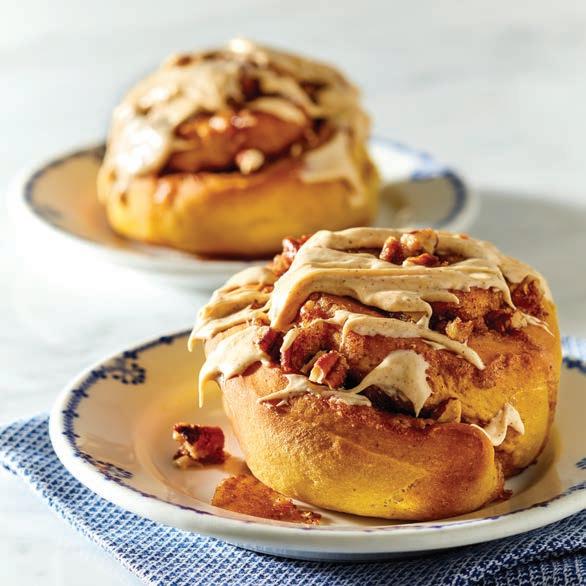
ew things have the instant appeal of the spiral of dough and filling that is a cinnamon roll. Just think of that curled circle of comforting sweetness, and that cinnamon-y fragrance. Whether you associate it with your grandma’s kitchen or the food court at the airport, it’s irresistible. The spiral of dough with its flavorful swirl is such fun to eat, too, as you unwind it with your fingers, exposing the melted filling. That’s why they also beg to take on other flavors beyond cinnamon and sugar.
The perfection of the spiral roll translates into all sorts of sweet and savory flavor combinations. In this collection of recipes, you can try variations from fruity and chocolaty to herbal and cheesy, and undoubtedly find
new favorites. Pumpkin spice is the flavor of the season, and the pumpkin spice rolls have a pumpkin cheesecake frosting that takes it to the next level of spicy goodness. Raspberry jam-filled rolls, dappled with chocolate chips and drizzled with chocolate ganache take the spiral a little closer to dessert status. And on the savory side, Pesto Scone Rolls make a great breakfast or appetizer—and even go well with a glass of wine. The Walnut Gruyère Rolls have enough cheese and nuts to serve as a light lunch and are delectable enough to earn a place on your holiday table. You have the option to use frozen, prepared dough in a few recipes to save some time, if you prefer. It’s easy to celebrate the spiral and try some new sweet and savory rolls this season.
Use this basic dough to make the Classic Cinnamon Rolls and the Raspberry Rolls with Ganache.
5cups all-purpose flour, plus more for dusting ½cup sugar
1tablespoon instant-rise yeast
1teaspoon salt
¾cup milk
¼cup water
1stick unsalted butter, sliced in pats
2large eggs
1. In the bowl of a stand mixer or large bowl, combine flour, sugar, yeast, and salt and stir to mix. Insert dough hook if using the stand mixer.
2. In a small pot, combine milk, water, and butter pats and place over medium heat. Stir, taking the temperature with an instant-read thermometer often, until butter is melted and mixture is 120-130°F.
3. Turn the mixer on low and pour in the milk mixture, then add the eggs. Mix until combined, then knead for 5 minutes.
4. Transfer the dough to an oiled bowl, cover with a wet towel or plastic wrap, and put in a warm spot to rise for 1½ hours or more until doubled in size.
5. When the dough has doubled in size, punch down with your fist. Then, pull the sides into the center and gently press into a loose ball.
6. Return to recipe instructions for Classic Cinnamon Rolls (step 4) or Raspberry Rolls with Ganache (step 3) and proceed.
Nutrition (per serving):
Calories: 310, Fat: 9g (Sat: 5g), Cholesterol: 50mg, Sodium: 210mg, Carb: 49g, Fiber: 2g, Sugar: 9g, Protein: 7g
MAKES
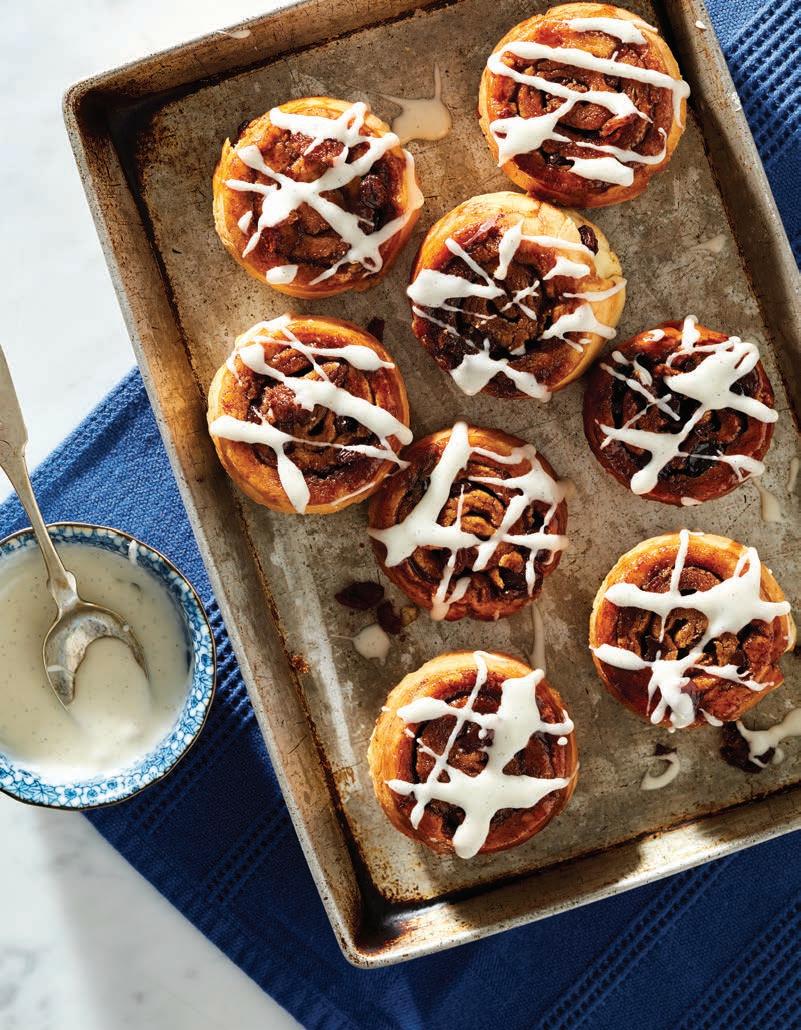
Take your sweet rolls into decadent dessert territory with the flavor combination of raspberries and chocolate. Instead of a cinnamon filling, these are spread with raspberry jam for a fruity, colorful swirl, and you have the option to sprinkle some chocolate chips in, too, for a chocolate lover’s dream. Once baked, you’ll drizzle them with a deep chocolate ganache, creating an irresistible treat everyone will rave about.
For the Filling 1cup raspberry jam ¾cup mini chocolate chips (optional)
1. Make the dough using the Classic Roll Dough recipe (see recipe left).
2. While the dough is rising, line a large sheet pan with parchment paper or butter a 9x13-inch baking pan and set aside.
3. After the dough has risen, prepare the rolls. On a floured counter, pat or roll the dough to make a 12x18-inch rectangle. Spread the jam over the dough, leaving 1 inch bare on the edge across from you. Sprinkle with chocolate chips, if using.
4. Roll up the dough, jellyroll style (see box below), and pinch the seam to seal. Place seam side down and use a sharp serrated knife to cut in four even cylinders, then divide each into three slices, to make 12.
5. Transfer to the prepared pan, spacing the rolls evenly. Cover the rolls with a damp towel or plastic wrap and let rise in a warm place for 1 hour until puffed. Heat the oven to 375°F.
6. Bake the rolls for 20 minutes, until an instant-read thermometer inserted into a roll
For the Ganache
4ounces semisweet chocolate, chopped ¼cup heavy cream
registers 190°F, or until the rolls are golden around the edges. The rolls in the baking pan will take 5 minutes longer. Let cool.
7. Make the ganache: In a microwave able bowl, combine chopped chocolate and cream. Microwave for 45 seconds, then stir, and continue microwaving in 10 second incre ments until melted. Let cool slightly, then drizzle it decoratively over the rolls. Chill until the ganache is set. The rolls will keep, tightly covered, for up to 4 days in the refrigerator.
Cook’s Note: For the dough, you could use 2 pounds of frozen sweet dough, thawed. Follow package instructions to thaw in the refrigerator overnight, then proceed to roll out as in step 3.
Nutrition (per serving): Calories: 440, Fat: 14g (Sat: 8g), Cholesterol: 55mg, Sodium: 220mg, Carb: 73g, Fiber: 2g, Sugar: 31g, Protein: 8g
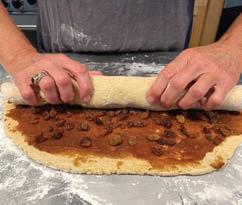
To ll and roll your dough, shape the dough into a rectangle, then pat or roll to the dimensions in the recipe. The longer side should be parallel to the edge of the counter. Sprinkle or spread the lling over the dough as evenly as possible, leaving 1 inch of the edge of the dough farthest from you bare.
Starting with the edge closest to you, roll the dough away from you over the lling, to form a cylinder. Pinch the seam to seal, then place, seam side down, on the counter to cut into rolls. Use a sharp, serrated knife to cut in the number of rolls directed in the recipe, holding the dough cylinder in place with your other hand.
These cinnamon rolls have the perfect combination of tender, buttery dough and brown sugar-cinnamon swirl plus a sweet vanilla glaze to top it off. You have the option to bake them in a 9x13-inch baking dish for pull-apart rolls, or on a half sheet pan so they stay separate. You can fill them with raisins, as I did, or opt for your favorite nuts. Either way, the scent of these rolls as they come out of the oven will bring everyone to the kitchen.
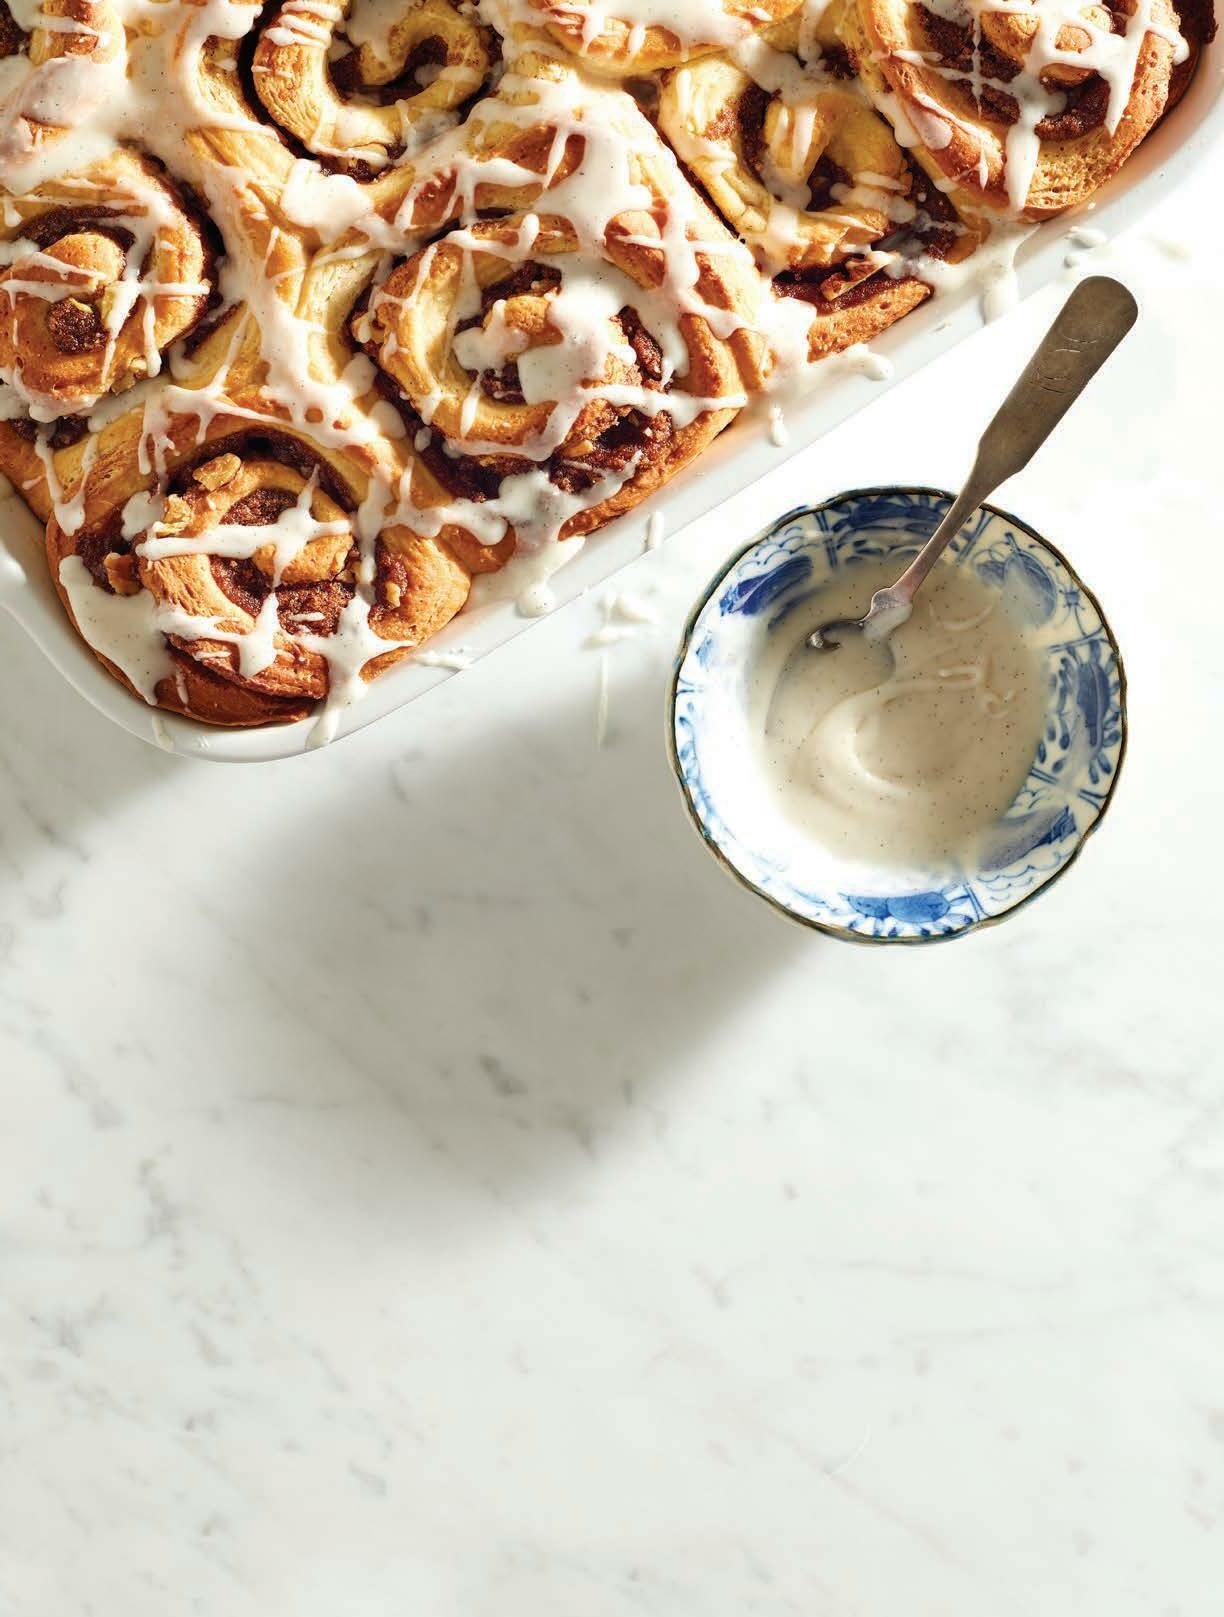
1Classic Roll Dough
recipe on page 32)
For the Filling
1cup light brown sugar
2tablespoons all-purpose flour
2tablespoons cinnamon
salt
4tablespoons (1⁄2 stick) unsalted butter, melted
1. Make the dough using the Classic Roll Dough recipe (see box on page 32).
2. While the dough is rising, line a large sheet pan with parchment paper or butter a 9x13-inch baking pan and set aside.
3. Prepare the filling: Combine the brown sugar, flour, cinnamon, and salt and stir to mix, then stir in the melted butter to make a thick paste. Reserve.
4. After the dough has risen, prepare the rolls. On a floured counter, pat or roll the dough to make a 12x18-inch rectangle.
1cup raisins
chopped walnuts or pecans)
For the Glaze Frosting
2cups powdered sugar
1teaspoon vanilla
2tablespoons unsalted butter, melted
whole or 2% milk
Sprinkle the filling over the dough, leaving 1 inch bare on the edge across from you.
Use your fingers to spread the paste evenly. Sprinkle evenly with raisins (or nuts).
5. Roll up the dough, jellyroll style (see box on page 32), and pinch the seam to seal.
Place seam side down and use a sharp ser rated knife to cut in four even cylinders, then divide each into three slices, to make 12.
6. Transfer to the prepared pan, spacing the rolls evenly. Cover the rolls with a damp towel or plastic wrap and let rise in a warm place for
1 hour, until puffed. Heat the oven to 350°F.
7. Bake the rolls for 20 minutes, until an instant-read thermometer inserted into a roll registers 190°F, or until the buns are golden around the edges. The rolls in the baking pan will take 5 minutes longer. Let cool.
8. Make the glaze frosting: Combine the pow dered sugar, vanilla, and melted butter and stir, then drizzle in the milk, stirring to make a pourable glaze. Make sure the rolls are cool. If you glaze the rolls while warm, it will melt into the rolls, and if you wait until the rolls are com pletely cooled, you can drizzle it decoratively over the rolls. These will keep, tightly covered, for up to 4 days in the refrigerator.
Cook’s Note: For the dough, you could use 2 pounds frozen sweet dough, thawed. Follow package instructions to thaw in the refriger ator overnight, then proceed to roll out as in step 4.
Nutrition (per serving): Calories: 550, Fat: 19g (Sat: 11g), Cholesterol: 75mg, Sodium: 250mg, Carb: 89g, Fiber: 3g, Sugar: 45g, Protein: 8g
It’s pumpkin spice season, and everyone is craving the warm, comforting spices we associate with pumpkin pie. In these rolls, you’ll make your own blend of spices (or use pumpkin pie spice), and put some in the dough, filling, and even the frosting. Sweet, tender pumpkin dough is filled with a combination of brown sugar, spices, and chopped pecans for a roll that’s delicious, even without frosting—but you won’t want to skip the topping; it’s like spreading a layer of pumpkin cheesecake over the roll for even more pumpkin spice goodness.
4teaspoons cinnamon
1teaspoon ground nutmeg
1teaspoon ground cloves
1teaspoon ground ginger
6½cups all-purpose flour, plus more for dusting ½cup sugar
1tablespoon instant-rise yeast
1teaspoon salt
1teaspoon spice mix (from above)
1(15-ounce) can pumpkin (not pie filling), divided 6tablespoons unsalted butter
1cup milk
1large egg
1. Make the spice mix: In a small bowl, combine the cinnamon, nutmeg, cloves, and ginger and stir to mix. Reserve. Line a large rimmed half-sheet baking pan with parch ment paper. Reserve.
2. In a stand mixer or large bowl, combine the flour, sugar, yeast, salt, and 1 teaspoon spice mix, and stir to mix.
3. In a small pot, combine 1 cup of the pump kin, butter, and milk, and stir over medium heat until it reaches 120-130°F on an instantread thermometer. Add the warm liquids to the flour mixture, then add the egg, stirring until mixed. Knead for 5 minutes, then scrape out into an oiled bowl. Cover with a damp towel or plastic wrap and place in a warm spot to rise for about 1 hour, until the dough has doubled in size.
4. While the dough is rising, make the filling. Mix the melted butter, brown sugar, flour, and spice to make a paste. Reserve.
5. When the dough has doubled in size, punch down with your fist. Then, pull the sides into the center and gently press into a loose ball.
6. On a floured counter, pat or roll dough to make a 15x18-inch rectangle. Spread the fill ing over the dough, leaving 1 inch bare on the edge across from you. Sprinkle with pecans.
7. Roll up the dough, jellyroll style (see box on page 32), and pinch the seam to seal.
4tablespoons (1⁄2 stick) unsalted butter, softened
1cup light brown sugar
1tablespoon all-purpose flour
1tablespoon spice mix (from left) 1cup chopped pecans
For the Pumpkin Frosting
8ounces cream cheese, softened ¾cup canned pumpkin, from above ½teaspoon vanilla
3cups powdered sugar
1tablespoon spice mix (from left)
Place seam side down and use a sharp ser rated knife to cut in four even cylinders, then divide each into three slices, to make 12.
8. Transfer to the prepared pan, spacing the rolls evenly. Cover the rolls with a damp towel or plastic wrap and let rise in a warm place for about 1 hour, until puffed. Heat the oven to 350°F.
9. Bake the rolls for 25 minutes, until an instant-read thermometer inserted into a roll registers 190°F, or until the buns are golden around the edges. Let cool.
10. Make the frosting: In a stand mixer with the batter paddle inserted, beat the cream cheese, scraping down until completely smooth. Add the pumpkin and vanilla and beat to mix, scraping down and repeating until completely smooth. Add the powdered sugar and remaining spice mix and mix on low until combined, then raise the speed for 30 seconds or so to whip. Spread on the cooled rolls. The rolls will keep, tightly cov ered, for up to 4 days in the refrigerator.
Cook’s Note: For the spice mix, you could use 7 teaspoons prepared pumpkin pie spice.
Nutrition (per serving): Calories: 680, Fat: 24g (Sat: 11g), Cholesterol: 60mg, Sodium: 280mg, Carb: 106g, Fiber: 5g, Sugar: 49g, Protein: 11g
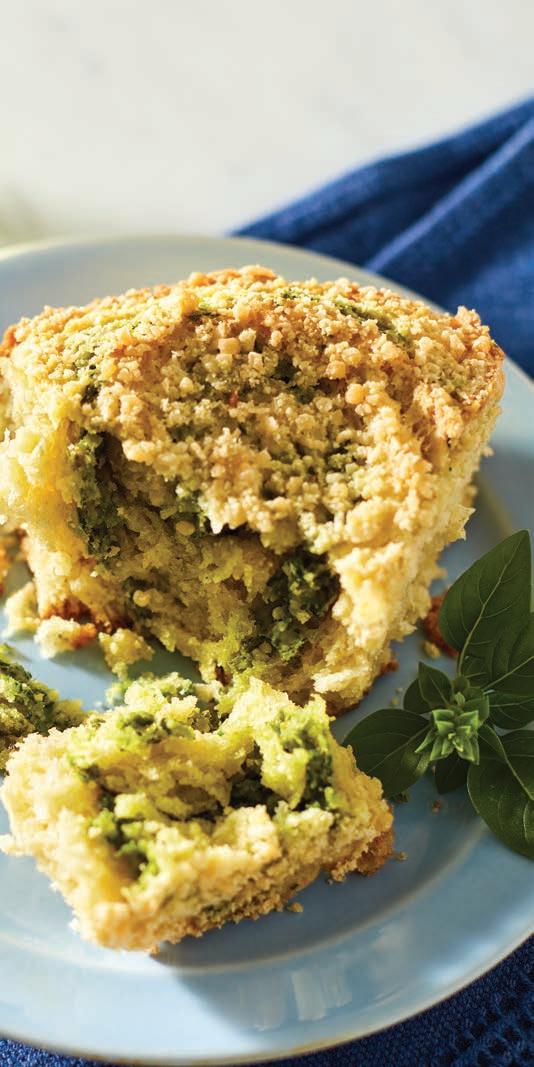
MAKES 8
You can skip the rising time of a yeasted dough with these scones, and they have a spiral of intensely flavorful basil pesto that makes them a savory treat to serve with wine. Plus, try with soup, a salad, or at breakfast alongside scrambled eggs.
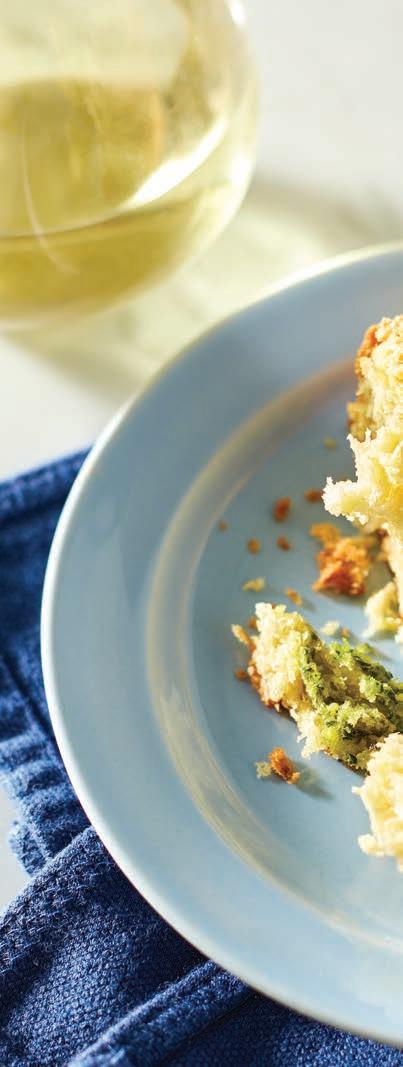
For the Pesto
½cup fresh basil
½cup fresh parsley
2tablespoons pine nuts
2cloves garlic
1teaspoon salt, divided 1½cups shredded Parmesan cheese, divided
For the u est rolls in the shortest amount of time, these recipes use the quick-rise yeast method. Instead of mixing yeast with warm water to proof, you’ll mix the yeast with the dry ingredients, then warm the liquid ingredients to between 120-130°F. You’ll need an instant-read thermometer to test the temperature, and to insert in the baked rolls to make sure they have reached 190°F.
If you don’t have one, it would be well worth purchasing one. They can be found for around $8 and are also an important tool for making sure meats are safely cooked.
1tablespoon extra-virgin olive oil, plus more for pan
2cups all-purpose flour
2teaspoons baking powder
1teaspoon baking soda
6tablespoons unsalted butter, cold ¾cup buttermilk
1. First, make the pesto. In a food processor bowl, combine the basil, parsley, pine nuts, garlic, ½ teaspoon salt, and ½ cup Parmesan. Process until a thick paste is formed, then scrape down and drizzle in 1 tablespoon olive oil. Process to mix. Scrape out into a small bowl.
2. Heat the oven to 375°F and lightly oil an
8-inch round cake pan and reserve.
3. Make the dough: In a large bowl, com bine the flour, baking powder, baking soda, and the remaining salt, mix, and then stir in ½ cup Parmesan.
4. Use the coarse holes of a grater to shred the cold butter into the flour mixture, toss ing the butter shreds to coat with flour. Stir in the buttermilk, just until barely mixed, and use your hands to press and turn the mixture until all the flour is incorporated. Don’t knead.
5. Sprinkle counter with flour. Place dough on the flour and press out to make a 9x9-inch square. Sprinkle and spread pesto mixture over the dough, patting to spread evenly, leaving 1 inch bare on the side opposite you.
6. Roll up the dough, jellyroll style (see box on
page 32), ending the cylinder seam side down.
7. Use a serrated knife to divide in half, then cut each half in four even slices. Place the rolls in the pan, placing one roll in the center and arranging the rest around it.
8. Sprinkle the rolls with the remaining ½ cup Parmesan and bake for 15 minutes, until the edges are golden brown and the rolls are firm.
9. Cool on a rack for 5 minutes before serv ing, or cool completely and wrap tightly and store in the refrigerator for up to 2 days.
Nutrition (per serving):
Calories: 290, Fat: 17g (Sat: 9g), Cholesterol: 35mg, Sodium: 860mg, Carb: 27g, Fiber: 1g, Sugar: 2g, Protein: 10g
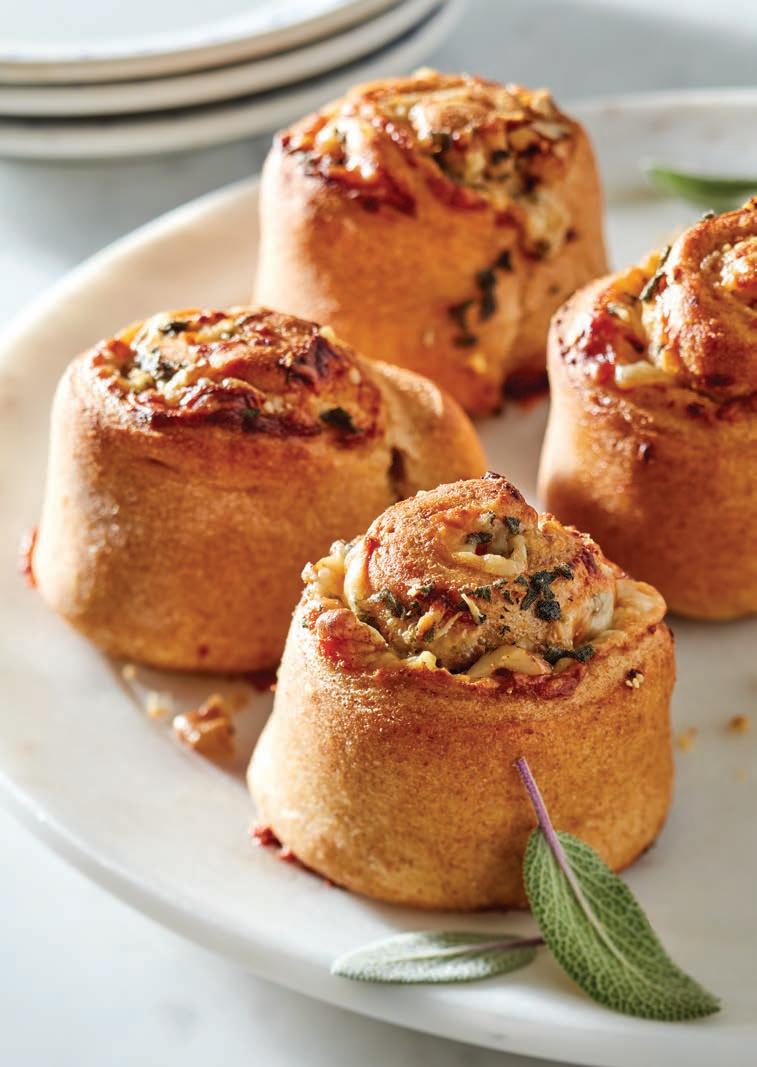
These whole-wheat rolls, filled with tangy Gruyère and crunchy walnuts, are a light meal in themselves. With a hint of Dijon mustard and fresh sage in the spiral, you’ll crave these for breakfast, lunch, or dinner, and they are worthy of being included in your holiday meal. You can also save time by using frozen whole-wheat bread dough—just remember to thaw it overnight in the refrigerator.
3½cups whole-wheat flour
2teaspoons quick-rise yeast
1teaspoon salt
1¼cups warm water (120-130°F)
2tablespoons unsalted butter
2tablespoons honey
3tablespoons Dijon Mustard
6ounces Gruyère cheese, shredded
2tablespoons fresh sage, chopped ½cup chopped walnuts
1. Make the dough: In a stand mixer bowl or large mixing bowl, combine the whole-wheat flour, yeast, and salt. Stir to mix.
2. Warm the water to 120-130°F (use an instant-read thermometer to check) and stir in the butter and honey to melt. Using the dough hook or a sturdy spoon, stir the liquids into the flour mixture. When mixed, knead for 5 minutes. The dough should be soft; it’s OK if it’s a little sticky.
3. Transfer to an oiled bowl, cover, and let rise in a warm spot for 1½ hours.
4. Heat the oven to 375°F and line a large sheet pan with parchment paper and reserve.
5. Lightly flour a counter, and pat or roll dough out to a 12x15-inch rectangle. Spread evenly with Dijon, then sprinkle with Gruyère, sage, and walnuts, leaving 1 inch bare at the side opposite you.
6. Roll up, jellyroll style (see box on page 32), tucking in any of the filling that falls out. Let the roll rest, seam side down, for 1 minute, the use a serrated knife to cut across the cylinder, dividing it into four even sections, then slic ing each of those into three even rolls. Place the rolls on the sheet pan, leaving 2 inches of space between them. Loosely cover with plastic wrap, waxed paper, or a barely-damp kitchen towel. Let rise for 1 hour, until puffed.
7. Bake for 25 minutes, until golden brown and firm when pressed. Transfer to a cooling rack. Serve warm.
Cook’s Note: You could use two (2-pound) loaves whole-wheat frozen bread dough in place of the dough recipe here. Thaw the dough according to package directions, then flatten each piece of dough to a 1-inch-thick
rectangle, then stack one on top of the other and press to flatten and form one solid sheet. Let the dough relax if it becomes hard to roll.
Nutrition (per serving):
Calories: 260, Fat: 11g (Sat: 4.5g), Cholesterol: 20mg, Sodium: 280mg, Carb: 32g, Fiber: 2g, Sugar: 3g, Protein: 9g
MAKES
1. Get a 12-cup muffin tin and use butter to thickly grease the cups.
Reserve. Heat oven to 350°F.
2. Melt 6 tablespoons of the butter to use in the dough, and let the rest soften at room temperature.
3. Warm the milk to 110-115°F and place in a bowl or cup. Stir in 1 table spoon of the sugar and the yeast and let bloom for 5 minutes.
4. In the bowl of a stand mixer (using the paddle attachment) or a bowl using a handheld mixer, mix the flour blend, remaining4tablespoons sugar, baking powder, and salt.
5. Add the yeast mixture, melted butter, eggs, and vanilla. Mix slowly until combined, then beat on high for 2 minutes.
6. Mix the brown sugar and cinna mon in a cup. Sprinkle cornstarch on a clean counter. Scrape out the dough and form into a rectangle about 12x18 inches, sprinkle with cinnamon mix ture, and cover with raisins. Roll up, forming a spiral, and use a sharp, serrated knife to divide into four even cylinders, then cut each of those into three even slices. Place each into the prepared muffin cups. Cover with a damp towel or plastic wrap and let rise 1 to 11⁄2 hours, until the rolls have puffed and filled out the cups.
Just because you are avoiding gluten
a
pan, which makes
12tablespoons
sticks)
unsalted butter, divided, plus 1 tablespoon for greasing tin
1cup milk
5tablespoons sugar, divided
1tablespoon quick-rise yeast
3¼cups Pillsbury Gluten-Free AllPurpose Flour Blend
2teaspoons baking powder
1teaspoon salt
2large eggs
2teaspoons vanilla
gum.
are baked
mean you can’t have a cinnamon roll! In this recipe, you build from a gluten-free all-purpose blend, which contains
1tablespoon cinnamon
brown sugar
2cups powdered sugar
1teaspoon vanilla
2tablespoons melted unsalted butter
2tablespoons milk
Cornstarch, for work surface
7. Bake for 20 to 25 minutes, until puffed and golden. Let cool in the pan for 5 minutes, then run a paring knife around each roll to loosen. Place a sheet pan or large platter on top of the pan, holding tightly as you flip the two pans, inverting the rolls onto the sheet pan, and allow to cool before glazing.
8. Make the glaze: Combine the powdered sugar, vanilla, and melted butter and stir, then drizzle in the milk, stirring to make a pourable glaze. If you glaze the rolls while warm, it will melt into the rolls, and if you wait until the rolls are completely cooled, you can drizzle it decoratively over the rolls.
Cook’s Note: These rolls were created and tested with Pillsbury Gluten-Free All-Purpose Flour Blend. If a different gluten-free blend is used, results may vary.
Nutrition (per serving): Calories: 420, Fat: 15g (Sat: 9g), Cholesterol: 65mg, Sodium: 310mg, Carb: 69g, Fiber: <1g, Sugar: 36g, Protein: 5g ■
Tasty small bites and a delicious bottle of wine come together for a fun and festive night.
 RECIPES BY BARBARA SCOTT-GOODMAN
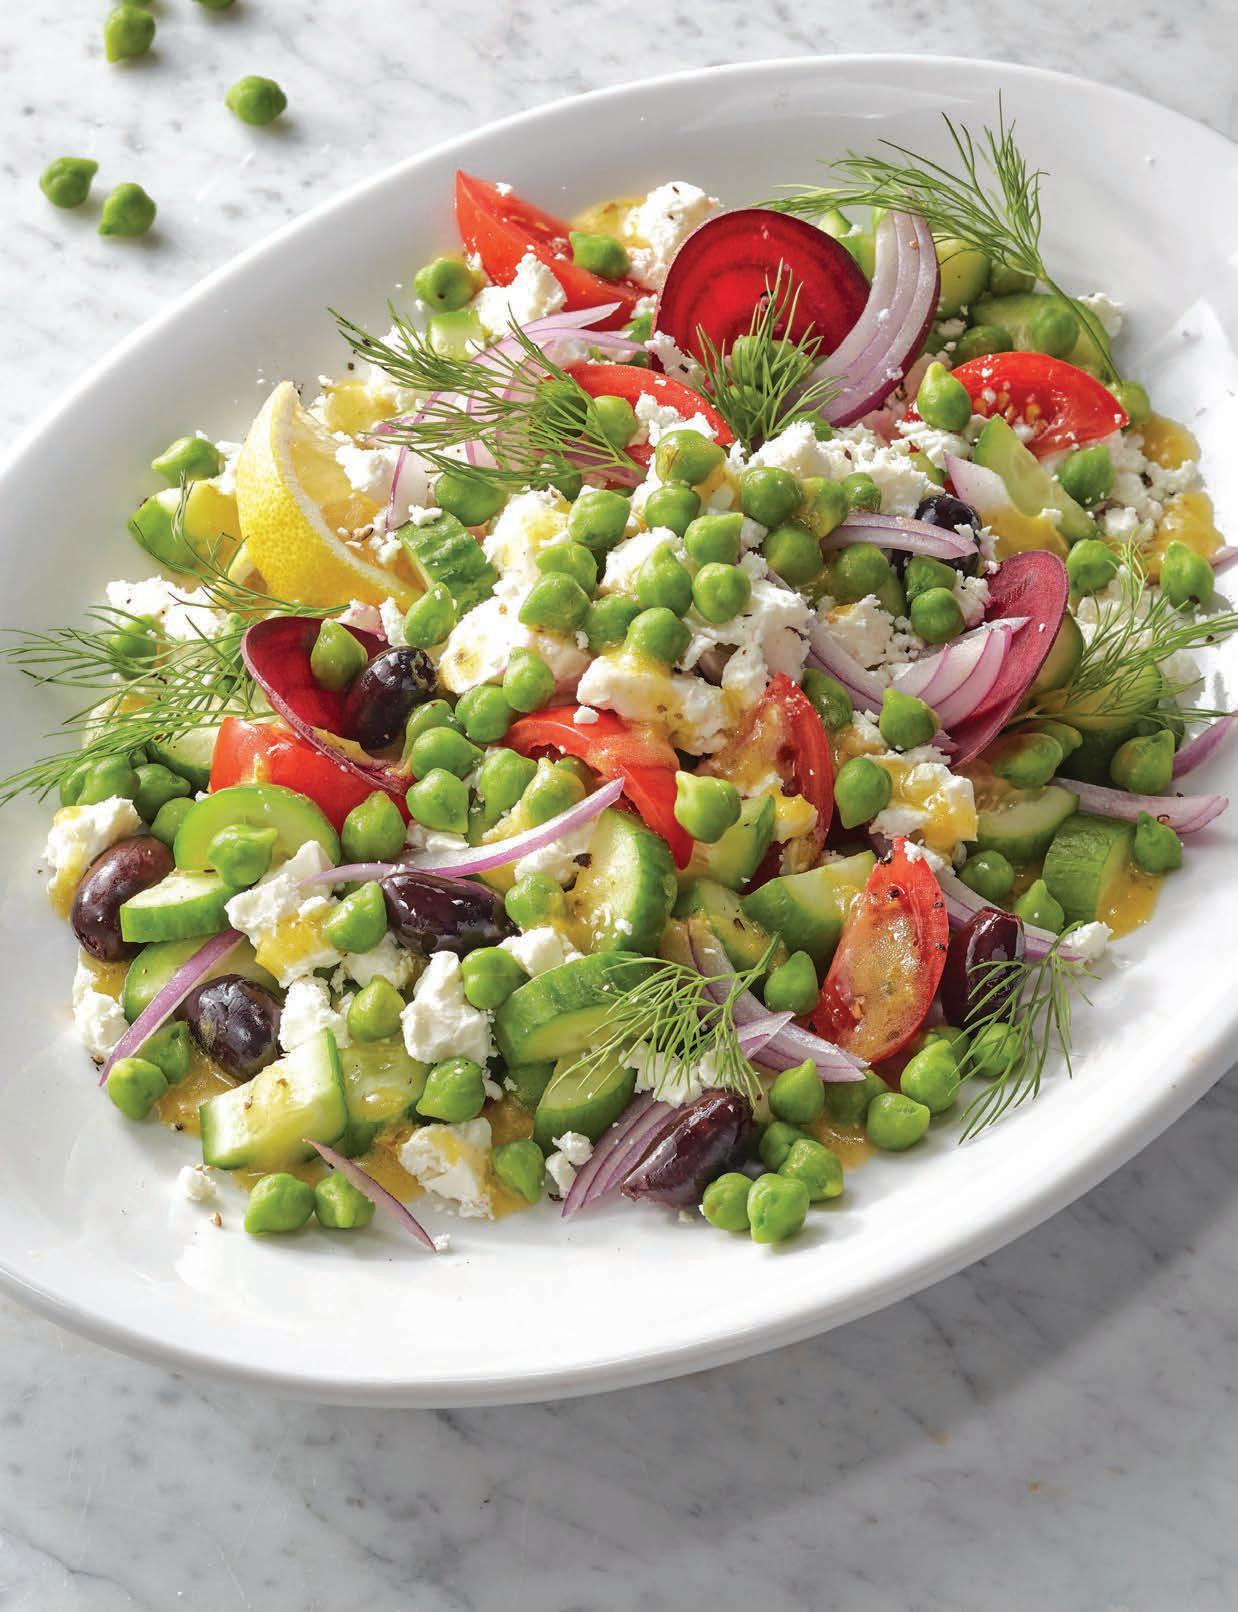
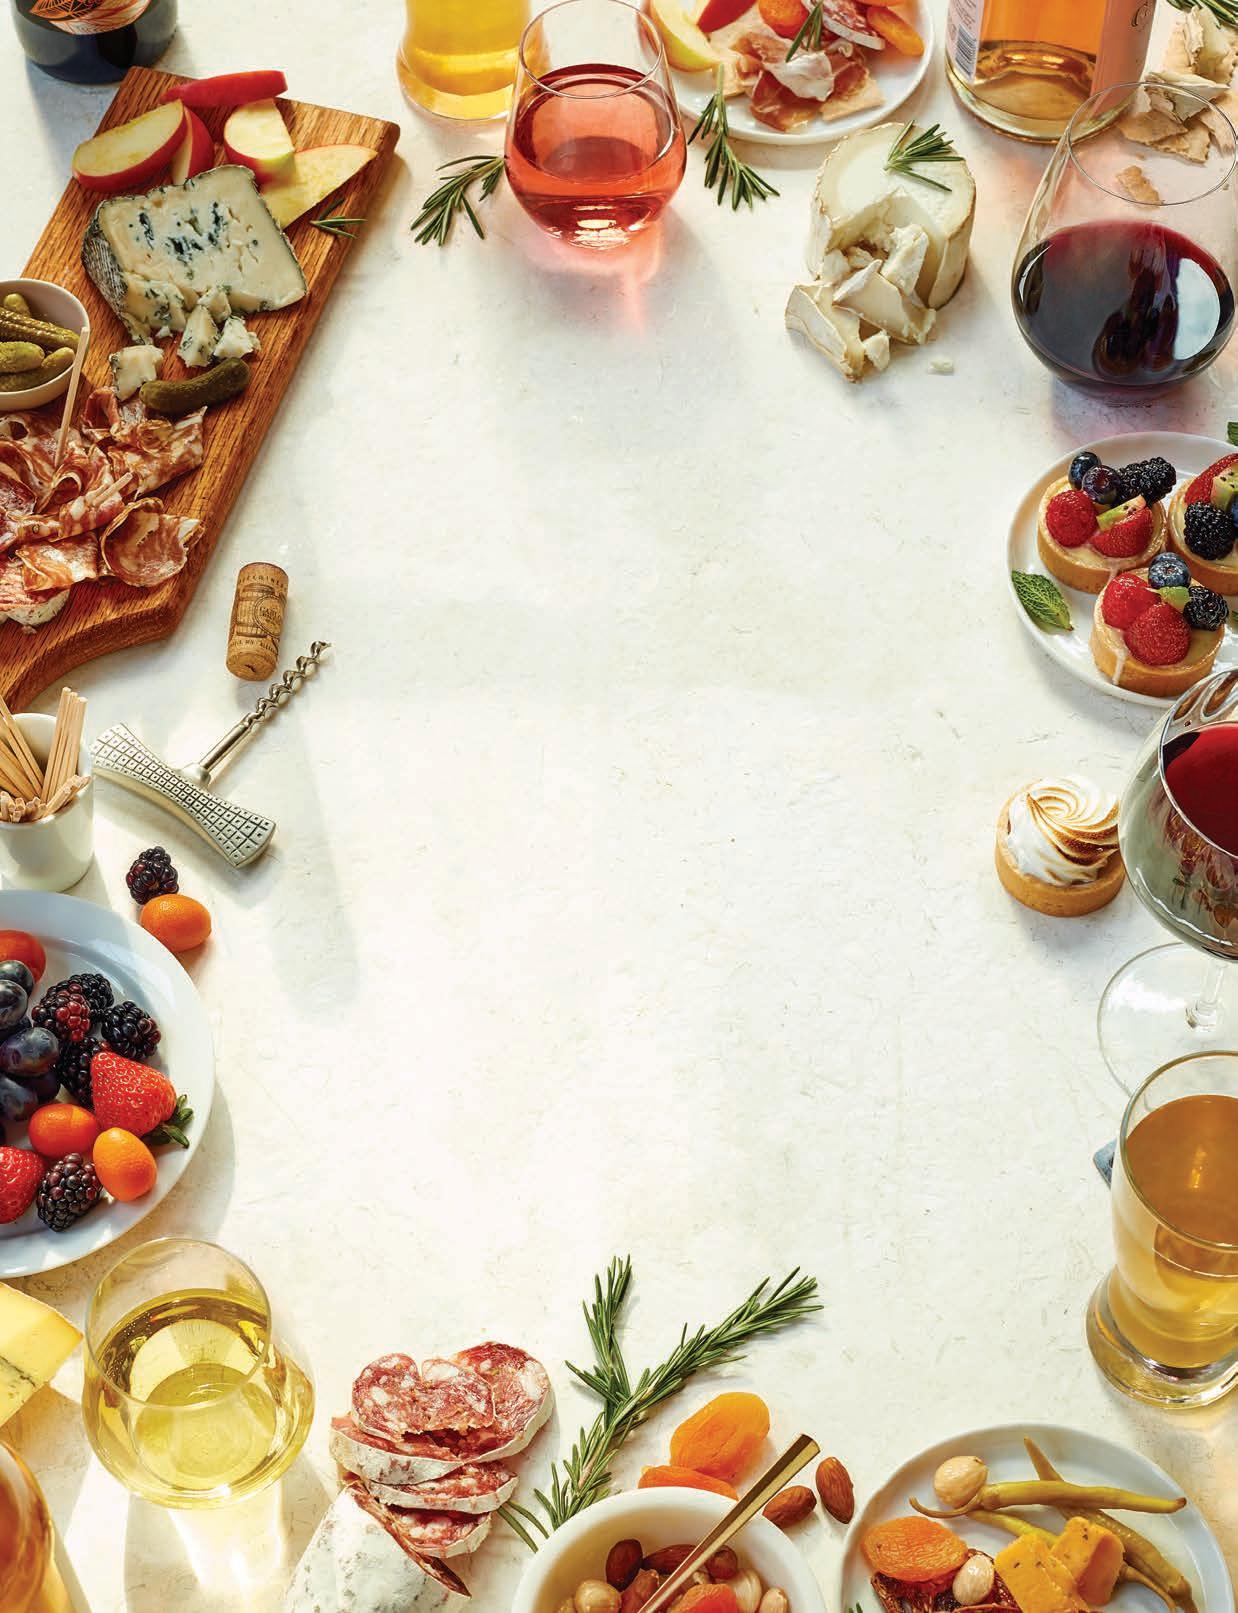
here is nothing better than raising a glass to the season with a group of friends or family and enjoying some tasty food—and it doesn’t have to be a big meal. A range of appetizers paired with a complementary wine is a perfect plan for either a casual evening or a festive fete, and you can make them as easy or as involved as you wish. The pantry staple chickpeas, for example, make an easy snack when roasted, and you can have a bowl of them ready when your guests arrive to nibble on while you get drinks together. Crisp endive leaves topped with creamy goat cheese, savory walnuts, and herbs are perfect for a variety of parties, a variation on bruschetta can be a delicious twist, and the ever-popular meatballs are always a welcome heartier bite. These recipes and more by Barbara Scott-Goodman from her book “Wine Time” will help you prepare delectable apps that can be eaten in one or two bites, and with or without a wine glass in hand.
The recipes here include wine suggestions that would pair well with each of them. Almost all food goes well with wine, and while there are so-called rules about pairing certain wines with certain foods, what matters most is that you enjoy the wine you buy and drink, says Scott-Goodman.

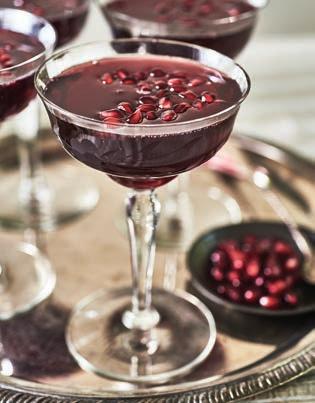
“I recommend that you let your palate be your guide: Use my pairing suggestions as starting points, and then try a lot of different wines with various foods until you figure out what you like,” she suggests. Wine cocktails are also easy to make as single drinks or in batches, so her recipe for Champagne Pom Fizz is also included here to add a festive note to any event.
subialka
MAKES ABOUT 3½ CUPS
Here is an all-purpose tomato sauce that is easy to prepare. It freezes well and is good to have on hand for a number of dishes. In addition to topping pasta and pizza, it makes an excellent dipping sauce for cocktail snacks, such as meatballs.
2 tablespoons extra-virgin olive oil 2 garlic cloves, minced 1 (28-ounce) can organic peeled and crushed tomatoes
1 teaspoon sugar
Pinch of red pepper flakes
Kosher salt and freshly ground black pepper, to taste ¼ cup chopped fresh basil
1. In a large skillet over medium-low heat, heat the olive oil. Add the garlic and cook, stirring frequently, until golden brown, about 2 minutes. Add the tomatoes, sugar, and red pepper flakes and season with salt and pepper to taste.
2. Increase the heat to medium and bring to a simmer, then lower the heat to low and simmer, uncovered, for 30 minutes, stirring occasionally. Add the basil and stir. Cook for 5 minutes more. Taste and adjust the seasoning, if necessary. Serve warm.
Cook’s Note: The sauce will keep, tightly covered in the refrigerator, for up to 1 week and in the freezer up to 1 month.
Nutrition (per about 1⁄3 cup serving): Calories: 50, Fat: 3g (Sat: 0g), Cholesterol: 0mg, Sodium: 220mg, Carb: 6g, Fiber: 1g, Sugar: 4g, Protein: 1g
Meatballs are always very popular at gatherings, and it seems like nobody can eat just one. Ricotta cheese is the key ingredient in this recipe because it makes the meatballs quite tender. They’re very good to serve with marinara for dipping or as sliders.
1⁄3 cup panko ¼ cup whole milk
1 pound ground pork 4 ounces whole-milk ricotta cheese ¼ cup freshly grated Parmesan cheese
1 large egg, lightly beaten 1 teaspoon fines herbes or herbes de Provençe
1. In a large mixing bowl, mix together the panko and the milk and let stand for 5 minutes. Add the pork, cheeses, egg, herbs, and nutmeg. Season with salt and pepper and work the mixture together with your hands until it is well incorporated.
2. Form the mixture into 30 balls that are 1 inch in diameter, and arrange them on a baking sheet lined with parchment paper. Cover and refrigerate until well chilled, up to 2 hours or overnight.
3. Position an oven rack in the center of the oven and heat the oven to 425°F.
4. Brush the meatballs with olive oil and bake until golden and cooked through, turning once halfway through baking, about 12 minutes total. Transfer to a platter, garnish with parsley, and serve with marinara sauce, if desired.
■ The meatballs can be prepared and refrigerated up to 1 day ahead of time. They can also be baked and then stored in the freezer for up to 1 month. Thaw and bake them for about 25 minutes in a 425°F oven.
Pinch of freshly grated nutmeg Kosher salt and freshly ground black pepper Extra-virgin olive oil, for brushing Chopped fresh flat-leaf parsley, for garnish Marinara, for serving (see recipe at left; optional)
■ For delicious mini meatball sandwiches or sliders, heat the meatballs in a large saucepan over medium heat with enough tomato sauce to cover. Once warm, spoon the meatballs into mini hamburger or slider rolls. Sprinkle with freshly grated Parmesan cheese, garnish with parsley, and serve.
Nutrition (per meatball):
Calories: 60, Fat: 4g (Sat: 1.5g), Cholesterol: 20mg, Sodium: 40mg, Carb: 1g, Fiber: 0g, Sugar: 0g, Protein: 3g
When shopping for wine, take full advantage of your wine merchant’s expertise. Most people are in the wine game because they are passionate about it and they enjoy recommending wines. They’re willing to help you find the right wine for every occasion. –B.S.G.
“Whether gathering a crowd or treating yourself, good food and a great glass of wine raise our spirits and enhance our lives.”
—Barbara Scott-Goodman
Chianti Classico and full-bodied Zinfandel always complement red meat, and either one would be a good choice to serve with the meatballs.
 PORK AND RICOTTA MEATBALLS WITH MARINARA
Is there any drink more festive than a sparkling drink made with Champagne?
Whether you’re toasting a birthday, capping off an anniversary, or celebrating the holidays, this cocktail is always a winner.
1 ounce pomegranate juice
4 ounces Champagne
1 ounce St-Germain Elderflower Liqueur Splash of sparkling water or club soda
1 tablespoon pomegranate seeds, for garnish
Pour the pomegranate juice into a Champagne flute or coupe. Add the Champagne, liqueur, and sparkling water. Stir gently to combine. Garnish with pomegranate seeds and serve.

Note: If you’re making a batch of drinks with Champagne, Prosecco, or Cava, a good rule of thumb is that two 750 mL bottles will make 10 drinks, four bottles will make 20, and so on.

Nutrition: Calories: 200, Fat: 0g (Sat: 0g), Cholesterol: 0mg, Sodium: 5mg, Carb: 15g, Fiber: 0g, Sugar: 16g, Protein: 0g
Variations on toppings include:
■ Orange segments, balsamic glaze; garnish with toasted nuts and chopped fresh flat-leaf parsley
Chopped apples; garnish with toasted nuts and orange zest
Chopped pears; garnish with toasted nuts and pomegranate seeds

Spoonful of plum and ginger jam or apricot preserves
Chopped roasted beets, balsamic glaze; garnish with toasted nuts
Chopped smoked salmon; garnish with drained capers, lemon zest, and chopped dill
Chopped kalamata olives; garnish with red pepper flakes and chopped fresh flat-leaf parsley
Chopped fresh tomatoes; garnish with pine nuts and chopped basil
Full-bodied whites like Chardonnay or Viognier go well with the cheesestuffed endive.
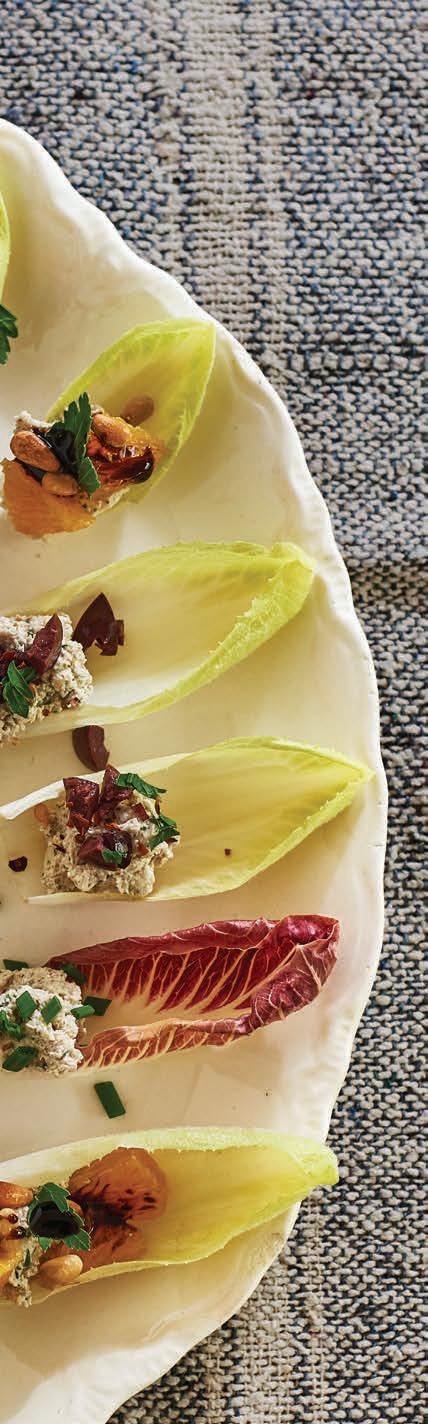
Crisp endive leaves filled with a mixture of creamy goat cheese, walnuts, and fresh herbs are a perfect finger food to serve at all types of parties. This is a basic recipe, but if you like, you can sub in a variety of sweet and savory ingredients for different fillings and garnishes. Look for red Belgian endive leaves to add even more color to the platter.
½ cup goat cheese, at room temperature
¼ cup cream cheese, at room temperature
½ cup walnuts, coarsely chopped
1 tablespoon fresh lemon juice
1 tablespoon minced fresh chives, plus more for garnish
1 tablespoon finely chopped fresh flat-leaf parsley
Kosher salt and freshly ground black pepper 20-24 green and/or red Belgian endive or chicory leaves (2 or 3 heads)
1. Place the goat cheese, cream cheese, walnuts, lemon juice, chives, and parsley in a food processor, season with salt and pepper, and blend until very smooth. Transfer to a small bowl (see Cook’s Note).
2. Spoon the mixture evenly into the endive leaves, garnish with chives (or other toppings and garnishes of your choice; see Toppings box at left), and serve.
The goat cheese mixture will keep, tightly covered, in the fridge for 1 day. Bring to room temperature before serving.
Calories: 120, Fat: 11g (Sat: 4.5g),
Cholesterol: 15mg, Sodium: 105mg, Carb: 2g, Fiber: 1g, Sugar: <1g, Protein: 5g
Bruschetta, crostini, or toasts— whatever you want to call them—are a favorite appetizer to serve for all occasions. When bread is grilled over a fire or on a grill pan or baked in the oven, its flavor and texture are enhanced, and any topping you might want to add will taste even more delicious. When preparing grilled bread, be sure to use artisanal loaves, such as ciabatta, sourdough, or baguettes— these hold up the best to grilling, and their flavor will complement the chosen toppings wonderfully.
Grill Method: Prepare a medium-hot fire for direct grilling in a charcoal barbecue or preheat a gas grill to medium-high. Cut bread into ½-inch slices or rounds and brush each side with olive oil. Arrange them in a single layer on the grill rack and grill, turning once, until they are golden brown, crispy, and slightly charred around the edges, 2 to 3 minutes per side. Transfer the bread to a platter and rub one side of each slice with the cut side of half of a garlic clove, if desired.
Grill Pan Method: Heat an ungreased stove-top grill pan over medium heat. Cut bread into ½-inch slices or rounds and brush each side with olive oil. Arrange them in a single layer on the pan and grill, turning once, until they are golden brown, crispy, and slightly charred around the edges, 4 to 5 minutes per side. Transfer the bread to a platter and rub one side of each slice with the cut side of half of a garlic clove, if desired.
Oven Method: Heat the oven to 450°F. Cut bread into ½-inch slices or rounds and brush one side with olive oil. Arrange them in a single layer on a baking sheet and bake, turning once, until golden brown and crispy, about 3 minutes per side. Transfer the bread to a platter and rub one side of each slice with the cut side of half of a garlic clove, if desired.
An Italian white, such as Pinot Grigio, or a red Chianti will complement the bruschetta beautifully.


Here’s a great way to serve bruschetta: Top grilled bread with creamy ricotta cheese, a chunky mixture of black and green olives, capers, lemon zest, and a slice of prosciutto. If you prefer to make it vegetarian, simply omit the prosciutto.
¾cup mixed olives, pitted and chopped
1tablespoon extra-virgin olive oil
1tablespoon drained capers
1teaspoon lemon zest
Pinch of red pepper flakes
12slices grilled bread
1½cups fresh ricotta cheese
4ounces prosciutto, thinly sliced lengthwise
1. In a medium bowl, combine the olives, olive oil, capers, lemon zest, and red pep per flakes and toss to mix well.
2. Grill bread. (See Grilling Bread box on page 43 and Cook’s Note below.)
3. Spread each grilled bread slice with some of the ricotta cheese, top with a spoonful of the olive mixture and a slice of prosciutto, and serve at once.
Cook’s Note: The grilled bread can be pre pared about 1 hour ahead of time.
Nutrition (per serving):
Calories: 300, Fat: 13g (Sat: 5g), Cholesterol: 30mg, Sodium: 960mg, Carb: 28g, Fiber: 1g, Sugar: 2g, Protein: 16g

These roasted chick peas pair well with a red, such as Merlot, or a white, such as Chardonnay.
It’s amazing how handy a few cans of chickpeas in the pantry can be. You can use them to make hummus or top salads, rice, and grains; plus, these versatile legumes make a great savory snack when roasted with olive oil, garlic, and a coating of Parmesan cheese.
2(15½-ounce) cans chickpeas, drained and rinsed ½cup freshly grated Parmesan cheese 3tablespoons extra-virgin olive oil, divided 1teaspoon minced garlic ½teaspoon paprika
Pinch of cayenne pepper
Kosher salt and freshly ground black pepper, to taste
1. Arrange the chickpeas on a baking sheet lined with paper towels, and let them dry for about 30 minutes. Transfer to a large bowl.
2. Heat the oven to 400°F.
3. In a medium bowl, stir together the Parmesan, 1½ tablespoons of the oil, the garlic, paprika, and cayenne until well mixed. Pour over the chickpeas and toss well to coat.
4. Spread the chickpeas in a single layer on a rimmed baking sheet, drizzle with the remaining 1½ tablespoons of oil, and season with salt and pepper to taste. Bake for 20 minutes, stir, and continue to bake until the chickpeas are crisp and golden, about 5 minutes more.
5. Remove from the oven and transfer to paper towels to drain. Let cool completely. Taste and adjust the seasoning, if necessary, and serve.
Cook’s Note: The chickpeas can be made up to 4 hours in advance and can be stored in an airtight container at room temperature for up to 1 day.
Nutrition (per serving): Calories: 140, Fat: 7g (Sat: 1.5g), Cholesterol: <5 mg, Sodium: 390mg, Carb: 14g, Fiber: 3g, Sugar: 0g, Protein: 6g ■
Embrace the relaxed pace of mountain life with recipes rooted in the peaks.
RECIPES BY LIZZIE KAMENETZKY AND KELLEY EPSTEINThis delightful onion bread (as it literally means) is something of a cross between a tart and a pizza. The soft, squidgy dough melds with the tender sweet onions and the tang of sour cream. –lizzie kamenetzky
¼ ounce fresh yeast (or ¼ ounce sachet dried yeast)
½ cup low-fat milk, just-warm, divided
1⅓ cups all-purpose our ½ teaspoon ne sea salt
2 tablespoons unsalted butter, melted and cooled 1 egg yolk
inter can be a wonderful season of family time and meals of comforting foods. Traditional comfort food holds special importance in places like the mountains where the cold can be fierce. Certain meals might help provide a feeling of warmth and evoke memories centered on love and cheer. Sometimes these foods can be as simple as a fresh loaf of bread or a warm pudding, both of which inspired Lizzie Kamenetzky’s book “Fireside Food for Cold Winter Nights.” She grew up spending many happy holidays in the Swiss Alps, where residents use local foods and specialties to make hearty food filled with flavor and warmth for cold days. She was taken by these delicious meals and designed the recipes in “Fireside Food” to have roots in the small mountain towns of Europe while involving a well-balanced combination of classic and modern ingredients.
“We move so fast through our lives, always rushing, never enough time to cook, to eat, to enjoy, but in the mountains, life slows down,” Kamenetzky writes in the intro to her book. “You can’t get anywhere fast in the mountains, so you might as well relax and let it wash over you.”
Those who enjoy the mountains for the winter pastime of skiing may be aware of the phrase “après-ski.” Simply meaning “after ski,” this marks the time of day when skiers leave the mountains and settle down for drinks and food with new and old friends alike. This time of day is usually when the slopes close, but Kelley Epstein believes that enjoying après shouldn’t only be for skiers, and winter is the perfect time to indulge. The title of her cookbook, “Après All Day,” says it all. It features snacks and easy meals to warm you up, and dishes perfect for a winter potluck.
Food next to a crackling fire in a snowy setting is the epitome of cozy, and the recipes from these books evoke that feeling of contentment and happiness whether your home is in the mountains or on a city street. –samantha johnson

For the Filling
2 tablespoons unsalted butter
1 pound 2 ounces (about 4 medium) onions, thinly sliced ½ teaspoon caraway seeds ⅔ cup (scant) sour cream
1 egg
Sea salt
1. Line a 14x10-inch roasting pan with baking parchment and set aside.


2. Mix the yeast with 3 tablespoons of the warm milk and leave until it is frothy. Tip the our into a bowl with the salt. Make a well in the center and add the yeast, the remaining milk, melted butter, and egg yolk. Mix until you have a soft, slightly sticky dough. Knead well on a lightly oured surface for 10 minutes then put in a clean bowl and cover with lightly greased plastic wrap and leave in a warm place for 1 hour or until doubled in size.
3. Meanwhile, melt the butter for the lling in a pan and fry the onions with the caraway seeds and a good pinch of salt over low heat for 35 to 40 minutes until really softened and golden brown. Tip into a bowl to cool.
4. Heat the oven to 400°F.
5. Roll out the dough and use to line the prepared roasting pan. Leave to rise, covered in lightly greased plastic wrap for 15 to 20 minutes.
6. Mix the onions with the sour cream and eggs. Spread over the top of the dough and leave to rise for 10 to 15 minutes.
7. Bake in the preheated oven for about 30 to 35 minutes until golden. Cool on a wire rack. Serve slightly warm or at room temperature.


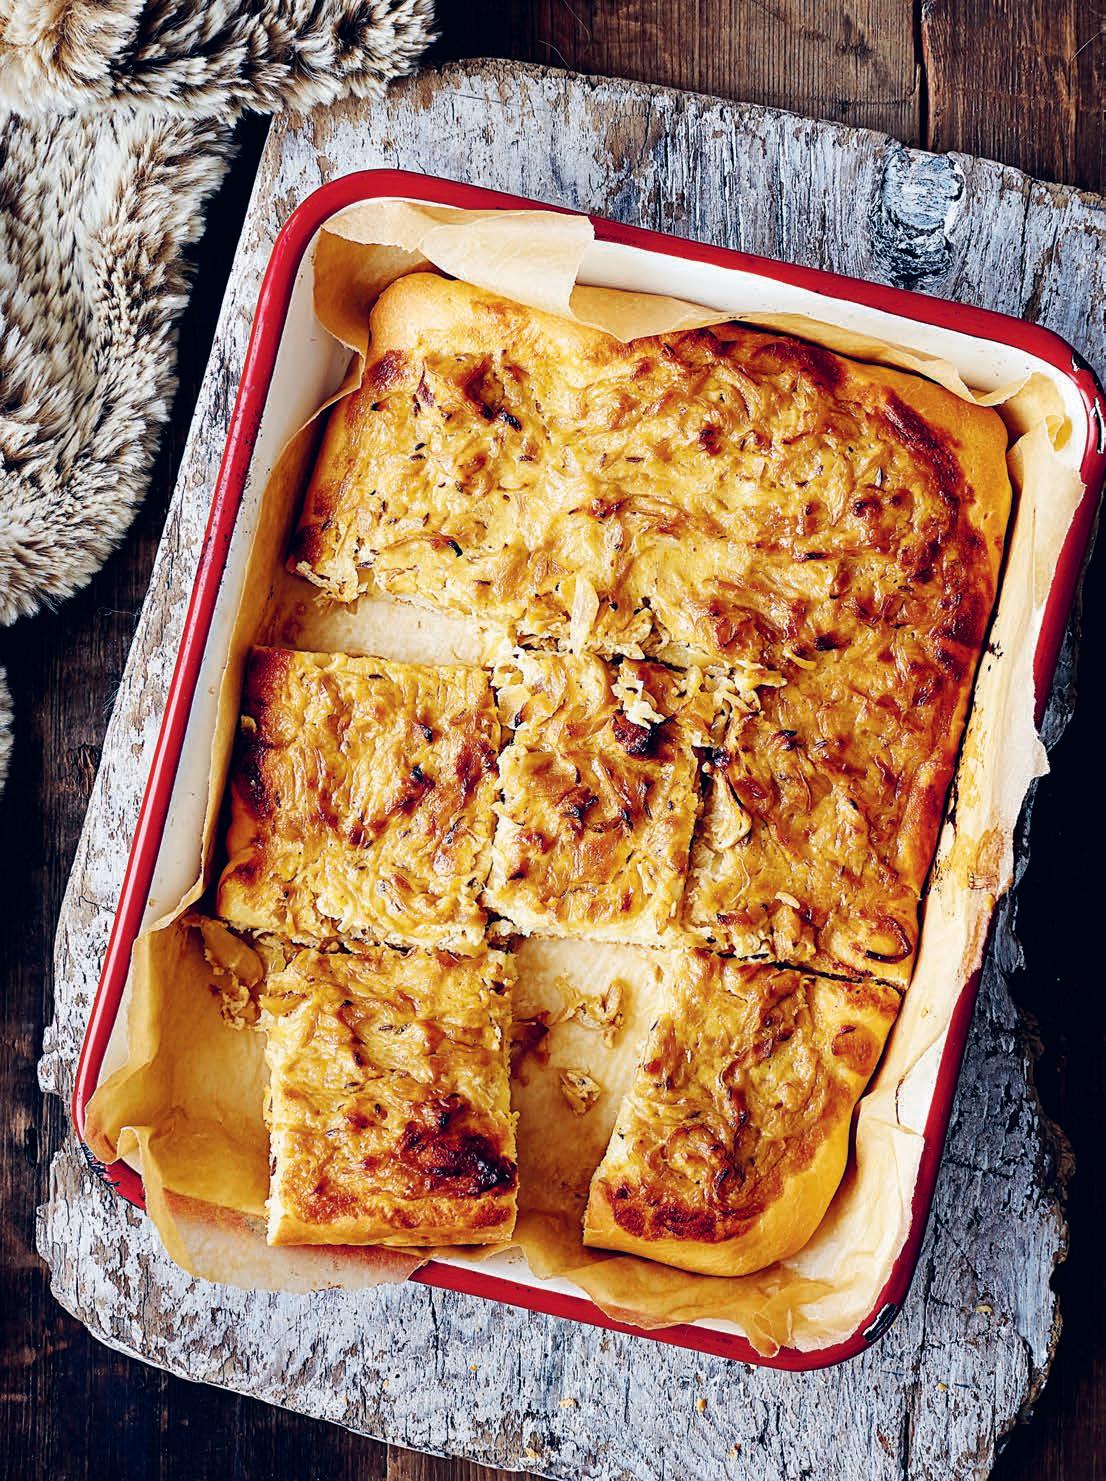


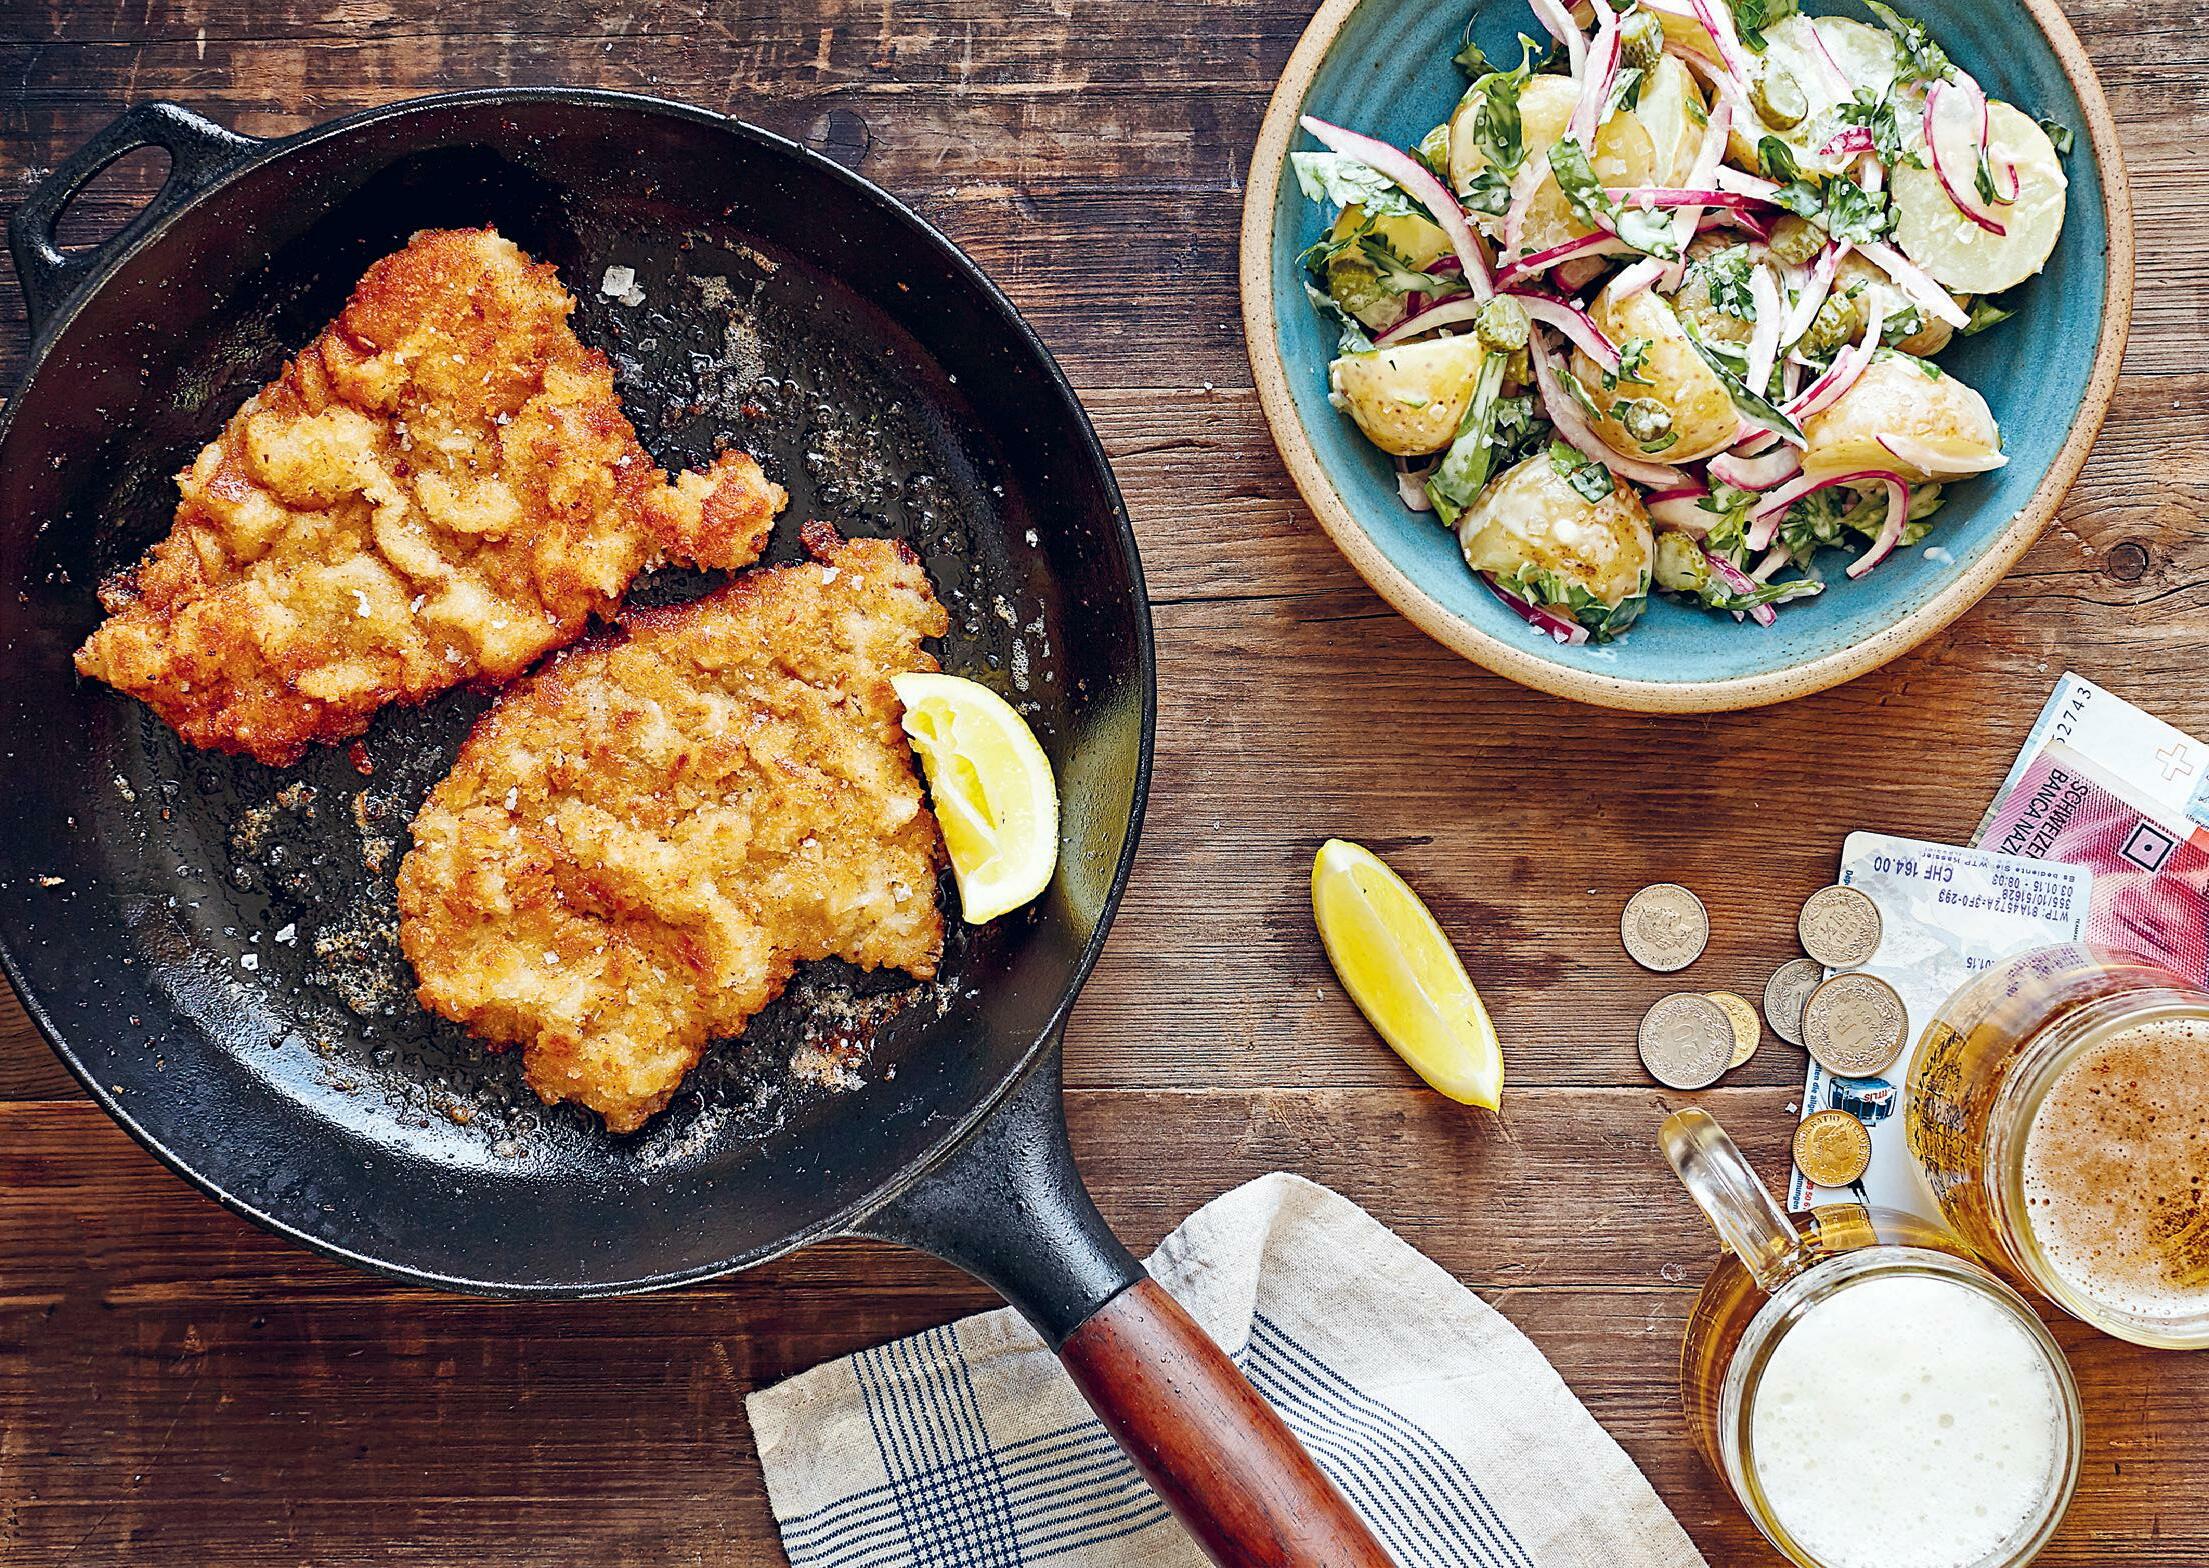
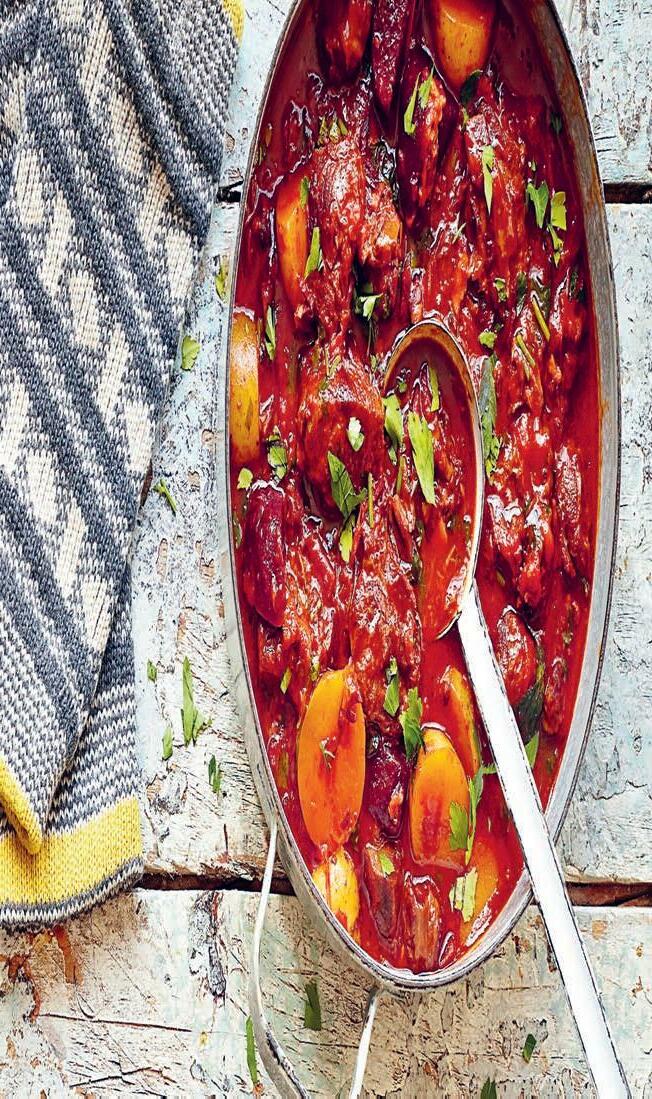
 SCHNITZEL WITH WARM POTATO SALAD
Traditionally made with veal, schnitzel is equally delicious when made with pork or even chicken. A schnitzel should be lovely and thin with a crisp, golden casing of crumbs. Here they are served with a classic German potato salad that has a tang of vinegar and pickles to offset the creamy dressing. –lizzie kamenetzky
1 small white loaf, preferably 1 or 2 days old 4 veal escalopes, about 4½ ounces each 2 tablespoons all-purpose our 1 extra-large egg, beaten 1 tablespoon heavy cream
Vegetable oil, to fry 2 tablespoons unsalted butter
Sea salt and ground black pepper
Lemon wedges, to serve
For the Potato Salad
1 pound 10 ounces waxy new potatoes, halved
1. Heat the oven to 225°F
2. Remove and discard the crusts from the loaf and whiz it in a food processor or blender to form coarse crumbs. Spread the crumbs onto a baking sheet and cook in the preheated oven for about 1 hour to dry out slowly—start checking them after 30 minutes.
MAKES 6 SERVINGS | FROM “FIRESIDE FOOD”
1 red onion, thinly sliced
3 tablespoons white wine vinegar


1 tablespoon Dijon mustard
3 tablespoons mayonnaise

2 tablespoons extra-virgin olive oil
2 tablespoons crème fraîche


A pinch of super ne sugar
12 cocktail gherkins, nely chopped
1 tablespoon gherkin liquid
A few sprigs of fresh tarragon, nely chopped
A small bunch of fresh flat-leaf parsley, leaves nely chopped
4. For the potato salad, put the potatoes in a pan of cold salted water and bring to a boil, then simmer for 15 minutes until just tender.
5. Meanwhile, put the onion in a bowl with the vinegar. When the potatoes are cooked, drain them, and mix with all the remaining potato salad ingredients, including the onion and vinegar. Season well with salt and pepper and set aside.
6. Season the our with plenty of salt and pepper and put in a shallow dish. Beat the egg with the cream and put in a second dish. Put 3 cups of the crumbs in a third dish (or more if you need to).
7. Heat a good layer of oil in a large nonstick frying pan/skillet. Dip each of the escalopes into the our, shaking off any excess, then coat in the beaten egg and nally the breadcrumbs. Make sure the escalopes are completely coated.
Once dry, whiz again to make ne crumbs. (You can keep any you don’t use in an airtight container for several weeks.)
3. Put the escalopes between two pieces of baking parchment or plastic wrap and bash with a meat tenderizer or rolling pin until they are as thin as possible, without tearing meat.
8. Add the butter to the pan, and once it is melted and foaming, add the escalopes. Fry for 1 to 2 minutes on each side until golden. You may need to cook them one or two at a time, depending on the size of your pan.
9. Serve immediately with lemon wedges and the warm potato salad.
This Hungarian dish spread into the mountains, where it is always popular in the huts and cabins as a hearty meal on the slopes and trails. There is a healthy kick of paprika with the added richness of sour cream, which helps to make this one of the most warming and comforting dishes. This is also delicious made with pork instead of beef—use a slow-cook cut such as shoulder/butt and cut it into large chunks. –lizzie kamenetzky
Olive oil, to fry
3¾ ounces bacon, nely chopped
2¼ pounds braising steak or beef shin, cut into 1-inch chunks
2 heaping tablespoons all-purpose our
2 large onions, thinly sliced
2 red bell peppers, deseeded and sliced
3 garlic cloves, crushed
5 juniper berries, crushed 2 bay leaves
1. Heat a good layer of olive oil in a ameproof casserole or large saucepan and fry the bacon over medium heat until it starts
1 tablespoon sweet smoked paprika
½ tablespoon hot paprika
2 teaspoons caraway seeds
2 tablespoons tomato paste
1 tablespoon red wine vinegar
5 cups beef stock
11 ounces waxy potatoes, cut into chunks
2 beets, cut into chunks
Sea salt and ground black pepper
Freshly chopped parsley and sour cream, to serve
to color. Remove bacon with a slotted spoon and set aside.

2. Dust the beef in the our with plenty


of seasoning, then brown in batches over high heat in the same pan, adding more oil if necessary. Remove and set aside with the bacon.
3. Add a little more oil to the pan and add the onions and bell peppers. Fry for 10 minutes until the peppers are softened and the onions start to color. Add the garlic, juniper, bay leaves, and spices, and fry for a few minutes before adding the tomato paste, vinegar, and stock.
4. Return the beef and bacon to the pan and season well. Bring to a simmer, then cover and cook for 2 to 2½ hours until the beef is starting to become really tender.
5. Add the potatoes and beets to the pan and simmer, with the lid off, until the vegetables are tender.
6. Stir in the parsley and serve in large, warmed bowls with generous dollops of sour cream.
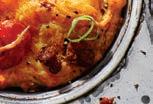
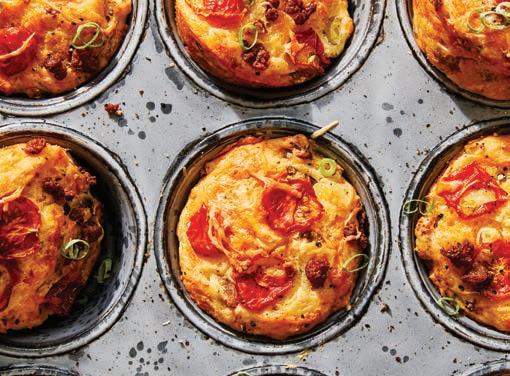
One of my teammates brought these crazy-delicious muffins to a potluck celebrating the end of tennis league play. I was smitten at first bite and asked for the recipe. Perfectly savory, almost biscuit-like, and yet still light, they are a staple in my kitchen. –kelley epstein
8 ounces breakfast sausage
12 cherry tomatoes
1½ cups all-purpose flour


1½ teaspoon baking powder


½ teaspoon fine salt
¼ teaspoon freshly ground black pepper
1 cup buttermilk

4 tablespoons unsalted butter, melted
1 large egg
8 ounces shredded sharp cheddar (or Swiss) cheese
½ cup chopped green onion, white and light green parts only 1 teaspoon coarse salt
1. Heat the oven to 375°F. Line a plate with paper towels. Grease and lightly flour a standard 12-cup muffin tin.
2. Heat a large skillet over medium-high heat. Add the sausage, breaking it into small crumbles with a wooden spoon, and cook until nicely browned. Remove from the heat and transfer the sausage to the paper towel–lined plate to drain.
3. While the sausage is cooking, slice the cherry tomatoes about 1⁄8 inch thick. Lay the tomato slices on a paper towel and cover with another paper towel to remove the excess moisture.
4. In a large bowl, combine flour, baking powder, fine salt, and pepper.
5. In a small bowl, combine the buttermilk, melted butter, and egg.
6. Pour the wet ingredients into the dry ingredients and stir just to combine—lumps are okay! Fold in the cooked sausage, grated cheese, and green onion. Take care not to overmix.
7. Divide the batter evenly among the 12 muffin cups.
8. Top each muffin with 2 or 3 tomato slices. Sprinkle with a pinch of coarse salt.
9. Bake 20 to 25 minutes, or until golden brown. Remove from oven and let rest 10 to 15 minutes in the tin before removing and cooling on a wire rack. Serve warm or at room temperature. Store in an airtight container in the refrigerator up to 3 days or freezer up to 1 month.
MAKES 8 SERVINGS | FROM “APRÈS ALL DAY”
I love nothing more than an easy, prep-ahead meal, and the slow cooker gives me the ability to do just that. This creamy chili is the marriage of two family favorite recipes: enchilada suizas and ranch chicken tacos. This is a true throw-and-go slow cooker recipe that you can prep in the morning, and by the time you come home from your morning ski or snowshoe, lunch is ready! –kelley epstein
1¼ pound boneless, skinless chicken thighs (see Cook’s Notes)
Half of a 1-ounce package ranch salad dressing mix
¾ cup diced sweet onion
1 large garlic clove, minced
1 (15-ounce) can corn, drained
1 (15-ounce) can great Northern beans, drained
8 ounces salsa verde
2 cups low-sodium chicken broth
¼ cup heavy cream
1 tablespoon cornstarch

2 ounces cream cheese, at room temperature

Corn chips or tortilla chips, for serving Lime wedges, for serving Fresh cilantro, for serving Chopped red onion, for serving
1. Add the chicken thighs to the crock of a slow cooker. Sprinkle with the salad dressing mix.
2. Add the onion, garlic, corn, beans, salsa, and chicken broth.
3. Cover and cook on low 4 to 5 hours, or until the chicken is cooked through and shreds easily. It will literally almost fall apart when done.
4. Transfer the chicken to a large plate. Shred the meat and return it to the slow cooker.
5. In a small bowl, mix the heavy cream with the cornstarch. Stir until the cornstarch dissolves. Stir the cornstarch mixture and the cream cheese into the chili. Cover and cook on low for 30 minutes more, or until the cream cheese is melted and the chili is creamy.
6. Serve with bowls of chips, lime wedges, cilantro, and red onion for everyone to choose from! Cook’s Notes:
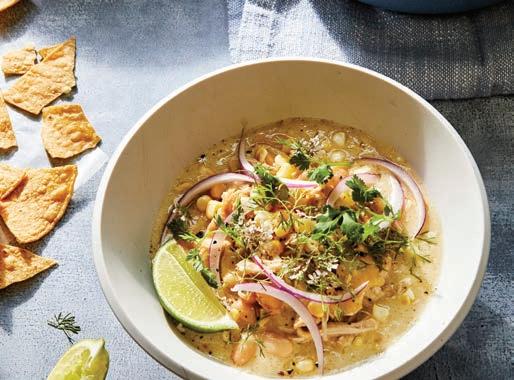
■ Chicken breasts will work if you prefer, but thighs will have more flavor and won’t be as dry.
■ Any green enchilada sauce or salsa will work here.
MAKES ONE 12-INCH PIZZA | FROM “APRÈS ALL DAY”
If you like thin, crispy pizza crust, then you’ll love these. My favorite is the margherita; my oldest loves the ham and pineapple, and my husband and youngest love the classic cheese. So simple to make, these get gobbled up faster than I can produce them!
NOTE: My boys usually eat one and a half to two of these depending on how hungry they are. Because I have only one cast-iron pan, we cut them up and eat these family-style as they come out of the oven!
–kelley epstein


1 teaspoon olive oil
1 (12-inch) flour tortilla ¼ cup marinara or pizza sauce ½ cup shredded whole-milk mozzarella
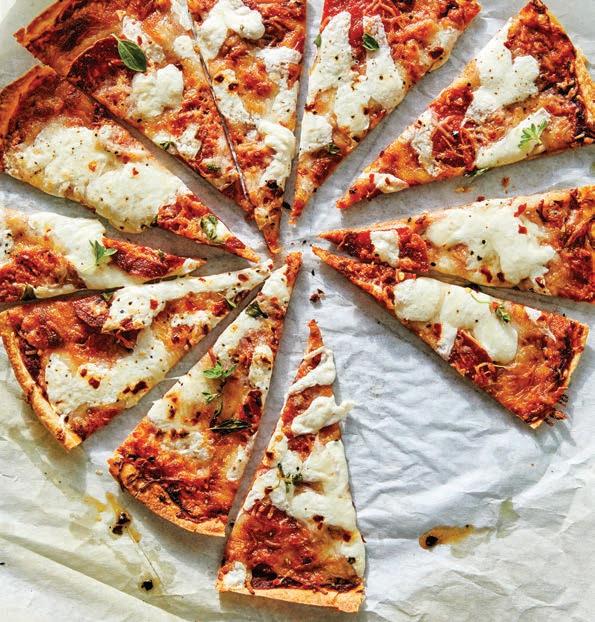


1. Set the oven to broil.
2. Heat a large cast-iron skillet or griddle over medium-high heat. Add the olive oil. Once shimmery, spread the oil around the skillet with a paper towel to absorb any excess oil. Put the tortilla in the center of the skillet. Top the tortilla with the marinara sauce, spreading it all the way to the edges. Sprinkle evenly with the mozzarella cheese. Cook for about 2 minutes, just until the underside of the tortilla is brown and crispy. Be careful because it can burn quickly!
3. Put the skillet under the broiler and cook for 60 to 90 seconds, or until the cheese is melted and bubbly and the tortilla starts to brown at the edges.
4. Remove from the oven and transfer the pizza to a cutting board. Let rest for 2 to 3 minutes before cutting into eighths. Serve immediately.
1 Classic Cheese Pizza (recipe above)
½ Roma tomato, thinly sliced 2 basil leaves, torn into small pieces
Pinch of coarse salt
1. Assemble the pizza as directed for the classic cheese pizza.
2. Top the cheese with the sliced tomato and torn basil. Cook as directed. When you remove the pizza from the oven, sprinkle with salt.
1 Classic Cheese Pizza (recipe above)
2 slices deli ham, cut into bite-size pieces
2 tablespoons thinly sliced canned pineapple chunks
Reduced balsamic vinegar, for drizzling
1. Assemble the pizza as directed for the classic cheese pizza.
2. Top the cheese with the ham and pineapple. Cook as directed. Finish with a drizzle of reduced balsamic vinegar.
PEPPERONI PIZZA
1 Classic Cheese Pizza (recipe above)
8 pepperoni slices
1. Assemble the pizza as directed for the classic cheese pizza.
2. Top the cheese evenly with the sliced pepperoni. Cook as directed. ■
FOUR WAYS
Nutrition Information:
“Fireside Food”
Goulash Soup (per serving):
Calories: 440, Fat: 19g (Sat: 7g), Cholesterol: 110mg, Sodium: 880mg, Carb: 27g, Fiber: 4g, Sugar: 11g, Protein: 41g
Zwiebelkuchen (per serving): Calories: 470, Fat: 21g (Sat: 11g), Cholesterol: 140mg, Sodium: 350mg, Carb: 61g, Fiber: 5g, Sugar: 19g, Protein: 12g
Schnitzel with Warm Potato Salad (per serving): Calories: 900, Fat: 36g (Sat: 11g), Cholesterol: 205mg, Sodium: 1180mg, Carb: 68g, Fiber: 5g, Sugar: 11g, Protein: 46g
“Après All Day”
Savory Sausage and Cheddar Muffins (per serving): Calories: 260, Fat: 12g (Sat: 5g), Cholesterol: 80mg, Sodium: 160mg, Carb: 20g, Fiber: 4g, Sugar: 4g, Protein: 20g
Ranch Chicken Chili (per serving): Calories: 230, Fat: 16g(Sat: 8g), Cholesterol: 55mg, Sodium: 660mg, Carb: 14g, Fiber: <1g, Sugar: 2g, Protein: 9g
Cast Iron Tortilla Pizza Four Ways (per each whole pizza)
Classic: Calories: 560, Fat: 25g (Sat: 11g), Cholesterol: 45mg, Sodium: 1220mg, Carb: 60g, Fiber: 3g, Sugar: 5g, Protein: 21g
Margherita: Calories: 570, Fat: 25g (Sat: 11g), Cholesterol: 45mg, Sodium: 1230mg, Carb: 63g, Fiber: 4g, Sugar: 7g, Protein: 22g


Ham and Pineapple:
Calories: 620, Fat: 26g (Sat: 11g), Cholesterol: 60mg, Sodium: 1760mg, Carb: 64g, Fiber: 3g, Sugar: 8g, Protein: 29g
Pepperoni: Calories: 640, Fat: 32g (Sat: 14g), Cholesterol: 60mg, Sodium: 1480mg, Carb: 61g, Fiber: 3g, Sugar: 5g, Protein: 24g


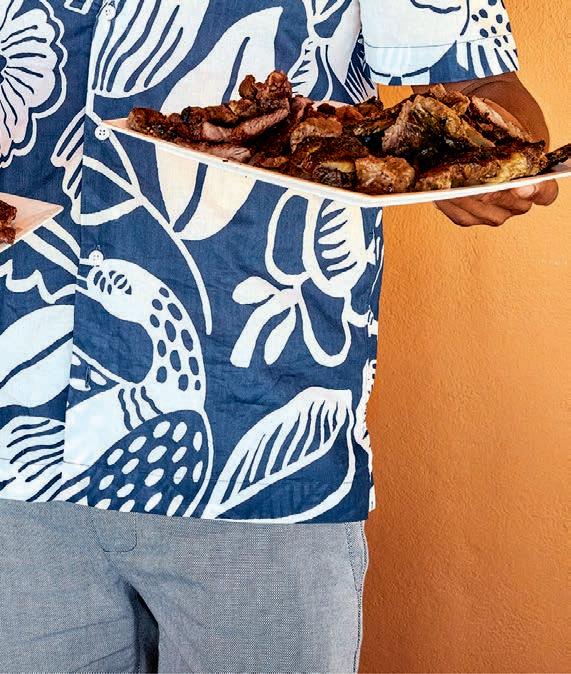


sk him about the word “authentic” and Rick Martínez, author of “Mi Cocina: Recipes and Rapture from My Kitchen in Mexico,” takes exception to the term when applied to particular recipes or cooking techniques from various global cuisines.
“I think that the idea of authenticity is an American construct that originated from trying to market historically non-white food to white audiences,” Martínez says. “Over the years, us Americans have been taught to look for cookbooks that are the most authentic, with the idea that there’s but one way to correctly prepare a dish. The reality is that in Mexico and other countries, if I invite 10 people over to my house today and ask them all to bring the same dish, you’ll get 10 different versions that are all incredibly delicious and reflect the personality and the style and the flair of the cooks who made them.”
It’s this eclectic vision as applied to Mexican cuisine that animates his recently released debut cookbook, “Mi Cocina,” and affords home cooks the opportunity to experiment with dishes that go far beyond the tacos and fajitas that might already be in their wheelhouse. Just as no single cookbook could claim to represent the scope of American cuisine without including both New Orleans jambalaya and New England clam chowder, Martínez breaks down the food of Mexico into eight regions, from Baja, California, to the Yucatan Peninsula.
Martínez hardly took a hands-off approach to compiling the material that went into his book. “Mi Cocina” is the product of an epic 586-day road trip he took all through Mexico in a used cherryred Nissan Versa sedan. Starting in October 2019, he traveled to all 32 Mexican states, 156 cities and towns, and covered more than 20,000 miles. Everywhere he went, he sought out and connected with local cooks.
“I’d ask the cooks a single question: ‘Out of everything you make, what do you like best?’” Martínez writes in the book. “With this as my criterion, 99.9% of what I ate was delicious. Out of the countless dishes I got to try this way, I selected a hundred of my favorites and created my own interpretation of each, not as an archetype or a be-all and end-all ‘best’ version, but as a highly personalized love letter to that dish, with my own unique sazón, of course—my personal flair and signature that makes these dishes my own.”
The result is a cookbook of impressive breadth and variety, with basic instruction on stocking the kitchen with the staples of Mexican cooking along with make-your-own tortilla recipes. Home cooks can sample delights such as a sumptuous Albóndigas en Chipotle (herb and cheese meatballs in smoky sauce) or Mole Amarillo con Chochoyotes (chicken and corn dumplings in a velvety chile sauce) from Oaxaca (see
the recipe on page 54), and Burritos de Chilorio (braised pork, avocado, and cheese in toasted tortillas) from northern Mexico.
Writing “Mi Cocina” entailed a long physical journey in that Nissan—which he still owns, parking it outside the home in Mazatlán he settled into in 2020 and shares with his rescue dog, Choco. It was also part of a profound personal journey for Martínez, weaving together threads of his own story and that of his family, and how food and cooking have been thematic constants in his life.
Martínez is a third-generation Mexican American, born and raised in Texas. Although he has said he was viewed as a “brown kid,” he had never gone farther into Mexico than border towns. His parents generally tried to blend in with American culture, and when he was growing up, his mother explored the terrain of Betty Crocker-style cooking—he describes memories of such dishes as chicken-fried steak and salmon croquettes.
Still, he recalls spending a good deal of time with his mother watching cooking shows growing up. Among them were famous programs such as Diana Kennedy’s and “Mexico: One Plate at a Time” with Rick Bayless. Today, he describes his fascination with those Mexican-cooking icons as a “love-hate relationship.”
“Now I know that this desire was masking a deeper one: the desire to understand myself,” Martínez writes. “[A] British woman (Kennedy) and Rick Bayless, a white man from Oklahoma, got to represent the culinary diversity of Mexico while my Mexican American family tried to enculturate with meatloaf and Chef Boyardee.”
Today, Martínez credits this feeling of remembered resentment with an acknowledgment that friction underneath the surface of his youth truly flowered in the self-discovery that led to “Mi Cocina.”
“Those programs gave me a glimpse of this world and this culture. I hadn’t understood that a piece of my heritage had been lost when my family came from Mexico more than 100 years ago,” Martinez says. “It also inspired me to write this book. I had always wanted to learn more and to understand where I came from. I had made this declaration as a 19-year-old boy that I wanted to be like Diana Kennedy and travel this country and know this food.”
While he was always attracted to the world of food and cooking, in his early adulthood his parents pointed him toward getting what he has called a “real” degree (in European history and Spanish history
Rick Martínez’s journey of a lifetime brings him back to “Mi Cocina.” BY QUINTON SKINNER
“I want you to make this food. It’s not an exact replica of anything I ate anywhere. It’s the food I enjoyed eating the most as created for American home cooks. It’s easy to make with ingredients you can find in the grocery store with equipment you already own.”
–rick martínez
Chicken and corn dumplings
simmered in a velvety chile sauce
MAKES 6 TO 8 SERVINGS
I love this dish because of the chochoyotes, which are masa dumplings with a dimple in them that holds onto the mole. Growing up in Texas, my mom made chicken and dumplings when it was cold and dreary out, and it was like getting a hug and kiss from her. This dish could be the Mexican comfort equivalent with chicken, a rich and thick, albeit spicy stew, and soft maíz dumplings cooked in that rich bright, spicy, and slightly sweet mole. –rick martínez
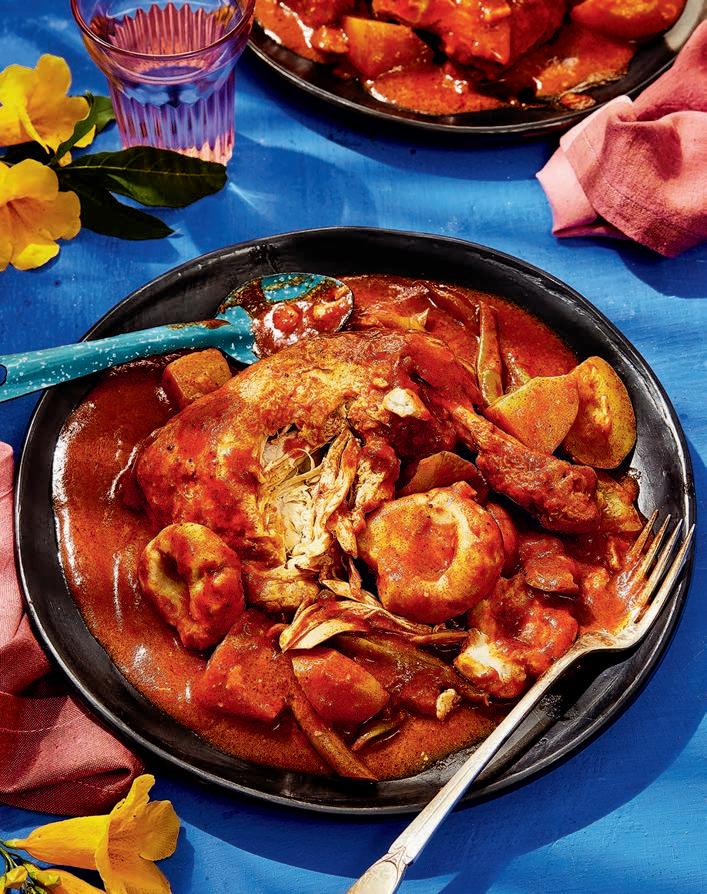
For the Chochoyotes
1cup harina de maíz, such as Bob’s Red Mill Masa Harina
1tablespoon rendered lard or unsalted butter
¼teaspoon Morton kosher salt
For the Mole Amarillo
3large chilies chilhuacles amarillos or chilies guajillos, stemmed and seeded (see Editor’s Note)
2tablespoons rendered lard, olive oil, or vegetable oil
4(2.2 pounds) whole chicken legs
½medium white onion, chopped
2large fresh yellow chilies güeros/ caribes, banana, wax, or bell peppers, stemmed, seeded, and chopped
3medium tomatillos, husked, rinsed, and chopped
at the University of Texas at Austin), which led to years working in advertising and marketing. Eventually he graduated from the French Culinary Institute (now Institute of Culinary Education) in New York, then worked as a cook at ABC Kitchen and a food stylist with the Food Network before he moved into food writing and ended up as a senior editor at Bon Appétit magazine. In 2020, however, he resigned from the popular “Test Kitchen” video series along with other creators alleging inequal pay for staff and contributors of color. It was a major step into the unknown.
“I think that we Americans believe you don’t walk away from money, from opportunity, from security,” Martínez says of that time. “But the reality for me is that at that moment, I was not happy, and I was tired of trying to perform for people who didn’t necessarily really want my content at their publication. For my own sanity, I decided to walk away.”

In that moment, the COVID-19 pandemic was creating massive uncertainty. Also, the very day Martínez signed the papers to close
the deal on his house in Mazatlán, the story of him and several of his colleagues leaving Condé Nast broke in The New York Times.
“I was thinking, ‘oh my God, what have I done?’” he recalls. “I had zero income and no prospects on the horizon. It could have been a huge mistake, but in that moment, I was really happy. I had started to realize that dream of myself from when I was a 19-year-old boy: my Mexican kitchen, going to the market for fresh produce and protein from local farmers, the handmade clay ceramic plates and dishes that I had collected. That was fulfillment for me.”
That vision—from watching those cooking shows about Mexico to feeling a centuries-old heritage calling him to the country of his ancestors—carries Martínez into new endeavors. He’s a regular contributor to The New York Times food section and hosts a companion video series to “Mi Cocina,” as well as “Sweet Heat” and “Pruébalo” on YouTube. He also teaches live weekly cooking classes for the Food Network Kitchen and cohosts a podcast.
“I think, honestly, when you’re happy doing what you do, people
6 garlic cloves, finely grated 2¼ teaspoons Morton kosher salt
1 teaspoon black peppercorns
1 teaspoon dried oregano, preferably Mexican
½ teaspoon cumin seeds
4 allspice berries
1 whole clove
1 hoja santa leaf or ¼ cup each mint and cilantro leaves
1 dried bay leaf
3 cups homemade chicken stock or store-bought low-sodium chicken stock
2 (6-inch) baked tostadas de maíz (corn tortillas), broken into small pieces (see Cook’s Note)
1½ pounds summer or winter squash (such as zucchini or butternut), peeled if necessary, seeded, and cut into 1-inch pieces

½ pound green beans, ends trimmed
1 medium chayote or large Yukon Gold potato, peeled (and seeded if using chayote) and cut into 1-inch pieces
1. Make the Chochoyotes: In a medium bowl, mix the corn masa flour, lard, salt, and ¾ cup warm water until combined. Cover with plastic wrap and let sit at room temperature for 30 minutes to allow the masa to hydrate.
2. Make the Mole Amarillo: Meanwhile, soak the chilies for the mole: In a large saucepan
over high heat, bring the chilies chilhuacles amarillos (or chilies guajillos) and ½ cup water to a boil. Cover the pot, remove from the heat, and let sit until the chiles have softened, for 30 minutes. Transfer the chile mixture to a blender and puree until completely smooth. Set aside.
3. To shape the chocoyotes, scoop tablespoon-size portions of masa and roll into balls. Gently press your thumb into the middle of the ball to create a large and deep dimple, then transfer to a sheet pan and repeat with the remaining masa. Loosely cover with plastic wrap until ready to cook.
4. In a large heavy pot over medium-high, heat the lard. Working in batches if necessary, cook the chicken, turning once, until browned on both sides, for 8 to 10 minutes. Transfer to a plate and set aside.

5. To the same pot, add the onion, chilies güeros, tomatillos, garlic, salt, peppercorns, oregano, cumin, allspice, clove, hoja santa, and bay leaf and cook, stirring occasionally and scraping up any browned bits from the bottom of the pan, until the vegetables are tender but just before they start to brown, for 6 to 8 minutes. Add the stock, tostadas, and reserved chicken. Bring to a boil, then reduce the heat to medium-low, cover, and simmer until the chicken is cooked through, tender, and falling off the bone, for 35 to 45 minutes. Transfer the chicken to a medium bowl and let cool slightly.
6. Working in batches, carefully add the chile mixture and the liquid to a blender and puree until completely smooth. Transfer the mole to a large bowl.
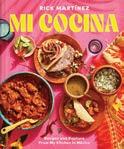
7. Rinse and dry the pot, then return the mole to the pot and bring to a simmer over medium-low heat. Add the squash, green beans, and chayote and cook until almost cooked through, for 10 to 15 minutes.
8. Nestle the chicken into the pot and gently add the chochoyotes. Cook until the chochoyotes float to the top and are cooked through, for 5 to 10 minutes.
Editor’s Note: If chilhuacles amarillos or guajillos are not available, the pasilla pepper would be the closest substitute, and then the ancho pepper.
Cook’s Note: To bake the tostadas de maíz (corn tostadas), arrange a rack in the center of the oven and heat to 450°F. Brush both sides of 2 (6-inch) corn tortillas with 1 teaspoon vegetable oil per tortilla. Season with kosher salt and arrange on a sheet pan. Bake the tortillas until they’re golden brown in spots and crisp, about 10 minutes. Let cool before serving.
gravitate toward it,” Martínez says of his work today. “My popularity soared exponentially when I finally started to act like me and not the person others wanted me to be.”
It has been a long journey—that old Nissan Versa has seen its odometer turn over once, and now has about 120,000 miles on its new cycle—but for Martínez, it’s meant to be shared. Don’t call what he’s doing “authentic,” but all his creative enterprises are definitely meant for anyone to enjoy.
“Going back to that idea of authenticity, one reason people are scared of different cuisines is because they feel like there’s going to be something in the way,” he says.
“Either because they can’t find an ingredient at their local store and don’t want to pay $50 on Amazon for it, or because a technique feels really scary.”

Don’t be scared, Martinez says. “I want you to make this food. It’s not an exact replica of anything I ate anywhere. It’s the food I enjoyed eating the most as created for American home cooks. It’s easy to make with ingredients you can find in the grocery store with equipment you already own.”
Everyone is looking for a sense of discovery, after all, whether it comes from our past, our sense of possibility, or from the flavors in our kitchens.
“So I think: just remove the restrictions of the idea of authenticity from yourself,” Martínez says. “Just have fun with it. Use a different dried chili. Change the pork recipe into a vegan recipe. Use beef instead of chicken or zucchini instead of pumpkin. Use the ingredients you like, have fun, make these recipes your own—and I think you’ll learn to be an even better cook.”
■
“Just remove the restrictions of the idea of authenticity from yourself. Just have fun with it.”
–rick martínez
Sweet cocktails deliciously top off any celebration.
BY MARY SUBIALKA PHOTOGRAPHY TERRY BRENNAN FOOD STYLING LARA MIKLASEVICSR elax with a spirited sweet a er dinner this holiday season. Dessert cocktails can stand in for sweets, or try these drinks alongside chocolate candies and cookies such as classic decorated sugar varieties, gingerbread, snowball cookies, and more. Shake things up and also sip these while enjoying the traditional yule log cake, cheesecake, and other goodies, and experiment with your favorite pairings.
This classic creamy after-dinner treat is like a chocolatemint cookie in a glass. It’s said New Orleans restaurant bar owner Philibert Guichet created it in his French Quarter establishment, Tujague, in 1918 and went on to win second prize in a noteworthy New York cocktail competition with this drink. It then gained popularity during the 1950s and ’60s.

To a cocktail shaker filled with ice, add 1 ounce green crème de menthe liqueur, 1 ounce white crème de cacao, 1 ounce heavy cream, and 1 ounce milk. Shake and fine strain into a chilled cocktail glass. Garnish with a mint leaf.
Vanilla vodka, amaretto, and Irish cream combine to create flavors of the holiday favorite cookie. Deck the glass with sprinkles and an optional dip in frosting first for an extra sweet and festive boost.
Prepare a cocktail glass by either dipping the rim in Irish cream or spreading prepared vanilla frosting around the rim, then dip the rim in your choice of sprinkles and set aside. To a cocktail shaker filled with ice, add 1½ ounces vanilla vodka, 1½ ounces Irish cream liqueur, 1 ounce amaretto liqueur, and a splash of whole milk or cream, if desired. Shake and strain into the prepared glass.
The Irish cream adds richness and a little spice to this dessert in a glass that tastes like a milkshake for grownups.
Drizzle either 1 ounce melted dark chocolate or chocolate syrup inside a martini cocktail glass or rocks glass along the rim and set aside. To a cocktail shaker filled with ice, add 1 ounce vodka, 1 ounce coffee liqueur (such as Kahlúa), and 1½ ounces Irish cream liqueur. Shake and strain into the prepared glass—either over ice cubes or without, depending on preference. Garnish with chocolate crumbles or shavings, if desired. ■
At US Foods, being one of the largest food service distributors in the country means our customers are never alone. With readily available tools, resources, and customer support, we partner with our customers every step of the way to help them make it.