S z zzzle e Summer


Summer 2023 complimentary
Lunds & Byerlys
season long Getfired up for delicious grilling
star power shines
out with frozen treats
Mason Hereford has fun with food PLUS
all
Rice’s
Chill
Chef


*All tickets are subject to availability. All attendees must be 21 years of age or older. Legal ID required. No children or strollers. No exchanges or refunds. FineSpiritsClassic.com Thursday, July 13, 2023 Machine Shop, Northeast Minneapolis VIP Early Admission: 5:30-6:30 p.m. | Main Tasting: 6:30-9 p.m. A Celebration - ofSpirits and Cocktails MINNESOTA MONTHLY PRESENTED BY VIP EARLY ADMISSION INCLUDES A CROOKED BEVERAGE (THC) GIFT AND VALET PARKING


Tickets on sale now! Use promo code CHEERS for 25% OFF all tickets thru June 30, 2023 at FineSpiritsClassic.com SPONSORED BY $60 General Admission $70 VIP Early Admission
SUMMER


Watermelon Tip


For a fresh twist, squeeze lime juice on top of watermelon slices and add a pinch of Himalayan pink salt. Place the slices over ice to serve.

2 real food
HELLO, GRILL SEASON!
PHOTOGRAPHER TERRY BRENNAN FOOD STYLIST LARA MIKLASEVICS
“Food brings people together on many di erent levels. It’s nourishment of the soul and body; it’s truly love.”
 –GIADA DE LAURENTIIS


20 Backyard Party Time
Enjoy your own summer soiree with a menu including makeahead dishes, a cheese-stu ed burger, and citrusy pork kebabs.


 BY MOLLY STEVENS
46 Frozen Yummy Treats

Keep your cool this season with homemade desserts that bring out the kid in all of us.
RECIPES BY HANNAH MILES AND LOUISE PICKFORD
4
Bites
Summer squash is great for a range of possibilities— including zoodles.
BY EMMA ENEBAK
6

Four of a Kind
Watermelon is cool in this quartet of sweet and savory recipes.
BY MARY SUBIALKA
17 Tips and Tools
Simple kitchen concepts make the most of your time.
BY EMMA ENEBAK
52 Fun with Food
Chef Mason Hereford’s lighthearted approach to cooking brings delicious joy to the plate.
BY MARY SUBIALKA
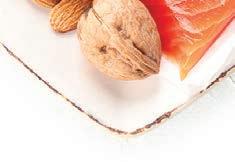
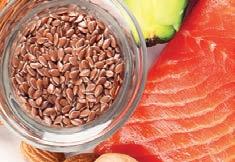
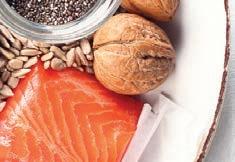
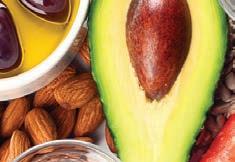
18 Healthy Habits
Take care of your heart with healthy food choices and habits.
BY SAMANTHA JOHNSON
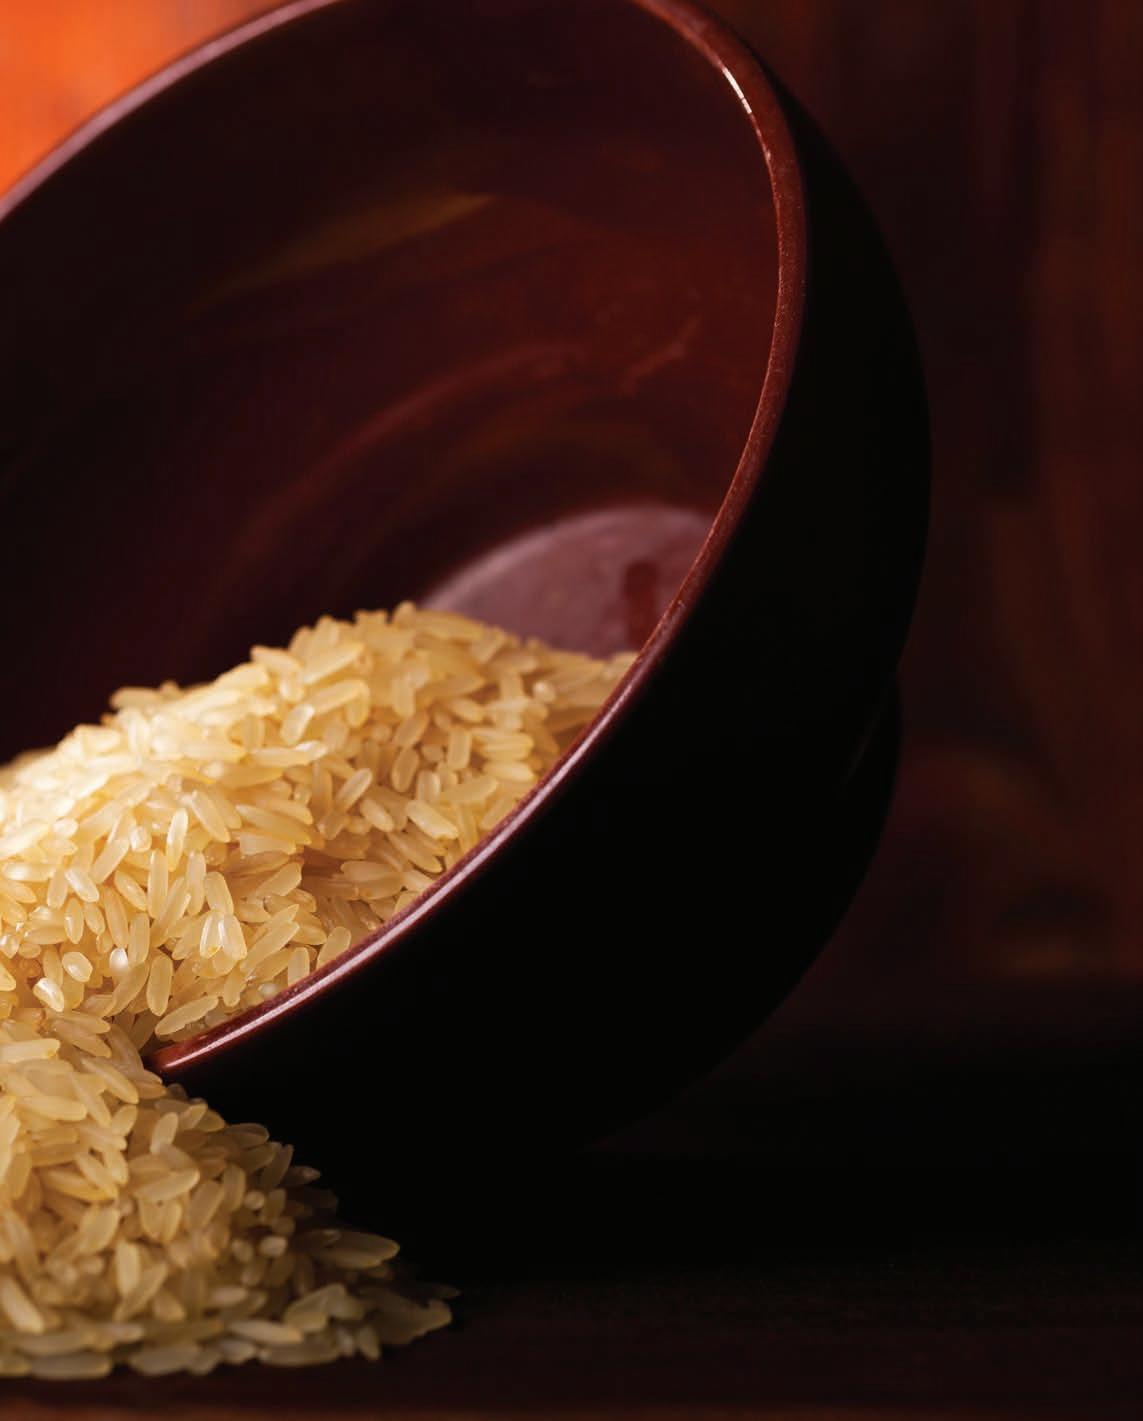
28 Global Grain
Explore the diversity of rice and deliciously transform this pantry staple. RECIPES BY CARYL LEVINE AND KEN LEE
38 Fire up EntréesYour
You’ll be covered all grilling season with these beef, sh, and plant-based ideas.
56 Pairings
The heat of summer calls for a spritz at your backyard bistro.
BY MARY SUBIALKA
WHAT CAN YOU LEARN FROM A WATERMELON’S STRIPES? PLUS, HOW TO JUICE AND USE IT IN RECIPES. See page 6


ON THE COVER
Cheese-Stuffed Burger, page 20

PHOTOGRAPHER
Terry Brennan
FOOD STYLIST
Lara Miklasevics
PUBLISHER
Tammy Galvin
EDITORIAL DIRECTOR
Alesha Taylor
CONTENT DIRECTOR
Mary Subialka
ASSOCIATE EDITORS
Emma Enebak and Samantha Johnson
CREATIVE DIRECTOR
Tonya Sutfin
SENIOR ART DIRECTOR

Ted Rossiter
PRODUCTION DIRECTOR
Deidra Anderson
SENIOR ADVERTISING COORDINATOR


Mikayla Snyder
SALES & MARKETING SPECIALIST


Tausha Martinson-Bright
VOLUME 19, NUMBER 2
Real Food magazine is published quarterly by Greenspring Media, LLC, 9401 James Ave. S, Suite 152, Bloomington, MN 55431, 612.371.5800, Fax 612.371.5801. All rights reserved. No part of this publication may be reprinted or otherwise reproduced without written permission from the publisher. Real Food is exclusively operated and owned by Greenspring Media, LLC. Printed in the USA. realfoodmag.com
The pages between the covers of this magazine (except for any inserted material) are printed on paper made from wood fiber that was procured from forests that are sustainably managed to remain healthy, productive and biologically diverse.

3 summer 2023
BACKYARD PARTY TERRY BRENNAN FROZEN TREATS STEVE PAINTER FUN WITH FOOD WILLIAM HEREFORD
Sweetest Squash Season THE
Soft-skinned,
by emma enebak
The summer months signal not only a change in weather, but also the squash varieties available, as colorful and soft-skinned summer squash replaces winter squash in the produce aisles. Summer squash is typically harvested before full maturation, resulting in more tender and flavorful skin than the tough, rigid skin of winter squash. This tougher skin makes winter squash ideal for storing through cold months, but it also requires it to be peeled before eating, unlike its summer counterparts, which can be enjoyed with the skin on. This not only simplifies the preparation process, but also reaps additional health benefits present in the nutrient-rich skin. Following, learn more about this fruit (or vegetable?), common varieties, health benefits, and its versatility to stand in as a low-carb pasta substitute.
is squash a fruit or a vegetable?
The answer to this age-old debate isn’t quite so simple. Technically, squash is both a fruit and a vegetable, depending on which properties are used for classification. Because it contains edible seeds and grows from the flower of a plant, squash is botanically a fruit. However, its mild, savory taste better classifies it as a vegetable for culinary purposes. Since summer squash is generally sweeter than winter squash, it seems fitting to stick with science and primarily refer to it as a fruit, settling (at least for now) this debate. But, since it serves as a vegetable for culinary uses here, perhaps the debate rages on?
when life gives you squash—make noodles
Yes, you read that right. The popularization of “zoodles,” or spiralized zucchini noodles, spread like wildfire in the early 2010s, and has today solidified squash as a go-to, health-conscious substitute for noodles. Summer squash is especially qualified for this swap, with its softer, more tender flesh. Reference our Tips and Tools (page 17) to see how a spiralizer tool can be used to easily slice squash into perfect, pasta-like spirals. To make it even easier, you can also find prepacked squash noodle options in store. Follow this simple, nutritious recipe for a delicious take on zoodles!
California Avocado Basil Pesto with Zucchini Noodles

It’s hard to believe this flavorful and creamy California Avocado Basil Pesto is entirely dairy-free! It makes a delicious sandwich spread and also adds a silky richness to fresh spiral zucchini noodles.
for the california avocado basil pesto
1 tablespoon extra virgin olive oil
2 ripe avocados, seeded and peeled
3 cloves garlic
1 cup packed basil leaves
2 cups baby spinach
¼ cup pine nuts
1 lemon, juice only
¼ teaspoon red pepper flakes
¼ teaspoon sea salt
¼ teaspoon ground black pepper, plus freshly ground black pepper, to taste (optional)
for the spiral zucchini noodles
1 tablespoon extra virgin olive oil
8 medium zucchini, spiralized Sea salt, as needed (optional)
Freshly grated Parmesan cheese (optional)
1. Combine all of the California Avocado Basil Pesto ingredients in a food processor. Puree until smooth, set aside.
2. Next, add 1 tablespoon olive oil to a large skillet and heat over medium-heat. Add spiralized zucchini to skillet, sprinkle with a bit of optional sea salt, if desired, and cook for about 2 minutes until zucchini softens.
3. Pour California Avocado Basil Pesto over cooked zucchini noodles and toss to evenly distribute.
4. Top with optional additional black pepper and freshly grated Parmesan cheese, if desired.
Serve warm or cold.
4 real food
MAKES 6 SERVINGS | RECIPE AND PHOTO BY NOURISHRDS MCKENZIE HALL-JONES, RDN, AND LISA SAMUEL, MBA, RDN. COURTESY CALIFORNIA AVOCADO COMMISSION
bites
sweet, and mild summer squash varieties lend themselves to a range of delicious possibilities
Popular Summer Squash Varieties


crookneck
True to its name, this summer squash variety is characterized by its hourglass figure, with a bulbous body and a long, skinny neck. Originating in North America, the crookneck squash is believed to be one of the oldest varieties of summer squash and has long been lauded for its high concentration of nutrients, including betacarotene, which can contribute to improved eyesight. The delicate skin and mild, buttery flavor of this sunshinecolored squash makes it delicious both raw in salads and cooked in vegetable medleys and more.
pattypan


This geometric, flying saucer-shaped, scallop-edged squash is almost too cute to eat—but don’t let that stop you. This versatile summer squash comes in a variety of shades, from golden to green, and has dense, vitaminpacked flesh that is filling enough to stand in as a protein or carb substitute in some of your favorite recipes. High in vitamin C, potassium, and fiber, pattypan is a little tougher than other summer squash, and is great in casseroles, soups, and salads, as well as being a perfect substitute for carb staples like pasta and french fries.
straightneck


Easily identifiable by its tapered, straight shape, this squash is thought to be the o spring of its near-twin, the crookneck squash—their appearances can be di erentiated only slightly by their neck shapes. Its vibrant yellow shade is the result of a high concentration of natural pigments called carotenoids, which act as antioxidants in the body. Its mild taste and delicate skin lend this squash to a wide variety of recipes. Add raw slices to salads or grate into coleslaw. Try slicing into thin crescent moons and layering in lasagna for a healthy take on the popular dish.


zucchini


While zucchini can be enjoyed year-round, it’s at its peak during the summer, with thinner, sweeter-tasting skin and soft, white flesh. It has 40% of the recommended daily intake of vitamin C, and a generous level of antioxidants, which are known to be natural defenders against disease. Plus, it’s a natural contributor to healthy digestion. This nutrition rings true for both green and yellow (sometimes called golden) zucchini, which di er only in their color and yellow’s slighter sweeter taste. Summer zucchini’s soft, tender flesh is perfect for grilling and enjoying raw in salads. It also makes a great gluten-free substitute for pasta (see the recipe at left).

5 summer 2023
“A recipe has no soul. You, as the cook, must bring the soul to the recipe.”
CROOKNECK MAXSOL7 / ADOBE PATTYPAN KOLES NIKOVSERG / ADOBE STRAIGHTNECK LI COOK / ADOBE ZUCCHINI SOMMAI / ADOBE
–THOMAS KELLER
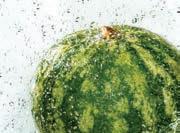
Wonderful Watermelon
This quintessential fruit of summer is a cool slice of sweetness
by mary subialka
Summer wouldn’t be the same without the thirst-quenching refreshment of watermelon. As the name suggests, it is made up of a high percentage of water—92%, in fact—so it’s a natural refresher for hot days.


While watermelon helps support hydration, it is also a healthy addition to your diet. Virtually fat and cholesterol free, it’s low in sodium and is a good source of vitamins A, B6, and C, and contains the antioxidant lycopene—all this at only 40 calories per cup.
spitting contests at picnics for generations. But due to high demand, the majority of watermelons grown today are seedless. These were invented over 50 years ago, and are not the result of genetic engineering, but rather hybridization, which is the crossing of two different types of watermelons. They usually have some small, soft white seeds, which are perfectly safe to eat. These round or oblong melons weigh in at 10 to 25 pounds.
only


Watermelon is a botanical cousin to cucumbers, pumpkins, and squash, and there are more than 300 varieties cultivated in the United States and South America, so the growing seasons provide a year-round supply, but late spring and summer are peak for domestic watermelon. It’s grown in more than 30 states, and some of the top producers are Florida, Georgia, California, and Texas.
selecting and storing
Look for a firm, symmetrical watermelon that is free from bruises, cuts, or dents. It should feel heavy for its size. Turn it over and look for a creamy yellow spot on the underside of the watermelon (called the “ground spot”). This is where it sat on the ground and ripened in the sun. The rind should be dull, not shiny, and just barely yield to pressure. Store cut watermelon in glass or plastic containers in the refrigerator where it should keep 3 to 5 days.


The varieties taste much the same, even those with yellow or orange flesh, and they vary mostly by size. The large, elongated variety with green or gray-green striped rind and pink flesh is the most popular. These average 15 to 35 pounds.


The many shiny black seeds scattered throughout the sweet flesh have starred in seed-


wash before use
There are also petite round “personal watermelons” that range from 1 to 7 pounds, and their thinner rinds can mean more flesh per pound. Hollow them out for a compostable serving bowl. Yellow and orange-fleshed watermelons lack the lycopene of red-fleshed watermelon, but they bring unique color to the table. These weigh 10 to 30 pounds.
Wedges of deliciously juicy watermelon are always a great snack or dessert. But you can also use them in many sweet and savory ways: Add chunks in a salad, use it as the gluten-free base for an appetizer, make a dessert “pizza” or Italian ice, or you can even use the rind in stirfries, such as in the following recipes, which are courtesy of the Watermelon Board.
watermelon juice


To make juice, cut watermelon into cubes, blend in a blender or food processor, and strain. You will need 2½ cups of cubes for about 2 cups of strained juice. (1⁄4 of a seedless watermelon, which is about the same yield as a mini watermelon, will give you about 8 cups of cubes that equals 4 cups of unstrained juice and about 33⁄4 cups strained juice.)


6 real food four of a kind
A WATERMELON’S STRIPES ARE INDICATORS OF VARIETY; THEY DO NOT INDICATE RIPENESS.
Make sure to wash watermelon with cool tap water and dry before cutting to remove any surface dirt and impurities that might be on the rind that could be transferred from the knife to the flesh when cut. CLOCKWISE FROM TOP BERGAMONT / ADOBE IURII KACHKOVSKYI / ADOBE SASA PANCHENKO / ADOBE
Watermelon Italian Ice
This Italian-inspired ice is a version of Italian granita and is a blend of watermelon, sugar, ice, and flavoring. Try a taste of an Italian summer!

Watermelon Rind Stir Fry

The next time you buy a whole watermelon, reserve the watermelon rind for this ingenious recipe! The rind will soften and quickly absorb the flavor of your sauce.
Cut these out and use the recipes on the reverse side to make creative dishes with watermelon.

Watermelon Canapes
Who needs bread with this quick and easy appetizer that can be made hours ahead of your event?
Sweet Watermelon Pizza
The hardest part of making this sweet pizza is deciding what toppings to use. Healthy enough for breakfast and sweet enough for dessert, this watermelon pizza will quickly make its way into your weekly meal rotation.

7 summer 2023
✁ ALL WATERMELON BOARD ✂
Watermelon Rind Stir Fry
MAKES 4 SERVINGS
2 teaspoons sesame oil
2 cups watermelon rind, julienned (white part only, from about 1⁄2 of seedless watermelon)
1 cup julienned carrots
1⁄2 cup chives, cut into 3-inch pieces
1 tablespoon honey
1 tablespoon soy sauce
Watermelon Italian Ice
MAKES 4 SERVINGS
1 tablespoon fish sauce
1 clove garlic, minced
1 (1-inch) piece ginger, minced
1⁄2 cup fresh basil leaves, torn
1⁄4 cup mint leaves
1⁄4 cup cilantro leaves
Crushed red pepper flakes (optional)
1. Heat sesame oil in a wok over high heat. Add the watermelon rind and carrots and stir-fry, stirring constantly, for 1 to 2 minutes. Let sit over high heat for 1 additional minute without stirring.
2. Add the chives and stir to combine.
3. In a small bowl, whisk together the honey, soy sauce, fish sauce, garlic, and ginger.
4. Pour the sauce over the watermelon rind and cook, stirring, 30 seconds to 1 minute until fragrant.
5. Transfer to a serving dish. Add the basil, cilantro, and mint, tossing to combine.
6. Sprinkle with red pepper flakes, if desired, and serve as a side dish.
Sweet Watermelon Pizza
MAKES 8 SERVINGS
1 watermelon round cut into 1-inch thick (for crust)
Shredded coconut
Greek yogurt of choice
Mint
Berries of choice (blueberries, strawberries, blackberries)
Slivered almonds
1. Spread yogurt to cover watermelon, leaving room to hold the rind.
2. Sprinkle watermelon pizza with coconut, mint, berries and almond toppings as desired.
Variation: To make a savory watermelon pizza, cut a watermelon round 1-inch thick for the “crust.” In a small bowl, mix some goat cheese and 1 tablespoon heavy whipping cream to make it spreadable. Spread goat cheese mixture to cover watermelon, leaving room to hold the rind. Place prosciutto, then greens of your choice for toppings as desired. Drizzle with balsamic glaze and sprinkle with pepper to taste.
4 cups chopped watermelon
1⁄2 cup sugar
2 teaspoons lemon zest
2 tablespoons lemon juice
Mint leaves (optional)
1. Add all ingredients into a blender and blend until smooth. Pour into a shallow pan and place in freezer.
2. When the liquid is almost frozen (about 1½ to 2 hours), remove from freezer, scoop into blender, and gently blend or place in a large bowl and whip for about 1 minute.
3. Place in 4 serving bowls and return to the freezer for ½ hour or longer. Remove from freezer and let sit for 10 minutes, then serve with a garnish of mint leaves, if you like.
watermelon fun fact
The first recorded watermelon harvest occurred about 5,000 years ago in Egypt and is depicted in Egyptian hieroglyphics on walls of their ancient buildings. Watermelons were often placed in the burial tombs of kings to nourish them in the afterlife.
Watermelon Canapes
MAKES 6 SERVINGS
12 1¼ x 3-inch seedless watermelon rectangles, ¾-inch thick
1 cup tapenade (olive pâté)
61⁄2 ounces crumbled herbed goat cheese
1. Place the watermelon rectangles close together in a tight row on a work surface or a piece of waxed paper.
2. Spread the tops of the watermelon slices evenly with the tapenade.
3. Sprinkle the goat cheese over the tapenade.
4. Arrange the canapés on a serving tray.
Variation: To make a cheesy cucumber topping, mix ¾ cup diced cucumber, ¾ cup feta cheese, and some optional diced watermelon with 1 tablespoon red wine vinegar and 2 teaspoons olive oil. Season with salt and pepper to taste. Place mixture atop watermelon rectangles and drizzle with balsamic glaze, if desired.
8 real food
✁
welcome
Apple Valley: Coming Soon!
Bloomington: 952-896-0092
Burnsville: 952-892-5600
Chanhassen: 952-474-1298
Eagan: 651-686-9669
Eden Prairie: 952-525-8000
Edina
50th Street: 952-926-6833
France Avenue: 952-831-3601


Golden Valley: 763-544-8846
Maple Grove: 763-416-1611
Minneapolis
Downtown: 612-379-5040


Nokomis: 612-729-4000
Northeast: 612-548-3820
Uptown: 612-825-2440

Minnetonka Glen Lake: 952-512-7700
Highway 7: 952-935-0198
Ridgedale: 952-541-1414
Navarre: 952-471-8473
Plymouth: 763-268-1624
Prior Lake: 952-440-3900
Richfield: 612-861-1881


Roseville: 651-633-6949
St. Cloud: 320-252-4112
St. Louis Park: 952-929-2100

St. Paul
Downtown: 651-999-1600
Highland Bridge: 651-698-5845
Wayzata: 952-476-2222
White Bear Lake: 651-653-0000
Woodbury: 651-999-1200
SHOP ONLINE

Shop.LundsandByerlys.com
CATERING
LundsandByerlys.com/Catering 952-897-9800
L&B EXTRAS Get extra o ers and tools to make shopping easier. LundsandByerlys.com/Extras
DOWNLOAD OUR APP LundsandByerlys.com/Mobile
STAY CONNECTED
Follow us on social media and sign up for our e-newsletter. LundsandByerlys.com/StayConnected

FOOD QUESTIONS?
Call our FoodE experts: 952-548-1400

REAL FOOD COMMENTS

Aaron Sorenson: 952-927-3663


Sustainability Journey
Our sustainability efforts are not something we often shout about. I think a lot of that comes from not wanting to sound like we’re bragging. (We are Minnesotans, after all.) And we certainly don’t want to sound like we have it all figured out. (Hint: we don’t.) While we know there is always much more to be done on our sustainability journey, I am extremely proud of the work our teams do to reduce our company’s carbon footprint. It started many years ago with environmentally friendly choices we made around using LED lighting in our stores, reducing emissions with updated refrigeration systems, and creating a Reuse & Reward program that encourages reusable bag usage in our stores, to name a few.
In more recent years, our sustainability efforts have expanded to include implementing an organic recycling program, introducing sustainable takeaway containers in our delis, and significantly reducing food waste through food donations totaling nearly 6 million pounds per year to local food shelves and farmers.
As I shared earlier, we know there is always more to do. And our teams continue looking for opportunities to elevate your shopping experience while also enhancing our overall sustainability. One recent example is the launch of new Seal Fresh packaging for all of our beef and pork. There are many great benefits to this new packaging, and because the product stays fresh longer, it helps all of us reduce our food waste (see story on page 10).
According to the U.S. Department of Agriculture, nearly 30 to 40% of our country’s food supply goes to waste every year, which also means water, energy, and other resources are wasted that went into producing those foods. As we continue to focus on reducing food waste, our deli team has recently partnered with Phood Solutions. Their innovative technology utilizes camera vision and artificial intelligence to help our team members quickly scan and weigh food as it goes into our hot bars and then again before any food is discarded. In doing so, early results show we will further reduce our food waste by nearly 150,000 pounds every year (see story on page 13).
Another sustainability effort we are proud of is the use of CO2based refrigeration systems at our newest stores, including our Highland Bridge store in St. Paul. At that store alone, we expect to reduce our carbon dioxide emissions by 540 metric tons per year because of this state-of-the-art refrigeration system. That is equivalent to the annual electricity usage of 94 homes. Because of this effort, we were honored to earn the Environmental Protection Agency’s coveted GreenChill platinum award.
We know sustainability is a never-ending journey, and we look forward to finding even more ways to further reduce our environmental footprint.
Sincerely,
Tres Lund president and ceo


9 lundsandbyerlys.com
A Better Way


Seal Fresh beef and pork packaging maintains freshness longer, helping prevent food waste


What’s for dinner? This age-old question can cause stress on busy weeknights as we run from activity to activity. But it doesn’t need to be complicated! Here at Lunds & Byerlys, we are excited to introduce you to our new Seal Fresh beef and pork. It’s the same incredible offerings you know and love from our Meat & Seafood cases, now expertly packaged to maintain superior freshness and flavor. Beef and pork are dinnertime staples. They’re savory, satisfying, and easy to work with, and now, with our new Seal Fresh packaging, you’ll be able to easily keep a few extra cuts in the freezer for when other provisions have dwindled.
ready when you are


For years we’ve carried Seal Fresh ground beef in our stores, and customers have expressed their appreciation for the overall freshness and quality of the product. And now we’re excited to introduce that same special airtight packaging to our other cuts of premium beef and pork. We rely on the airtight packaging to help maintain longlasting freshness in the refrigerator. Plus, if your dinner plans suddenly change, the airtight packaging will allow for more flexibility—and your items won’t go bad before you can use them. Seal Fresh packaging is also freezer ready! Items can easily be moved to the freezer without repackaging and they defrost easily.
a smart choice


We also appreciate the airtight Seal Fresh packaging as it helps us combat food waste. Our goal is to always feed people first and avoid food waste whenever possible. This new packaging allows us to help play a part in eliminating some food waste from the waste stream—and it’s the same for you at home! Since the airtight packaging keeps beef and pork fresh and flavorful in the fridge for much longer, that means you can avoid throwing out spoiled items.
your favorite cuts


Look for our new Seal Fresh packaging on your favorite cuts of beef and premium pork in our Meat & Seafood departments. We’ll have everything from New York strip steaks and porterhouse steaks to short ribs and ground beef, plus pork chops and roasts, ribs, and much more.
Whether you’re looking for something to make for dinner tonight, later this week, or next month, our Seal Fresh beef and pork products are the perfect choice to answer the question, “What’s for dinner?”
10 real food
meat & seafood
How to Cook the Perfect Steak
Follow these simple steps to make a perfectly seared, perfectly juicy steak every time— no grill required!

1. Season: Heat oven to 350°F. Meanwhile, on the stovetop, heat a 12-inch cast iron skillet over medium heat until hot. Pat steaks dry and season heavily with salt and pepper. Place steaks in hot skillet.
2. Sear: Sear steaks for 4 minutes, turning once. Do not turn until the steak releases from the skillet on its own. If the steak is sticking to the skillet, it is not ready to turn.
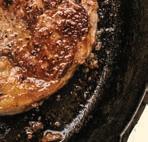
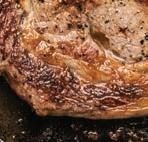


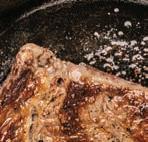


3. Cook: Place skillet into the 350°F oven for 10 to 15 minutes, depending on desired doneness. Turn once, halfway through the cooking time.


4. Check Temperature: Remove skillet from the oven when internal temperature reaches 120°F for rare, 130°F for medium-rare, and 140°F for medium doneness. Always use a thermometer to determine doneness.


5. Tent: Remove steaks from skillet and tent loosely with aluminum foil. Let stand for 5 to 10 minutes before serving. (Its temperature will continue to rise about 5°F ).

lundsandbyerlys.com STEAK TOP EXCLUSIVE-DESIGN / ADOBE
L&B Deli Salads


From classic sides and mains to new salads, our selection brings something delicious to the party
Summer is in full swing— and so are outdoor gatherings! If you’re looking for something to serve at your get-together on the patio or picnic at the park, you can never go wrong with our L&B deli salads.
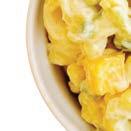
Our L&B Cherry Chicken Pasta Salad is a classic and the top seller in our delis. Or maybe you like to kick off a sunny day with L&B Sunny Broccoli Salad. And potato salad is another classic! Both our original Byerly’s and Lunds varieties are sure to be a hit at your next party.

If you’re looking for a salad full of vitamins, minerals, and antioxidants for a meal that’s sure to be nutritious, then L&B Superfood Salad will become your new favorite side salad or entrée. You can never go wrong with L&B Coleslaw, which couples perfectly with any good oldfashioned sandwich at your next barbecue or picnic.
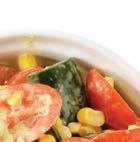
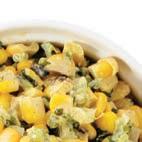
This summer we’re excited to introduce a few new deli salads that are sure to become favorites! Visit the deli counter and try our L&B Spaghetti Vegetable Salad . This perfect year-round pasta salad is back by customer demand, and includes diced cucumbers, tomatoes, and green peppers
tossed in Italian dressing and Salad Supreme seasoning.


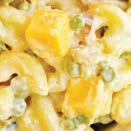
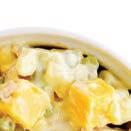
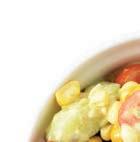
Another blast from the past that’s back by popular demand is our L&B Ham, Pea, and Cheese
Pasta Salad . This mayobased salad features julienned ham, peas, cubed cheddar, and macaroni pasta.

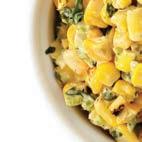


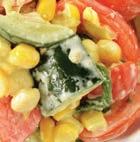
If a veggie-centric salad sounds more up your alley, you’ll love our L&B Farmer Goddess Salad , featuring baby spinach, cucumbers, tomatoes, and sweet corn tossed in a creamy Green Goddess buttermilk dressing.
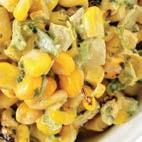
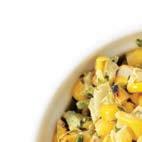
And our L&B Mexican Street Corn Salad is perfect for those looking for a little kick! Great as a vegetarian entrée, a side dish, or a chip dip, it features fire-roasted corn, red onion, avocado, red bell peppers, jalapeño chili peppers, fresh cilantro, and mild Cotija cheese tossed in a creamy roasted garlic dressing. Whether you’re looking for a nutritious and delicious entrée, or a side dish to go with your main course, you’ll be sure to find a salad you love at our deli counters.
12 real food deli
L&B SPAGHETTI VEGETABLE SALAD
L&B FARMER GODDESS SALAD
L&B MEXICAN STREET CORN SALAD
L&B HAM, PEA, AND CHEESE PASTA SALAD
TACKLING Food Waste
Food waste in the United States is estimated to exceed 100 billion pounds per year. Exact figures are unknown, as tracking food waste is notoriously difficult at every level of the supply chain.
Here at Lunds & Byerlys, our ability to more precisely track and reduce food waste on our deli food bars is now possible through a partnership with Phood Solutions. Based on initial results, we anticipate further reducing our annual food waste by nearly 150,000 pounds.

Through the use of a scale, computer vision, and artificial intelligence, Phood allows Lunds & Byerlys team members to quickly and easily scan and weigh food as it is added to the food bar and then again before any food is discarded. Utilizing Phood’s robust reporting, we can make necessary adjustments to our daily food offerings to ensure significantly less food is wasted by providing our customers with the right food offerings at the right time.

“We are deeply committed to providing our customers with a wide variety of fresh, high-quality food options while also being good environmental stewards,” says Katie Swenson, Director of Deli
Operations at Lunds & Byerlys. “Phood provides us a tremendous tool to track our waste so we can make smarter decisions about the quantity of each offering on our expansive food bars.”
Lunds & Byerlys is the first retailer in the Twin Cities to utilize Phood’s innovative solution as yet another way to minimize food waste. Through our projected food waste reductions with Phood, along with our robust partnership with Second Harvest Heartland’s Food Rescue Program and food donations to local pig farmers, we are keeping nearly 6 million pounds of food from being wasted every year.
“Being from the Twin Cities myself, it’s particularly exciting to bring this program into Lunds & Byerlys,” says Max Mliner, head of operations at Phood. “Since installation, every level of the organization has been incredibly engaged—eager to achieve substantial waste reductions while ensuring the highest quality food is offered to customers. We look forward to continuing to work with such an enthusiastic partner and building on this success together.”
We are so excited to partner with Phood and continue tackling food waste here at Lunds & Byerlys.
13
lundsandbyerlys.com sustainability
Lunds & Byerlys reduces food waste through partnership with Phood Solutions
WHAT’S In Store
Lunds & Byerlys experts share favorite finds and L&B products you’ll want to check out


L&B
Colossal Cookies
A sweet treat just for you! New in our Lunds & Byerlys bakeries is The Cookie Studio—a fun, exciting cookie menu filled with delicious, unique flavors. All the Colossal Cookies start with our exclusive soft vanilla cookie base and are then topped with velvety, rich icing in fun flavors. Some of our current flavors include birthday cake, peanut butter, raspberry white chocolate, churro, French silk pie, and salted caramel. And our pastry chefs are dreaming up more creations all the time. Flavors change monthly, so be sure to check back often! Cookies are about 4 inches and come in singles or packs of three.

Liam’s Frozen Entrées


Liam’s began when founder and mom Angie learned her son Liam had food allergies, and their family was looking for quick, well-balanced, and safe meals they could all enjoy. Angie partnered with Chef Gil to create delicious, nutritious meals that are free of peanuts, shellfish, fish, milk, gluten, eggs, soy, sesame, and tree nuts. The frozen entrées can quickly be heated in the microwave or oven so you can have a meal on the table in no time! Varieties include chicken alfredo rotini, cheezy rotini, tangy pulled pork, and beef and pea pods.

14 real food shopping
De Nigris Vinegars


For more than three generations, the De Nigris family has dedicated itself to the production of the highest quality vinegars possible. They control every step of the supply chain—from growing grapes throughout Italy, to harvesting and bottling. These versatile vinegars come in many delicious varieties including rosé sweet vinegar, balsamic vinegar of Modena, organic white balsamic vinegar of Modena, and organic balsamic vinegar of Modena. Give them a try in your vinaigrettes, pan sauces, salad dressings, or as a finish on your favorite dishes.
Brownwood Farms Bourbon-Infused Ketchups and BBQ Sauces

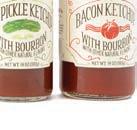


Brownwood Farms makes its delicious condiments in small batches with fresh ingredients sourced from the Great Lakes region. The bourbon-infused BBQ sauces come in three flavors—original recipe, maple bacon, and ghost pepper—and are rich, deep in flavor, and super spreadable. They’re perfect for dipping, drenching, and brushing on a variety of grilled meats. Plus, the bourbon-infused ketchups come in three flavors—dill pickle, bacon, and kickin’—and are perfect paired with burgers, fries, and anything else that needs a flavor boost. Spice up your summer barbecues with Brownwood Farms condiments!
Cedar’s Organic Hommus


Cedar’s founder, Abe Hanna, lovingly perfected how Cedar’s makes hommus—the traditional way with pure ingredients and a simple process. Today, Cedar’s chefs have lifelong expertise in Mediterranean foods and are constantly creating authentic recipes with unique, bold flavors. Their organic topped hommus options are made with the freshest chickpeas, savory tahini, and a perfect blend of spices without any preservatives. Varieties include original, roasted red pepper, Mediterranean, Grecian golden hour, and hot chili. Happy snacking!
L&B Chocolate Hazelnut Butter


Meet our new favorite treat! L&B Chocolate Hazelnut Butter is made in small batches with just a few simple ingredients including hazelnuts, sugar, cocoa powder, fresh vanilla, and sea salt. It’s naturally dairy free and made without palm oil. We love it for breakfast: Slather it on toast, drizzle over pancakes, or mix it into a bowl of oatmeal. It also makes an outstanding dessert topper. It’s delicious as a fruit dip, spooned over ice cream, or drizzled over a slice of cheesecake.


15
lundsandbyerlys.com
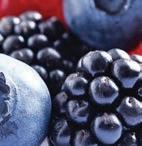
A GUIDE TO Berries
Sweet, juicy little berries are big on flavor and nutrition


VARIETY
Blackberries


NUTRITION/FLAVOR AVAILABILITY


Vitamin C, vitamin K, fiber, and antioxidants. Slightly tart with defined sweetness.
Blueberries


Vitamin C, vitamin K, and antioxidants. Sweet in flavor.
Currants (Red and Black)


Vitamin C, iron, potassium, and fiber. Wonderful tart and sweet flavor. Ideal for jelly.
Rosé Strawberries
Year-round
Raspberries


Vitamin C, fiber, potassium, and antioxidants. Smooth, silky texture that delivers a sweet peach flavor and soft, floral finish.


Vitamin C, folate, iron, potassium, and disease-fighting ellagic acid. Mildly tart and sweet.
Strawberries (Regular and Long Stem)


Rosé Raspberries Tropical Bliss Strawberries

Vitamin C, folate, fiber, potassium, and antioxidants. Sweet in flavor.
Year-round
June through August
June through August
Year-round
Vitamin C, iron, and potassium. Smooth, silky texture that delivers notes of peach, banana, and other tropical fruits.


Vitamin C, fiber, potassium, and antioxidants. Naturally white and yellow hues with notes of tropical punch, passionfruit, and pineapple.
Year-round (peaking


April through June)
May through October
April through September
16 real food
SOURCE: LUNDS & BYERLYS
produce PHOTOS ADOBE
SIMPLE Kitchen Concepts


These easy ideas will add flair to summer recipes and minimize time in the kitchen, while maximizing time in the sunshine


 by emma enebak
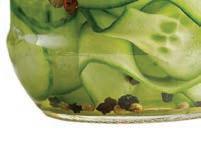
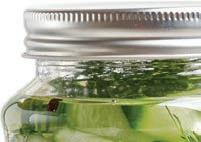
Make Pickles Quick


While pickling vegetables might sound intimidating, the process is made easy with this quick refrigerator pickle recipe—a fun way to dress up salads and bowls or serve alongside your summer barbecue meals. Some of the most popular vegetables to pickle are cucumbers, radishes, red onions, beets, carrots, and summer squash. First, chop the vegetable of your choice into thin slices and place in a large mixing bowl. Mix with about 1 tablespoon kosher salt, a sweetener (such as 1 teaspoon sugar or honey), and about 1 teaspoon spices of your choice (1⁄3 teaspoon dill, 1⁄3 teaspoon coriander, and 1⁄3 teaspoon allspice, for example). Transfer to a Mason jar or container with a lid, and add enough distilled white vinegar to fully cover the vegetables. Finally, seal the lid and refrigerate. The veggies should be ready within 10 minutes but can be stored in the fridge for up to 3 days.


Give Tossed Salads a Spin


A salad spinner is a helpful tool for removing water from your greens, but it can also help with tossing salads. Simply throw your ingredients in the bowl, seal with the lid, and turn the handle at the top to spin salad contents mess-free. The resulting, evenly mixed salad can be served straight from the bowl, making the spinner a portable dish to bring to barbecues and picnics all summer long.


Scream for Homemade Ice Cream


Indulging in a bowl of ice cream is the perfect way to beat the summer heat. No ice cream maker? No problem. All you need is a blender or food processor and frozen fruit. Blend or pulse the frozen fruit until a smooth and creamy consistency is achieved, usually about 5 to 10 minutes, depending on the fruit. This trick works best with frozen ripe bananas on their own or with a dash of milk or cream, a combo which whips up into a soft-serve ice cream-like texture. Enjoy immediately or place in an airtight container and freeze until firmer. For berry fanatics, try adding in heavy whipping cream with your frozen berries to help produce a similar ice cream texture. Get creative and toss in sugary-sweet additions such as chocolate chips or peanut butter.


A Veggie Twist
Put down the kitchen knives. Instead, opt for a spiralizer, a compact and easy-to-use tool that can slice vegetables into slinky spirals in just minutes. The popularity of these tools has grown in recent years, coinciding with plant-based alternatives to carb-heavy pasta dishes. Zucchini and sweet potato are popular veggies to stand in for pasta. While there are many models on the market, most spiralizers, like the OXO 3-blade model pictured here, include the basic components—a multiblade platform against which the vegetable will be secured, and a handle or dial to begin rotating the vegetable against the blade, initiating the spiralizing process. The spirals open a world of possibilities for delicious, plant-based recipes. Try with the easy zoodle recipe on page 4.


A Cool Trick for Reheating Rice


It can be tricky to restore leftover rice to its former glory. To avoid the crunchy and dry texture that can result from reheating, try popping an ice cube on top before microwaving your rice. Rather than melting, the water from the ice cube produces steam, which will moisturize the rice and restore it to its desired flu y texture.


summer 2023 tips and tools
ICE CREAM MIZINA / ADOBE VEGGIE TWIST OXO ICE TRAY ALEX SHYRIPA / ADOBE SALAD SPINNER FOTOGAL / ADOBE PICKLES MARIA / ADOBE
Follow Your Heart
The heart is the powerhouse of the body. It transports oxygenated blood to organs to keep them working, so it’s incredibly important to keep it in tip-top shape.
Heart disease is the No. 1 killer worldwide, with stroke coming in at second place, and according to the Centers for Disease Control and Prevention, one person dies every 34 seconds from cardiovascular disease.
Organizations like the American Heart Association (AHA) are working to raise awareness about heartrelated diseases and teach people how to live a healthy and happy life. Like any muscle, it takes work to make your heart strong and keep it strong, so implementing these heart-healthy tips from the AHA into your life is a great place to start—or a good reminder of what you know you should be doing.
healthy eating
While those are scary statistics, there are plenty of steps to take to work toward keeping your heart (and body) healthy, so you can live a long life. Start simple—with food choices! You don’t need to be a trained chef to create healthy and delicious meals at home. Start by choosing whole grains, healthy proteins, and minimally processed foods at the store. The AHA makes it easy to shop for heart-healthy foods with the Heart-Check mark, a symbol that can be found on products that the association recommends.
Most Americans are used to a high-sodium diet, but excess sodium can pull water into the bloodstream, increasing the volume of blood and making the heart have to work harder. Over time, this high blood pressure can weaken blood vessel walls and contribute to the blockage

of the vessels by sticky plaque. Along with high blood pressure in response to diet, it also naturally increases as we age, so it’s never too early to start trying to consume less sodium. The easiest way to reduce the amount of sodium in your diet is to pay attention to your food choices.

The AHA recommends no more than 2,300 milligrams of sodium per day, and ideally moving toward a limit of no more than 1,500 milligrams for most adults. On average, American adults eat more than 3,400 milligrams of sodium daily, according to the AHA, which is more than double the ideal recommended limit. So while shopping, keep an eye out for low-sodium varieties of condiments and canned vegetables, and check the amount of sodium per serving in packaged and prepared foods. While the Heart-Check mark indicates heart-healthy food, it doesn’t necessarily mean that a product is also low-sodium, so be sure to double-check.

Here are sodium-related terms you might see on food packages:
SALT/SODIUM-FREE —Less than 5 milligrams of sodium per serving


VERY LOW SODIUM —35 milligrams or less per serving
LOW SODIUM —140 milligrams or less per serving


REDUCED SODIUM —At least 25% less sodium per serving than the usual sodium level
LIGHT IN SODIUM OR LIGHTLY SALTED

At least 50% less sodium than the regular product
NO-SALT-ADDED OR UNSALTED —No salt is added during processing (but these products may not be salt/sodium-free unless stated)
When preparing meals, use onions, garlic, citrus, vinegars, and other herbs and spices to add flavor to your dish instead of adding more salt. Other tips are to rinse and drain canned beans and cook food by gilling, roasting, sauteing, or searing to bring out natural flavors and reduce the need for salt. Adding potassium to meals is a great way

18 real food
TOP BIT24 / ADOBE KEBABS AMERICAN HEART ASSOCIATION healthy
more
habits
We rely on our hearts to keep us moving, so actively take care of it with these tips
by samantha johnson
to counteract sodium. Incorporate tasty and high-potassium foods including potatoes, sweet potatoes, greens, white beans, cantaloupe, and bananas into your diet. And it’s all about balance: If you indulge with a less-than-healthy meal at one time in the day, adjust your other meals to keep within your daily guidelines for health.
healthy living
In addition to eating well, make sure to stay active and manage stress. Start by consulting your doctor to learn how many calories you should be eating or drinking to be at a healthy weight (as this naturally varies by height, age, gender, level of physical activity, etc.). Then, consider that nutrition facts on labels are usually based on a 2,000 calorie-perday diet, and work to balance your physical activity with the amount of food eaten. The AHA suggests aiming for at least 150 minutes of moderate physical activity or 75 minutes of vigorous activity (or an equal amount of both) every week. Don’t worry if you can’t meet those times right away, adding simple activities like gardening, dancing in the kitchen, or going for an evening walk all add up to heart-health contributions.
Along with eating right and staying active, it’s bene cial to get enough sleep and manage stress. Your mood, memory, organs, and eating habits can all be a ected if your sleep habits are out of whack. Try to keep your tech devices away from you before and during bedtime, aim for 7-9 hours of sleep, and try starting a new routine— like going to bed around the same time, not hi ing snooze, and having a healthy breakfast in the morning.
Like any endeavor, creating healthy habits starts with a single step. Focus on those small steps to keep yourself moving in a hearthealthy direction, including trying the recipe at right. After all, a healthy heart is a happy heart.
For more information, visit heart.org. Always consult your health care provider if you have health concerns or before making any major dietary changes.
Rosemary-Peach Chicken Kebabs with Orange Glaze

MAKES 4 SERVINGS | RECIPE FROM THE AMERICAN HEART ASSOCIATION
End your day on a sweet note with these honey-citrus glaze kebabs.
1 pound boneless, skinless chicken breasts, all visible fat discarded, cut into 16 11⁄2-inch pieces
2 large ripe but firm peaches, cut into 16 1-inch wedges
1 large green bell pepper, cut into 16 11⁄2-inch squares
1⁄4 teaspoon pepper
1⁄8 teaspoon salt
1. Lightly spray the grill rack with cooking spray. Preheat the grill on medium.
2. Meanwhile, thread the chicken, peaches, and bell pepper alternately onto four 14- to 16inch metal skewers. Sprinkle the pepper and salt over the kebabs.
3. In a small bowl, whisk together the glaze ingredients. Set aside half the glaze (about 2 tablespoons). Brush both sides of the kebabs with the remaining glaze.
4. Grill the kebabs for 6 to 8 minutes, or until the chicken is no longer pink in the center and the vegetables are almost tender, turning once halfway through and brushing with the reserved
for the glaze
3⁄4 teaspoon grated orange zest
3 tablespoons fresh orange juice
1 tablespoon chopped fresh rosemary
11⁄2 teaspoons honey
11⁄2 teaspoons canola or corn oil
2 tablespoons of glaze, using a clean basting brush. Reduce the heat or move the kebabs to a cooler area of the grill if they are cooking too fast.
Cook’s Notes:
Ripe but firm peaches are important for this recipe. The direct heat softens and sweetens the fruit, even if it’s not quite at its prime. You can replace the peaches with other stone fruits, such as nectarines and plums.
Nutrition (per 1 kebab serving):
Calories: 202, Fat: 5g (Sat: 1g),
Cholesterol: 73mg, Sodium: 206mg, Carb: 14g, Fiber: 2g, Sugar: 11g,
Protein: 25g
19
Recipe reprinted with permission from “American Heart Association Go Fresh” Copyright © 2014 by the American Heart Association. Published by Clarkson Potter/Publishers, a division of Random House Inc.
Backyard TIME
Enjoy your own summer soiree with a menu including make-ahead dishes

One of the joys of summer entertaining is the relaxed ease of hanging around the backyard with a group of friends or family, but any good host knows that even a casual party takes a little planning—especially if the host wants to enjoy the gathering as much as the guests. One way to make sure you enjoy yourself is to build your menu around a few reliably delicious make-ahead dishes, such as a luxurious fetared pepper dip, a vegetable-packed potato salad, and a showstopping fresh fruit tart. For the main course, choose between vivacious pork and pineapple kebabs or decadent cheesestuffed burgers—or make both if you want to offer options. Both recipes are foolproof enough that you can even hand off the cooking duties to whoever wants to show off their grilling skills. Besides, it’s summer; time to kick back and enjoy the season.
by molly stevens photos by terry brennan food styling by lara miklasevics
20 real food
CHEESESTUFFED BURGERS

Cheesy filling keeps the insides of these stuffed burgers decadently gooey, while the outsides have a gorgeous smokekissed char.


This feta and jarred piquillo pepper dip makes an ideal appetizer: You can make it in minutes or well ahead of your party time.


WHIPPED FETA AND PIQUILLO PEPPER DIP
Whipped Feta and Piquillo Pepper Dip
MAKES 6 TO 8 SERVINGS
The combination of briny feta and sweet piquillo peppers makes an ideal party appetizer because it comes together in minutes and can be made well ahead. For the best-tasting, flu est version, shop for good feta and jarred piquillo peppers (see Cook’s Notes for tips). Serve alongside fresh crudité and pita wedges.
8 ounces feta, broken into large chunks
1 cup (5 ounces) coarsely chopped piquillo peppers (see Cook’s Notes)
1⁄2 cup (1 5.3-ounce tub) plain Greek yogurt
3 tablespoons extra-virgin olive oil
1 tablespoon honey (see Cook’s Notes)
1 tablespoon fresh lemon juice
Pinch red pepper flakes
Freshly ground black pepper
Salt, to taste (optional)
2 tablespoons chopped fresh dill, plus more for garnish
1. Combine the feta, peppers, and yogurt in a food processor and pulse several times to create a coarse puree. Add the olive oil, honey, lemon juice, red pepper flakes, and several grinds of black pepper. Puree until smooth and spreadable. Taste for seasoning. Some feta will not need any additional salt, but it may need another shot of red or black pepper. Add the dill and pulse to combine.
2. Spoon into a bowl and serve, or cover and refrigerate for up to 5 days.
Cook’s Notes
Shop for feta in a block, either in brine or a vacuum pack. French and Bulgarian feta have the softest texture, making them best for whipping into a dip. Whatever you buy, skip the pre-crumbled variety as it will give the dip a chalky feel.
Piquillo peppers come in a jar or can; they are small, sweet red peppers that have been roasted over wood fires, peeled, and packed in brine. Drain before using. If you can’t find piquillo peppers, any good quality roasted red pepper will work. You can also roast and peel your own by charring a whole bell pepper, turning until blackened all over and tender, under the broiler or on a gas burner. Once cool, the skin slips right o .
To avoid a mess when measuring honey, pour it into the same tablespoon you used to measure the olive oil. The sticky honey will slide right out.
Nutrition (per serving):
Calories: 170, Fat: 13g (Sat: 5g), Cholesterol: 30mg, Sodium: 420mg, Carb: 6g,
Fiber: 0g, Sugar: 4g, Protein: 7g
Cheese-Stu ed Burgers
MAKES 6 SERVINGS | PHOTO ON PAGE 21
Known in some parts of the country as a Juicy Lucy, the technique of putting the cheese inside the burger—and not on top—is brilliant and well worth adding to your summer grilling repertoire. The outsides of the burgers maintain their gorgeous smoke-kissed char while the filling keeps the insides decadently cheesy, gooey, and, yes, juicy.
2 pounds ground beef, preferably 80% lean chuck
4 ounces cheddar cheese, thinly sliced
1 large red onion, peeled and cut into thick rounds
1 tablespoon olive oil
Kosher salt and freshly ground black pepper (see Cook’s Notes)
for the sauce
½ cup mayonnaise
¼ cup finely chopped dill pickle
1. Divide the beef into 12 equal portions (see Cook’s Notes), then shape each into a thin patty, about 4 inches across. Season the tops of all the patties with salt and pepper.

2. Divide the cheese among half the patties, breaking up the cheese slices and piling them in the center of the patties so there is at least a 1⁄2-inch border. Top each cheese-topped patty with another flat patty. One by one, pick up each burger and pinch the edges to fully seal the cheese inside. Pat and shape each burger until smooth, round, and slightly flattened (about 11⁄4 inches thick). Season the outsides with salt and pepper. (The burgers can be stu ed, shaped, covered, and refrigerated for up to 8 hours before grilling.)
3. Make the sauce: Combine the mayonnaise, pickles, ketchup, mustard, pickle juice, and hot sauce in a small bowl. Season with salt and more hot sauce to taste. (The sauce may be made ahead and covered and refrigerated for up to 2 days.)
4. Heat a grill to medium-hot. Brush the onion rounds with oil, and grill, turning as needed, until tender and browned, about 8 minutes. Set aside. Arrange the burgers on the grill and cook, flipping two to three times, until well seared on the outside and done to your liking, 10 to 14 minutes. Transfer to a serving platter to rest for a few minutes. Use this time to toast the buns on the grill (or toast in a toaster oven).
5. Spread sauce on both sides of the buns. Top with the burgers and grilled onions, adding any optional toppings, and serve.
Cook’s Notes
To make equal-size burgers, first divide the ground beef into 6 evenly sized lumps and arrange them on a plate. Adjust by adding a little here and removing a little
2 tablespoons ketchup
2 teaspoons yellow mustard
1 teaspoon dill pickle juice (from pickle jar)
Few drops Sriracha or other hot sauce, to taste
Salt, to taste
6 hamburger buns
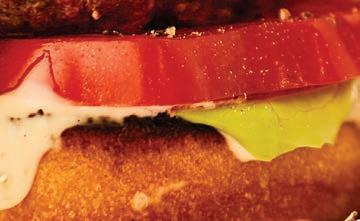
Optional toppings: Sliced ripe tomato, lettuce, pickles
there, until all the lumps look the same size. Then, divide each in half to give you 12 portions. (Or use a kitchen scale to weigh out 6 burgers at 5.3 ounces each.)
For seasoning the burgers, combine 4 teaspoons salt and 2 teaspoons pepper in a little bowl to season the burgers without touching your salt and pepper containers while handling the meat. Toss out any salt and pepper leftover in the little bowl, and wash your hands.
To judge doneness, resist cutting into the burgers, as the cheese can spurt out. A thin-gauge instant-read thermometer is your best bet; look for 130 to 135°F for medium-rare, and 140°F for medium.
Branch out and try other cheeses such as Swiss or smoked Gouda, or seasoned cheese spreads like pimento cheese and Boursin for a center that’s extra gooey and good.
Nutrition (per serving):
Calories: 700, Fat: 46g (Sat: 14g), Cholesterol: 135mg, Sodium: 920mg, Carb: 30g, Fiber: 2g, Sugar: 6g, Protein: 40g
summer 2023 23
ICONS
PROVECTORS, OLEG / ADOBE
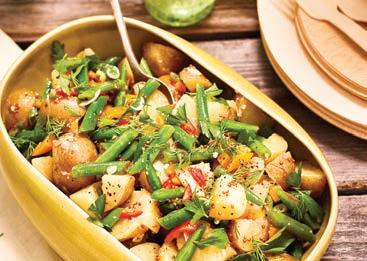
Summer Potato and Green Bean Salad
MAKES 6 TO 8 SERVINGS
Bright and colorful, this potato salad adds flair and flavor to any summer meal. Crisp-tender green beans and crunchy mini sweet peppers balance the earthiness of boiled new potatoes, and the zingy, vinaigrette-style dressing keeps it light and fresh.

3 pounds small red or white potatoes, scrubbed
1 pound green beans, trimmed and cut into 1-inch lengths
1 tablespoon coarse grain mustard


¼ cup red wine vinegar
Salt and freshly ground black pepper, to taste
½ cup extra-virgin olive oil


8 ounces (about 15) sweet mini peppers, cored, seeded, and diced
4 scallions, white and green parts, finely chopped
½ cup chopped fresh flat-leaf parsley
1. Put potatoes in a large saucepan, cover with water, and add a good pinch of salt. Bring to a boil. Adjust heat and simmer until the potatoes are tender, 15 to 18 minutes. Drain and set aside until cool enough to handle.
2. Meanwhile, bring a second pot of salted water to a boil. Add the green beans and boil until tender, about 3 to 4 minutes. Drain and immediately plunge into cold water to stop the cooking. Drain again and spread onto a towel-lined tray to dry.
3. In a small bowl, whisk together the mustard and vinegar. Season with salt and pepper. Add the olive oil, whisking to combine. Taste for salt and pepper.
4. When the potatoes are just cool enough to handle, cut them into 1-inch chunks and place them in a large bowl (see Cook’s Notes). Add the green beans, diced peppers, scallions, and parsley. Toss gently with a flexible spatula to combine. Pour the dressing over the mixture and toss again. Season to taste with salt and pepper. Serve or refrigerate for up to 1 day.
Cook’s Notes
When testing potatoes for doneness, a thin skewer pokes fewer holes than a fork, leaving the potatoes more intact and making them less apt to get waterlogged.

The potato skins can add color and texture to the salad, but if they are at all bitter or tough, scrape them o as you’re cutting the boiled potatoes. To decide, before you start to cut the boiled potatoes, take a small taste of the skin. If it’s at all disagreeable, scrape it o .
The salad can be made ahead, but chilling mutes the flavors, so check for salt and pepper before serving. If needed, add an extra drizzle of olive oil and splash of vinegar as well.
Parsley adds a welcome sharpness to the salad, but feel free to substitute other fresh herbs, such as chives, dill, mint, or basil.
Nutrition (per serving):
Calories: 320, Fat: 17g (Sat: 2.5g),


Cholesterol: 0mg, Sodium: 190mg, Carb: 39g, Fiber: 6g, Sugar: 6g, Protein: 6g

24 real food
SUMMER POTATO AND GREEN BEAN SALAD
A
zingy
dressing, crisp-tender
green beans, and crunchy sweet peppers balance potatoes in this fresh take on the classic picnic side.
Mojo Marinated Pork and Pineapple Kebabs
Mojo refers to a family of garlic- and citrusbased Latin American sauces that can double as marinades and sauces. Pork and pineapple are the perfect duo for this zesty orange and lime version accented with oregano and cumin. For best flavor, marinate the meat for 30 minutes and up to 2 hours before assembling the kebabs.
for the mojo marinade
2 tablespoons (about 4 cloves)
minced garlic
2 teaspoons freshly grated orange zest
½ cup fresh orange juice


¼ cup fresh lime juice
2 teaspoons dried oregano

1 teaspoon ground cumin


¾ teaspoon kosher salt, or to taste
Freshly ground black pepper

Pinch cayenne
½ cup olive oil


2 pounds pork tenderloin, cut into 11⁄2-inch chunks

3 cups (about 12 ounces) pineapple chunks
3 tablespoons chopped fresh cilantro
Special equipment: 12 bamboo or metal skewers


1. Combine the garlic, orange zest, orange juice, lime juice, oregano, cumin, salt, pepper, and cayenne in a blender or small food processor. Blend until well combined. With the machine running, add the olive oil in a thin stream. Taste for salt and pepper.
2. Place the pork in a non-reactive dish or bowl and pour about half the marinade on top. With your hands or a flexible spatula, massage the marinade into the meat. Cover and refrigerate for at least 30 minutes, and up to 2 hours. Stir the cilantro into the remaining marinade, and pour into a jar or small bowl.
3. Prepare a medium-hot grill. Make the kebabs by alternating pork with pineapple chunks (see Cook’s Notes). Arrange the kebabs on the grill and cook, turning a few times, until browned or cooked to your liking, 8 to 12 minutes. Test for doneness by cutting into a piece of meat or by testing with an instantread thermometer (look for 140 to 145°F). Transfer to a platter and drizzle with about half the remaining marinade. Let sit loosely covered with foil for a few minutes. Serve, passing the remaining sauce at the table.
Cook’s Notes
The marinade can be made a day or two in advance, but don’t marinate the pork for longer than 2 hours; otherwise, the acid in the citrus can make the meat mushy.
Shorter (8- to 9-inch skewers) are easiest to grill and serve; just figure 2 per person. It can help to arrange the pork and pineapple in 12 small heaps before threading the skewers. This avoids ending up with unevenly sized skewers.

If using bamboo skewers, soak them in water for at least 30 minutes to prevent them from catching fire on the grill.
If grilling isn’t an option, cook these
indoors. Arrange the kebabs on a baking sheet without crowding. Roast in a 400°F oven, turning a few times, until the pork is cooked through, about 18 minutes.
Nutrition (per serving):
Calories: 390, Fat: 23g (Sat: 4g), Cholesterol: 90mg, Sodium: 370mg, Carb: 12g, Fiber: 1g, Sugar: 7g, Protein: 33g
summer 2023 25
MOJO MARINATED PORK AND PINEAPPLE KEBABS
MAKES 6 SERVINGS
Get your mojo: Pork and pineapple are the perfect partners for the zesty orange and lime-based marinade.
Fresh Berry Tart with Hazelnut Graham Cracker Crust
MAKES 1 (9-INCH) TART, 8 SERVINGS
With a crunchy, nutty crust and dreamy not-too-sweet filling, this pretty tart is a great way to showcase the freshest summer berries. Use all one type or mix and match di erent berries and get creative arranging them in a colorful pattern.
for the crust
½ cup hazelnuts, lightly toasted
2 tablespoons granulated sugar
1 cup graham cracker crumbs (see Cook’s Notes)
1 large egg white
4 tablespoons unsalted butter, melted Pinch salt
for the filling
8 ounces cream cheese, softened
¼ cup sour cream
1. Arrange a rack near the center of your oven and heat the oven to 325°F.
2. For the crust: Combine the hazelnuts and granulated sugar in a food processor and pulse until coarsely chopped. Add the
¼ cup lightly packed brown sugar, light or dark
Finely grated zest from 1 lime (about 1 teaspoon)
¼ teaspoon pure vanilla extract
Pinch salt
2 to 3 cups fresh berries, such as blueberries, raspberries, and strawberries (see Cook’s Notes)
Special equipment: 9-inch removable-bottom tart pan
graham cracker crumbs and grind until fine.
3. Whisk the egg white in a medium mixing bowl until smooth. Add the crumb mixture, melted butter, and salt, and combine with a flexible spatula until the mixture looks like
Grilled Corn on the Cob with Herb Butter
Many cooks like to grill corn in the husk, but this method requires the extra steps of removing the silk and soaking the ears—and in the end, the corn comes out more steamed than grilled. For a real summer treat, there may be no better way to cook peak-season sweet corn than directly on a hot grill. Start by husking the corn (if you like, leave the husk attached and twist it into a sort of handle). Grill the ears over a hot fire, turning several times, until just browned, no more than 6 to 8 minutes. Don’t overcook or the corn will dry out. During the last minute of grilling brush with melted butter. Transfer to a serving platter, sprinkle with fresh herbs (chives or cilantro are especially good), and a squeeze of lime or lemon.

wet sand. Transfer to a 9-inch removablebottom tart pan and press the crumbs into an even layer and 1⁄2 inch up the sides of the pan. Set the pan on a baking sheet and bake until dry and slightly darker around the edges, about 10 minutes. Let cool on a wire rack.
4. For the filling: Beat together the cream cheese, sour cream, brown sugar, lime zest, vanilla, and salt on low speed with an electric hand mixer or standing mixer.
5. When the crust is completely cool, spoon the filling into the crust and spread it evenly. Arrange the berries over the filling, pressing lightly so they set in. Chill for at least 30 minutes and up to 2 hours (see Cook’s Notes). Cut into wedges and serve.
Cook’s Notes
To toast the nuts, place on a small baking sheet and toast in a 325°F oven or toaster oven until fragrant and lightly browned, 8 to 10 minutes. Let cool completely before grinding.
If making your own graham cracker crumbs, you’ll need 8 full graham crackers.
To press the crust into the tart pan, use the bottom of a metal measuring cup to tamp it into an even layer.
When topping with the berries, you can either be conservative, letting the creamy filling show through or you can pile them on. It’s up to you.
Make ahead note: Any fresh berries will work here, and it’s fun to combine shapes and colors. If using larger berries, like strawberries, that need to be sliced, serve the tart within 2 hours of making, otherwise the berry juices may start to run. You can also fill the tart with the cream cheese filling ahead, and top with berries just before serving.
Nutrition (per serving, with strawberries): Calories: 330, Fat: 23g (Sat: 10g), Cholesterol: 45mg, Sodium: 250mg, Carb: 28g, Fiber: 2g, Sugar: 17g, Protein: 5g
Molly Stevens is a cooking instructor and author of several award-winning cookbooks, including “All About Dinner,” “All About Braising,” and “All About Roasting.” She has been named Cooking Teacher of the Year by both Bon Appétit and IACP. Her recipes and articles have appeared regularly in a number of national publications, and she is a co-host of the Everything Cookbooks podcast.
26 real food
CORN RUSLAN MITIN / ADOBE
There’s always room for dessert: Showcase fresh summer berries atop a creamy filling and a crunchy, nutty crust in this pretty tart.

 FRESH BERRY TART WITH HAZELNUT GRAHAM CRACKER CRUST
GRAIN


Explore the diversity of rice and learn to transform this pantry staple into avorful and nourishing dishes
28 real food
recipes by caryl levine and ken lee with kristin donnelly recipe photos by erin scott
GLOBAL
GRAIN


t has been 3,500 years since people intentionally started planting rice as a crop and, according to the USA Rice Federation, the average American now eats more than 20 pounds of rice per year. The popularity has led to rice being grown on every continent aside from Antarctica. The diversity of rice types, the endless meal possibilities, and the grain’s naturally gluten-free and nutrient-rich nature (those nutrients being complex carbohydrates, protein, fiber, antioxidants, and more than 15 vitamins and minerals) are just a few of the reasons for its popularity.
In an ode to the grain and its growers, Caryl Levine and Ken Lee, founders of Lotus Foods, showcase how to use rice for easy meals in their book, “Rice is Life: Recipes and Stories Celebrating the World’s Most Essential Grain.” Following a journey 25 years in the making, Levine and Lee filled “Rice is Life” with a vast assortment of dishes inspired by places all over the world—including those featured here—and the people who grow the rice we eat today. Along with those stories, the two work to instill intention into the average person’s interactions with rice by introducing lesser-known rice varieties and flavors, and hope to encourage people to choose rice with as much care as fresh produce, considering how it is grown, and the livelihoods of the farmers who grow it.

 –samantha johnson

29 summer 2023
than
In Lotu
TIPS FOR FRIED RICE
Use day-old rice if it’s white
Fried rice should be flu y, dry, and a little bit crispy. The best way to achieve that texture with white rice is to use day-old rice that’s been refrigerated. If you’d like to cool down rice quickly to use for fried rice, spread it out on a baking sheet and let stand at room temperature for up to 1 hour. Whole grain rice, including brown, red, and black, works well in fried rice, even when it’s freshly cooked, as long as it’s not wet.
Prep all your ingredients ahead
Cooking fried rice moves lightning fast. Have ingredients prepped and sauces mixed before you heat the oil.
Add ingredients in the right order
Ken starts with the aromatic vegetables, like onions, garlic, and ginger. He then follows up with firmer vegetables, such as carrots or celery. He finishes with quickcooking vegetables, like frozen peas or tender leafy greens.
Cook eggs so they form large curds
You do not want the eggs to coat every ingredient but rather form their own curds that get mixed into the rice. Some people achieve this by cooking the eggs first, then removing them from the pan and adding them back in. Ken prefers to scramble the eggs as he cooks the fried rice, but he creates a well in the center of the pan so they can cook without coating the other ingredients.
Use a wok or large cast-iron skillet
A wok or cast-iron skillet will help you achieve the heat level needed for fried rice.
Use high heat
Ken is always seeking wok hey, a Cantonese term that literally means “breath of a wok” and figuratively refers to an ine able flavor that comes from high-heat wok cooking. While it’s challenging to achieve wok hey on a home stove, you can get close by using high heat.
Ken’s Fried Rice
MAKES 2 TO 4 SERVINGS
Growing up, Ken’s father and his four brothers owned a Chinese restaurant in Providence, Rhode Island, and throughout most of his life, he enjoyed his family’s delicious food. When Ken was about to move to Houston for a job, he realized he didn’t know how to cook any of the dishes his father made, so he asked his dad to teach him how to cook fried rice. His father showed him how to prepare each ingredient with respect for its individuality so it would cook properly and contribute to a harmonious whole. “I realized later that he was teaching me about life, about the importance of blending in with people, of accommodating di erent kinds of conversations that are inclusive,” says Ken.
Ken now uses his father’s method but not the same ingredients. Instead, he makes fried rice with what he has on hand, including vegetables Caryl grows in the garden. In spring, he reaches for asparagus, chives, and leafy greens. He adds the asparagus toward the beginning of cooking, so it’s cooked through. If you like more al dente asparagus, add it just before adding the eggs.
2 large eggs
¼ teaspoon salt, plus more to taste
2 tablespoons peanut or rice bran oil
1 small yellow onion, chopped
2 garlic cloves, finely grated
1 teaspoon finely grated fresh ginger (from 1-inch peeled ginger)
1pound medium-thick asparagus, ends trimmed and spears cut crosswise into ½-inch pieces
1. Lightly beat the eggs with ¼ teaspoon salt.
2. In a well-seasoned wok or large, deep skillet (not nonstick) over high heat, warm the oil until shimmering. Have a lid that fits over the top of the wok nearby.
3. Add the onion, season with salt, if desired, and stir-fry until the onion is bright white and opaque and just starting to soften, 1 to 2 minutes. Add the garlic and ginger and stir-fry until fragrant, about 20 seconds. Stir in the asparagus, then push the vegetables to the side of the wok to form a well in the center.
4. Add the rice and several pinches of salt, if desired, to the well and use a spatula to press down the rice to quickly heat it and break up any clumps, about 20 seconds. Push the vegetables up and over the rice, then spread out the rice and cover the wok. Cook, until you hear the rice start to crackle, 10 to 20 seconds. Uncover and use the spatula to flip the rice in large sections so the rice on the bottom is now toward the top; the rice should be a bit browned on the bottom in spots. Press the rice into an even layer to work out any clumps, cover the wok again, and cook
4 cups cooked, cooled rice (see Tips for Fried Rice at left)
1 (5-ounce) bag baby spinach
2 tablespoons soy sauce or tamari, or 1 tablespoon soy sauce blended with 1 tablespoon oyster sauce Chopped chives or green onion tops, for serving
until it begins to crackle, 10 to 20 seconds.
5. Push the fried rice to the side of the pan to form a well in the center. Add the eggs to the well and cook, without stirring, until they start to set on the bottom, about 30 seconds; stir to allow the unset egg to cook, creating medium to large curds of scrambled eggs.
6. Use the spatula to push the vegetables and rice on top of the eggs, then stir-fry to incorporate the egg curds; continue to press the rice to remove any clumps as you see them, about 10 seconds. Add the spinach, in batches if necessary, and stir-fry until the leaves are barely wilted, about 10 seconds.
7. Pour in the soy sauce around the edges of the wok or skillet so it hits the surface of the pan. Stir the sauce into the rice until incorporated. Remove the fried rice from the heat. Taste and season with a little salt, if desired. The rice should taste seasoned but not overly salty so the delicate flavors of the rice, eggs, and vegetables can come through. Sprinkle with chives and serve.
Nutrition (4 servings per recipe):
Calories: 330, Fat: 103g (Sat: 2g), Cholesterol: 85mg, Sodium: 710mg, Carb: 50g, Fiber: 5g, Sugar: 4g, Protein: 12g
30 real food
PREVIOUS SPREAD NITR / ADOBE

KEN’S FRIED RICE
Quick-Marinated Salmon with Coconut Rice, Herbs, and Fried Shallots

MAKES 4 SERVINGS
Inspired by the flavors of southern Vietnam, this is one of those dishes in which each component relies on the others and comes together to form a beautiful whole. For example, fried shallots serve as a garnish, and the flavorful oil they produce is used to season the rice and cook the fish. For a lighter take on coconut rice, we use coconut water instead of milk because it lends a sweet nutty flavor without the richness.
4 (6-ounce) salmon fillets (skin-on)
3 tablespoons fish sauce
2 tablespoons maple syrup
4 tablespoons unseasoned rice vinegar, divided
1½ cups jasmine rice, well rinsed and drained
2¼ cups coconut water, or 2 cups coconut milk plus ¼ cup water
Salt, to taste
¼ cup, plus 2 tablespoons, canola oil
4 large shallots, thinly sliced
1 cup finely chopped tender herbs, such as cilantro, mint, Thai basil, and dill Chili garlic sauce, for serving
1. Run your fingers along the salmon fillets to check for pin bones and remove if necessary.
2. In a shallow dish large enough to hold the salmon, whisk the fish sauce with the maple syrup and 2 tablespoons of the rice vinegar. Add the salmon and turn the fillets to coat. Let stand while you make the rest of the dish or for up to 1 hour.
3. In a medium saucepan, combine the rice with the coconut water and a couple large pinches of salt; bring to a boil. Lower the heat to low, cover the pot, and cook until the rice is tender and the coconut water is absorbed, about 20 minutes. Turn o the heat and let stand for 5 minutes.
4. Meanwhile, set up a plate next to the stove lined with paper towels. In a large skillet over medium heat, warm about ¼ inch of oil. When it shimmers, add the sliced shallots, season with salt, and cook, stirring frequently, until they turn golden, about 6 minutes (keep a careful eye on them as you cook because they can go from golden to burnt quickly). Working quickly, use a slotted spoon to transfer the shallots to the prepared plate. Season the shallots with salt. Remove the oil from the heat and let cool to warm, then strain the oil into a small bowl.
5. Add ¼ cup of the shallot oil and 1½ tablespoons of the rice vinegar to the warm rice. Season with more salt, if desired.
6. Preheat the broiler to high and line a baking sheet with foil. Remove the salmon
fillets from the marinade and arrange them skin-side up on the baking sheet. Drizzle the skin with some of the shallot oil or plain canola oil and season lightly with salt. Broil the fish about 3 inches from the heat source until the skin is nicely blistered and the flesh is just cooked through, 4 to 7 minutes, depending on the thickness of the fillets. Transfer to a plate or work surface and let cool slightly.
7. In a large bowl, toss the herbs with the remaining ½ tablespoon of rice vinegar. Add the rice to the herbs and stir to mix.
Using a fork, flake the fish into large pieces, reserving the crispy skin, if desired.

8. Either fold the fish into the rice before serving or spoon the rice into bowls and top with the fish. Just before serving, garnish the rice with the crispy shallots and salmon skin, if desired. Serve with chili garlic sauce.
Nutrition (per serving):
Calories: 740, Fat: 32g (Sat: 3.5g),
Cholesterol: 90mg, Sodium: 1310mg, Carb: 75g, Fiber: 4g, Sugar: 13g, Protein: 40g
32 real food
QUICK-MARINATED SALMON WITH COCONUT RICE, HERBS, AND FRIED SHALLOTS
Savory Rice Torta
MAKES 4 TO 6 SERVINGS
Much like a frittata, this torta tastes best at room temperature and keeps well overnight. You can also vary the vegetable fillings based on what you have on hand.

2 tablespoons butter, plus more for the pan
1 ounce Parmigiano-Reggiano cheese, finely grated


2 cups whole milk, divided
½ cup arborio rice
Salt, to taste
1 small yellow onion, chopped
Freshly ground pepper (preferably white pepper)
1 (5-ounce) bag baby arugula or spinach
6 large eggs
4 ounces Gruyere cheese, grated
1. Heat the oven to 350°F and butter a 9-inch cake pan. Sprinkle the Parmigiano-Reggiano cheese in the bottom of the cake pan and tip the pan so it sticks to the sides of the pan as well. Set the cake pan on a baking sheet.
2. In a small saucepan over medium heat, combine 1 cup of the milk with the rice and a few large pinches of salt and bring to a simmer, stirring. Remove from the heat and let cool until just warm.
3. In a medium skillet over medium heat, melt the butter. Add the onion, season generously with salt and pepper and cook, stirring until softened (about 8 minutes). Add the arugula in batches and cook, stirring until wilted (about 1 minute). Remove from the heat and let cool to warm. Season with more salt, if desired.
4. In a bowl, whisk together the eggs. Add the remaining 1 cup of milk followed by the warm rice-milk mixture and whisk together. Stir in the cooked vegetables and the Gruyere cheese. Pour the mixture into the prepared pan, then bake on the baking sheet until golden, pu ed, and completely set in the center, 45 to 50 minutes.
5. Carefully transfer the pan to a wire rack and let the torta cool to room temperature. Run a butter knife around the edge of the pan to loosen. Invert the pan to flip out the torta onto a plate or serve in wedges right from the pan.
Make Ahead
The torta can be assembled up to 1 day ahead and refrigerated overnight, then baked. The baked torta can be refrigerated for up to 1 day. Bring to room temperature before serving.
Nutrition (per serving):

Calories: 370, Fat: 22g (Sat: 11g), Cholesterol: 250mg, Sodium: 550mg, Carb: 23g,

Fiber: 1g, Sugar: 6g, Protein: 21g
RICE FUN FACTS
Rice grows in many diverse types of climates, including every continent except Antarctica.
It can tolerate unrelenting heat and frequent rains in the tropics as well as temperate climates.
Rice that is fully milled (where the husk and bran layers are removed) is white in color, while rice that is only partially milled (the husk is removed but the bran is left) is brown.
33 summer 2023
SAVORY RICE TORTA
RICE GRAINS ANTONIO
/
TRUZZI
ADOBE

 SUMMER RICE SALAD WITH TOMATOES, CORN, AND ROASTED PEPPERS
Summer Rice Salad with Tomatoes, Corn, and Roasted Peppers
MAKES
This is a great light summer meal or dish to bring to a picnic. A single tablespoon of mayonnaise might seem so small that it’s worth leaving out, but it really works to bring all the flavors together. Use vegan mayo if you prefer. A feta cheese sprinkle is a nice optional addition.
3 tablespoons extra-virgin olive oil, divided, plus more for grilling
1 garlic clove, smashed
1 cup brown jasmine rice or other short-or medium-grain brown rice, rinsed
Salt and ground pepper, to taste
4 ounces green beans, trimmed and halved crosswise
Juice of 1 lime (about 3 tablespoons)
1. In a medium saucepan over medium heat, warm 2 tablespoons of the olive oil. Add the garlic and cook, tipping the pan so the oil pools, until the garlic is softened and fragrant. Remove the garlic clove and reserve for another use. Add the rice and stir to coat with the oil, then add 1¾ cups of water and season with salt and pepper. Bring to a boil over high heat, cover, and lower the heat to medium-low. Simmer the rice until the water is absorbed and the rice is tender, 30 to 40 minutes. Turn o the heat, add the green beans to the pot, then recover and let stand for 5 minutes. Uncover and use a wooden spoon to flu the rice.
2. Meanwhile, in a large bowl, combine the lime juice, shallot, a pinch of salt, and a pinch of sugar and toss to combine. Let stand as you prepare the rest of the salad.
3. Heat a grill or a broiler to high heat. Rub the corn and peppers lightly with oil. Grill the corn and peppers, turning occasionally, until the corn is blistered in spots and the pepper skin is completely blackened, about 10 minutes. Alternatively, set the corn and peppers on a baking sheet and broil about 4 inches from the heat, turning once halfway through, until the corn is blistered in spots and the pepper skin is blackened, about 10 minutes total (you might need
MOST COMMON RICE VARIETIES
Arborio
1 large shallot, thinly sliced Pinch of sugar
4 medium ears of corn, husked
2 medium sweet red peppers, such as Jimmy Nardello or Italian frying peppers, or 1 red bell pepper
1 pint cherry tomatoes, halved
1 tablespoon mayonnaise
1 cup chopped cilantro or other tender herbs, such as mint or basil
to adjust the position of the vegetables under the broiler, so they cook evenly).
4. Transfer the corn to a work surface and the peppers to a bowl. Cover the peppers with another bowl so the pepper skin loosens. When the corn is cool enough to handle, use a serrated knife to remove the kernels, cutting down the cobs. Add the kernels to the large bowl with the shallot mixture and season with salt and pepper. Rub o and discard the skins from the peppers, remove the stem and seeds, and cut the pepper flesh into strips. Transfer the peppers to the bowl and season with salt and pepper.
5. Add the rice, green beans, tomatoes, mayonnaise, and remaining 1 tablespoon of olive oil. Season with salt and pepper and toss to combine. Let stand for 10 minutes to let the flavors meld, then add the herbs to the salad, and toss.
6. Taste the salad once more and season with more salt or lime juice, if necessary, then serve at room temperature.
Nutrition (per serving without optional salt): Calories: 310, Fat: 12g (Sat: 1.5g), Cholesterol: 0mg, Sodium: 25mg, Carb: 49g, Fiber: 4g, Sugar: 7g, Protein: 6g
SAFELY STORING COOKED RICE
Make sure to refrigerate leftover rice soon after cooking. Grain-based foods like rice— plus quinoa, pasta, and more—can contain a microorganism called Bacillus cereus. If rice is cooled slowly after cooking (and left between 40°F to 140°F for a long time), these bacteria spores can germinate, grow, and produce a toxin that causes food poisoning. To avoid this, make sure to cool and refrigerate rice as soon as possible after cooking. Store leftovers in an airtight container in a spot in your refrigerator that is colder than 40o°F, and the USDA suggests keeping it no longer than 4 to 6 days.
Now grown in Argentina and the United States, arborio rice is an Italian variety most commonly used to make risotto. The grain has an oval shape and is starchy.
Basmati
Characterized as long and slender, basmati rice is dry, flu y, and separate when cooked, due to being high in a dry starch called amylose. Since Iranian rice is hard to find in the United States, Persian dishes are frequently made with basmati.
Black Rice
The same compounds that give blueberries and purple cabbage their color are what gives black rice its pigment—anthocyanins. When used in cooking, black rice becomes more purple color, slightly sticky, and has a light floral aroma.
Brown Rice
Whole-grain rice (more commonly known as brown rice) is simply rice that isn’t fully milled and still has bran and germ intact, giving it earthy flavor. It comes in all lengths and has a starchy consistency.
Jasmine Rice
Jasmine rice is a medium-to-long grain rice that originated in Thailand and Cambodia. Due to the light floral aroma and sticky nature, jasmine is commonly chosen in Southeast Asia and parts of China. Though comparable to sticky rice, jasmine tends to be the flu er of the two.
Short Grain Rice
Typically what we see labeled as sushi rice. When rinsed and cooked properly, the grains stick together while retaining each grain’s shape. This can be both white and brown.
Sticky Rice
This round grain rice is also known as sweet rice. Due to the lack of amylose, this rice is exceptionally sticky and used to make doughs for foods like Mochi Ice Cream and Lunar New Year cakes.
35 summer 2023
4 TO 6 SERVINGS
Scallion Rice Cakes with Dipping Sauce
MAKES 4 TO 6 SERVINGS
for the dipping sauce
3⁄4 teaspoon sugar
1½ teaspoons warm water

2 tablespoons soy sauce
2 tablespoons unseasoned rice vinegar

1 teaspoon chili garlic sauce or sambal ulek
for the rice cakes
2 cups cooked short to-medium grain white or brown rice

2 large eggs, lightly beaten
8 green onions, thinly sliced
1 teaspoon toasted sesame oil
¾ teaspoon fine sea salt
Vegetable oil, for cooking
1. To make the dipping sauce, in a bowl, dissolve the sugar in the water. Stir in the soy sauce, rice vinegar, and chili garlic sauce.
2. To make the cakes, in a large bowl, gently mix together the rice, eggs, green onions, sesame oil, and salt. Line a plate with paper towels.
Spicy Noodles with Bok Choy and Pork or Tofu

MAKES 4 TO 6 SERVINGS
This quick noodle dish gets its sweet, umami-rich heat from gochujang, a Korean red chili paste made with sticky rice powder and fermented soybeans. You can make the dish with ground pork or, for a vegetarian version, silken tofu. If you use tofu, add more toasted sesame oil at the end for richness, plus a bit more soy sauce to season.
1¼ cups soy sauce
1 tablespoon sherry vinegar
1 tablespoon dark brown sugar
4 garlic cloves, finely grated
1 tablespoon finely grated fresh ginger (from 3 inches of peeled ginger)
1 teaspoon toasted sesame oil
1 teaspoon gochujang, plus more for seasoning
¼ teaspoon smoked paprika
1. In a small bowl, combine the soy sauce, vinegar, and sugar and whisk to dissolve the sugar. Whisk in the garlic, ginger, sesame oil, gochujang, and smoked paprika.
2. In a large pot of boiling water, cook the noodles until just cooked, 5 minutes. Drain and rinse.
3. Meanwhile, in a large skillet over medium heat, warm the canola oil. Add the pork or tofu, season lightly with salt, and cook, breaking it up with a spoon (be gentle with the tofu, if using). Cook the pork until brown in spots and nearly cooked through, 5 minutes (cook the tofu just until warm, 2 minutes). Add the sauce and cook, scraping up any
1 pound Lotus Foods Pad Thai noodles or other medium thick rice noodles
2 tablespoons canola oil
1 pound ground pork or 1 (14-ounce) package silken tofu, drained
1 pound baby bok choy, trimmed, washed well, leaves left whole, and separated Salt, to taste
Thinly sliced green onions, for garnish
browned bits from the bottom of the pan, until slightly thickened, 2 minutes. Add the bok choy, toss, and cook until wilted, about 1 minute. Rinse the noodles once more and add them to the skillet. Cook and toss until coated with the sauce and warmed through, about 1 minute, seasoning with more soy sauce, gochujang, or salt, if desired.
4. Serve the noodles in bowls and garnish with green onions.
Nutrition (per serving with pork): Calories: 580, Fat: 31g (Sat: 8g), Cholesterol: 70mg, Sodium: 950mg, Carb: 78g, Fiber: 4g, Sugar: 3g, Protein: 25g
3. In a large nonstick or well-seasoned cast-iron skillet over medium-high heat, warm about 1⁄8 inch of oil until it’s hot enough that a grain of rice sizzles when it touches the oil. For each cake, use a ¼ cup measure to scoop enough of the rice mixture so it’s about three-quarters full and add the mixture to the skillet. Use a spatula to press into thin patties; don’t worry if they are not perfect rounds. Cook until nicely golden on the bottom, about 2 minutes, then flip. Cook until golden on the second side, 1 to 2 minutes longer. Lower the heat if the oil starts to smoke or the patties brown too fast. Transfer the patties to the plate and repeat with the remaining rice mixture, adding more oil as necessary. Serve with the dipping sauce.
Nutrition (per serving):
Calories: 430, Fat: 38g (Sat: 6g), Cholesterol: 70mg, Sodium: 810mg, Carb: 20g, Fiber: 1g, Sugar: 2g, Protein: 5g
36 real food
SPICY
NOODLES WITH BOK CHOY AND PORK OR TOFU
RECIPES AND PHOTOS FROM “RICE IS LIFE: RECIPES AND STORIES CELEBRATING THE WORLD’S MOST ESSENTIAL GRAIN” BY CARYL LEVINE AND KEN LEE OF LOTUS FOODS WITH KRISTIN DONNELLY ©2022, REPRINTED WITH PERMISSION FROM CHRONICLE BOOKS. PHOTOGRAPHY BY ERIN SCOTT.

SCALLION RICE CAKES WITH DIPPING SAUCE

ENTRÉES FIRE UP YOUR
Bring grilled favorites to the table everyone can enjoy—from beef and fish to plant-based burgers and brats
Parties and family dinners outdoors are part of what makes summer great, and grilling is a key component. Make your neighbors wonder what smells so good wafting on the winds from your house—or invite them over, too! With these recipes it’s a perfect excuse to spend a little more time outdoors, brush up on your grilling skills, and make some new meals to add to your grilling repertoire. –mary subialka

summer 2023 39
KATYNN / ADOBE
BARBEQUE
BEEF UP YOUR BBQ
Beef is a classic barbecue favorite and encompasses all levels of grilling skill. Here, we feature recipes to help you switch up your usual burgers and steaks with avorful options from a marinated skirt steak to an African-spiced steak and grilled eggplant to zesty street tacos. With these recipes and the following tips, courtesy of Beef. It’s What’s For Dinner (BeefItsWhatsForDinner.com), your cookouts are sure to sizzle.
GRILLING TIPS
It is best to trim visible fat before grilling to prevent flare-ups. When marinating to add flavor, time makes all the difference. For tender beef cuts like rib or sirloin, marinate for 15 minutes up to 2 hours. For less tender cuts like round, marinate 6 to 24 hours. Always marinate in the refrigerator, never room temperature. Don’t flip the steaks so much! One flip is usually all you need, but take care to avoid charring or burning and be ready to turn down the heat (or move to a cooler spot on the grill) if necessary.
Since beef is cooked to preferred levels of doneness, it’s best to measure the internal temperature to achieve desired results. Reach 145°F for medium-rare, 160°F for medium, and 175°F for well done. Keep in mind the internal temperature will continue to rise for a few minutes after coming off the grill.
Cowboy Marinated Skirt Steak with Corn Salad

This simple but flavorful skirt steak is served alongside an equally delicious corn salad.
for the marinade
2 tablespoons vegetable oil

2 tablespoons fresh lime juice
3 tablespoons water

2 teaspoons garlic, minced
2 teaspoons sweet paprika

11⁄2 teaspoons dried thyme leaves

1 teaspoon garlic powder
1 teaspoon onion powder
½ teaspoon kosher salt


½ teaspoon black pepper


11⁄2 pounds beef skirt steak, cut into 4 to 6-inch pieces
1. Combine the marinade ingredients in a small bowl. Place steaks and marinade in food-safe plastic bag; turn steaks to coat. Close bag securely and marinate in refrigerator 6 hours or as long as overnight, turning occasionally.
2. For the Corn Salad, combine corn, tomatoes, red onion, basil, garlic, Italian dressing, salt, and pepper in a medium bowl. Cover and refrigerate until ready to serve.
3. When ready to cook, remove steaks from marinade and discard marinade. Place steaks on grid over medium, ash-covered coals. Grill, covered, 7 to 12 minutes (over medium heat on preheated gas grill, 8 to 12 minutes) for medium rare (145°F) to medium (160°F) doneness, turning occasionally.
for the corn salad
1 (15-ounce) can corn, drained and rinsed (see Cook’s Note)
1 cup cherry tomatoes, halved
¼ cup diced red onion
2 tablespoons fresh basil, chopped
2 teaspoons granulated garlic
1⁄3 cup Italian dressing


1 teaspoon freshly ground black pepper
1 teaspoon kosher salt
Carve steaks diagonally across the grain into thin slices; season with salt, as desired.

Cook’s Note


Whole grilled corn on the cob can be used in place of canned. Place 4 corn cobs on grid over medium, ash-covered coals. Grill, 10 to 14 minutes (over medium heat on preheated gas grill, 8 to 10 minutes) turning on all sides. Remove corn and let cool. Carefully cut corn kernels from cob and let cool.
Nutrition (per serving):
Calories: 354, Fat: 20g (Sat. 5.4g), Cholesterol: 79mg, Sodium: 660mg, Carb: 20g, Fiber: 2g, Sugar: 8g, Protein: 28g
40 real food
MAKES 6 SERVINGS
COW SKETCH BIGJOY/ ADOBE FOOD PHOTOS COURTESY OF BEEF. IT’S WHAT’S FOR DINNER (BEEFITSWHATSFORDINNER.COM)
COWBOY MARINATED SKIRT STEAK WITH CORN SALAD
Berbere Spiced Grilled Flat Iron with Garlic-Herb Grilled Eggplant
MAKES 4 SERVINGS
Berbere spice blend is inspired by African cuisine. Complete the meal with a garlic-herb grilled eggplant.
1 beef flat iron steak (about 1 pound) for the rub
½ teaspoon ground cardamom

1 teaspoon kosher salt
½ teaspoon freshly ground black pepper
1 teaspoon ground coriander
½ teaspoon allspice
½ teaspoon nutmeg
½ teaspoon ground ginger
1 teaspoon chili powder
½ teaspoon ground cinnamon

1 teaspoon granulated garlic
for the grilled eggplant
1 eggplant, cut into ½-inch slices
2 teaspoons minced garlic
11⁄2 teaspoons Mexican oregano
2 tablespoons olive oil
1⁄2 teaspoon kosher salt
4 slices naan bread, for serving Greek-style yogurt, for serving Fresh parsley, for garnish
1. Cut the steak evenly into 4 portions (about 4 to 6 ounces each).

2. Combine all rub seasonings in a small bowl. Spread evenly onto all surfaces of the steaks.
3. For the eggplant, in a small bowl combine garlic, oregano, salt, olive oil, and eggplant slices. Toss eggplant, making sure all sides are coated evenly.
4. Place steaks onto a preheated gas grill, covered, 10 to 14 minutes for medium rare (145°F) to medium (160°F) doneness, turning occasionally. Remove from grill and let rest for at least 5 minutes.
5. Grill the eggplant on gas grill for 4 to 6 minutes flipping halfway through. Remove from grill and keep warm.
6. Serve the grilled steaks and eggplant with naan bread and yogurt and garnish with parsley.
Nutrition
(per 4-ounce serving):
Calories: 300, Fat: 18g (Sat: 6g), Cholesterol: 72mg, Sodium: 810mg, Carb: 11g, Fiber: 5g,
Sugar: 5g, Protein: 24g
Street Tacos with Pineapple Salsa and Jalapeño Crema
MAKES 4 SERVINGS
This might be the hottest recipe of the summer. Ancho chile spiced grilled top sirloin topped with jalapeño crema and a pineapple salsa and served as street tacos. Can’t beat it.

1 pound beef top sirloin steak (1⁄4-inch dice)
2 tablespoons olive oil
2 teaspoons ancho chile powder
1 teaspoon kosher salt
1 teaspoon granulated garlic
8 (4-inch) corn tortillas for the jalapeño crema
1 avocado, peeled and pitted
2 tablespoons fresh lime juice
3 tablespoons sour cream
2 jalapeño peppers, seeded and chopped
1. Cut beef steak lengthwise in half, then crosswise into 1⁄4-inch cubes. (Tip: Freeze the sirloin steak for up to 30 minutes to help aid in the cutting.)
2. In a medium-size bowl, combine beef, ancho chile powder, salt, garlic, and olive oil. Cover and refrigerate for at least 30 minutes.
3. Heat a large nonstick skillet over medium heat. In batches, add in half the beef mixture and cook for 6 to 8 minutes, stirring occasionally. Repeat until all the beef is cooked, remove from heat and set aside.
4. To make the Jalapeño Crema, place avocado, lime juice, sour cream, salt, and jalapeño peppers in bowl of food
for the pineapple salsa
6 fresh pineapple rings, grilled and chopped
3 teaspoons fresh lime juice
¼ cup red onion, diced
½ cup diced tomatoes
3 teaspoons fresh cilantro
½ teaspoon kosher salt
Crumbled Cotija cheese, fresh cilantro, and diced onion, for garnish
processor; pulse until smooth.
5. To make the Pineapple Salsa, in a medium-size bowl, combine pineapple, red onion, cilantro, lime juice, salt, and tomatoes. Cover and refrigerate for at least 15 minutes.
6. To assemble, grill tortillas for 1 to 2 minutes on each side. Top o each tortilla with beef, then pineapple salsa, and top with Jalapeño Crema and additional garnishes, as desired.
Nutrition (per 2-taco serving):
Calories: 407, Fat: 21g (Sat: 4g), Cholesterol: 61mg, Sodium: 540mg, Carb: 32g, Fiber: 5g, Sugar: 11.8g, Protein: 25g
summer 2023 41
BERBERE SPICED GRILLED FLAT IRON WITH GARLICHERB GRILLED EGGPLANT
STREET TACOS WITH PINEAPPLE SALSA AND JALAPEÑO CREMA
FISH AND FLAMES
This barbecue season, make sure to include fish in your protein choices. It is low in fat but also rich with omega-3 fatty acids and vitamins B and D. Not only is it good for you, grilled fish can make a tasty meal—and it’s easier to do than you think. Here are some tips and recipes, courtesy of Alaska Seafood, to help your fish grilling endeavors go swimmingly.
GRILLING TIPS
Marinate in any container except one made of uncoated cast iron or aluminum, which can react with acids and develop offflavors. Limit marinating time for seafood portions to a maximum of 45 minutes (the proteins could start to break down if left in many marinades longer).
Oil grill then cook fish skin side down first, which protects it from burning and drying out—and can add natural oils to the grill to help it from sticking when flipped. Turn fish only once to help prevent it from falling apart. Use a two-prong kitchen fork inserted between the grill bars to slightly lift fish fillets or steaks, then slide a metal spatula under fish and turn.
Try grilling fillets on aluminum foil, which makes it easier to move and will also catch marinade drippings. Or, use a grill basket or perforated grill rack to keep flaky fish from falling through the grill bars.
Charred Alaska Halibut Tacos with Cilantro Pesto
MAKES 4 SERVINGS | RECIPE
COURTESY ALASKA SEAFOOD
BY NATALIE KAHN
Pesto isn’t just for pasta! This zesty cilantro and parsley pesto is a mouthwatering accompaniment to grilled, gluten-free halibut tacos.
for the pesto
1 bunch cilantro
1 bunch flat leaf parsley
1 jalapeño, minced
¼cup toasted pepitas (pumpkin seeds)
1 clove garlic, minced
¼ cup cotija cheese
¼ cup extra-virgin olive oil, plus more if needed
Salt and pepper, to taste
1. Make the pesto: Combine all pesto ingredients in a blender or food processor and blend. Drizzle in more olive oil or water, if needed, until you get a salsa-like consistency. Season to taste with salt and pepper, and set aside.
2. Grill the halibut: Heat grill to medium-high heat (400°F). Brush halibut and grill surface with oil. Grill 5 to 7 inches from heat for about 8 minutes, turning once during cooking. Cook just until fish is opaque throughout. Season with salt and pepper to taste.
3. Assemble tacos: Char tortillas on grill or grill pan. Top each taco with a big pinch of shaved
for the tacos
1pound Alaska Halibut fillets
Olive oil
8 small (4-inch) corn tortillas
1⁄2 head red cabbage, finely shaved
1⁄4 cup cotija cheese
Lime wedges, for garnish
red cabbage. Break halibut into chunks and distribute evenly between tortillas. Top with a generous spoonful of pesto, a sprinkle of extra cotija cheese, and a lime wedge.

Cook’s Note
Alaska halibut can also be sautéed, roasted, or broiled, cooking just until opaque throughout.
Nutrition (per serving):
Calories: 460, Fat: 26g (Sat: 6g), Cholesterol: 65mg, Sodium:
341mg, Carb: 31g, Fiber: 6g, Sugar: 4g, Protein: 30g
42 real food
FISH SKETCH IADAART/ ADOBE HALIBUT TACOS AND SALMON RICE BOWL ALASKA SEAFOOD MARKETING INSTITUTE
CHARRED ALASKA HALIBUT TACOS WITH CILANTRO PESTO
Peruvian Grilled Alaska Pollock Sandwiches with Spicy Green Sauce
MAKES 4 SERVINGS
Add some punch to your lunch with these spicy Peruvian-style grilled Alaska pollock sandwiches.

for the sauce
3 whole jalapeño peppers, roughly chopped (see Cook’s Notes)
1 tablespoon aji amarillo pepper paste (optional, see Cook’s Notes)
1 cup fresh cilantro leaves
2 medium cloves garlic
½ cup mayonnaise
¼ cup sour cream
2 teaspoons fresh juice from 1 lime
1 teaspoon distilled white vinegar
¼ cup extra-virgin olive oil
Kosher salt and freshly ground black pepper, to taste
for the fish
3 medium garlic cloves, roughly chopped
1. To make the sauce, combine jalapeños, ají amarillo (if using), cilantro, garlic, mayonnaise, sour cream, lime juice, and vinegar in a blender. Blend on high speed, scraping down as necessary, until smooth. With blender running, slowly drizzle in olive oil. Season to taste with salt and pepper. Sauce will be quite loose at this point but will thicken as it sits. Transfer to a sealed container and refrigerate until ready to use.
2. To prepare the pollock: In a large mortar and pestle, pound garlic and salt until a smooth, sticky paste forms. Add cumin, paprika, black pepper, and vinegar and grind them together to form a paste. Drizzle in vegetable oil while grinding.
4 teaspoons kosher salt
2 tablespoons ground cumin

2 tablespoons paprika
1 teaspoon freshly ground black pepper
2 tablespoons white vinegar
2 tablespoons vegetable or canola oil
4 wild Alaska pollock fillets (4-6 ounces each)
Nonstick spray
for the sandwiches
4 sturdy buns, such as ciabatta
2 ripe avocados, halved, pitted, and scooped out


Thinly sliced red onion
Crisp lettuce leaves, such as romaine
Alternatively, mince all ingredients with a knife and form into a paste. Cut the fillets in half, so you have 8 pieces total. Transfer fish and marinade to a large bowl and massage very gently with your hands until fish is completely coated in the marinade. Set aside while you heat your grill pan.
3. Heat a grill pan over medium-high heat (or set an electric griddle to 400F). Spray with nonstick cooking spray. Place fish on grill pan and cook about 4 minutes. Flip and cook on second side until cooked through and slightly browned, about 2 minutes more. Carefully transfer to large plate.
4. Place buns cut side down over the top of the grill pan and cook, moving and rotating occasionally, until well toasted and beginning to char, about 1 minute. Transfer to a large cutting board. Use a fork to mash half an avocado on each bottom bun. Sprinkle with a little salt. Top with red onions, lettuce, and 2 pieces of fish each. Spread top buns with sauce and close sandwiches. Serve immediately, with any extra green sauce on the side.
Cook’s Notes
For a less spicy sauce, remove the ribs and seeds of the jalapeños before puréeing. Ají amarillo is a Peruvian yellow pepper paste. If you can’t find it, it can be omitted. If pollock is not available, you could substitute Alaska cod.
Nutrition (per serving):
Calories: 740, Fat: 57g (Sat: 9g), Cholesterol: 95mg, Sodium: 2960mg, Carb: 33g, Fiber: 8g, Sugar: 2g, Protein: 28g
Char-Grilled Alaska Salmon Rice Bowl with Peanut Sauce

MAKES 4 SERVINGS
Healthy Alaska seafood bowl with wild Alaska salmon skewers, fresh veggies, and zesty peanut sauce.
for the sauce
Prepared or bottled Thai peanut sauce
for the cucumber tomato salad
2 cups English cucumber, halved lengthwise, and thinly sliced
2 cups cherry or grape tomatoes, halved ½ cup red onion, half-moon slivered
for the rice
3 cups cooked brown rice, kept warm
1⁄4 teaspoon nigella seeds or black sesame seeds
1⁄2 tablespoon extra-virgin olive oil
Salt and pepper, to taste
for the salmon
4 (4-5 ounce each) Wild Alaska salmon fillets, quartered
2 teaspoons canola oil
Salt and pepper, to taste
8-12 cups mixed greens
1. Prepare the rice. Toss warm rice with nigella or black sesame seeds, olive oil, and salt and pepper. Refrigerate, covered, if not using immediately.
2. For the fish, heat grill over medium-high heat. Rub canola oil on grill grates and metal skewers. Skewer salmon. Brush fish with additional canola oil, then salt and pepper to taste. Cook for a few minutes on each side, until slightly charred. Remove skewers from the grill.
3. For each serving, place 2 to 3 cups mixed greens in the bottom of a large single-serving bowl. Add 3⁄4 cup rice. Add 3 small dollops of sauce onto greens and rice. Place 1 cup of cucumber tomato salad around the rice. Add a skewer of salmon and 1 tablespoon sauce. Garnish with chopped green onions, crushed peanuts and crispy fried garlic, as desired.
Nutrition (per serving):
Calories: 450, Fat: 13g (Sat: 3.5g), Cholesterol: 50mg, Sodium: 360mg, Carb: 55g, Fiber: 7g, Sugar: 8g, Protein: 32g
summer 2023 43
CHAR-GRILLED ALASKA SALMON RICE BOWL WITH PEANUT SAUCE
PERUVIAN GRILLED ALASKA POLLOCK SANDWICHES WITH SPICY GREEN SAUCE
VEG AT THE COOKOUT
Serve “meaty,” plant-based grill classics to crave so everyone at the barbecue can join in the fun with delicious options. Check out these recipes, courtesy of Beyond Meat.
GRILLING TIPS
Thaw Beyond Cookout Burgers in the refrigerator overnight before cooking and use within 10 days of thawing. Do not refreeze. Cook thoroughly before serving. The edge and interior of the patty may still be red or pink when fully cooked. Cooking time may vary depending on equipment. Make sure to always cook to an internal temperature of 165°F.
Want to grill vegetables to serve with your plant-based entrées? There is no need to oil the grates when the vegetables have been brushed with oil.
When grilling harder vegetables such as cauliflower or carrots, they may benefit from soaking for 20 minutes in a bowl of ice water before cooking. The hydration creates steam from within and helps them cook to perfect tenderness.
Grill vegetables with the lid closed so the temperature is similar to a hot oven.
Beyond Sausage Mexican Street Corn Brat
MAKES 4 SERVINGS
Enjoy the taste of summertime in a plant-based grilled brat.
4 Beyond Sausage brats, thawed
4 hot dog buns, toasted
1 ear fresh corn (see Cook’s Note)
¼ yellow onion, finely diced
4 garlic cloves, minced
2 slices pickled jalapeño, minced
2 tablespoons fresh cilantro, minced
¼ lime, zested and juiced
1. Slice the kernels o the ear of corn with a knife.
2. Heat a large skillet over medium-high heat for 1 minute. Drizzle with olive oil and add the corn. Season with salt and pepper and let the kernels sear on one side, undisturbed, for 1 minute or until caramelized.
3. Continue to cook for 1 to 2 minutes, stirring occasionally, until the kernels are all evenly browned.
4. Add the onions, garlic, and jalapeños to the skillet. Continue stir-frying for 1 minute or until the onions are tender. Turn o the heat and stir in the scallions, cilantro, zest, and the juice of ¼ lime. Season the mixture to taste with salt and pepper and set aside.
5. To grill the sausage, preheat a grill to 500°F. Lightly grease the grates and cook the sausage, flipping halfway through, for 6 minutes or until the internal temperature reaches 165°F. (Alternatively, preheat a
Vegan (or regular) chipotle aioli, to taste
Vegan (or regular) feta cheese, for garnish
Smoked paprika, optional for garnish
Cilantro leaves, optional for garnish
Extra-virgin olive oil, as needed
Salt, to taste Black pepper, to taste
nonstick skillet over mediumhigh heat, drizzle it with olive oil, and add the brats. Cook, stirring continuously, for 10 to 12 minutes or until the internal temperature reaches 165°F. Remove the brats from the pan.)
6. Add a brat to each bun and finish with the chipotle aioli, corn mixture, and cheese. Optional to add a pinch of smoked paprika, cilantro leaves, and a squeeze of lime for garnish as well. Serve immediately.

Cook’s Note
To grill the corn on the cob, preheat a grill to 500°F. Lightly grease the grates and evenly caramelize the corn, turning occasionally, for 3 to 5 minutes. Set aside and slice o the kernels when cool.
Nutrition (per serving):
Calories: 330, Fat: 14g (Sat: 5g), Cholesterol: 0mg, Sodium: 760mg, Carb: 32g, Fiber: 4g, Sugar: 5g, Protein: 20g
44 real food
BEYOND SAUSAGE MEXICAN STREET CORN BRAT VEGETABLES SKETCH NIKOLE/ ADOBE BEYOND SAUSAGE AND BEYOND KOREAN BBQ BURGER BEYOND MEAT CALIFORNIA BURGER EMILY MEADOR, LETTUCE THRIVE
Beyond Korean BBQ Burger
MAKES 2 SERVINGS
This plant-based burger gets creatively spiced.
for the korean slaw
2 cups green cabbage, shredded
1 cup carrot, cut into matchsticks
1 cucumber, cut into matchsticks
¼ cup soy sauce
¼ cup sweetened or seasoned
rice wine vinegar
2 tablespoons chili flakes
2 teaspoons salt
for the kimchi aioli
1 cup vegan (or regular) mayonnaise
1 cup kimchi, finely chopped
¼ cup gochujang
¼ cup agave nectar or honey
⅛ cup sweetened or seasoned
rice wine vinegar
Kosher salt, to taste
for the korean bbq burgers
2 Beyond Burger patties
2 sesame seed burger buns, toasted
1 tablespoon soy sauce
1 tablespoon sugar
1 tablespoon minced garlic
1 tablespoon minced ginger
4 tablespoons kimchi aioli (recipe above)
1 cup Korean slaw (recipe above)
Olive oil, as needed
1. To prepare the slaw, whisk together the soy sauce, vinegar, chili flakes, and salt. Fold in the cabbage, carrots, and cucumbers. Season to taste and refrigerate overnight.
2. To prepare the aioli, whisk together all of the ingredients and season to taste. Set aside and refrigerate overnight.
3. For the burgers, mix together the burgers, soy sauce, sugar, garlic, and ginger. Reshape the beef into two patties.
4. Preheat a nonstick skillet over mediumhigh heat. Drizzle with olive oil and sear the burgers for 4 minutes on each side.
5. Lay the toasted burger buns on a clean surface, cut-side up.
6. Spread the kimchi aioli evenly over the buns and transfer the cooked burgers to the bottom slices.
7. Top each burger with a pinch of Korean slaw, finish with the top bun, and serve immediately.

Nutrition (per serving; reduce kimchi and slaw serving size if sodium is a concern):
Calories: 600, Fat: 27g (Sat: 7g), Cholesterol: 5mg, Sodium: 2570mg, Carb: 60g, Fiber: 5g, Sugar: 19g, Protein: 28g
California Cookout Classic Burger
MAKES 2 SERVINGS | RECIPE
BY EMILY MEADOR, LETTUCE.THRIVE, COURTESY BEYOND MEAT
This vegan burger takes all the flavors of California cuisine and mashes them into one delicious burger, and tops it o with a perfect spicy-sweet sun-dried tomato aioli.
for the caramelized onions
1 medium onion, thinly sliced
1 tablespoon olive oil
1 teaspoon salt
for the plant-based sun-dried tomato aioli
¼ cup vegan mayo
1 tablespoon finely chopped sun-dried tomatoes (packed in oil)
1 teaspoon lemon juice
1. Start by making the caramelized onions. Heat a medium skillet over medium heat. Add the olive oil, sliced onions, and salt. Cook for 20 to 25 minutes, stirring occasionally until the onions are soft and starting to brown.
2. While the onions are cooking, prepare the aioli by mixing together the plant-based mayo, sun-dried tomatoes, garlic, lemon juice, salt, and lemon pepper. Chop the garlic and sun-dried tomatoes as finely as you can to create a smoother texture.
3. Cook the Cookout Classic patties according to package instructions: Preheat grill or nonstick pan to medium-high heat and cook for about 4 minutes per side. Do
⅛ teaspoon salt
¼-½ teaspoon finely minced garlic
¼ teaspoon lemon pepper
2 Beyond Meat Cookout Classic patties
2 burger buns
½ avocado, sliced
1 cup arugula
4 slices tomato
2 slices vegan smoked gouda
not overcook. (Edge and interior of patty may still be red or pink when fully cooked.) Always cook to an internal temperature of 165°F. Once you flip the patties, add the plant-based smoked gouda. Toast the buns on the grill for 2 minutes.
4. Assemble the burgers by spreading 1 tablespoon of aioli on each half of the bun, then layer ½ cup arugula, 2 slices of tomatoes, the patty, caramelized onions, avocado, and the top bun.

Nutrition (per serving):
Calories: 790, Fat: 59g (Sat: 14g), Cholesterol: 0mg, Sodium: 2230mg, Carb: 40g, Fiber: 5g, Sugar: 7g, Protein: 23g
summer 2023 45 BEYOND KOREAN BBQ BURGER
CALIFORNIA COOKOUT CLASSIC BURGER
F ROZEN UMMYTREATS


Keep your cool this season with delightful homemade desserts
The ringing of the ice cream truck bell or the unmistakable music that calls out for blocks may have sent you running for brightly colored frozen goodies on sticks when you were a kid, but now you can easily make your own versions anytime—no questions asked. Frozen treats are certainly a welcome refreshing dessert on hot days, and we step it up a notch with more natural flavors and colors in this collection of recipes from “Frozen Sweet Treats & Desserts” by Ryland Peters, and Small. Try a healthy take on breakfast yogurt, matcha minty pops, mix some espresso in your frappé, and impress with a tropical take on an icebox terrine. Plus, sprinkles make everything fun and bring out the kid in you, so we have included a recipe for ice cream whoopie pies that everyone will love. Ding, ding! –mary subialka
46 real food
WHOOPIE PIES STEVE PAINTER

ICE CREAM WHOOPIE PIES RECIPE ON PAGE 49

COCONUT AND MANGO ICEBOX TERRINE
Coconut and Mango Icebox Terrine

MAKES 8 SERVINGS | RECIPE BY HANNAH
MILES


Coconut and mango make a totally tropical combination. This is a delicate icebox dessert with pretty white and orange layers. The ice cream terrine is coated in a ginger crumb layer which adds a wonderful crunch.
for the coconut ice cream
3 extra-large egg yolks
½ cup white granulated sugar


1¾ cups (scant) coconut milk

¾ cup (generous) heavy cream


1 large ripe mango, peeled, stoned, and sliced into very thin slices using a mandoline or sharp knife
for the crumb layer
7 ounces ginger cookies, blitzed to fine crumbs in a food processor or blender
7 tablespoons butter, melted and cooled
special equipment
Ice cream machine (optional)
1. For the ice cream, in a mixing bowl, whisk together the egg yolks and sugar until very thick and creamy and doubled in size. Place the coconut milk and cream in a pan and bring to a boil. Take o the heat and slowly pour the hot coconut mixture over the whisked egg yolks, whisking all the time. Return the coconut custard to the pan and heat until the custard starts to thicken. Remove from the heat and allow to cool completely.
2. Churn the cooled coconut custard in the ice cream machine following the manufacturer’s instructions (or transfer to a freezer-proof container and place in the freezer, whisking every 20 minutes to break up the ice crystals until the ice cream is frozen, about 2 to 4 hours). Line a 9½ x 4-inch loaf pan with a double layer of plastic wrap. Place it in the freezer to chill.
3. Spread one-third of the ice cream over the base of the lined loaf pan. Then place a layer of mango on top, using about half of the mango. Repeat with a second ice cream layer and more mango, then finish with the remaining ice cream. Wrap in more plastic wrap and freeze overnight.
4. To make the crumb layer, stir the cookie crumbs through the cooled melted butter, then tip on to a large plate. Remove the ice cream from the freezer and lift out of the pan. Working quickly, peel o the plastic wrap, then press the ice cream loaf into the crumbs so that it is coated all over in a layer of crumbs. Re-line the pan with another double layer of plastic wrap, return the crumbed ice cream to the pan, and freeze for a further hour. To serve, remove from the freezer, peel o the plastic wrap, and place on a serving plate. Cut into slices.
Cook’s Note: If you want to use store-bought ice cream, allow it to soften, tip into a metal bowl, and whip until firm but spoonable. Continue as per recipe.
Ice Cream Whoopie Pies
MAKES 12 | RECIPE BY HANNAH MILES | PHOTO ON PAGE 47
These pies are a classic chocolate whoopie. You’ll need to assemble them at the last minute so that the ice cream doesn’t melt. You can substitute any flavor of ice cream you like, such as chocolate, for a double chocolate treat!
for the whoopie pies
9 tablespoons unsalted butter or vegetable shortening, softened


1 cup dark soft brown sugar
1 egg


1 teaspoon vanilla extract
2 cups plus 2 tablespoons self-rising flour
½ cup cocoa powder
1 teaspoon baking powder


½ teaspoon salt


1 cup plain yogurt
7 tablespoons hot (not boiling) water
for the ice cream filling
14 ounces vanilla ice cream in a block
Multicolored sprinkles, to decorate
special equipment
2 (12-hole) whoopie pie pans, greased (see Cook’s Note)
3-inch round cookie cutter


1. Heat the oven to 350°F.
2. To make the pies, cream together the butter and brown sugar in a mixing bowl for 2 to 3 minutes using an electric hand-held mixer, until light and creamy. Add the egg and vanilla extract and mix again. Sift the flour, cocoa, and baking powder into the bowl and add the salt and yogurt. Whisk again until everything is incorporated. Add the hot water and whisk into the mixture.
3. Put a large spoonful of mixture into each hole in the prepared pans. Allow to stand for 10 minutes, then bake the pies in the preheated oven for 10 to 12 minutes. Remove the pies from the oven, let cool slightly, then turn out onto a wire rack to cool completely.
4. Shortly before you are ready to serve, remove the ice cream from the freezer and allow to soften slightly. Cut 12 slices each about ¾-inch thick and, using the cookie cutter, stamp out a round from each slice. Sandwich an ice cream round between 2 cooled pie halves. Working quickly, put the sprinkles on a flat plate and roll each pie in them so that the ice cream is coated. Serve your whoopie pies immediately with napkins to catch any ice cream drips.
Cook’s Note: If you don’t have whoopie pie tins, you can use 2 large baking/cookie sheets lined with parchment paper or silicon mats. Make mounds of the mixture using an ice cream scoop, shape them with 2 spoons, or spoon the mixture into a piping bag fitted with a large round nozzle and pipe 21⁄2-inch diameter circles directly onto the sheets.
49 summer 2023
TERRINE
ISTEVE PAINTER
Breakfast Granola and Yogurt Pops
MAKES 6 TO 8 POPS | RECIPE BY LOUISE PICKFORD
Your classic morning breakfast bowl of yogurt, granola, honey, and fresh fruit in ice pop form! To be enjoyed at any time.
2¼ ounces granola
5 tablespoons clear honey, divided


1 cup (generous) Greek yogurt
5½–7 ounces prepared small fresh fruits such as grapes, strawberries and/ or kiwi, peeled and diced


1¾ ounces frozen or fresh raspberries, thawed if frozen
1 tablespoon powdered sugar
1. Place the granola in a bowl, stir in 2 tablespoons of the honey and mix so that all the granola is really sticky. Divide the


Mint Chocolate and Matcha Pops
MAKES 6 TO 8 SMALL OR 4 TO 6 LARGE POPS |


 RECIPE BY LOUISE PICKFORD

mixture among ice pop molds and press down firmly to compact the granola at the bottom. Freeze for 1 hour until really firm.
2. Place the yogurt in a bowl and stir in the remaining 3 tablespoons honey. Spoon a little yogurt mixture into each mold and add some of the fresh fruits, alternating between the two until the molds are full. Add the sticks in an upright position at this stage, or freeze first for a while until the mixture is firm enough to hold the sticks straight. Freeze for 4 to 6 hours until frozen.
3. Meanwhile, purée the raspberries in


a blender with the powdered sugar, then strain to remove all the seeds. Refrigerate.
4. Line a small baking sheet with parchment paper. About 20 minutes before you are ready to serve, put the prepared baking sheet into the freezer to chill. After 10 minutes, dip the molds into hot water for a second or two, then gently pull out the pops. Place the pops on the prepared chilled baking sheet and immediately drizzle over the raspberry sauce. Return to the freezer for 10 minutes to set before serving.
Co ee Frappé Float
MAKES 2 SERVINGS | RECIPE BY HANNAH
MILES


Matcha is the finely ground powder of green tea leaves, which are bursting with antioxidants. Here, matcha’s earthy flavor marries well with mint and coconut milk for a delicious, healthy, and slightly di erent chilled treat.
1 (14-ounce) can coconut milk
4 large fresh mint sprigs, bruised
1–2 teaspoons good-quality matcha powder, plus extra to serve


4 tablespoons maple syrup or clear honey
1¾ ounces dark chocolate, chopped
2-3 ounces melted dark chocolate, to serve
1. Combine the coconut milk and mint sprigs in a small pan over a medium heat. Bring the milk just to a boil, then remove from the heat and set aside until cold.
2. Strain the cold coconut milk, then whisk in the matcha powder and maple syrup (or honey) until completely dissolved. Refrigerate for about 1 hour until set enough to hold the chocolate pieces in place.
3. Fold the chocolate through the milk and then carefully spoon the mixture into ice pop molds. Add the sticks in an upright position at this stage, or freeze first for a while until the mixture is firm enough to hold the sticks straight. Freeze for 4 to 6 hours until frozen.
4. Line a baking sheet with parchment paper. About 20 minutes before you are ready to serve, put the prepared baking sheet into the freezer.


5. After 10 minutes, quickly dip the molds into hot water, then gently pull out the ice pops. Place the ice pops onto the prepared baking sheet and drizzle with melted chocolate. Dust with extra matcha powder and return to the freezer for 10 minutes to set before serving.
This shake is the ultimate pick-me-up—strong co ee and sweet ice cream. If co ee ice cream is not available, you can replace it with vanilla ice cream and add another shot of espresso instead.
2 shots of espresso, cooled
1½ cups milk


4 scoops co ee ice cream


15 ice cubes
Canned whipped fresh cream
Unsweetened cocoa powder, for dusting
2 chocolate-coated co ee beans or chocolate co eebean shaped chocolates, to decorate
1. Chill 2 soda or other tall glasses.
2. Put the espresso, milk, and 2 scoops of co ee ice cream in a blender with the ice cubes and blitz until thick and creamy. If your blender is not strong enough to crush ice, place the ice cubes in a plastic bag, seal and wrap in a clean dish towel, and bash the bag with a wooden rolling pin until the ice is crushed, then add to the blender with the other ingredients and blitz together.
3. Pour the shake into the chilled glasses and top each glass with a scoop of co ee ice cream. Squirt a little of the cream on top of the shake, dust with cocoa, and top with a chocolate co ee bean. Serve immediately with paper straws.

RECIPES AND PHOTOS FROM “FROZEN SWEET

TREATS & DESSERTS: OVER 65 RECIPES FOR POPSICLES, SUNDAES, SHAKES, FLOATS & ICE CREAM CAKES” ©2023 REPRINTED WITH PERMISSION FROM RYLAND, PETERS & SMALL.


50 real food


51 summer 2023 COFFEE FRAPPÉ FLOAT MINT CHOCOLATE AND MATCHA POPS BREAKFAST GRANOLA AND YOGURT POPS YOGURT POPS, MINT POPS IAN WALLACE COFFEE FRAPP É KATE WHITAKER
CHEF MASON HEREFORD'S LIGHTHEARTED APPROACH TO COOKING BRINGS DELICIOUS JOY TO THE PLATE— EVEN IF THAT PLATE IS VINTAGE DISNEY


 by mary subialka


52 real food
The walking tacos are served in, naturally, a ceramic hand.
A child’s lunchbox houses another creation, and a dinosaur is placed on the table—just for fun. As chef Mason Hereford goes head-to-head (or perhaps nose to tail as they are challenged to use a lamb), with chef Curtis Stone on Netflix’s “Iron Chef, Quest for an Iron Legend,” he brings his love of creative serving ware to the table and elevates the fun factor of this match while giving Stone a worthy challenger.
At Hereford’s restaurant Turkey and the Wolf in New Orleans, which he describes as an enthusiastically casual spot, the food is served on vintage Disney, Power Rangers, and Ronald McDonald plates purchased from eBay, and diners sit on chairs and at tables his mom found at yard sales. The menu, which has only around 10 items, features mostly sandwiches that align with no particular theme other than creations he and his team think taste good, including hog’s head cheese tacos with shredded iceberg and American cheese and a collard green sandwich that tastes like a Reuben, among the selections.
Hereford moved to New Orleans in 2008 and opened Turkey and the Wolf in 2016. Bon Appétit magazine named his sandwich shop “America’s Best New Restaurant” of 2017. Food & Wine and GQ called it one of the most important restaurants of the decade, and Guy Fieri featured it on his Food Network show “Diners, Drive-ins, and Dives” in 2018. Hereford’s debut cookbook, titled “Turkey and the Wolf: Flavor Trippin’ in New Orleans,” which was published in summer 2022, is a New York Times Bestseller.
He didn’t have designs on being a chef. “Right after college, I moved down to New Orleans, which I knew practically on arrival would be my forever home, and realized pretty quickly that I wasn’t going to be using my art history degree,” he writes in the intro of “Turkey and the Wolf.” His first job was as a door guy at Fat Harry’s bar, where a few months later he became a cook, learning to make burgers and cheese fries, and eventually became a bartender, which was the top financial level there.
“It was there, among the deep fryers and endless shots of Grand Marnier, where I became entranced by the alchemy of cooking, by how a little mustard wash, flour, and bird meat could enter a vat of bubbling oil and emerge as chicken fingers,” he writes. During slow times, the manager taught him how to cook the “cool stuff” that was not on the menu, such as soft-shell crabs and barbecue shrimp pistolettes. “At some point I realized, cash tips be damned, I wanted to cook.”
After a year at Fat Harry’s, he worked as a line cook at Coquette, a bistro that made inventive Southern food with local meat and produce. He worked there about six years and became the chef de cuisine, having learned techniques to take modest ingredients such as fried chicken or catfish, and dress it up, or dress down usually more “fancysounding” items like veal sweetbreads or beef tartare.
53 summer 2023
Creative freedom, youthful enthusiasm, and a great circle of talented coworker friends kept him going those years despite 80-hour workweeks. Then, in August 2016, he opened Turkey and the Wolf. The “Turkey” in the restaurant’s name is what his father called him and his siblings when they were acting up.


on a McDonald’s burger). The only way I knew how to turn that sandwich into something worth eating was to load it with saltand-vinegar potato chips,” he writes. “Never would’ve guessed that some 20 years later, my version of that bologna sandwich would be featured in magazines, on food TV shows, and, most important, in a mayonnaise commercial.”
In addition to those “doctored up” sandwiches of his youth, he took inspiration from other sources. Every week for a decade, he ordered a sandwich called The Jefferson at another store, which was turkey, cheddar, and cranberry
food that was somewhere in between. She made an amazing dish of chicken with evaporated milk and apple juice concentrate, he recalls, melted American cheese on broccoli served with frozen fish sticks, and used Rice Krispies as a crust for baked chicken thighs. For a special occasion, she made a “killer” chicken curry with peas. His mom’s burnt tomatoes were what he describes as a kind of magical casserole made from sliced, flour-dredged, pan-fried tomatoes that are sprinkled with sugar and baked. She still makes them for Thanksgiving every year, and they are a star of the table—and also featured in his cookbook.
Turkey and the Wolf restaurant had not yet been open a year when it was featured on a number of “best of” lists and became so busy they would go through the next day’s prep so quickly they would need to close early to avoid prepping late into the night. Then things got back to a more normal level.
It must have been used with some affection as his cookbook dedication is “To the late Robert Hereford, my old man and my best friend.” The “Wolf” comes from “the howls that went up from the kitchen at Coquette after we sent out the night’s final dish,” he says.
The tale of his journey to where he is today and his approach to food goes back to when he was a kid. “The story begins with a bad sandwich,” he writes. He grew up in the small town of Free Union in rural Virginia and says his formative food experiences were at “shabby, family-run country stores—part gas station, part convenience mart, and part takeout counter. They sold beer and gas, lures and ammo, chili-cheese dogs, and biscuits with white gravy.” Sometimes when they needed to grab a quick lunch, they would stop at one of these stores and his mom would get them bologna sandwiches. “I hated those bologna sandwiches,” he continues. “I hated the texture of flabby off-brand cased meat. I hated the yellow mustard (which I couldn’t stomach unless, for some reason, it was
relish on a French roll, slathered with an herb mayo that showed up in his dreams and now in his cookbook. Childhood meals of Doritos, Jimmy Dean sausage biscuits, and Snickers washed down with a Mr. Pibb soda also played a role. But junk food wasn’t his only muse, he says. His paternal “fancy grandma,” who asked to be call Ann, was a great cook, exposing him to dishes such as duck fricassee and snapper with herbed lemon butter served at a table set with the proper flatware. His maternal grandmother was also named Anne, but always went by Grandmommy. Her recipes like cornpone, kraut dumplings, and hickory-nut loaf cake were dished up in a more casual atmosphere. And his mother cooked
Hereford also owns a breakfast restaurant in New Orleans called Molly’s Rise and Shine, which opened in 2019 and is named after his sister. He and his friends now have more manageable working hours than the 80-hour weeks, but he kept busy working on the cookbook. “I’m happy I got to write this book with my pal JJ [Goode] … And I’m grateful that when the opportunity came, the talented friends I met during a dozen years of working in kitchens together showed up to help me make the thing special.”
The book contains recipes for food that he loves, and that the home cook can reasonably make, including some favorites from Turkey and the Wolf and Molly’s, including The Collard Melt, his


54 real food
CLOCKWISE FROM LEFT: HEREFORD ON “LATE NIGHT WITH SETH MEYERS” IN JUNE 2022; WITH HIS SIGNATURE FRIED BOLOGNA SANDWICH SUPPORTED BY A “FRIEND”; KRISTEN KISH AND MASON HEREFORD IN EPISODE 101 OF THE NETFLIX SHOW, “IRON CHEF: QUEST FOR AN IRON LEGEND”
“One thing I love about serving sandwiches is that they o er an opportunity to cra every bite of someone’s meal. … A sandwich is the sum total of a meal’s greatness served as the best bite over and over again.”
–mason hereford, “turkey and the wolf” cookbook
famous fried bologna sandwich, and a riff on a burger he enjoyed at the nowshuttered Yo Mama’s bar and grill in the French Quarter (see recipe at right). As much as his book is about good food, it’s also about giving you permission to relax a little, he says. “Fun is the most important thing.”
Not Yo Mama’s Peanut Butter-Bacon Burger

MAKES 1 AWESOME BURGER
It sounds like a gimmick, but in fact, it’s scientifically proven that joining savory beef fat, salty cured pork, and creamy peanut butter makes everything feel right. … if you want comfort, make this burger. –MASON HEREFORD

5 ounces ground beef, divided into 2 (2-inch) balls
1 teaspoon unsalted butter, divided

This he demonstrated during an appearance on the “Today” show last summer when the book was released, telling host Savannah Guthrie, as he made The Bologna sandwich, “The book is all about having a good time.”


Hereford is no doubt also inserting fun and a good time into his latest endeavor, Hungry Eyes, a third New Orleans restaurant he opened in April 2023. The 50-seat, full-service dinnerand-drinks restaurant is a departure from his sandwich shop and breakfast cafe, but with its ’80s theme, it is likely to serve up some “rad” vibes along with delicious food.

½ teaspoon (generous) Lawry’s Seasoned Salt, divided
1 Martin’s potato sandwich roll
2 bun-size pieces iceberg lettuce
Some thinly sliced red onion
Creamy peanut butter for serving
2 strips bacon, cooked however you like your bacon
Ketchup (there is only Heinz) for swiping
1. Set a medium cast-iron skillet over high heat until it’s pretty hot. While the skillet’s heating up, put a beef ball between two pieces of parchment or wax paper and evenly flatten it to make a 6-inch patty. Repeat with the other ball on separate parchment paper.
2. Add about ½ teaspoon of the butter to the pan and swirl it around. Lower the heat to medium, then add one of the patties and season the up-side liberally with Lawry’s (a generous ¼ teaspoon per patty).
3. Cook until the first side gets a little brown (you’re not looking for a crust here), 30 to 45 seconds. Flip the patty and cook about 45 seconds more. Move the patty to a plate and use a roll half to wipe up the buttery drippings, leaving it for a few seconds, so it gets a little toasty. Cook the other patty the same way (the butter, the Lawry’s), but this time, stack the patty on the other patty. Use the other roll half to sop up the drippings and let it get toasty, too.
4. Here’s how I build it, but no rules apply, as long as you get all the stu between the buns: On the bun bottom, add the lettuce leaf and some onion. Add the patty stack, then some peanut butter (I go large and use 3 tablespoons, but 2 tablespoons is probably more reasonable) and the bacon (break ’em up to fit on the burger). Swipe some ketchup on the top bun, cap the burger, and eat.
summer 2023 55
RECIPE AND PHOTOS FROM “TURKEY AND THE WOLF: FLAVOR TRIPPIN’ IN NEW ORLEANS” ©2022 BY MASON HEREFORD WITH JJ GOODE REPRINTED WITH PERMISSION FROM TEN SPEED PRESS, A DIVISION OF PENGUIN RANDOM HOUSE.
CLOCKWISE FROM TOP: LLOYD BISHOP/NBC; WILLIAM HEREFORD; ADAM ROSE/NETFLIX; BURGER: WILLIAM HEREFORD
Summer Spritz

When even lighter white and rosé wines sound a little heavy on a hot summer day, go for a spritz. The Italians have long known the beauty of the spritz to combat the heat of summer, relaxing around Venetian bistro tables with a refreshing orange creation—the iconic Aperol Spritz.
A spritz is a refreshing mix of wine with a splash of soda or juice, or, in the case of Italy’s iconic drink, a mix of Prosecco, Aperol liqueur, and a spritz of soda. Usually enjoyed as a predinner apéritif, or “aperitivo” in Italian, its orange and fresh bittersweet taste is meant to bring lighthearted spirit to the happy hour table.
Here’s something to sip on while you relax with a glass: The drink naturally gets its name from a key ingredient, Aperol liqueur, but also a German word. Aperol, created in 1919 from a secret recipe of herbs and roots, has an intense orange flavor with herbal, woody notes and mellow vanilla. The “spritzen,” means “to squirt” in German. In the 1800s, when the Veneto region of Northern Italy was part of the AustroHungarian empire, soldiers and visitors from other areas were said to have found Italian wines too strong, so they lightened them with a “spritz” of water.
Soon after the creation of Aperol, the spritz cocktail bearing its name became popular all over Italy, particularly with folks gathered at cafes in Padua and Venice as a light drink before dinner. In recent years, it has become popular worldwide, and pairs well with appetizers, but also brunch and dinner fare.

Some traditional Italian aperitivo snacks called “cicchetti” are perfect accompaniments for a relaxing late afternoon spritz on the patio. Serve a selection of small side dishes of olives, nuts, hard-boiled egg halves, calamari, artichoke hearts, and tiny sandwiches with meats, seafood, and veggies. A meat and cheese charcuterie board, focaccia with prosciutto, or smoked salmon crostini would also be tasty pairings. Also mix up a spritz with weekend brunches and dinner for a lower-alcohol light drink for the evening.
Try the Aperol recipe here, and your own variations on the formula to enjoy a refreshing spritz throughout the summer in your backyard bistro. Salute!


Aperol Spritz

MAKES 1


3 ounces Prosecco
2 ounces Aperol
1 splash soda, or to taste Orange slice, for garnish


Fill a wine glass with ice. Pour in the Prosecco followed by the Aperol. Add the splash of soda and garnish with an orange slice.

56 real food
pairings
SVETLANA CHERRUTY / ADOBE
The heat of summer calls for lighter drinks. That’s where the spritz comes in. by mary subialka


PREPARE TO BE INSPIRED 3 WEEKENDS OF MULTI-MILLION-DOLLAR HOMES JULY 28-30, AUG. 4-6, AND AUG. 11-13 presented by VISIT LUXURYHOMETOUR.NET TO PURCHASE TICKETS AND FOR LIST OF BUILDERS AND HOMES 25% OFF TICKETS