3 minute read
15. Adding unique effects to your pictures

from The Ontarion - 190.2
by The Ontarion
Next Article

Double Exposure
Adding unique effects to your pictures in Photoshop
Short tutorials on how to make a picture stand out with Photoshop manipulation
ARTICLE AND IMAGES BY NICOLAS BUCK
There are a ton of interesting effects that you can add to your photos to make them more unique and appealing to a viewer. Many of these effects can be created in Adobe Photoshop through easy photo manipulation tutorials. Learning how to use these effects not only helps make your photos stand out, but they teach you helpful tools that can be used in future projects. Here are a few of my favourite effects that can be accomplished within Photoshop. You can also search each of these on YouTube to find more in-depth or visual tutorials.
Definitions
Mask:
A mask will appear beside a layer after you click “add layer mask.” The white portions of the mask will show what is visible, and the black portions of the mask show what is hidden. While on the mask layer, tracing over the photo with a white brush will reveal, and tracing over with a black brush will hide (you can change the opacity of the brush at the top toolbar).
Select and Mask:
This is for more accurate selection. You click this at the top toolbar after making your original selection.
Match color:
Image - Adjustments - Match color, will allow you to match the colour tones of a selected layer to another layer within the Photoshop file.
Blending mode:
This will be found at the top of the layer menu where you can select between different blending options for the layer that is selected (ex. Screen, Multiply, Overlay, etc.) each has a different purpose to experiment with.
Adjustment layer:
Found at the bottom of the layer menu, here you will find different effects to add to your layer (ex. Hue and Saturation, Exposure, Curves, etc.). DOUBLE EXPOSURE GLOW EFFECT
A double exposure photo is a photo that is masked within a photo (A ‘mask’ allows two layers to be visible in the same photo, where the top layer would only be shown in areas that were traced over with a selection tool).
Step 1
Place a photo over another photo and lower the opacity on the top photo temporarily so you can line up where you want the top photo to be shown in the bottom photo.
Step 2
Trace the main portion of the photo on the bottom layer and when that is done, click the Mask button on the top photo (this will only reveal a portion of the top photo within the selection you made on the bottom photo).
Step 3
Blend the photos by changing the opacity on the brush to get a clean look.
Step 1
Select the object you want to glow and make three duplicates of it while adding a Gaussian Blur under the filter tab (5px to the first duplicate - 150px to the second - 300px to the third). Then go to blending mode on each duplicate layer and change the mode to Screen.
Step 2
Add hue and saturation to change the colour of the glow.
Step 3
Darken the exposure of the image — but not the glowed object.
Step 4
Lightly brush areas around the glowing object to make it seem more natural (brush on the exposed layer).
DISPERSION EFFECT
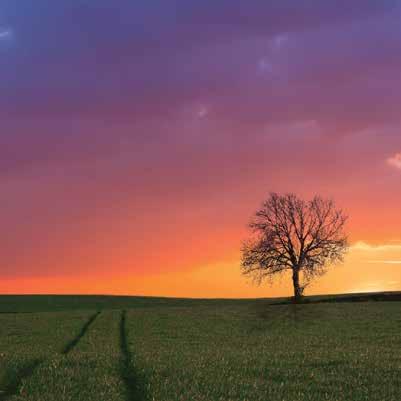
SKY REPLACEMENT
Step 1
Mask out the original sky (use Select and Mask found on the upper tool bar after clicking the Quick Selection tool. Then click Refine Edge Brush to get harder areas such as tree branches).
Step 2
Place the new sky behind the foreground layer.
Step 3
Colour match the foreground to the sky to get a more natural look.
Step 1
Cut out the main image that you want to disperse and paste it onto a background.
Step 2
Duplicate the dispersion image, and, on the bottom duplicate layer, add a Liquify Effect under the filter tab to stretch out the image.
Step 3
Add a black mask to the stretched image and a white mask to the top image. Use a particle brush to hide some of the top image and reveal some of the bottom image.


