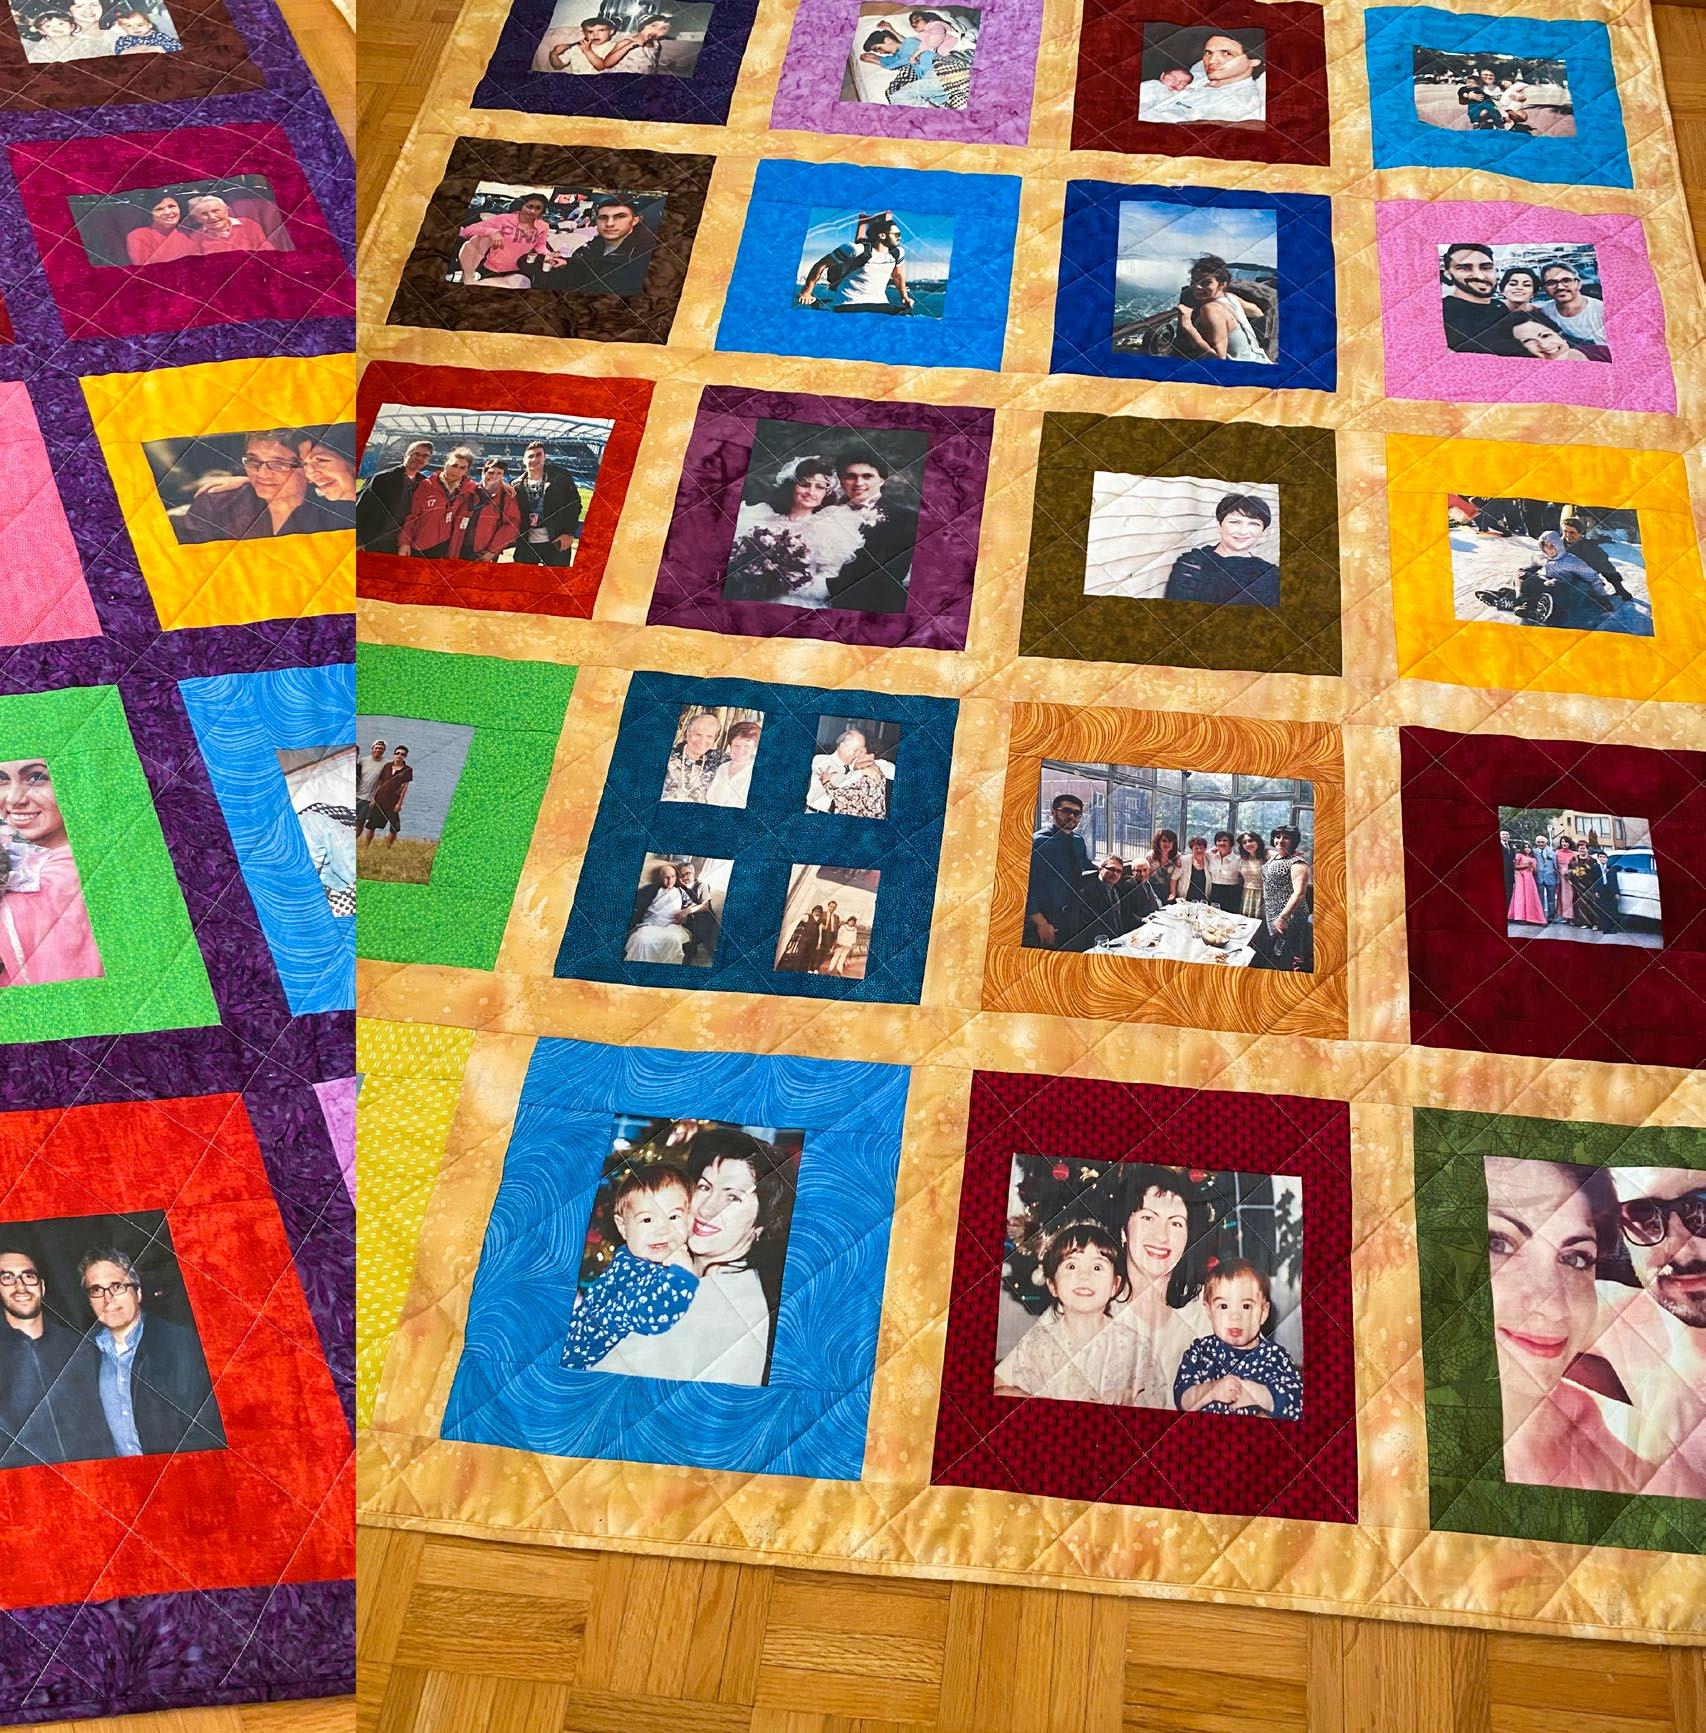




Quilting a memory quilt for a friend or family member is quilting with wild anticipation. As we piece the photos, sashing, and borders we imagine the moment of delivery and the feeling only gets stronger as we sew our way to the finish line – the binding. How will the person react? Surely with great surprise! From the recipient’s perspective, there is a sense of bewilderment to find their favorite photos on a quilt, particularly if it's a surprise! Such was my experience upon receiving a memory quilt from quilter Paul Léger earlier this year. He was in cahoots with my daughter to get photos for the said quilt. The strange part about receiving the quilt is that although the photos were obviously familiar to me it felt in fact like seeing them
for the first time; rather surreal. Receiving a memory quilt is an exalting experience and to this day I haven’t yet stored the quilt away instead it’s still on display like an opened photo album.
Paul and I are so excited to share with you his easy method of transferring the photos to cloth, and everything you need to know to finish your memory quilt. You might finish it in time for the upcoming holidays but thankfully it’s the kind of gift suitable for all occasions throughout the year, even if it’s just to say, ‘just because’. One word of caution, the difficult task in making a memory quilt is choosing the photos!
Also included in this issue is the experience of improv quilting, where Claire Haillot encourages you to let go of the idea of following a quilt pattern and improvise the quilt design. Claire explains the exercise for expanding your creativity in simple steps so you can apply it to your improv quilting.

See what Elaine Theriault has to say about making piping and welting, primarily used by quilters to make their decorative cushions look professionally made. So much to explore.


Enjoy the issue,
Cheerfully,
PUBLISHER, EDITOR-IN-CHIEF, ART DIRECTOR
Carla A. Canonico carla@QUILTsocial.com
PUBLISHER, ADVERTISING SALES
John De Fusco john@QUILTsocial.com
PHOTOGRAPHERS
Carla A. Canonico, John De Fusco
BLOGGERS/CONTRIBUTORS
Elaine Theriault crazyquilteronabike.com Christine Baker christinebaker-fairfieldroaddesigns.blogspot.com
Paul Léger paullegerquilts.com Claire Haillot quiltingwithclaire.com
GRAPHIC & WEB DESIGN
Carla A. Canonico carla@QUILTsocial.com
GRAPHIC ASSISTANT and SOCIAL MEDIA Sondra Armas
WEB and IT SUPPORT Alejandro Araujo
WEBSITE / BLOG : https://QUILTsocial.com


Like us on Facebook : QUILTsocial
Follow us on Pinterest : quiltsocial
Follow us on Instagram : quiltsocial Follow us on Twitter : @QUILTsocial
QUILTsocial is a quarterly eMagazine published by A Needle Pulling Thread. It is available free for personal use online at https://QUILTsocial.com
A limited number of printed copies of QUILTsocial are available for purchase at select quilt shops and specialty stores. Ask for it at your local shop. QUILTsocial is not available by subscription.

If you are interested in carrying QUILTsocial in your store, please email john@QUILTsocial.com
Designers and other contributors who would like to be considered for future issues please email carla@QUILTsocial.com with a brief description of your work and your proposed project for the magazine.
©2022 QUILTsocial. All rights reserved. Issue 24 ISSN 2368-5913
No part of this publication may be reproduced without written permission from the publisher.
All designs, patterns, and information in this magazine are for private, non-commercial use only, and are copyrighted material owned by their respective creators or owners.
EAT, SLEEP, QUILT, REPEAT!


Improvisational or ‘IMPROV’ quilting – Let’s get started (beginner) 10 Strip piecing for IMPROV quilting: WHY and HOW to let go of what you know 12 Creating movement in your strip quilt: What does the trick? 13 Designing your improv quilt for the WOW factor (think about it!) 14 Free motion quilting straight lines: WHERE to start and HOW to move 16 Pieced borders for panels: QUICK and EASY for any size! 19 12 easy steps to making no waste flying geese Pick a size 21 4 tips for adding flying geese blocks to a border with the Brother NQ900 23 4 steps to adding a floating block border to your quilt top [easy tutorial] 25 5 quick steps to calculate yardage for quilt backing [3 styles] 28 The right tools make a memory quilt a fun and easy project (rulers RULE!) 30 Measure, Cut, Trim! How to frame a fabric photo into a quilting block 32 Cutting strips with OLFA rotary cutters – it’s SHARP! 33 Marking the right spots for perfect rows | Strip alignment made easy 34 6 simple TIPS to go from QUILT TOP to QUILT DONE! 36 Lost in the jumble? Here’s how to organize your sewing machine accessories 40 Piping vs welting What’s the difference? Which presser foot works best? 44 The beauty of perfect piping: Here’s how, PLUS tips for success 47 Piping around corners and seamless joins (EASY tutorial) 50 What is welting? Here’s how to make it a DOUBLE and how to USE it! 53 Paul's TIPS


Over the recent years, I really fell in love with improvisational quilting and wanted to get more into it. What better way than to log my progress by sharing my work on QUILTsocial! I don’t believe in New Year resolutions for my day-to-day life. I do, however, believe in setting goals in my quilting creativity to ensure I do get projects done. And this year is just fabulous as I have no more UFOs (thank you pandemic for that) and I have a clean slate!

I found that many quilters like seeing improvisational, or ‘improv’ for short, quilts but are afraid to try it as we’re so accustomed to following a pattern. So, my goal will be difficult as improv usually means going with your creativity and not following a pattern. But to get you started, I’ll do my best to write in detail, like a pattern, my steps to making my first improv quilt.
I was inspired to make this project in January, with all the snow and the beautiful blue skies. I reminded my boyfriend, as he looked at the bright blue sky and said how beautiful it was, that a bright blue sky in the middle of winter is actually the first sign of sub-zero temperatures and that it wasn’t a good idea to stay outside too long.
And this year we’ve had quite a few of these days to make me realize that yes, the sky is a gorgeous blue color when it’s cold. That’s when I realized I wanted to capture this moment in my very first improv project.
Claire HaillotI went through my fabric stash and found exactly what I needed.
• 6 fat quarter of whites and off-whites (3 solids and 3 tone on tone) (A)

• 1 fat quarter of solid medium blue (B)
• 1 fat quarter of solid dark blue (C)
• 2 scraps of batik in very light blue and off-white (D) - (I couldn’t find the color I needed in my fat quarters so I only had the equivalent of fat eights.)
This process can really be tricky. You need to audition your fabrics to ensure they blend well together. Besides the very dark blue fabric, none of the other fabrics should stick out as they need to be ‘blenders’, and blend in. This is when the Sew Easy Color & Tone Guide and Tonal Estimator comes in handy. You can take the tonal estimator and look through it to evaluate the tones of the fabric you chose. Another trick is to take a picture and play with the filters to see it in black and white. If you notice that none of the fabrics stick out, then you’re good to go.

After you choose the fabrics, there’s an important step that’s very crucial for the project we’re about to begin. You need to iron and flatten the fabrics with Mary Ellen’s Best Press Starch Alternative (I use the Scent Free). I love this product! It helps you manipulate your fabrics with more ease and it also relaxes those stubborn wrinkles you find in fat quarters. But the added benefit is that it has a special stain shield that protects your fabrics. And don’t worry, it won’t leave a white residue on your dark fabrics.
For this step, I also used my UNIQUE quilting wool pressing mat - 18’’ x 24’’ - Grey. The pressing mat is made of premium quality New Zealand wool that’s tightly felted and very thick (½’’), and as wool retains heat, it’s like your fabric gets ironed from both sides at the same time. I love it so much, just as much as my Oliso Pro TG1600 Pro Plus Smart Iron. For this project, I do use steam and this iron has a 12.7 oz tank which is really convenient; the iron sends a constant flow of steam and is very hot which makes the flattening of the fabrics easier. So go through your fabrics stash and pick your color combination for this project. Prepare your fabric for the next steps.
Haillot Photos by Claire Choose the right fabrics with the Sew Easy Tone Guide The right tools to prepare your fabricsThe whole point with improvisational quilting is to figure it out on your own, and to give yourself the freedom and permission to create as you see fit! Now, let’s begin our journey with some fun strip piecing.
But until you get there on your own, here are the cutting instructions.
cutting instructions
Group I
From your A fabrics, cut:
• 1 – 2¼” strip (set aside for later)

• 3 – 1” x 22” strips
• 3 – 1½” x 22” strips
• 3 – 2” x 22” strips
Group II
From your D fabrics, cut:
• 3 – 1½” x 22 “strips
• 3 – 2” x 22” strips
We’ll prepare the B and C fabrics in next article.


Now the fun part about this project is that you don’t need to worry too much about the quilting police! It’s OK if your strips are not cut perfectly straight. In fact, it adds character to your project. You can choose to cut some strips at 1¼” and 1¾”. So, if you have scraps, go with the widths you have, and don’t go smaller than ¾” or larger than 2”.
I do have to say that I kept a portion of each fat quarter to be able to make the binding with the same fabric. So, ensure you keep at least 1 strip of 2¼” of each color to make your binding. To give you an idea, I needed 156” of binding for my project.
Winter Sunshine – My first improvisational quilt All set up with my favorite tools for some improv strip piecingLet’s begin our journey with some fun strip piecing.
For sewing the pieces together, I used Gütermann Cotton 50wt Thread in the beige color. But for my choice of fabrics, I could also use ecru, pongee, beige, or ivory. I also installed a new Klassé Universal Sharps Needles - Size 80/12

Grab all your Group I strips and sew them 2 x 2 (meaning 2 strips side by side lengthwise). Pick each strip randomly to create as many diverse groups of 2, not matching colors or strip size. Make 24 units with sizes varying from 2” to 3” x 22”. Remember…there is no quilting police. This means that not only can you cut your strip a bit crooked, you also don’t need to sew perfectly at the ¼” seam allowance. However, it’s very important to press the strip using Mary Ellen’s Best Press Starch Alternative to ensure the strips are nice and flat.
Sewing strips in groups of 4 After my groups of 2 were nicely ironed, I went back to my sewing machine to sew them 2 x 2 once more giving me 12 units of 4 strips with the size varying from 4” to 5” x 22”. I also went back to my UNIQUE quilting wool pressing mat - 18” x 24” - Grey to iron the strips using my Oliso Pro TG1600 Pro Plus Smart Iron and Mary Ellen’s Best Press Start Alternative

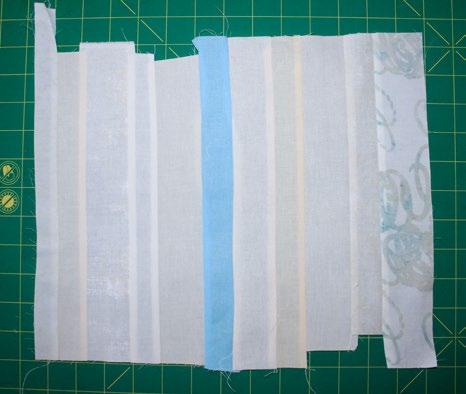
Sew one strip of your Group II fabrics randomly to the edge of each unit. The strip sizes of these 12 units will now vary from 6” to 7” x 22”.
Cut each unit in half, in the middle of the 22” length, to give you 24 units we’ll call A Units.


Sewing strips 2 x 2

Adding a fifth strip and cutting in half


I came up with a quick way to create movement in my piece.
I thought creating 6 units where the seams align horizontally would definitely create movement where all the other seams are vertical. Here’s how I quickly created those units while adding bolder colors.
In your B fabric, cut:
• 1 – 2¼” strip (set aside for later)
• 2 – 1½” x 22” strips
• 2 – 2” x 22” strips
Then, cut each strip in half so you have:

• 4 – 1½” x 11” strips (B1)
• 4 – 2” x 11” strips and cut in half lengthwise (B2)
In your C fabrics, cut:
• 1 – 2¼” strip (set aside for later)
• 2 – 1½” x 22” strips
• 2 – 2” x 22” strips
Then, cut each strip in half so you have:
• 4 – 1½” x 11” strips (C1)
• 4 – 2” x 11” strips and cut in half lengthwise (C2)
Adding a dark blue strip to the mix

Adding a light blue strip between 2 A units
Aligning your ruler with the seams
Cutting 6 strips in varying widths
Using the UNIQUE sewing seam-fix seam ripper to remove a seam from each tube 6 unique strip pieces for the Winter Sunshine quilt
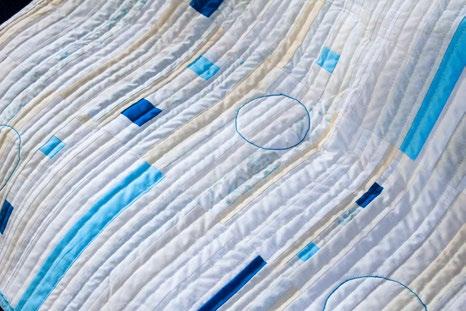

What’s important to remember is to allow yourself time to pause, review and make modifications to the pattern I’m suggesting, so you can tap into your creativity. Now that you have all the units to finish the Winter Sunshine quilt top, let’s continue the process to create your very own improv quilt! I’ve done my best to give you the main steps to create an improvisational quilt, as I hope it’ll allow you to understand how liberating it is to create without having to always follow rules.
Is your blade dull on your rotary cutter and you’re too afraid to change it because you’re unsure how to position the washer and nut? That’s what I love about this rotary cutter…it’s simple to switch blades and get back to your quilting. Here’s how:

Video: Change blades in seconds with the OLFA Quick-Change Rotary Cutter
Let’s get back to the quilt top assembly. Take 2 A units and sew them randomly together, adding a D strip in the middle. Makes 1 unit we’ll call B
Take your Group III units (the 6 strips you made from previous post) and insert them in the rows where you feel they make the best visual impact. Don’t be afraid to use your seam ripper to position them within a unit. See how adding horizontal strips enhances the visual flow? This is exactly the fun part of an improvisational quilt, experiencing movement through alternative directions and color.

Winter Sunshine – My first
Take all your Group A units, as demonstrated in previous post, and cut them so they measure 9½” in height. The width will vary on each unit and that’s OK. Align your seams with the lines on your ruler to ensure your strips continue to have a vertical flow. I used my Omnigrip Ruler – 12½” x 12½” for this step along with my OMNI Cutting Mat17” x 23” and OLFA Quick-Change Rotary Cutter 45mm.

This is your chance to step out of your comfort zone and play with fabrics to really take in the improv experience. Head to your design wall and place your B unit in the center. Add randomly 5 A units to make a row. Position randomly 7 A units above to make another row. Position randomly 7 A units below to make another row.
Let’s add a touch of color to the mix. Add some of your B1, B2, C1, and C2 strips left from previous post. Take the time to look at your piece on the design wall and go with your instincts. No one is watching, so enjoy the process. Take the time to test several alternatives, and take pictures. If you’re afraid that you can’t commit, or are too uncertain of your decisions, then set a timer and once your time is up, sew exactly what’s on your design wall.
Once ready, stitch rows together. Makes 3 units size 9½” by approximately 44”. Then, stitch the 3 rows together.
Again, don’t stress over making the seams align. It’s improv quilting which means it doesn’t have to! Your final piece should measure 27½” by approximately 44”.
 improvisational quilt
Adding a fifth strip and cutting in half
Playing with the units on your design wall
Adding the Group III units to the mix
Adding colored strips to the mix
Finished Winter Sunshine quilt top


Let me show you how to finish your improvisational quilt made with a little guidance from my Winter Sunshine design and beautiful Sulky and Gütermann cotton threads. Once more, this part of the project is very much improv, which means letting go of rules and enjoying the process. Let’s start with what you need to quilt your project.
materials fabric
• 35” x 55” [89 x 140cm] fabric for backing
• 45” x 60” [114 x 152cm] Fairfield Quilter's 80/20 Quilt Batting thread
• Gütermann Cotton 30wt Thread 300m - Natural Tints
• Gütermann Cotton 30wt Thread 300m - Light Sand
• Gütermann Cotton 30wt Thread 300m - Col. 9917
• Sulky Cotton Solid Color 12wt Thread 46m - Dark Turquoise
• Sulky Cotton Solid Color 30wt Thread 457m - Dark Turquoise
• Sulky Cotton Blendables 12wt Thread 302m – Ice notions
• Klassé Quilting Needles Cassette - Size 80/12 - 5 count
• Odif 505 Temporary Adhesive for Fabric
I sandwiched the quilt using a backing fabric that was just perfect as it had blues that matched the quilt top and had pines which reminded me of winters. For a puffier look, I used a mid-loft batting. I also chose 30wt light-sand Gütermann thread for thick quilting, which meant I also used a size 80/12 quilting needle , but your machine may prefer a size 90/14 quilting needle. The quilt size is ideal for setting up the backing and batting on my kitchen table and then using the Odif 505 adhesive spray to sandwich the quilt.
Using the leftover strips to create the binding on the quilt


Remember all those 2¼” strips you cut and set aside? Sew them together and use them for your binding! For a quick finish on this project, I actually stitched the binding on the bottom of the quilt and proceeded to fold the binding to the top of the quilt. And instead of hand sewing the binding to the quilt, I simply picked a decorative stitch on my sewing machine and stitched the binding to the top of the quilt.
Odif 505…my favorite adhesive spray to sandwich the quilt
I started by free motion quilting straight lines on the top, starting in the middle of the piece and quilting to the edges and altering quilting directions (meaning a line upward and then one line downward). Of course, I also randomly picked the length between my quilting lines. Altering from ¼” to 1”. Once these quilting lines were done, I felt it still needed one more quilting. So, I chose a dark blue thread (I used Sulky 12wt for the top and 30wt in the bobbin) and quilted circles to balance all the blue squares in the quilt.
Finishing the binding with a decorative stitch
And that’s how I finished my improv quilt using the winter blue sky as my inspiration, and essential notions such as Odif 505 Temporary Adhesive for Fabric to ease the process. I finished the quilt just in time to welcome spring and see all the snowmelt to make room for luscious greens. Perhaps this’ll be my cue for my next improv quilt? Who knows! I hope you go on this ‘improv’ journey to creating your version of this quilt, and please do share your finished project with us using the #TheSewGoesOn.
Free motion quilting straight lines while improvising
Claire Haillot www.quiltingwithclaire.com My must-haves to quilt the project



 Christine Baker
For these series I will show you how to use any size panel to make a lapsize quilt. I’m using my trusty Brother NQ900 sewing machine and a panel with coordinating fabrics I’ve wanted to use for over 2 years!


We’ve had a lot going on at our house over the last few months and to make things even crazier we got a puppy two months ago. Although she’s super cute and I wouldn’t trade her for the world, I found it’s a lot harder to get into my studio to do anything creative. As soon as I get into something, I see she’s gotten into something too or about to piddle on the floor! So, I wasn’t all that confident that I’d actually get this project done, but I think Piper and I have reached a puppy milestone… these last few days I’ve actually been able to sew while she either plays or sleeps on the carpet beside me. Here’s Piper, our 4-month-old Springer Spaniel – I think you’ll agree there isn’t anything cuter than a puppy sleeping on a button rug!!
So now that Piper and I have figured out how to spend constructive time in my studio, I’m super happy to be back piecing quilts! I don’t think I’ve actually pieced a quilt top since I went to a quilt retreat last November and I didn’t realize how much I missed it!
This bee-themed panel by Gail Pan measures 24” x 44”. Panels come in all shapes and sizes, but one of the sides is usually the entire width of the fabric bolt – most often 44”. Sometimes panels are printed sideways too so that the height of the panel is 44” but the width is 60” or more. I talked about Using fabric panels in quilt patterns in my July 4, 2016 QUILTsocial post. In this feature, I’ll show you how to add pieced borders to any size of panel you find.
I also have yardage of 5 different coordinating fabrics, so I decided to make a lap quilt I can use on my back deck on chilly evenings.
Most quilters love using panels because you can make a fast and easy project for lots of different occasions like baby showers and birthdays. Sometimes, however, panels are not printed squarely on the fabric and this can cause headaches. If your panel has a wide border around the edge, use your cutting mat and rotary cutter to trim your panel so the edges are as straight and as even with the design printed as possible. Keep any printed border as wide as you can as your eye won’t notice small differences in width with a wide border. The narrower a border, the more accurate you need to be.
If your panel doesn’t have a border on it, then you can easily trim it so the edges are squared up and even with the printed design.

Notice when I trim my panel that I’m lining up one of the lines on my ruler with the inner edge of the blue border. As long as I’m trimming so the border width is even, I don’t worry if I’m not trimming off an even amount of excess fabric all the way around.
Now that my panel is trimmed, I need to decide what borders to add. For my decision process, I always just lay my fabrics on my cutting table and overlap them to show the different widths of borders, and then stand back to see if I like them. I don’t cut anything until I decide which ones go where.
First, I want to see what the black bee fabric looks like next to the dark blue border on the panel.

When you’re designing your own quilts, pay attention to the width of the borders that are beside each other. For good visual appeal, make sure a border is either wider or narrower than the border beside it – not the same size. Since the blue border printed on the panel is about 2” wide, I’m cutting my red fabric 1½" wide. I almost always attach my side borders first and then the top and bottom borders. I’m cutting 4 strips 1½" x the width of the fabric (WOF).


Next, I try out the red fabric with the scattered bee images to see what it looks like between the blue and the yellow fabic. As you can see in the two pictures, the red fabric shows up much better beside the blue, and looks nice with the yellow word fabric, so I’m making my first inner border red.
Cut the red border fabric 1½" wide.
My Brother NQ900 sewing machine has a great foot that I always use for my piecing. I use the J foot and set the machine on stitch 29 in the utility stitches and it sews a perfect ¼" seam.
Setting
Sew on side borders first.
Press the border seam away from the panel.
First, I sew on the two side borders using a ¼" seam.


Then, using my Oliso Pro Smart Iron, I press the seams towards the border (away from the fabric panel).
Then I sew on the top and bottom inner borders and again press the seams towards the borders.
Now my panel is trimmed and I sewed on the first inner border using my Brother NQ900 sewing machine.
Sew on top and bottom borders.

I’m using my Brother NQ900 sewing machine to show you how to make flying geese blocks the no waste way!


If you don’t want to do the math yourself, just type no waste flying geese measurements in your search engine and you’ll find many charts with all of the cutting directions listed.
Step 5 Place the squares.
Pin two of these squares to opposite corners of the large geese fabric square, aligning two raw edges of the small squares with the raw edges of the large square. Also, make sure to line up the drawn line on the two small squares. Pin in place. Your two small squares will overlap a tiny bit in the middle.
Step 1 Pick your fabrics.
The first thing to decide when you’re making flying geese blocks is what fabric will be the geese and which fabric will be the sky. The geese are the large triangles, and the sky is the small triangles on either side. I’m making three different colored geese but I’m using the same sky fabric for all of them.
Step 2 Decide on your size.
Decide on the finished size of your flying geese blocks. I decided to make them 6” wide – this automatically makes them 3” tall, as flying geese blocks are traditionally half as tall as they are wide.
Step 3 Calculate and cut.
Once you decide on your size, calculate the size to cut your fabrics. For this method, take the finished width of the block and add 1¼" and cut a square of your geese fabric to this measurement.
Since I want my blocks to finish at 6” wide, I cut my square of geese fabric 7¼” x 7¼” (this is the black fabric in the photo).


Now take the finished height of the block and add 7⁄8” Then cut four squares of your sky fabric to this measurement. My flying geese blocks will be 3” high so I cut four squares of my sky fabric 3 7⁄8” x 3 7⁄8” (this is the yellow fabric in the photo).
Cut one large square of geese fabric and four small squares of sky fabric.

Step 4 Mark the sky fabrics.
Draw a diagonal line on the back of the four blocks of sky fabric. These lines don’t show on the finished quilt so you can use any type of marking pen or pencil that you prefer. Mark the line from one corner to the opposite corner.
Pin two small squares to opposite corners of the large square of fabric.
Step 6 Sew ¼" away from the line.
Sew ¼" away from the line from one corner of the large block to the other.
Draw a diagonal line on the back of the smaller squares.
Sew from corner to corner ¼" away from the line.
When you get to the end, turn around and sew along the other side of the drawn line.
Sew on the opposite side, from corner-to-corner ¼" away from the line.

Step 7 Cut along the line.
Cut along the drawn line to separate the square into 2 triangular units.
Step 9 Pin in place.
Pin the remaining two sky squares to these two triangular units. Once again align the raw edges of the small squares with the raw edges of the large triangle. Orient the square so the drawn line ends at the point of the large triangle.
Step 12 Press.
Press the small triangles and the seams away from the larger triangles.

Cut along the line.


Step 8 Press.
Press the small triangles and the seams away from the large triangle.
Pin the remaining small squares to the two units.
Step 10 Sew.

Sew down both sides of the drawn line leaving a ¼" seam.
Press the seam away from large triangle.
Press the seam away from the large triangle.
Sew down both sides of the drawn line.
Step 11 Cut apart.
Cut these two units in half along the drawn lines to make a total of 4 units.
Cut along the line.
4 identical flying geese units

Ta-da!! Now we’ve got 4 identical flying geese units. Repeat all these steps to make the total number of flying geese units you want for your quilt. I decided to make 24 flying geese units for my borders. Since I’m not putting them around the panel, it really doesn’t matter how many I have, but I’d like them to take up about half of the distance along each border. I think 5 blocks for each of the top and bottom borders and 7 blocks for each of the sides will work well. When you’re designing, remember that odd numbers of blocks or images are almost always better than even numbers.
To make 24 flying geese blocks, I’ll need 6 large squares of geese fabric (I’ll cut two from each of three fabrics) and 24 small squares of sky fabric.


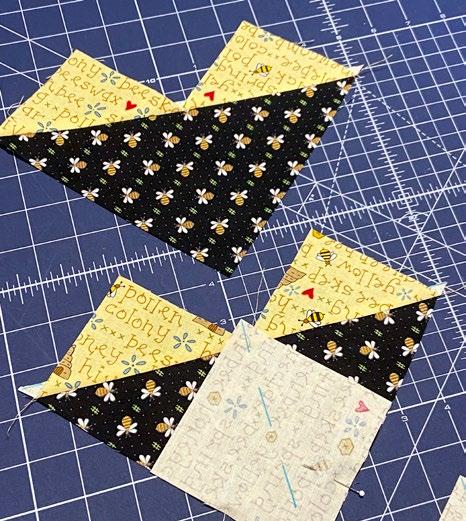
Now that I’ve got all of my flying geese blocks made, the next step is to sew them together to make the borders.
Flying geese units
TIP 1 Alternate the blocks.
Since I have three different colors of flying geese blocks (red, green and black) I’m alternating them on my four borders. First, I’m sewing together four sets of black and red blocks so the points of the blocks are oriented in the same direction.


Press the seam away from the point of the flying geese block.
Next, I’m sewing a green block beside the black block and then another red block. All my borders will have the blocks in the same order – red, black, green, red, black, green, and so on.
Two borders with 5 blocks each
As you can see, no two borders are the same!
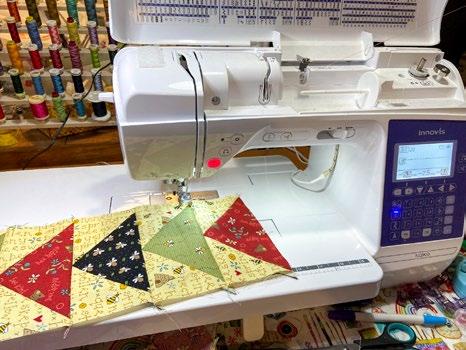
Sew one black flying geese block to one red flying geese block.
TIP 2 Press the seams in the right direction.
Now I need to press the seam between the two blocks with my Oliso Pro Smart Iron. I find it easier to press this seam towards the block on the top (the red block in my picture). This way the bulk of the seam from where the points meet is pressed toward the side that doesn’t have any bulky seams.

Sew four flying geese blocks together.
Here, I’ll keep adding blocks onto each of the four borders until I have two borders that are 5 blocks long and 2 borders that are 7 blocks long. Even though I’m putting the three different colored blocks in the same order, I’m starting each row with a different color so that my borders will each look a little different.
Two borders with 7 blocks each
TIP 3 Measure blocks before cutting other fabrics.
I’m making these 4 borders long enough to fit the quilt by adding my yellow word fabric to the ends. Before you cut your border fabric, measure your flying geese borders with your ruler to make sure they are the width that you think they are – mine are 6½" wide.


TIP 4 Make sure the blocks are pointing in the right direction.

Sew one fabric square to the bottom end of each of your shorter pieced borders. The bottom end of the flying geese strip is the end that doesn’t have the point.
Sew one of the short strips of border fabric that you set aside earlier to the opposite end of one of your short borders (the end with the point). Repeat with the second short border.

With your rotary cutter and using a cutting mat, cut four strips of your border fabric the width of your flying geese border (mine are 6½") across the width of fabric (WOF), and then cut one square from two of these strips (again, mine are 6½" squares). Set aside the remainder of these two strips.
You now have two borders with a square of border fabric at one end of the 5 flying geese and a longer strip of border fabric at the other end of the flying geese blocks. These are your top and bottom borders.
To make the side borders for the quilt, sew one of the remaining border strips to the top (pointed end) of each of the remaining flying geese block borders.
Step 1 Cut inner and outer border strips. The first thing I need to do to make my floating border is to cut strips for an inner and outer border using the same fabric I used for the ‘sky’ in my flying geese blocks – my yellow word fabric. Since my small red border, which I attached previously, was cut 1½" wide, I’m cutting these strips 2" wide. I need about 7 strips for this border and another 7 for the last border, so I’m cutting them all now – all 2" wide using my rotary cutter, quilting ruler and cutting mat.
To get strips long enough to make my borders, I need to sew these 2” strips together end to end. Unless I’m piecing together striped fabric strips, I always join these strips with a mitered (diagonal or 45°) seam. As you can see, for narrow strips like these, I don’t cut or pin, I just layer the fabrics together so they are perpendicular to each other, and then I sew diagonally from one side to the other. For wider strips, I pin the strips together and then draw a diagonal line to follow when I’m sewing.
Then with my Oliso Pro Smart Iron, I press these seams open
Just sewing the extra long border to the quilt and cutting off the excess can lead to borders that are too long and wavy.
Press the seams open.
Step 2 Cut borders and sew the borders onto the quilt.
Now we measure the length of the quilt from top to bottom and cut our two side borders to this exact length. Lay the quilt on a flat surface and pin the border to the side of the quilt before sewing. By measuring, cutting and pinning we help the borders to lay flat.

Sew the side seams first.

After you sew both side borders onto the quilt, press the seams towards the borders. Measure the width of your quilt, cut two borders this exact length, and pin them to the top and bottom of the quilt. Sew and then press the seams towards the borders.


Step 3 Trim the pieced borders and attach them to the quilt. Now we attach our flying geese borders. Before we sew on the side borders, we need to measure the length of the quilt again and trim the two long flying geese borders to this exact length. Make sure you cut off the end of the border that doesn’t have the flying geese units.
Next, pin these borders to the sides of the quilt and sew them on with a ¼" seam.
Pin the long borders to the two sides of the quilt.
Sewing with an accurate ¼" seam ensures the points of your geese don’t get lost in the seam. Press your borders. With a pieced border like this, I like to press the seams away from the pieced border, towards the center of the quilt. This helps to disperse the bulk of the seams where the points meet.
Sew the two side borders on first.
Measure across the width of the quilt and trim the two shorter borders to this exact length. On your flying geese border, measure from the end that has the square of fabric, and cut away the excess fabric from the opposite end.

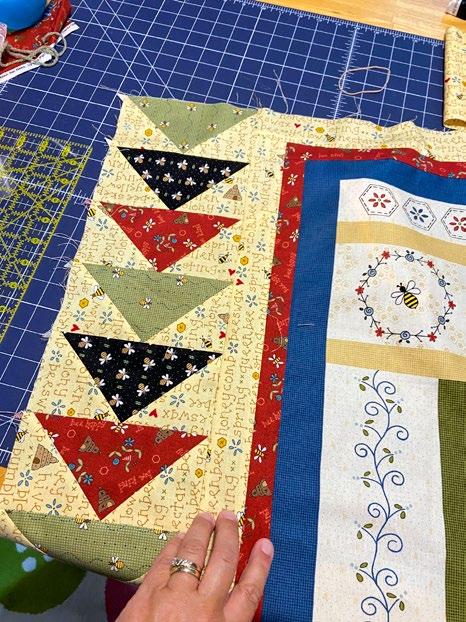

Pin one of these borders to the top of the quilt, matching up the seam between the square of fabric and the flying geese on this border and the seam that you just sewed to attach the side border. Sew with an accurate ¼" seam and press the seam away from the pieced border.
Repeat this process with the bottom border.
Step 4 Add the final border.
The final step is to sew on the last outer border using the remaining 2" fabric strips. Measure the length of the quilt from top to bottom and cut two side borders this exact length. Lay the quilt on a flat surface and pin the border to the side of the quilt before sewing. Sew one side and then the other and press the seams toward the border.
Now measure the width of your quilt, cut two borders this exact length, and pin them to the top and bottom of the quilt. Sew and then press the seams toward the borders.
And that’s how you make a border with pieced blocks that appear to ‘float’ on the background. This technique works especially well with Amish-style quilts with a black background – the pieced blocks appear to ‘pop’.
Now that the quilt top is finished, I’m getting ready to make my backing using my Brother NQ900 sewing machine

Press the seam toward the inner border.

Sew on the second side border and press.
Sew the top and bottom borders to the quilt.
The ‘floating’ flying geese border


Lots of quilters buy wide backs of quilting fabric that are 104” to 120” wide to put on the back of their quilts. But if you can’t find one you like or have fabrics in your stash you want to use up, you probably need to piece your backing.
Here’s how to figure out how much fabric you need for the back of your quilt.
Step 1 Measure your quilt.
Easy-peasy! Just measure the length and width of your quilt and add about 6” to 8” to both of these measurements. My quilt top is 42” x 64” so I need a backing that’s at least 48” x 72”. This is an awkward size because it’s just a bit wider than the width of most quilting fabric, so I need to piece my backing.
Step 2 Decide if you need to piece horizontally or vertically.
This step is probably where most quilters go off the rails, but you really don’t need to fret! Just look at the size of your quilt and decide which side of the quilt can be most closely matched by a multiple of the width of fabric. For this measurement, we as pattern designers always assume the fabric is 40” wide –we do this because some quilters will prewash (and shrink) their fabric before sewing. So, for my quilt, the length is 72” which is closer to 80” (2 x 40”) than my width (42”) is. So, if I piece my quilt horizontally, the back will look like this:
If your quilt top is longer than 80” and the width is 65” to 70”, then you’re probably best to piece your backing vertically (so the seam goes down the middle from the top to the bottom. The quilt backing will look something like this:
One of the most fun ways you can make a backing is to use left-over blocks or fabric scraps from the front of the quilt to make a backing that matches. The sky’s the limit when it comes to how you can piece this backing. If you have a piece of backing fabric that’s long enough for your quilt, but is just a bit too narrow, you can use this method easily by splitting the fabric in half lengthwise and then making a pieced strip that goes down the middle of the quilt back like in this diagram:
Vertically pieced quilt back
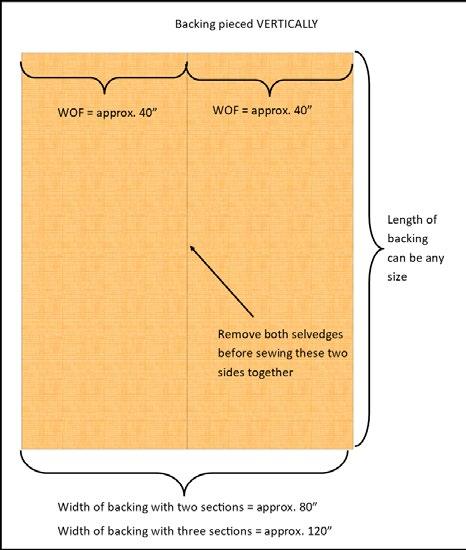

You can also piece three sections together to make a backing that’s wide enough for a king-sized quilt.
Multi-piece quilt back
Since I have a nice large piece of the yellow word fabric and large blocks of the fabrics that I used to make my flying geese, I’m using this method to make my backing.
Step 3 Calculate yardage.
Now that you decided how to piece your quilt, you need to calculate the amount of fabric required. If you’re piecing horizontally, you need two fabric sections that are 6” to 8” longer than the width of your quilt. So, a quilt that is 64” wide needs two sections that are about 70” long. The total amount of yardage is 140” (70” x 2). Divide this number by 39 to get the number of meters needed:140/39 = 3.6m. To get the number of yards needed divide this number by 36: 140/36 = 3.9yds which is approximately 37⁄8yd.

Step 4 Cut fabrics.
Cut your backing fabric into sections in the lengths needed. Trim one selvedge edge off each section. If you have directional fabric, make sure to cut the correct edges off so when you sew the fabrics together, they’ll both be going in the right direction.


If you’re piecing two sections vertically, cut them 6” to 8” longer than your quilt and remove one selvedge from each. If you’re piecing 3 sections together, cut both selvedge edges off the middle section.
You may be asking “Why do you cut off the selvedge?”. We do this because the selvedge edge does not stretch like the main fabric and is more tightly woven than the rest of the fabric making it harder to quilt through, and it won’t shrink the same when washed.
Step 5 Sew and press.
I’m using some of the leftover fabric from my flying geese blocks to make a strip to go down the center of my backing with my Brother NQ900 sewing machine. For this method, trim the blocks so they’re all the same width –don’t worry about what length they are. Sew the rectangles of fabric together using a ¼" seam, and then press all the seams open. By pressing the seams in your backing open, you make the seams less bulky for quilting.
Press the seams open.
Press the seams open.
The completed quilt backing
Once the center strip is long enough, sew the two long sections of the backing fabric to either side of your pieced strip. Sew the cut edge of the backing fabric to the pieced strip, not to the selvedge edge. And then press the seams open.
Here’s my finished backing. Now I’m all ready for quilting!!
Now that I’ve got my quilt top and backing made, I’m ready to layer them with my batting and start quilting with my Brother NQ900 sewing machine. I think simple lines that go from top to bottom are a quick and easy way to quilt the lap quilt on my home machine. Hopefully, my new puppy Piper will keep letting me have some uninterrupted quilting time and I’ll be able to get this quilt finished before the end of patio season!
Christine Baker christinebaker-fairfieldroaddesigns. blogspot.com


Many see a quilt as a blanket to put on a bed, we quilters know better. A quilt is love that brings comfort in so many ways. One way I bring comfort with my quilts is by making memory quilts using t-shirts, clothing, and photographs.

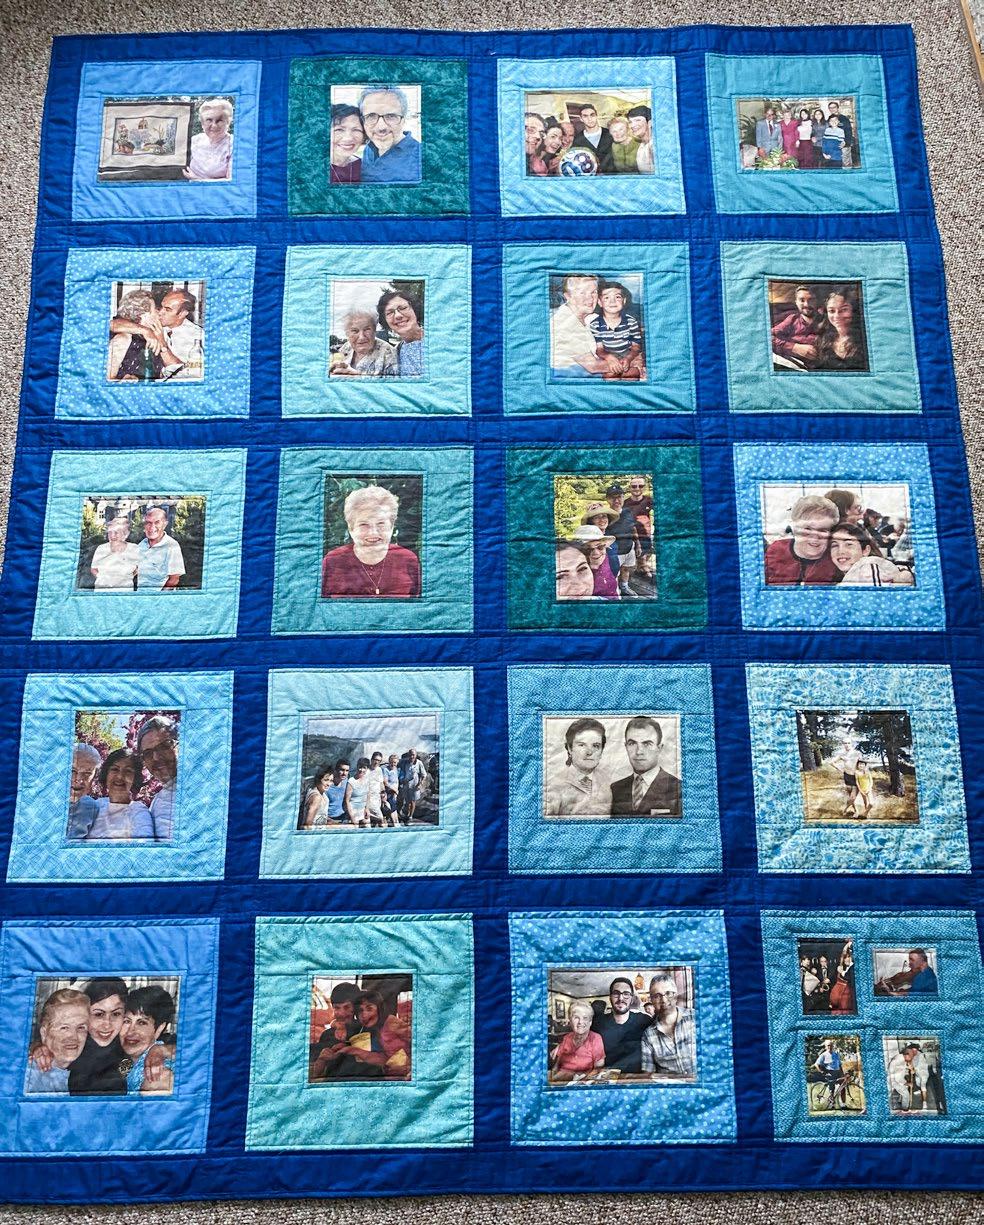
The memory quilt I’m showing you was made as a Mother’s Day gift for Delfina. It measures 58½” x 72½”.
Here’s a list of all the great tools I used to make this quick and easy quilt.
• OLFA Splash Rotary Cutter 45mm
• OLFA Tungsten Tool Steel Rotary Blade 45mm
• OLFA 12½” Square Frosted Acrylic Ruler
• OLFA 6” x 12” Frosted Acrylic Ruler
• OLFA 6” x 24” Frosted Acrylic Ruler
• OLFA Square Rotating Cutting Mat
• Oliso Pro TG1600 Pro Plus Smart Iron

• Sew Easy Freezer Paper for Quilting and Applique - 12.1m x 38.1cm (13.2yd x 15”)
• UNIQUE quilting 12 Clever Clips Small Important note: Read all instructions prior to starting Other essential materials for this project:
• 20 digital photos
• 11⁄3 yards [1.5m] white fabric (read all instructions prior to getting fabric.)
• 2¼ yards [2.0m] for lattice work (or use scraps to add a variety of colors to the quilt.)
• 5⁄8 yard [0.5m] for binding
• 3½ yards [3.25m] for backing
• 1 double size batting
When selecting the fabrics for this project, consider using the recipient’s favorite colors. I used aquas to frame the photos and a blue which has a hint of aqua for the lattice, as these are Delfina’s favorite colors.
The first step in creating this quilt is to transfer the photos to fabric. I transferred the photos to a document I created using a word processing software. Once the document was created, I played with the photo’s size, by this I mean I enlarged the photo as big as I could. Normally one photo per page. If the photo was of poor quality or low resolution, then I didn’t use a whole page for one photo.
Paul Léger Family photo memory quiltsWhen the photos and documents were ready to be printed, the fun began.
Printing photos on fabric can only be done using an ink jet or bubble printer. DO NOT use a laser jet printer. Here are two ways I transfer photos to fabric.


Method 1
1. Using the OLFA 12½” x 12½” square ruler, cut 20 – 8½” x 11” rectangles of the Sew Easy freezer paper.

Cut 20 pieces of freezer paper measuring 8½” x 11”.

2. Cut 20 – 8½” x 10¾” rectangles from the white fabric.
3. Press fabric rectangles onto the freezer paper leaving a ¼” space at one end. Do not center fabric on the freezer paper. The purpose of leaving a ¼” of freezer paper is to simply make it easier to feed into the printer.

5. Separate the freezer paper from the fabric.
6. Heat set ink by using the iron’s hottest cotton setting. I do this step on both sides of the fabric.
Method 2
I also use fabric sheets that are already prepared for ink jet printers. The fabric is a bit thinner with a backing to make it easy to feed in the printer. Ask the local quilt shop for these specialty photo sheets.
Once the photo is printed and the backing removed, the fabric is ready to be trimmed.
Both methods are great. However, with each method, remember to test, test and test
Press freezer paper onto fabric leaving a ¼” space on the paper.
4. Print photos to the fabric. When printing, I always do a test print first to ensure all is working well. Also, I don’t change any of the printer settings.
7. Trim fabric with photo to the desired size.
Trim photo to the desired size.
Important note: Ensure you follow every step in Method 1 prior to printing multiple photos. I’ve had photos where the ink didn’t set properly and came out when washed. I don’t know if the issue was the fabric, the iron not hot enough or the batch of ink. Now when I use this method, I use it for a project that will not be washed.
The idea to print photos on fabric can be nerve-wracking the first time you attempt it. The important thing to remember, as I mentioned earlier, is to test.
Sew Easy Freezer paper and OLFA’s 12½” x 12½” ruler
Having the right tools makes the whole process easy. With the help of the OLFA 12½” Square Frosted Acrylic Ruler and Sew Easy Freezer Paper for Quilting and Applique, I was able to cut and trim as needed.


Now I’ll show you how I framed and trimmed the photos. To do so, I needed the help of the following tools.
• OLFA 12½” Square Frosted Acrylic Ruler
• OLFA 6” x 12” Frosted Acrylic Ruler
• OLFA Splash Rotary Cutter 45mm
• OLFA Square Rotating Cutting Mat
With all the photos printed, I purposely cut and trimmed all the photos in different sizes. I like the idea of having photos with a variety of shapes and sizes because it adds interest and makes it less formal looking. Think of grandma’s mantle with all the photos, small, big, wide, in color and black and white. What fun it was to look at.
Adding a frame around a photo is no different than adding a border around a quilt. You add the frame to the sides first. Then you add the top and bottom frame pieces.
With every photo measuring a different size, there is not a one size fits all when it comes to cutting the fabrics for each photo’s frame pieces.

Note: Read the next two steps and suggestion prior to starting.
I decided when I started this quilt, that each framed photo (block size) would measure 12½” x 12½” unfinished. With the block size in mind, the first step was to measure each photo individually. This photo measure 6½”x 8½” unfinished.
Because the photo is 8½” wide, I needed to add pieces measuring 2½” x 6½” to both sides of the photo, this made the block 12½” wide.
Note: All seams are ¼”.
Add frame to sides of photo first.
OLFA essential toolsStep 2
To add the top and bottom frame pieces, I again looked at the size of the photo, which is 6½” in height. Adding a fabric strip measuring 3½” x 12½” to the top and bottom gave the block it’s needed height of 12½”.
TIP Cut the frame pieces a bit wider than needed. I’ve learned from past experiences to add at least ¼” more than is needed because if I measure or cut wrong, or sew a bit more than a ¼”, that little bit of extra fabric ensures I’ll have a 12½” x 12½” block after trimming. Looking at the example for this photo, the pieces I cut measure 2¾” x 6½” for the side and 3¾” x 13” for the top and bottom frame pieces.
OLFA makes two rotating cutting mats. The OLFA Square Rotating Cutting Mat measures 12” x 12” and the OLFA Square Rotating Cutting Mat measures 17” x 17” which is a great size for cutting the 12½” x 12½” blocks safely with the help of the OLFA 12½” x 12½” ruler
With the rotating mat, you can cut one side, then rotate the mat without having to move the block or ruler. This reduces the chances of cutting mistakes, and injury.
Now to add the frame to the remaining photos. Remember my TIP. Cut the fabric pieces a bit wider than needed to make sure the blocks are the desired size when trimmed.
OLFA does make great cutting tools such as the ones I used to frame and trim my photos for my memory quilt.


Add the frame pieces to the top and bottom of photo.
Trim blocks to 12½” x 12½”.
Photos printed on fabricAnother important tool we all need is a quality rotary cutter such as the OLFA Splash Rotary Cutter 45mm. Remember, OLFA rotary cutters come in a selection of colors and sizes such as 18mm, 28mm and 60mm. There’s a rotary cutter for every quilting and sewing need.

Don’t forget to get extra OLFA Tungsten Tool Steel Rotary Blades. It’s always a good idea to have some on hand.
Once the fabric is folded, to get four layers ensure:
• the edges of your fabrics are all nicely aligned;
• the folds are tight; and
• the fabric section to be cut lies flat on the cutting table.
With the OLFA 6” x 24” ruler, square off the edge of the fabric by removing the selvage. A good, sharp rotary cutter blade easily cuts through 4 layers of fabric.
Cut 25 – 2½” x 12½” strips.
The quilt has four photos in each row that need five 2½” x 12½ strips. This gives you one strip between each photo and one at each end of the row.

Complete the five rows. Then take a break.
Let's add lattice between each photo - a process that’s simple and quick.
From the fabric selected for the lattice, cut the following:
• 6 strips measuring 2½” x 58½” (I always cut my strips 2” longer than needed.)
• 25 strips 2½” x 12½”
• 4 strips 2½” x 70” for the quilt binding (If you use another fabric for the binding, cut seven strips measuring 2½” x width of fabric.)
TIP Always cut the longest strips first.


Cutting long strips of fabric is not difficult. To start, I prefer to unfold the fabric by its width and refold it by its length.
If you need strips that measure over 46” long, fold the fabric twice to give you 4 layers.
Remove
Cut the four 2½” x 70” binding strips first, followed by the six 2½” x 58½” lattice strips and finish the cutting with the 25 – 2½” x 12½” lattice strips. Take advantage of this step to remove the raw edges at the end of each strip.

Add 2½” x 12½” strips between each photo and at each end of the rows.
Make sure you use a great quality rotary cutter such as the OLFA Splash Rotary Cutter 45mm with replacement OLFA Tungsten Tool Steel Rotary Blades. You can get OLFA rotary cutters in different colors, size and style.
Cut the longest strips first.
After you cut the long strips, cut the 25 –2½” x 12½” strips. For this step, I cut 12½” pieces of fabric and used my OLFA 12½” x 12½” ruler. Makes the work so much easier.
OLFA rotary cutters and blades Selvage.The only tools we need are pins, the OLFA 6” x 12” Frosted Acrylic Ruler and a pencil. Sewing a long strip between a row is almost as easy as it was to sew the 2½” x 12½” strip between the photos.
When I work with strips that divide rows, I make sure all vertical rows are aligned perfectly. The important step to ensure alignment is perfect is to mark the six 2½” x 58½” strips before you sew them.
This is where I use my pencil and the OLFA 6” x 12” ruler. I lightly mark on the back of the horizontal strips to indicate where the vertical strips need to intersect:
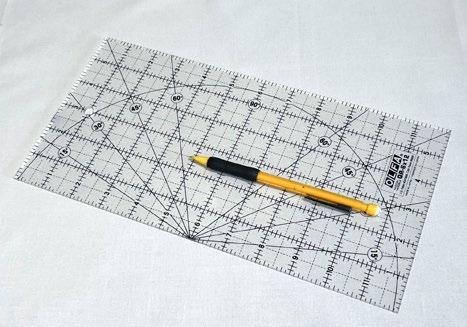
• The first mark needs to be at 2¼” then 12”.
• The subsequent marks are at 2” and 12”, respectively.
TIP Mark both edges at once and mark all the strips at the same time.
Now, line up the marks with the seam of the vertical strip on each row. Sew a strip between each row and on a strip on both the top and bottom of the quilt.
After you sew the horizontal strips to all rows, sew the rows together. The row intersections should be perfectly aligned.

With all the horizontal strips and rows sewn together, the quilt top is complete.

When making a quilt top, not all steps need many tools and notions. This demonstration only required pins, a pencil, the OLFA 6” x 12” Frosted Acrylic Ruler and a sewing machine.


OLFA 6” x 12” ruler and pencil
Mark the back of the strips to indicate where the vertical strips intersect.
Perfect alignment of the vertical stripsI showed you how to make a memory quilt such as the one I made for my friend Carla’s mother as a Mother’s Day gift. The techniques I used, such as using a ruler and pencil to mark your strips for perfect alignment, were simple and easy with the OLFA rulers, rotary cutters, and mats. These tools made the creative process a pleasant one.


As a reminder, here are the tools I had fun using.
• OLFA Splash Rotary Cutter 45mm
• OLFA Tungsten Tool Steel Rotary Blade 45mm
• OLFA 12½” Square Frosted Acrylic Ruler
• OLFA 6” x 12” Frosted Acrylic Ruler

• OLFA 6” x 24” Frosted Acrylic Ruler
• OLFA Square Rotating Cutting Mat
• Oliso Pro TG1600 Pro Plus Smart Iron
• Sew Easy Freezer Paper for Quilting and Applique - 12.1m x 38.1cm (13.2yd x 15”)
• UNIQUE quilting 12 Clever Clips Small

I’ll be the first to admit that I’m not the most prolific machine quilter, and with a limited budget I can’t send out all my quilts to be quilted by a professional with a long arm machine. When I decide to quilt my own quilts, I keep it simple. There’s nothing wrong with simply quilting straight lines. The line can be marked as I did on this quilt. I quilted ¼” on each side of the lattice strips and around each photo. If I make a quilt I know will be used and washed often, I quilt it a bit more.
After I baste my quilt, I always roughly trim the batting and backing to approximately ½” from the quilt top’s edge. Then once the quilting is completed, with the help of an OLFA ruler and rotary cutter, I trim the access batting and backing.
After quilting is completed, trim away excess batting and backing.
A variety of OLFA tools with UNIQUE clever clips and Sew Easy freezer paperBefore I sew the binding strips together, I draw a 45-degree line on each end of the strip. This is because, when I grab a strip to sew, I just need to find either end as they’re both marked.

I personally have no objections to anyone securing the binding edge to the quilt by machine. If you use the right color thread and take care sewing, it can give a nice result.
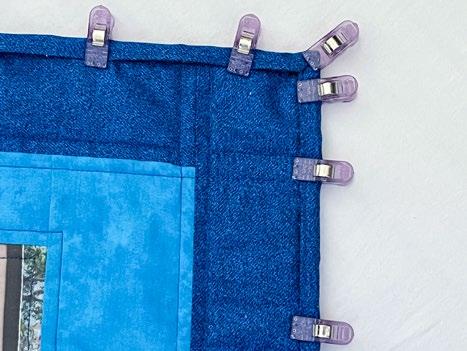
With the quilt quilted and the binding on, Mamma Delfina’s quilt is done.
As I showed you with this memory quilt, quilting doesn’t need to be complicated to be beautiful and appreciated.
Mark


I struggled for years with the corners when putting on binding. My friend Jim recommended I snip a little of the corner after I sew on the binding. This trick works nicely…no more struggles.
Snip corners to easily turn the binding over.
This is probably the easiest part of putting on a binding, but can be tiring for the fingers trying to hold it down. To make this job easier on my fingers, I use small UNIQUE quilting Clever Clips. I place them every few inches, and put them closer together in the corners.


Here's an invaluable resource for you.
I mean, it doesn’t get better than this. You'll find the name of each presser foot, its purpose, a photo of the presser foot in action, and instructions on how to use the presser foot. The part number is listed, and there's a series of circled numbers, which I'll explain in a minute.
Not only is this guide valuable for identifying our presser feet, but the tool is a good learning resource. While hands-on classes at your dealer are worth taking, there's a lot of educational material in this free guide!
It's a great idea to go through all your presser feet, find it in the User's Accessory Guide and then do some samples - more on that later. I’m guilty of buying a new presser foot and felt I now knew how to use it because I’d purchased it!
It's the Accessories User's Guide. I have a hard copy of the guide, which isn't easy to get.

This guide is like a bible to me, and I use it all the time. Not only does it list all the accessories for the Husqvarna Viking sewing machines and sergers, but there's also a hoop compatibility guide for each of the embroidery machines. You'll find diagrams and instructions on using the various presser feet or accessories.


HA – I soon learned that’s not the case. I have to open the package, get some sample fabric, and try it out. I'll make many mistakes, and only then can I call myself competent with the presser foot! So, keep that thought in mind – you know where I'm going with this.
OK – so back to those little circles – what the heck do they mean? They’re there to help you buy the correct presser feet for your sewing machine!

Inside the front of the User's Accessory Guide is a chart of all the Husqvarna Viking sewing machines, which fall into nine groups, depending on the technology associated with that grouping. Things like the maximum stitch width, the width of the feed teeth, Integrated Dual Feed, and so on.
The sewing machine in Group 6, as listed in the User's Accessory Guide
If I scan the list, I find the Opal 670 right at the bottom, so I know any accessory with a 6 in the circle is appropriate for the Opal 670. Now it’s so easy to get the right accessories.
The Designer EPIC 2 is in Group 9.
Instructions for using the Clear Piping Foot

Category 9 is for the Designer EPIC 2, a 9mm sewing machine, so the presser feet are wider and have the cutout in the back to work with the Integrated Dual Feed system (if applicable).
This information will help you sort through all your sewing machine feet if you have multiple machines.
If your presser feet are still in the packages, you'll see the name in multiple languages, part numbers, and sewing machine groups in the little circles.

So, how should one store their sewing machine feet? One way is to use the accessory tote you can purchase through your local dealer.

Inside are many zippered pockets, which greatly help sort and store those presser feet. The pockets are large enough to hold the labels in the packages, or you can use a labeler and add your labels.
I'm in the process of sorting all my presser feet that come as part of the accessory kit for the various Husqvarna Viking sewing machines I own. I have all my Utility Feet A in one pocket, all the B in another, and so on. I have some small plastic bags, and I'll put the various sizes in a baggie and then put that category in one zippered pouch. You can purchase extra pages for the zippered tote!
However you decide to sort your presser feet, this accessory tote will be convenient! Now, why haven't I used this before?

Should I need to go to class, I'll grab the feet I need for the machine I'm taking, and I'll be good. The rest of the feet can stay home in the tote.
The new presser feet have the stitch width engraved on them. While it’s possible to tell the different widths apart, this helps to keep things under control.

So, you know what I'm going to say next – you have work to do! If you don't have a copy of the User's Accessory Guide, you need to go and get it.
Then dig out all your presser feet. Are they organized? If not, then you have a job to do. If they are, you can go through the guide to see which ones you're missing. Make a list so you can avoid buying duplicates the next time you're shopping.
The front of the packaging for the piping foot
The back of the packaging has several pictures you'll also find in the User's Accessory Guide or online. If you've sewn for a while, this may be all the information you need to use it, while others may want all the details in the guide.
The back of the packaging for the piping foot
 Sewing machine feet stored in zippered pouches
The presser foot size engraved at the back of the foot

Did you get out your accessory feet and start sorting? I made a start, and my Husqvarna Viking Accessory Tote will look amazing. Le'ts look at different size piping or welting, and which presser foot to use with the Husqvarna Viking Opal 670
But first, let me show you how I started organizing my presser feet.
I'm so excited!! I've sorted quite a few feet, and hopefully, I'll have had a chance to get everything labeled by the end of the week. WOW – I impressed even myself!!
OK, let's get into the topic and I'll tell you upfront that I dove off the deep end. I had a plan for this feature; however, what I was going to say will get broken up over several steps because there's too much information to share at once.
I have a curious mind, and when I get an idea in my head, I like to dig as deep as I can, especially if it's an area where I don't know all the ins and outs. As I mentioned, this feature is all about the accessories for the Husqvarna Viking sewing machines.
Here are a couple of examples where I made and used piping.
Presser feet sorted by the maximum width of stitches

I found some small plastic zippered bags in my stash, perfect for sorting the presser feet. I used my handy label maker to indicate the size of the feet.
And if that wasn't enough excitement, I put the zippered bags into a clear pocket in the accessory tote and labeled the pocket. I’ll be so organized; I'll have way more time to sew!
There are several piping feet, which I think is an excellent category to explore. However, as I went through my plan, several questions arose about the piping feet, and I decided it was better to stop and research the answers to my questions before we moved on to using the piping feet.
My favorite way to learn something is to pick a topic, experiment, and research to get the answers. Yes, I could take a class and learn from others, which I occasionally do, but I love to play with the tools, which helps me remember the information.
As we explore presser feet used to make piping, I'll use the Husqvarna Viking Opal 670 as my model. I love this little sewing machine – it's an excellent machine for retreats or even as your main sewing machine, and it packs a big punch!


Adding piping to a garment or a home decor project can add a beautiful polished look to the finished product.
Piping around the edge of a cushion cover
Piping in a high contrast color brightens up the collar of a jacket.
Piping applied to the collar of a jacket
The presser feet are sorted and labeled in the accessory tote
Contrasting piping also adds a decorative element to the outer seams on a tote bag and adds an accent to the pocket. Piping along the edges of a bag, especially the bottom, helps prevent wear and tear on the fabric. Who knew that?


As I look through the Accessory User's Guide, I find three feet with the word piping in the name, and they do not look the same. The Mini Piping Foot has a plastic version, the Piping Foot is metal and the one on the right? Well, it looks very different, and we'll address that later.


A dark blue line of piping provides contrast in the teal blue fabric
And you can also add piping along the binding of a quilt or table runner to add a little pop of color.
The Mini Piping Foot, the Piping Foot, and the Mega Piping Foot
What's unique about piping feet is their underside, where you find a groove in the bottom to allow the piping cord to fit under the presser foot. The Mega Piping Foot works a bit differently as you'll see later.
Contrasting piping on the top of a pocket and the outer seams of a tote bag
Here's another example of where the piping helps identify the top of the pocket inside a tote bag. The pocket and the lining fabric are the same, so it's hard to see the top of the pocket. Problem solved with the pink piping.
Piping added inside the binding on a table runner

Before we get into the details of making the piping and how to sew it into our projects, let's step back and look at the available piping feet for your Husqvarna Viking sewing machine. Although I'm using the Opal 670 for my demo here, these piping feet also work on the other Husqvarna Viking sewing machines.
Pink piping identifies the top of the pocket inside this tote bag
Piping in this quilted table runner provides a contrast between the two pieces of fabric in similar colors.
And that brings up a good point. If you want to purchase a new presser foot for your Husqvarna Viking sewing machine, do yourself a favor and drop by your local dealer. You want to get the namebrand product to avoid any potential issues, and we also want to support our local dealers!
The groove in the bottom of the Mini Piping Foot and the Piping Foot
One has a large groove – much larger than the piping foot, and one of them has two large grooves.
I have to say, I puzzled over that wording (piping versus welting) long enough. It's time to figure this out.
It turns out that piping and welting are the same things. Well, it makes sense since the feet look similar. One difference could be the result of where you live, as some countries call welting, piping, and vice versa. The best distinction is that piping (which tends to be smaller and softer) is for garments, and welting is for home decor – predominately in cushions and furniture.
I was almost sure that piping and welting were the same things, but I was never 100% sure, and you know what they say – knowledge is power. I also learned how to use two presser feet in my stash better.
Piping is created by encasing a cord inside a strip of fabric. You'll find various thicknesses of cord and content choices, so match the cord to your fabric. You can also use yarn, rat tail, and many other cord types. Here are a few things to keep in mind.


• It's possible to make piping from a thick fabric like denim, but it adds a lot of thickness to the seam allowances.
• If your piping fabric is transparent, you want a nicely finished cord, like rattail on the inside.

• If your project is small or delicate, you want a thinner cord to make your piping. Use larger piping for large items.
• Larger piping tends to be stiffer, so save it for furniture, cushions, or tote bags.


• If you have a lot of curves to go around, the thinner piping is easier to handle.
Here's a sampling of the cording I've accumulated over the years, and I'll be using these to show you how to select the right piping/welt cord presser foot.
Other tips for making piping or welting

• Shrink your piping cord if the fiber content is from a natural fiber.
• If your item has curves of any kind, you must cut the piping fabric on the bias.
• The smaller the piping, the easier it is to go around corners or curves.
• Instead of making a 90-degree corner, it's easier to overlap the piping at the corner, as I did with the pink piping on the table runner we saw earlier.
Which size piping foot to use and when? So, let's look at the various piping feet to determine which one to use for your project.
Here's a photo of the Mini Piping Foot using the smallest cording I have on hand. The foot is plastic, so we can see precisely where the piping sits under the presser foot. See how it sits in the groove on the underside of the presser foot. The groove keeps the piping cord in place and allows you to get a smooth straight line of stitching when making your piping and also when inserting it into your project.
Of course, you have fabric surrounding the cord when you’re sewing, but seeing the cord like this helps see exactly how the piping foot works.
Be careful of this very large cording. It has netting on the outside, and I find it's not very smooth and could result in rippled piping once it's finished.
You want to make sure the piping cord is not too large for your chosen piping foot. The cord I'm using here is for making roman blinds and is easy to get from your home decor fabric store. Although it's hard to tell in this photo, the presser foot sits on the feed teeth, allowing the feeding mechanism in your Opal 670 to advance the fabric evenly to give you consistent stitches. While the stitching will not be visible, making good quality products is essential.
This time, I used the Piping Foot and the 1⁄8" mini-welt cord - the same one I used here. The Piping Foot is sitting right on the feed teeth, so this gives me a beautiful seam with consistent stitches.
While the largest piping cord I tried (about 3⁄8") appears to fit, the cord is flattened by the foot, and there's a good chance that part of the loosely woven cord will get caught in the stitching line, which would add thickness where I don't want it, and the presser foot also was not sitting on the feed teeth.
The thin piping cord sits entirely in the groove allowing the presser foot to rest on the feed teeth


In this instance, I placed a 1⁄4" mini-welt cord in the groove of the Mini Piping Foot. It's hard to see, but the presser foot is not sitting on the feed teeth. So, if I use this cording with this Mini Piping Foot, my stitches won’t be even because the feeding mechanism won't work correctly, and I'd probably end up with a wobbly seam. Not good when you're trying to use the piping to create finesse in a garment.
Well, let's try another experiment. This time, I put a slightly thicker cord under the Piping Foot, and it's easy to see that this won’t work, as the presser foot is not sitting on the feed teeth. I'd have a huge mess for sure.


And that's where the Mega Piping foot comes into play! The piping cord sits beside the foot, allowing us to use any cord thickness!

This time, I'm using the Single Welt Cord Foot with the thicker cord, and it's perfect!
The Mega Piping Foot

WOW – that's incredible! Who knew there were all these options? It doesn't matter what kind of piping you want to create; a Husqvarna Viking piping or welting presser foot is available.

 A 1⁄8" welt cord under the Mini Piping Foot and the foot does not rest on the feed teeth
A metal piping foot with a 1⁄8" welt cord in the groove
A thicker cord under the Piping foot and the presser foot is not sitting on the feed teeth
The Single Welt Cord foot and the thicker cord
The 3⁄8" piping cord is too large for the Single Welt Cord Foot

I'm using the Husqvarna Viking Opal 670 to make the piping, but I'll also be using the Husqvarna Viking Designer EPIC 2 to share something pretty cool with you.
The technique I'm showing is the same for the Clear Mini Piping Foot, the Piping Foot, and the Single Welt Cord Foot. The only difference is to match the cord size to the foot and cut the fabric strip to the appropriate width. Remember, the smaller piping is used mainly for clothing, while the thicker and usually stiffer piping is for home decor.
I'm using the Clear Mini Piping Foot, 1⁄16" cord, and a strip of fabric cut 1" wide. A good rule of thumb is to cut the fabric strip twice the diameter of the cord, plus at least 1½". Use bias fabric strips if you're using the piping on a curve. If you need to make a long strip of piping, join the fabric strips (or bias strips) with a diagonal seam and press the seam open.

Start by attaching the piping foot to the Opal 670. Fold the fabric strip in half with the wrong sides together, and insert the cord. It helps to leave about ½" of cord extended beyond the end of the fabric to ensure it doesn't shift within the fabric.
Here's something else we need to be aware of – the position of our needle. I don't want my first stitching line to be right against the cord. When I sew the piping into my project, I want the stitching line to be snug against the cord, but not right now –more in a minute. The bottom line is we need to move the needle to accommodate what we are trying to achieve.

The Opal 670 has 29 needle positions – the center needle position for basic sewing and then 14 positions to the left and 14 to the right. This feature provides us with super flexibility when we need to move the needle.


The first step is to secure the cord within the strip of fabric. Notice the stitching line is close to but not on the cord. It doesn't matter which color of thread you use at this point.
How does one move the needle? You use the Stitch Width function on the screen to move the needle to the left or right.
In this photo, the needle is in the center position.
Cutting the fabric strip extra wide allows you to trim the seam allowance. You'll see it's hard to get the seam allowances even, and there are rulers you can use to trim your seam allowances for more precision. The most versatile ruler lets you trim 1⁄16" to ¼" piping with a ¼" or ½" seam allowance.
Did you notice the raw edges are uneven? It's challenging to get the fabric evenly distributed around the cord. Hence, if you start with a wider strip, there's room to trim the seam allowance to the desired width. I find the thicker the cord, the wonkier the raw edges. Better to use a wider strip and trim than to have a wonky seam allowance.
Using the Plus and Minus icons below the Stitch Width setting allows us to move the needle to the left or the right. Notice how the space around the number changes color, which alerts me at a glance that the needle is no longer sitting in the center position. Super easy to identify. I love that. If I'm going to use this same setting for another project, it might be a good idea to take note of the setting or add it to the notes you'll keep for using the piping feet.
Supplies to make mini piping The piping cord inside the fold of the fabric strip The cord stitched inside the fabric stripAlternatively, you can save the settings in one of the memory slots.
The needle is now sitting to the left of the center position

If you're working with a stitch that has a width to it, say a zigzag stitch, you can still move the stitch to the left or the right, but the amount of movement to the left or right will also be affected by how wide the stitch is. You can't exceed the maximum stitch width of your sewing machine.


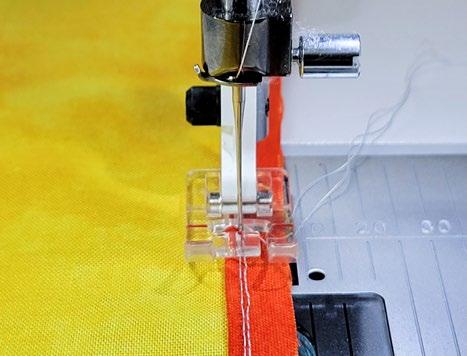

Now let's sew the piping into a seam. This technique works for all types of seams and all three piping feet. Later, I’ll show you how to start and stop a continuous piped seam and how to handle turning corners.
Depending on your skill level and your project, you may want to baste the piping in place before you add the second layer of fabric. Why would I baste? If there are a lot of curves or tight areas, or corners, I want to ensure that the piping is well positioned, so there are no surprises when I do the final seam. I'll baste the piping in place using the appropriate piping foot, and if you want to get a little closer to the piping cord, move the needle one more notch to the left. Use a basting stitch (length of 4.0) if you prefer.
Line the raw edges of the piping along the raw edge on the right side of your base fabric and ensure the cord is in the groove on the underside of the piping foot.
When I stitched the cord into the piping fabric, the needle was already reasonably close to the cord, so when I basted the piping to the base fabric, I moved the needle only one position to the left. Sometimes, this gap is larger, or the line of basting stitches may be right on the first line of stitching.
You'll use your piping foot again to sew this seam. Remember, the cord will run along the groove in the bottom of the foot to ensure a nice even seam. This time, position the needle so the stitching line is snug against the cord but not sewing into the cord. If you sew into the cord, this increases the bulkiness of the seam allowance, and you don't want that. It also makes the piping appear uneven on the right side.
Here's a picture of the needle in the center position.
The piping basted to the base fabric
Check that the piping is where you want it to be along the edges, curves, or corners. If things are good, it's time to add the second layer, sandwiching the piping between the two layers of fabric.
The needle is in the center position
Here's the needle several positions to the left. This needle position is too far to the left to sew the seam properly, as the stitching line will fall right on the piping, but you get the idea of how and why we can position the needle.
Add the second layer of fabric
The needle repositioned several notches to the left
The last thing to do is to sew along the seam. The groove keeps the cord in the correct position, and since it's basted to the base layer, the layer also stays put. All we need to do is ensure the raw edge of the new piece of fabric lines up with the raw edge of the piping and the base fabric.
Sewing the final seam to sandwich the piping between two layers of fabric
Here's the completed seam with piping. If you were careful with the needle position, your piping will be even, and none of the threads should show on the right side. If you're having difficulty, you may want to sew the final seam with matching thread.

Press the seam allowance to one side depending on the project. Try to not flatten the cord, so carefully press along one side. A wool pressing mat comes in handy as it helps to cushion the round shape of the piping without it getting crushed on a flat pressing surface.
When you cut the cord, place a piece of tape where you’ll cut it. Then slice the cord through the middle of the tape, and both ends will be secure!
And that's how easy it is to make and insert piping. As I mentioned earlier, I don't have space to incorporate corners and stopping and starting techniques, so check out next article.
Here's an essential tip for your piping cord. The ends of the cording can start to unravel and fray quite badly, even when stored neatly in a plastic bag. When you purchase a cord, secure both ends with a piece of masking tape.

Beads and piping?
Do you want to jazz up your piping? Look at this next project, which I must try. I'm moving over to the Husqvarna Viking Designer EPIC 2, which has Wi-Fi connectivity.

Look at this project that showed up on the blog several months ago.
Once you're connected to the internet in the comfort of your home and have a mySewnet account, you'll have access to the mySewnet blog. Now, what does all this mean?
Well, mySewnet is a relatively new ecosystem of information sharing, embroidery software, transferring and storing embroidery files, and much more.
I wrote a post about All about mySewnet ecosystem and how it makes embroidery so easy. The website and tools evolve daily, but this will give you a good overview.
One of the fun things about having a free mySewnet account is accessing the mySewnet blog. Keep in mind the blog is available directly on your Wi-Fienabled sewing machine, such as the Designer EPIC 2.

You'll get tips, inspiration, project files, embroidery motifs, and news on the blog, and it comes right to your Wi-Fienabled sewing machine.

OH – I have to try that. Imagine using beads as the piping cord to get a different look? If you have a Wi-Fi-enabled Husqvarna Viking sewing machine, check out the sewing instructions to find this article. It's several posts back in the Sewing Instructions tab.

Sewing instructions to make beaded piping on the mySewnet blog
WOW – that's so fun to get tips or techniques directly through the blog to the Designer EPIC 2, or another Wi-Fi enabled Husqvarna Viking sewing machine.
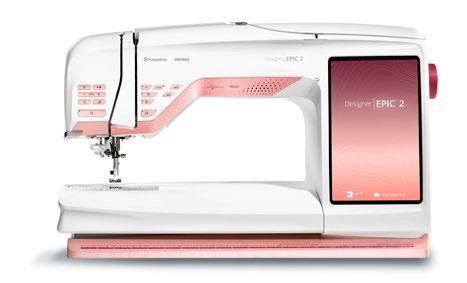
Well, I think that's enough excitement! I've made piping before, but I've learned so much here that I have lots more I want to do! And it isn't even over yet!
Dig out your piping feet and some cord. Take stock of what you have and then start to experiment. It's the only way to learn.
A beautiful seam with piping Use tape to prevent fraying on the piping cord Husqvarna Viking Designer EPIC 2 The mySewnet blog on the home screen of the Designer EPIC 2I went out the other day to see what types of cord were available, other than what I had on hand, and the drapery cord is much too stiff to put in garments. I love the cording used in roman blinds (very skinny) for mini piping that works in quilts, garments, or any other project. However, if you want more substantial but softer piping, the next best thing I found was a cable cord in various diameters, which is pliable and works for garments.
As you can see in this picture, turning a corner with the piping looks challenging, and the piping doesn’t want to go around the corner even when using bias fabric strips. For my samples here, I’m using the roman blind cording with the clear Mini Piping foot, and the seam allowance on the piping is ¼”. I’ll start by basting the piping to the base fabric.
Use a sharp pair of scissors that cuts to the end of the blades and carefully snip the piping seam allowance DO NOT cut the base fabric. Snip just to the line of stitching on the piping, but not through it. The snip should be where the piping will lie at the corner. If you’re using a ¼” seam allowance, like I am, then snip ¼” inside the outer edge of the base fabric.
Line the piping back under the groove in the mini piping foot and continue the seam. You may need to fudge a stitch or two to turn the corner, which is normal, and it’s best to try this technique with small piping before you get to the thicker stuff.
You’ll notice my clip is slightly off from where it should be, as there should be an imaginary diagonal line from the clip to the corner. However, my clip did the job, and you can always add another clip right at the corner if you feel it’ll make the piping lie flatter. You can use a basting stitch for this stitching line, but I used a stitch length of 2.5 and gray thread.
You have to clip the seam allowance, so you can pivot at the corner. Use your Needle Stop Up/Down feature on the Opal 670 to make it easy to turn the corner.
Stop with the needle in the down position when you get close to the corner. With the needle in the fabric, and the presser foot raised, pivot the fabric and the piping, making it easy to see where to clip.


Continue sewing to the intersection, and raise the presser foot, with the needle in the down position.
Then pivot the piping to make a 90-degree corner which is now possible because of the clip. It can be tricky to get that clip right at the corner, and as mentioned here, I find it’s easier to rotate my fabric and snip before I reach the corner. It’s a challenge to snip right at the intersection, but the more precise the positioning of the clip, the flatter the piping will lie.

The clip at the corner allows the piping to turn a 90-degree corner.
The next step is to add the top layer. Wait – I’ll talk about joins in a minute.
Lay your top layer of fabric over the piping and the base fabric and match the raw edges. It’s best to pin all the layers in place.
I’m using the clear Mini Piping Foot to sew this seam, and a stitch length of 2.0 or 2.5, whatever is appropriate for my fabric.
I also moved the needle a notch closer to the piping using the Stitch Width setting, so the stitching is snug against the piping but doesn’t sit on it.
Don’t start at a corner.
With the needle down, pivot the piping to line up the next side of the base fabric

 The mini piping doesn’t want to go around the corner
Snipping the seam allowance of the piping
Preparing to stitch the layers together using the clear Mini Piping Foot
As you can see in this photo, I have one line of stitching to baste the piping, and the second line of stitching is to secure the two layers of fabric together. I did not use a basting stitch length for the basting process.
And when you turn it inside out, the corner is perfect. You’re looking for an even width of piping even at the corners, and this is pretty darn close. I also used a gray thread to sew the last seam, and no gray thread is showing. The tension on the Opal 670 is spot on, and if the tension is good, we should not see the construction thread from the outer side of the project.
The stitched corner with the piping inserted between the two layers
You may want to grade or trim down the seam allowances in the corners to reduce some bulk.


Let’s move on to the join, which can be troublesome if not done correctly. There are two ways to make the join. One method requires trimming the ends of the piping even when you get to the final join and overlapping the piping fabric, and I find this method very fiddly. The second method is the overlap method, which I’m showing you here.
After prepping your piping, it’s time to sew it on. Start along one of the edges, never the corner, and it’s preferable to start on a spot that gets the least attention – the bottom of a cushion, for instance.
Start by placing the piping at an angle, as shown in the photo. Line up the groove on the piping foot with the piping cord and stitch the corners as described above.
Start the piping at an angle when stitching a continuous line of piping.
When you get back to the beginning, end the stitching line by running the piping off the project at an angle. It overlaps the start of the piping, and that’s how it should be. I don’t worry about removing any cord from inside the piping.
Overlapping the piping to finish the continuous line of stitching
Trim or grade the seam allowances in the corner to reduce bulk.
A perfect piped cornerThe back of the project looks like this once the two layers are together. Trim the excess piping away to eliminate unnecessary bulk.
Even looking at it head-on, the join is pretty neat. If I wanted it a little less noticeable, I’d shortened the amount of the overlap. The piping is tiny, so it’s not a huge deal.
The techniques highlighted here also work for purchased decorative cording, with the seam allowance attached, essentially piping. The techniques also work for packaged fabric piping.


The join where the two layers are sewn together
Then turn the project inside out and double-check the join to make sure you’re happy with the results. The join is perfect and is not visible, especially since this join is on the bottom edge of the cushion.
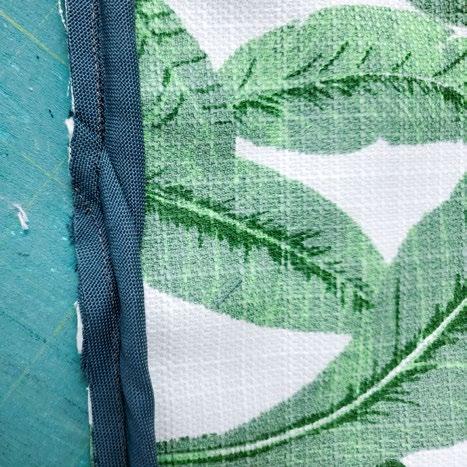


So, what about thicker piping? I made this overlapped join on a cushion using the Mega Piping Foot and ¼” piping cord, and you can read about the technique if you wish. Just overlap the two ends and stitch off the fabric. Make the length where the two ends overlap short, so it’s less noticeable.

Decorative cording with a seam allowance to use as piping
Are you ready to try out the corners and the join? Dig out your piping feet and make a sample or two, and don’t forget to test out different diameters of the piping cord!
The join of the mini piping is almost invisible
The goal is to keep the join the same diameter as the rest of the piping.
The join is the same diameter as the rest of the piping.
You’ll have professional-looking piping, especially when using the right tools. With the Husqvarna Viking Opal 670 and the correct accessory feet, whether you use the clear Mini Piping Foot, the Piping Foot, or the Single Cord Welt Foot, you can do any of the techniques shown here with fabulous results.
Using the overlap technique to join thicker pipingEven though I’m mostly a quilter, I love to play with the accessory feet for my Husqvarna Viking sewing machines. Why? It expands my options for creativity, and we saw how fantastic the piping was as an accent around the binding or as a pop of color between various sections of a table runner.


And imagine the possibilities if you’re making a fidget quilt or a child’s activity quilt. The piping can add texture to a fidget quilt; different piping diameters can help a child learn the difference between small, medium, and large. Or create blocks with varying numbers of piped seams to help a child learn to count.
The more I experiment with sewing machine accessories, the better I handle any design challenge that comes my way. Now, it’s all about welting. I puzzled over this term for the longest time, and as I said earlier, it’s really another word for piping, but welting is often referred to in the furniture world, while piping is for garment sewing.
In the previous posts, I used the Single Welt Cord Foot to make piping with a thicker cord, and now, I’m using the Double Welt Cord Foot
I had difficulty finding someone with furniture with double welting as trim, but my friend Helen has a dining room chair with double welting around the bottom.
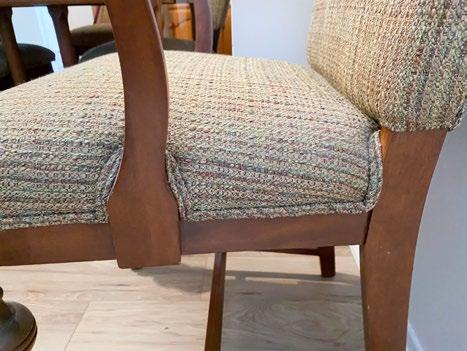


Here’s a closer view of the welting. In furniture, it acts as a trim to tidy up the edges where the upholstery meets the wood.
Lay one of the cords inside the fabric strip and fold the fabric around the cord. The fabric should cover the cord with an excess on the right-hand side, equal to the diameter of the cord.
I’m not planning on upholstering any furniture soon, so why do I want to use the Double Cord Welt Foot?
Let’s start by looking at how to make the double welt as there are two different methods, and they each have a unique way of attaching them to the project. While shopping for some cord the other day, I came across a piping cord used specifically for furniture called T-Braid. The fiber content is paper, so you wouldn’t put it in an item to be laundered. It’s a great example of why we need to know the fiber content of what materials we plan to use and the end-use of our project!
Take two lengths of cord and a wide strip of your piping fabric. The piping fabric is prepared the same way as for other piping methods – cut the strips on the bias (for curves) and join them with a diagonal seam, which is pressed open. The fabric strips should be somewhat wide (about 2”), and you’ll trim the excess fabric away before using the double welt.
Inserting the first cord when making a double welt cord
Then position the second cord beside the first, ensuring the cord sits on top of the excess fabric, with the raw edge tucked in.
Adding the second length of cord to make the double welt cord
A chair with double welting as trim around the edge of the upholstery A close-up of the double welting used on the chairThen flip both lengths of cord over (to the right), so they’re both inside the fabric with the excess fabric to the right.
Using a sharp pair of scissors, cut the excess fabric strip away, leaving a raw edge on the underside of the double welt.

There’s another way to use the Double Cord Welt foot, and this one allows you to sew the double welt to your project. You can use the double welt on home decor items such as cushions, or on garments where it’s often used on the edge of pockets, or applied to the strap of a purse or handles of a tote bag. And, I’m sure there are other places you can use the double welt as a decorative trim.
Both welt cords inside the fabric strip
Thread the Opal 670 with a matching thread in the top and bobbin and attach the Double Welt Cord Foot. Position the two cords within the two grooves on the underside of the foot. I set the stitch length at 2.5.


Trim the excess fabric away using a pair of sharp scissors.

The double welt is now ready to attach to your project. Gluing the double welt to the final product is the most common way of attaching the double welt to furniture. You can also use staples between the two cords; however, the staples may show, so the industry prefers the glue method.
So, if you happen to be restoring a piece of furniture and want some decorative trim to conceal those rough edges, it’s super easy to make a double welt and apply it!!
And remember, the cording used for double welt is stiff and not appropriate for garments, and be mindful of the paper version!

Start with a wide strip of fabric and two lengths of cord. Position the two cords side by side inside the fabric strip with the excess to the right. Notice the big pieces of tape – those tame the ends of the cording.
Preparing to stitch the double welt cord
You can use the FIX function to secure the start and end of your double welt. With the Double Welt Cord Foot, getting a beautiful even stitching line is easy.
An even line of stitching between the two lengths of cord
The double welt ready for application
Inserting the two lengths of cord side by side inside the fold of the fabric

I used the Single Welt Cord Foot to sew alongside the right-hand cord to encase both cords in the fabric. Keep the fabric relatively taut around the cords, but not so tight that the cords bunch up onto each other.
Roll the seam allowance to the back while being very careful to keep the two lengths of cord side by side.


And there it is – your double welt! Isn’t that so much fun! And it was super easy to do.
Using the Single Welt Cord Foot to stitch a tube around the two lengths of cord
This is what it looks like after the first line of stitching.
The seam allowance is rolled to the back
Attach the Double Welt Cord Foot to the Opal 670 and use threads that match your welt fabric. Position the double welt on your base fabric. Place the two cords in the grooves of the Double Welt Cord Foot and stitch down the middle.
The softer the cording you use, the more flexible it is, and you can stitch some gentle curves.
I have to say, I had a lot of fun with this feature learning all about piping, welting, cord, and how easy it all is to make with the Husqvarna Viking Opal 670 and the various piping and welt feet. I know I’ll use my piping and welting presser feet more. It’s a fast way to make decorative trim for any project. If you prefer to purchase your piping, it will take even less time!
Be sure to dig out your piping feet and see what you can create. Share your photos – we’d love to see them.
Thanks for following along. Have a super day! Ciao!!!
The first seam of the double welt
Next, trim off the excess seam allowance.
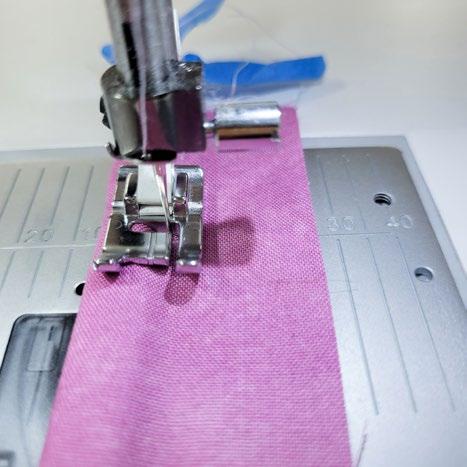
Elaine
Theriaultcrazyquilteronabike.blogspot.com
The excess fabric trimmed away
The double welt stitched to the base fabricthe best way to organize your sewing machine needles


Typically cutting mats only have markings on one side but are double-sided.
So, when the front of a cutting mat is worn-out flip the cutting mat over and use the backside.
Granted it’s nicer to have the markings found on the front of the cutting mat, but when in a ‘quilting’ pinch, the absence of markings won’t be noticed.

giving old cutting mats a second life
Like woodworkers and chefs who have the right tool for every task, I have sewing machine needles for most sewing projects.

A great way to store sewing machine needles is to use a container which has compartments such as an embroidery floss organiser box. Quilting space bliss.
As I finish a quilting project, I immediately cut my scraps into squares or strips. I then organize the squares and strips based on their size in plastic bins.
The square pieces of fabrics will be used as leaders and enders which in turn will be used to make scrap quilts. The strips may be used to make jelly roll quilts or bindings. Shoe boxes are also great to store scraps.
To list your business in this space please call 1.866.969.2678.
Brampton Sew & Serge
289 Rutherford Rd S, Unit 7, Brampton, ON L6W 3R9 905.874.1564 bramptonsewnserge.com monique@bramptonsewnserge.com
Welcome to Your One Stop Sewing Centre! We are authorized dealers of Baby Lock, Husqvarna Viking, and Singer sewing machines and sergers. We also offer a full schedule of sewing classes for everyone.
Brandon Sewing Centre
821 Princess Ave, Brandon MB R7A 0P5, 204.727.2752
Bytowne Threads - Ottawa, ON 1.888.831.4095 bytownethreads.com mlj@bytownethreads.com
Featuring Aurifil thread from Italy. Long staple Egyptian cotton threads - 270 colours in 12, 28, 40 and 50 wt; 88 colours in 80 wt. Polyester Aurilux - 240 high sheen colours. Wool threads - 192 colours. Many kits available. Check our website!
Canadian National Fabric - Brampton, ON https://canadiannationalfabric.com/ info@canadiannationalfabric.com
We are an online fabric shoppe offering a wide variety of fabrics, patterns, books and notions for all your sewing needs. Flat rate Canada wide shipping of $10. Shop in person available by appointment!
Carellan Sewing Centre
1685 Corydon Ave, Winnipeg MB R3N 0J8 204.488.2272, facebook.com/CarellanSewingCentre
35 King Street N, Cookstown, ON L0L 1L0 (new address) 705.458.4546, countryconcessions.com Gitta's
271 Lakeshore Rd E, Mississauga, ON L5G 1G8 905.274.7198 gittas.com questions@gittas.com
Nestled in the east village of Port Credit, Gitta's is the place where stitchers meet with their stitching friends, shop for stitching supplies and see the new stitching designs from Europe and the United States.
Hardanger House, designs by Betty Stokoe Oldham PO Box 1623, Penhold, AB T0M 1R0 403.573.2003 bettyoldham53@gmail.com tnplisting.com/hardanger-house Hardanger embroidery charts and kits. Designs feature contemporary adaptations of this traditional cutwork embroidery from Norway. Shop online at etsy.com/shop/ HardangerHouse. Some digital downloads available.
Haus of Stitches
626 Main Street, Humboldt, SK S0K 2A0 306.682.0772 or toll-free 1.800.344.6024
hausofstitches.ca
Our one of a kind store offers everything you need for sewing, quilting, knitting, rug hooking and needlework. Authorized dealers for Janome and Elna.
K & A Quilt Studio
90 Samnah Cres, Ingersoll ON N5C 3J7 (New Location!)
519.425.4141 kaquiltstudio.com
Where friends and creativity meet! Authorized distributor of Husqvarna VIKING sewing machines, and a Kimberbell Certified Shop. We stock full collections of quilting fabrics, featuring Northcott and Moda, plus lots of patterns, books, and samples to inspire you!
Kelly's Creative Sewing
804 Main St, Dartmouth, NS B2W 3V1
902.435.7380 kellyscreativesewing.ca
kellyscreativesewing@gmail.com
We offer sales and on-site service of high-end domestic embroidery, sewing machines and sergers, as well as a variety of educational programs.
Ottawa Sewing Centre
1390 Clyde Ave, #107, Ottawa, ON K2G 3H9
613.695.1386 ottawasewing.com
ottawasewing@gmail.com
Authorized Dealers for Brother, BabyLock, Elna, Q'nique & Grace quilting frames. Specialize in sales, parts & servicing for all makes & models of quilting/embroidery/sewing/ serger/overlock machines & cabinets by Sylvia Design.
Sew Inspired
375 Daniel St S, Arnprior, ON K7S 3K6 613.623.0500 sewinspired.ca info@sewinspired.ca
Your Ottawa Valley PFAFF® Authorized Dealer. We have a large supply of quilting & sewing supplies, knitting supplies, as well as in stock PFAFF® sewing machines. We also have a listing of sewing and quilting classes.
Sew With Vision
480 Parkland Dr, Halifax, NS B3S 1P9 902.479.2227, sewwithvision.net
550 Days Rd Unit 1, Kingston ON K7M 3R7 613.389.2223, stitchbystitchkingston.com
That Sewing Place
16610 Bayview Ave #10, Newmarket, ON L3X 1X3 905.715.7725, thatsewingplace.ca
The Quilt Store / Evelyn's Sewing Centre 17817 Leslie St, Unit 40, Newmarket, ON L3Y 8C6 905.853.7001 or toll-free 1.888.853.7001
The Quilt Store West
695 Plains Rd E, Unit 6, Burlington, ON L7T 2E8 905.631.0894 or toll-free 1.877.367.7070 thequiltstore.ca
Now with 2 locations to serve you, we are your Quilt Store Destination! The staff here at The Quilt Store is always on hand to provide Quilt Wisdom, Quilt Inspiration and most of all we pride ourselves as the place to make... All Your Quilt Dreams Come True!
The Stitcher's Muse Needleart #101 - 890 Crace St, Nanaimo, BC V9R 2T3 250.591.6873 thestitchersmuse.com info@thestitchersmuse.com
A divine little shop with supplies for all your hand stitching needs! Friendly, knowledgeable, helpful staff. Cross stitch, canvaswork, needlepoint, embroidery, counted thread, lace making & more. Books, patterns, fabric, threads, tools.
The Yarn Guy 15 Gower St, Toronto, ON M4B 1E3 416.752.1828 or toll-free 1.800.836.6536 theyarnguy.com info@sewknit.ca
See us on Facebook, follow us on Twitter! Knitting machines, sewing machines, repairs, parts for Passap, Studio, Singer, Silver Reed, Superba, White. Sewing notions and supplies, books, ball yarns, coned yarns, TAMM yarns, Paton's yarns, Bernat yarns, Phentex yarns, Bernat kits & crafts.
Upper Canada Quiltworks – Quiltworks Studio PO Box 64, Brockville, ON K6V 5T7 613.865.7299 uppercanadaquiltworks.com uppercanadaquiltworksstudio@gmail.com Quilt patterns and books, fabric and notions, felted wool, wool kits, punchneedle patterns and supplies and Valdani embroidery floss. Workshops in quilting, punchneedle, wool applique, rug-hooking, sewing, sign painting & more!
UNITED STATES
A Quilter's Folly 8213 Brodie Ln #100, Austin, TX 78745 512.899.3233, aquiltersfolly.com
A-1 Singer Sewing Center 1012 S Oliver St, Wichita KS 67218 316.685.0226, a-1singer.com
Charlotte Sewing Studio 1109 Tamiami Trl Unit 2, Port Charlotte FL 33953 941.235.3555, charlottesewingstudio.com
Close to Home Sewing Center 277 Hebron Ave, Glastonbury CT 06033 860.633.0721, closetohomestores.com
Discount Fabric Warehouse 933 Kanoelehua Ave, Hilo HI 96720 808.935.1234, discountfabricwarehouse.com
El Cajon Sew & Vac 1077 Broadway, El Cajon CA 92021 619.442.2585, sewezr.com
Hursh's Country Store 2425 W Main St, Ephrata PA 17522 717.721.2575, hurshscountrystore.com
Jessamine Quilt Shop LLC 1301 Old Cherokee Rd, Lexington SC 29072-9047 803.490.1031, jessaminequiltshop.com
JS Linen and Curtain Outlet
1250 Northside Dr, Statesville NC 28625 704.871.1939, jslinenoutlet.com/js-quilt-shop
Just Sew Studio
51 Third St NE, Waite Park MN 56387 320.654.1580, justsewstudiomn.com
Keeping You Sewing
226 4th Ave S, Clinton IA 52732 563.242.6135, keepingyousewing.com
Lone Star Quiltworks
4301 S Texas Ave, Bryan TX 77802-4360 979.595.1072, lonestarquiltworks.com
Maryland Vacuum and Sewing Center
26845 Point Lookout Rd (Rt 5), Leonardtown MD 20650 240.309.4019, mdvacsew.com
New England Sewing 501 Hartford Rd, Manchester CT 06040 860.647.8119, nesewing.com
Options Quilt Shop 102 E Commerce St, Jacksonville TX 75766 903.586.9546, facebook.com/optionsquiltshop
Paramount Sewing & Vacuum 3960 Rickey St SE, Salem OR 97317 503.990.8186, paramount-sew-vac.com
Pick Your Stitch
6701 Manlius Center Rd, East Syracuse NY 13057 315.437.0962, pickyourstitch.com
Quality Vac and Sew 1213 Gilmore Ave Ste E2B, Winona MN 55987-2632 507.452.2203, qualityvacandsew.com
Quilter's Attic Sewing Center 118 Maple Ave, Pine Bush NY 12566 845.744.5888, quiltersattic.com
Quilters' Corner @ Middlebury Sew-N-Vac 260 Court St Ste 4, Middlebury VT 05753 802.388.3559, middleburysewnvac.com
Quintessential Quilts 940 East Main St, Reedsburg WI 53959 608.524.8435, qquilts.com
Select Sewing 2415 East 65th St, Indianapolis IN 46220 317.255.6332, selectsewingservice.com
Sew Special 688 W Main St, Uniontown PA 15401 724.438.1765, sew-special.biz
Sew What? Fabric Shoppe 7 W Front St, Addison NY 14801 607.359.4308, sewwhatfabricshoppe.com
Sewing Solutions 1505 S Glenburine Rd, Ste G, New Bern SC 28562-2689
252.633.1799, sewingsolutionsnc.com Sierra Sewing, Quilting, and Vacuums 8056 S Virginia St Ste 6, Reno NV 89511 775.823.9700, sierrasewing.com
Singer Factory Distributor 4914 W Irving Park Rd, Chicago IL 60641 773.545.6834, singerfactorydistributor.com
Suddenly Sewing 5850 Kroger Dr Ste 110, Fort Worth TX 76244 817.741.5400, suddenlysewing.com
Thimbelina's Quilt Shop 118 North B St Ste B, Livingston MT 59047-2662 406.222.5904, thimbelinasquiltshop.com
Wise Monkey Quilting 501 Hwy 39 N, Denison IA 51442 712.393.7979, wisemonkeyquilting.com


