
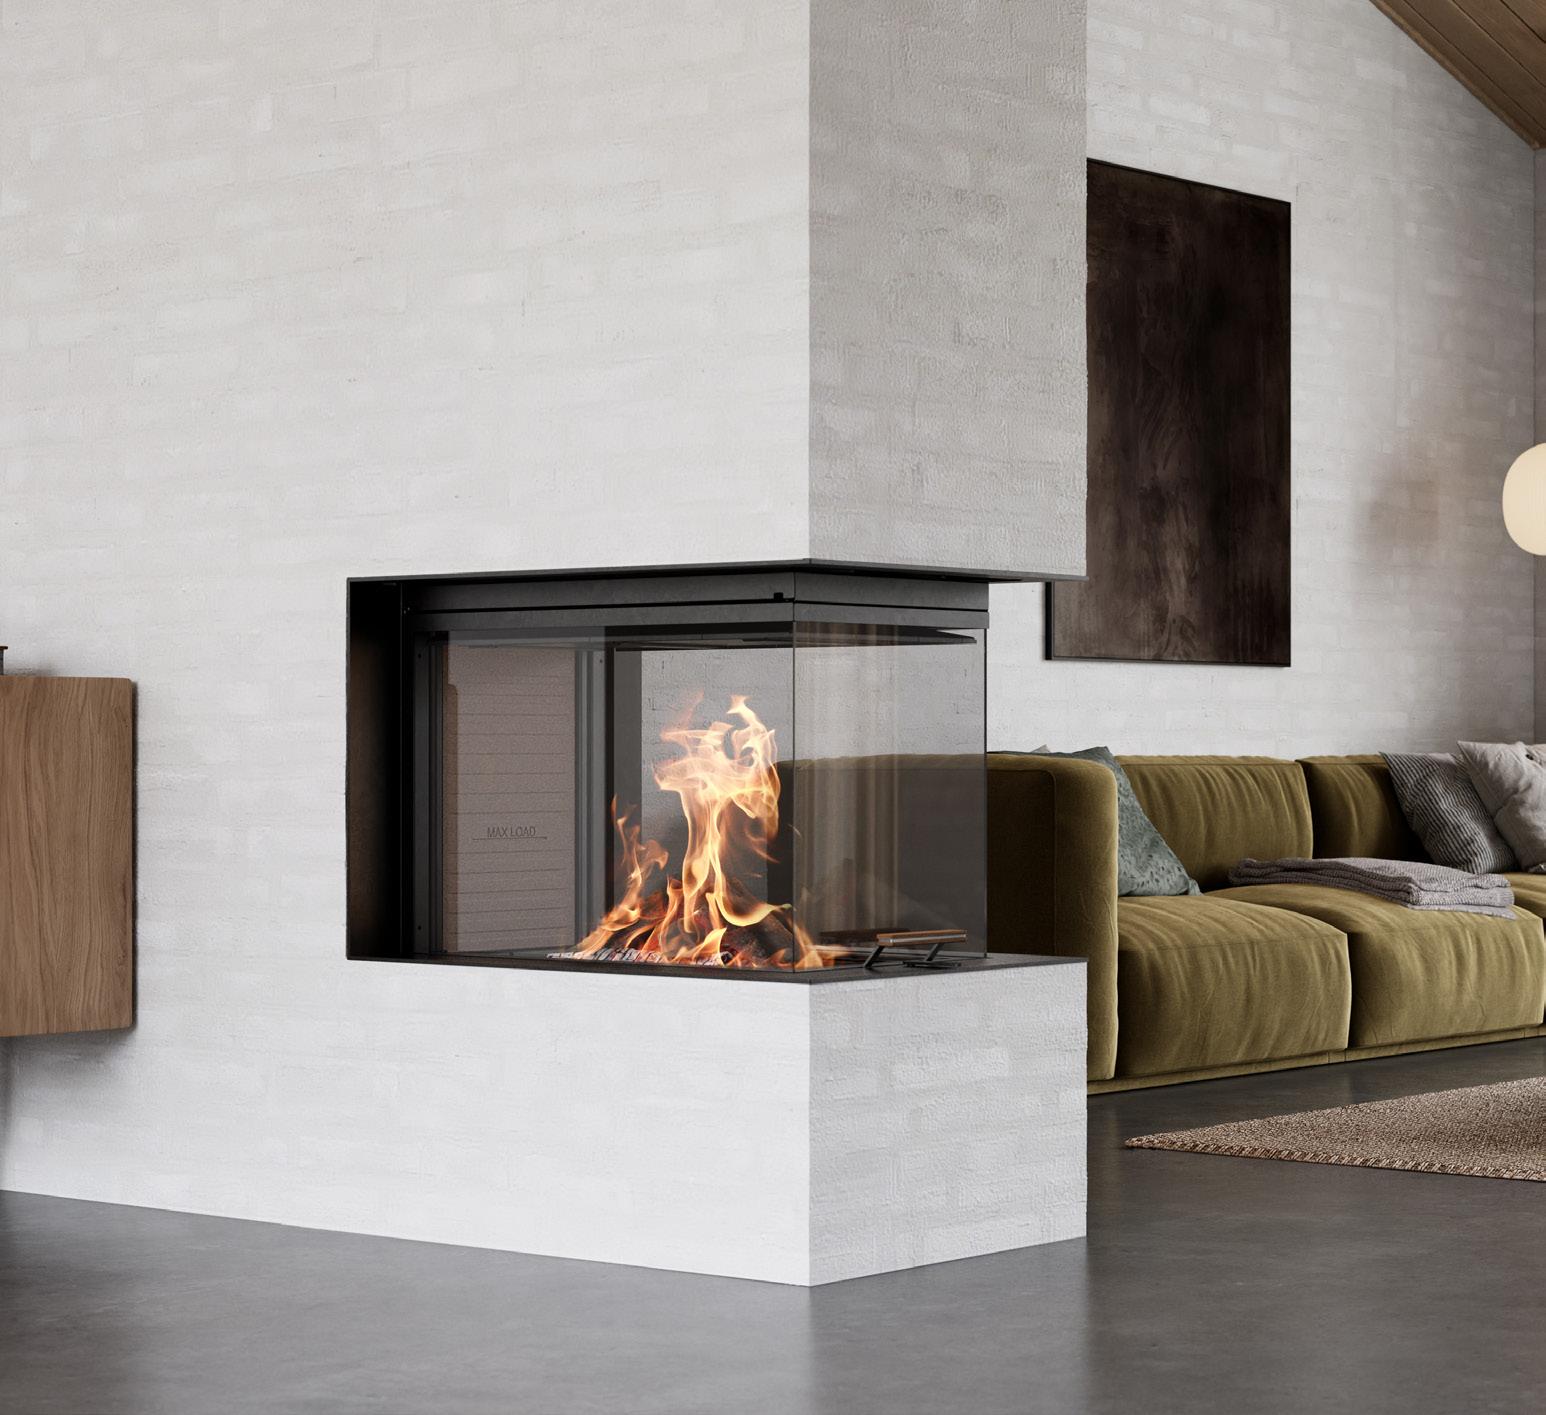
VISIO UNIQ 3:1
USER MANUAL (UK)
PRODUCTION NUMBER
PRODUCTION NUMBER
Congratulations on your stove. Each stove has its own unique production number. The production number is located in the oven’s bottom left corner, but it is included as well on the first page of the printed user manual. The number is the stove’s identification and must be used in any enquiries related to the stove’s warranty.
In order to ensure you have all the information needed in case you have any questions, please write down the production number, where you bought the stove and when you did so.
Date:
Dealer:
Production number:


CONTENT
CONGRATULATIONS ON THE PURCHASE OF YOUR NEW STOVE
WOOD
use approved fuels only
The wood must be dry
wood must fit the stove
FIRING
Recommended amount of wood for stoking the fire
interval for refuelling
SETTING THE DAMPER
damper adjustment
LIGHTING YOUR STOVE CORRECTLY
Lighting yout stove for thee first time
CLEANING
Revision:
Date:
31-01-2024
We reserve the right to make printing errors.
CONTENT
GENERAL INFORMATION ON TOUR STOVE
Glass system
External air supply - Airsystem
CO2 and the enviroment
FREQUENTLY ASKED QUESTIONS – FAQ
Why is my stove not burning the way it should?
stove making ”clicking noises”?
does the glass turn black?
Why is smoke coming out

CONGRATULATIONS ON THE PURCHASE OF YOUR NEW STOVE
Congratulations on the purchase of your new wood-burning stove – and welcome to RAIS or attika! High quality, design and function go hand in hand in the wood-burning stove you have selected.
For the latest tips, information and inspiration, follow us on our various channels:
We have put our hearts, souls and minds into each and every one of our products. We want you to enjoy using your stove for many years to come, so we have focused all our efforts on ensuring that this is possible.
You are now about to learn all about your stove – and turn your dream into reality. You will soon be enjoying using the stove in your home.
This user guide can help you get started with your new wood-burning stove. You will receive an in-depth introduction to the following topics below:
• Wood
• Setting the damper and lighting your stove correctly
• Cleaning and maintaining your stove
• Frequently asked questions – FAQ
It is important for you to read up on all these topics so that you can get the maximum out of your wood-burning stove. You can also return to the user guide if you have any problems or queries when you have been using your stove for a while. We hope you will find all the information that you need.
You can get in touch with your RAIS/attika dealer if you have any further questions.
Always make sure to comply with all local regulations, including those referring to national and European standards when operated.
WOOD
It is important for you to use dry, untreated wood and light the wood correctly so that you wood-burning stove can operate correctly. Which wood you should use and how to treat it prior to use are shown below.
USE APPROVED FUELS ONLY
General wood (wood that you have purchased or collected yourself) or pure wood briquettes are approved fuels. You should not use newspaper or similar as this will cause soot in your stove and give off contaminated smoke.

WARNING
Never use lacquered, laminated or impregnated wood, wood with a plastic coating, painted wood, chipboard, plywood, household waste, paper briquettes or coal. This may cause toxic smoke that smells unpleasant and causes contamination. Under no circumstances use any form of liquid fuel as this could cause an explosion. Your guarantee will be rendered void if you burn non-recommended fuel in your stove and cause it to overheat.
THE WOOD MUST BE DRY
If you can, bring in the wood a couple of days before you want to use it so that it is at room temperature. The wood must have a water content of 15-20%. In practice, this means your wood should be left to dry for at least one year (and ideally two) before you use it. As a result, it is a good idea to buy your wood early and organise good storage for it. Wood needs time to dry, and proper air drying can take up to 2 years depending on the type of wood and how it is stored.
Wood dries best when it is sawn and chopped. Place your wood in a well ventilated, sunny location protected from the elements, ideally under a lean-to or a woodshed, i.e. a shed with slatted sides. Avoid covering your wood, this will retain the moisture. Drying wood outdoors is almost always best because this ensures that plenty of air can circulate.


WOOD
YOUR WOOD MUST FIT THE STOVE
The pieces of wood you use must fit the combustion chamber of your stove. Pieces of wood of a diameter greater than 10 cm should be chopped.
WARNING
If you use incorrect wood or wood that is too damp, this may cause soot to form in the chimney, possibly leading to a chimney fire. If this happens, close off all air supplies to your stove if a valve connected to an AirSystem connection from outside is installed.
CALL THE FIRE SERVICE IF YOUR CHIMNEY CATCHES FIRE.
Never use water to put the fire out!
Then contact a chimney sweep to check your stove and chimney.
WARNING
Never use petrol, lamp oil, kerosene, charcoal lighter fluid, ethyl alcohol or similar liquids to start or ”re-ignite” a fire in the heater. Keep all such liquids well away from the heater while it is in use.
FIRING
RECOMMENDED AMOUNT OF WOOD FOR STOKING THE FIRE
To find the recommended amount of wood for stoking the fire, please refer to the tables below.
The recommended amount of wood to burn after lighting depends on your stove model. Based on the nominal output of your stove, you can read the recommended amount of wood to use for refuelling.
EXAMPLE OF READING THE RECOMMENDED FIRING RATE WHEN REFUELLING
By reading the CE labelling plate (or finding the output on our website), the stove has a nominal output of 11.3 kW. See an example of the CE labelling plate on the next page.
Based on the rated output, the recommended amount of wood to be used when refuelling the stove can be read from the wood quantity table for wood-burning stoves.
Recommended volume of wood for stoking fireplace inserts
the CE marking plate)
** The exact indication of the recommended volume of wood to be stoked (kg) is found in your fireplace insert’s installation manual under “Specifications”.
The table indicates that if the stove’s output is between 11 and 12 kW, it is possible to use up to 4.5 kg of wood per hour, split into a maximum of 5 pieces of firewood (see table).
The stove will be considered to have overfired and the warranty will be voided if more than this is used.
AFSTAND TIL BRÆNDBART, BAGVÆG
ABSTAND ZU BRENNBAREN BAUTEILEN, HINTEN
DISTANCE TO COMBUSTIBLE BACK WALL
DK: 0 mm SE BRUGERVEJLEDNING
DE: 0 mm SIEHE BEDIENUNGSANLEITUNG
UK: 0 mm SEE USER MANUAL DIST. ENTRE COMPOSANTS COMBUSTIBLES, ARRIÈRE
AFSTAND TIL BRÆNDBART, SIDEVÆG
23
ABSTAND ZU BRENNBAREN BAUTEILEN, SEITE
FR: 0 mm CONSULTEZ LE GUIDE
DK: 600 mm SE BRUGERVEJLEDNING
DE: 600 mm SIEHE BEDIENUNGSANLEITUNG
DISTANCE TO COMBUSTIBLE SIDE WALL
EN 13240:2001+A1:2004, EC.NO: 14
Notified Body: 1235

AFSTAND TIL BRÆNDBART, MØBLERING
Produced at: RAIS A/S, Industrivej 20, 9900 Frederikshavn, Denmark
ABSTAND VORNE ZU BRENNBAREN MÖBELN
Visio Uniq 3:1
FR: 600 mm CONSULTEZ LE GUIDE
UK: 600 mm SEE USER MANUAL DISTANCE ENTRE COMPOSANTS COMBUSTIBLES, COTÉ
DK: 800 mm SE BRUGERVEJLEDNING
DE: 800 mm SIEHE BEDIENUNGSANLEITUNG
DISTANCE TO FURNITURE AT THE FRONT
DK: 0 mm SE BRUGERVEJLEDNING
AFSTAND TIL BRÆNDBART, BAGVÆG
ABSTAND ZU BRENNBAREN BAUTEILEN, HINTEN
DE: 0 mm SIEHE BEDIENUNGSANLEITUNG
UK: 800 mm SEE USER MANUAL DISTANCE ENTRE COMPOSANTS COMBUSTIBLES, DEVANT
DISTANCE TO COMBUSTIBLE BACK WALL
DIST. ENTRE COMPOSANTS COMBUSTIBLES, ARRIÈRE
AFSTAND TIL BRÆNDBART, SIDEVÆG
CO EMISSION (REL. 13% O2)
ABSTAND ZU BRENNBAREN BAUTEILEN, SEITE
DISTANCE TO COMBUSTIBLE SIDE WALL
UK: 0 mm SEE USER MANUAL
FR: 800 mm CONSULTEZ LE GUIDE
FR: 0 mm CONSULTEZ LE GUIDE DE L’UTILISATEUR
DK: 600 mm SE BRUGERVEJLEDNING
DE: 600 mm SIEHE BEDIENUNGSANLEITUNG
CO EMISSION IN DEN VERBRENNUNGSPRODUKTEN (BEI 13%O2)
DISTANCE ENTRE COMPOSANTS COMBUSTIBLES, COTÉ
≤ 0,12 % / ≤ EMISSION OF CO IN COMBUSTION PRODUCTS (AT 13%O2)
AFSTAND TIL BRÆNDBART, MØBLERING
ABSTAND VORNE ZU BRENNBAREN MÖBELN
UK: 600 mm SEE USER MANUAL
FR: 600 mm CONSULTEZ LE GUIDE DE L’UTILISATEUR
DK: 800 mm SE BRUGERVEJLEDNING
EMISSION CO DANS LES PRODUITS COMBUSTIBLES (À 13%O2)
DISTANCE TO FURNITURE AT THE FRONT
DISTANCE ENTRE COMPOSANTS COMBUSTIBLES, DEVANT
CO EMISSION (REL. 13% O2)
DE: 800 mm SIEHE BEDIENUNGSANLEITUNG
UK: 800 mm SEE USER MANUAL
FR: 800 mm CONSULTEZ LE GUIDE DE L’UTILISATEUR
STØV / STAUB / DUST / POUSSIÈRES: ≤ 40 mg/Nm3
CO EMISSION IN DEN VERBRENNUNGSPRODUKTEN (BEI 13%O2)
EMISSION OF CO IN COMBUSTION PRODUCTS (AT 13%O2)
EMISSION CO DANS LES PRODUITS COMBUSTIBLES (À 13%O2)
≤
RØGGASTEMPERATUR / ABGASTEMPERATUR / FLUE GAS TEMPERATURE / TEMPÉRATURE DES GAZ DE FUMÉE:
STØV / STAUB / DUST / POUSSIÈRES:
RØGGASTEMPERATUR / ABGASTEMPERATUR / FLUE GAS TEMPERATURE / TEMPÉRATURE DES GAZ DE FUMÉE:
NOMINEL EFFEKT / HEIZLEISTUNG / THERMAL OUTPUT / PUISSANCE
≤
262 °C
11,3 kW
262 °C
NOMINEL EFFEKT / HEIZLEISTUNG / THERMAL OUTPUT / PUISSANCE CALORIFIQUE: 11,3 kW
CALORIFIQUE:
DK: Brug kun anbefalede brændsler. Følg instrukserne i brugermanualen. Anordningen er egnet til røggassamleledning og intervalfyring.
VIRKNINGSGRAD / ENERGIEEFFIZIENZ / ENERGY EFFIENCY /EFFICACITÉ ÉNERGÉTIQUE:
DE: Lesen und befolgen Sie die Bedienungsanleitung. Zeitbrandfeuerstätte. Nur empfohlene Brennstoffe einsetzen.
DK: BRÆNDE
DE: HOLZ
≥ 75 %
UK: Fuel types (only recommended). Follow the installation and operating instruction manual. Intermittent operation.
UK: WOOD
DK: Brug kun anbefalede brændsler. Følg instrukserne i bruger manualen.
FR: BOIS
DK: BRÆNDE Anordningen er egnet til røggassamleledning og intervalfyring.
FR: Veuillez lire et observer les instructions du mode d’emploi.
Foyer à durèe de combustion limitèe, homologué pour cheminée à connexions multiples. Utiliser seulement les combustibles recommandés.
(Not to be used in a shared flue in UK)
DE: Lesen und befolgen Sie die Bedienungsanleitung.
Geeignet für den Anschluss an einen gemeinsamen Schornstein, sofern beide
DE: HOLZ Zeitbrandfeuerstätte. Nur empfohlene Brennstoffe einsetzen.
Geräte den gleichen Besitzer haben.
Suitable for connection to a shared flue, on the condition that both devices have the same owner.
Raumheizer für feste Brennstoffe
Appliance fired by wood
Poêle pour combustibles solides
UK: Fuel types (only recommended). Follow the installation and UK: WOOD operating instruction manual. Intermittent operation.
Produced for: ATTIKA FEUER AG, Brunnmatt 16, CH-6330 Cham / RAIS A/S, Industrivej 20, DK-9900 Frederikshavn
Veuillez lire et observer les instructions du mode d’emploi.
TIME INTERVAL FOR REFUELLING
The recommended fuel quantity should be stoked within 45–60 minutes from the last stoking.
FR: BOIS Foyer à durèe de combustion limitèe, homologué pour cheminée à connexions multiples. Utiliser seulement les combustibles recommandés.
(Not to be used in a shared flue in UK)
Geeignet für den Anschluss an einen gemeinsamen Schornstein, sofern beide Geräte den gleichen Besitzer haben.
The exact interval for when to stoke the volume of wood is 52 minutes which can be seen under ”Specifications” in the stove’s installation manual under ”Intermittent operation”.
Raumheizer
SETTING THE DAMPER
It is worthwhile spending some time finding out how best to operate the damper on your stove. This will ensure your wood burns as effectively as possible and gives you the most beautiful fire.
AIR DAMPER ADJUSTMENT
The three settings on the damper are adjusted by rotating it from side to side.


POSITION 1. Push the damper all the way to the right. The air damper is fully open and provides full air when starting your stove. This position is solely for use when starting your stove (approx. 10-20 minutes) and topping up and is not used during normal operation.
POSITION 2. Push the handle to the left to the first “notch”. This is the central position. During regular burning, we recommend placing the damper between positions 2 and 3. When the damper is set correctly, the flames are clear and yellow.
POSITION 3. Push the handle all the way to the left. The air damper is closed, which keeps the air supply to a minimum. This setting should be avoided while your stove is operation, but it can be used when your stove is not in use.
Combustion in your stove will be poor if It is not getting enough air, and in a worst-case scenario this may result in fumes, smoke, inefficient use of the wood and less heat. A dark smoke will emerge out of the chimney. The smoke from the chimney is almost invisible if the wood is burning correctly.

REMEMBER!
If you find your stove is getting too hot you should not turn the damper down all the way – instead, you should vent the stove. You cannot adjust the heat in the room using the damper, only the amount of wood you use can affect this.
LIGHTING YOUR STOVE CORRECTLY
LIGHTING YOUR STOVE FOR THE FIRST TIME
When you use your stove for the first time, it is best to light a small fire initially so that it “gets used to” the high temperatures. There may be a little odour and smoke due to the materials used in the stove – but this will soon disappear and it will only occur the first couple of times you light your stove. Make sure you allow this smoke to escape. The first time you light your stove, it is also recommended that you should open and close the door at regular intervals to prevent the seal on the door sticking.
If your stove has been left unused over the summer, for example, light a small fire the first time you start using it again. Your stove may give off a slight odour the first time you light it after any length of time.
If you adjust the airflow manually, the damper on the stove is set to fully open when you light it, and you then close it slightly as the fire gets going. See the following section for how to light your stove correctly and adjust the air damper.
NOTE:
Remember to open and close the door slowly when adding wood. This will not cause overpressure in the chimney and cause smoke to emerge into the room.
REMEMBER!
When you use your stove for the first time, it is important for you to vent it while the paint settles (the stove gives off an odour and a small amount of smoke). This process may be repeated the first couple of times you use your stove. This will decline when your stove has reached its maximum temperature. Avoid touching the paint on your stove before lighting it for the first time and before the stove has cooled completely.
TESTING YOUR STOVE
You can test how your stove is burning by checking:
• Is the ash pale or white?
• Are the walls of the combustion chamber soot-free?
• Is the smoke from your chimney almost invisible?
If you answer “yes” to all three of these questions, your stove is burning well.

LIGHTING YOUR STOVE CORRECTLY
IGNITION AND REFUELLING - ”Top-down” burning
Follow the instructions 1-5 below for correct ignition and use of the stove.
You should never open the door when the flames are high, as they can damage the paint on the stove.
Begin by stacking 12 pieces of split firewood in layers of four at the bottom of the stove. Place the ignition bags between layers 2 and 3, as shown in the image. Place the remaining two sticks. The split firewood should measure about 4x3x23 cm. It is critical that there is air between the pieces; otherwise, the fire will struggle to take hold.


LIGHTING YOUR STOVE CORRECTLY
Set the air damper to the open position. Light the fire by igniting the two ignition bags placed between the layers.


Igniting the ignition bags

NOTE ! - It is important to get the wood burning quickly.
When the fire has a firm grip on the sticks, set the air damper to the centre position.


If the fire has burned down too far and there is not enough embers, start the lighting process all over again.
LIGHTING YOUR STOVE CORRECTLY
When the last flames have died and there is a nice layer of embers, add two to three pieces of wood. Only add new wood after the smaller pieces have burned down to a reasonable level, not while the fire is in full flame.


After 5 minutes - or when there are clear yellow flames - gradually close the damper.


LIGHTING YOUR STOVE CORRECTLY
WARNING
To ensure safe combustion, the flames must be clear and yellow or the embers must be clear – the wood must never sit and “smoulder”. If the fire is merely smouldering or smoking and insufficient air is supplied, this will cause uncombusted fumes to form. Fumes may ignite and explode. This may cause damage, and potentially injure people.
THEREFORE, NEVER CLOSE OFF THE AIR SUPPLY ENTIRELY WHEN LIGHTING YOUR STOVE.
OVERFIRING
The oven must not be overfired. The maximum firing quantity of your stove can be found in the table. If more than the specified amount of wood read in the table on page 8 is used, the stove is overfired.
If the wood quantity limits in the table are exceeded, the stove is considered overfired and is no longer covered by the factory warranty, as the stove may be destroyed by excessive heat.
CLEANING YOUR STOVE
When using your stove, it is important for you to know how to maintain it. This section describes how to clean and maintain your stove.
CLEANING THE OUTSIDE OF YOUR STOVE
When cleaning the outside of your stove, how you go about this is dependent on the colour of the stove and what it is made of. The table below shows how to clean your stove.
Note: Your stove must only be cleaned when cold.
It is important to clean your stove regularly. If dirt and stains are left on the stove (particularly in pale areas), there is a risk of the stains being burnt on.
If you need to maintain the surface, all colours are available as spray paints.
If general cleaning is not enough to remove any discolouration, please contact your RAIS/attika dealer.
Stove colour Procedure
White Nickel
Platinum
Silver
Black Mocha
Wipe with RAIS Brændovnsrens or warm, soapy water (washing-up liquid)
No liquids. Wipe with a wrung-out cloth


TIP! - We recommend that you always use regular, mild detergents for cleaning your stove. Always test a detergent in a non-visible location (behind the stove, for example) before cleaning.
CLEANING YOUR STOVE
CLEANING OF COMBUSTION CHAMBER
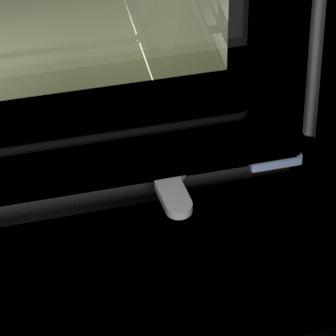
The combustion chamber is emptied of ash as needed. You can carefully take the ashes out with a small hand shovel, or sweep it through the grate into the ash tray. The ash must be completely cooled before it is discarded, as it can still store itself glows in it for up to two days. Open the grate to access the ash drawer, see picture below. Remember to use a glove when the oven is hot. Never completely empty cover the firebox with ash, as the fire burns best with a small layer of ash.


Scrape/shovel the ash into the grate in the centre of the fireplace insert. The ash drawer underneath the grate can be removed and emptied in a non-combustible container until it has cooled off. Ash can be disposed of as ordinary household waste.
CLEANING YOUR STOVE
GLASS
All RAIS and attika stoves come with a glass system, which means that hot air flows down over the glass and removes any soot residues. This happens when the fire is burning correctly and there is a high level of combustion in the stove. However, you may still find some soot on the glass when using your stove.
CLEANING THE GLASS
There are three effective ways of cleaning the glass on your stove:
1. Schott dry sponge. Available from most stove dealers.
2. Window cleaner suitable for stoves. Follow the instructions. When using detergent, you must always rinse with clean water so that any detergent residues are also removed. This will prevent residues burning onto the glass and leaving marks the next time your stove gets hot.
3. Cleaning with as. Clean the inside of the glass with a damp cloth dipped in the very fine ash inside the stove. Then wipe down and polish with a soft cloth. Your stove must be cold when you start cleaning it.
OPENING THE GLASS FOR CLEANING
Before the side doors can be opened for cleaning, the door must be placed in bottom position. There are two locking hooks above the door. The hook on the right side is rotated to the right and the left hook to the left to release them.


CLEANING YOUR STOVE
There is a door stop on both sides of the door. By turning them out, you ensure that the locking hooks cannot hit the built-in frame. Lift the door and twist out both door stops.
There are also locking hooks under the door, which are turned in the same way as the upper locking hooks. These can advantageously be opened at the same time. The door can now be lowered, and the door stops will land on their contact surface inside the stove.


The side doors can now be opened for cleaning the door glasses. The side doors are locked again, in reverse order. Remember all 4 locking hooks and the two door stops.

REMOVING THE COMBUSTION CHAMBER LINING
The combustion chamber lining protects the fireplace insert against the heat from the fire. The large temperature fluctuations can cause cracks in the plates, which, however, do not affect the functionality of the fireplace insert. The plates only need to be replaced when they begin to crumble after several years of use. The plates are only laid or placed into the fireplace insert, and can thus be replaced without problems by you or your dealer.
Removal of the combustion chamber lining is done in the following order.
1. Remove the flue deflector plates (1) by pushing the front upwards and pulling it forward so that the rear end is free. The smoke deflector can now be carefully removed.
2. Remove the smoke baffle plates (2) by pushing the front upwards and pulling it forward so that the rear is free. The smoke baffle plates can now be carefully removed.
3. The back plate (3) is removed by pulling out the bottom of the plate.
4. The bottom plates (4) are removed by first removing the grate and ash tray, see section Cleaning the combustion chamber. The base stones can then be removed.

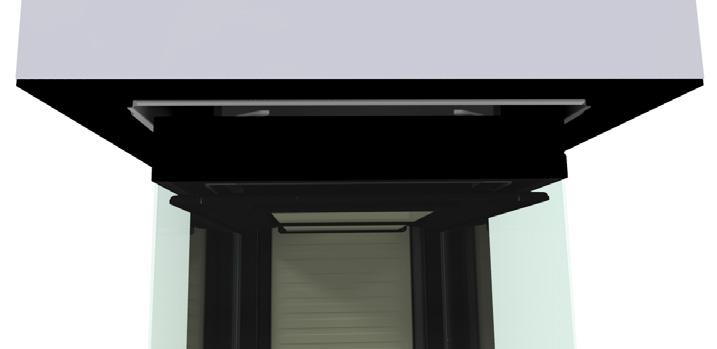
The MAX LOAD mark indicates that firewood must not be loaded above this line.


CLEANING THE FLUE
CLEANING THE FLUE
To gain access to the flue, remove the top plates of the firebox - the smoke deflector plate and smoke baffle. They must be handled carefully.
Remove dirt and dust and insert in reverse order.

MAINTAINING YOUR STOVE
CHECKING THE CHIMNEY
The chimney is what makes your stove work. Remember – even the best stove will not work perfectly unless the chimney is drawing correctly and to the necessary extent. The chimney and flue gas collar must always be checked for blockages before each new heating season. Your chimney sweep should check both the chimney and your stove at least once a year. You should always contact your chimney sweep if you are in any doubt as regards the condition of your chimney.
If there your chimney is drawing too much, fitting the chimney or flue with a regulating damper is recommended. Contact your dealer.
MOVING PARTS
Guide rails for the lock are lubricated as needed with lubricating spray. Contact your dealer to purchase the lubricant.
REPLACING SEALS
Inspect your stove for damage regularly, both inside and out, in particular the seals and heat insulating plates. The seals must be replaced if they are worn or fractured.


FURNISHING DISTANCE
There must be a certain distance from the stove‘s glass to combustible materials, such as furniture and other home furnishings. For safety reasons, it is important to observe these distances.


GENERAL INFORMATION ON YOUR NEW STOVE
CONVECTION
All RAIS/attika stoves are convection stoves. Essentially, convection is all about the distribution of heat throughout the room. A convection stove is good at circulating hot air throughout the room. Cold air is drawn in at the base of the combustion chamber and heated. The hot air then rises and flows out at the top and creates circulation in the room. Convection ensures that heat is distributed evenly and comfortably throughout the room. Be aware that all exterior surfaces will be hot, so do not touch the stove when it is lit.
GLASS SYSTEM
All RAIS and attika stoves come with a glass system, which means that hot air flows down over the glass and removes any soot residues. This happens when the fire is burning correctly and there is a high level of combustion in the stove.
EXTERNAL AIR SUPPLY – AIRSYSTEM
If you live in a low-energy building, your home is insulated or you just live in a recently built house, you may find it necessary to provide an air supply from outside and directly into the stove. This may also be necessary if there is vigorous extraction near to your stove, such as an extractor hood. This external air supply is what we call AirSystem. All RAIS stoves have the option of providing an external air supply. If there is no external air supply, the stove uses air in the room for combustion instead. With AirSystem, the air is taken from outside. The system’s air intake can be concealed by installing it in the floor, or in the wall behind the stove.
CO2 AND THE ENVIRONMENT
You may also be wondering how your new stove will affect the environment, and not least your CO2 emissions. Burning wood is regarded as CO2-neutral, as the amount of carbon dioxide emitted when wood is burnt correctly is equivalent to the amount of carbon dioxide that the tree would have given off as it decayed in the forest.
As regards the environment, all RAIS stoves do of course meet the very strictest requirements in terms of efficiency and discharge of residual particles, and they are at the very front of the field in the European market when it comes to eco-friendliness. We are constantly working to develop and optimise combustion, and work in partnership with organisations such as Aalborg University and the Danish Technological Institute.


