
Heart & Home

Catherine Carton is the lady behind the award-winning interiors and lifestyle blog daintydressdiaries.com. She is a lover of upcycling, recycling and making the old new again. Dainty Dress Diaries was created in 2014. While brain-dumping potential names with a workmate, Catherine and her pal decided to go with ‘Dainty’ because Catherine is 4’11”, ‘Dress’ because all she wore was cute dresses, and ‘Diaries’ so that the blog could cover a wide range of topics. In the beginning, Catherine mostly blogged about vintage style, fashion and homeware, but over the years she has become known for her warm personality and the unique creative projects she shares with her online community.
Her first book for The O’Brien Press was the bestselling Dainty Dress Diaries (2022). www.daintydressdiaries.com www.youtube.com/daintydiaries www.instagram.com/daintydressdiaries
Heart & Home
Craft and DIY projects to bring love into your house and garden
Text and photographs by
Catherine Carton
First published 2024 by The O’Brien Press Ltd., 12 Terenure Road East, Rathgar, Dublin 6, D06 HD27, Ireland.
Tel: +353 1 4923333. Fax: +353 1 4922777
Email: books@obrien.ie. Website: obrien.ie
The O’Brien Press is a member of Publishing Ireland.
ISBN 978-1-78849-421-2
Text and photographs © Catherine Carton 2024
The moral rights of the author have been asserted.
Copyright for typesetting, layout, editing, design © The O’Brien Press Ltd Cover and internal design by Emma Byrne. Index by Lisa Scholey.
All rights reserved. No part of this publication may be reproduced or utilised in any form or by any means, electronic or mechanical, including for text and data mining, training artificial intelligence systems, photocopying, recording or any information storage system without permission in writing from the publisher.
10 9 8 7 6 5 4 3 2 1 28 27 26 25 24
Printed and bound by Drukarnia Skleniarz, Poland.
The paper in this book is produced using pulp from managed forests.
This is a DIY book, and all projects involve a degree of risk. Every effort has been made to ensure that all the information in this book is accurate. However, since conditions, tools, materials and skills will vary, the publisher and author cannot be responsible for any injury, loss or damage that may result from the use of the information in this book.
Published in Enjoying life with obrien.ie
For Jack & Lily, for showing me the magic of the world through your eyes
While I have so many people to thank, I want to begin by thanking you. The person who has bought this book, or maybe you are standing in a bookshop and having a flick through. I hope these pages become a source of inspiration, information, and, above all, a companion on your journey of putting heart into your home.
A village put this book together, and I want to thank all the team at The O’Brien Press for their support. To Ivan and Kunak for having faith in me. A special thank you to my editor, Nicola. We had many cups of tea and brainstorming sessions in my back garden as we pieced this project together. A big thank you to Emma for her stunning design work, which breathes life into every page. To Susan for her advice on the sewing projects. To Elena, Brenda, Ruth, Chloe and Gabbie: thank you for getting this book into as many hands as possible, and for making the whole process fun!
I give heartfelt thanks to all my family members for their unwavering support over the years. I am grateful to the beautiful circle of women who consistently uplift, lend a listening ear, and create a nurturing space for my growth.Your presence during triumphs and challenges means the world to me. A special shoutout to Karen, Joanne, Rachel, Adele, Greta & Chloe. And finally, thank you to the online community that stands by me every day. Whether it’s with a kind comment, valuable feedback or inspiring ideas, you fill my heart with gratitude.Your willingness to share my message and accompany me on this creative journey means more to me than words can express. Thank you for being an integral part of this beautiful adventure.
Níl aon tinteán mar do thinteán féin
Contents
Introduction 8 The Heart of the Home: Kitchen 14 Kitchen Revamp 16 Hand-painted Coasters 21 Easy Sew Curtain 24 Eco Cleaning Products 27 Mini Kitchen Pantry 32 Pretty Tiled Tray 35 Down Time: Living Room 38 DIY room diffuser 40 Circle Mirrors 42 Framing Memories 44 Stylish Wood Staining 47 Wallpaper Like a Pro! 50 Wine Bottle Candles 56 Wainscoting 60 A Warm Welcome: Hall & Stairs 66 Hallway Revamp 68 Hand Hotties 72 Lavender Wreath 76 Front Door Makeover 80 Stairs, Three Ways: 83 Removing Old Carpet 83 Painting a Stair Runner 84 Carpet Runner 86 Make a Splash: Bathroom 88 Bathroom Revamp 90 Chunky Towel Scrunchie 93 Heatless Hair Rollers 96 Makeup Headband 99 Simple Bath Stool 102 Sweet Dreams: Bedroom 106 Patterned Paint Roller 108 Lavender Pouches 110 Upcycled Bottle Lamp 113 Meditation Mat 116 Board & Batten Panelling 119 Patchwork Cushion 122 Little Creatures: Kids & Pets 126 Children’s Room Revamp 128 Hot Air Balloon Lampshade 132 No Sew Book Pillow 136 Salvaged Table & Chairs 139 Play Kitchen Makeovers 142 Painted Playhouses 145 Pawfect Scratching Post 148 Recycled Pet Bed 151 Cute Cat Collar 154 Nature & Nurture: Garden 158 Growing Your Garden 160 Going Potty! 168 Cut Flowers 172 Easy Window Mirrors 178 Brick Effect Floor & Wall 180 Vertical Gardens 183 Bangin’ Bird Box 186 Cosy Lounge Cushion 190 Tiled Garden Table 194 Sewing Terminology 198 Furniture Painting Guide 201 Index 206

Introduction
When I was asked to think of a title for this book, I struggled. I wanted to get across the idea of putting heart and love into your home, but I know that for many, especially nowadays, ‘home’ can be a stressful concept. No amount of piped cushions or DIY diffusers can ease the pain of high rents, interest rates and a dire housing market.
But I’ve always found comfort in tweaking whatever space I’m in, whether it was rearranging my bedroom as a kid, a fresh lick of paint after a breakup, or new bedsheets … just because.
And so I began to think about the idea of home. What makes a home? Is it a particular smell, or a feeling? Have you ever walked into a show house or a fancy office block and it felt empty? Like it was missing something.
Houses become homes when we fill them with treasures we find along the way, and when we make memories inside those four walls. I love it when old houses have wallpaper stripped and you get to see the layers of paper underneath, how each layer holds memories, and how the wall could tell a story if it could speak.
My own home journey led me here to this book. Like many others, after buying my house, I didn’t have a reno budget. In fact, I barely had enough for a kettle and toaster set! Over the last decade, I flexed my creative muscles, tried many different crafts and learned new skills (and failed at some) to create a home that gives me a feeling of calm and joy when I return to it each day. Over time, I put heart into my house, which became my home.
Throughout this book, I want to inspire you to get creative and love your space, whatever size it may be, wherever you are on your journey. Start right now by asking yourself, what do you think puts heart into your home?
A little letter on my learns
In the time between my first book and this one, I took part in two new classes in my local area: woodworking and an art class. I was anxious to start something new but also crazy excited, and
Introduction 9
before attending, my head was bursting with all these big project ideas.
I was humbled on my first day in both classes to find out how much I had to learn, and so I began with the basics. I spent three hours cutting wood with a hand saw in my first woodwork class, and in my first art class, I spent hours drawing shapes.
Sometimes when we try to create something new, we see the end point in our minds, and if we don’t achieve it quickly and perfectly, it can knock our confidence. The joy really is in the journey when it comes to working on your home and tackling a new project.
If it’s your first time to drill a hole, sew, stain or paint, take some time to drill holes on a scrap piece of wood, grab old pieces of fabric and sew straight lines, get comfy with a paintbrush and take a little extra time to practise before tackling bigger jobs.
For example, if you want to create wall panelling, like on page 119, why not try making wooden frames for pictures, like on page 44, first? By doing this smaller project, you get a feel for the material, and if you are like me, you’ll realise it’s harder to cut than it looks in YouTube videos! Practise measuring and cutting your mitre corners with that smaller project before stepping up to an entire room of wall panelling.
Mistakes are welcome around here
As they say, mistakes are your best teachers, and I know from experience that accidentally sewing the wrong sides of fabric together or sticking your stool leg on wonky will teach you more than this book or any online tutorial will. You learn your best lessons when you have the patience to problem-solve and see where you went wrong.
My weekly woodworking classes also taught me about ‘progress over perfection’. Yes, it’s cheesy enough to put on a motivational mug, but it is very true! Each week, as my cuts got straighter and my hand was less shaky with the chisel, it was a win. Two months in, I was proud as punch with my stool, but I was prouder for giving myself that time to show up each week to practise.
When trying something new, be extra kind to yourself. That inner critic can rear its head and fill us with doubting thoughts. As my favourite painter Bob Ross used to say, anything you’re willing to practise, you can do.
I still battle with my inner perfectionist, although these days it’s more of a friendly squabble. She rears her head when I try something for the first time, when I want to be good at it immediately, with no mistakes. I want to run before I can walk, sew a cushion before I can thread a needle, and I want my seeds to sprout tomorrow.
10 Heart & Home
Introduction 11
If you are anything like me, try to remember that it’s not all about the end result. In other words, take pride in your progress. If you’re doing a straightforward project like the headband on page 99, why not sew a few of them (they make lovely gifts), compare them, and see how your stitches improve after each one?
I do this each year in the garden. When something grows differently than expected, I will plant it in another spot the following season, enjoying the journey and not seeking perfection.
Finding time in a hectic world
I have heard myself say, ‘But I don’t have the time to learn that’ or ‘I don’t have time to practise’. Absolutely, yes, there are busy periods in our lives when we can’t (or shouldn’t) take on any more. Even energetically, we all have our winter seasons where we might not have the energy to try something new, and that’s okay. But there are also times when we think we are too busy, when in fact, we are overstimulated by our phones, work email and streaming TV. (Guilty as charged.)
We make time to go to the gym or outdoors to exercise our physical bodies, but watch what magic can happen if you exercise your creativity for two or three hours a week, at a class or just noodling around for practice.
Throughout this book, I have smaller projects that you can do in a shorter time, perfect for when you have an hour or two for yourself to create.
Creating on a budget
Taking up a new skill can be costly, but I know from experience that there are dusty toolboxes on shed shelves, sewing machines in friends’ attics, and second-hand sites bursting with nearly new craft supplies that people are passing on. Reach out to others and ask to borrow things, as most people are very happy to help out. Myself and my neighbour are regular plant swappers and often give each other soil, divided plants and wheelbarrow lends.
Sometimes, renting a tool can be more cost-effective, especially if you don’t have loads of storage space. For example, rent a saw the first time you’re doing a big DIY project; if you find yourself hooked, you can then invest in one.
Always look around your house before heading to the shops. Old curtains and bedsheets are perfect for many sewing projects, and pallet wood can be great to practise on. I still buy new things, and when I do, it feels like such a treat, but I get more of a buzz when I can reuse something old.
12 Heart & Home
Also, don’t be afraid to ask for help. Wallpapering is more fun when there are two people, and problem-solving a mitred corner can be easier with a friend. I would love it if you shared a project in this book with a good friend and tried it together.
And lastly, take all these ideas and make them your own. I say this often on my YouTube channel, but I really do mean it. Tweak measurements, try different fabrics, use different paint colours and patterns. Make these projects yours, and put your stamp on them.
Now go and get messy and have fun! Explore your creative side and put your heart in your home.

Introduction 13
WThe Heart of the Home
Kitchen
hether your kitchen is a galley, L-shaped or one-wall, it is safe to say that this is a hot spot of action in most homes. I know that in my house, the kitchen is the first place people go and congregate. It’s where we have chats over mugs of tea, and the kitchen table doubles up as a doodle area when my niece and nephew visit.
Some of the most common pain points in our kitchens are outdated cabinets and counters, lack of storage or space, and clutter. Tackling these issues can help make the kitchen more functional, appealing and comfortable.
Kitchen renovations are expensive, and even more so right now, with the costs of materials and labour rising. In this section, I want to share some practical and pretty projects that warm up your home’s heart, whatever your budget.
The Heart of the Home 15
Kitchen Revamp
The kitchen is the hardest-working room in the house, so it’s no surprise that it can be the most expensive to renovate too. Over the years, I have been tackling jobs in my kitchen to create a functional, inviting space that gives me joy.
Back in 2013, when I purchased my home, all my money had gone on the deposit and fees, so I had to get creative and roll up my sleeves. Saving up for a big kitchen renovation can take time, but there are plenty of ways you can revamp and refresh on a budget.
Before tackling a DIY project, weigh up the pros and cons of each option and consider your DIY skills, the time it will take and the cost.You can also take your budget kitchen reno in stages, tackling one area at a time.
Kitchen cabinetry
Custom built-in cabinets are very on trend, but of course they are expensive as they are made by highly skilled tradespeople. Here are some ways you can upgrade your cabinets by yourself, whatever your home decor style.
• Paint existing cabinets with a pop of colour or a neutral tone. See our Painting Guide on page 201.
• Re-stain solid wood cabinets or sand them to create a lighter wood tone.
• Use a vinyl wrap to cover old cabinets (renter friendly!).
• Look on second-hand online sites for people selling old kitchen units.You can use old cabinets as the bones for your new kitchen.
• Upgrade a flat-pack kitchen with wood moulding and trim to create a custom look on a budget.
• If your cabinet boxes are in good condition, replace just the doors and drawer fronts to give the cabinets a new look.
• Open shelving can be a fun way to create an airy feel in your kitchen. Why not remove the upper cabinets and put in shelves instead?
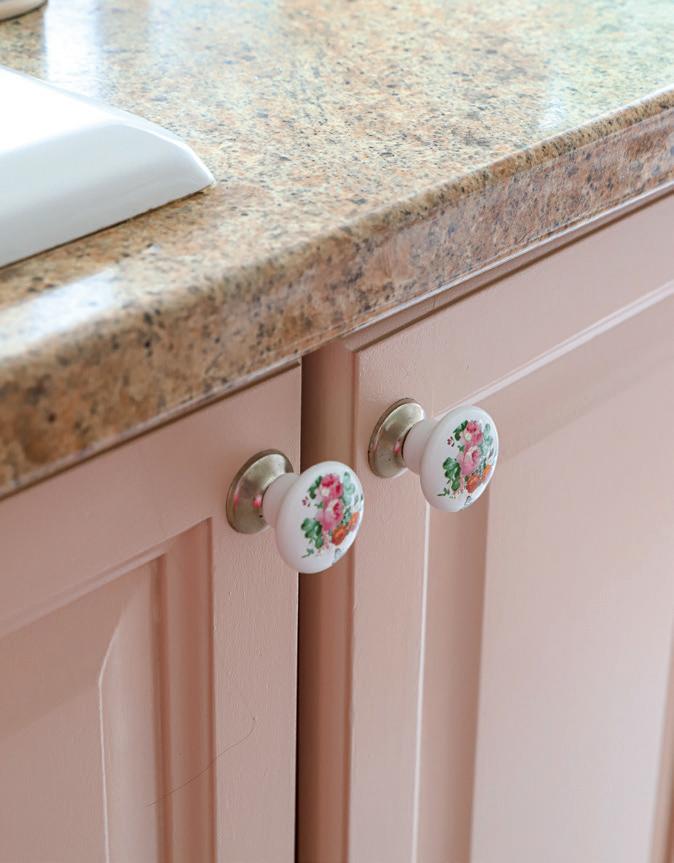
• Replace the hardware. New handles and knobs are a simple way to upgrade your cabinets. Have fun mixing and matching.
16 Heart & Home
The Heart of the Home 17
Countertops
Countertops can have a significant impact on a kitchen. For almost a decade, I lived with a dark laminate countertop, which made the kitchen feel shady and small no matter what colour I painted my cabinets. So once I had the money, I replaced the countertop with a white one, and instantly my kitchen felt bigger.
As with everything, you can skimp or splurge here. If you have a smaller budget, go for materials like laminate, butcher’s block and concrete. More expensive options are natural stone like granite, marble and soapstone; quartz is also a popular option made from stone and resin.
Here are my tips for picking the perfect budget countertop.
• Measure twice, buy once. Most laminate counters from DIY shops will come in a standard size.You may need to have it cut, or you might need a longer piece.
• Get a custom size. Some DIY stores and IKEA offer a service where you can order a custom-size counter for your kitchen.You can make an appointment and give your measurements to a specialist, who will create a bespoke counter.
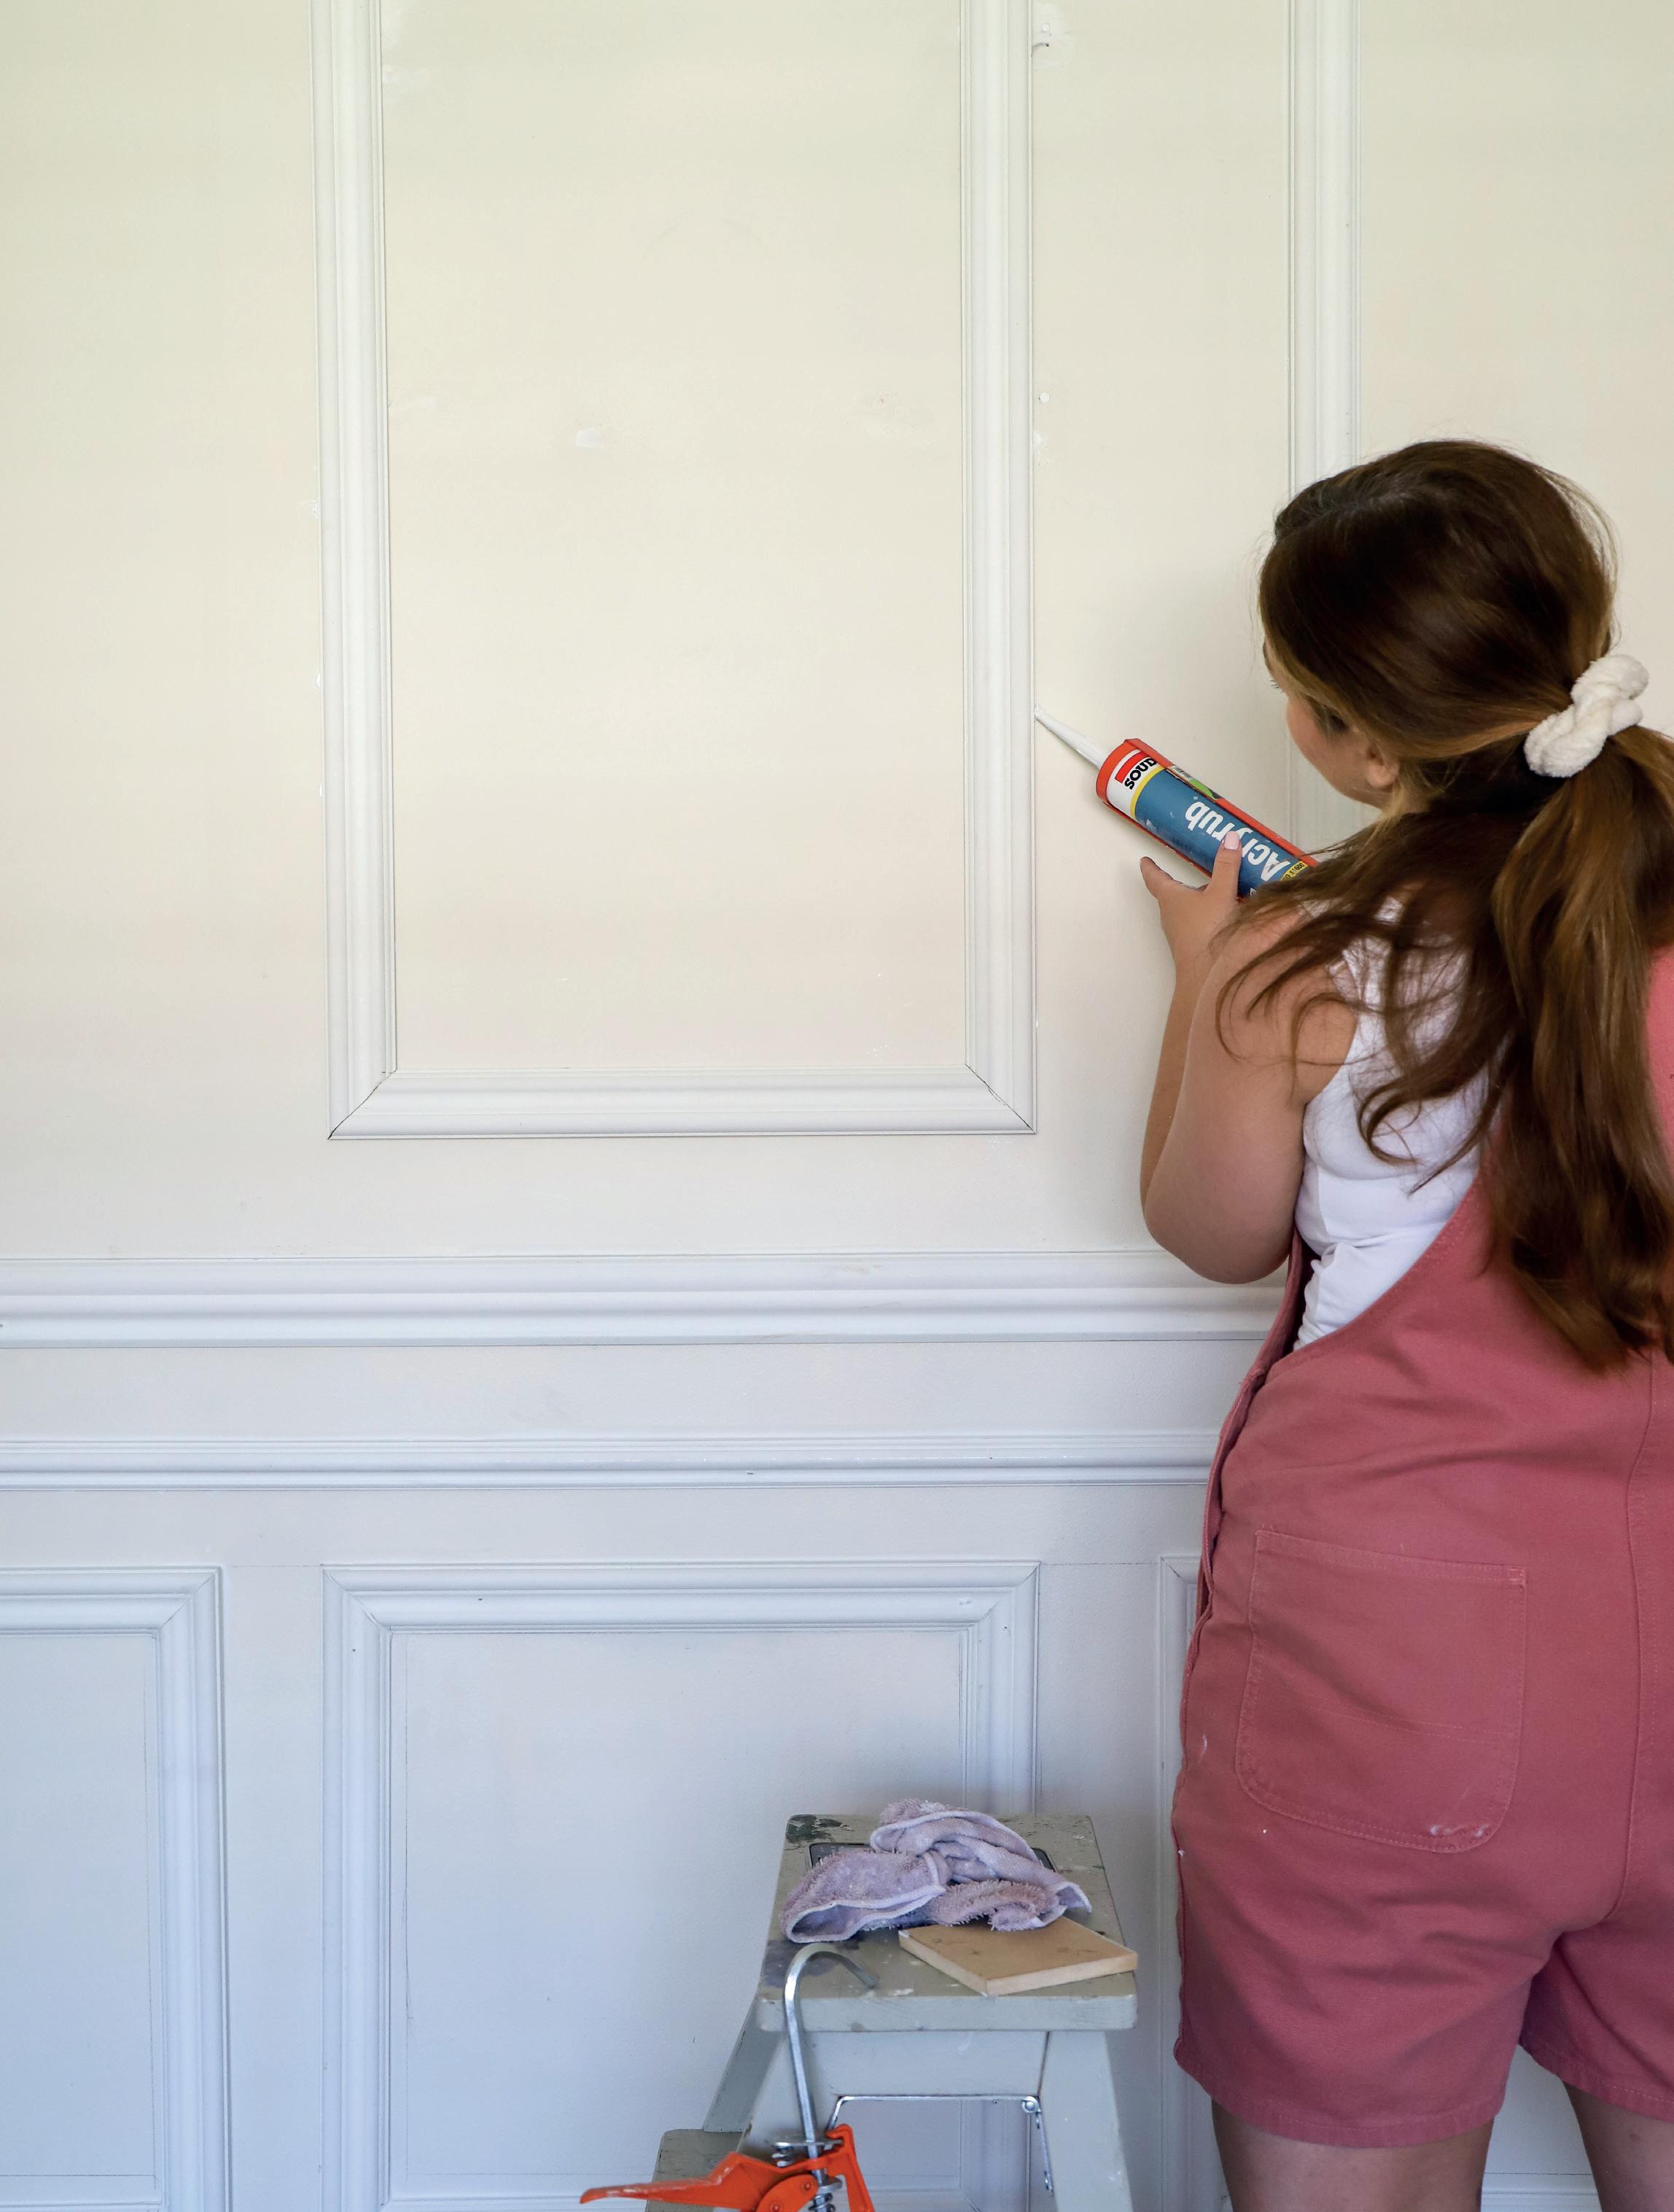
• Installation. If you are confident with cutting and caulking, you can save money and replace your counters without calling in the experts. Depending on the size of the kitchen, this is a two-person job, so get a friend to help.
• My biggest counter-tip is to hire help where needed. While I am fairly confident with a drill and a silicone gun, when doing my own countertops, the weight was just too much and I didn’t feel
18 Heart & Home
comfortable doing it all myself, so I happily paid two lads to install it for me. As a price guide, mine cost around €650, which included the new white laminate counter and the cost of labour.
Backsplash
Changing up a backsplash is another great way to revamp your space. There are loads of options available, from mosaics to chicken-printed wall tiles, in all shapes and sizes. Tiling is a skill, but if you have the time and patience to learn, you could do this one yourself – or you can always call in a tradesperson to do it for you.
Here are some tips if you want to revamp your existing tiles on a budget.
• Tile paint:You can buy paint designed especially for covering ceramic and porcelain tiles. Depending on the brand, you may need to use a special primer first. Painting tiles is a budget- and time-friendly way to change up your old tiles, but bear in mind that the paint may deteriorate over time. See page 21 for some tips on tile painting.
• Peel-and-stick tiles:You’ll find lots of peel-and-stick tiles online and in DIY shops – they’re a great option if you’re renting. When shopping for peel-and-stick, try a tester first, as some are better quality than others.
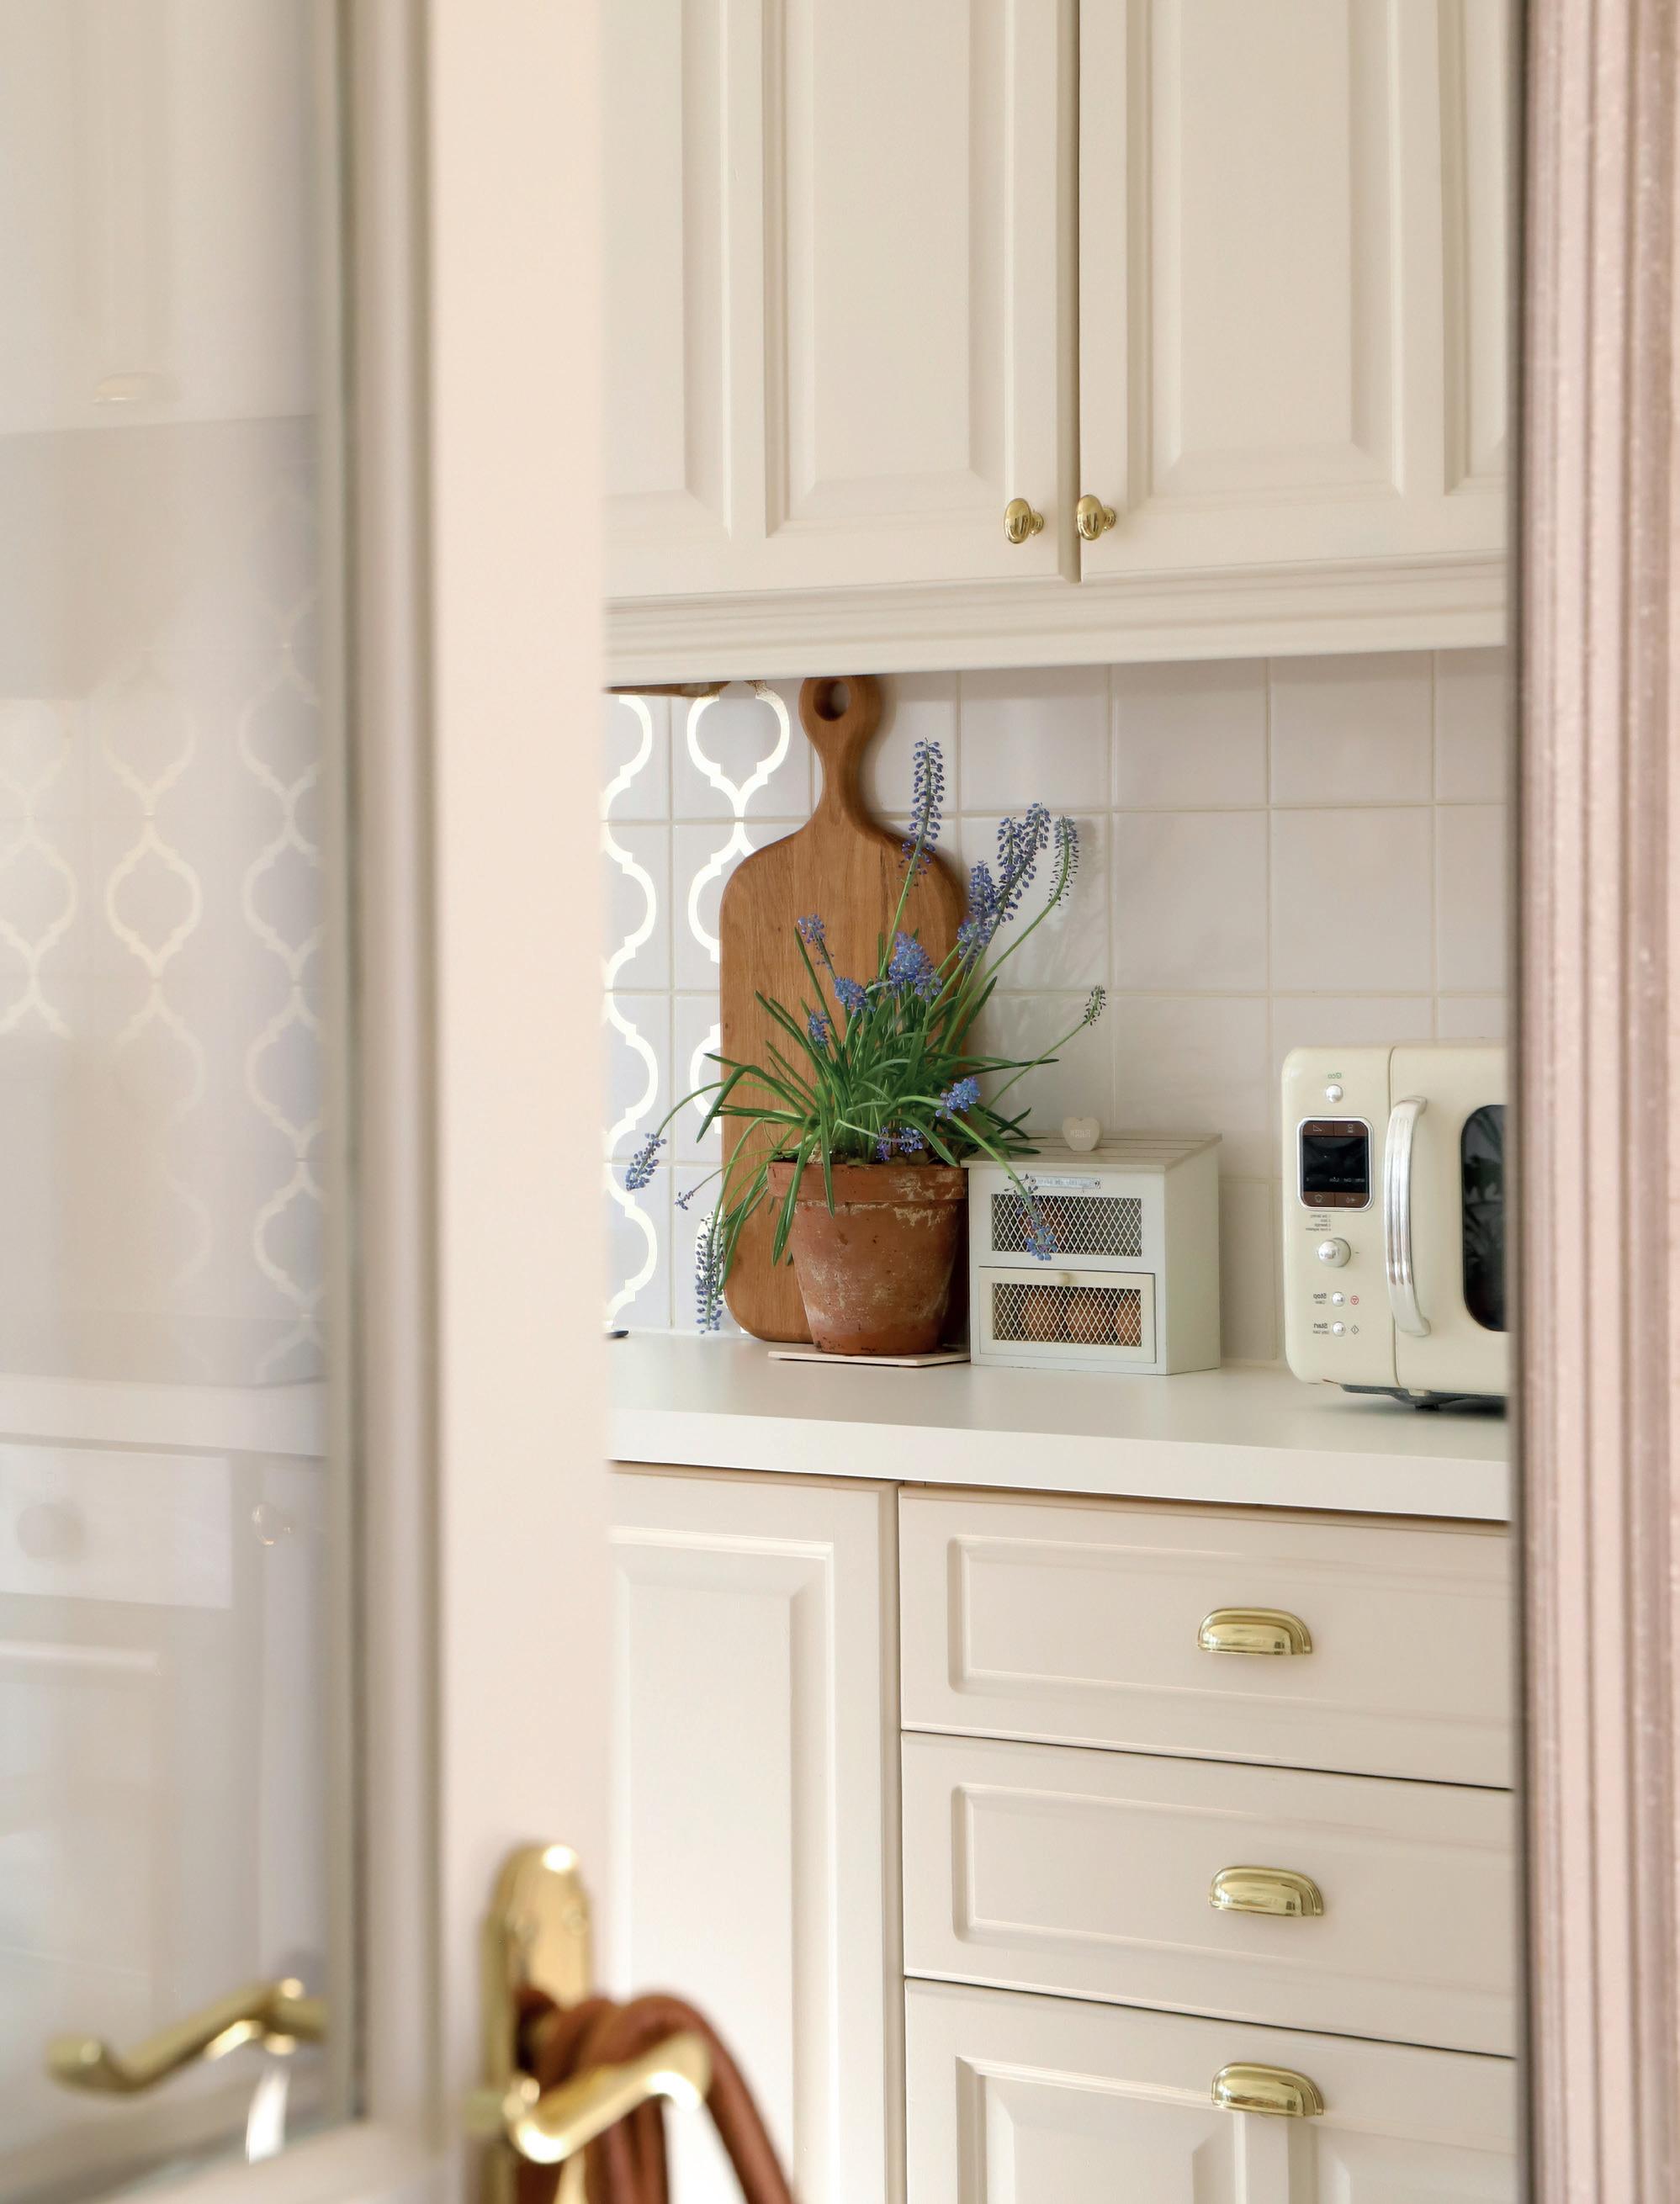
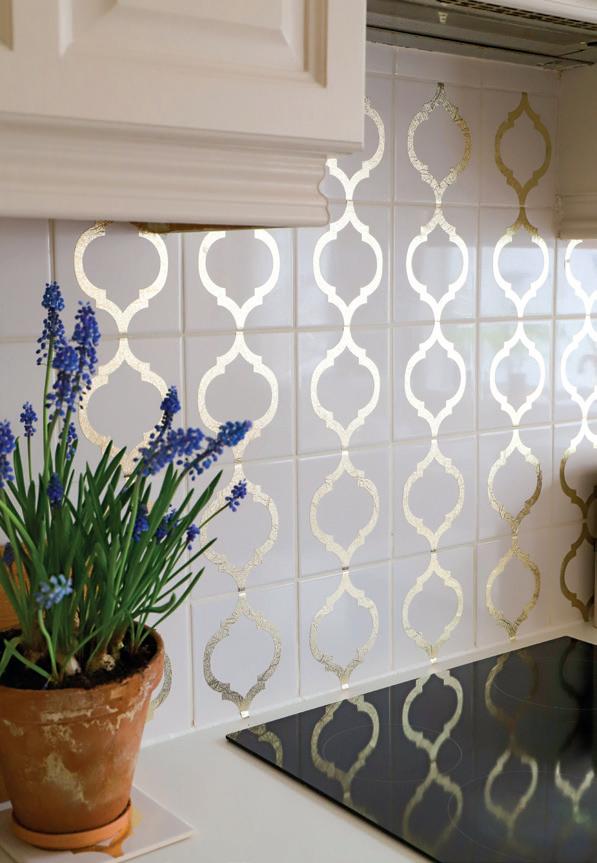
• Vinyl stickers: If you have a plain tile, you can add a simple pattern or print to the tile with vinyl stickers.You can purchase these online, or if you have a vinyl-cutting machine, you can create and cut your own.
• Most kitchen mess happens around the cooker and sink.You can save money by only tiling around these areas and using wipeable kitchen paint on the other backsplashes.
• A mirrored backsplash can give the illusion of more light and space. Get a piece of mirror cut to size and use a strong adhesive to stick it to the wall. Opt for an aged effect on the mirror if you want that rustic feel.
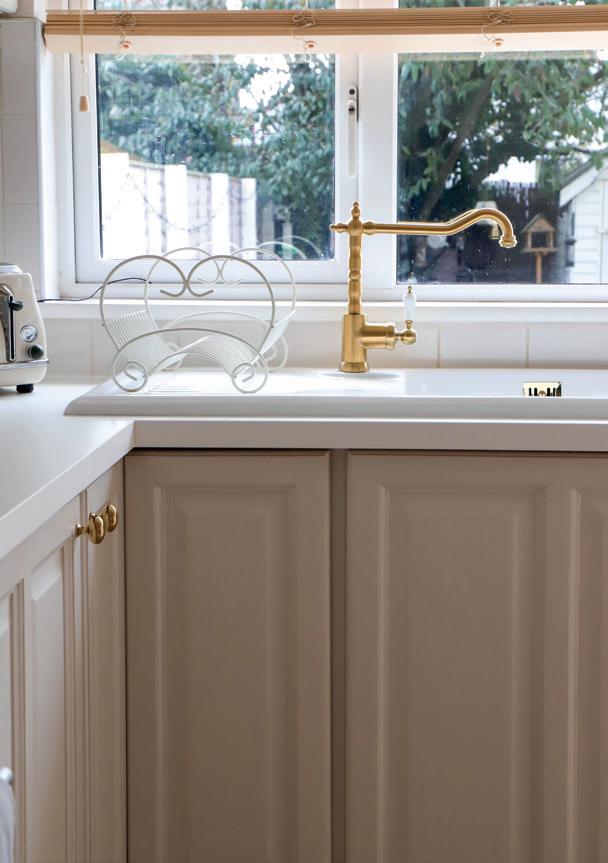
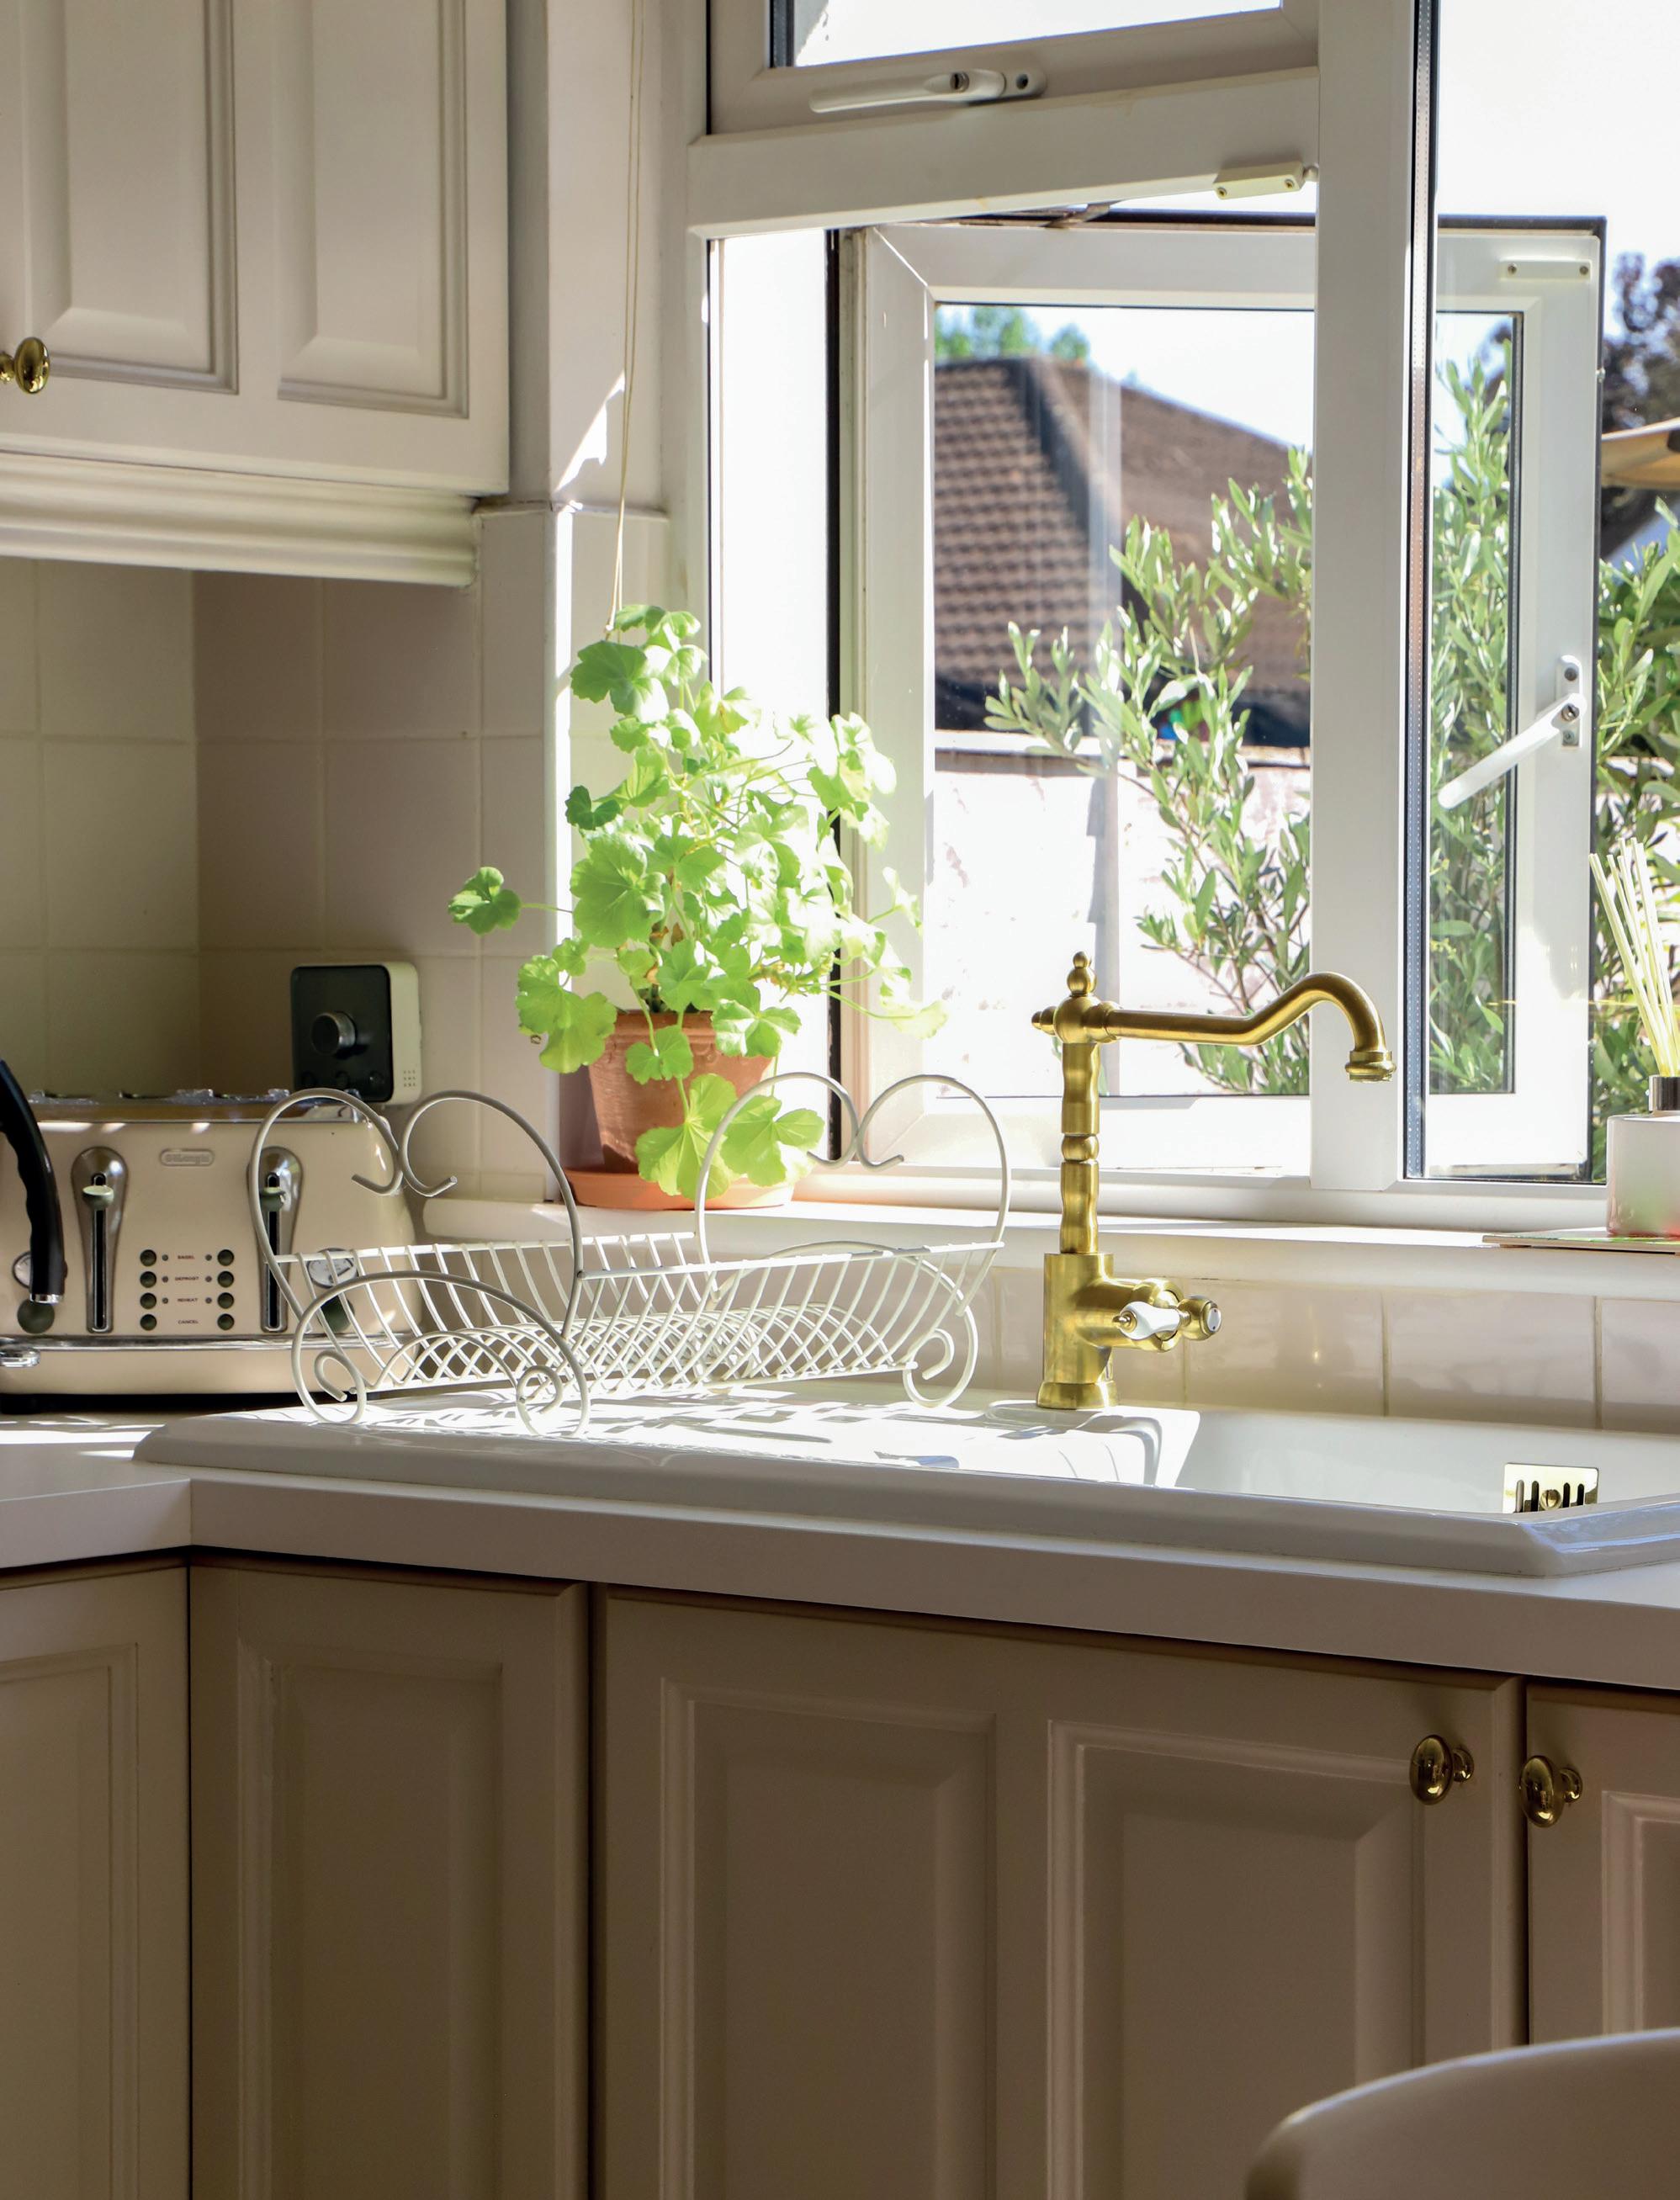
Swap out your sink and tap
My dream has always been to have a bright and airy cottage-style kitchen, but when I bought my house, the reality was a dark laminate kitchen with a stainless-steel sink full of limescale. So one of the first things I did was to buy a white ceramic sink and a new tap to upgrade my plate-washing space.
The Heart of the Home 19
Nowadays, you can get different coloured sinks and taps to suit your style. Black taps and basins have become popular, as well as gold. If you are happy with the rest of your kitchen and want a mini upgrade, swapping out your sink, taps and hardware can make a big difference.
Kitchen furniture
Most kitchen tables double up as a homework hot spot or a craft table, or even a home office. Kitchen and dining tables can be expensive, but you can get excellent second-hand items online that you can paint or stain to suit.
I bought a solid-wood round kitchen table and four chairs on a second-hand site for €50. I have had it for about eight years, so it has served me well. Over the years, it has been painted white, stripped back to wood and whitewashed, and I have sanded and re-sealed the tabletop as needed.
How to shop online like a pro:
• Set a search alert for the type of furniture or item you want, to help you stay away from things you do not need.
• Be strict with measurements. Having a table that is too large for your kitchen is a common mistake, and it can make the room feel smaller and uncomfortable.
• Check items for damage and factor the cost of repairs into your budget. A solid-wood table is worth salvaging, and minor repairs to the wood shouldn’t be too dear. However, if you are a beginner upcycler, try to avoid any items that have woodworm or water damage.
• Flat pack hack! The internet is buzzing with furniture hacks for flat-pack items. For example, adding a countertop can turn an old flat-pack chest of drawers into a mini kitchen island.
Just like elsewhere in your home, you can also change up your kitchen flooring, lighting and wall colour. When planning your remodel, sit with your paint and material samples for a while until you are happy with them.
You don’t have to rip your kitchen apart in one weekend (unless you really want to!). Instead, you can change it gradually, over time, to suit your budget and lifestyle.
20 Heart & Home
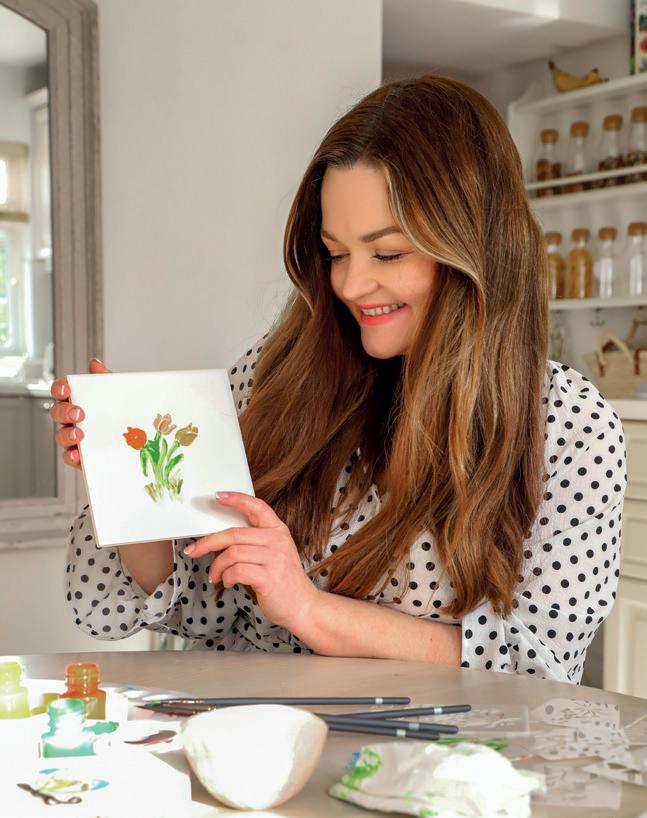
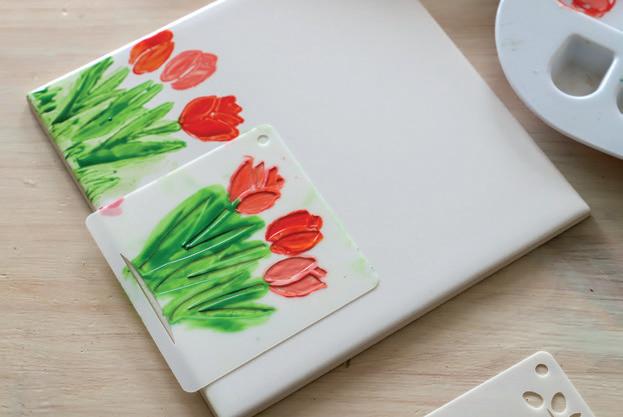
Hand-painted Coasters
When picking a canvas for your artwork, a tile mightn’t be the first thing that comes to mind. A few years back, I visited Sintra in Portugal and fell in love with all the hand-painted ceramics at the markets. The streets of Portugal were also full of decorative tiles, and I loved how dainty they looked and how they added charm and character.
Let me share an easy way to paint on a tile. A painted tile or coaster would make a cute present, and it’s a lovely project to do with younger artists. You can pick up tile samples in most hardware stores or online, or look on second-hand sites for any free leftover or reclaimed tiles. A tile with a smooth, glossy surface is best.
What you need
A blank tile
Water and vinegar in a spray bottle, or dish soap
Ceramic paint suitable for porcelain and glass
An artist’s palette Paintbrushes
Stencil (optional)
Cork dots or cork base
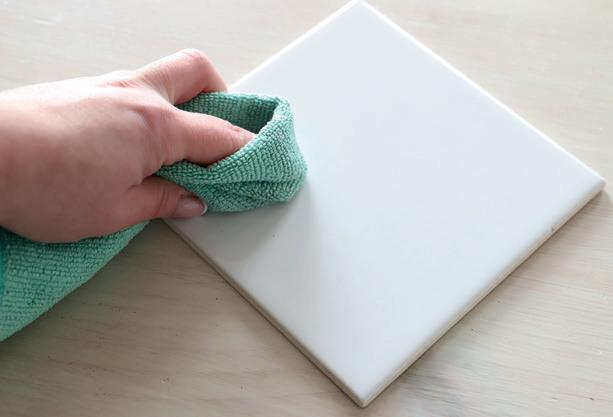
• Prep the tile by cleaning the surface with either a water and vinegar spray or warm, soapy water to remove any grime before painting.
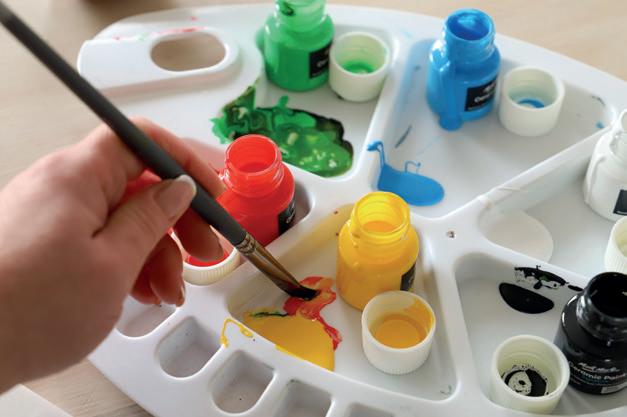
• Pour a small amount of paint onto your artist’s palette and mix your colours as desired.
• If using a stencil, you can tape it to the tile or hold it firmly as you apply the paint, as this will stop the paint from bleeding underneath.You’ll notice that the consistency of ceramic paint is a bit different to other paints. It’s similar to acrylic, but the brushstrokes might feel different when painting on the
The Heart of the Home 21

porcelain tile rather than a canvas.
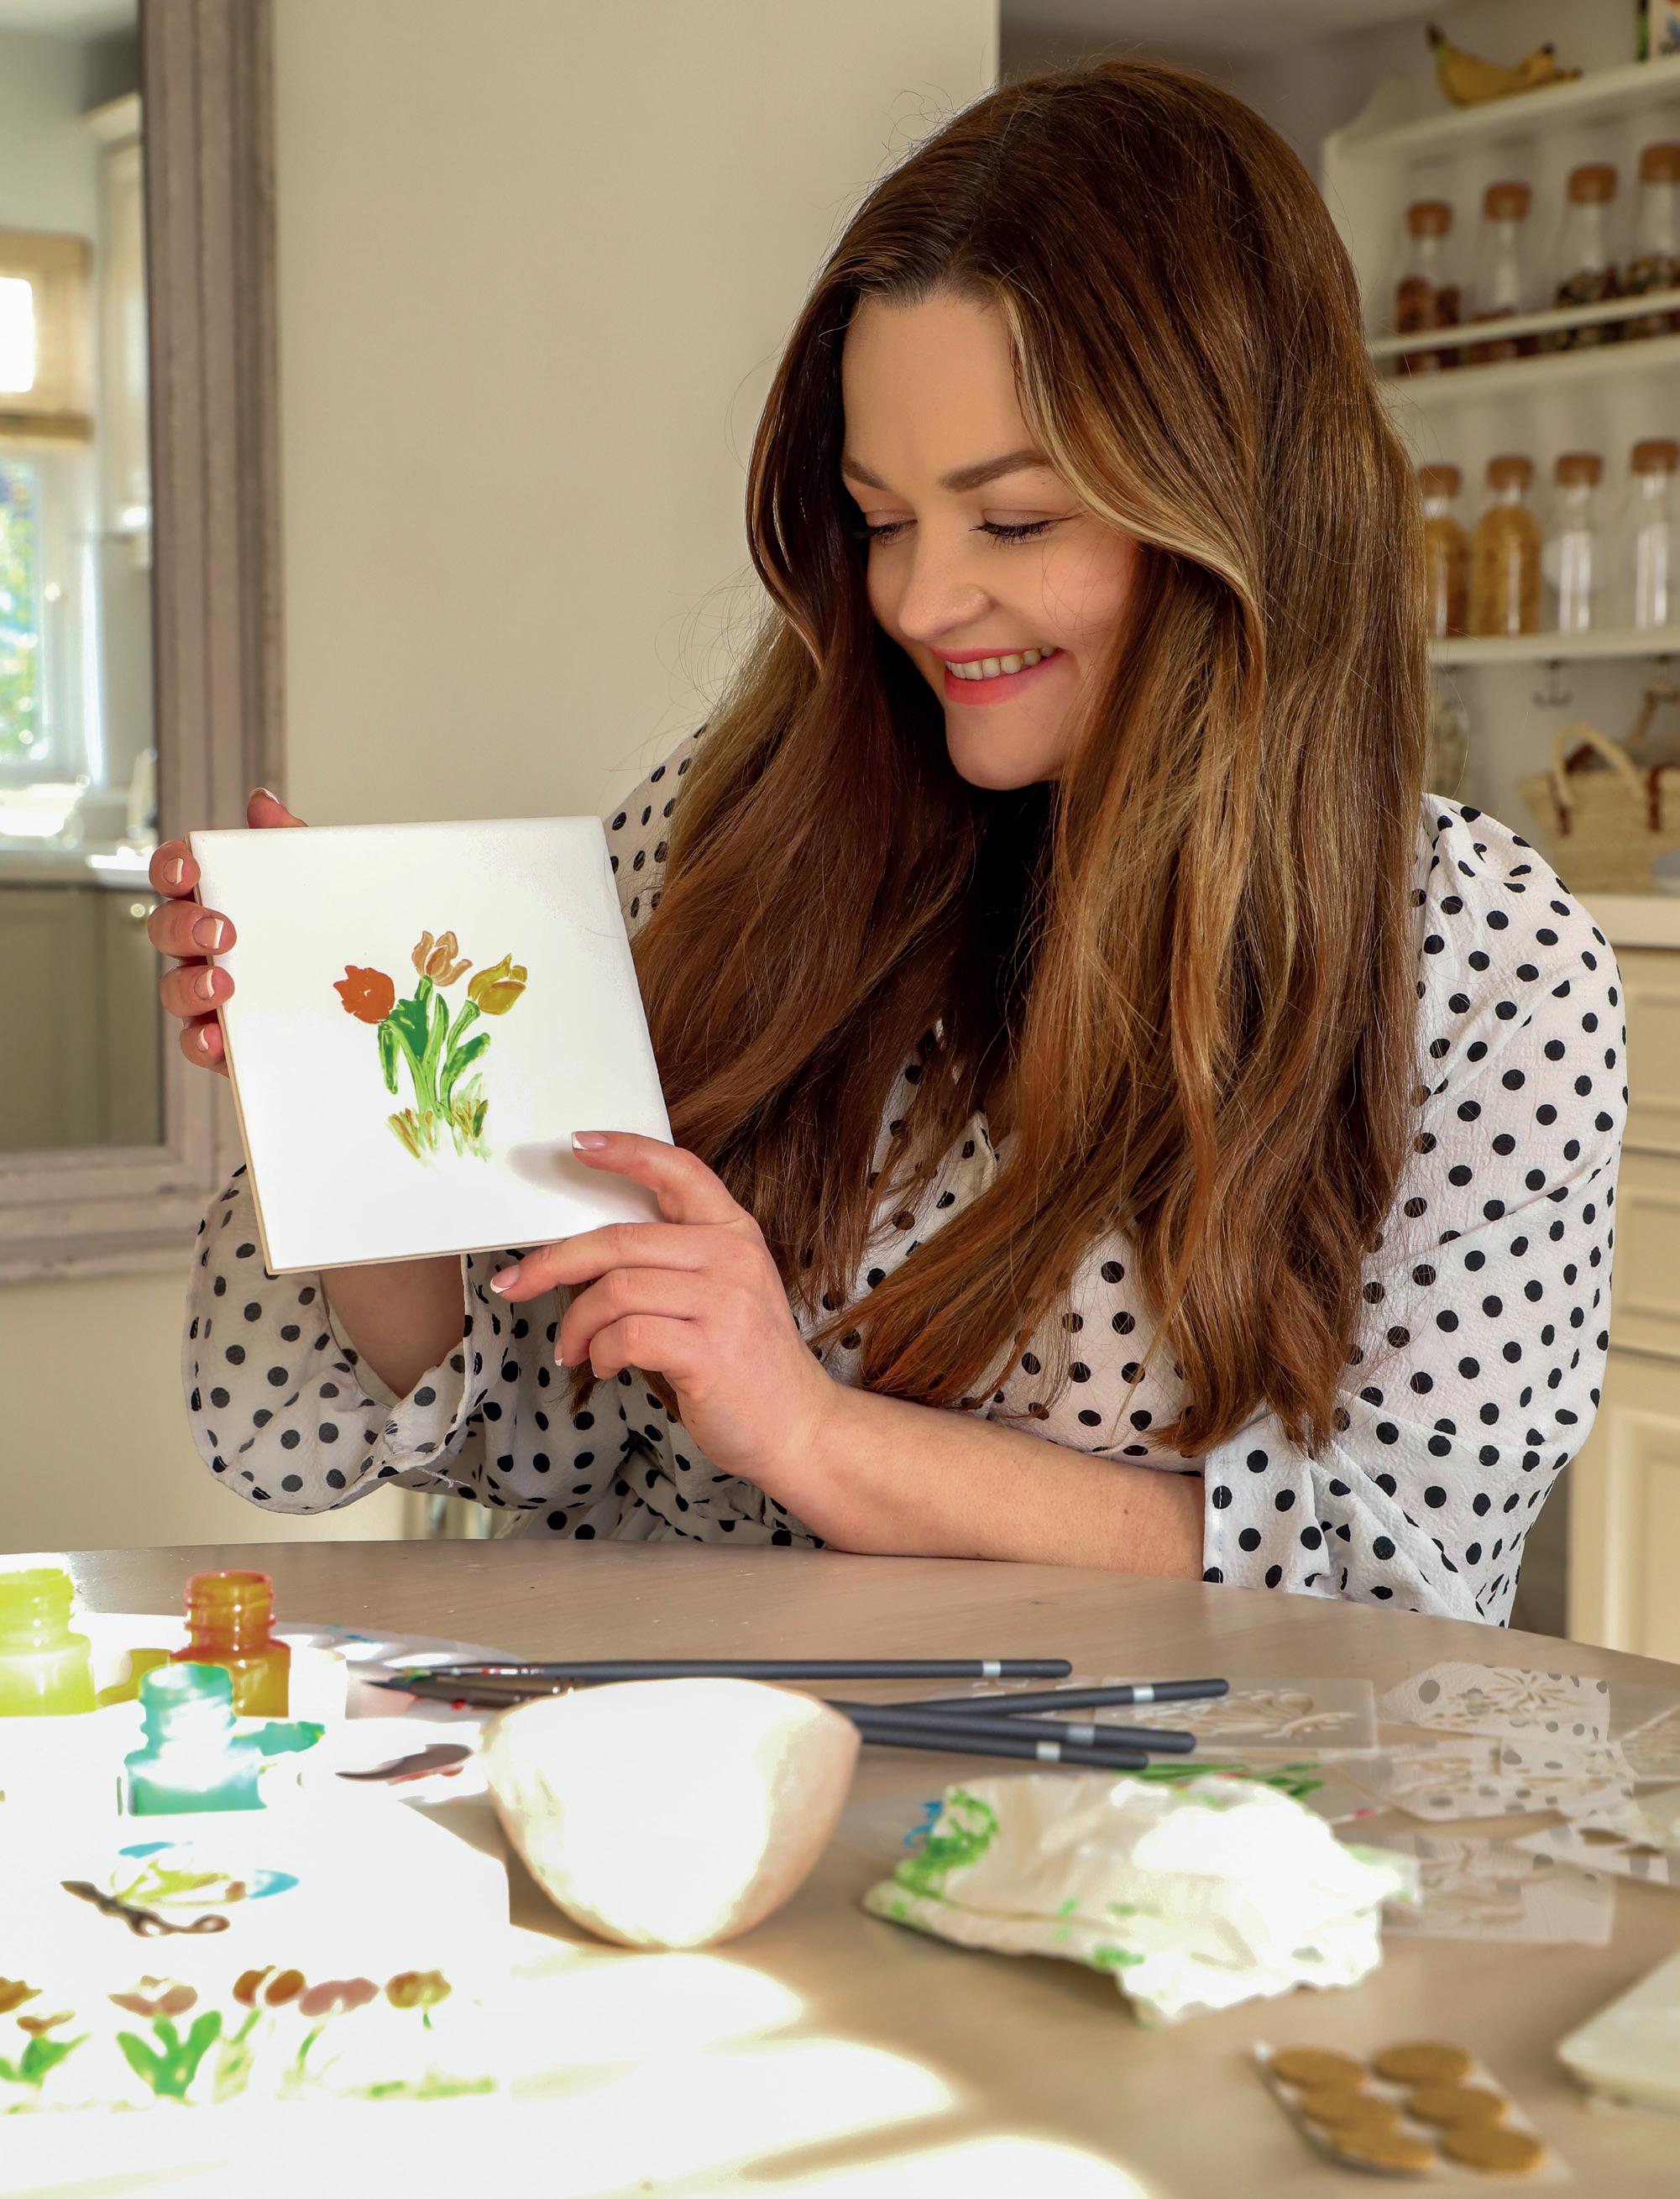
• Have fun painting and figuring out what brushstrokes work for you. For example, on my flower, I like layering the paint thicker around the head and stem and then lighter around the base to create grass.
• Don’t worry if you have any bleeding from a stencil, as you can wipe this away with a Q-tip or tissue paper or blend it with your brush. I like using stencils as a guide, as I have yet to perfect my flower painting skills!
• If you make a mistake while the paint is touch dry, you can use a window scraper and some water and vinegar to gently scrape the design away.
• Allow the paint to dry for twenty-four hours before baking, and avoid washing for twenty-four hours after that.
• Depending on the paint you use (see instructions on the pack), oven-bake your tile for around thirty minutes at 140°C (280°F). Carefully remove the tile from the oven using oven mitts and allow it to cool down.
• Gently hand wash your tile in warm, soapy water. Avoid soaking it, and don’t pop it in a dishwasher.
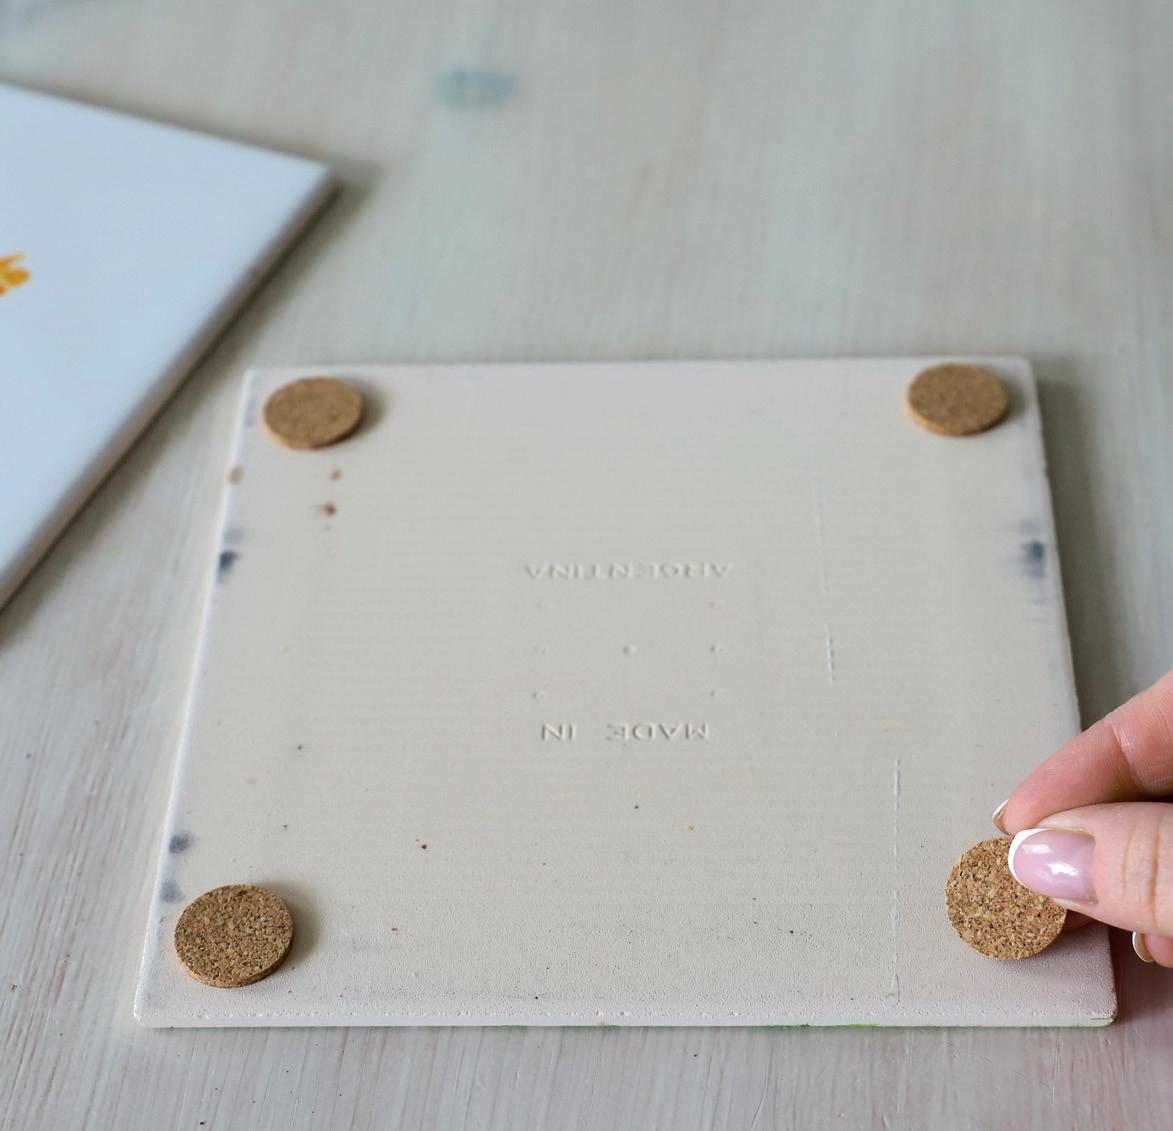
• To turn your tile into a coaster, apply your cork dots to each corner of the base. Most cork dots come pre-glued, but if not, use some glue to stick them.
• It’s not recommended to paint surfaces used for food and drink, so use your lovely painted tiles for decoration only.You could also modify this idea and paint on ceramic plates, teacups or a glass coaster.
22 Heart & Home
The Heart of the Home 23
Easy Sew Curtain
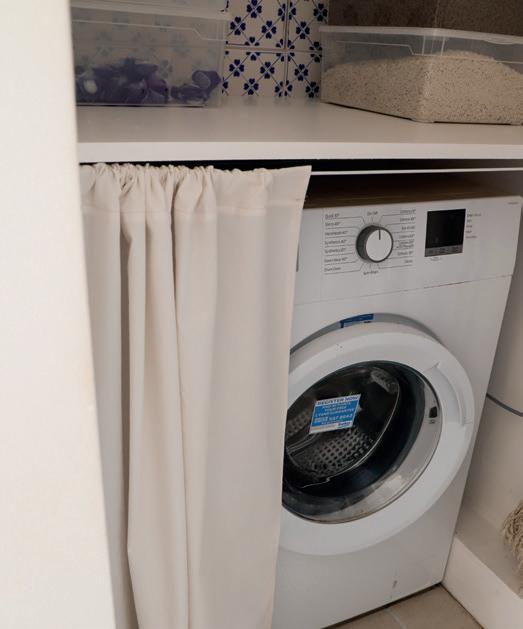
A fabric curtain is easy to make and a great way to hide things! If you don’t want visitors to see a washing machine or a cluttered corner of the kitchen, or if you want to add curtains to an upcycled piece of furniture, this one’s for you.
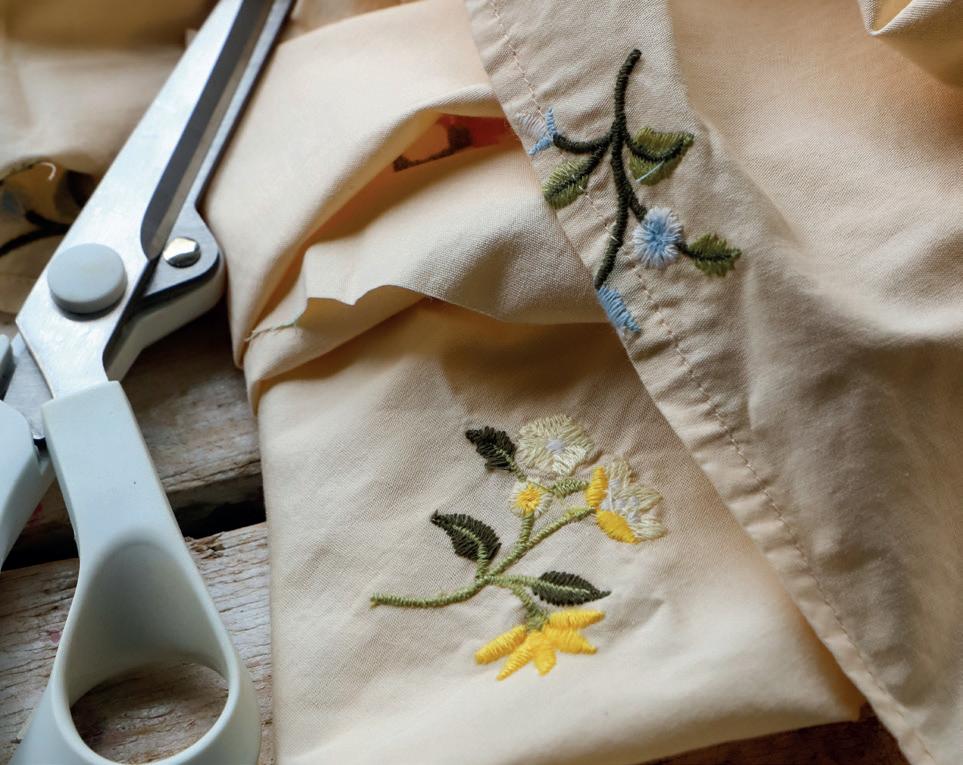
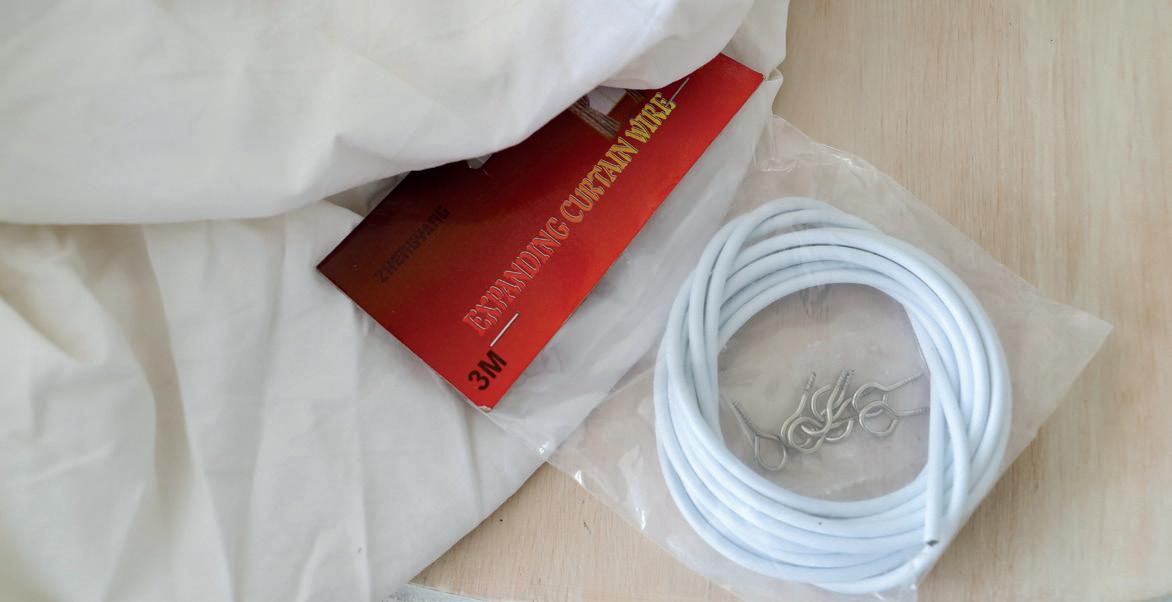
I used an old bedsheet to make a curtain for my kitchen nook (see photos on page 26) and a spare piece of thick cotton for my cabinet curtain (opposite). If you’re a beginner, lightweight cotton or polycotton is the easiest to work with. Oilcloth is another option; it is wipeable, hard-wearing and durable for the kitchen.
If you’re unfamiliar with any of the language in the sewing projects, check out the Sewing Terminology guide on page 198.
What you need
Cotton or polycotton fabric
Tape measure
Fabric marker
Fabric scissors
Sewing pins
Iron
Sewing machine
A curtain wire cord set with hook and eye
• Begin by measuring the width of the area you want to cover and add 2 in (5 cm) for the hem at either side.
• Measure the length of the area and add 4 in (10 cm). The extra inches will create a pocket for the curtain rod at the top.
• Use a tape measure and fabric marker to transfer your measurements onto your fabric, then cut the fabric to size with a sharp pair of fabric scissors.
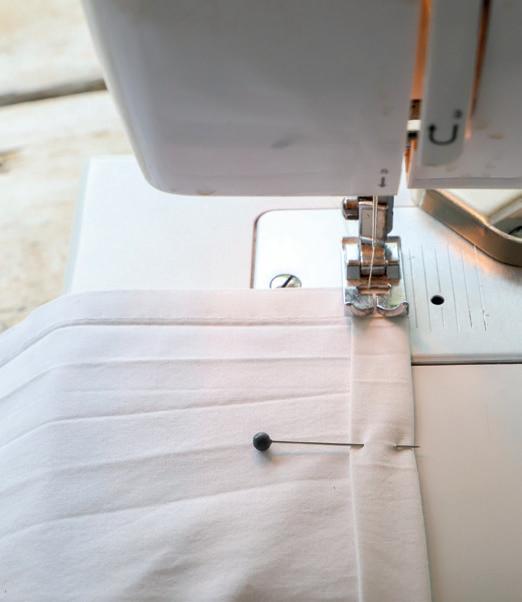
• Create a hem on both sides of the fabric curtain first. To create a hem, iron the raw edge of the fabric over 1/5 in (1/2 cm) and press with your iron, then fold over again by 1/5 in (1/2 cm) and press. Use sewing pins to secure it in place. Then, using your sewing machine, sew a straight line of stitching down the hem to secure it in place.
• After hemming the sides, let’s create a pocket for the cord. On the top of the fabric, fold over the raw
The Heart of the Home 25
edge of the material by 1/5 in (1/2 cm) and press. Next, fold the cloth over by 11/2 in (4 cm) and press. Finally, use sewing pins to pin the folded edge in place.
• When stitching the tunnel, the line of straight stitching should be approximately 11/2 in (4 cm) from the edge of the fabric to allow room for the cord to go through. This is unlike sewing a regular hem, where you sew closer to the edge.You can adjust the measurements for the tunnel depending on how thick a cord you use. Take my measurements as a guide and tweak as needed.
• Your last piece of sewing will be for the bottom hem. Before sewing the bottom hem, I like to take the curtain to where it will go and check the final measurements. Then, you can adjust the hem and make it longer or shorter. Follow the same steps for the bottom hem as for those on the sides.
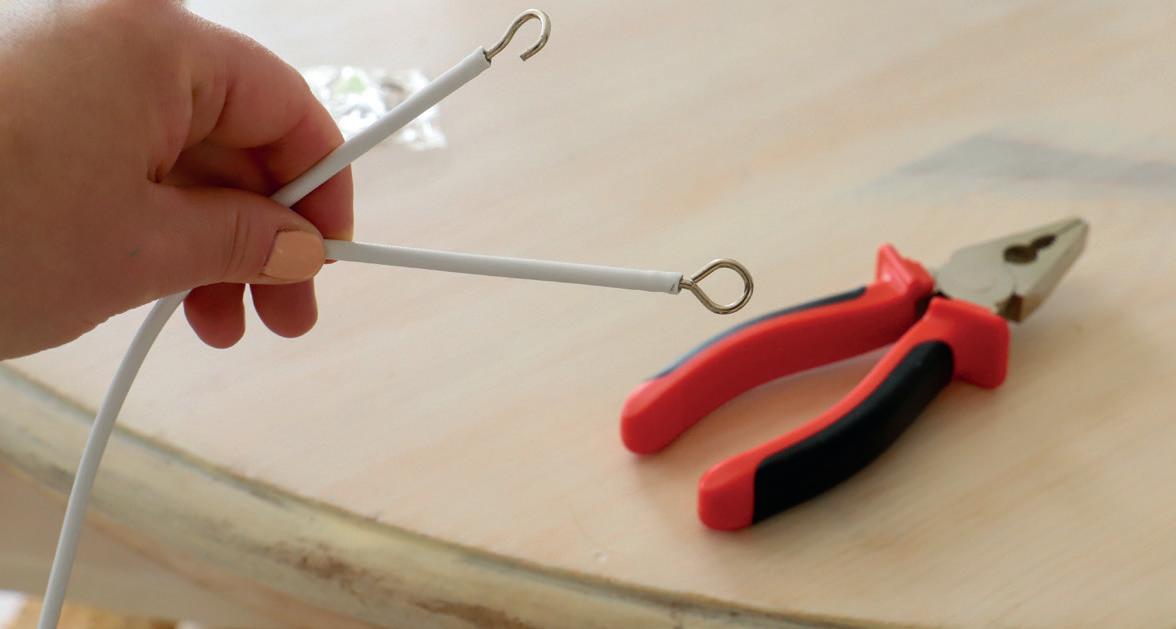
• Thread the curtain cord through the tunnel.You can trim most curtain cords with a wire cutter.Your cord will come with tiny screws and hooks. Screw the hooks into the two ends of the curtain rod and screw the other two into the area you are hanging.
• When creating curtains for a cabinet, I followed the steps above but did it twice to make two curtains. While you can add fabric panels to furniture with a staple or glue gun, I prefer this way. It’s easier to remove and wash, and I can also swap the fabric curtains if I want to change the cabinet in the future.
26 Heart & Home
Eco Cleaning Products
Many years back, I decluttered my cleaning cupboard, which was full to the brim with the contents of the supermarket cleaning aisle. I had a bottle for this and two more for that. However, after suffering from migraines, I decided to cut down on the harsh smells and chemicals in my environment. The cleaning cupboard was one of the first places I made the switch. Changing to more eco-friendly and less toxic cleaners not only helped with my migraines but also saved me a lot of money over the years.
Now, I still buy certain things, like washing powder and bleach for the bathroom, but I no longer buy the newest scented spray and my cleaning cupboard isn’t overflowing with plastic bottles.You don’t have to gut your press completely, but if you want to save money and cut down on chemicals, then raid your kitchen cupboards for vinegar, baking soda and some lemons!
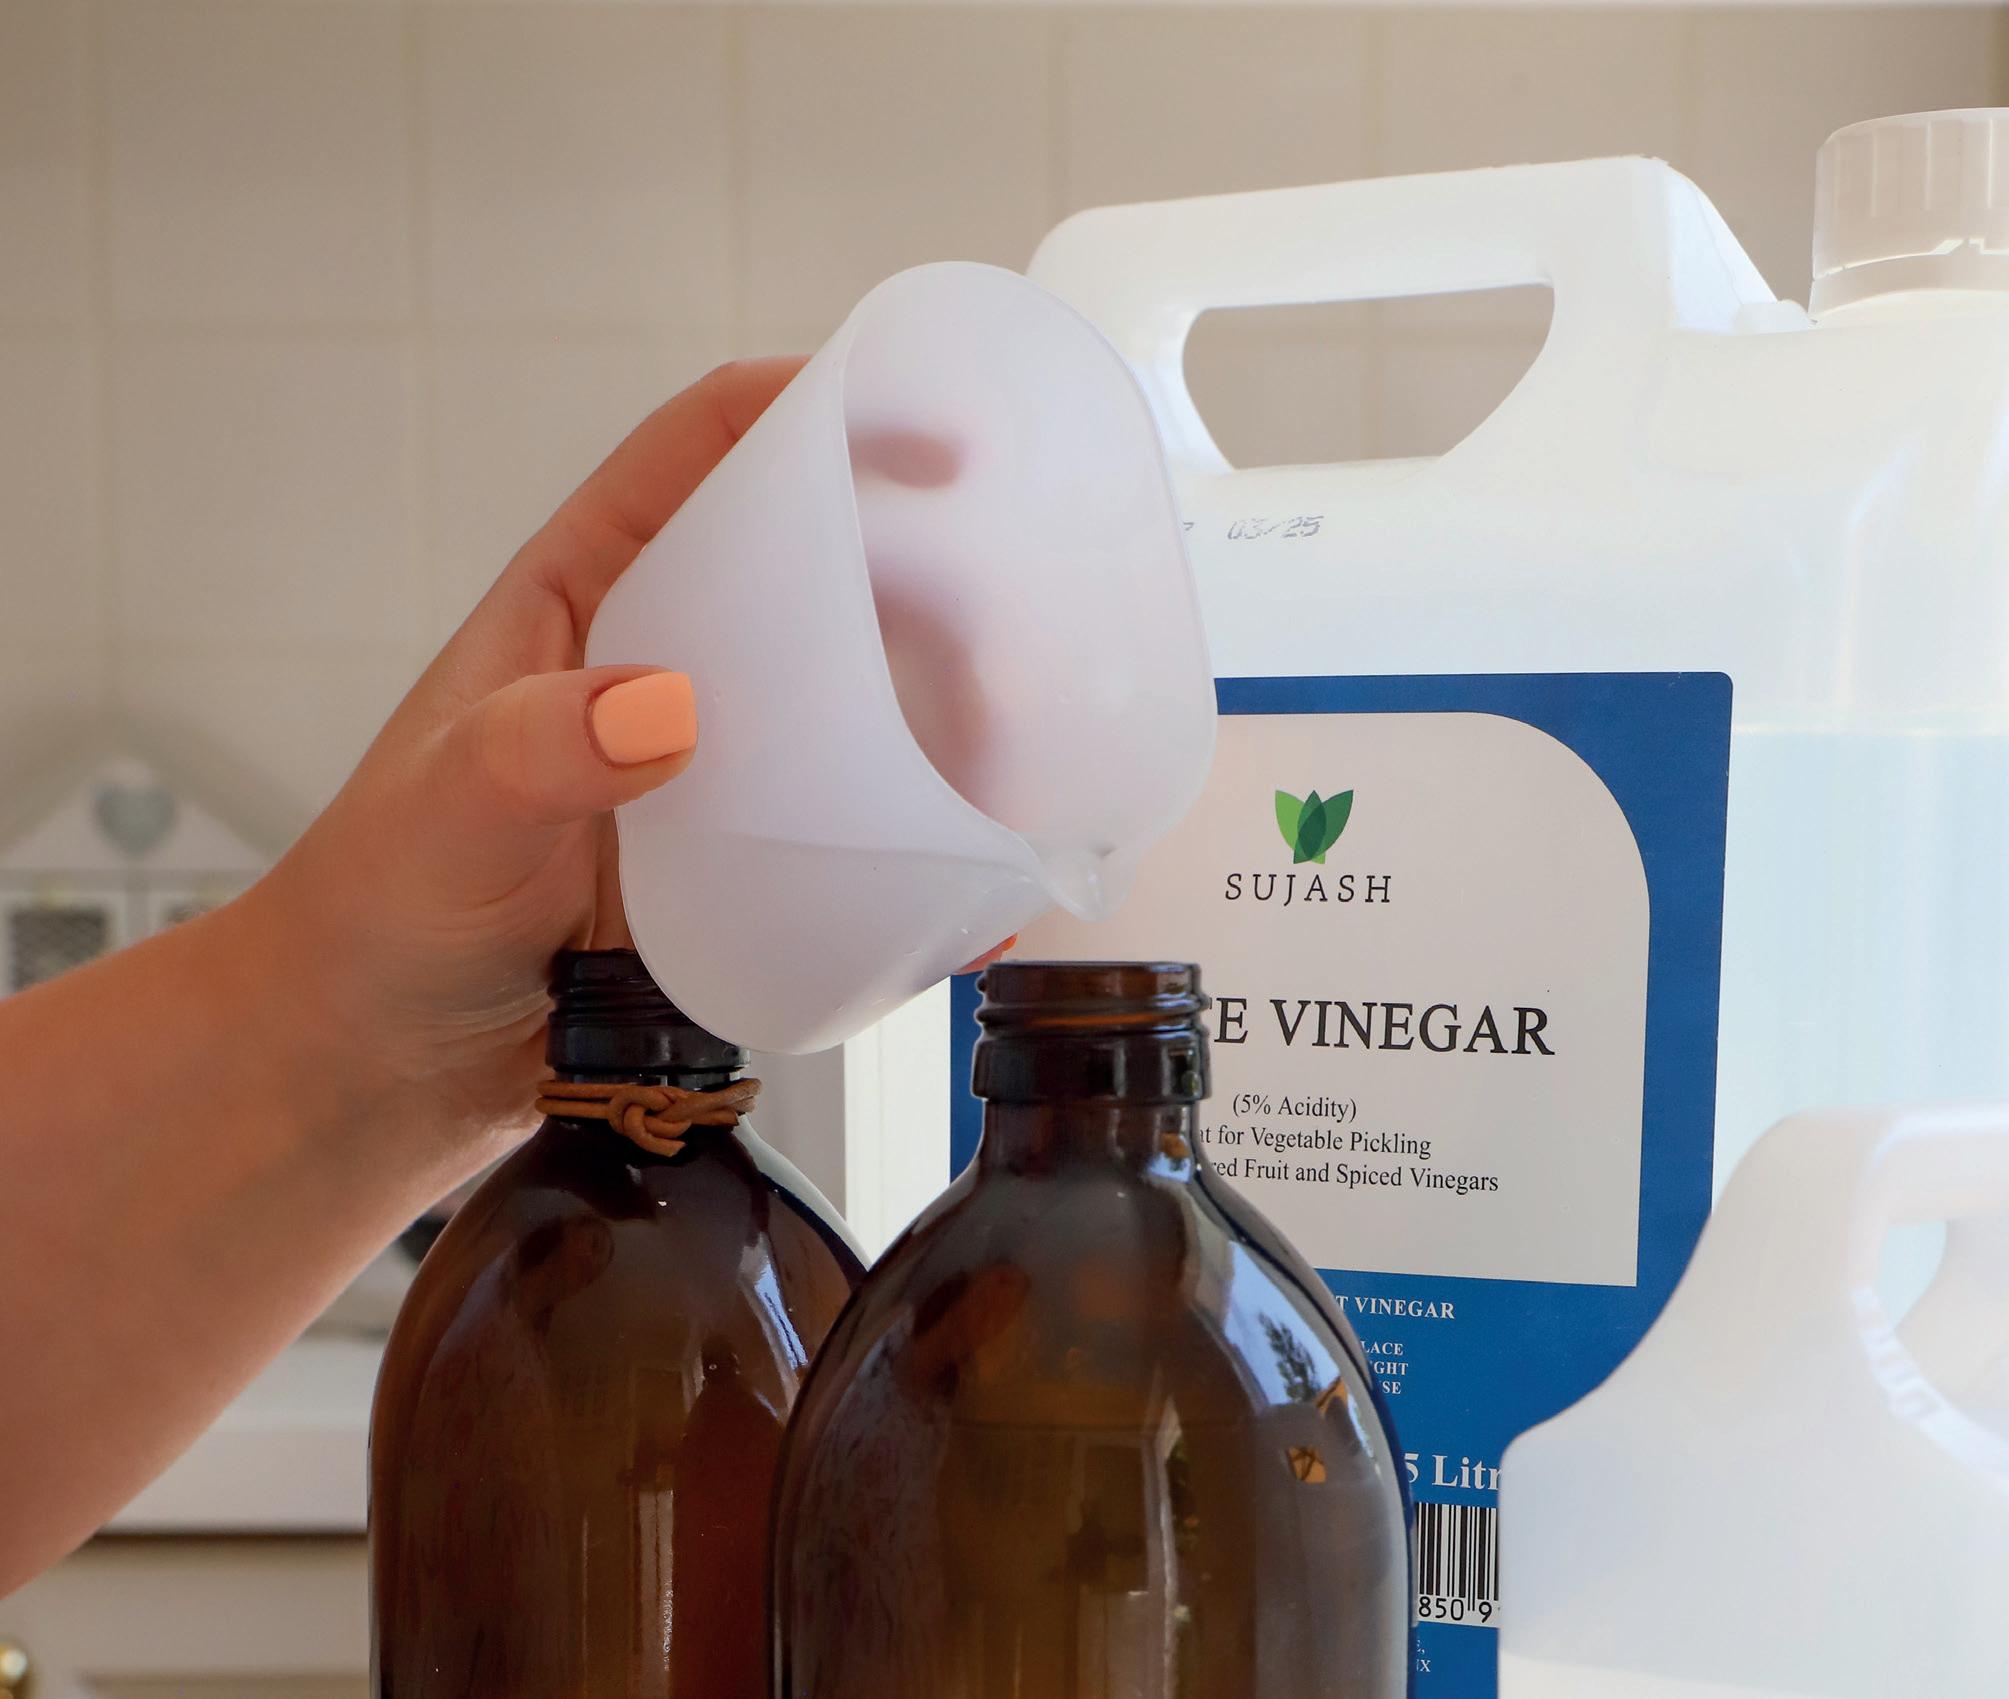
Not just for your fish and chips, vinegar is also a workhorse in the home for cleaning.You can buy large five-litre bottles of white (note: not malt) vinegar cheaply in most euro/pound/dollar stores and online, or pick up a smaller bottle in the supermarket for less than a euro.
For cleaning:
Grab a spray bottle and mix up 50/50 vinegar and distilled water.You can add a few drops of essential oil to ease the smell; for a 500 ml spray bottle, I add 15-20 drops of essential oil. Lemon is my favourite, but sometimes in winter I will add apple and cinnamon for a cosy scent. Note that some essential oils can be toxic to pets, so do some research or reach out to your vet for advice.
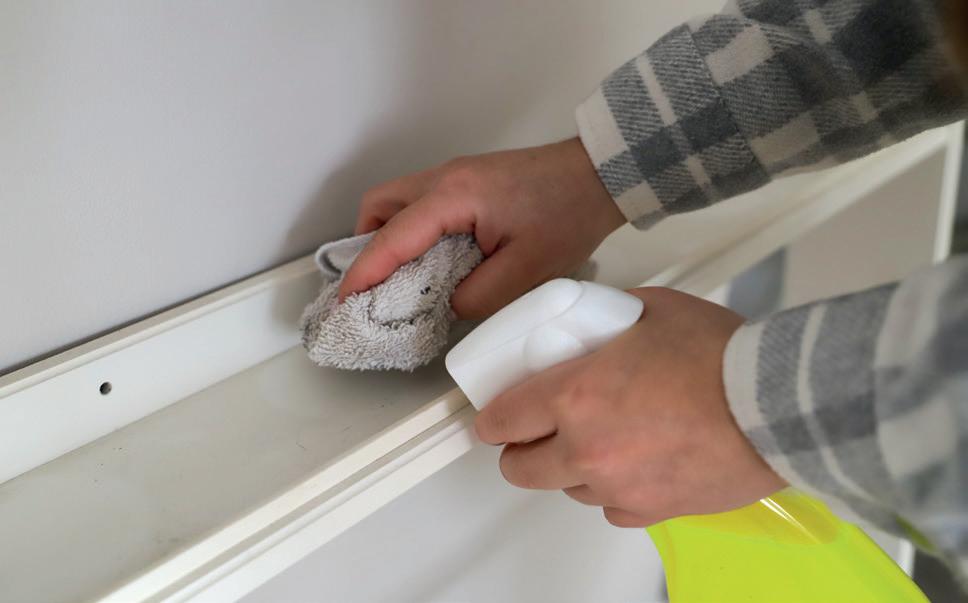
This vinegar/water spray is the one I use the most at home. It is excellent for cutting through bathroom watermarks, cleaning windows, or as an all-around surface spray. I also use it when dusting down skirting boards, window frames, etc. You should avoid using vinegar on porous surfaces like marble, granite or certain types of stone, as it can cause damage.
For smells:
Now, I know what you’re thinking … ‘Will my house not smell like vinegar?’ Fear not: the smell disappears quickly, especially when used on a hard surface. I find that once it has dried, the scent is
The Heart of the Home 27
Vinegar

28 Heart & Home
gone in at most thirty minutes – a little longer on soft furnishings and fabrics.
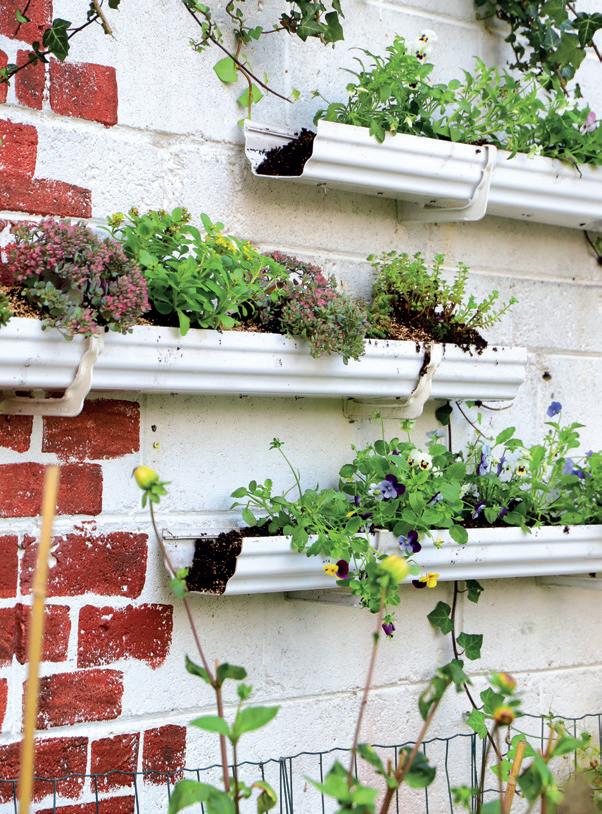
Vinegar is known for being a natural deodoriser, and as it evaporates, it removes neutralised molecules and leaves no scent. If you have a stale odour in a room, leave a small bowl of vinegar in a corner. Or have you cooked something stinky in the kitchen? Boil a small pot with 50/50 water and vinegar and let it simmer for a few minutes to help eliminate strong cooking odours.
As a fabric softener:
You can also swap vinegar for shop-bought fabric softeners, as it leaves your clothes fresh and soft. Add 1/4 cup of white vinegar to the fabric softener dispenser of your washing machine when washing your clothes. It also prevents static: lint and pet hair are less likely to cling to your clothing.
Speaking of pet hair, an internet hack I stumbled across is to use a rubber cleaning glove to wipe away pet hair from fabric surfaces. I find this helpful when running out the door and wiping away cat hair from my jumper or leggings!
For limescale:
If, like me, you live in a hard-water area, you are probably familiar with pesky limescale on your taps in the kitchen and bathroom. Well, before whipping out the harsh limescale cleaners, give vinegar a try. I like to pour white vinegar directly onto a cloth and wipe around the surface of my taps. For more stubborn limescale, I wrap the cloth around the tap for thirty minutes and rinse away. With shower heads, you can soak them for thirty minutes in a bowl or bucket of a 50/50 vinegar-to-water solution to remove limescale.
Lemon juice is another fantastic limescale remover; you can use it like above. If you have coloured taps, make sure to test an area first – this goes for shop-bought cleaners too.
Noisy kettle? Me too! It might be due to a limescale build-up. To descale a kettle, fill it up with equal parts vinegar and water. Let it soak for an hour, then boil and rinse your kettle thoroughly. (The most challenging part of this job is lasting an hour without a cup of tea!)
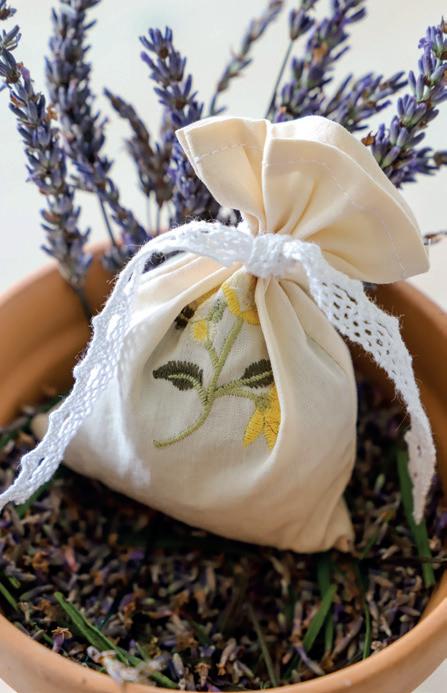
Continue the natural theme in your home with some beautiful scents! Find out how to make reed room diffusers on page 40 and pretty lavender pouches on page 110.
The Heart of the Home 29
Bicarbonate of soda
Also known as baking soda and not to be confused with baking powder, bicarb is another safe, natural and effective alternative to commercial cleaning products and something that might already be lurking in the back of your cupboard.
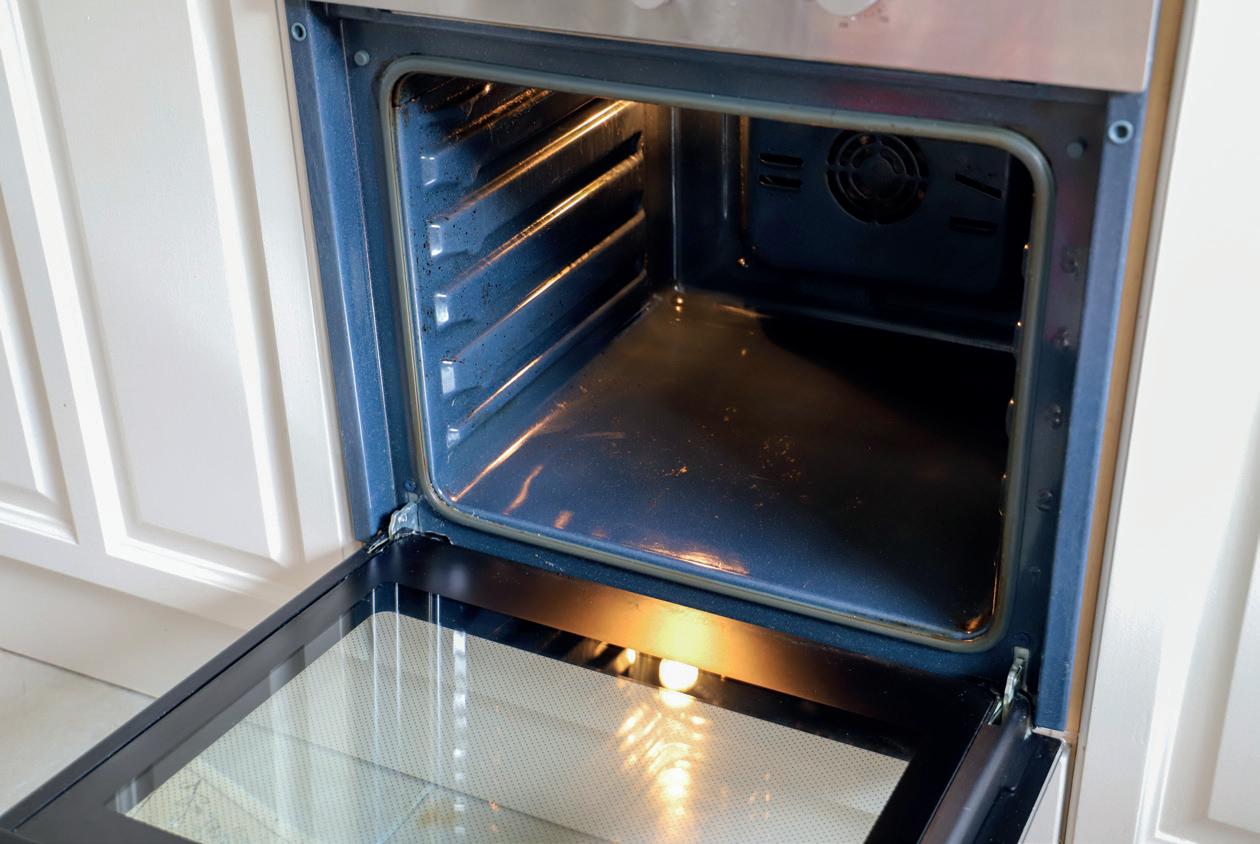
For ovens:
Bicarbonate of soda is a great degreaser and odour eliminator. To clean your oven, mix the bicarbonate of soda with water to create a paste, then spread it all over the inside of your oven. Let it sit for a few hours (or overnight), then wipe it away with a damp cloth, or use a scraper or wire wool (and some elbow grease!) to really get in there. I tried mixing vinegar with bicarb but found it wasn’t as effective.You get this satisfying fizzing and bubbling when the two mix, but they cancel each other out and turn to salty water. Creating a paste with water is more effective.
Oven tip! Did you know you can easily remove your oven door? Most models will have a clip on the bottom sides that you can flick and lift off the door, making it really easy to get inside to scrub and rinse.
For carpets:
Need to refresh a rug or revive the carpet? Sprinkle some bicarbonate of soda, let it sit for a few hours, then hoover it up for a fresh, clean scent.
In the bathroom:
Like vinegar, bicarb can be used to clean sinks, toilets and bathtubs. I like to mix it with water to create a paste, bung it on a sponge or cloth, scrub my ceramic areas, and then rinse away.
On clothes:
Want to brighten white clothing? Add a cup of bicarbonate of soda to your laundry to help brighten whites and remove odours.
30 Heart & Home
The Heart of the Home 31
32 Heart & Home
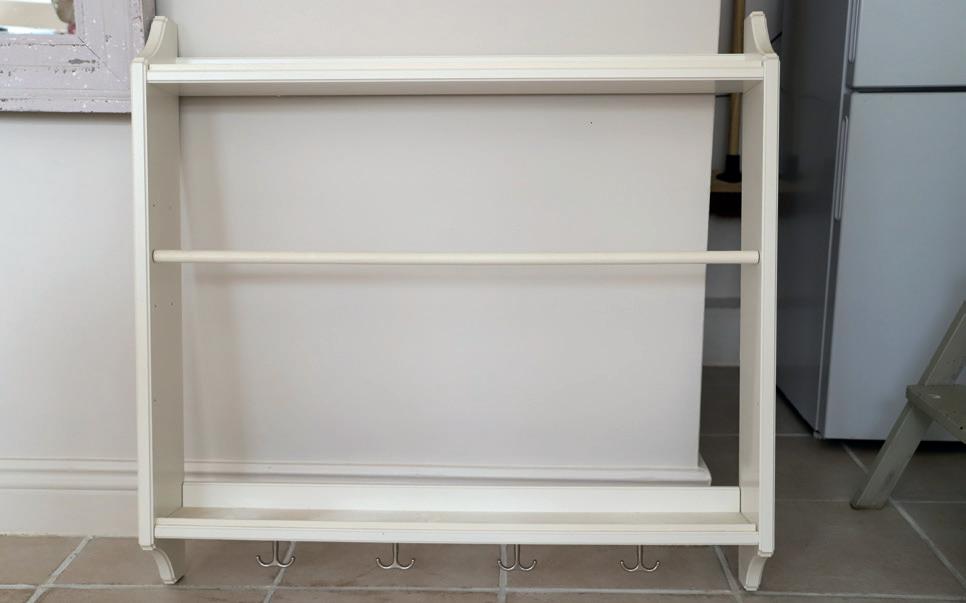
Mini Kitchen Pantry
Storage is a common problem in most kitchens. Sometimes more is needed, but sometimes we just need to learn how to use the space properly. I am guilty of having the kitchen drawer of doom and the overflowing press full of half-empty bags of food!
Using shelves or upcycled cabinets is a great way to add more storage to a bare wall. It can free up space elsewhere and help you feel more organised.
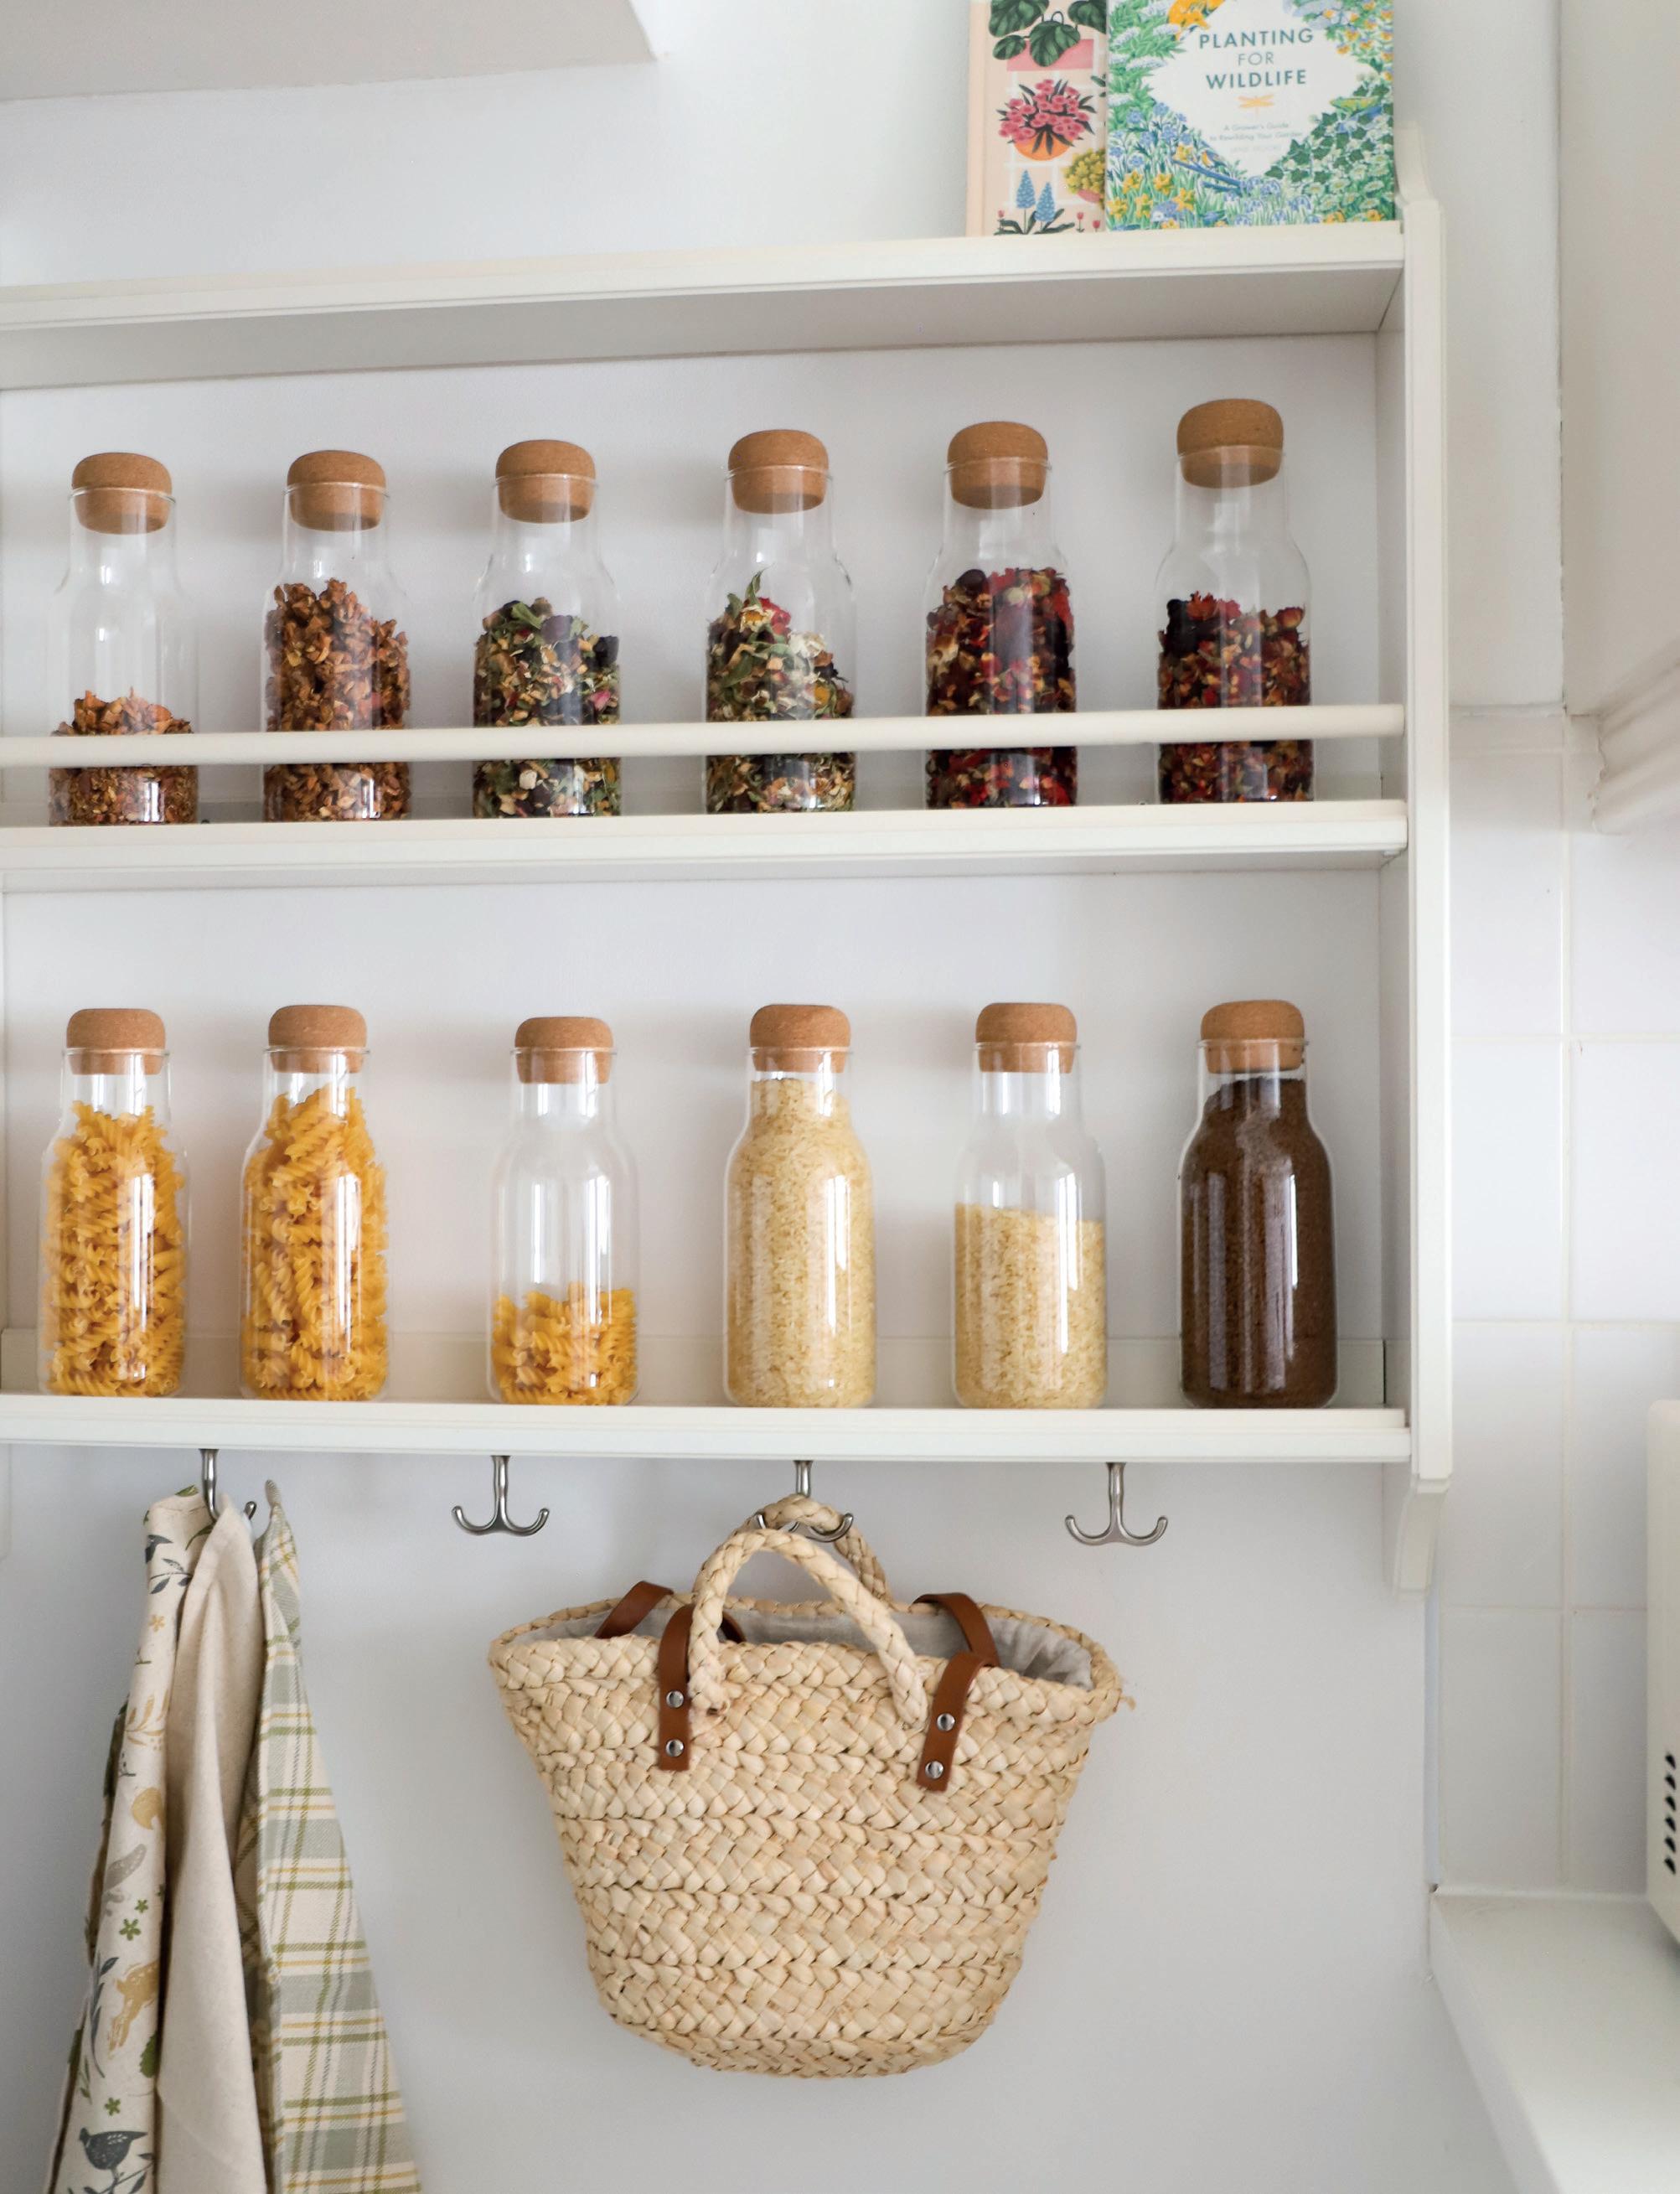
I decided to create this mini pantry from an old shelf. My cabinets are now less jam-packed, and I made something practical but also pretty in my kitchen.
When thrifting or searching for suitable second-hand pieces online, look for old kitchen plate racks and wall-mounted kitchen shelves. You can sand, paint or stain pieces to suit your style and even remove spindles to make your storage containers fit your space.
What you need
A stud finder (for plasterboard/drywall; see note below)
An old shelf
Spirit level
Pencil
A drill
Screws
Wall fixing / wall plugs (see note below)
You can get special drywall anchors if you cannot locate studs or if the studs are not where you want to hang the shelf. These are commonly known as Molly bolts or hollow wall anchors.
You will need different fixings for different types of walls. For example, if you are hanging a shelf on plasterboard, it will require different hardware than if you are hanging it on a masonry wall. In the hardware shop, screws and fixings are typically sorted by project type, such as masonry or drywall. The screw packets also include detailed information about where to use the screws and fixings. Now, let’s hang your shelf!
• If drilling into plasterboard, locate the studs in the wall where you want to hang the shelf; you can use a stud finder or tap on the wall and listen for a solid sound. See note above.
• Hold the shelf in place on the wall. Use your spirit level to make sure it is level and centred. Use a
The Heart of the Home 33
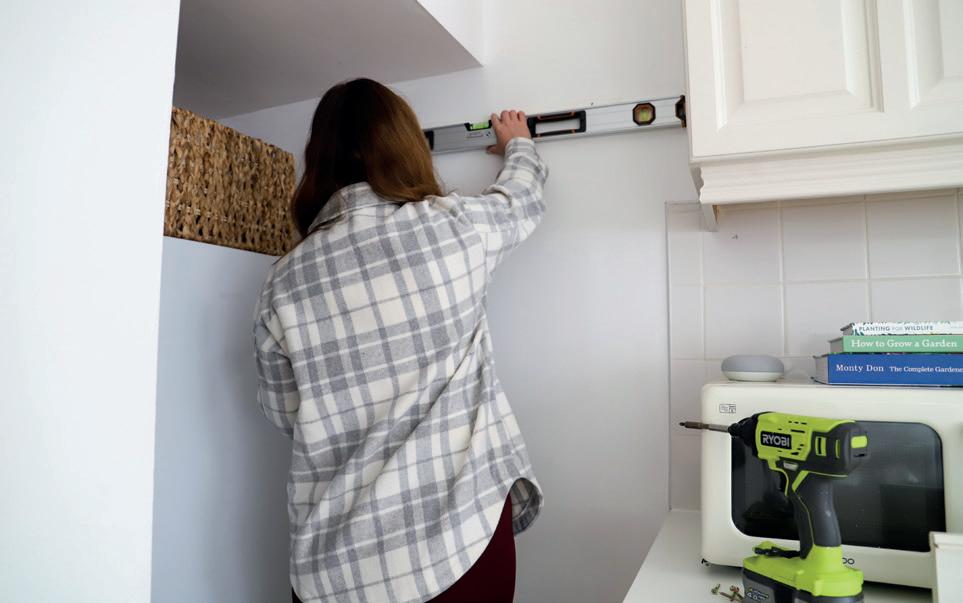

pencil to mark the location of the holes on the wall.
• Use your drill to drill holes into your markings on the wall, making sure they are deep enough to insert the screws.
• Insert a wall plug into the hole (or a Molly bolt if it is drywall; see note on page 33). Hold the shelf in place again and insert the screws into the holes. Tighten the screws until the shelf is secure.
• I use glass storage jars to store the likes of pasta, rice and coffee and tea.You can pick up these glass containers in various sizes online or in most home decor shops. When picking glass jars, measure the size before buying them to ensure they will be manageable and won’t fall off your shelf. I stuck a small, reusable label on the base of each jar for the best-before dates.
When unpacking my food shopping, I remove the excess wrapping before storing items. For example, my six-pack of King crisps come out of their bag and into a basket in the naughty drawer. Removing the extra packaging before storing helps keep drawers and presses less cluttered and overwhelming.
34 Heart & Home
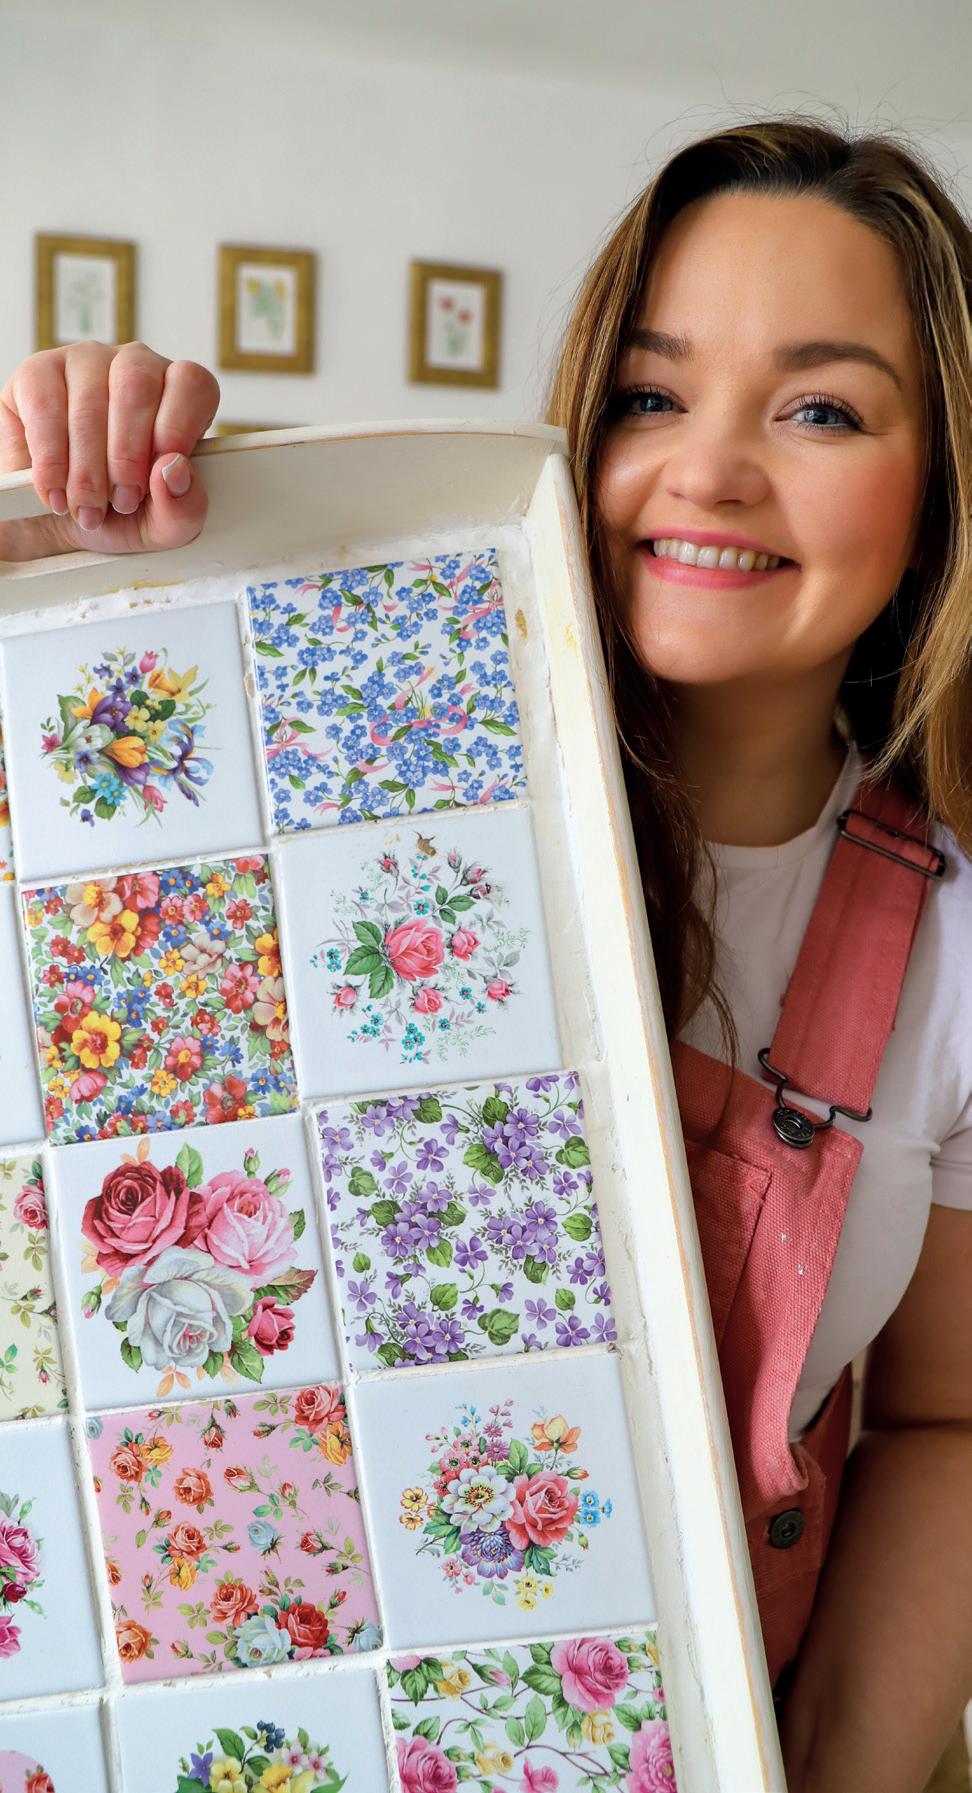
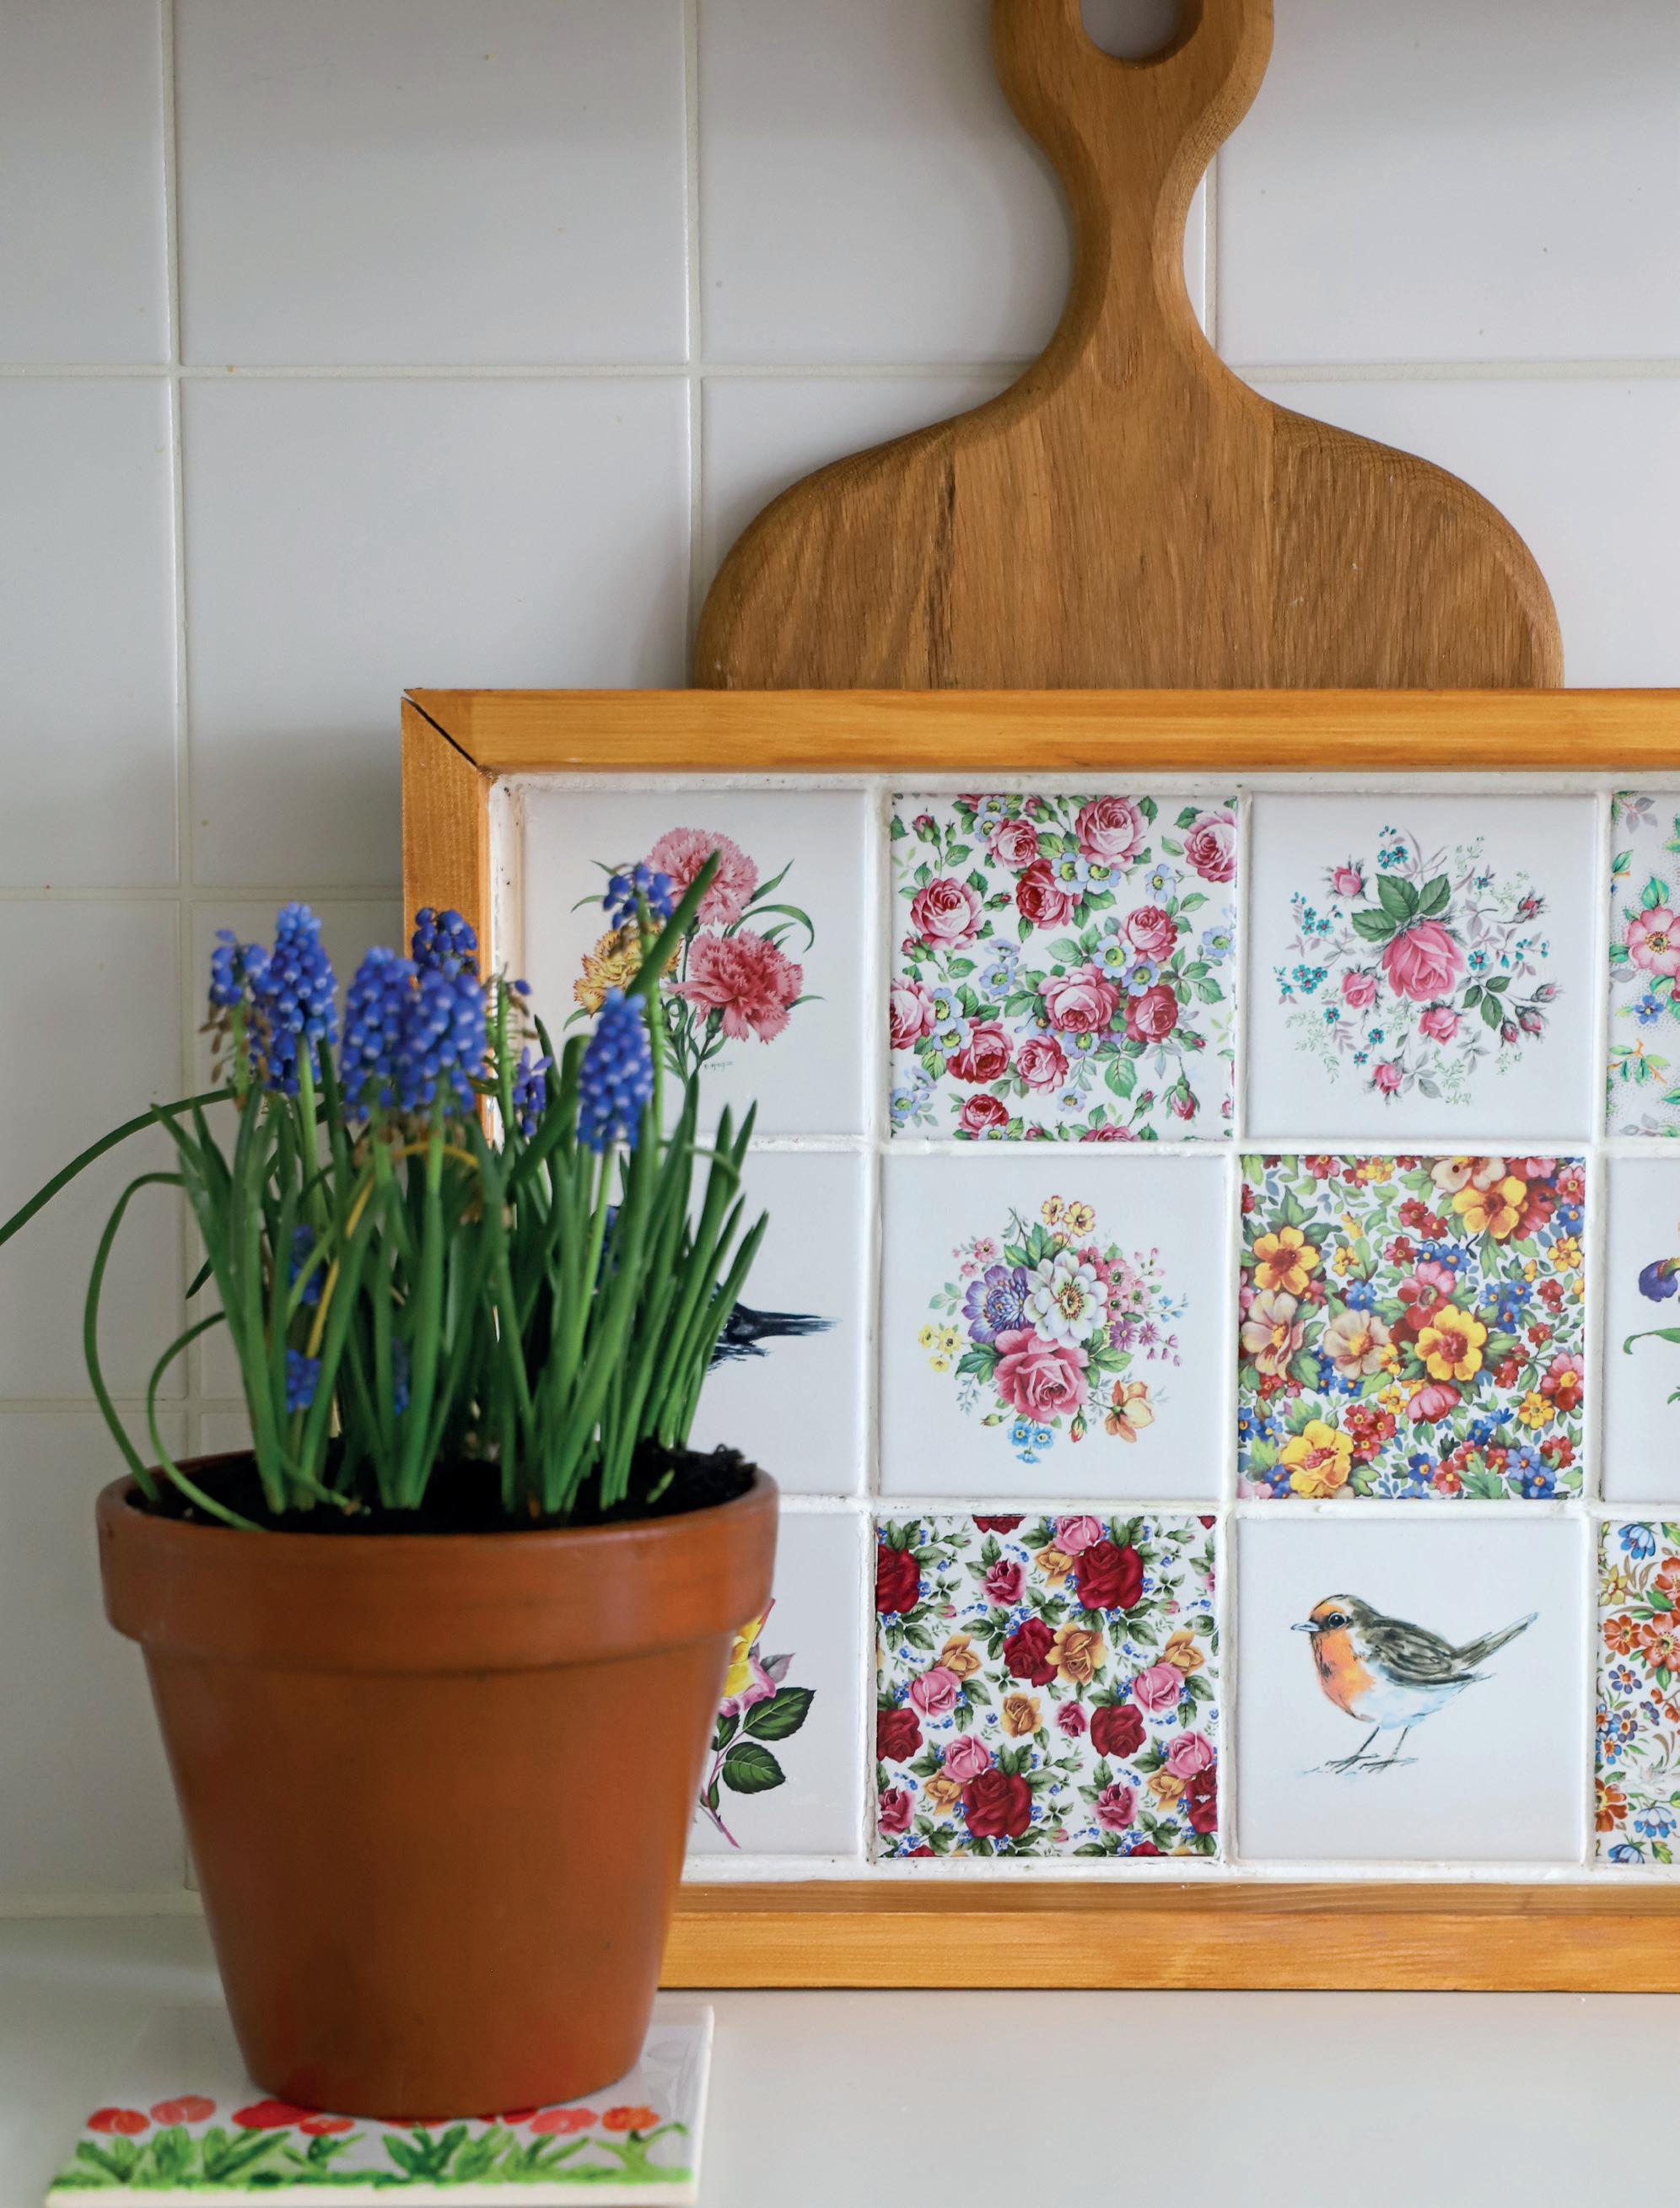
Pretty Tiled Tray
I fell in love with these adorable floral tiles a few years ago, but unfortunately, I didn’t have anywhere for them on my walls. So I decided to experiment with a tiled wooden tray. That was back in 2018, and my skills have improved slightly since then!
I will share two ways to create a tiled tray. You can use a tray you have already, in which case you’ll skip the first set of instructions. But if you feel like flexing your woodworking skills with a straightforward project, read on …
Note: For projects like these where you need to be precise, it’s best to measure in millimetres, so I haven’t included inches in the measurements.
What you need
MDF board
Measuring tape and ruler (or T-square) and pencil
Wood clamps
Safety mask and goggles
Circular saw
2 x 1-inch wood
Hand saw and mitre box
Wood glue, tack nails (I used 16 mm), hammer
* Paint/stain (optional)
* Decorative tiles
* Serving tray
* Adhesive
* Grout, smoothing tool and damp rags
* if you are using an existing tray, you only need items marked with an asterisk
To make the wooden tray:
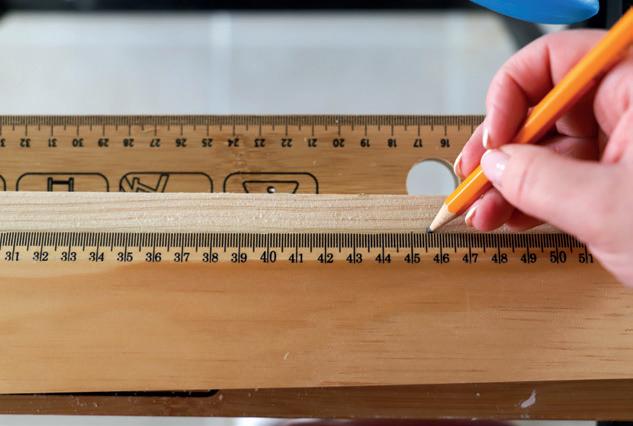
• Cut MDF base to 45.5 x 35.5 cm. I used a scrap piece of MDF that was 9 mm thick, but you can use thicker wood too.You could also use reclaimed wood for the base. When cutting your MDF base, measure and mark with a pencil. I find it easier to get a precise measurement with a T-square than a measuring tape and ruler, but use what you have in your crafty stash. I used a circular saw to cut my MDF, but you can also use a hand saw. Use woodworking clamps to clamp the wood to a strong
The Heart of the Home 35
36 Heart & Home
surface before cutting and be sure to wear your mask and goggles.
• Next, you’ll cut your 2 x 1 wood. Cut two pieces 45.5 cm long and two pieces 35.5 cm long. I cut each end at a 45-degree angle using a mitre box and saw. Mitres can be confusing if you’re a beginner, so you can cut these straight if you prefer.
• Apply a bead of wood glue to the 2 x 1’s and firmly place them onto the base. Clamp the wood in place and allow the glue to dry.
• Hammer in some tack nails to secure the base to the side pieces. Adding some nails will help the tray take the weight, as the tiles can be heavy. Ensure your nails are fully hammered into the wood to avoid scratching your table.
To tile the wooden tray:
• You can choose to paint or stain your tray to suit your style – best to do this before tiling. For tips on painting, check out page 201. I am doing a feminine and floral tray here, but you could use retro tiles and create a bougie tray that would look fab at a home bar or drinks corner.
• Before tiling, arrange your decorative tiles in your favourite pattern. Rearrange and move things around until you are satisfied.
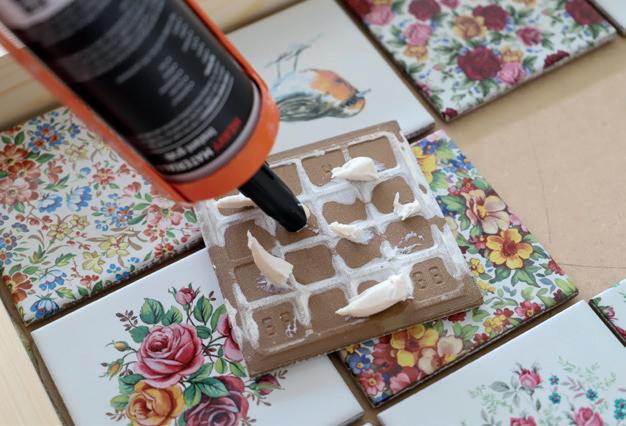
• You can pick up small pots of tile adhesive and grout in most hardware stores, or use strong glue to adhere the tiles to the base. Just check that the glue is suitable for ceramic and wood.
• If you are using a serving tray that you didn’t make, check that it can hold the weight of the tiles before adding, and if it’s a second-hand tray, look for any damage to the base before using it.
• Smooth out your adhesive and place your tiles firmly on the base. Allow the adhesive to dry thoroughly, which can take up to twenty-four hours, depending on the temperature in your home.
• I didn’t use tile spacers; instead, I used a ruler tip to check that they were even as I placed them.
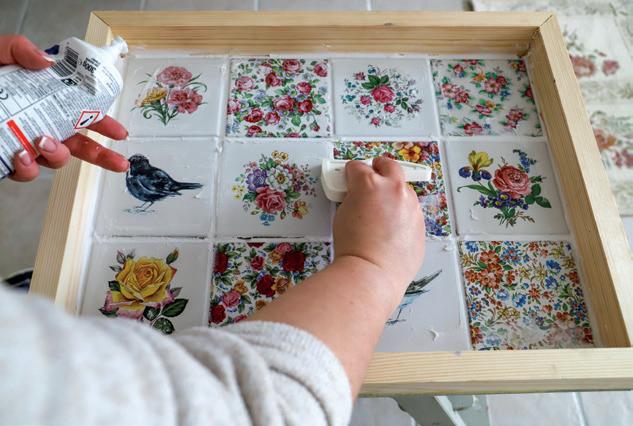
• Once the tiles are fully dry, it is time to grout them. This is the fun part, kind of like icing a cake. Add grout to the gaps between the tiles and smooth it using a smoothing tool (an old bank card would work too). Wipe away any excess grout with a damp cloth and allow it to dry for twenty-four hours.
• The next day, polish the tiles and remove any remaining grout with a damp cloth.
The Heart of the Home 37

Down Time
WLiving Room
hen I imagine my dream living room, it’s a cosy and inviting space that allows me to unwind after a long day. While the kitchen is the heart of the home, the living room is a social hub with a special charm.There is nothing quite like settling down in the evening with a steaming mug of tea, lighting a candle and enjoying a box set marathon before a roaring fire.
Living rooms can often be dual spaces, with many having work-from-home nooks. Even the couch sometimes becomes a ‘soft office’ for me. Pain points here can be lack of storage, character and design.You want your living room to look pretty but also be functional for you and your family.
In this section, I will share my DIY and decor tips to help you create a living space that suits your personal taste and enhances your home’s functionality and flow. From wallpapering like a pro to adding some DIY art, let’s dive in and get inspired.
Down Time 39
40 Heart & Home
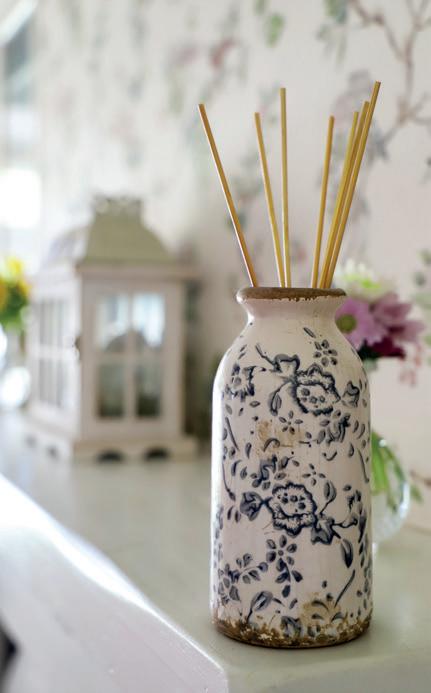
DIY Room Diffuser
Creating your own diffuser is a great way to add a subtle scent to a room. They are straightforward to make, and you might already have the supplies sitting in your kitchen cupboards or crafty stash.
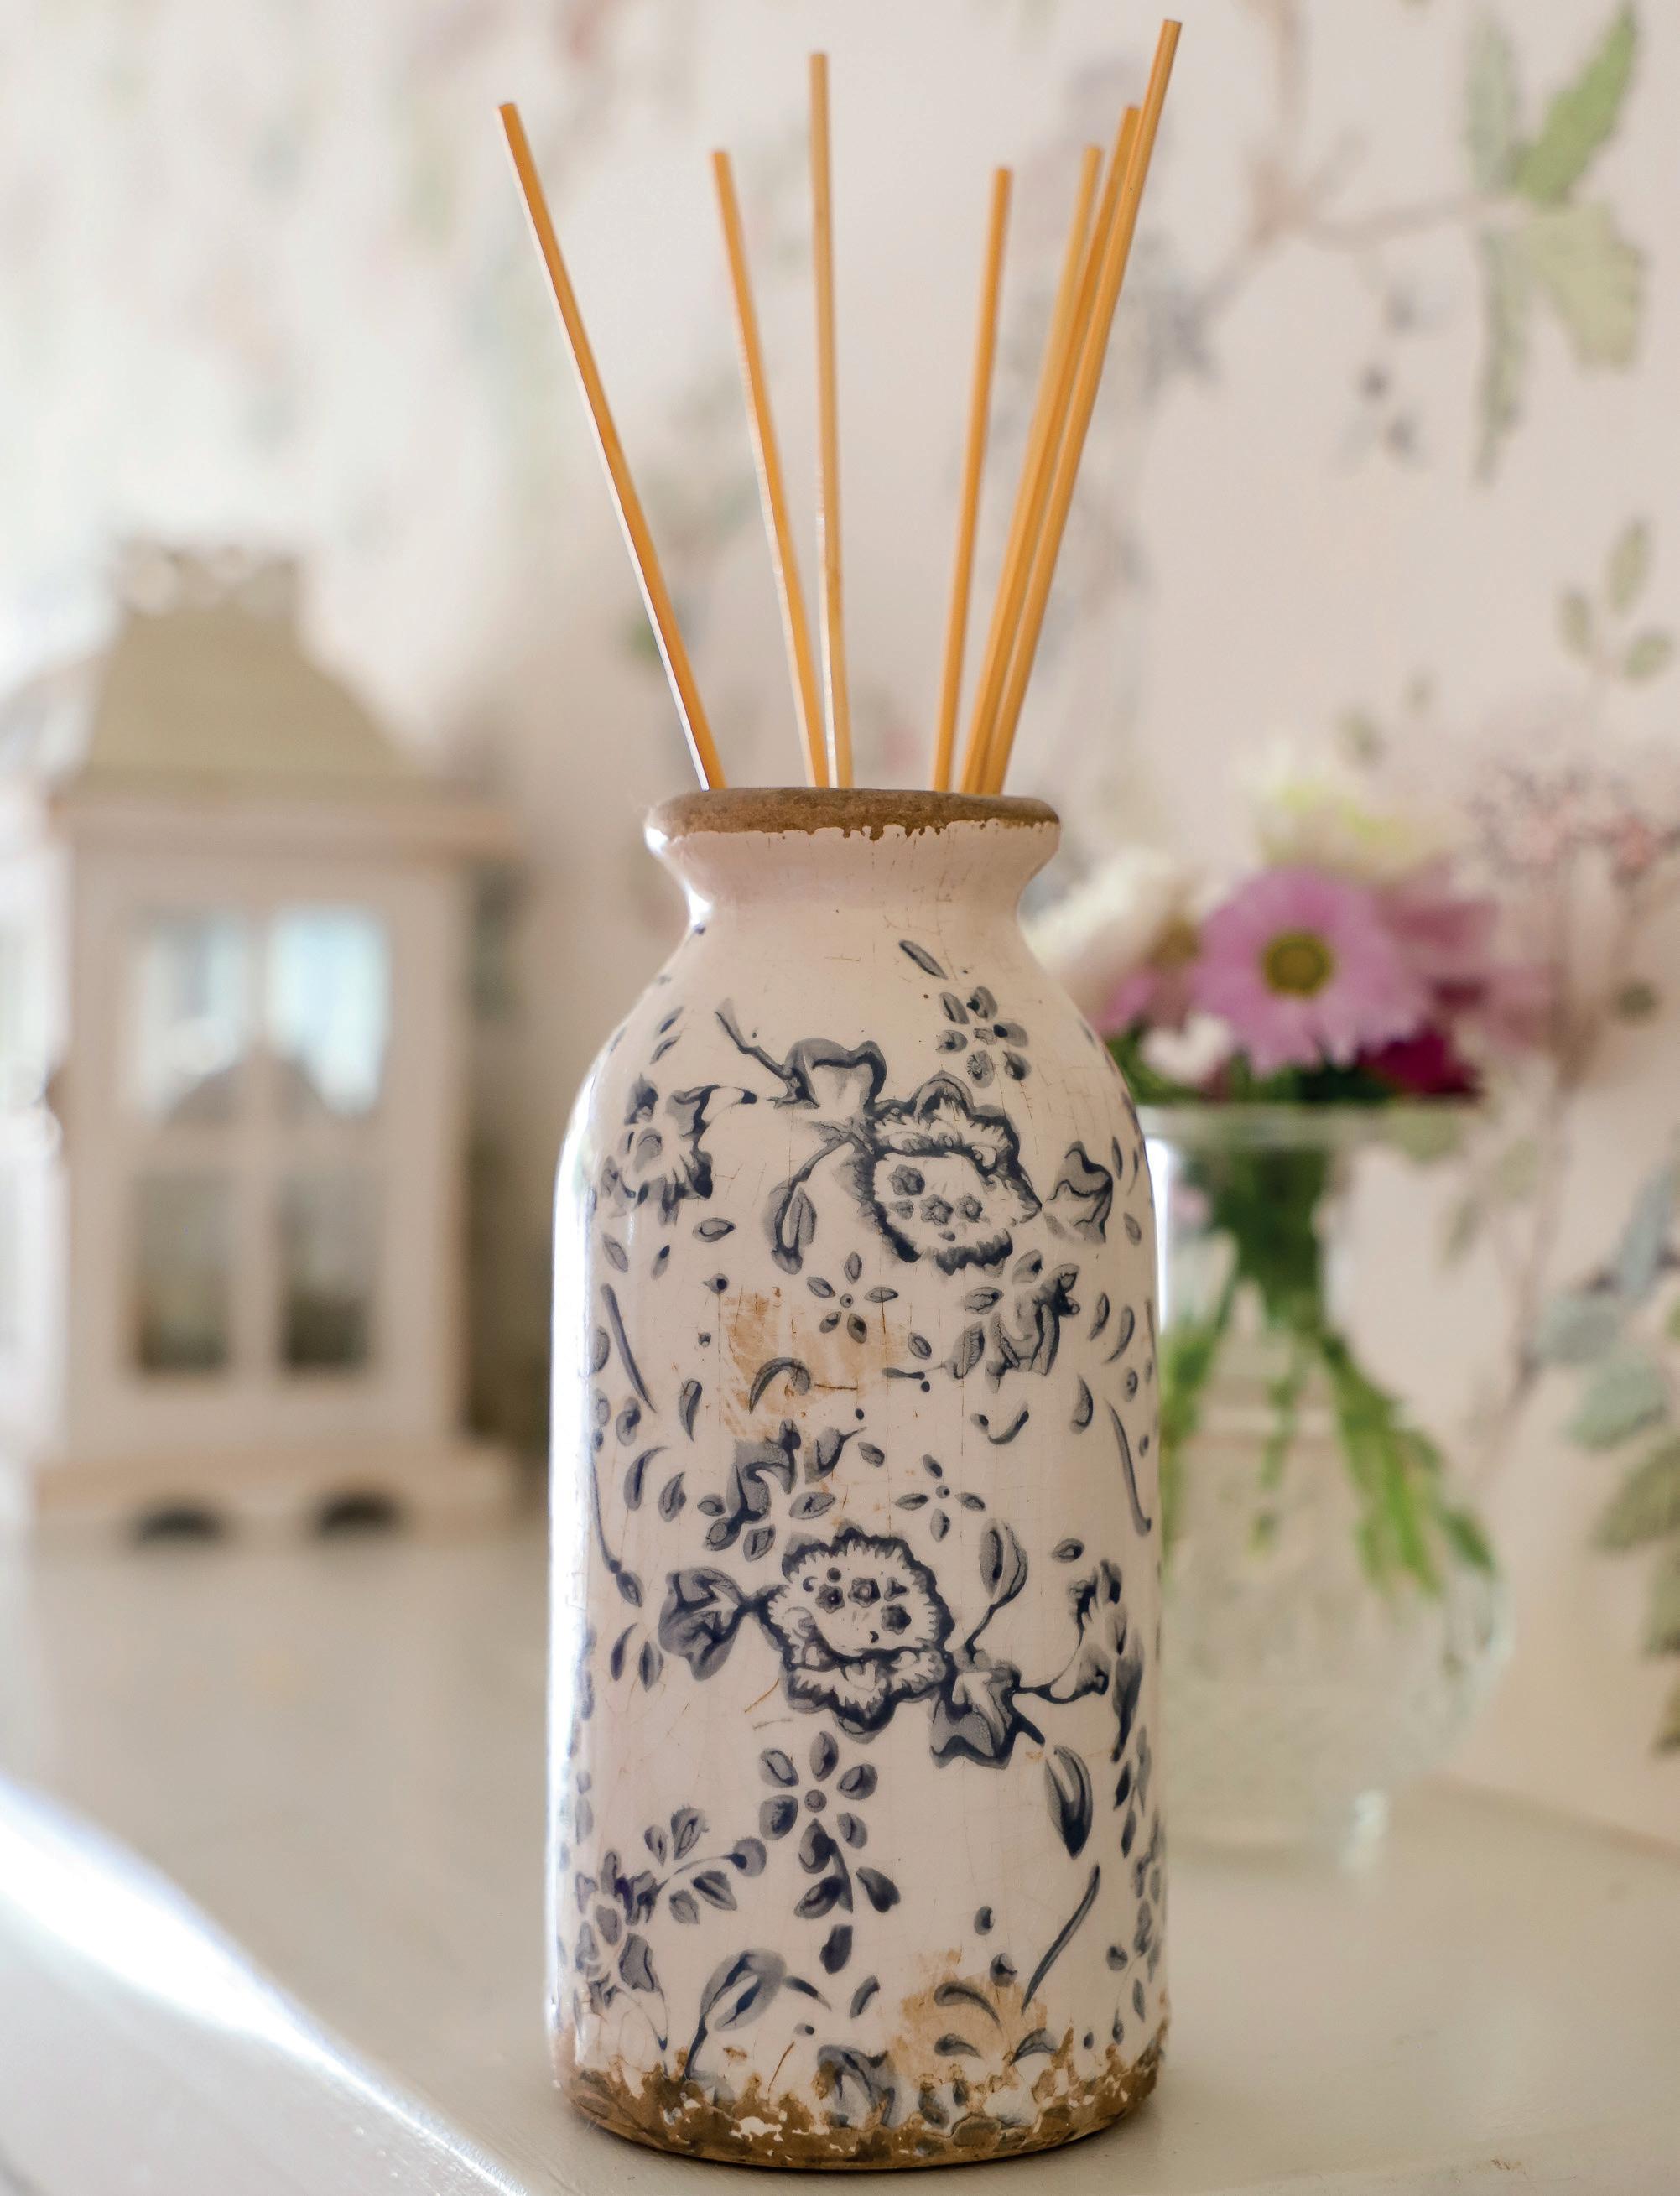
What is a reed diffuser, I hear you ask? It is a type of room diffuser that uses reeds or sticks to absorb and disperse essential oils. The reeds are placed in a container filled with oil, and the oil travels up the reeds, releasing the scent into the air.
You might have stumbled across these in the candle section of your favourite store and noticed their hefty price tag. So, gather your supplies and let’s make some of our own!
What you need
Ceramic or glass vase
Measuring jug
Sweet almond oil
Essential oils of your choice Reed diffuser sticks or bamboo sticks
• Choose a glass or ceramic vase with a narrow top opening to slow down evaporation. Check its capacity by pouring in water from a measuring jug, then dry thoroughly.
• When picking a base oil, choose one that is lightweight. I used sweet almond oil here, but from searching online, I know safflower, coconut and sunflower oil are also popular.
• Pour your sweet almond oil into a measuring jug. Add 8–10 drops of essential oils per 100 ml of sweet almond oil and stir well. I wanted an autumn scent, so I went for spiced apple and cinnamon. Geranium is lovely for spring, as are lavender and lemongrass. Add more essential oils for a stronger scent.
• Pour your mixture into your chosen vase and insert eight or ten reed diffuser sticks. I didn’t have any reed sticks, but I did have a massive bag of bamboo sticks in my craft stash, so I cut off their sharp edges and stuck them inside. Just give the reeds or skewers a little flip after an hour or when they’re halfway wet.
• To reinvigorate the scent, flip the reeds every other day and replace the oil mixture once a month.
• These diffusers are quick to make, great for presents, and could even be a DIY wedding favour. I love that you can adjust the intensity of the fragrance. I mention on page 27 that certain smells cause me migraines. So, by creating my own scent, I have control over what is released into the air in my home.
Down Time 41
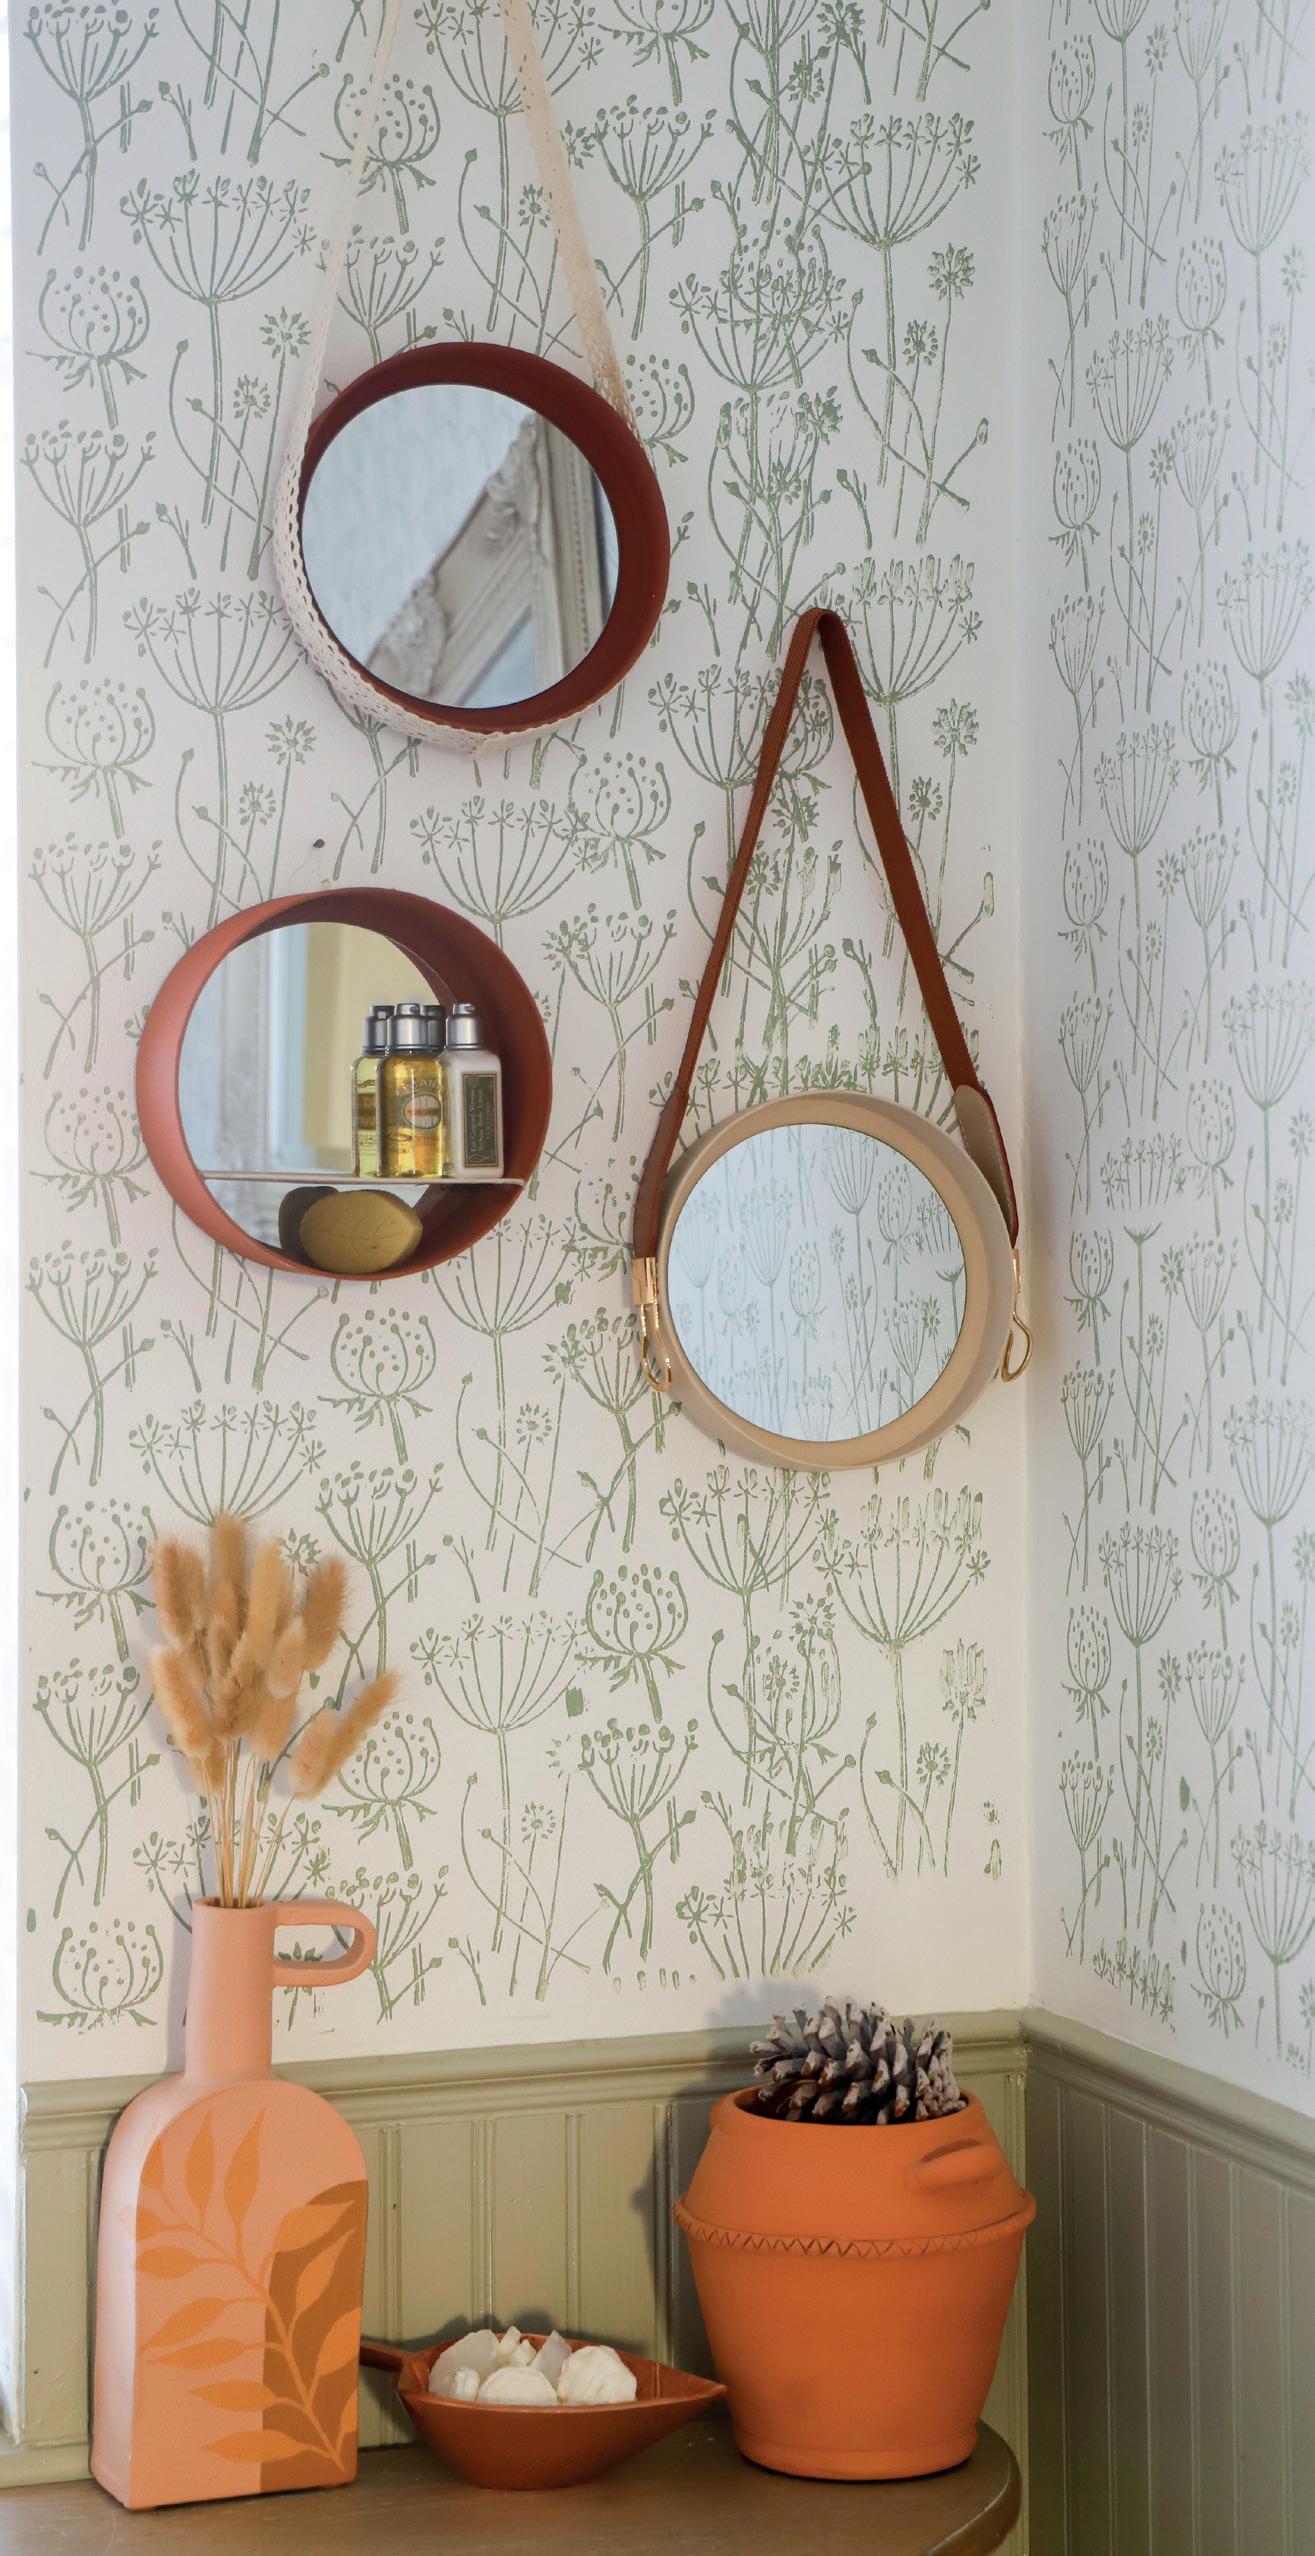
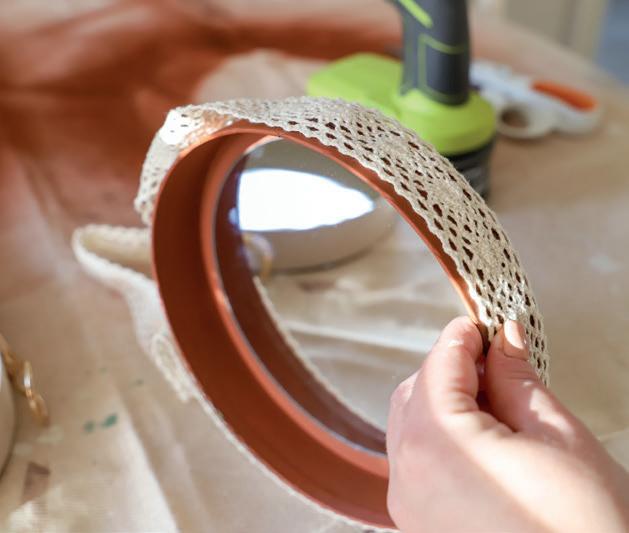
Circle Mirrors
Circular mirrors are all the rage, and for good reason! They can be hung individually, grouped together, or you can do different sizes and mix them up. In this project, I will show you how to transform a gift box into a mini circular mirror that will make a stylish addition to any room. You can purchase small, light mirrors from most craft shops or online. They come in various sizes and are generally inexpensive – I paid €5 for a pack of three 15 cm mirrors. As for the paint, chalk or acrylic will look great, and tester pots are perfect.
Feel free to get creative! You could do a square mirror instead of round. And if painting isn’t your thing, try covering the lid with a beautiful fabric.
What you need
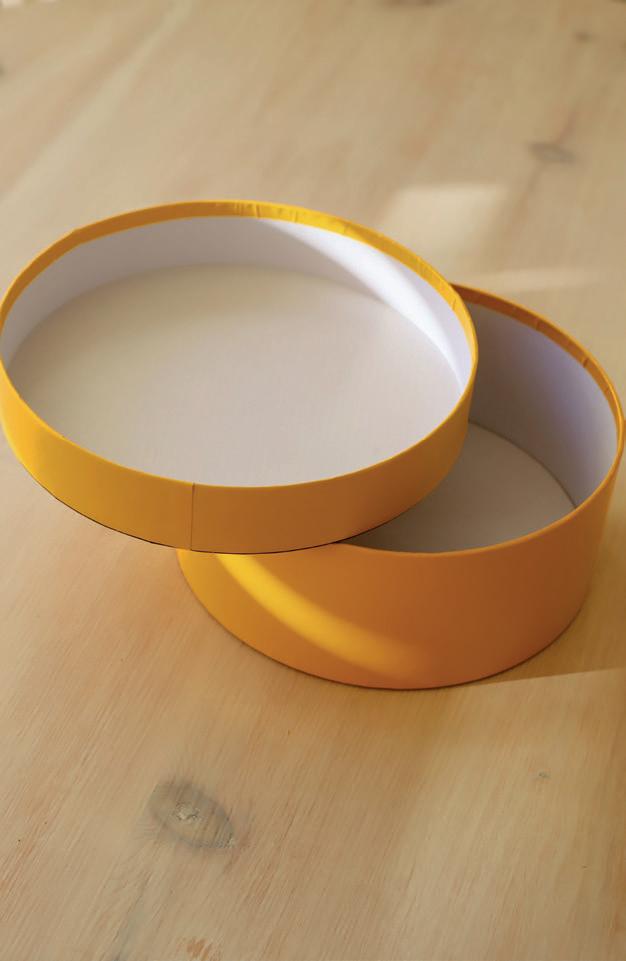
A gift box
Measuring tape
Self-adhesive mirrors
An old belt or strap
Picture frame hangers
Hot glue gun and glue sticks
Paint and brushes
• Use a measuring tape to measure the box’s circumference and pick a mirror that will sit comfortably inside. I made three mirrors here, using gift box lids and bases.
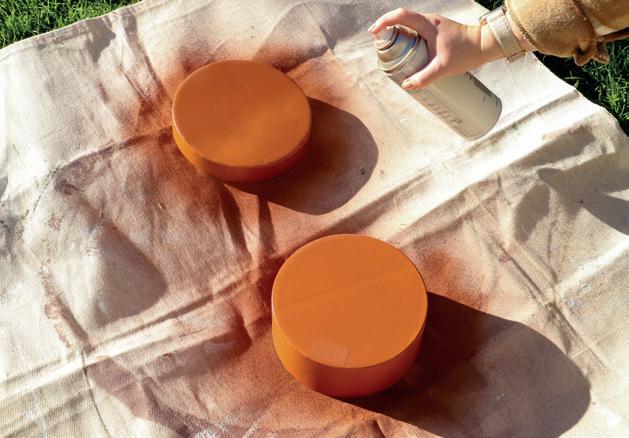
• Begin by painting your lid. Apply two coats and allow the paint to dry (follow instructions on tin).
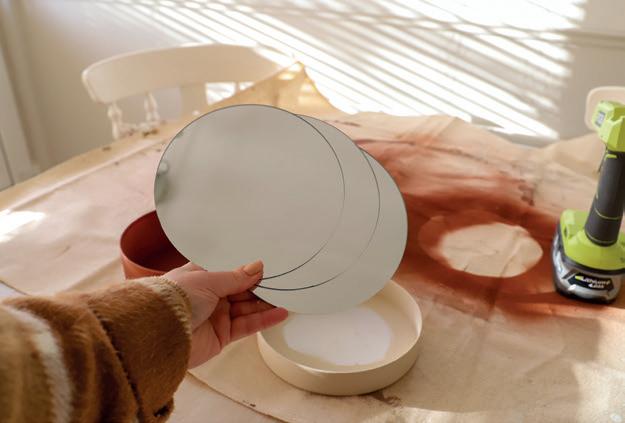
• Once the paint is fully dry, apply hot glue to the back of the mirror and firmly place it inside the lid. Most craft mirrors have a self-adhesive backing, but it’s best to add an extra bit of glue for security.
• To add a strap (I used an old belt for one of mine), find the mid point of each side, apply hot glue and firmly fix each end of the strap to the box. Once the glue sets, check that the strap is strong enough to hold the weight. If you’re using a particularly big and heavy mirror, screw in the belt strap instead, as hot glue may not be strong enough and we don’t want seven years of bad luck if your mirror falls.
• If you don’t want a strap, add a picture frame hanger to the back instead before hanging on the wall.
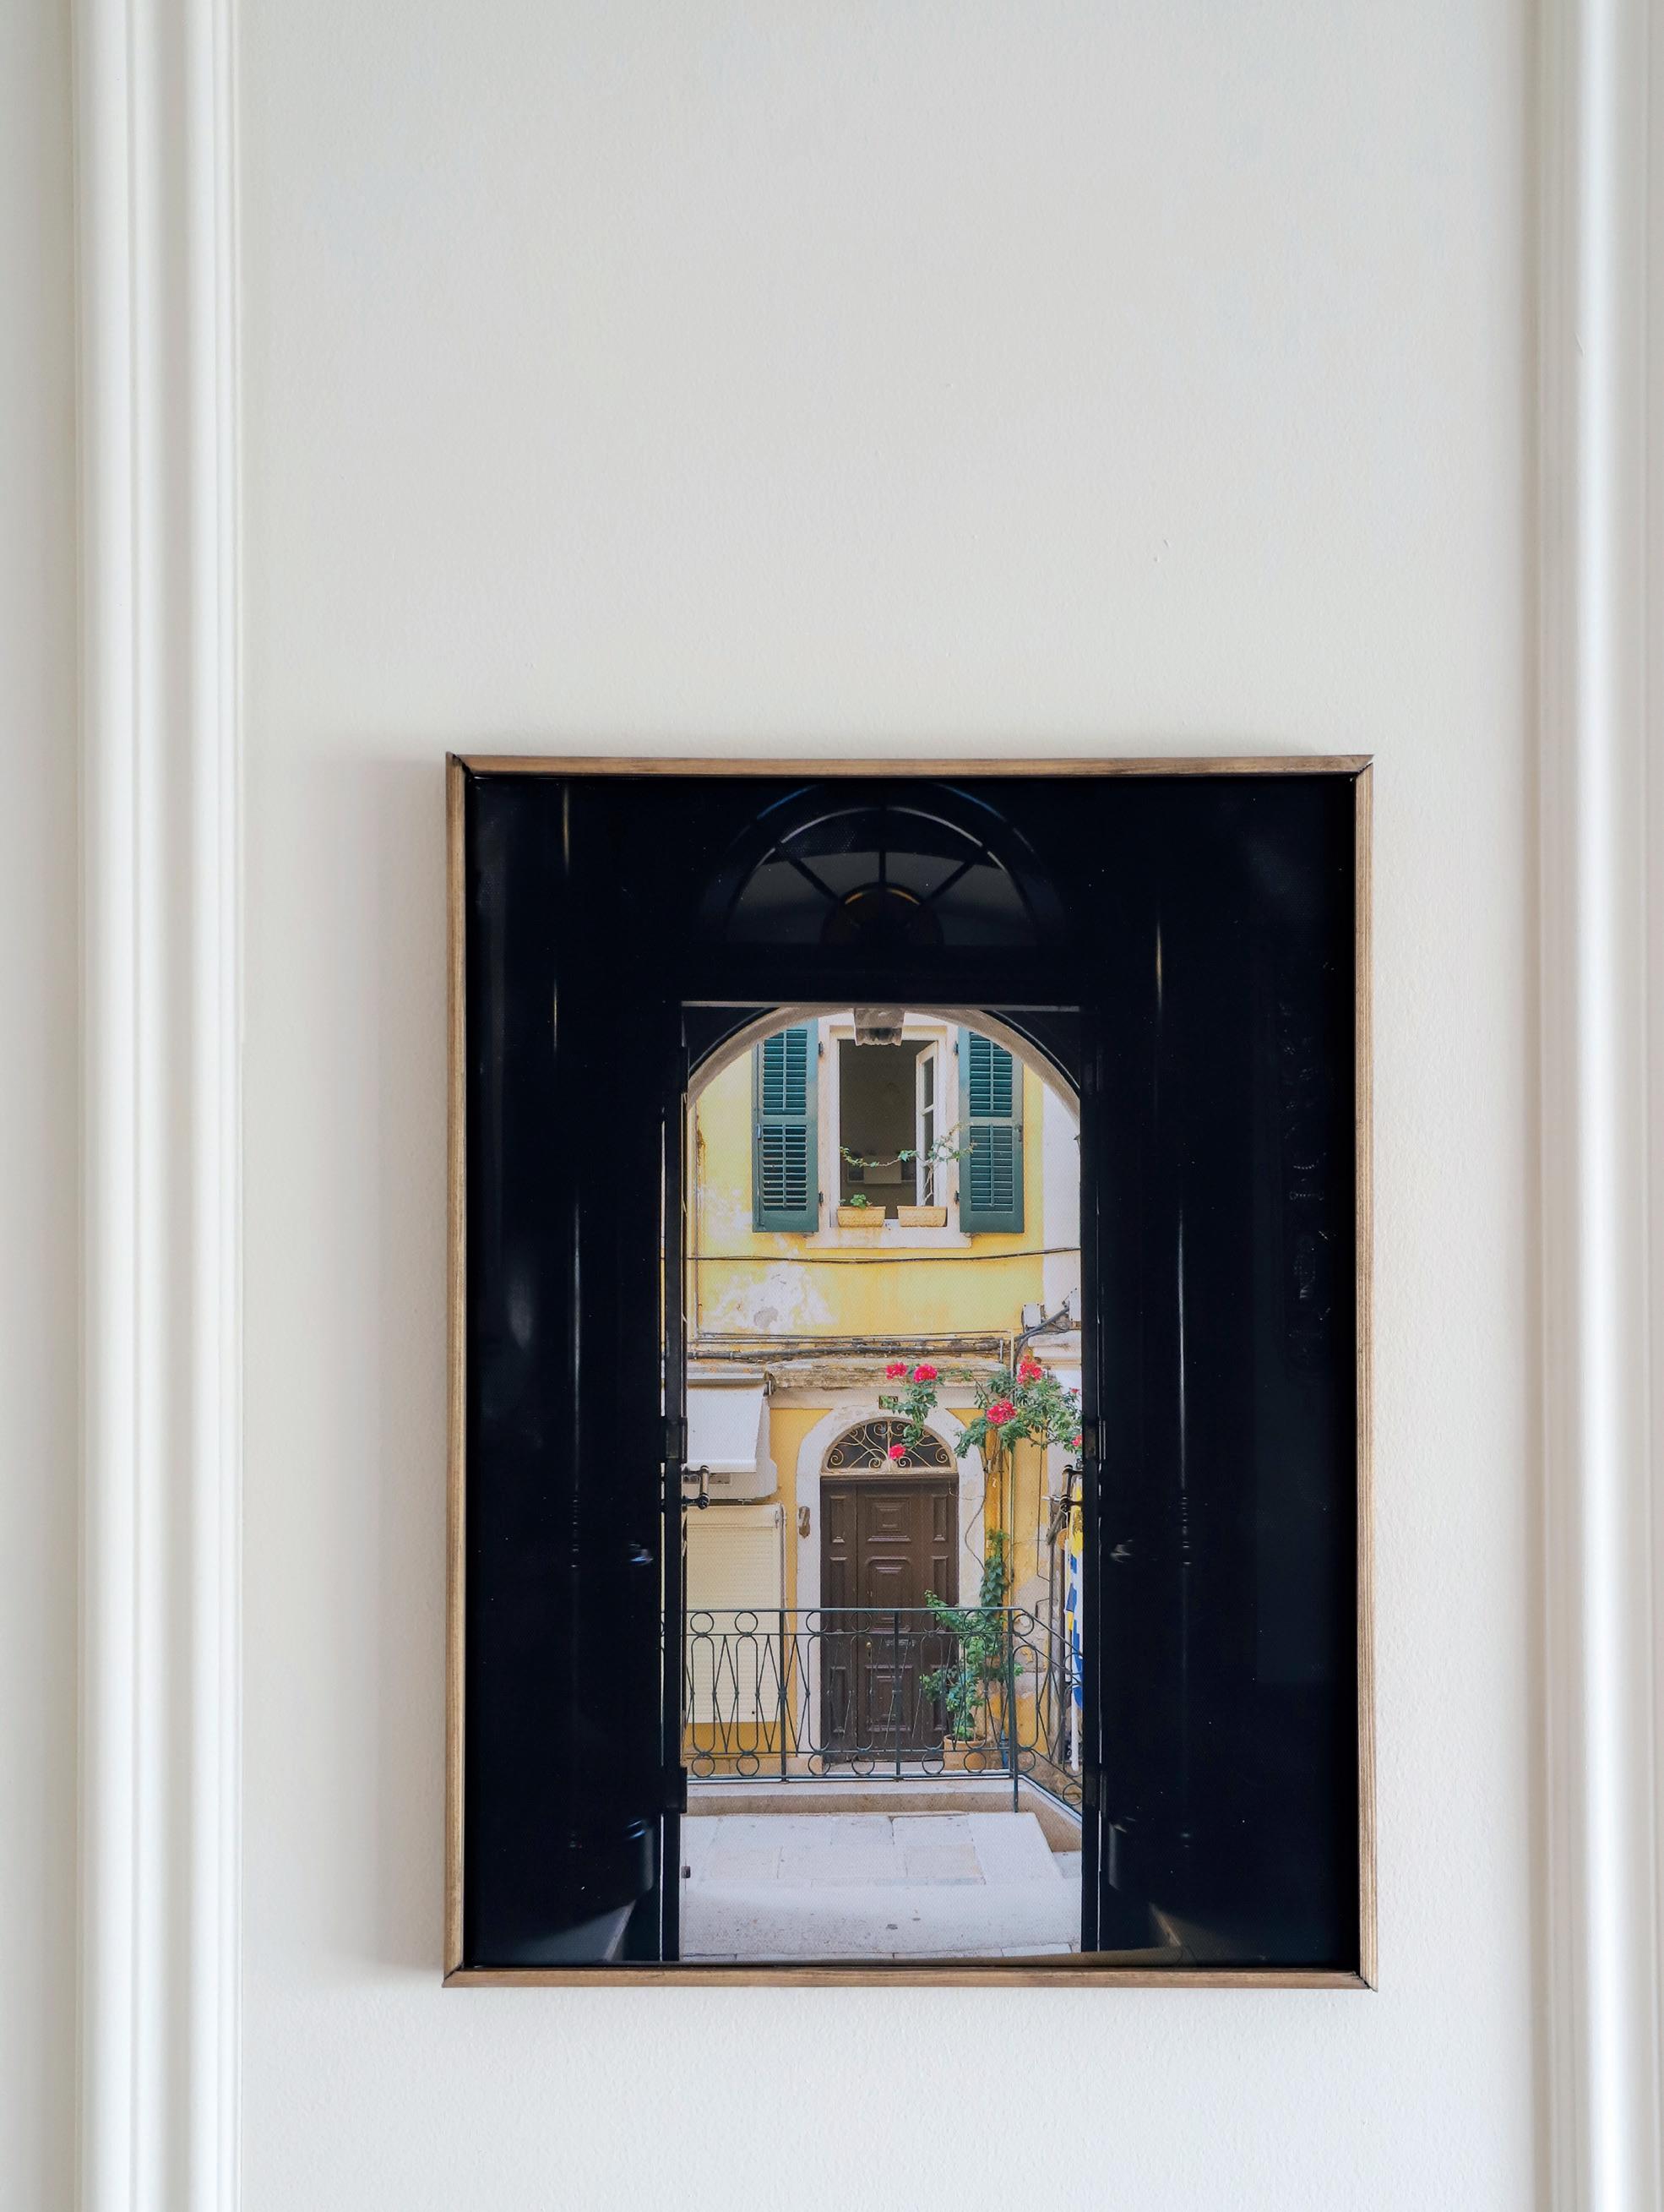
• Mirrors can work wonders in a room, reflecting light and adding a touch of whimsy. Even the dullest corner can be transformed into a bright and inviting spot with this simple addition!
42 Heart & Home
Down Time 43
44 Heart & Home
