258-5 Pyrography Cover.qxd
3/11/05
10:12 AM
Page 1
Crafts/Woodworking $19.95 US
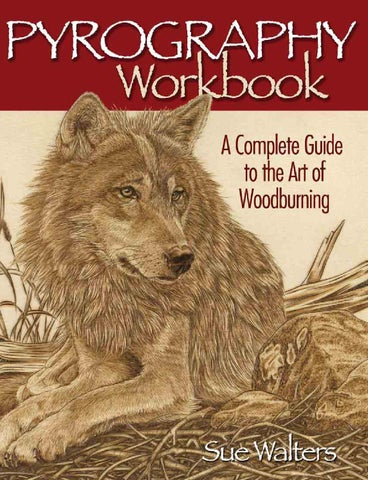
versatile art form that dates back to the Victorian age and continues to thrive today because of its beauty and endless possibilities. In Pyrography Workbook, internationally renowned Australian pyrographer Sue Walters offers inspiration and sound practical information that will open your eyes to the artistic potential
Pyrography Workbook
Pyrography, meaning “to draw with fire,” is a
of pyrography. Whether you’re a novice or an advanced burner, the engaging style and award-winning talents of Sue Walters will remove the mystery from this captivating art form and make it a more enjoyable experience.
In addition to a gallery of her award-winning work, three step-by-step projects, and a selection of original patterns to inspire future burning, Sue Walters explores: ■ Practical and necessary aspects of safety and work area set-up
■ Preparing the wood and transferring the design ■ Special nib techniques and how to apply them ■ Textures, patterns, and unusual pyrographical variations ■ Burning on leather, gourds, bark, and other materials ■ The integration and use of color in pyrography
ISBN 1-56523-258-5
ËxHSLFQFy232587zv&:,:*:^:&
Sue Walters
■ Equipment and timber selection
PYROGRAPHY Workbook BY
SUE WALTERS
Alan Giagnocavo
© 2005 Fox Chapel Publishing Company, Inc.
Publisher
Gretchen Bacon Editor
Linda L. Eberly Book Design and Layout
Pyrography Workbook is an original work, first published in 2005 by Fox Chapel Publishing Company, Inc. The patterns contained herein are copyrighted by the author. Artists may make up to three photocopies of each individual pattern for personal use. The patterns, themselves, however, are not to be duplicated for resale or distribution under any circumstances. This is a violation of copyright law.
Jon Deck Cover Design
Sue Walters Gayle Martin
ISBN 1-56523-258-5 Publisher’s Cataloging-in-Publication Data
Interior Photography
Walters, Sue. Pyrography workbook / by Sue Walters. -- East Petersburg, PA : Fox Chapel Publishing, 2005. p. ; cm. ISBN: 1-56523-258-5 1. Pyrography. 2. Etching. 3. Woodwork. I. Title. TT199.8 .W35 2005 745.51/4--dc22
Special thanks to Gayle and Barb for their help in proofreading.
Special thanks to Razertip Industries Inc. for providing the chart information on page 42.
0505
To learn more about the other great books from Fox Chapel Publishing, or to find a retailer near you, call toll-free 1-800-457-9112 or visit us at www.FoxChapelPublishing.com. Note to Authors: we are always looking for talented authors to write new books in our area of woodworking, design, and related crafts. Please contact Peg Couch, Acquisitions Editor, with a brief letter describing your idea at 1970 Broad Street, East Petersburg, PA 17520.
Printed in China 10 9 8 7 6 5 4 3 2 1
Because burning wood and other materials inherently includes the risk of injury and damage, this book cannot guarantee that creating the projects in this book is safe for everyone. For this reason, this book is sold without warranties or guaranties of any kind, expressed or implied, and the publisher and author disclaim any liability for any injuries, losses or damages caused in any way by the content of this book or the reader’s use of the tools needed to complete the projects presented here. The publisher and the author urge all artists to thoroughly review each project and to understand the use of all tools before beginning any project.
Dedication This book is dedicated with love, thanks, and deep appreciation to the following people: My Mother, Alison Walters Gayle Martin Barb Kaminski You make the impossible seem possible. Thank you for your help, support, belief, and love. And to The Boys, who look out for me. I love you both.
TABLE OF CONTENTS About the Author . . . . . . . . . . . . . . . . . . . . . . . . . . . . . .v Introduction . . . . . . . . . . . . . . . . . . . . . . . . . . . . . . . . . .vi Gallery . . . . . . . . . . . . . . . . . . . . . . . . . . . . . . . . . . . . . .1 Chapter 1: Equipment, Work Area, and Safety . . . . . . . . . . . . .11 Chapter 2: Preparation and Transfer . . . . . . . . . . . . . . . . . . .19 Chapter 3: Materials for Pyrography . . . . . . . . . . . . . . . . . . .23 Chapter 4: Varieties of Pyrography . . . . . . . . . . . . . . . . . . . .33 Chapter 5: Nib Use and Care . . . . . . . . . . . . . . . . . . . . . . .37 Chapter 6: The Three Basic Nibs . . . . . . . . . . . . . . . . . . . . .43 Chapter 7: Texturing . . . . . . . . . . . . . . . . . . . . . . . . . . . .52 Chapter 8: Ducks and Bulrushes: A Beginner’s Project . . . . . . . .56 Chapter 9: Golden Eagle: An Intermediate Project . . . . . . . . . . .66 Chapter 10: Wolf: An Advanced Project . . . . . . . . . . . . . . . . .76 Chapter 11: Animal Coat Techniques . . . . . . . . . . . . . . . . . .94 Chapter 12: Color . . . . . . . . . . . . . . . . . . . . . . . . . . . . .102 Chapter 13: Troubleshooting . . . . . . . . . . . . . . . . . . . . . .109 Chapter 14: Patterns . . . . . . . . . . . . . . . . . . . . . . . . . . .115 Index . . . . . . . . . . . . . . . . . . . . . . . . . . . . . . . . . . . . . .136 Resources . . . . . . . . . . . . . . . . . . . . . . . . . . . . . . . . . .138
ABOUT THE AUTHOR
SUE WALTERS is a self-taught, internationally renowned, and award-winning pyrographic artist. After a career in horticulture, Sue began her pyrographic journey after receiving a burner as a present. She soon started designing and burning souvenirs for the Australian tourist industry. Her focus then shifted to extensively experimenting with various types of pyrographic techniques, eventually specializing in the areas of high realism, wildlife, and miniature burning. Sue’s passion for pursuing all that pyrography has to offer continues to this day, and she remains dedicated to passing on her knowledge to other aspiring burners. A fifth-generation Aussie, Sue was born in 1962 and still calls Australia home.
v
Introduction
Pyrography, meaning to draw with fire, was fashionable in the Victorian and the Art Deco periods and is now experiencing an exciting new wave of popularity and innovation. Whether this is due to the development of modern burning tools or simply because its time has come again is hard to tell. One thing is certain: Pyrography fascinates people. In its most basic form, the appeal of pyrography lies in its rustic and natural beauty. In its most complex form, the combination of texture and drawing can create pictures that appear almost lifelike. Add the use of color and the wide varieties of wood and materials that can be used, and you begin to see that the possibilities for burning are almost endless, no matter what direction you choose to take. For some people, the thought of a large horizon of possibilities is exciting; others find that prospect more than a little daunting, and rather than flying blind, they would prefer someone to help show them the way. That’s where I come in. My aim is to help both the beginner and advanced burner make the most of pyrography, to demystify burning, and to make it a more enjoyable experience. Whether you want to take up pyrography as a hobby, use it as part of your craft, or simply get more use of your burner than signing your name, it is my hope that this book not only teaches you
vi
sound practical advice but also inspires you and opens your eyes to new and exciting possibilities. Together we’ll explore special nib techniques and learn how to apply them in a series of step-bystep projects. We’ll also look at textures and patterns, unusual pyrographical variations, and how to burn on leather and other materials. Color can accent and complement pyrographic work, so I’ve dedicated a chapter to this subject also. This book wouldn’t be complete without covering the practical and necessary aspects of safety and work area setup. Timber selection, preparation, and pattern transfer will be discussed along with a look at the various types of burning tools that are available in today’s market. Finally, a selection of patterns is provided to help inspire future burning. Pyrography is a wonderful craft. There are few art forms in this world that offer the unique combination of being able to see what you draw as well as feel it. There are few craft tools that are so versatile as to be able to move from decorating furniture, to texturing a carved duck, to making a decorative piece of wall art. Pyrography can do all that and more. It has given me endless hours of enjoyment, and I hope it will give you the same. —Sue Walters
Gallery
© Sue Walters
Gallery
Here’s Looking at You, pyrography and acrylic paint on mallee.To enable pyrography to stand out on dark wood, color can be used to accent the burning. In this case, acrylic paint has been used on top of the pyrography to accent the owl’s face. (See Chapter 12: Color, page 102.) 10 inches by 12 inches.
1
Š Sue Walters
Pyrography Workbook
GALLERY
Koala, monochrome pyrography on basswood.To create the soft appearance of Koala fur, this piece was made up of thousands of burnt dots. (See the Fluffy Fur section, page 98.) 12 inches by 9 inches.
2
GALLERY
ŠS ue W alte rs
Gallery
Platypus Diving, monochrome pyrography on silky oak. Bark-edged slabs of timber can give a natural frame and an interesting platform for some pyrography.This large piece was relief carved before burning to help create an illusion of realism. (See the Relief Carving section, page 34.) Note that the shape of the wood has been carefully considered when choosing the subject matter. 39 inches by 20 inches.
3
Š Sue Walters
Pyrography Workbook
GALLERY
Charging Elephant, monochrome pyrography on cowhide. Leather burning requires a cooler heat than timber pyrography.The smell can be a little strong for some people, but the ease of burning more than makes up for this small shortcoming. (See the Leather section, page 26.) 11 inches by 8 inches.
4
GALLERY
Š Sue Walters
Gallery
Wedge Tail Eagle, pyrography and oil paint wash on cowhide. Many types of pigment can be combined with leather pyrography to great effect. In this case, a thin wash of artist oil paint, suspended in mineral spirits, was applied to the piece after it was burned. (See the Leather section, page 26.) 13 inches by 9 inches.
5
Š Sue Walters
Pyrography Workbook
GALLERY
Eagle Owl, monochrome pyrography on rag paper. Burning on paper is much easier than most people think. Because paper is always available and provides a white platform, this kind of pyrography is a viable and effective alternative to timber burning. (See the Paper section, page 27.) 8 inches by 5 inches.
6
© Sue Walters
Pyrography Workbook
CHAPTER 8
64
CHAPTER 8
Beginner’s Project © Sue Walters
65
CHAPTER 9
Golden Eagle: An Intermediate Project In this project, we explore using pyrography to create a realistic picture through the use of tone and texture.
Pyrography Workbook
Gradual Tone
One of the most important techniques in realistic pyrography is to master the technique of gradual tone. With many subjects, it’s important to develop a method that allows you to gradually build up an area of color without being able to see the individual strokes. Pyrographers haven’t got a “brush” wide enough to do this in one fell swoop, so they have to create a smooth patch of color by seamlessly blending together several overlapping lines. Although this technique is one of the most difficult to master, it is essential to do so if you would like to realistically recreate objects with smooth surfaces, like human portraits, water, horses, apples, and so on.
B
A
1
Here I used a spoon shader, but any shader can be used for the same technique. Use the same method of application whether the lines are curved or straight. Lines of the same color are burned next to each other and are slightly overlapping. It’s important to remember to keep the nib moving when making first contact for each stroke to avoid blobbing. If the coverage looks patchy or has broken lines throughout, you can go back over those areas with the shader to even out the tone. Remember, before attempting this technique, to have a clean nib and a finely sanded surface. These aid in the ease of nib movement and will help to develop an even coverage.
66
Intermediate Project
Š Sue Walters
CHAPTER 9
67
CHAPTER 9 A
B
There are two ways to approach burning gradual tone. The first way, side A, is to burn in the darkest color, and then burn increasingly lighter layers of tone below that area. This method is effective when burning a picture that has dark areas that need to fade into the surrounding lighter tones.
2
The second way, side B, is to gradually build up increasingly darker layers of tone, one on top of the other. This way is especially good when burning human portraits or anything needing a subtle variety of soft tones.
Pyrography Workbook
A
Nib temperature and consistency of speed are the keys to good gradual burning. It is essential that you practice developing an even stroke speed across the surface for each of the lines in a patch of tone. Developing a good rhythm helps. Try not to lift your nib off the surface for too long between the time you end one stroke and start another. The long break lets the nib heat up too much and increases the chance of uneven darkness at the start of each line.
B
You’ll notice that I laid a very light tone as a base to side A, even though I am working the shading from dark to light. Burning reacts differently when placed on top of a scorched area as opposed to an unburnt area. Burned marks on top of a previously burnt area are lighter and react more predictably than burning on raw timber. To prevent the raw area from burning differently than the previously burned area, I covered the surface with the lightest scorched coverage to help the entire piece burn consistently.
3
When blending a burned area with a raw area, always try to start your stroke from the burned area and pull into the raw area, not vice versa.
B
4
68
A
A
B
As you proceed, don’t forget to use a blade to fix any mistakes, to lighten any over-burned areas, or to help blend one edge of tone with another.
5
CHAPTER 9
Blade Use
A blade edge can be one of the most useful tools in your pyrographic kit. I personally use a snap blade, as seen in the picture below, but many other blades can be used to perform the same function, such as stencil knives, carving tools, and safety razor blades. If held on its side, a blade can be used like a cabinet scraper and will remove an area of pyrography far better than sandpaper. Its point is used to scrape out the highlights of eyes. It’s an excellent tool for lightening any over-burned areas, and it’s invaluable for tidying up burn flares along a skew line or other areas. The trick to using a scraper is to work gently. Don’t try to remove too much at once, or you risk gouging the wood and preventing neat removal of subsequent layers.
The Components
This intermediate project is made up of five basic components: the beak, the eye area, the head feathers, the neck feathers, and the body feathers. In the various stages, we’ll discuss what nibs work best and how best to use them. Of these five components, the feathers are divided further into four groups as explained on the following pages: head feathers, small neck feathers, large neck feathers, and body feathers. The construction of each of these feather groups can be broken down into three simple parts.
Head Feathers To create a crisp, well-defined line, the head feathers are outlined using a skew. Each stroke is like a tiny arch that adjoins its neighboring arch.
1
A thick, dark line is then burned below each arch. This line needs to be thick and soft, so a shading or a writing nib can be used.
2 3
All but the white highlights are then colored in by sweeping a shader over the top of the previous burning.
The Eye
Fill in the black parts using a shading nib or a writing nib. Because the eye is smooth, a shader is used to add just a touch of soft color to the iris.
2
Lastly, use the shader to burn a ring of slightly darker color around the iris. (You might want to use a writer for this if you feel your shader is too large.) A shader is also used to add a blush of shade under the eyelid. The highlight is scratched out. You can also create the highlight by leaving this area unburned.
3
Here I used the blade from a snap knife to accent the white highlights on the tips of large neck feathers. I lay the blade nearly flat and scrape repeatedly, but in a gentle manner, across the area.
69
Intermediate Project
Outline the eye with a skew. Because a skew can be difficult to turn in a tight circle, you may want to use a writing nib to burn the pupil and iris areas. To burn a neat circle it is often better to work in short strokes, overlapping the end of the previously burnt line and extending it a little farther on the next stroke. Keep turning the board and work the nib toward yourself.
1
258-5 Pyrography Cover.qxd
3/11/05
10:12 AM
Page 1
Crafts/Woodworking $19.95 US
versatile art form that dates back to the Victorian age and continues to thrive today because of its beauty and endless possibilities. In Pyrography Workbook, internationally renowned Australian pyrographer Sue Walters offers inspiration and sound practical information that will open your eyes to the artistic potential
Pyrography Workbook
Pyrography, meaning “to draw with fire,” is a
of pyrography. Whether you’re a novice or an advanced burner, the engaging style and award-winning talents of Sue Walters will remove the mystery from this captivating art form and make it a more enjoyable experience.
In addition to a gallery of her award-winning work, three step-by-step projects, and a selection of original patterns to inspire future burning, Sue Walters explores: ■ Practical and necessary aspects of safety and work area set-up
■ Preparing the wood and transferring the design ■ Special nib techniques and how to apply them ■ Textures, patterns, and unusual pyrographical variations ■ Burning on leather, gourds, bark, and other materials ■ The integration and use of color in pyrography
ISBN 1-56523-258-5
ËxHSLFQFy232587zv&:,:*:^:&
Sue Walters
■ Equipment and timber selection