HIKING WITH YOUNG CHILDREN
A practical manual for outdoor explorations with children 0-4 years old
Barbara Zennaro and Stéphanie Klaus
PERFORMA EDIZIONI VERSANTE SUD
First edition: June 2023
ISBN 978 88 55471 015
Copyright © VERSANTE SUD S.r.l. via Rosso di San Secondo, 1 20134 - Milano www.versantesud.it
All rights reserved world wide. No part of this book can be translated, electronically copied, reproduced, adapted partially or totally by any means.
Cover picture: Stéphanie Klaus
Pictures: Alessandro Galvagni (alessandrogalvagni@Instagram), Stéphanie Klaus, Barbara Zennaro (motherhoodonthetrail@Instagram).
Picture page 198: Educare nel bosco (www.canalescuola.it/trento)
Layout: Miriam Romeo
Print: Press Grafica s.r.l. – Gravellona Toce (VB), Italia
Disclaimer
Despite conscientious research and compilation, we cannot guarantee the exclusion of errors. Personal experience shows that techniques, equipment and methods regarding childcare and hiking activities continuously change and are adapted to new findings. It is the responsibility of each one to get professional support and to assess the personal situation.
HIKING WITH YOUNG CHILDREN
A practical manual for outdoor explorations with children 0-4 years old
EDIZIONI VERSANTE SUD
Barbara Zennaro and Stéphanie Klaus
4 summary PREFACE 6 PARENTING OUTDOORS 9 Raising the new generation 10 - Our philosophy: Expedition parenting - Your role as a guide The benefits of parenting outdoors 15 - For the children - For the family How to guide in a sustainable way 17 - Leave no trace - Support local communities - Learn about the environment you are in - Avoid single use plastics - Move consciously FIRST STEPS BEFORE HIKING 23 Introduction 24 Get ready 24 - Prepare for the hike - Plan the right hike - Understanding the magnitude of the day - The final formula Taking the weather into account 36 - Weather patterns in the Alps Packing the right equipment 40 - The essentials for safety - The essentials for energy - Clothing for all weathers SAFETY WITH YOUNG CHILDREN 55 Introduction 56 Teaching safe behaviour 57 - Scenario 1: Crossing alpine pasture - Scenario 2: Dealing with thunderstorms - Scenario 3: Learning about local flora, fauna and funga Safety while walking together 60 - Risks linked to the status of the trail while walking - Parent’s attitude toward children taking risks Safety while carrying the child 64 - Risks linked to the act of carrying - Risks linked to the status of the trail while carrying Examples of risks related to hiking with a child 70 - Getting lost - Being bitten by ticks or other insects - Being surprised by thunderstorms THE FIRST MONTHS TOGETHER 77 Introduction 78 A new mother 79 - Physical transformations - New body, new clothing - Emotional and psychological transformations - Sleep A new child 86 - Thermoregulation - Lungs - Skin - Eyes - Ears HIKING WITH YOUNGER INFANTS (0 TO 6 MONTHS) 91 Introduction 92 Get dressed! 93 - Clothing - Footwear Carrying the child close to you 92 Using a carrier cover 98 Carrying the younger infant 100 - Babywearing with soft carriers - The ergonomic position Taking breaks on the trail 106 - Sitting and stretching - Feeding the younger infant - Pooping on the trail HIKING WITH OLDER INFANTS (6 MONTHS TO 1 YEAR) 115 Introduction 116 Get dressed! 116 - Clothing - Footwear Carrying the older infant 117
5 - The framed child carrier - The hip belt carrier - The pushchair - The multisport chariot Resting on the trail 126 - Sitting and stretching - Playing and exploring - Feeding - Pooping on the trail HIKING WITH YOUNGER TODDLERS (1 TO 2 YEARS) 131 Introduction 132 Get dressed! 133 - Clothing - Footwear Moving on the trail 135 - The carriers - Child-led hikes - Motivating to walk toward a set destination Taking breaks 141 - Feeding - Pooping - Playing barefoot HIKING WITH OLDER TODDLERS (2 TO 3 YEARS) 145 Introduction 146 Get dressed! 147 - Clothing - Footwear The first backpack 151 Moving on the trail 152 - To carry, or not to carry, this is the question - Slow hiking: a new mindset for the parents - Coyote teaching Dealing with big feelings 157 HIKING WITH LITTLE HIKERS (3 TO 4 YEARS) 161 Introduction 162 Get dressed! 163 - Clothing - Footwear Moving on the trail 165 - Ditching the carrier system - Motivating to go hiking Playing on the trail 173 - Risky play BACKPACKING 177 Introduction 178 Backpacking at different ages 179 - Backpacking with infants - Backpacking with toddlers and little hikers Choosing the right place 183 - Managed hut or mountain houses - Basic huts - Tents Equipment 190 - Food and water - Sleeping surface - Sleepwear - The bed-side set - Personal hygiene - Mosquito net - Charging system - Entertainment HIKING WITH MORE CHILDREN 199 Introduction 200 Tandem carrying 201 - Carrying two children with a single wrap - Using a double carrier system - Using two single carrier system - Equipment for tandem carrying Hiking in groups 205 ANNEXES 209 GLOSSARY 232 BIBLIOGRAPHY 234
PREFACE
This book is “the book” that we wish we had found to encourage us to go hiking with our children and to spend more time outdoors.
We see the family as an expedition team, regardless of the amount of time spent outdoors, where the wellbeing of all members of the team is valued for an enjoyable day outdoors. The parents take the role of the child’s very own expedition guide and their task is to bring safety, meaningfulness as well as to teach about sustainability and the world. This guide goes behind the mere description of equipment. We describe how you can safely explore the outdoors with correct planning, preparation. Every aspect of the day out with an infant, a toddler and a little hiker (0 to 4 years old) is covered, including resting, feeding and pooping. It also describes how to bring meaningfulness to the outdoor experience, through a collaborative and positive attitude, proposing tools for both the parents and the children to keep motivated, have fun, and to connect with each other.
The book also covers spending the night out with children during backpacking trips and changes to consider when a little brother or sister joins the team, or when hiking in groups with more children.
Short informational boxes with tips and with the author’s personal experiences are present in each chapter. These highlight particularly curious and useful aspects of hiking with children.
Acknowledgment
Every woman and every child are different. Every mother-child pair is different. There is not a one-fit-all solution, especially to go hiking. Our hands-on experience is limited to our personal experience and for this reason we would like to thank the many women we contacted for their insights and feedback. Many other mothers shared their challenges and their solutions on social platforms, contributing to a worldwide web of knowledge. This book is in reality a compilation of knowledge and how-to developed by mothers from the whole world, living in different climate zones and facing different environmental and cultural challenges.
To all the mothers out there that inspire us, thank you very much!
A special thanks to our sons, with whom we grow daily, learning from each other (including how to video conferencing while breastfeeding, cuddling and playing), and without them this book would never have been conceived! Finally, hats off to our closest travel companions, who supported us despite the ups and downs all the way long to accomplish this book.
6
7
PARENTING OUTDOORS
All you need (for adventure) is a willing heart and a desire to connect with your kids. The rest will follow.
Greta Eskridge
0001
PARENTING OUTDOORS
RAISING THE NEW GENERATION
Our philosophy: Expedition parenting
“Expedition parenting” is a philosophy we created to describe our views on exploring the outdoors with our children. We compare the family to a team going on an adventure: the success of the expedition depends on how well the team members can work together, how well everyone’s needs are met. In “Expedition parenting”, each member of the family is considered as part of the team, regardless of their age and the number of legs they use to walk. Each team member has equal right to enjoy the hike as well as express wishes and concerns, although there is an expedition leader that will help moderate the team’s needs. The arrival of a newborn marks the arrival of two new family members: the new child, and the new mother. With two new family members, family dynamics will also change.
It is important to learn to work together again: re-assign tasks and re-evaluate the family/team capacities.
There are few key concepts in expedition parenting that differ from common beliefs:
• The new child is an active team member, not just a “bundle of joy” that can be passively carried around.
• No need to “lower your expectations” about hiking: once you include your child into the team it is about “re-assessing the team expectations”, based on the overall team capacity.
• A team is only as strong as its weakest link: if you want to do hard things, leave the weakest members at home for everyone’s safety and enjoyment.
• “Expedition parenting” embraces the concepts of responsive and respectful parenting.
10
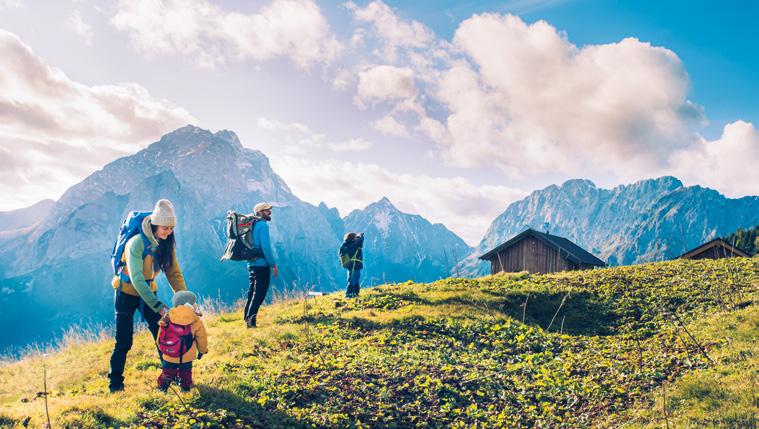
Reaching the mountain hut for the night is an achievement toward which every team member contributed!
Your role as a guide
Have you ever hiked with a professional guide?
A guide’s basic role is to keep you safe; a good guide will keep you safe while bringing quality and meaning to your experience; an excellent guide will keep you safe, bring quality and meaning to your experience, and will teach you about the sustainability of your actions.
No matter how young children are, they will be looking at their parents to set an example on how to behave in everyday life situations. Show them how you take care of yourself, how you ask for help, how you care for the environment and animals, how you handle mistakes, how you deal with frustration and problems.
As a new parent, you are now graduating as your child’s very own “expedition guide”: you will accompany your child
through their first outdoor discoveries and learn to connect, see them grow and provide them with nutrition, safety, and motivation. As a guide, you need to reassess your expectations. Find routes that are suitable for all family/team members. Being outdoors with children is an honour, although challenging at times, it will offer incredible rewards: it is a great opportunity to grow as a team leader and an expert hiker.
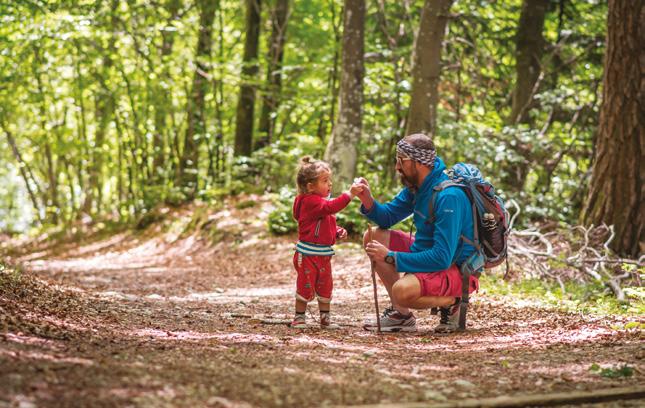
Hiking with children is not about physical performance; distance will come at the right time. It is not about hiking more, but about hiking together.
Consider hiking as a way to consolidate the new team, an opportunity for connection: prioritize bonding over the destination and the distance.
Share your passion: be patient, make their time outdoors fun and motivating, and respect their limits.
11 HIKING
OUTDOORS
WITH YOUNG CHILDREN – BARBARA ZENNARO AND STÉPHANIE KLAUS – PARENTING
Be your child’s own expedition guide
FIRST STEPS BEFORE HIKING
Extra time for children
Breaks while hiking with children are very important for diaper changes, stretching, feeding, playing, connecting etc. We personally add at least 30 minutes every 2 hours of our estimated hike duration, but this can vary between children, depending on personal characters and age.
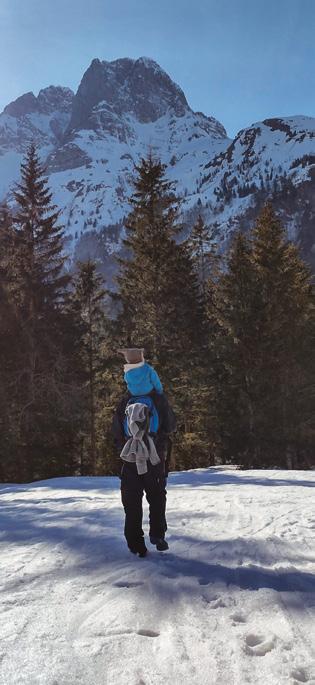
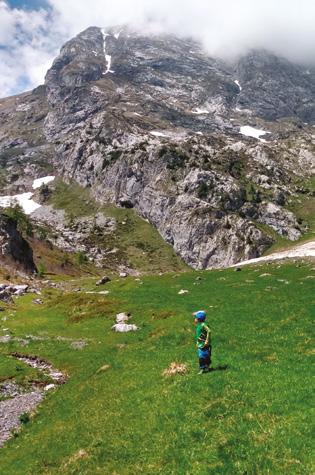
34
Calculating enought time for children to explore nature is part of good planing Hiking on snow can be considered as more difficult and should be calculated accordingly
The final formula
You can calculate the time you need to complete the hike by adding up these elements.
Understanding the time needed, the terrain type along your trail, the expected elevation gain and loss and how long you expect to carry the child, gives you an idea of the magnitude of the day.

Finally, you are the best person that knows how much your child will want to walk or to be carried. “Max (2 years old) does not like to be carried. The only chance to cover longer distances is during his naptime, about 1.5 hours after lunch. This means that his parents can expect to cover, on good flat terrain, about 4.5 km carrying him (= 1.5 hours *3km/hour), while for the rest of the hike they must consider his slow 1 km/ hour hiking speed.”
Remember that you are only as strong as the weakest member of your team, and that your team is your wonderful family!
35 + + + + + +
Distance and hiking speed on good terrain Distance and hiking speed on rough terrain Baby carrying Distance and hiking speed on good terrain Distance and hiking speed on rough terrain Baby walking
Extra time for elevation gain Extra time for elevation loss Extra time for rest, play...
HIKING WITH YOUNG CHILDREN – BARBARA ZENNARO AND STÉPHANIE KLAUS – FIRST STEPS BEFORE HIKING
FIRST STEPS BEFORE HIKING
Escape routes: shortening a hike
Escape routes are the paths that allow you to shorten your hike in case of need, whether it leads back to the car or to a safe place such as a hut or a shelter.
When planning a hike, make sure you identify escape routes along the way, this is especially important if you are the only adult with children. In this way, you will be able to make an informed decision quickly every time you are at a crossroad, without taking the attention off the children.
Make sure they are feasible: a steep/hard path downhill makes a poor choice of an escape route, if it is going to present another challenge.
Look at the form “Hike description” in annex for inspiration of information to collect when identifying escape routes (telephone number of close-by huts, number of local rescue services etc.).
TAKING THE WEATHER INTO ACCOUNT
There is not much we can do to change the weather, but there is a lot we can do as hikers in adopting proactive and reactive safety strategies. When you plan a hike, you need to know what kind of weather you can expect. Thorough planning, reliable weather forecasts and your personal perception are the key for a safe hike, even for short hikes.
36
“It is not about the journey or the destination, it is about the company” Anonymous
Get informed about the climate and weather patterns of the area you plan to hike: check guidebooks dedicated to regions, tourist and regional Alpine Associations website, but also chatting with locals or giving a short call to the tourist office or the hutkeepers has often proved worthwhile.
Get informed about the weather forecast and current weather: check it regularly, during planning and during the hike. There are various options to get this information, for example:
• Weather forecast from national, regional or private services that provide local weather forecasts, mountain/outdoor weather reports, satellite images and weather warnings.
• Live images via webcams that give information about the thickness of clouds as well as snow cover.
• SMS warning systems, which you can also get for free.
• Weather consulting service (Hotline).
Finally, your personal perception will help you make the right decision during the hike.
Taking a few minutes to look at the sky or feeling the winds, for example, can give a good indication on the current weather condition and on possible changes. Be prepared for the unexpected: the weather can change very fast.
Alpine Associations and hikers, who have experienced sudden deterioration of weather, warn that clouds, fog, snowfall, strong winds, heavy rainfalls and sudden changes of temperature, increase the risk of accidents.
37
Checking the weather real-time on a webcam to find the dew point and making sure to hike above it
HIKING WITH YOUNG CHILDREN – BARBARA ZENNARO AND STÉPHANIE KLAUS – FIRST STEPS BEFORE HIKING
SAFETY WITH YOUNG CHILDREN
In the following sections, we describe how you can increase balance to reduce chances of slipping and stumbling by:
1. Understanding how your balance is affected by the carrier system and by your child.
2. Considering how the weight distribution of the equipment can be optimally packed in the backpack or child carrier.
Understanding your balance
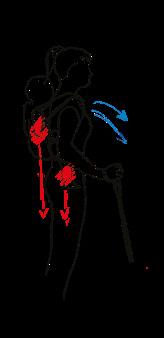
The child can be carried either in the front or in the back, and additional equipment can be stored either in a day bag opposite to the child, or in the storage compartment of the framed child carrier. All these different setups move your balance point differently. When carrying a child with a wrap or a soft structured carrier in the front, the centre of gravity of the load is close to the balance point of the person carrying the child, making it easier to adjust the balance. Carrying a small backpack on your back shifts your balance point back in a central position.
66
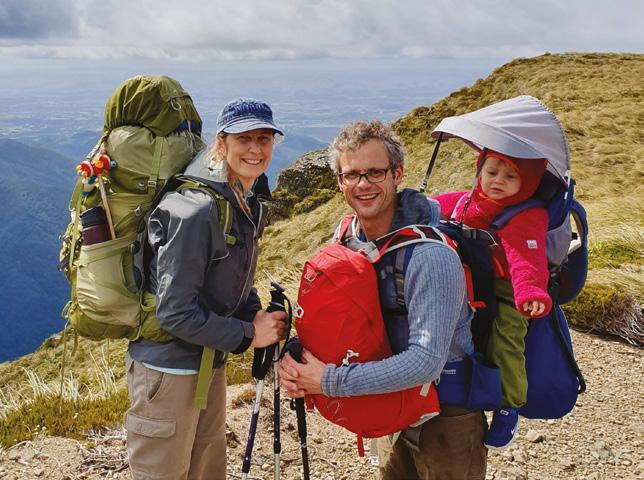
Going through a rough section of the trail
Child in a soft carrier
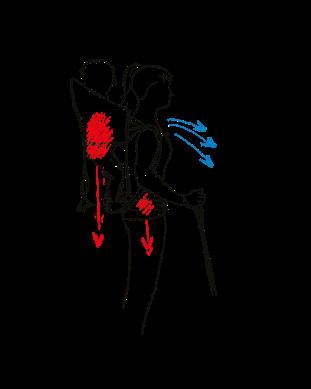
When carrying a child with a framed child carrier the main load (the child) is positioned further away from the balance point of the person carrying it. The whole load is generally also heavier: in addition to the child, the carrier itself, and any additional equipment in the storage compartment add to the weight. The metallic frame which runs from behind the child’s seat redirects the weight toward your hips, helping therefore moving the centre of gravity of the load toward your point of balance.
Child in a framed carrier
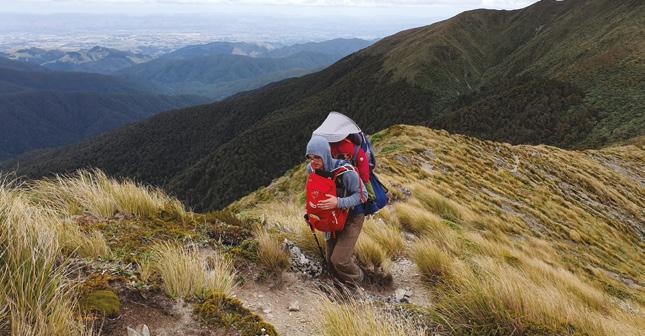
Because of the load center of gravity and the moved balance point, the posture of the person carrying the child needs to be considerably adjusted forwards
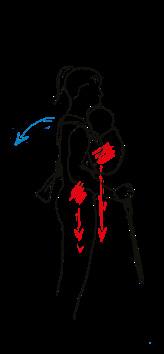
In addition to having a moved balance point, you need to be aware that children have increased mobility when carried in a framed carrier compared to a wrap or an SSC: this can result in extra work to compensate for both the lateral and vertical movements that the child may decide to do.
67
Table Efforts needed to keep the balance when carrying a child in a soft carrier versus a framed carrier
Because of the loads’ center of gravity and the moved balance point, the posture of the person carrying the child needs to be slightly adjusted either backwards or forwards. Regardless of the position (front or back) you are carrying the child, sit him centrally (not on the hips).
HIKING WITH YOUNG CHILDREN – BARBARA ZENNARO AND STÉPHANIE KLAUS – SAFETY WITH YOUNG CHILDREN
SAFETY WITH YOUNG CHILDREN
To reduce these movements as well as the risk of falling out of the carrier, framed child carriers are equipped with (read more in chapter 6 “The framed child carrier”):
• The safety harness locks the child inside the carrier.
• Side straps to keep the child forward, reducing possible gaps between the back of the person carrying and the child.
• The stirrups to help the child holding a central position on their seat.
Packing right
Packing right makes a difference on your balance, as the centre of gravity of your load will be closed to your balance point. It also improves the overall comfort, allowing you to distribute the weight uniformly on your shoulders and your hips.
If you are front carrying your child, pack your day backpack so that the heaviest items (like water) should be located closer to your torso. Medium weight items (for example rain gear and
68
HEAVY MEDIUM LIGHT
Packing right helps to keep better balance
Internal framed backpack
External framed backpack
snacks) should be on the top of the backpack, and lighter items (such as clean diapers) at the bottom. This will help you reduce the pressure on your shoulders. In an internal framed backpack, the heaviest load should be carried close to your back, but in a child carrier the heaviest items should go higher in the storage area, closer to your child, and the lighter ones below. Avoid putting anything heavy strapped behind your child’s back, as this will greatly increase the pull on your shoulder and also will create a different centre of gravity that will impact your overall balance. Child carriers with a dedicated pocket for water storage behind your back are definitely an advantage for those of you planning longer hikes. If you need to carry lots of equipment, rather than trying to pack everything into the carrier bag or having things hanging on the frame, carry some weight in the front with a day backpack: this will help spread the weight more uniformly on your shoulders and keep your centre of balance more centred.
69
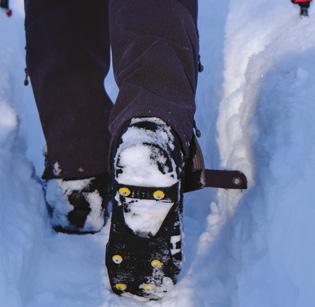
Hiking poles and microspikes on the shoes provide stability and traction on icy and frozen terrain
If storage is not enough, it is possible to carry an extra day bag in the front
HIKING WITH YOUNG CHILDREN – BARBARA ZENNARO AND STÉPHANIE KLAUS – SAFETY WITH YOUNG CHILDREN
HIKING WITH YOUNGER TODDLERS (1 TO 2 YEARS)
INTRODUCTION
This chapter is dedicated to hiking with younger toddlers, aged from approximately one to two years old, depending on the child’s personal development keystones. We define younger toddlers as children that can stand up independently and that are practising their first steps, one of the most exciting milestones in a child’s life. Even if at this age the children will still be carried most of the way, moments in which children can practise and refine their walking skill should never lack. You will probably have to replace socks regularly, therefore trousers that include footing are not practical anymore. In addition, it is time to start using footwear that offers some protection from the ground.
The child’s ability to stand on its own legs leads to some advantages, such as allowing changing diapers while standing up and two-piece clothing are therefore preferred to onesies, also to facilitate potty-training.
The section “Carrying the child” was replaced with “Moving on the trail” as hikes are from now on a combination of carrying and letting your child walk. The carrier systems previously described still apply to toddlers.
The new challenge for the parents is how to move on the trail when the child is not being carried. We present the practice of child-led hikes and how to use schemas to motivate your child to move in the “right” direction.
132
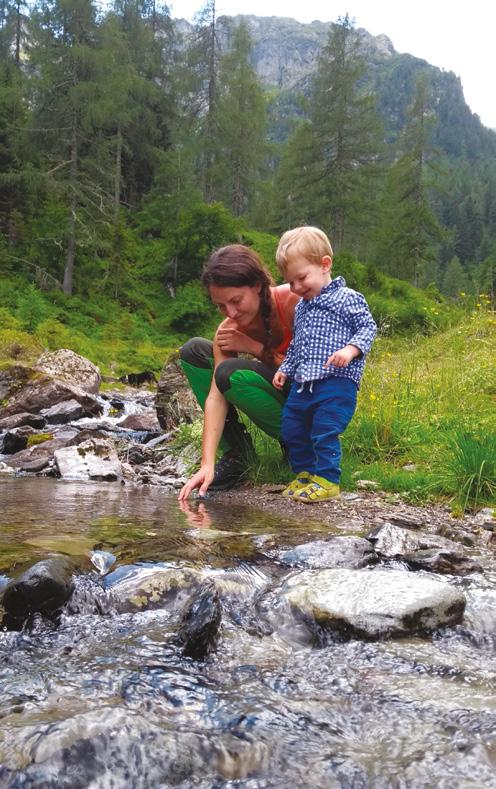
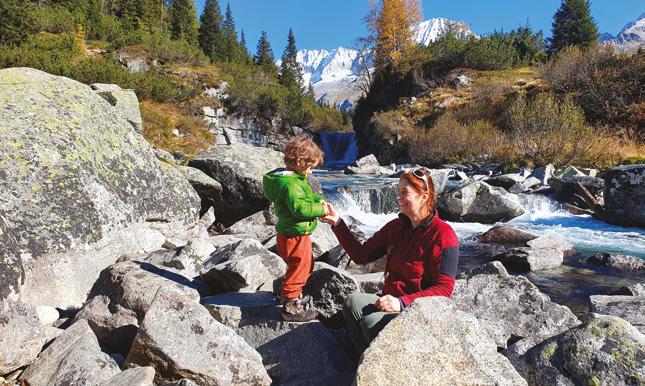
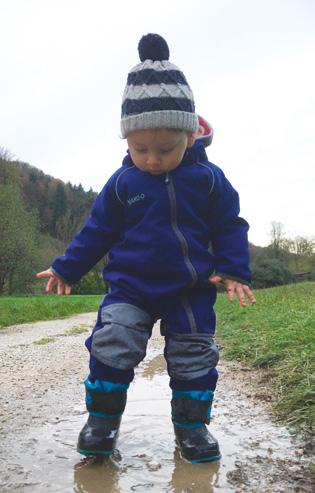
Every centimetre of the trail has something interesting that needs to be explored further: embrace your child’s sense of discovery for the microcosmos!
Breaks on the trail will be longer and will include some exploration: the perfect opportunity to connect as a team. They also offer the opportunity of some barefoot time for the whole family: this will make the whole outdoor adventure fun and interesting, an experience worth repeating! In the Annex, “Equipment for a day hike with toddlers” offers a checklist of items to comfortably hit the trail with your toddler.
GET DRESSED! Clothing
There are three main difference when thinking of clothing with a younger toddler, compared to dressing an infant: firstly, the child is going to be more and more active, hence increasing
their own body temperature through movement; secondly, it is possible to comfortable change the diaper while the child is standing up, a great benefit as you would not have to worry anymore about laying your child down on a humid or cold surface; thirdly, toddler spend a lot of time on their bum and on their knees, therefore their trousers wear out quickly.
These changes drive a little shift in the kind of clothing to be preferred for toddlers. We recommend:
• Using breathable outer layers to keep children drier when they are sweating.
• Dressing in tops and bottoms as it makes diaper change much easier contrary to onesies.
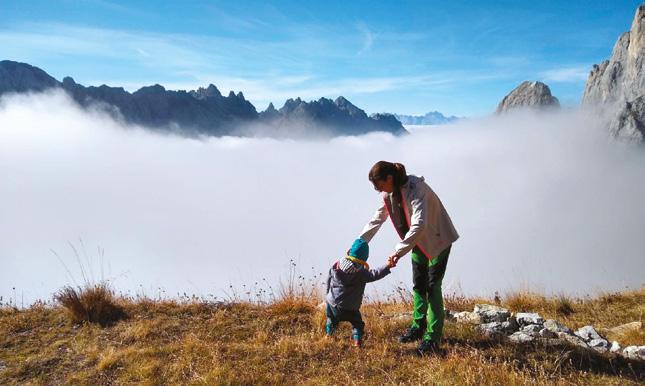
133
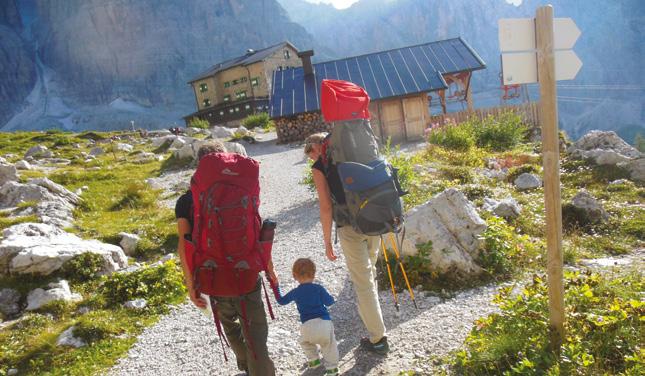
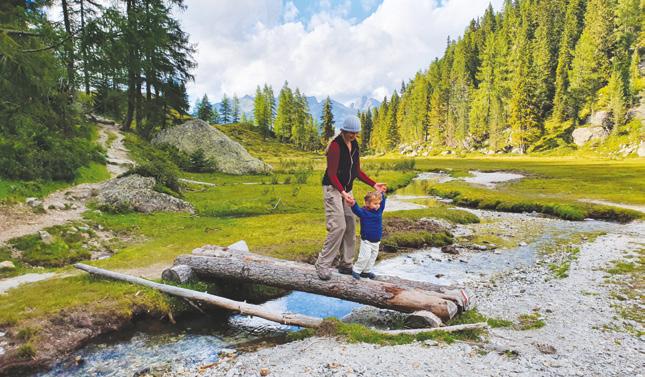
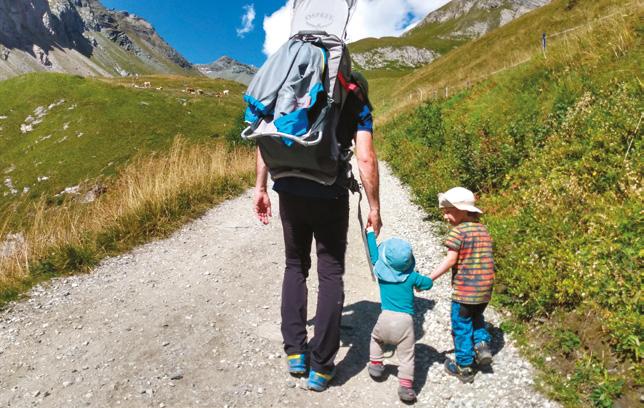
An older brother taking pride in helping the younger toddler walking on the trail: a great opportunity in which the whole family is learning to work as a team!
HIKING WITH YOUNG CHILDREN – BARBARA ZENNARO AND STÉPHANIE KLAUS – HIKING WITH YOUNGER TODDLERS
HIKING WITH YOUNGER TODDLERS (1 TO 2 YEARS)
• Choosing trousers with reinforced fabric patches to improve durability and comfort (read more in chapter 9 “Outdoor trousers”).
The outer layer can be slightly bigger to allow space for extra growth; some brands offer extendable sleeves and trousers ‘cuffs that allow you to add a few centimetres to the jacket and trousers, growing together with your child.
For cold weather consider using mittens with extra-long arm cuffs: these will be harder for your child to take off (they will surely try!). Some mittens have a zipper alongside to make wearing a bit easier. A string can be attached to both mittens and run inside the child jacket: in this way, even if your child manages to take the mitten off, you would not lose them. Some jackets and onesies also have clip-systems.
Footwear
When your child starts walking, comfort for the first steps is very important when it comes to choosing shoes. Other factors that will influence your choice of shoes depend, for example, on the type of surface your child will be walking on, or the time of year. One thing is certain: it is time to invest in quality shoes with a good sole. This means that the sole should still be light and flexible enough to support the natural movements of the foot and at the same time protect from the ground.
As your child gains confidence walking you may upgrade to a more technical shoe (read more in chapter 8 “Hiking shoes”).
134
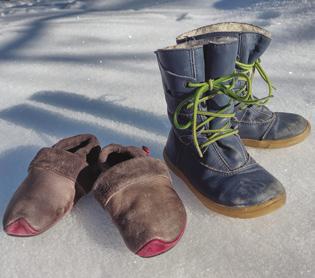
An outer shell with reinforced knees and seat, slightly big to allow space for growth
Soft soles are still preferable to let the child’s feet and muscles feel the ground and exercise while walking, even for winter shoes
MOVING ON THE TRAIL The carriers
The carriers described in the previous chapters can still be used when hiking with a toddler (with the exception of the stretchy wrap). The main difference compared to hiking with infants, who are carried the whole time while walking, is that toddlers are going to occasionally walk on their own. You will need more breaks to let them out of the carrier system and to let them roam around.
These free-range moments are very important for the development of the children: they explore the many interesting objects the outdoors offers; they gain a sense of achievement, rather than being carried the whole way; they improve their equilibrium by walking in even terrain.
This is a good time to start planning hikes in places where you can safely put your child down and take time to watch and enjoy them discovering the world on their own. The frequency in which you have to let the child on the trail influences your choice of the carrier system. If you foresee that your child will ask repeatedly to get in and out the carrier, choose a carrier that can be easily put on and off, such as SSC, a strapless front carrier (read more in the next session “The strapless front carrier) or a framed child carrier with a buckle on the side. Also consider the carrier system based on your child preferences: for example, if your child only sleeps in the framed carrier and not on the SSC, and you are hiking the whole day, then it is probably a better idea to prefer the framed child carrier so that your child can have a good nap and be happy the rest of the day.

135
A framed child carrier offers a comfortable place to rest and thanks to the quickstand bar it is possible to position the carrier on the ground without disturbing the child
HIKING WITH YOUNG CHILDREN – BARBARA ZENNARO AND STÉPHANIE KLAUS – HIKING WITH YOUNGER TODDLERS
HIKING WITH MORE CHILDREN
Equipment for tandem carrying
Tandem carrying also means new adjustments in terms of clothing, different solutions to store the equipment you need, and specific equipment for safety.
As you will be sandwiched between two children and you are up to hard/strenuous physical activity, expect to be hot.
• Wear down a layer when carrying the children, plan to wear material with good wicking properties such as merino wool.
• Wear shirts that cover the shoulders (no tan tops): because of the weight of the shoulder straps, you are very likely to sweat a lot there.
• Bring an extra shirt, so that you can change it during breaks: you are the engine your children are relying on and you should avoid injuring your back at any cost!
When you’re already carrying two little ones, it’s hard to find a place to stow your essentials.
Opting for minimal equipment means that you won’t always have everything you may need with you: in this case, you should always be able to return to safety quickly, for example if one of your children falls into a puddle in winter and you do not have a full change of clothes.
Many parents prefer having one child being carried on the framed child carrier so that they benefit from the capacious storage compartment. Moreover, having a carrier with a designated hydration compartment allows constant accessibility to water. Fanny packs tied around the waist offer a little storage option: hold it on your back, underneath the child, so that it won’t interfere with your walking movements.
There are hydration packs that tie around the waist too. A snack cup and a child drink bottle can be attached to the sides of the carriers with quickdraws to carry the essentials to keep your children fed and hydrated.

204
Examples of equipment for tandem carrying. The framed carrier, the SSC and the wrap (on the top) can be used to carry on the back, while the SSC, the strapless carrier and the wrap (on the bottom) can be used to carry in the front
Hiking poles are essential: children moving on the carriers, limited visibility on your feet and the extra weight will weaken your balance and having two extra points of contact with the ground will definitely help. Do not forget to bring with you a small mirror to check on the child on your back, without draining your mobile phone batteries to use the camera.
HIKING IN GROUPS
Hiking with friends, family and bigger groups exposes your child to other people, which is important to refine social developing skills. Hiking with another adult, even if they also are carrying children, provides many advantages: another set of eyes to check on the well-being of the children, the possibility to leave all children together supervised by one adult while the other manages other tasks (like going to the toilet or asking for help), the possibility of sharing weight when carrying. Children generally enjoy the company of other children as they
can play and learn from each other. Joining a local family hiking association offers the opportunity to meet new like-minded families.
Before every hike, assess the overall capacity of the group: you are only as strong as the weakest person in your team (read more in chapter 2 “How strong is your team”). The same general recommendations for caring for one child described in this book are still valid, but play particular attention to the following points when more children are present:
• Plan a hike that all team members can successfully complete, considering each individual own strengths and weaknesses.
• Share the essentials among the group: to lighten each adult’s overall weight. For example, just one first aid kit is needed for the whole group (apart from personal medicines).
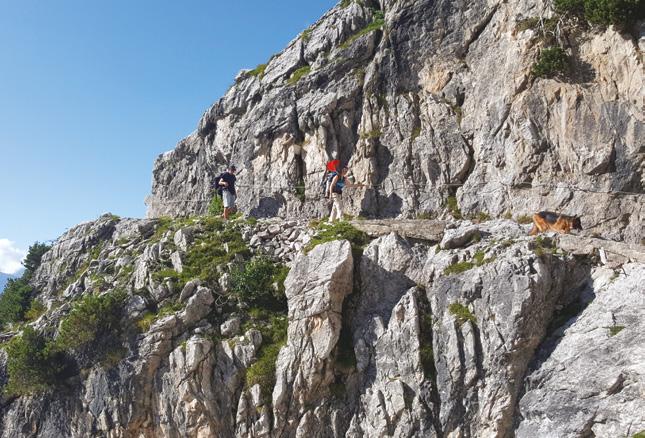
205
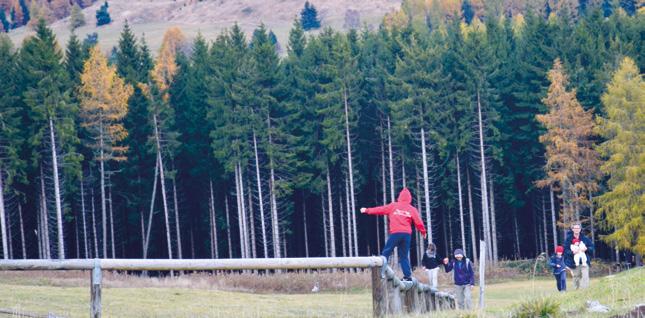
A little hiker is keen to follow an older child walking in equilibrium on a fence: what a great opportunity to learn a new skill!
HIKING WITH YOUNG CHILDREN – BARBARA ZENNARO AND STÉPHANIE KLAUS – HIKING WITH MORE CHILDREN
HIKING WITH MORE CHILDREN
• Avoid dysregulation (meltdowns and tantrums) triggers and offer regularly water and snacks.
• Regularly check the children’s body temperature to make sure they are warm and dry: children fully engaged in a game won’t notice that they are sweating a lot.
• Set rules among the children, which are valid for all of them, and agreed by all parents: for example, children should always be at sight with an adult and in a place where they can always hear them; children should return to the adults immediately when called; children should be courteous and look after each other.
Sometimes it happens that the group splits into smaller groups, for example older children speed up ahead with one adult, leaving the slower hikers behind. It is important to be mindful about these situations: make sure both new groups have essentials such as snacks and water, warm clothes etc. and consider whether the division will cause any child (or adult) to feel distressed.
Starting the hike in the morning is practical: the children generally have more energy and the group has more time to reach the final destination without stressing about getting dark or being late for dinner.
Finally, make hiking with the group a tradition, so that the children can look forward to it. They will be keener to participate in the planning and preparation processes, making it always more their own personal experience rather than something they are just being carried along.
206
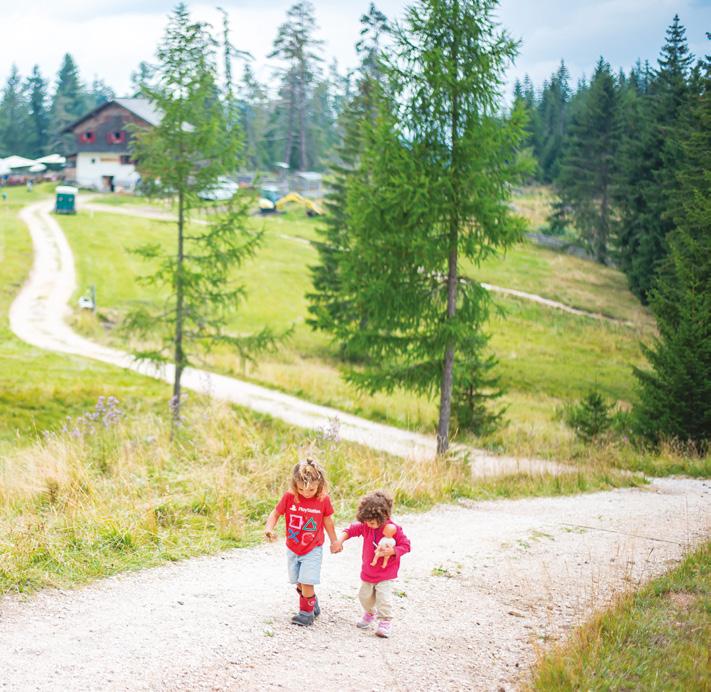
Motivating each other to walk along the path, hand in hand, and discovering the meaning of friendship
207
HIKING WITH YOUNG CHILDREN – BARBARA ZENNARO AND STÉPHANIE KLAUS – HIKING WITH MORE CHILDREN
L – EQUIPMENT FOR BACKPACKING
Backpacking with toddlers and little hikers MOTHER
Change of clothing
Underwear, bra and socks to be worn as soon as arrived at camp, dry shirt and trousers, comfort shoes
Food and Water
Breakfasts, lunches, dinners, extra water and snacks, water, a water purifying system
Sleeping surface: managed hut Sheet sleep sack
Sleeping surface: basic hut and tent Sleeping pad
Sleepwear
Base layer, mid layer (breastfeeding top for extra comfort), warm hat, sleeping bag (if blankets are not available)
Full change of clothing, comfort shoes
Breakfasts, lunches, dinners, extra water, favourite snacks (lots)
Fitted sheets for a single bed
Full change of clothing, comfort shoes
Breakfasts, lunches, dinners, extra water, favourite snacks (lots)
Sheet sleep sack fitted to the body size, waterproof urine pads
Proper insulating (cell foam pads without deeps or travel cot) Sleeping pad
Base layer, mid layer if needed, wearable sleeping bag or fleece onesie, bunting as needed
Base layer, mid layer, sleeping bag (if blankets are not available)
Bed-side set
Headlight, comfort light, clothing in case of a cold night, urination device with reservoir, chemical warmers, thermometer
Personal hygiene
Toothbrush, toothpaste, soap
Entertainment –
Other Mosquito net, power bank/solar panels
Clothing in case of a cold night, drinking bottle, fresh diaper and wet wipes
Toothbrush, children’s toothpaste, children’s soap
Comfort toy, favourite toys, books
Travel cot with mosquito net, ear protection
Clothing in case of a cold night, drinking bottle
Toothbrush, children’s toothpaste, children’s soap
Comfort toy, favourite toys, books
Mosquito net
226 ANNEXES
LITTLE
TODDLER
HIKER
M – PACKING THE EQUIPMENT FOR A BACKPACKING TRIP (BARBARA’S EXPERIENCE)
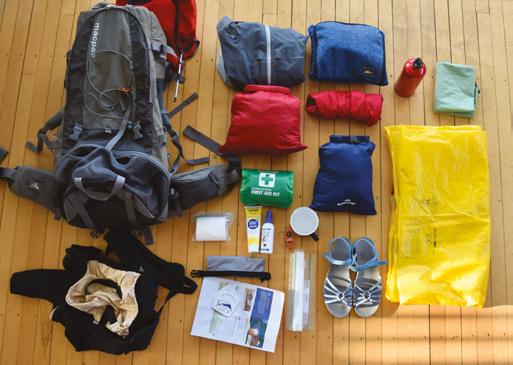
227 1 3 4 5 6 16 9 10 17 12 13 14 15 8 11 2
1. Framed child carrier + sunshade + weather cover
2. SSC (to be attached in the net outside) In the framed child carrier side pockets
3. Sunscreen
4. Insect repellent
5. Map
6. Whistle
7. Cell phone
8. Metal mug
Inside, on the very top (lightweight items)
9. Outer layer for the mother
10.Outer layer for the child
11.Comfort shoes
12.Compact fast drying towel
Mid position, wrapped inside an emergency bivouac bag (yellow)
13.Full change of clothing for the mother
14.Full change of clothing for the child
Lower position
15.First aid kit
16.Diaper bag (diapers, wet wipes, rush cream, muslin, plastic bags for dirty diapers)
17.Water bottle
(2 nights out in basic huts with an infant)
HIKING WITH YOUNG CHILDREN – BARBARA ZENNARO AND STÉPHANIE KLAUS – ANNEXES
PARENTING OUTDOORS
Raising the new generation (Our philosophy: Expedition parenting
– Your role as a guide) – The benefits of parenting outdoors
(For the children – For the family) – How to guide in a sustainable way (Leave no trace – Support local communities – Learn about the environment you are in – Avoid single use plastics – Move consciously)
FIRST STEPS BEFORE HIKING
Introduction – Get ready (Prepare for the hike – Plan the right hike – Understanding the magnitude of the day – The final formula)
– Taking the weather into account (Weather patterns in the Alps)
– Packing the right equipment (The essentials for safety –The essentials for energy – Clothing for all weathers)
SAFETY WITH YOUNG CHILDREN
Introduction – Teaching safe behaviour (Scenario 1: Crossing alpine pasture – Scenario 2: Dealing with thunderstorms – Scenario 3: Learning about local flora, fauna and funga) – Safety while walking together (Risks linked to the status of the trail while walking –Parent’s attitude toward children taking risks) – Safety while carrying the child (Risks linked to the act of carrying – Risks linked to the status of the trail while carrying) – Examples of risks related to hiking with a child (Getting lost – Being bitten by ticks or other insects – Being surprised by thunderstorms)
THE FIRST MONTHS TOGETHER
Introduction – A new mother (Physical transformations – New body, new clothing – Emotional and psychological transformations – Sleep)
– A new child (Thermoregulation – Lungs – Skin – Eyes – Ears)
HIKING WITH YOUNGER INFANTS (0 TO 6 MONTHS)
Introduction – Get dressed! (Clothing – Footwear) – Carrying the child close to you – Using a carrier cover – Carrying the younger infant (Babywearing with soft carriers – The ergonomic position)
– Taking breaks on the trail (Sitting and stretching – Feeding the younger infant – Pooping on the trail)
HIKING WITH OLDER INFANTS (6 MONTHS TO 1 YEAR)
Introduction – Get dressed! (Clothing – Footwear) – Carrying the older infant (The framed child carrier – The hip belt carrier –The pushchair – The multisport chariot) – Resting on the trail (Sitting and stretching – Playing and exploring – Feeding – Pooping on the trail)
HIKING WITH YOUNGER TODDLERS (1 TO 2 YEARS)
Introduction – Get dressed! (Clothing – Footwear) – Moving on the trail (The carriers – Child-led hikes – Motivating to walk toward a set destination) – Taking breaks (Feeding – Pooping – Playing barefoot)
HIKING WITH OLDER TODDLERS (2 TO 3 YEARS)
Introduction – Get dressed! (Clothing – Footwear) – The first backpack – Moving on the trail (To carry, or not to carry, this is the question – Slow hiking: a new mindset for the parents – Coyote teaching) – Dealing with big feelings
HIKING WITH LITTLE HIKERS (3 TO 4 YEARS)
Introduction – Get dressed! (Clothing – Footwear) – Moving on the trail (Ditching the carrier system – Motivating to go hiking) – Playing on the trail (Risky play)
BACKPACKING
Introduction – Backpacking at different ages (Backpacking with infants – Backpacking with toddlers and little hikers) – Choosing the right place (Managed hut or mountain houses – Basic huts – Tents)
– Equipment (Food and water – Sleeping surface – Sleepwear – The bed-side set – Personal hygiene – Mosquito net – Charging system –Entertainment)
HIKING WITH MORE CHILDREN
Introduction – Tandem carrying (Carrying two children with a single wrap – Using a double carrier system – Using two single carrier system – Equipment for tandem carrying) – Hiking in groups
35,00 €
VAT included
ISBN: 978 88 55471 015
www.versantesud.it
