1 minute read
Basic Installation
Next Article
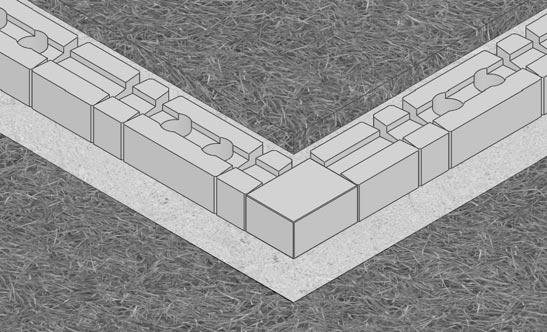
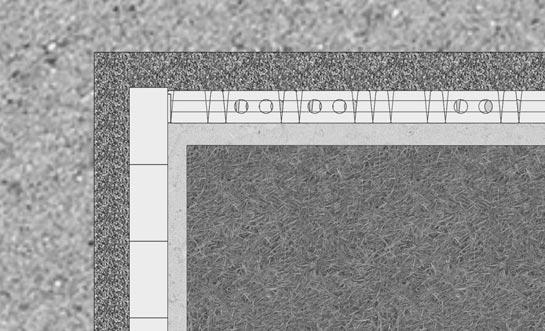
OUTSIDE 90º CORNER
Step 1 - Base Course Preparation with Corner Block
Established your corner location, and build out from the corner.
Step 2 - Successive Course Installation
Vintage Wall units are designed to create a random stone appearance. However, care should be taken to avoid a “stacked bond” or vertical seams in the wall. To finish corner courses, any cuts should be made to the last block - not to the corner block. Measure the distance from the last block set to the corner and cut the block as necessary. Use Super-Stik construction adhesive to secure all corner and cut units.
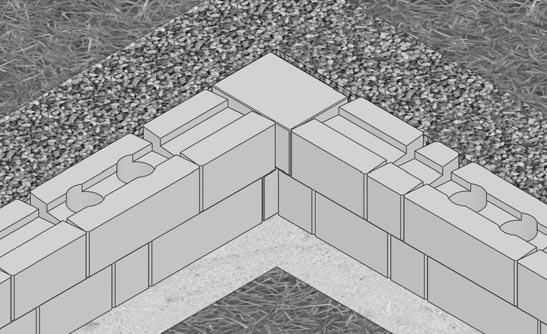
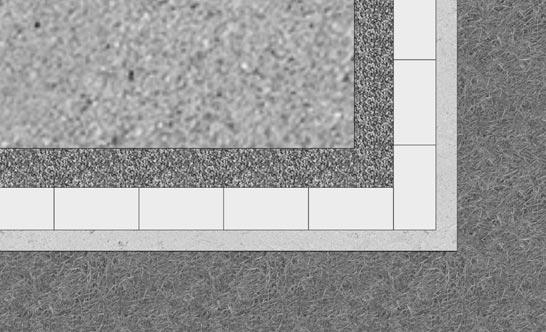
Step 3 - Finishing an Outside 90˚ Corner
Using a hammer and chisel, score and split a Universal Cap 4" from one side. Position it on the corner with 1" to 2" of overhang. Cut another Universal Cap to be placed on the adjacent corner wall so that it is flush with the other cap unit. Secure Universal Caps with Super-Stik.
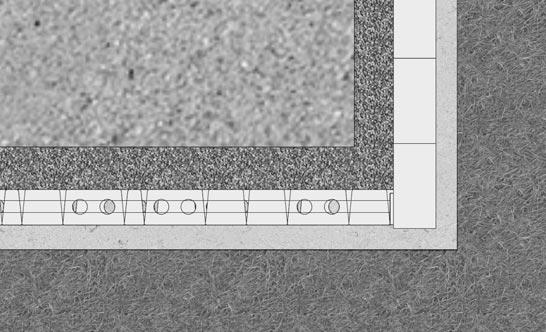
INSIDE 90º CORNER
Step 1 - Base Course Preparation
Begin an inside corner from the corner of the wall and install the blocks from the corner out when possible. Only half of a whole block installed on the corner will be exposed. This is true of each successive block that is staggered in the corner.
Step 2 - Successive Course Installation
Vintage Wall units are designed to create a random stone appearance. However, care should be taken to avoid a “stacked bond” or vertical seams in the wall. To finish corner courses, any cuts should be made to the last block - not to the corner block. Measure the distance from the last block set to the corner and cut the block as necessary. Use Super-Stik construction adhesive to secure all corner and cut units.
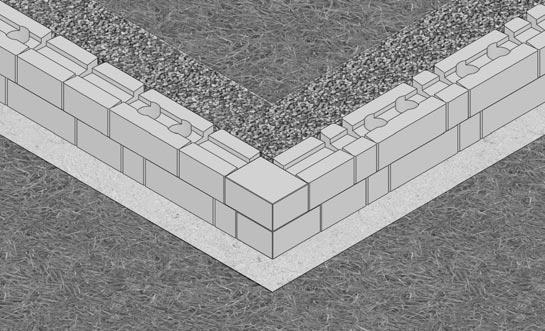
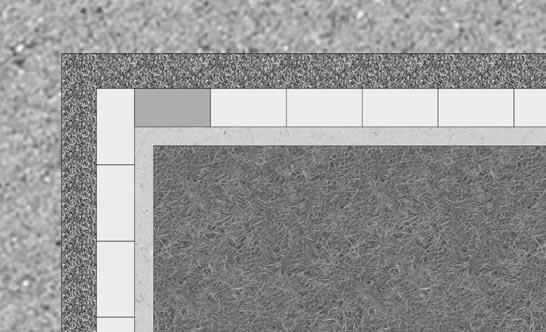
Step 3 - Finishing an 90˚ Inside Corner
Using a hammer and chisel or a masonry saw, cut a Universal Cap so it is perpendicular to the wall face. Cut the next Universal Cap to be flush with the corner cap. Secure Universal Caps with Super-Stik.
Convex And Concave Curves
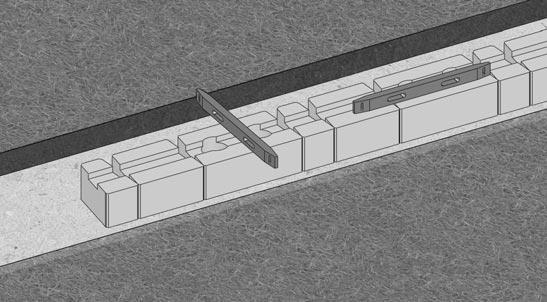
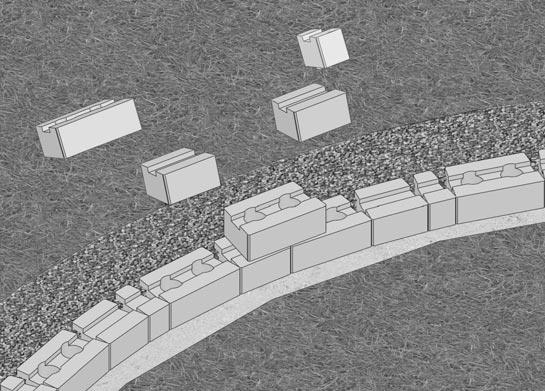
Step 1 - Base Course Preparation for a Convex or Concave Curve
Place the blocks on the leveling pad so there are no gaps between them.
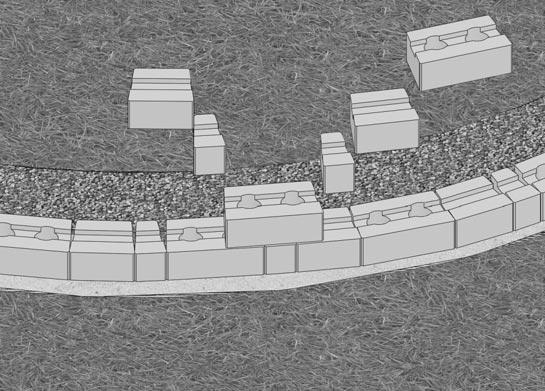
Step 2 - Successive Course Installation for a Convex or Concave Curve
When building multiple courses on a curve, begin installation by placing a block in the middle of the curve and centering it on two blocks directly below it. Build the wall from the center block outward.
CAPPING A WALL Shown with typical 3" or 4" tall rectangle cap block. See your manufacturer or distributor for available cap styles.