8 minute read
Civil 3D
from AUGIWORLD
by AUGI, Inc.
Next Article

Autodesk Civil 3D- Project Explorer
For this article I wanted to take a look at the new (ish) Project Explorer extension in Civil 3D. Some may have heard of it; some may not even know it exists! Even on the simplest of projects you will see a huge time/cost savings by being able to review and modify your design as well as utilize automated reports that will help you further understand your design at every step of the game.
One quick caveat……Project Explorer is only available if you have a subscription to the AEC Collection! You can also use this on previous versions (2020-2022).
As this article will be more of a high-level overview/ explanation, feel free to email me and I can send a step-by-step outline along with some sample files and videos.

Once installed, depending on the version, Project Explorer can be accessed from the Add-In’s tab of the ribbon, or from the Home tab next to your Toolspace.
HOW IS IT USED?
Typically, to manage project and drawing objects, users would use the Toolspace Prospector tab in Civil 3D.
Now, you can view and edit Civil 3D designs in a tabbed series of object lists, profile and section views, parameter lists, and many other design review tools.
You can validate your design using an extensive range of dynamic tooltips.
And finally, you can automate the production of user configurable reports, spreadsheets, dynamic tables, and AutoCAD drawings (see Figure 2).
In this article, I will break Project Explorer down into 4 topics. • Review / Understand Project
Explorer Capabilities • Design / Modify your design • Validate your design using Project Explorer • Report and share data with the touch of a button!
Figure 2
REVIEW / UNDERSTAND PROJECT EXPLORER CAPABILITIES

Project Explorer provides users with an easy-touse Civil 3D design model review tool and userconfigurable report generator. Civil 3D users now have a more efficient way to access, interact, and share the staggering array of design information that is in a Civil 3D model.
Project Explorer will help you: • Simplify project data navigation, review, and model editing. • Make it easier to discover and evaluate design criteria warnings to help meet design standards • Facilitate a more efficient generation of custom reports and tables that help meet delivery requirements.
With Project Explorer, project teams can reduce overall design times, better manage project complexity, and leverage project resources more effectively.
There are two different aspects to the customization of the user interface:
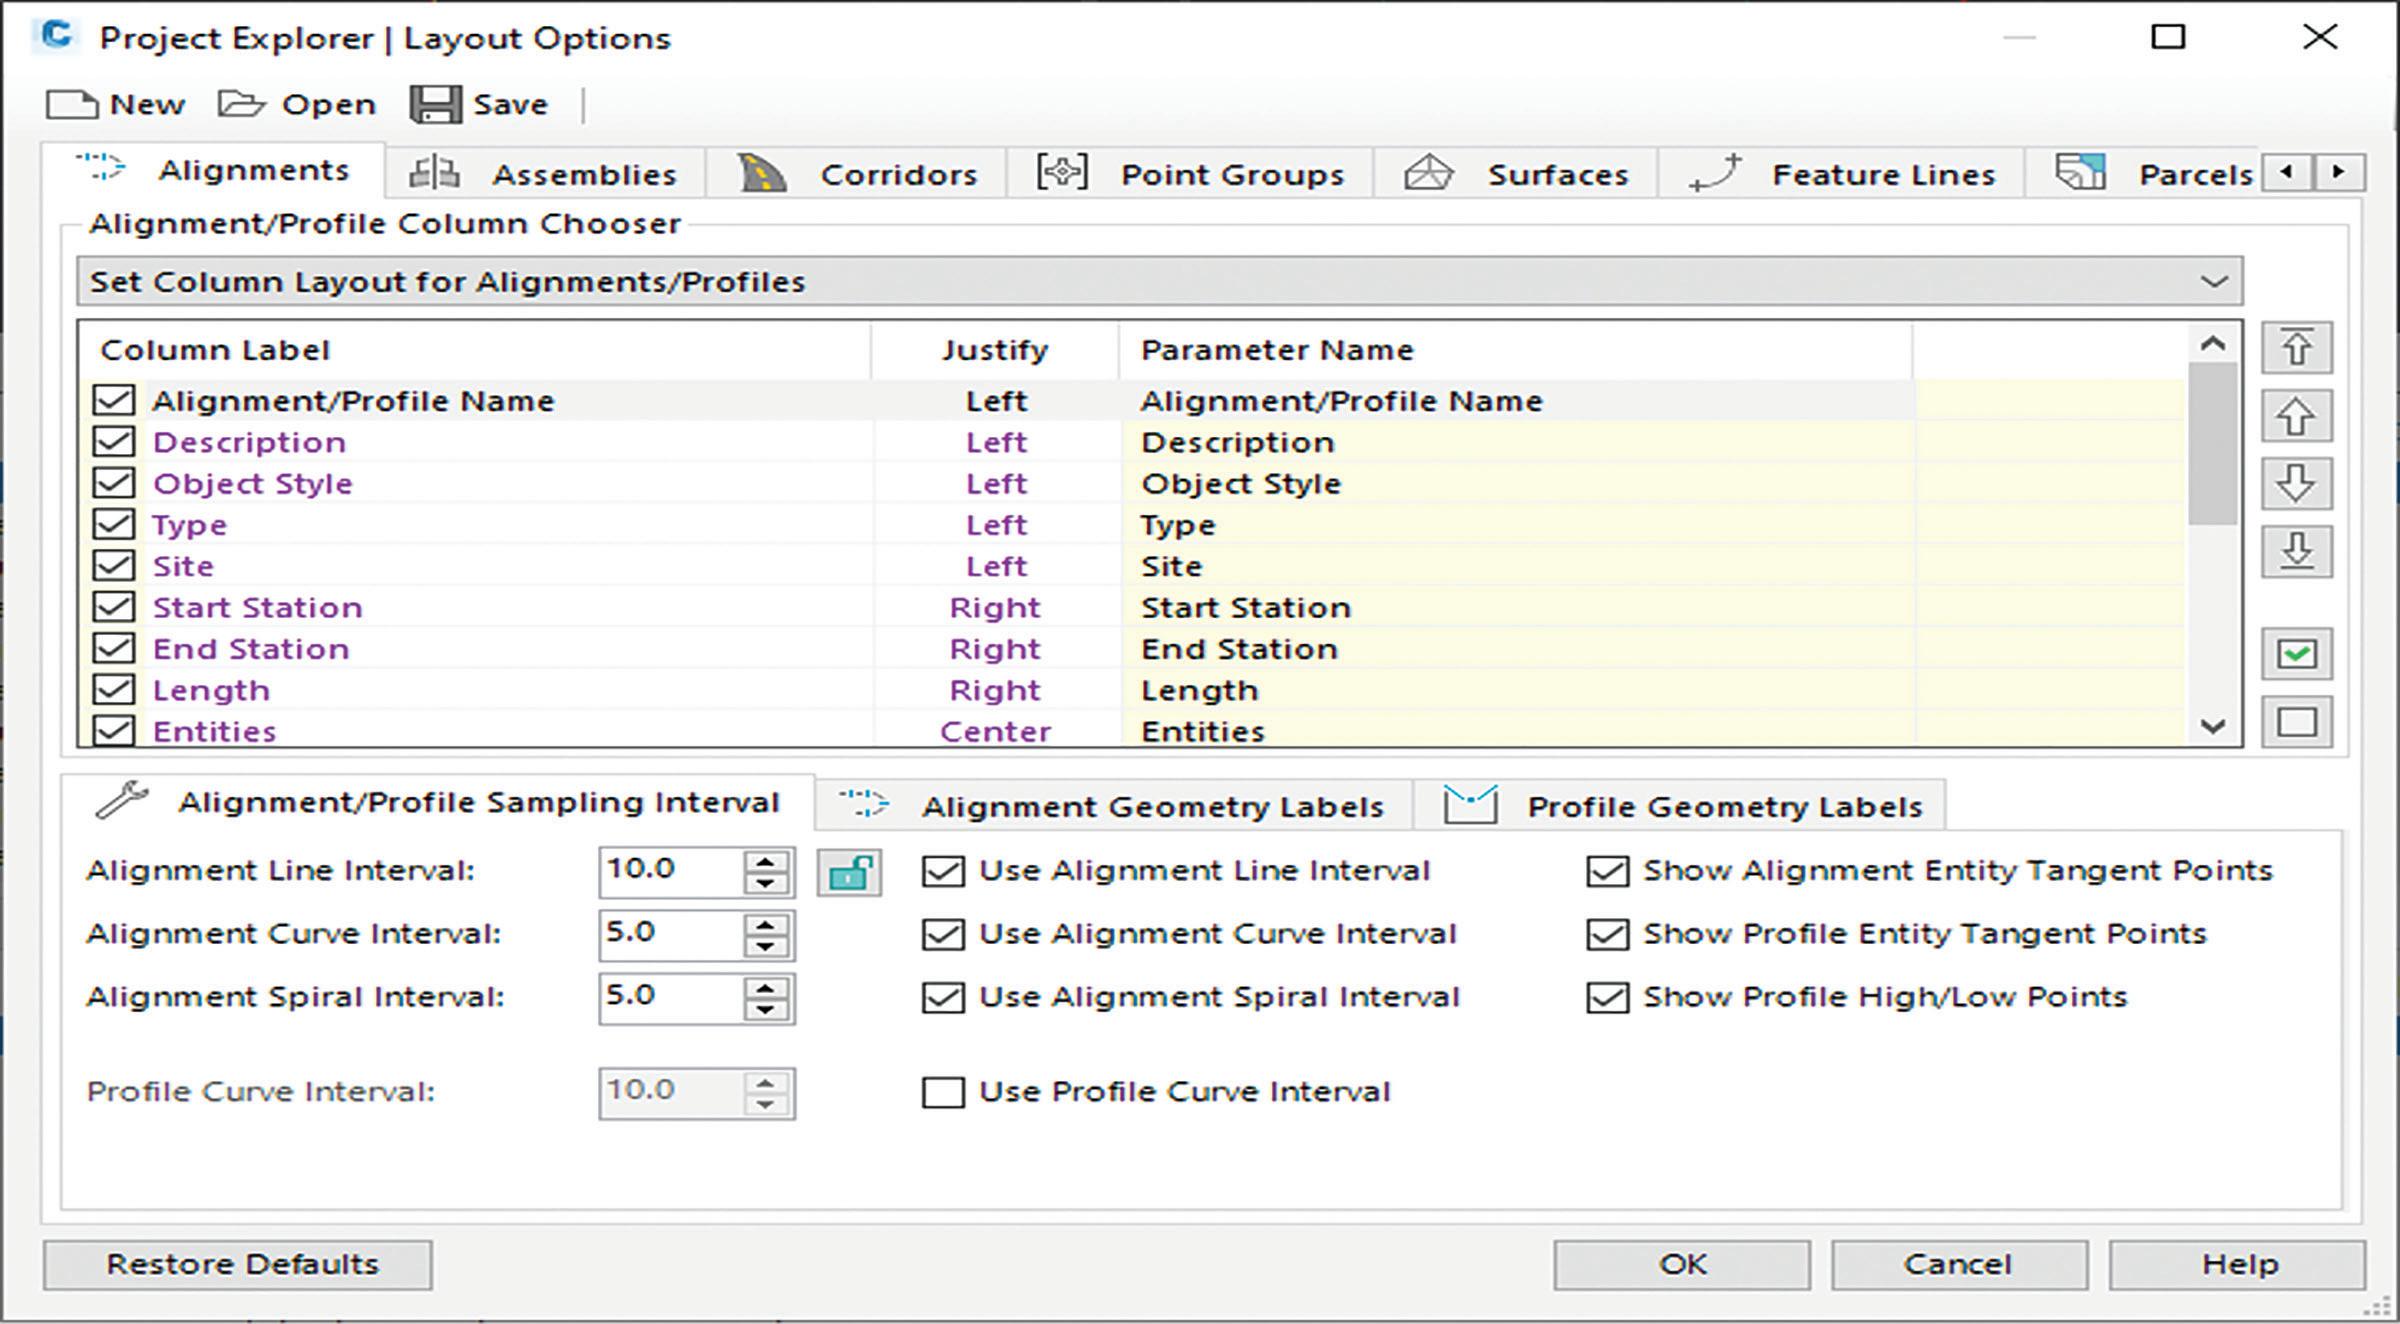
User Interface Layout
The layout of content is handled from the Layout Options window, which can be accessed from the Layout button in the bottom left of the main Project Explorer window. You can use this window to edit the layout, visibility, and name of all data columns. Layout Options can be saved to Layout Styles which can also be used to control the layout of reports and tables.
Figure 3
User Interface Preferences
The remaining options in the Project Explorer window such as fonts, colors, the layout, and visibility of Object Category tabs, and profile view colors and scales, are controlled from the Project Explorer Preferences window.
All information displayed in the Project Explorer window is live geometric project data from the Civil 3D model. Therefore, if something is modified or added to the Civil 3D model, the content in Project Explorer will update automatically.
If you use dual monitors, consider keeping Project Explorer open on your second monitor while you work in Civil 3D.
DESIGN / MODIFY YOUR DESIGN
Alignments, Profiles & Sections
Being able to see all alignments, profiles and sections in one area, and to be able to switch between features is key to streamlining workflows. Here, we will start with viewing and editing alignments, profiles and sections within project explorer.
Assemblies & Corridors
A massive amount of data exists within your assemblies and even more so within your corridor model. Project Explorer streamlines the viewing and editing of these models and provides insight into the data behind the scenes like never before.

Point Groups, Surfaces & Parcels
The are many other objects in Project Explorer you can view, edit, analyze and report on. Here we will quickly explore a few additional tools.
Pipe Networks
The options within Project Explorer for pipe networks are never ending! You can easily switch between pipe runs, edit multiple lines, SWAP

Figure 5


Figure 7
MULTIPLE parts and make global changes that you’ve always wanted to make, but never had the option to.
One thing that I think every pipe designer has wanted since Civil 3D day 1 has been the ability to select a run of pipes and tell it to grade them all at a specified percent! You can now do that using Project Explorer.
There are essentially three keyways to make changes to your Civil 3D design from the Project Explorer window.
• Double-click any highlighted parameter to directly edit the underlying individual value. • Right-click a selection of objects or points to access a slightly more limited range of parameters which can be edited for multiple selections. • Use a dedicated tool such as the Edit Pipe Run tool or the Swap Multiple Parts tool.
VALIDATE YOUR DESIGN USING PROJECT EXPLORER
Dynamic violation reporting is an important feature within the Project Explorer window.
Violation reporting quickly draws your attention to: • Areas of your design which may not fully meet your design goals • Objects within your civil model which are considered to be in an abnormal state. Because Project Explorer always displays live information from the civil model, you can monitor how each violation is impacted by every design decision you make.
REPORT AND SHARE DATA WITH THE TOUCH OF A BUTTON!
Sharing & Reporting Data
Within your Civil 3D files there is an abundance of information. As you know, within Civil 3D there are many reporting methods for creating tables and exporting reports.
Project Explorer has its own built in, customizable and exportable, reports and tables. These can be built from individual objects as well as a group of “Object Sets”.
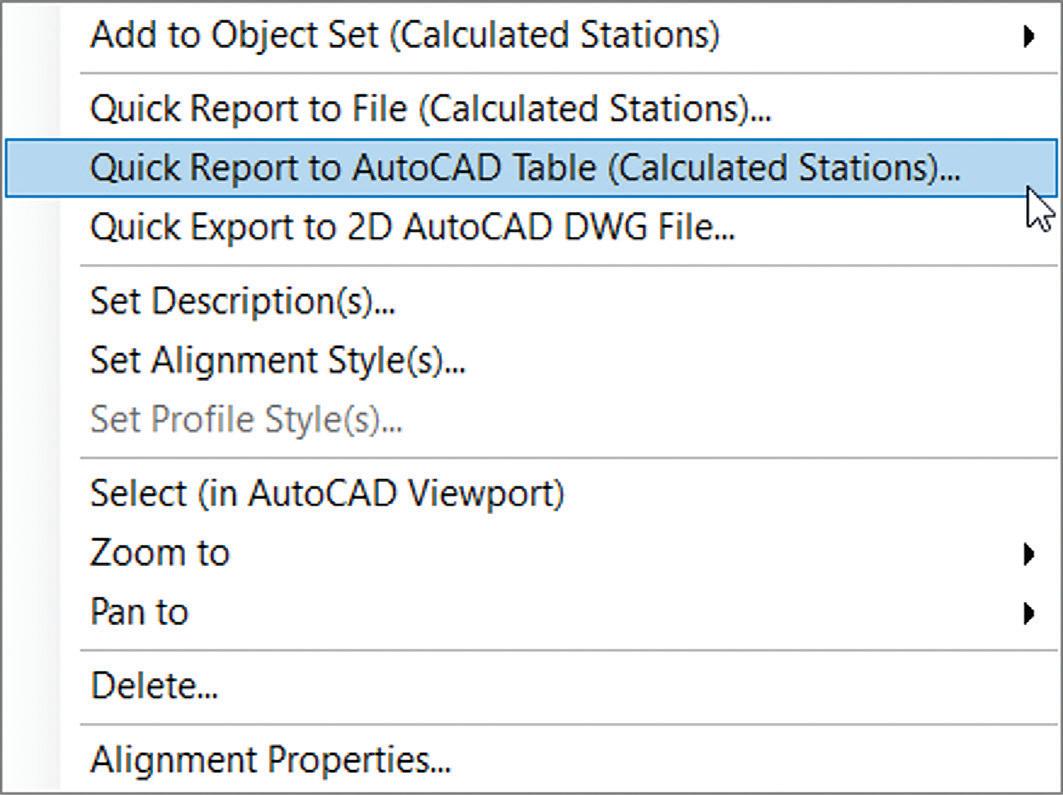
Figure 9
Also within Project Explorer are the options to export out to 2D AutoCAD drawings. This export ONLY the Civil 3D Entities, and no other linework.
Object Sets
The Object Sets tab in the main Project Explorer window allows one or more sets of objects to be persistently defined in your AutoCAD drawing. Object Sets are particularly useful for automating the generation of one or more reports from your drawing.
Actions may be associated with each Object Set, and these actions can be triggered with just a single mouse click. For example, a report generating action could be used to create a report file using a pre-configured Layout Style, Report Style, Output File Name, and Path (see Figure 9).
Reports
There are two key methods for generating reports and spreadsheets from Project Explorer. The quickest and simplest method is to use the Quick Report to File option. Alternatively, if more control is required over the content or scope of the report, or if it is likely to require updating repeatedly, an Object Set can be used to control the generation of your report.
Generate AutoCAD Drawings
The purpose of the 2D drawing export function in Project Explorer is to allow users to generate DWG files containing simplified 2D versions of their Civil 3D content. Exported geometry should look identical in plan but be built only from 2D entities. Sub-surface geometry and complex relationships that exist in the source Civil 3D drawing should be excluded from the exported drawing.
Generate AutoCAD Tables
There are two key methods for generating AutoCAD Tables from Project Explorer. The quickest and simplest method is to use the Quick Report to AutoCAD table option which supports the creation of static AutoCAD tables only. Alternatively, if more control is required over the content or scope of the table, or if it is likely to require updating repeatedly, an Object Set can be used to control the generation of your table. The Object Sets workflow supports the creation of dynamic AutoCAD tables which are linked back to source object geometry in Civil 3D.
CONCLUSION
When I first saw Project explorer in action, I thought it would be a bit overwhelming and didn’t see the real value in it. Afterall, can’t I do the exact same stuff natively in Civil 3D?? But once I got into it on my first couple projects, I realized that there is so much more to PE than I thought. The value add for pipe design alone is worth it, then you add in the robust reporting and ease of use, and you have a winner!
I also see Project Explorer as a great tool for managers and those who just want to review or explore a project but may not have much experience using Civil 3D objects. The QA/QC tools capabilities, especially on larger projects, can really help solidify your designs and identify errors early on.
Thank you!
Shawn has been a part of the design engineering community for roughly 15 years in all aspects of design, construction and software implementations. He has implemented and trained companies across the Country on Civil 3D and other infrastructure tools and their best practice workflows. Shawn can be reached for comments or questions at sherring@ prosoftnet.com.

