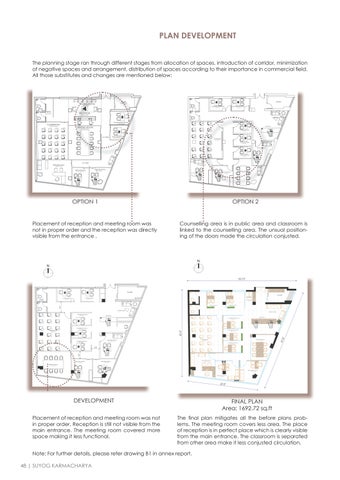
The planning stage ran through different stages from allocation of spaces, introduction of corridor, minimization of negative spaces and arrangement, distribution of spaces according to their importance in commercial field. All those substitutes and changes are mentioned below:
Placement of reception and meeting room was not in proper order and the reception was directly visible from the entrance .
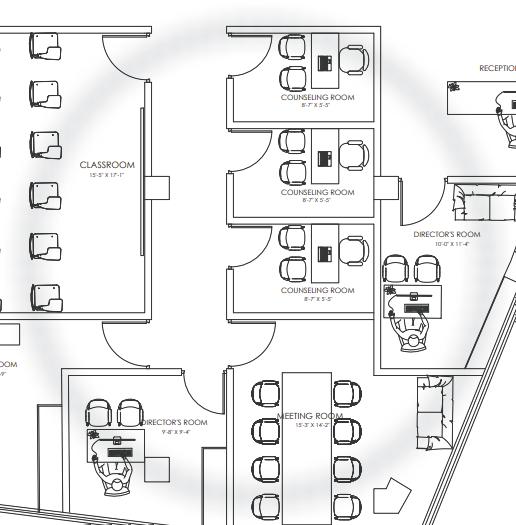
Placement of reception and meeting room was not in proper order. Reception is still not visible from the main entrance. The meeting room covered more space making it less functional.
Counselling area is in public area and classroom is linked to the counselling area. The unsual positioning of the doors made the circulation conjusted.
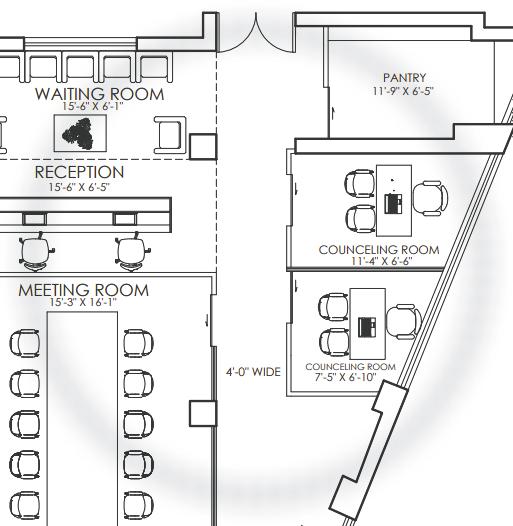
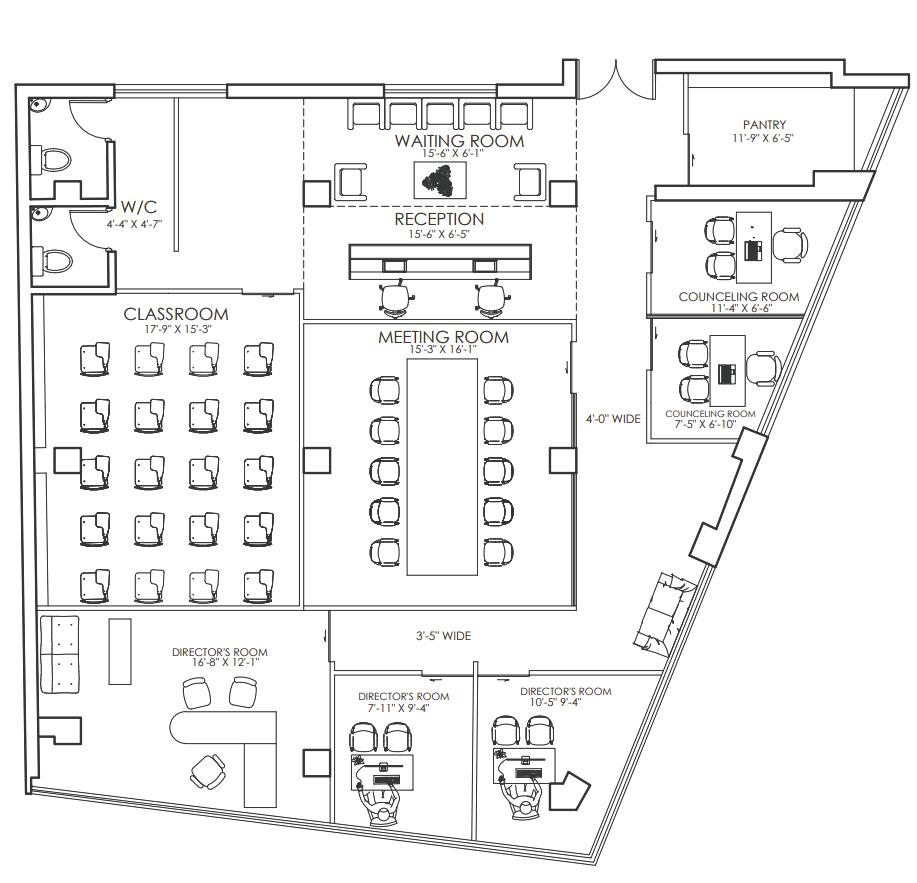
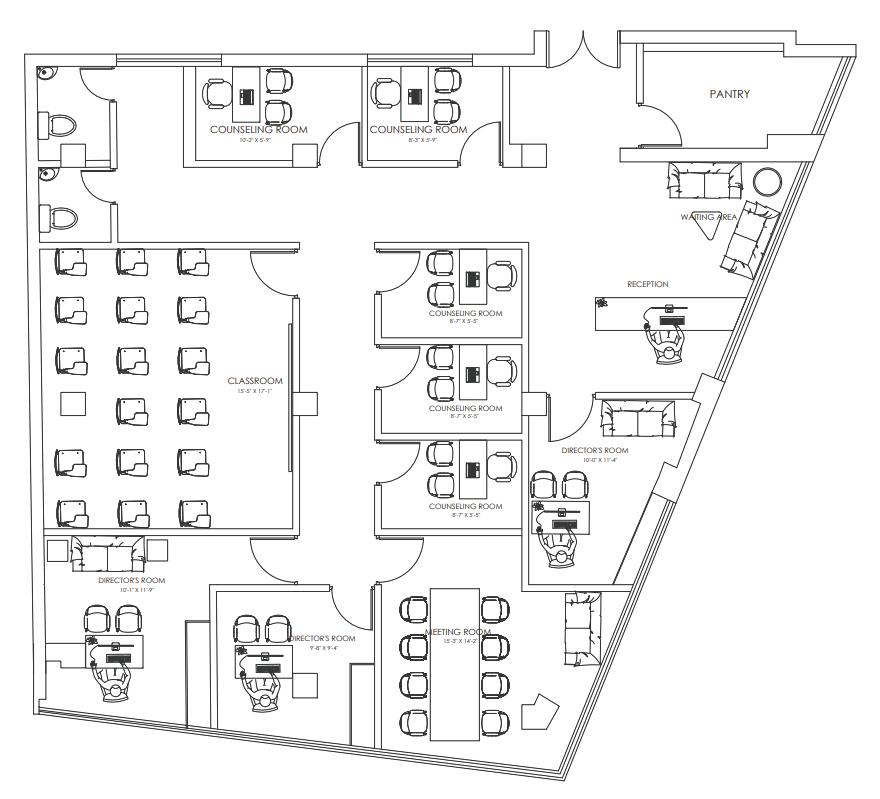
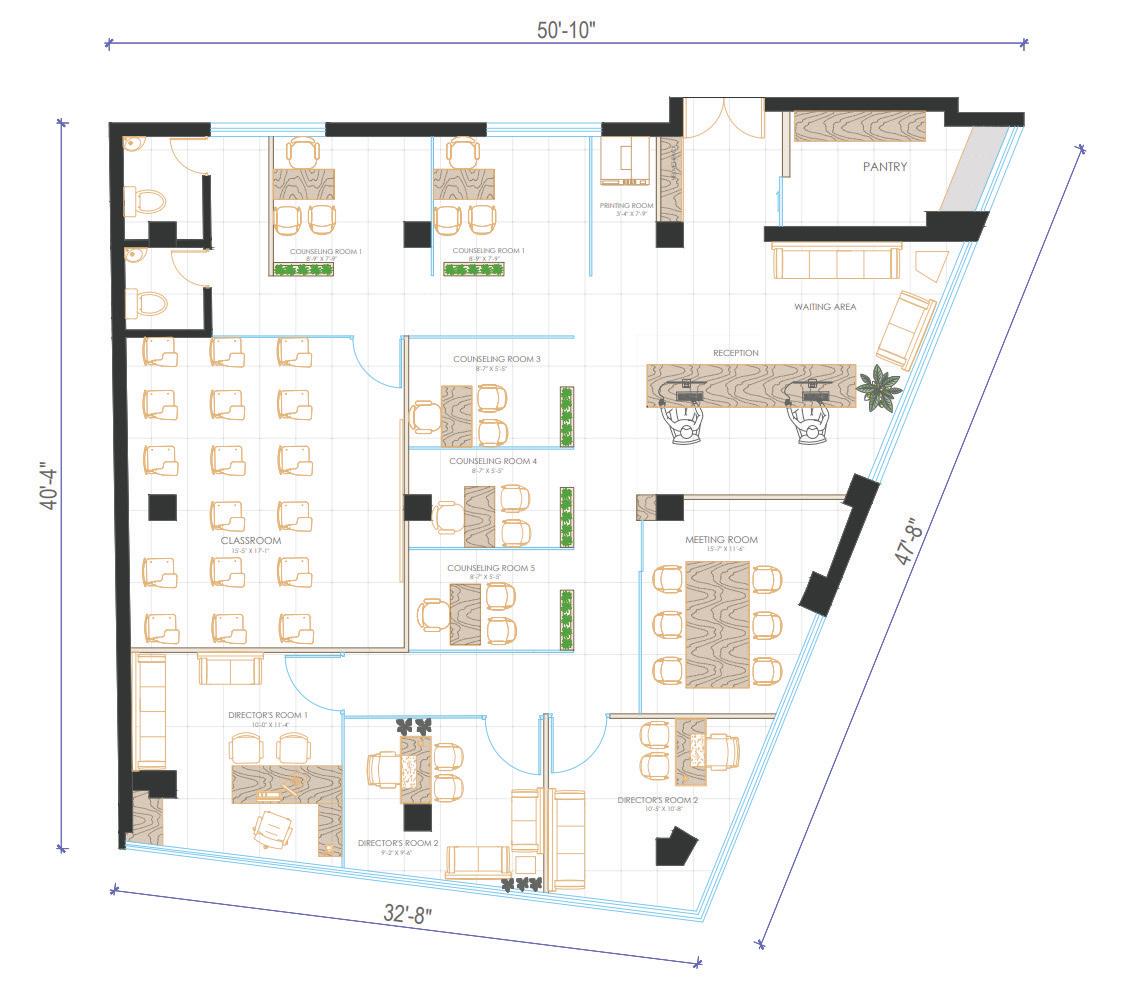
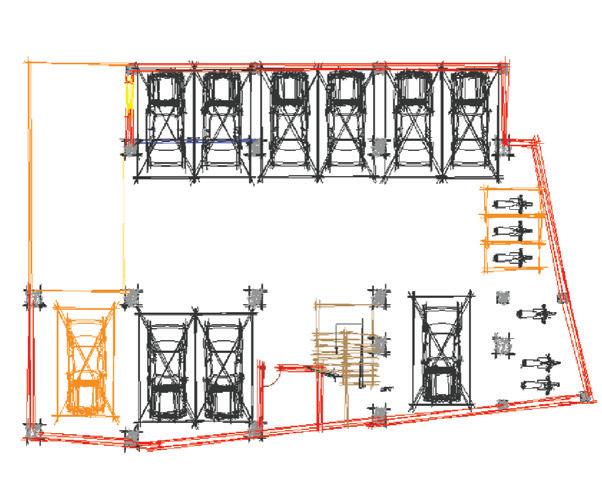
DEVELOPMENT FINAL PLAN Area: 1692.72 sq.ft
The final plan mitigates all the before plans problems. The meeting room covers less area. The place of reception is in perfect place which is clearly visible from the main entrance. The classroom is separated from other area make it less conjusted circulation. OPTION 1 OPTION 2
Note: For further details, please refer drawing B1 in annex report.
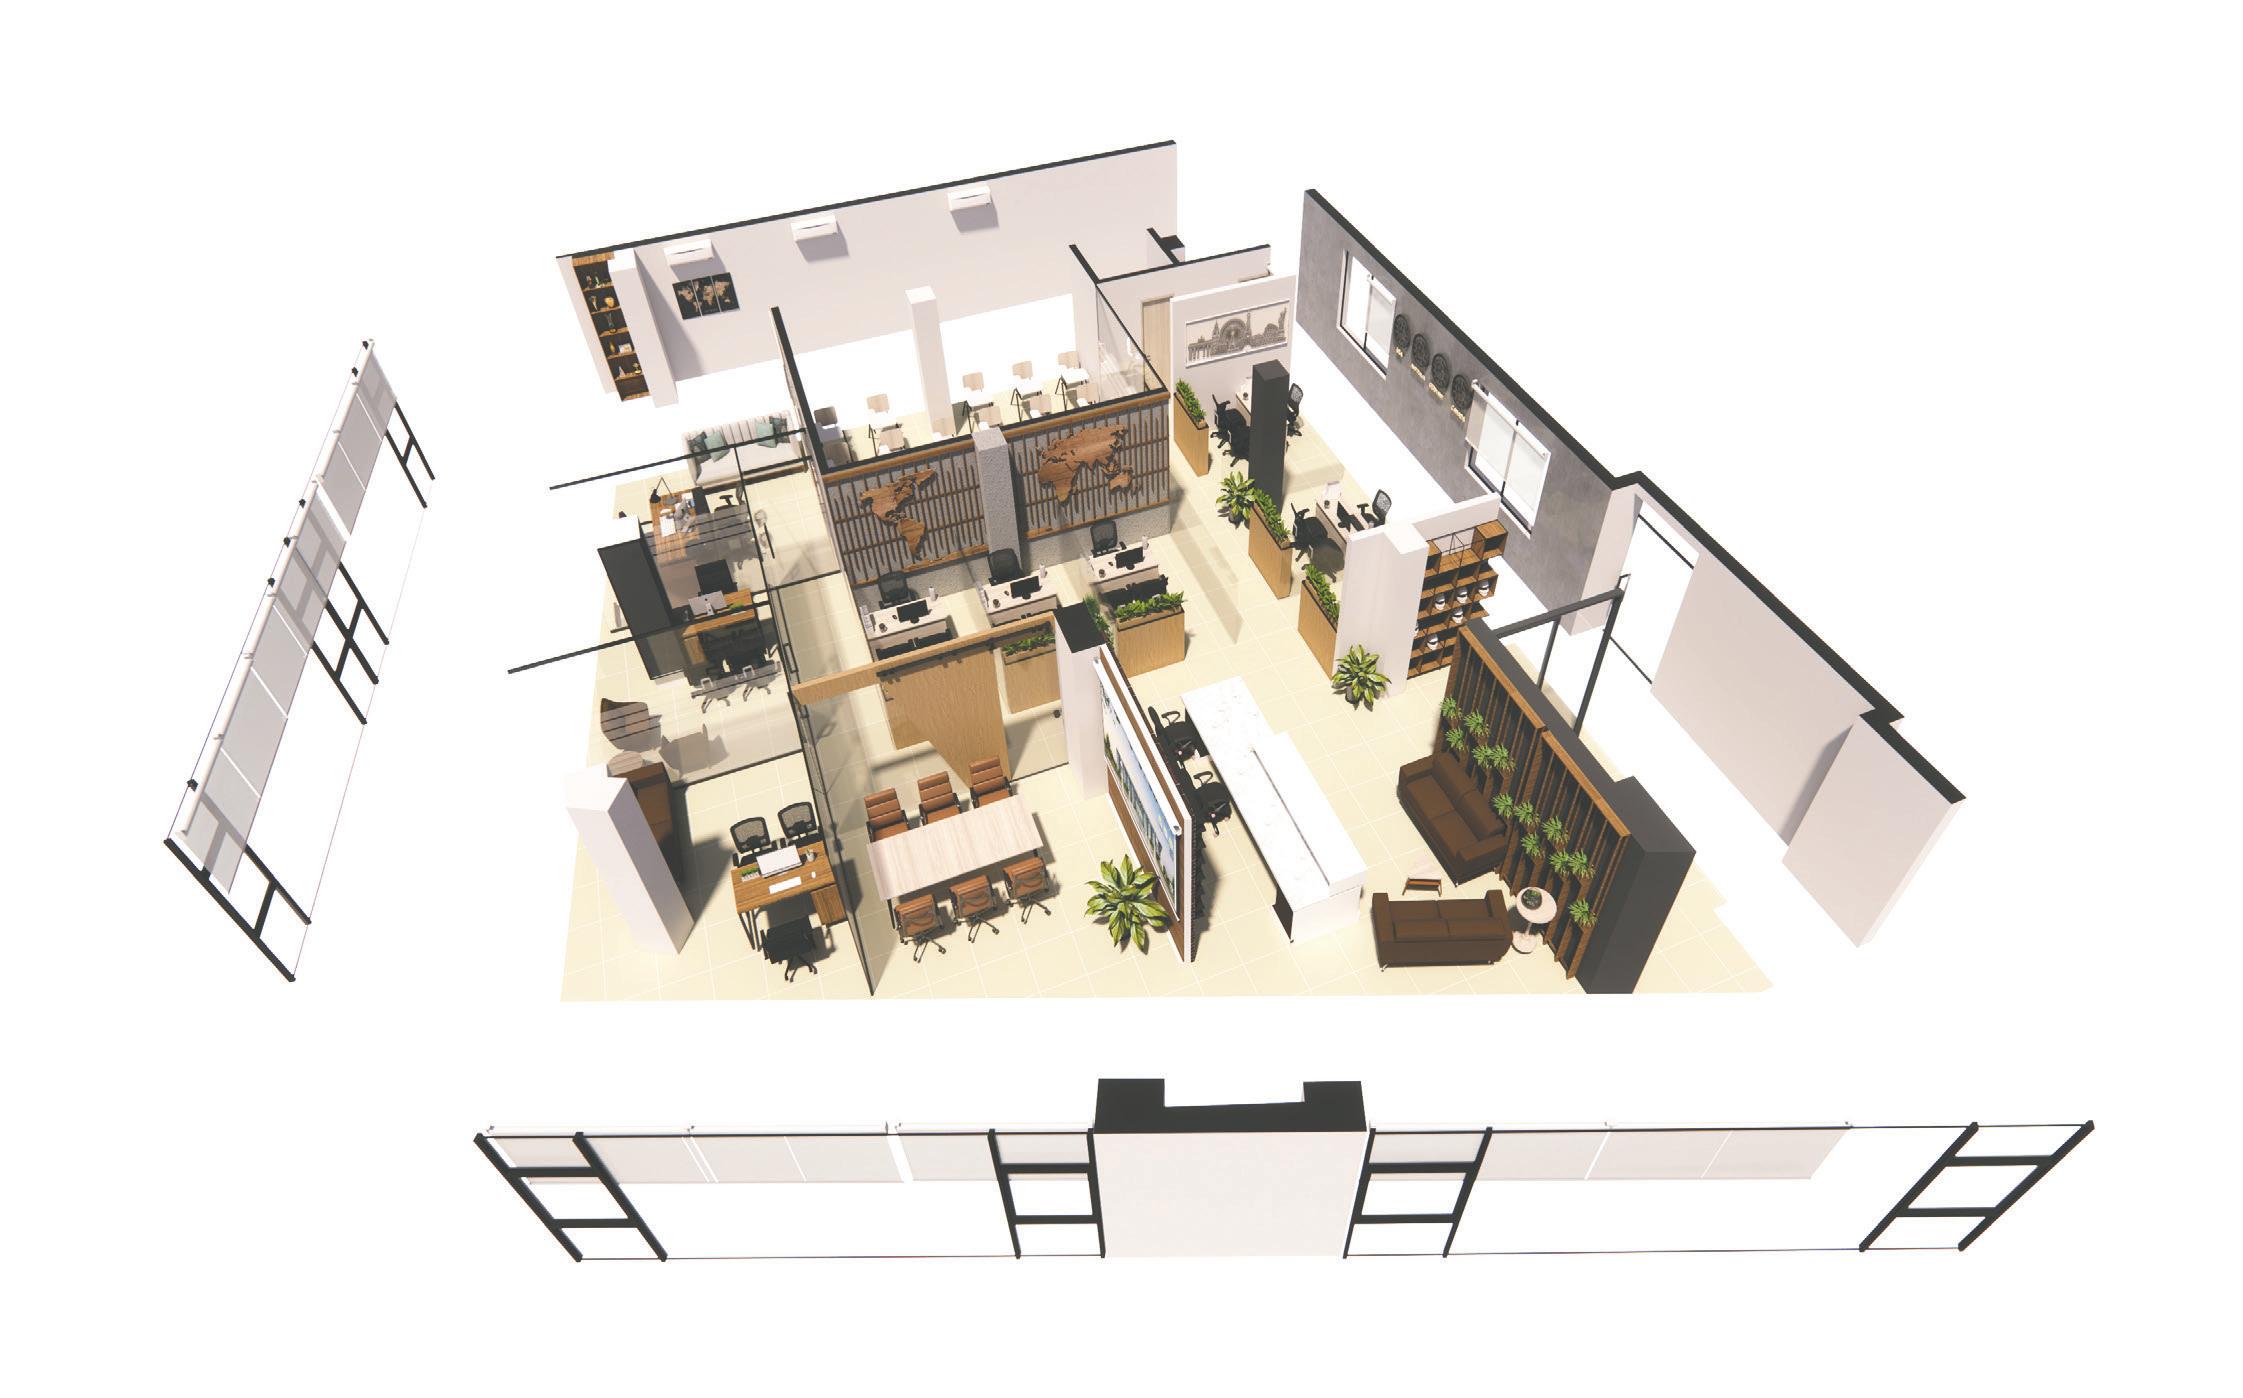
Meeting room
Classroom
Director’s room
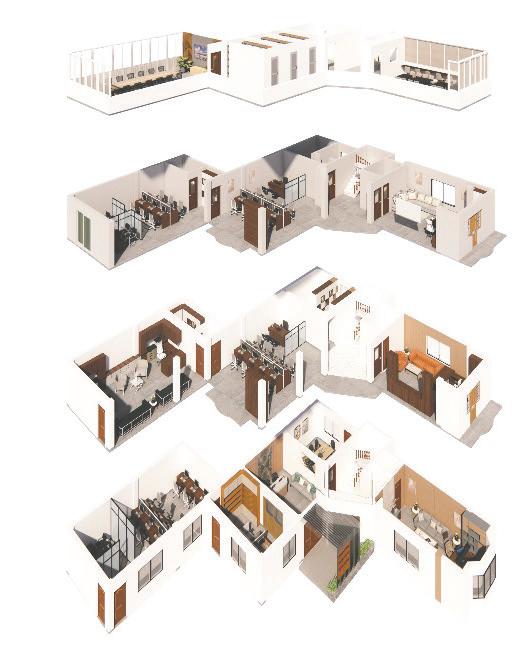
3D VISUALIZATION
Counselling areas
Pantry Recepttion and waiting area
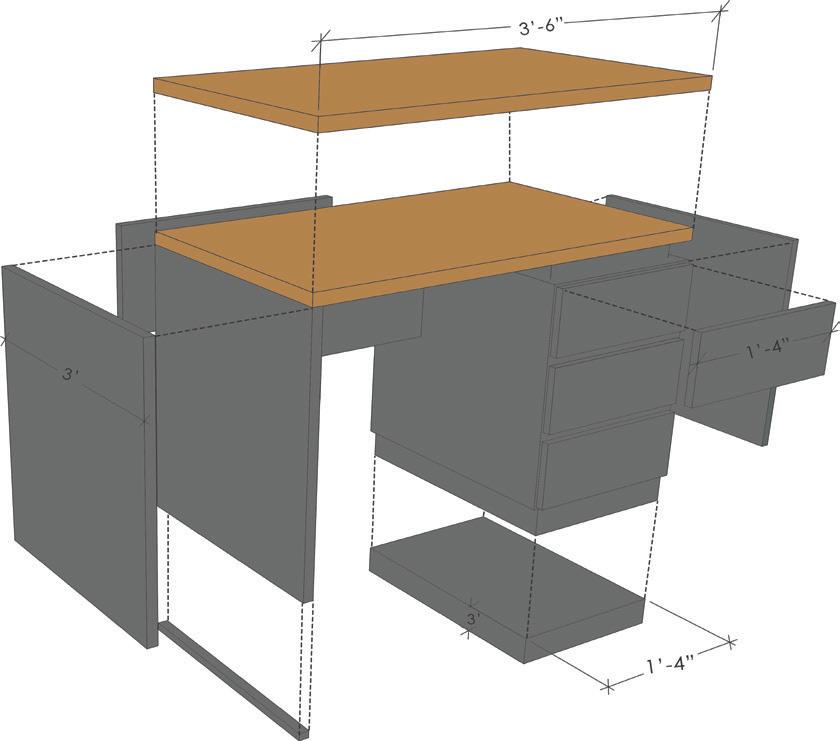
EXPLODED AXONOMETRIC VIEW
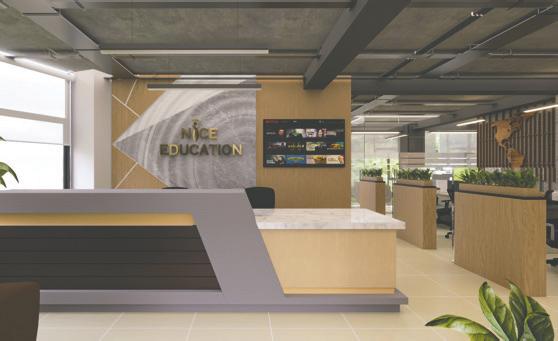
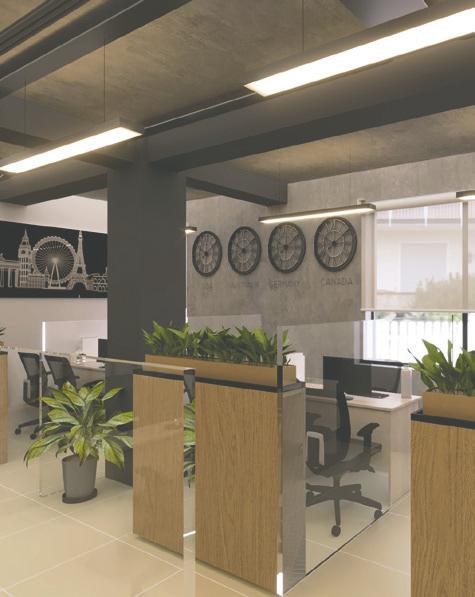
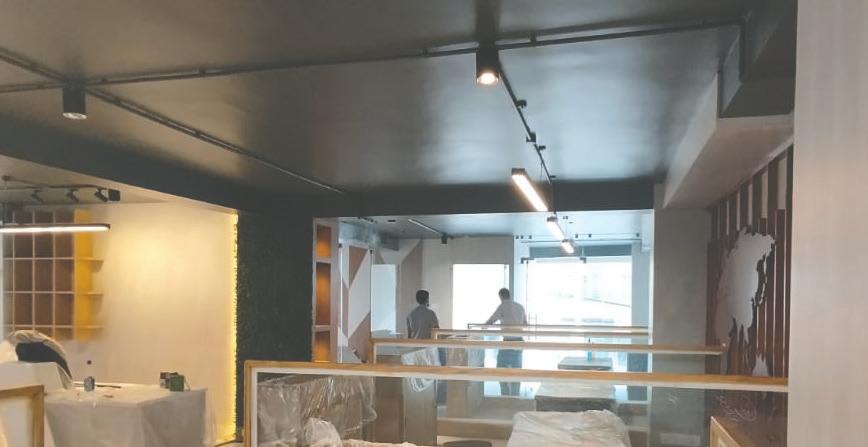
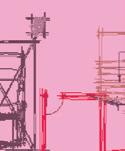
Nice Education Consultancy is designed with a distinctive industrial theme, skillfully balancing mass and void to create a dynamic and functional space. By integrating glass and half partition, we enhance openness and connectivity while maintaining defined areas with the workspace. The use of rich wood textures adds warmth and depth, complementing the raw industrial elements such as exposed ceiling with exposed conduit pipe with electrical fixings, and metal finishes. Green elements are thoughtfully incorporated to bring a touch of nature into the environment, promoting a refreshing and vibrant atmosphere. This design approach not only complements thee industrial aesthetic but also fosters a harmonious and inspiring setting for creativity and productive.
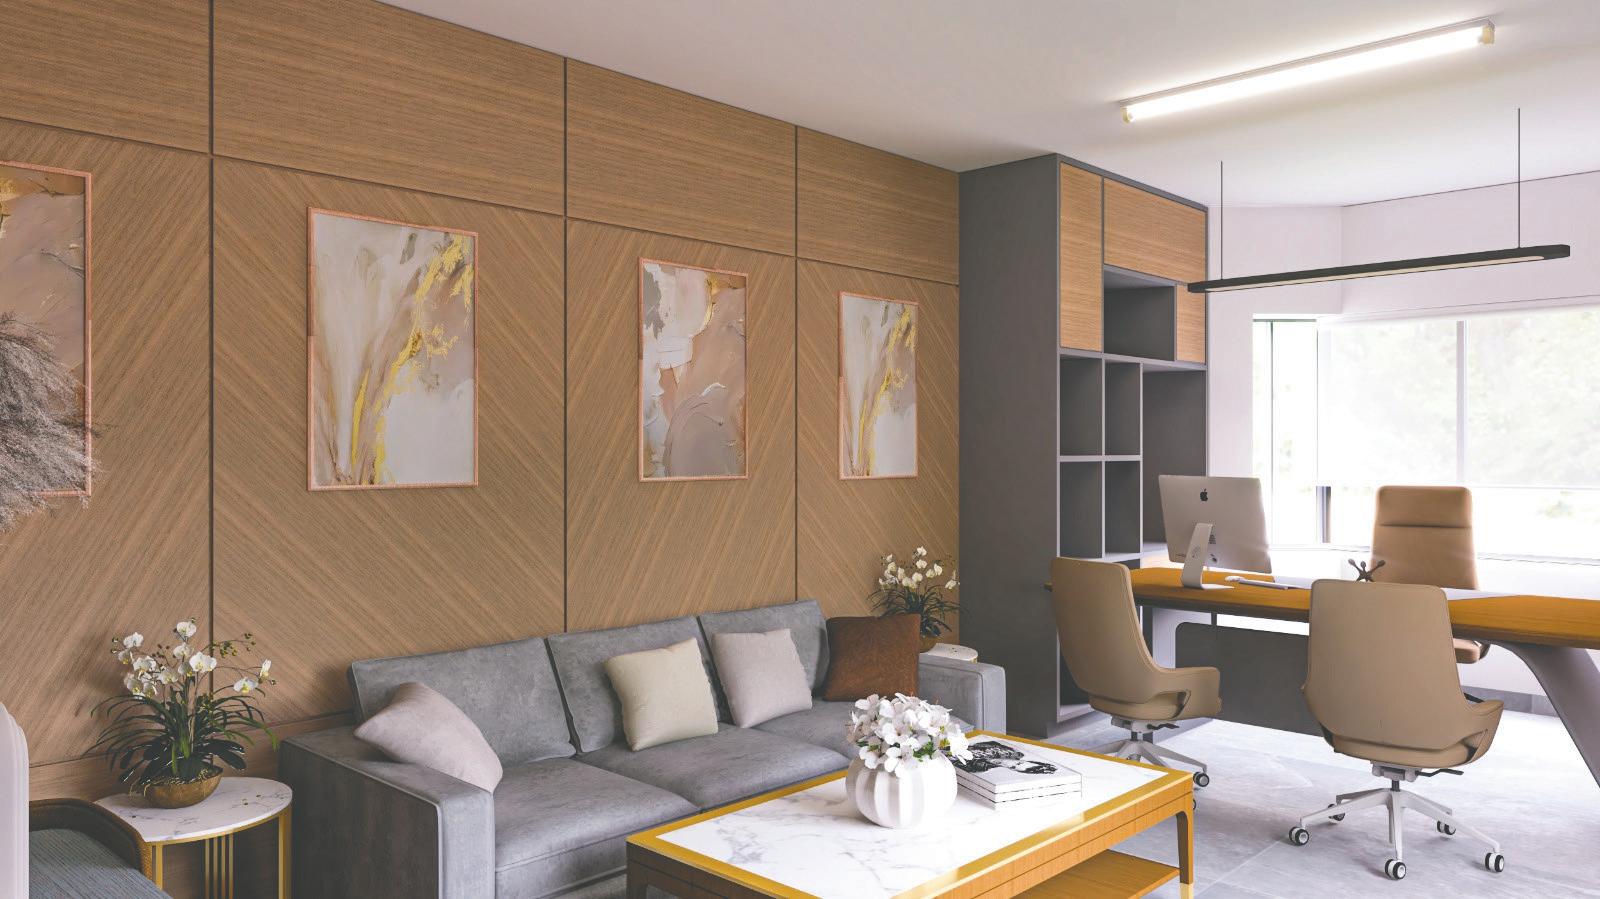
The furnitures are made up of 18mm plywood on which the industrial based monochrome colors, texture formica are pasted. The wooden paneling are made up of hard oakwood polished to match the furnitures. The furnitures are made without the handles, with power socket attached to it. The wall and ceiling grey colors shows the industrial theme embarked to the design. Not only the walls and ceiling but the exposed conduit pipes are colored so to match the theme. The matte tile finishing also complements the overall design. The interior design of Nice Education Consultancy has been meticulously crafted to reflect both functionality and aesthetic appeal, aligning with the company’s vision of creating an inspiring and conducive environment for education and consultation. By embracing an industrial theme, the design brings a modern, edgy vibe that resonates with the forward-thinking nature of the institution.
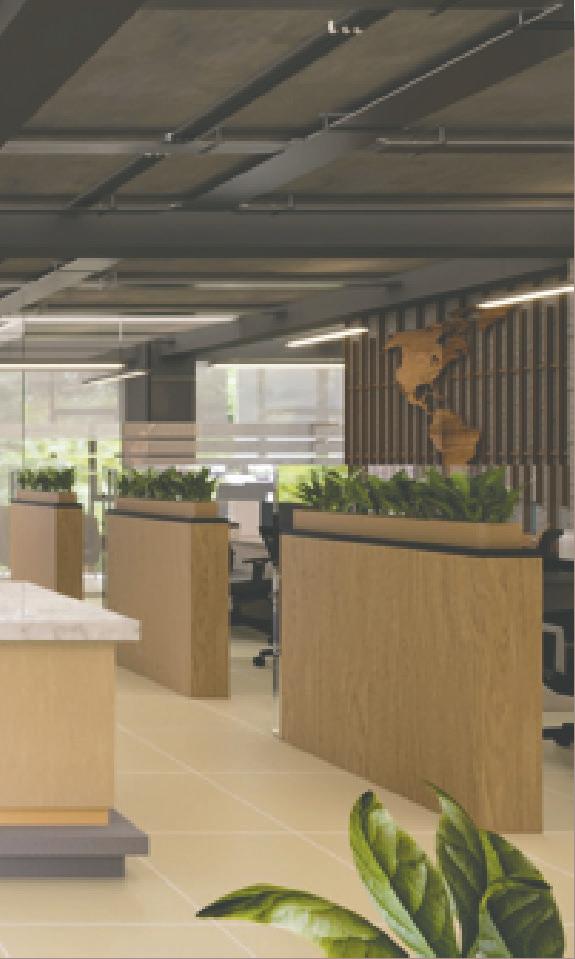
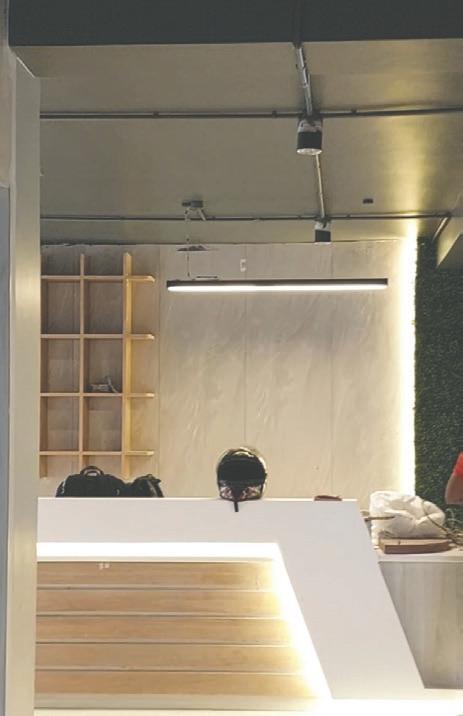
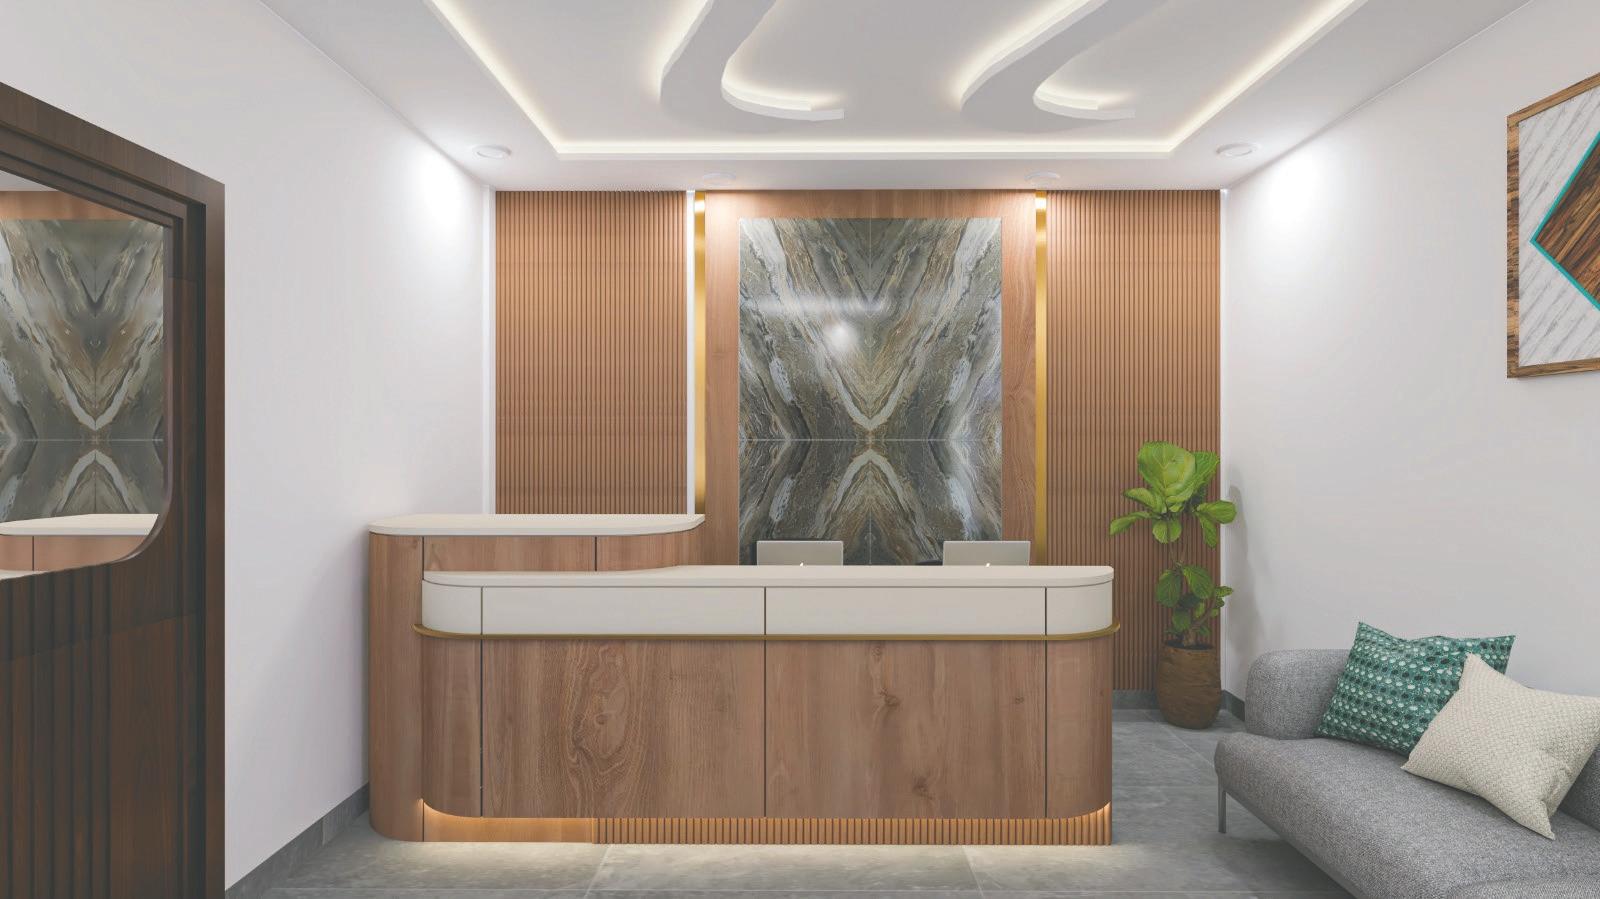
The reception area of nice education consultancy serves as the centerpiece of the industrial themed design, seamlessly blending raw aesthetics with functional elegance. It creates a welcoming and dynamic first impression. Green Elements are strategically incorporated to infuse vitality and balance, making the space both inviting and inspiring. The use of plywood, formicas variants and the table top corian materials bring more to the induestrial theme.
RENDERS
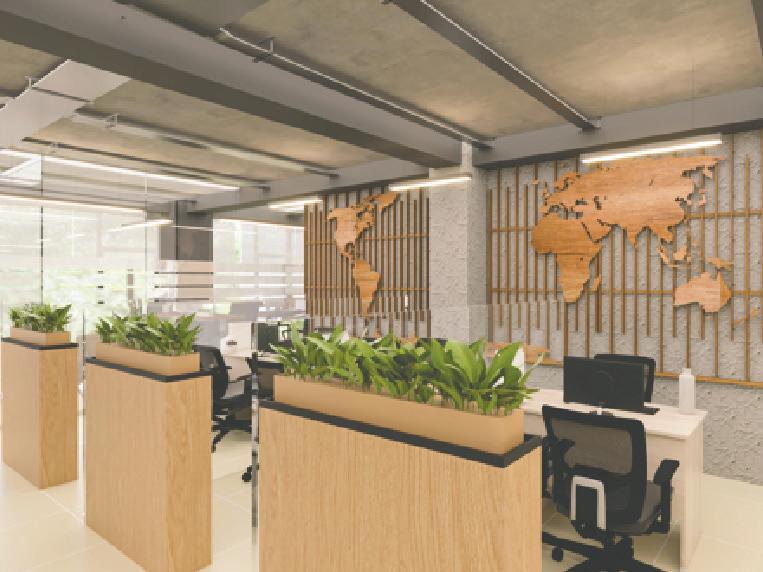
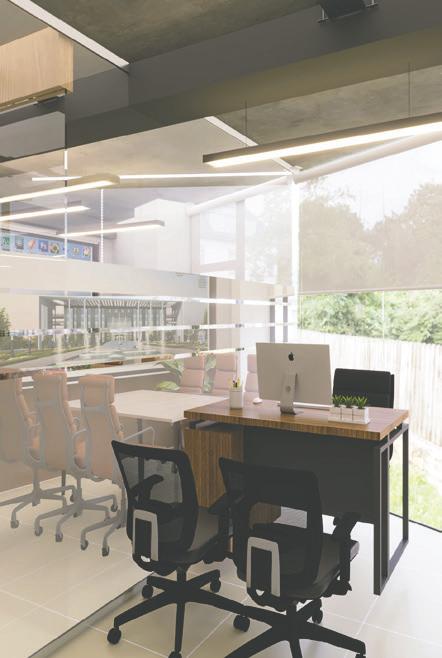
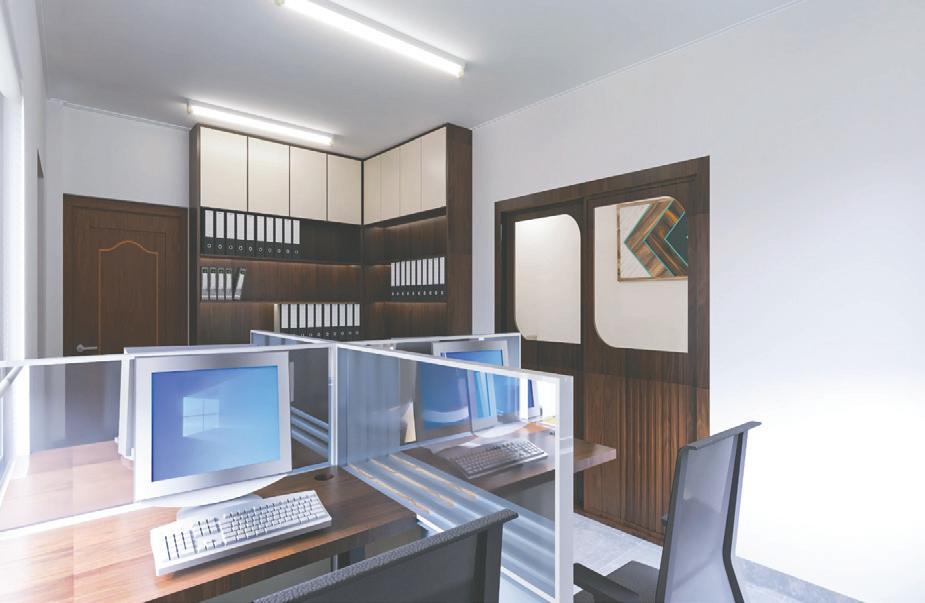
Counselling Area
Reception Area
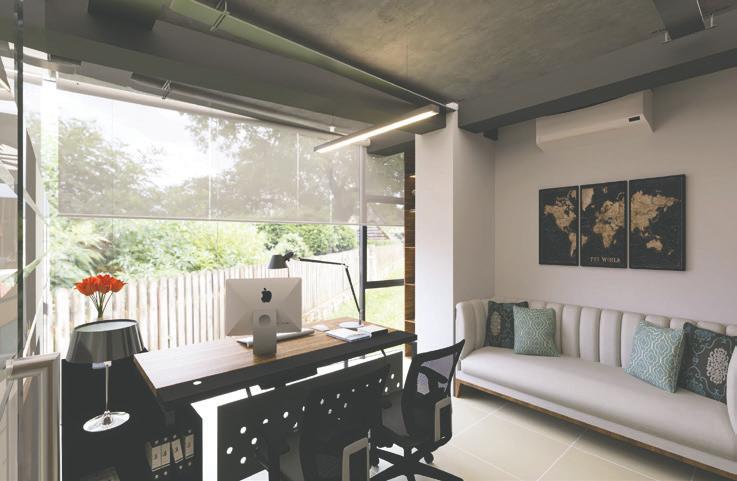
Director’s Office
Counselling Area
Head Director’s Office
Corian sheet pure white 12mm (15 sq.ft)
Corian sheet F104 12mm (30 sq.ft)
DESIGN DEVELOPMENT
In the design development of nice education consultancy, creating a cohesive industrial aesthetic through key elements were focused. We incorporated wall and half partitions to define spaces while maintaining openness. Custom furnitures and extensive wood paneling were selected to add warmth and texture. Glass features were used to balance mass and void, enhancing both functionality and visual appeal.
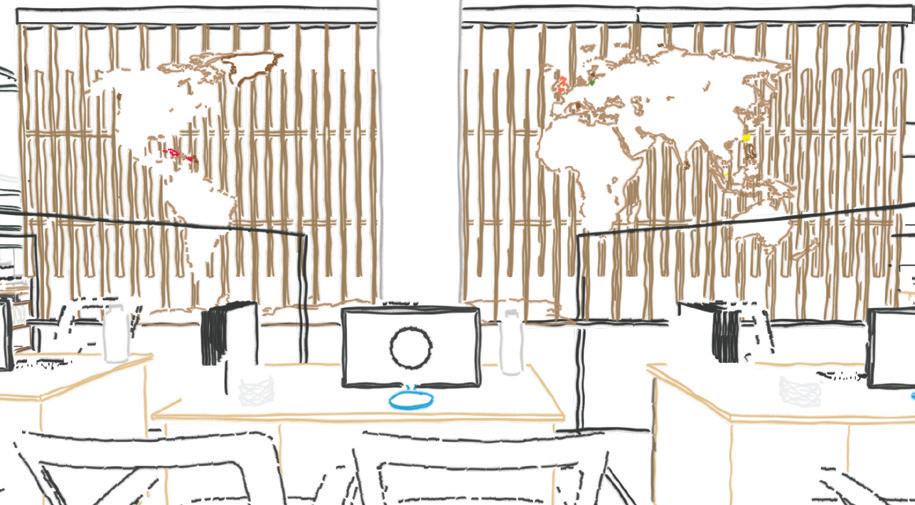
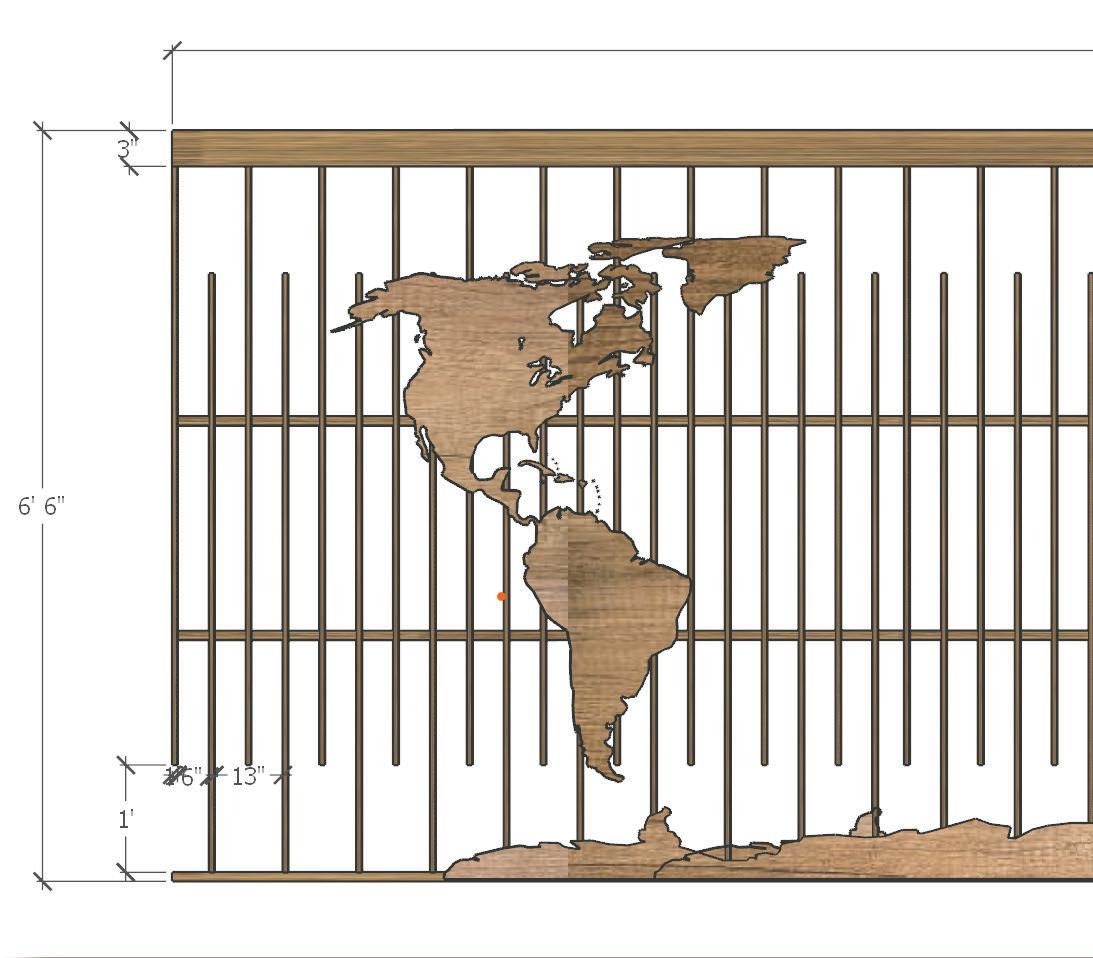
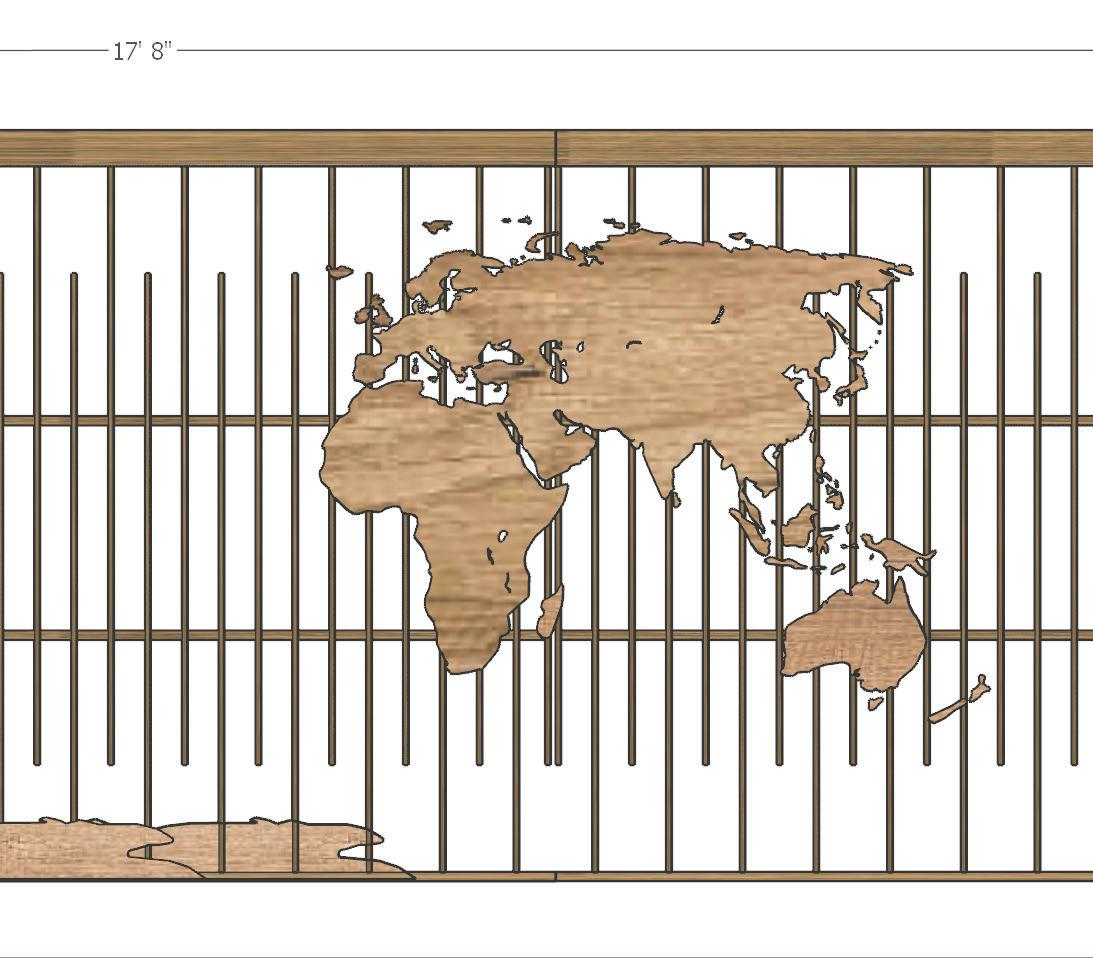
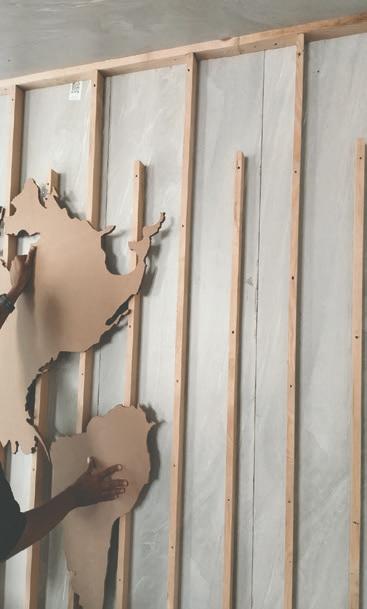
MAP WALL PANELLING
The wall paneling installed behind the counselling area features a world map, making it easy for separating the counselling room based on the country one need to apply on.
DESIGN SPECIFICATION
• Wooden Wall paneling design is fixed on wall partition with nails, heat-x and fevicol.
• Sallo post of 2”X1”X6”
• Maintain gap of 6’”
• World Map made from CNC board of 19mm was nailed to the sallo post.
• Finally polish was applied to match the furnitures.
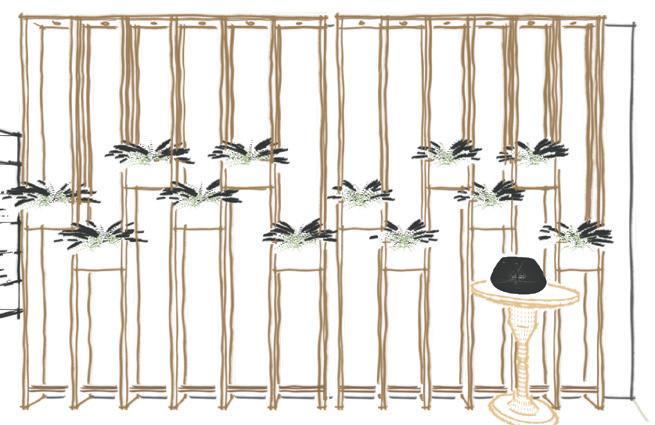
CONCEPTUAL SKETCH
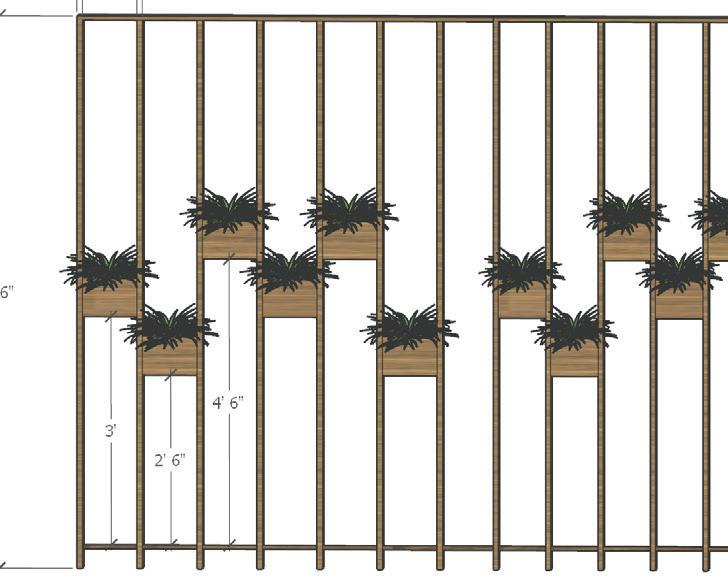
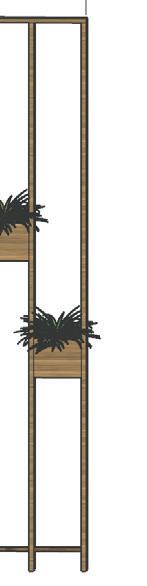
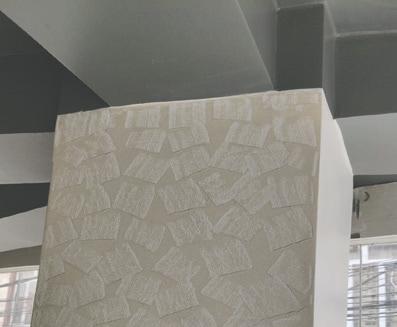
PLANT WALL PANELLING
The wall panelling installed behind the waiting area features sallo post with plywood base for small plants to hold on.
DESIGN SPECIFICATION
• Sallo post of 2”X1”X6” is nailed to the wall.
• The horizontal supports are fixed to upper and lower ends of sallo post.
• The plywood of 18mm is cut to maintain 9” gap to hold the plants.
• The plant frames and plates are screwed to the plywood base.
CONCEPTUAL SKETCH
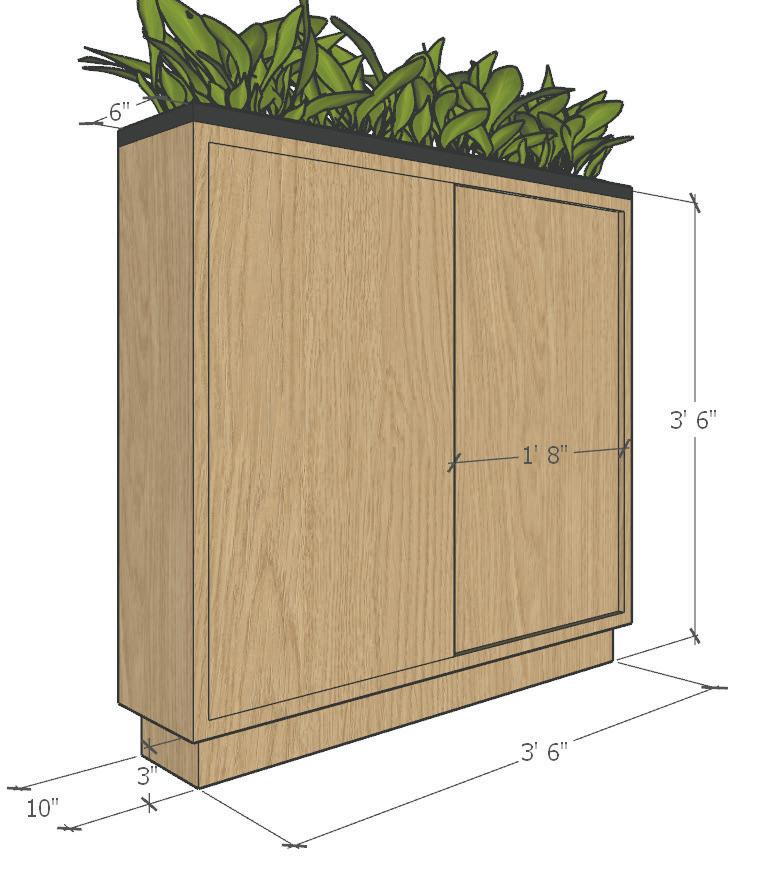
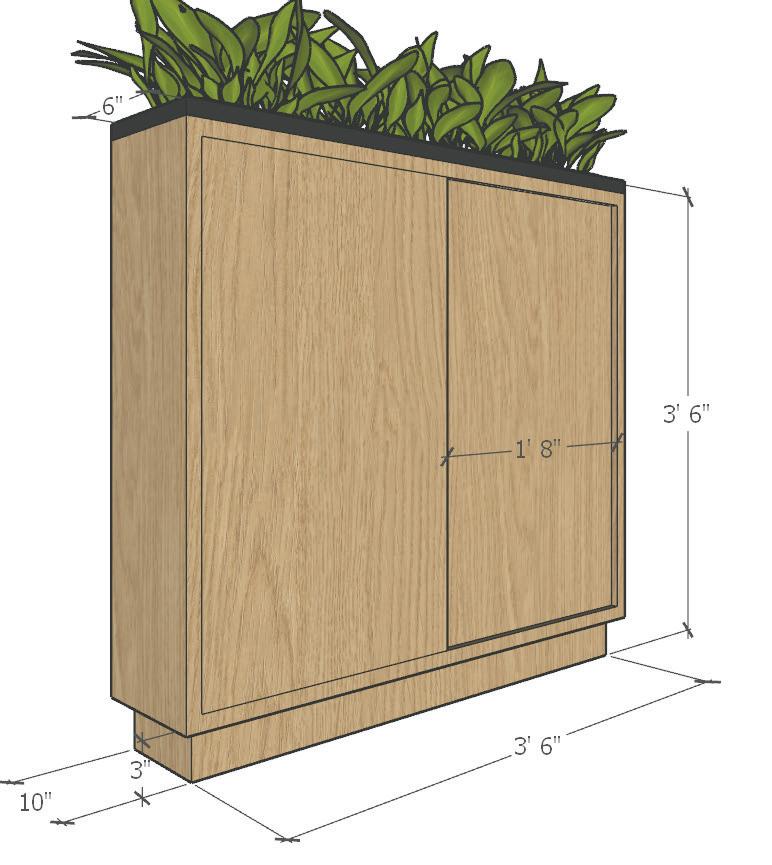
This serves as separation units between the counseling room. It also acts as a storage rack, a top groove just to fit the plant vase. The formica pasted matches the furnitures.
DESIGN SPECIFICATION
• Partition is made up of 18mm thick plywood board.
• Formica of 1mm thickness is pasted with fevicol.
• Inside 0.8mm matte white formica is pasted.
• The rack’s drawer was made from wooden 12mm channel. Q
• Listi of 7” lenth and 0.5” depth was fixed around the groove.
• The listi was the polished to match the fomica.
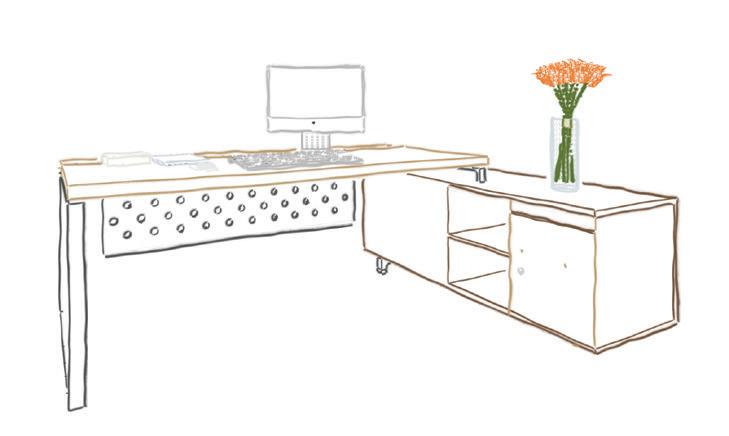
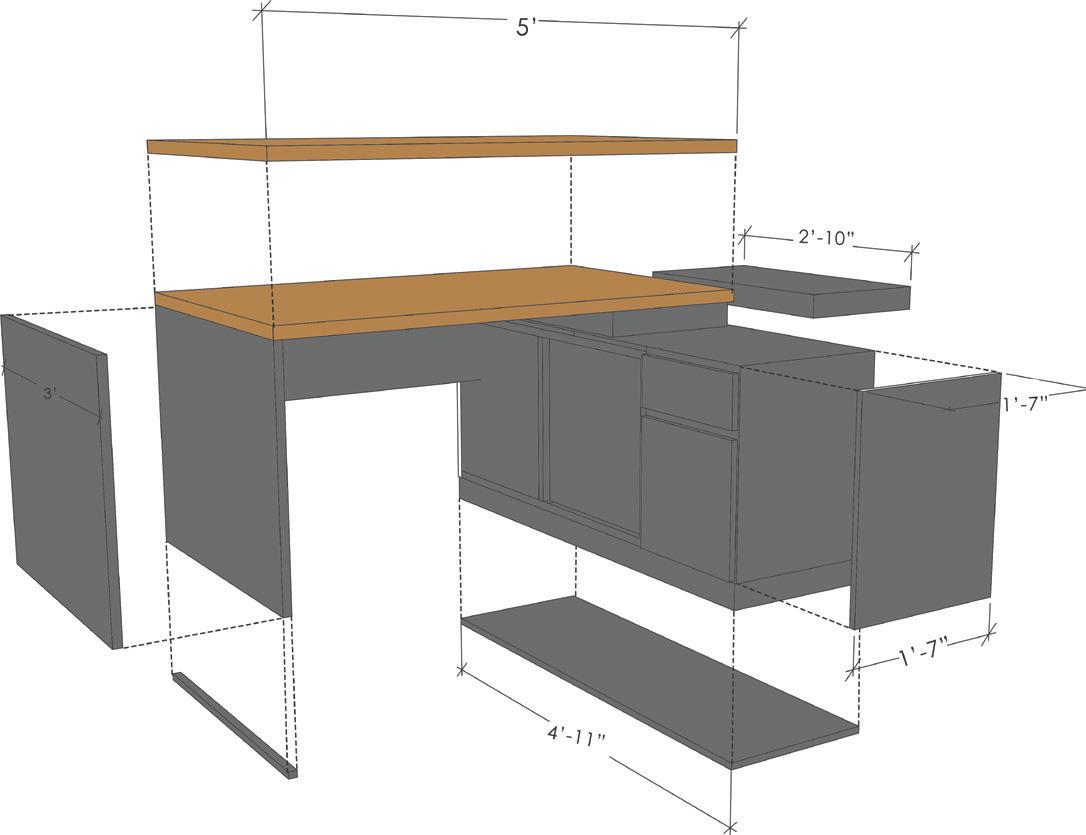
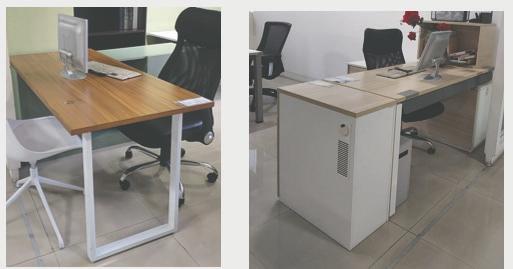
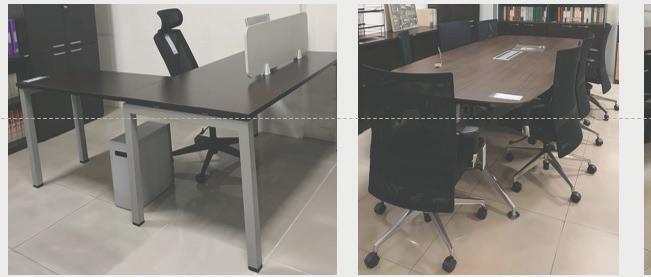
COUNSELLING AND DIRECTOR’S TABLE
The furniture design at nice consultancy features a grey and wooden theme with every pieces made up of 18mm plywood board. Custom furnitures include minimilistic desks, adjustable shelves, and seating, crafted from reclaimed wood to laign woth the industrial aesthetic. The grey finish adds a modern touch, while the wooden texture brings warmth amd natural elements to the space.
DESIGN SPECIFICATION
• 18mm plywood board used.
• Formica of 1mm outside and 0.5mm matte white pasted.
• 16” steel channel used in drawer.
• Sliding channel of 12mm used.
• Listi of 7” length and 0.5” depth was fixed around the table top and polished.
CONCEPTUAL SKETCH
DIRECTOR’S TABLE
COUNSELLING TABLE
12mm wooden sliding channel
5375 SUDSaturno Walnut
16mm steel channel
Backing for fixing power socket 1” gap to open drawers
Charcoal Grey
777 SUD
SITE SUPERVISION
As a part of my role in the Nice Education Consultancy project, I provided comprehensive site supervision to ensure the highest quality execution of the design,. This included oversight of tile work, electrical work, wooden partition installation, furniture manufacturing, putty, paint, I also supervised the polishing of furniture, the fixing of toughened glass, and final finishing process. My hands-on approach ensured that each stage of the project was completed to the highest standards, resulting in a space that fully realized our design. By overseeing this project, I gained invaluable hands-on experience in managing the design process from concept to completion, ensuring that every element aligned with the client’s vision and practical needs. The project not only honed my technical skills but also deepened my understanding of how to create environments that are both inspiring and functional, qualities that are essential in educational and consulting spaces.
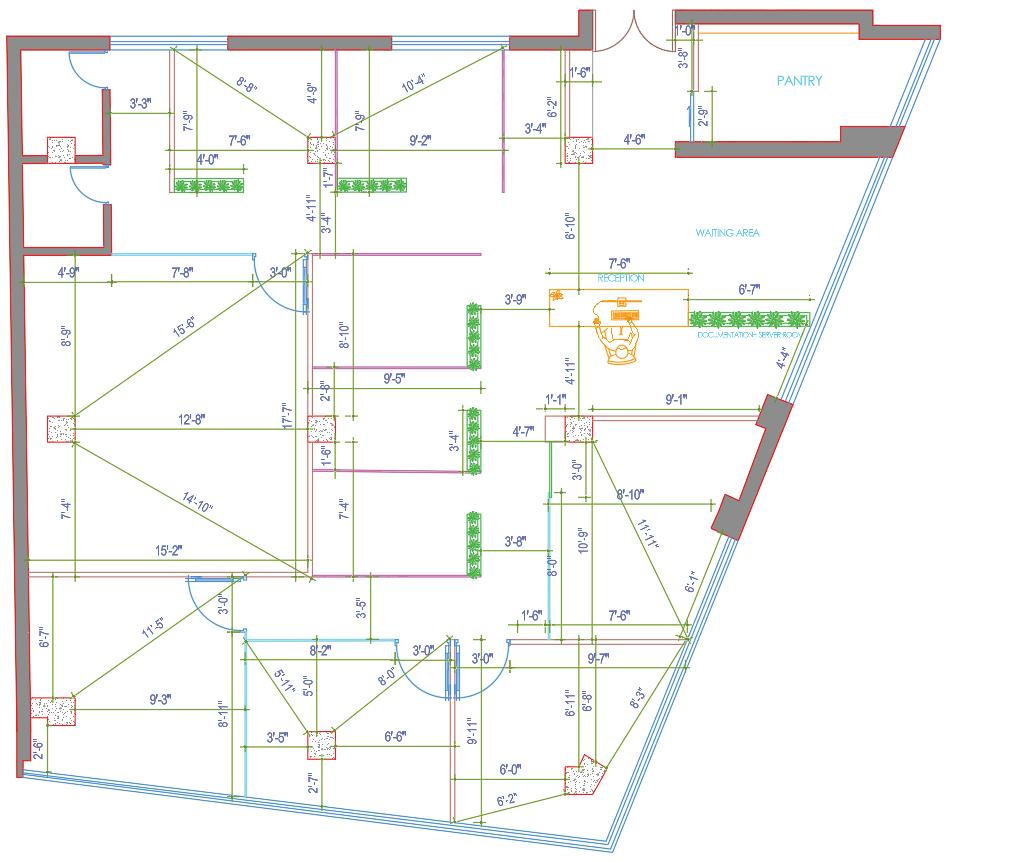
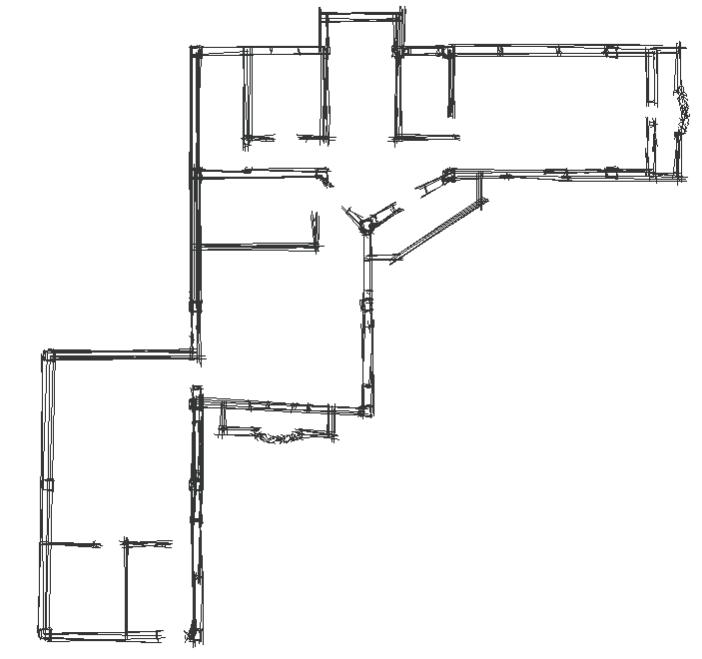
1. SITE LAYOUT
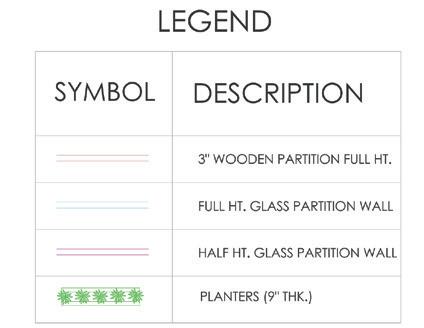
Before construction, the site was carefully measured to ensure accuracy in the layout. The site layout was deceloped using a whole-part approach. Employing perpendicular, parallel and diagonal methos to precisely define the spaces
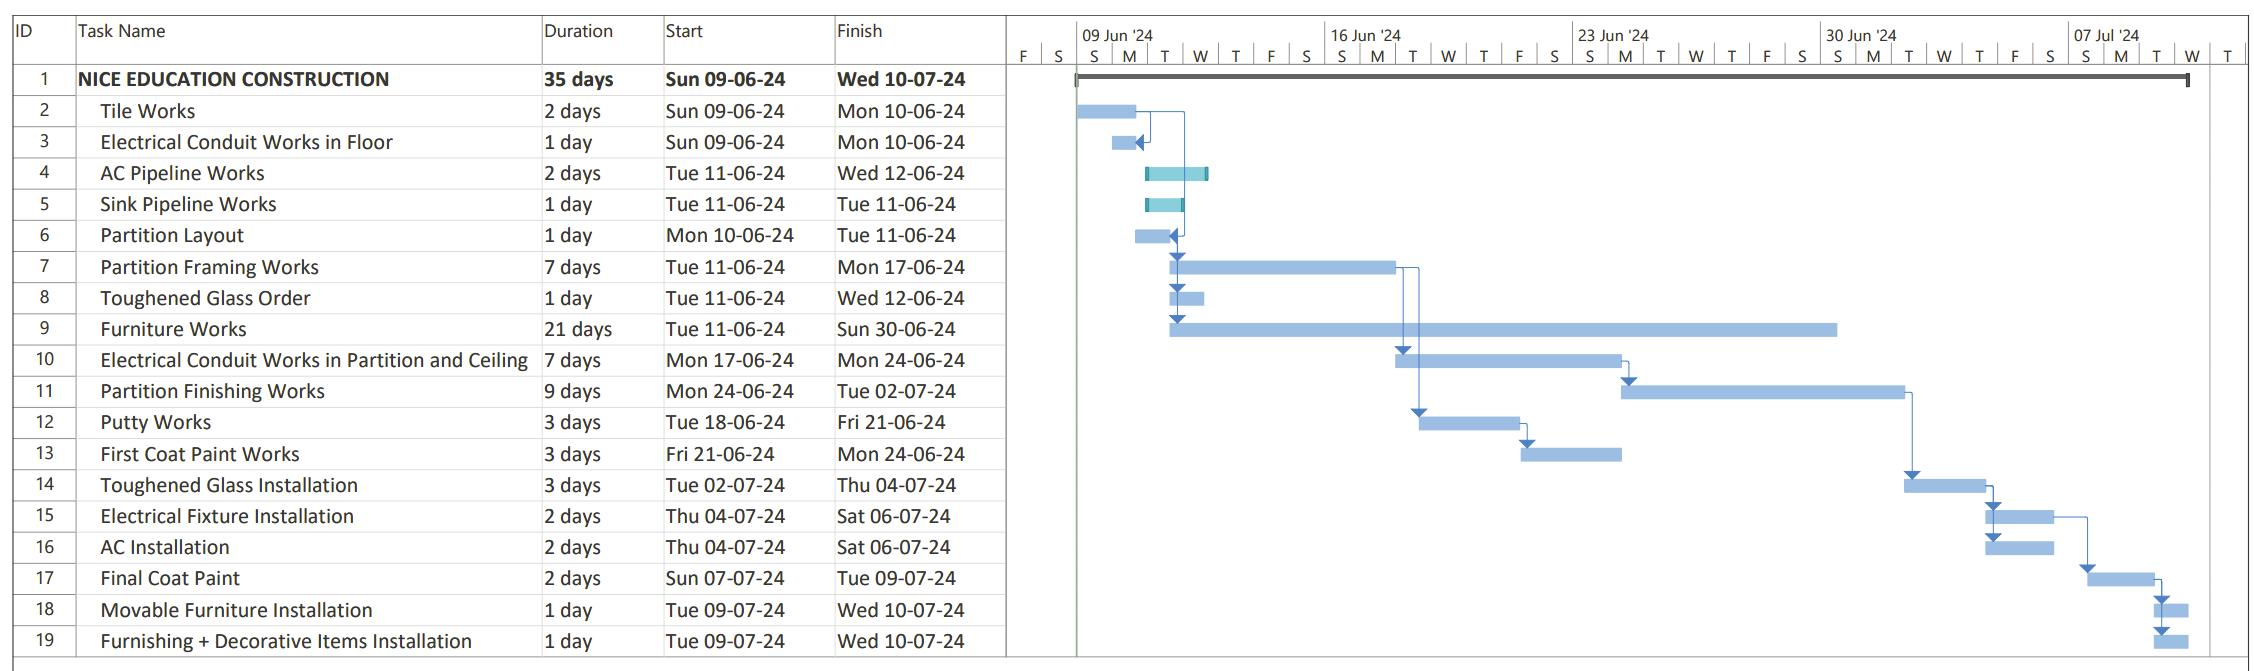
2. WORK SCHEDULE
Note: For further details, please refer drawing B2 from annex report.
A Ddetailed work schedule was developed to ensure the timely completion of nice education consultancy project. The detailed work flow is mentioned below in a spreadsheet.
3. SITE WORKS
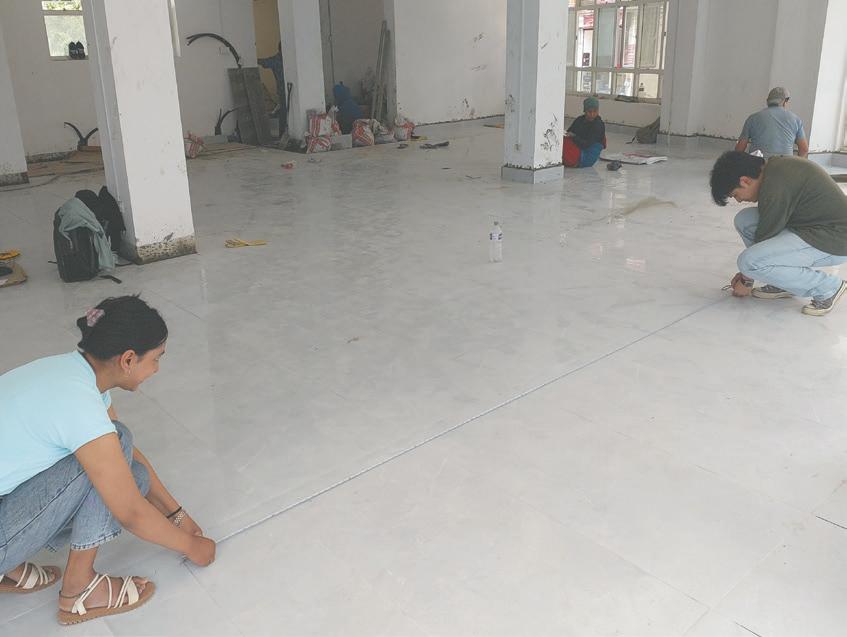
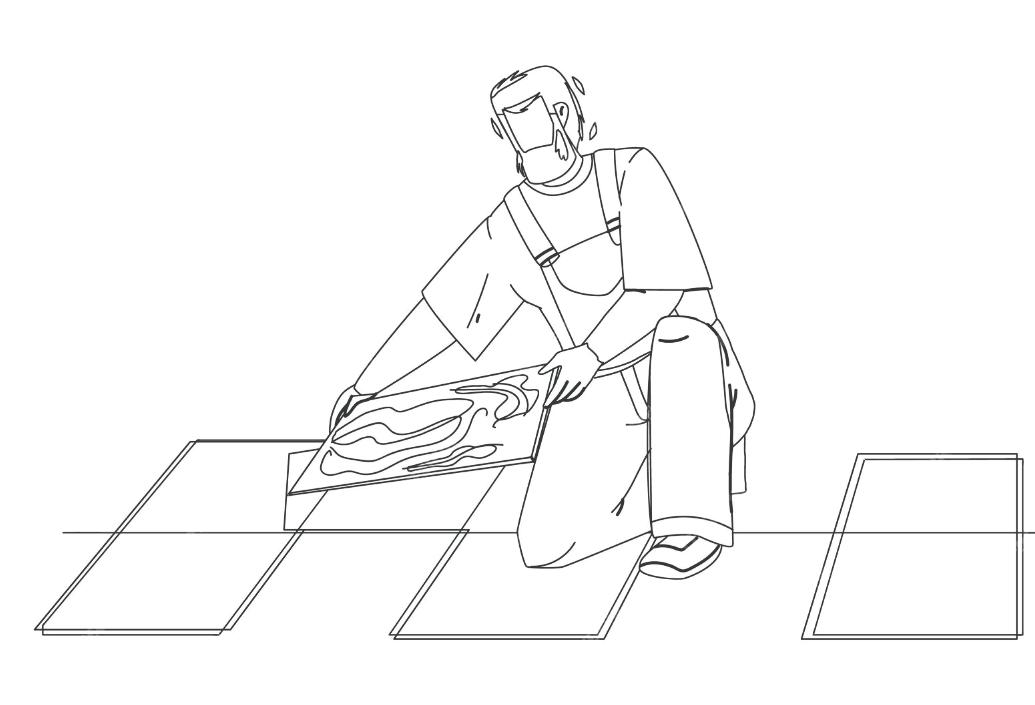
TILE WORK
For the tiel work, the surface are prepared, tiles are aligned and grouted properly and qualilty is inspected. The gap between tiles, or grout joint width, should be consistent and according to the tile design, it ranges from 1/16’ to 1/8” for standard tiles
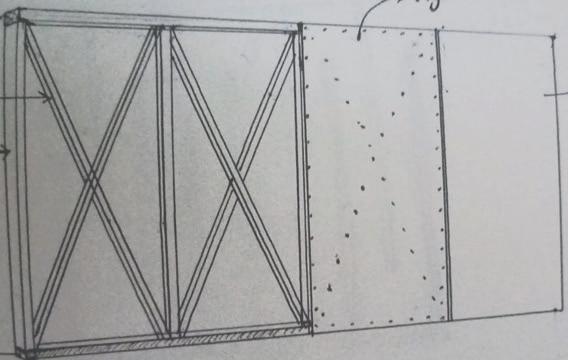
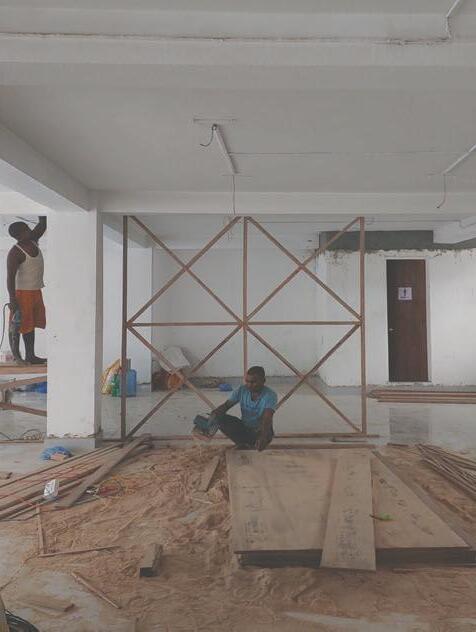
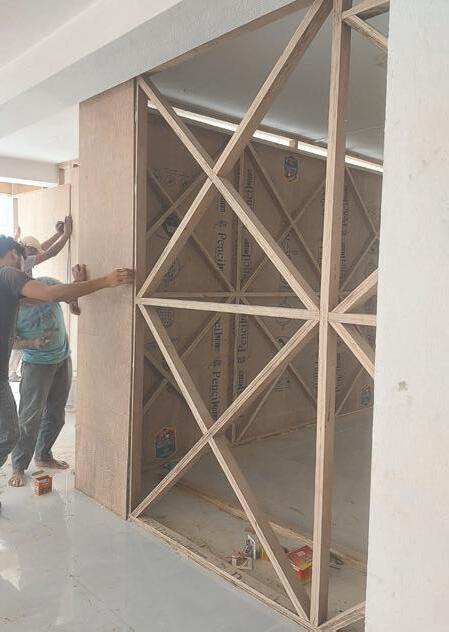
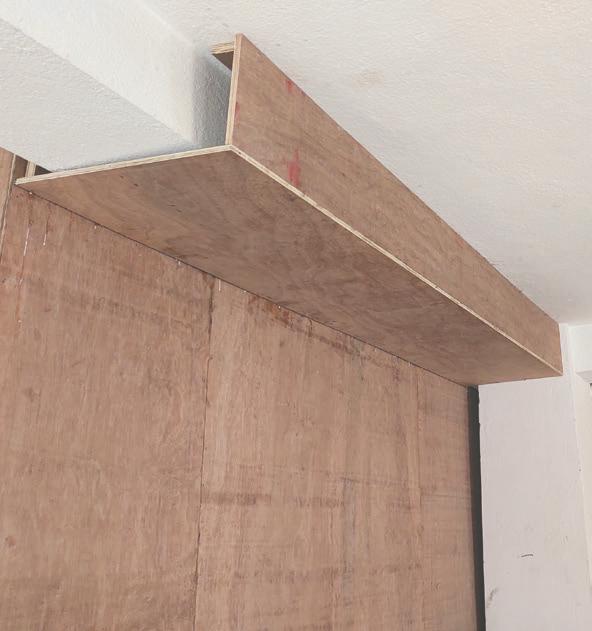
WOODEN PARTITION AND PANELLING WORKS
The wooden plyboard of 18mm were used for full wooden partition and covering of columns and beams.
Top Runner
18mm Plywood Studs
Wooden Frame
Base
Runner
Full Partition (3” thickness)
STAGE : 1
Wooden Framing
STAGE : 2 Covering wooden frame with 18mm ply.
STAGE : 3 Ply is fixed with nails
STAGE : 4 Pasting formica and panelling with fevicol.
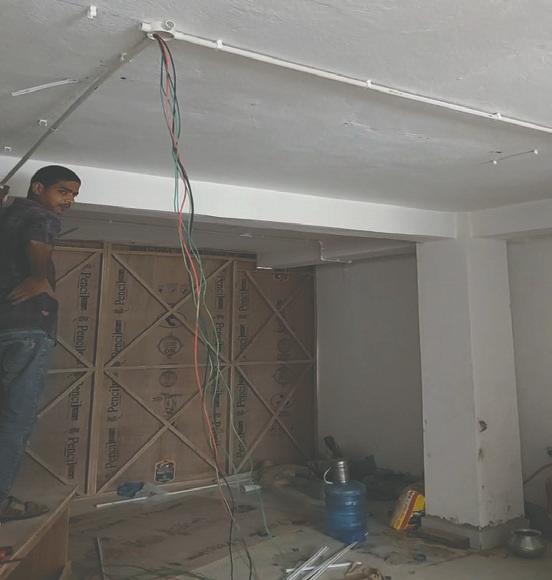
ELECTRICAL WORKS
Installed exposed conduit pipes of 20mm thickness enhancing the industrial theme according to the plan. Ensured secure mounting and proper insulation of wiring. The design reflects an aesthetic while meeting functionality and safety standards.
The lights used are hanging pendant light, adjustable circular ceiling lights, cob lights, profile light and strip lights. With the electrical works, the inter telecommunication, internet and network system were added to the power socket. The DB box, MCBs, PABX box, 8 port net switches were also fixed.
Strip light
Cob light
Lighting fixtures position layout
Note: For further details, please refer drawing B3 from annex report.
Circular ceiling light
After installation of conduit pipes and lights
Fixing of 20mm conduit pipes
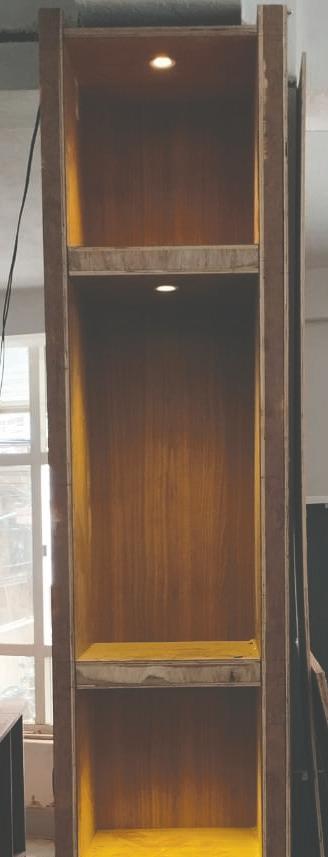
Cob light in niche rack
Strip light under reception desk
Profile lighting vertical to grass wall
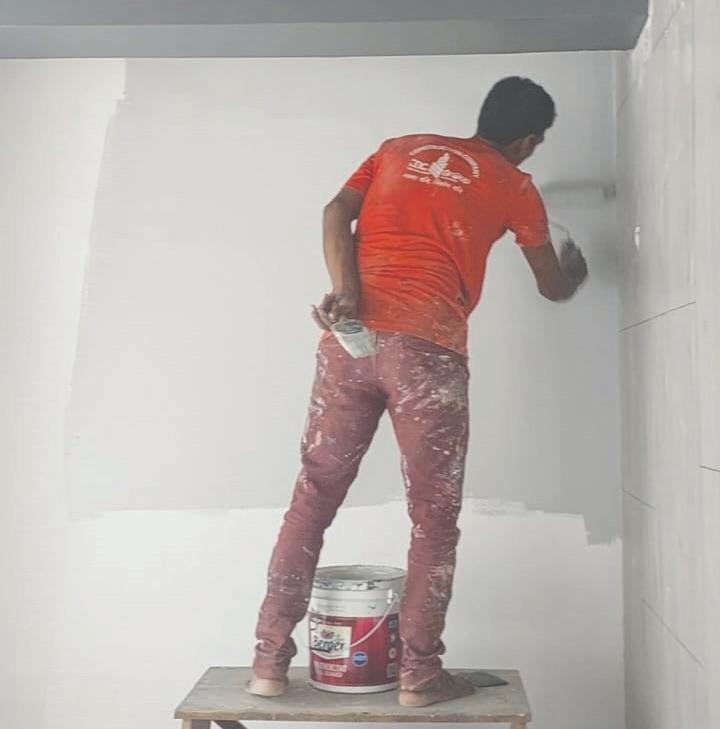
PAINT, PUTYY AND POLISH WORKS
Putty was applied twice for smooth finishing. The Berger primer was applied before applying high graded berger paint. The wooden panellings were made dirt free and polishing were done after the paint works
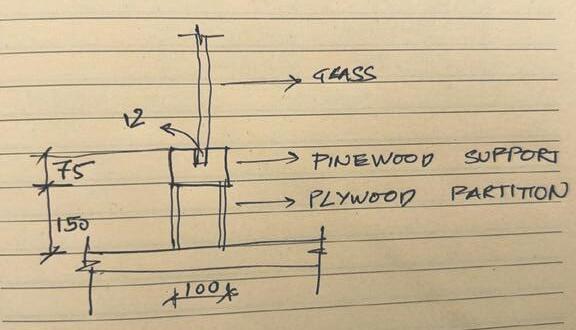
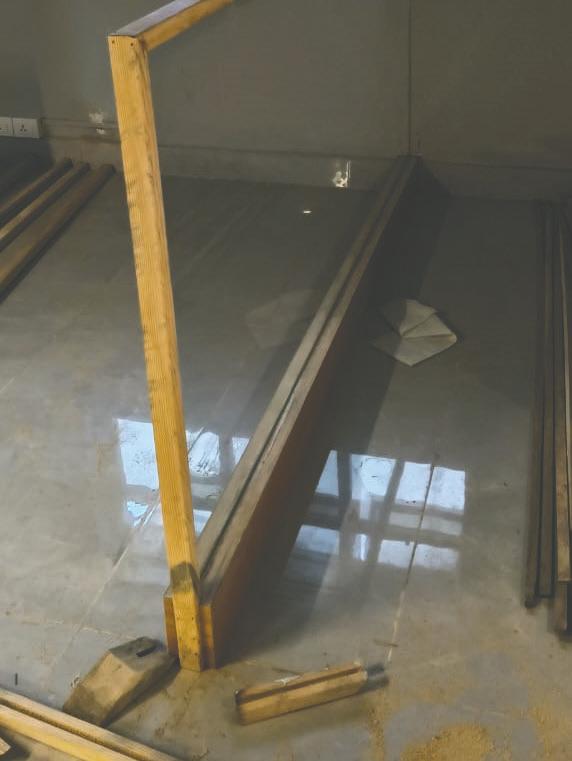
TOUGHENED GLASS WORKS
The toughened glas of 12mm thickness, securing it with precise mounting and sealing was done. The proper alignment and integrity, adhering to safety and design specification were ensured. For the half glass partition sallo works were done at the base and the railing.
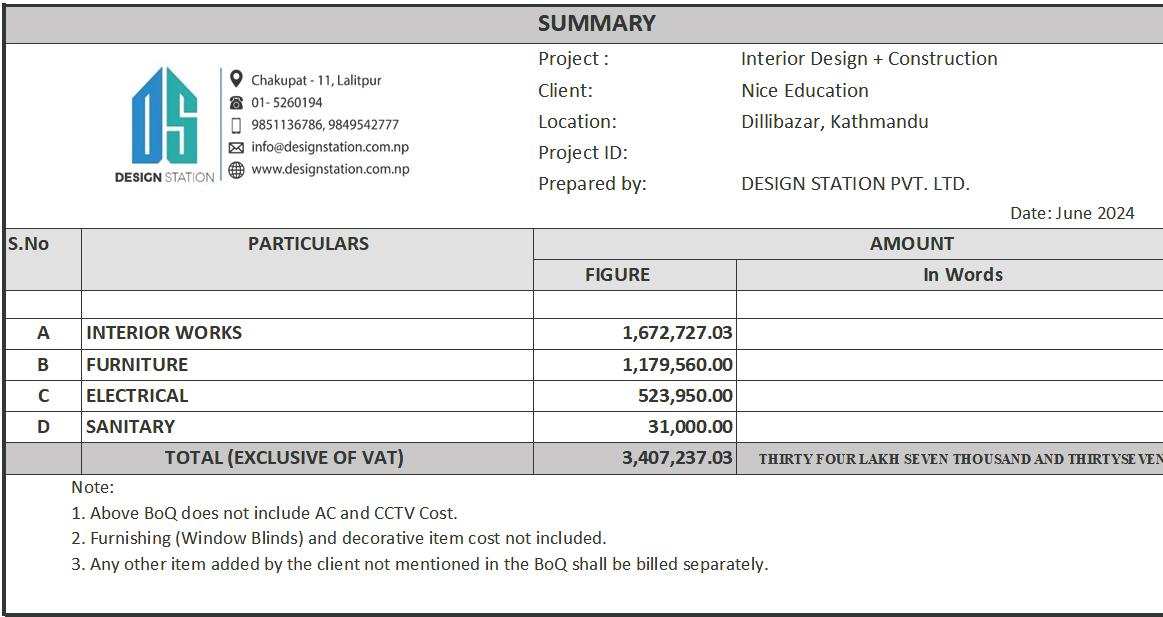
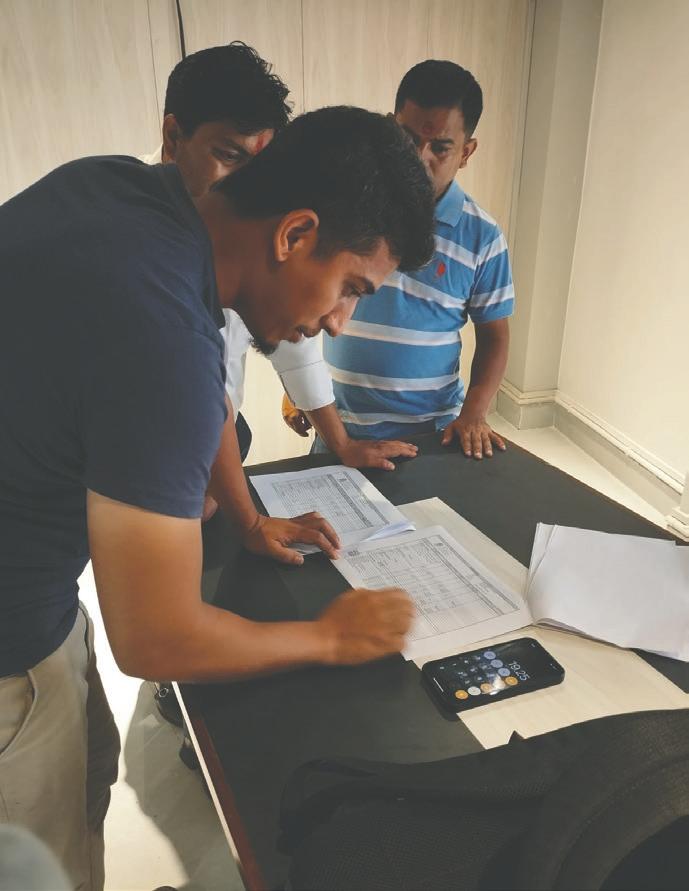
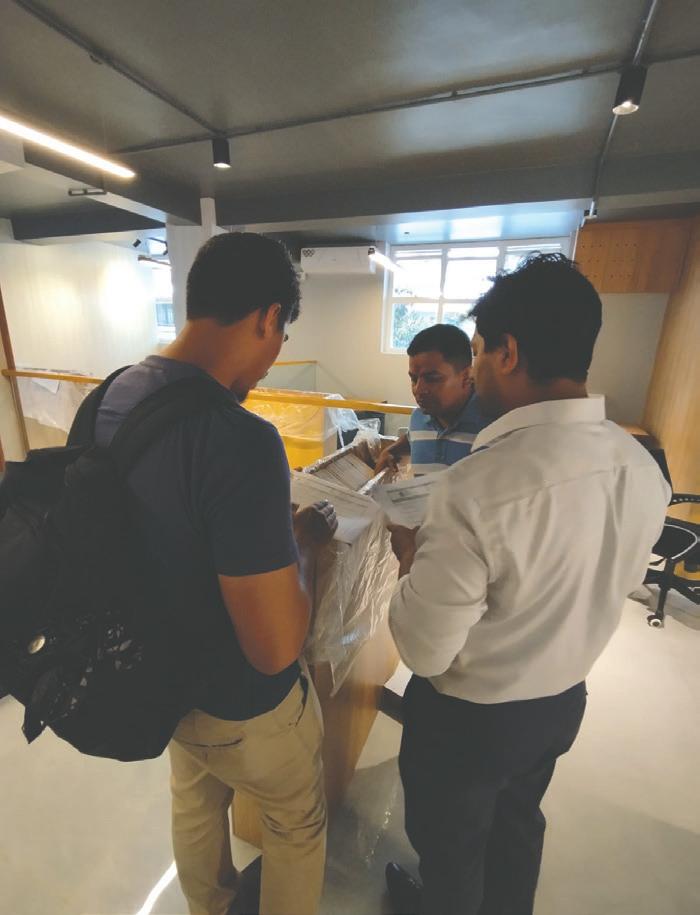
For the nice consultancy project, a comprehensive billing systems were developed, including a Bill of Quantities (BOQ), materials bill, measure sheet and bills for subcontractors, expenses and client bill ensuring accurate cost management and transparency.
Note: Detail BOQ is mentioned in the annex report.
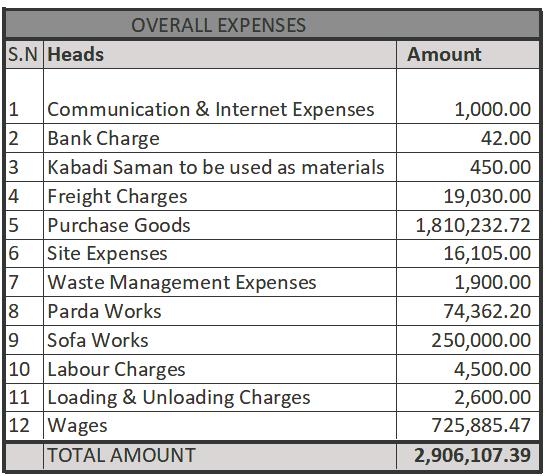
2. OVERALL EXPENSES
Note: The data may not be exact, conflict may occur.
1. BOQ (BILL OF QUANTITY)
Note: Client bill cannot be displayed due to office guidelines.
The final bill to the client summarizes all the project costs, including servies, materials, and expenses, its details the total amount due and payment terms, serving as the financial statement for the project.
4. CLIENT BILL
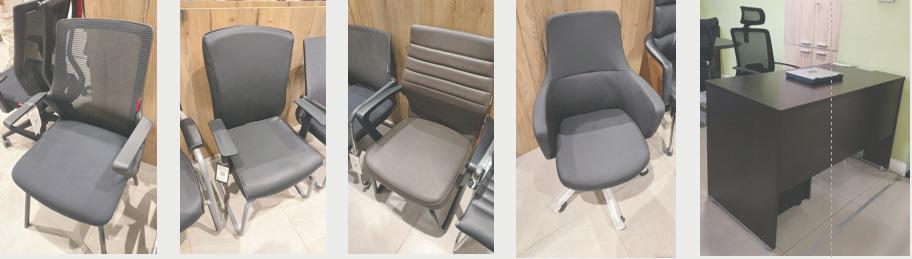
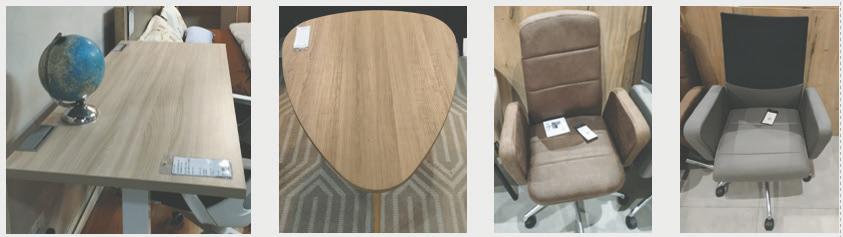
MARKET SURVEY
Market survey was done around kathmandu valley, to collect informations on materials, furnitures’s rates that matches the essence of the furnitures mentioned in our design.
The furniture showroom we visited were:
• Index Furniture
• Featherlite
• Fusion Office Furnitures
• Furniture Land Sore
• Furni Touch
• Steelcase
1. DESIIGN PROCESS
• Feasibility Study
WHAT I LEARNED
• Site Visit Site Survey Access Bye Laws Construction Information
2. BUILDING MATERIALS
• Greenlam Formica (0.8mm and 1mm)
• Lighting (Focus lights, ceiling lights, strip lights,handing pendant ligh) and their properties
• Wooden plywood, sallo, CNC works
• Aritificial grass works
• Blinds, sofa selections
• Paints (Silk, base and texture), Putty and polish works
• CCTV, AC, Invertor, Intercommunication systerms
3. SITE LAYOUT
• Perpendicular and parallel method of layout
• Whole to part
• Part to whole
• Triangulation (Diagonal method)
• Cross checking
4. ELECTRICAL LAYOUT
• Electrical fixtures placement layout
• Fixing of conduit pipe with the help of one, two, three and four faced circular box
• Selection and use of ceiling light, profile light, pendant hanging light, cob light and strip lights.
5. ALTERNATIVE DESIGN IDEAS
6. CLIENT INTERACTION
• Experienced the process of client agreements and negotiatons
• Learned the importance of clear communication and understanding the client needs.
7. SITE SUPERVISION
• Dealing with client, sub-contractor and porcurement department
• Work flow and Time Management
• Practical Skill
• Communication Skill
• Project Management
• Problem solving
8. BILL MAKING AND ANALYSIS
• BOQ (Bill of Quantity)
• Material bill in detail
• Sub contractor bill
• Client bill
• Comparative bill
9.SOFTWARES
PREMIER APARTMENT
LAZIMPAT , KATHMANDU
Role: Participating in planning,layout, 3d models, Rendering.
ARCHITECTURE, INTERIOR
LOCATION: LAZIMPAT KATHMANDU
CLIENT: PREMIER APARTMENT
STATUS: UNDER CONSTRUCTION
SITE AND ZONING
LIVING ROOM
KITCHEN
HALLWAY
FOYER
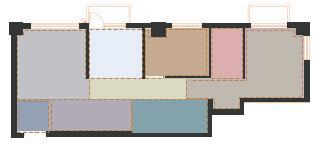
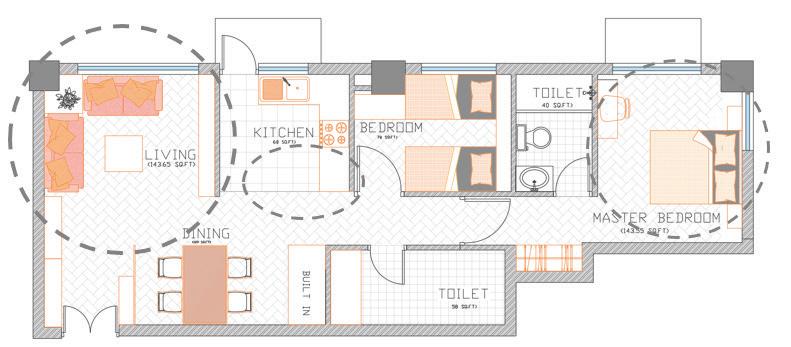
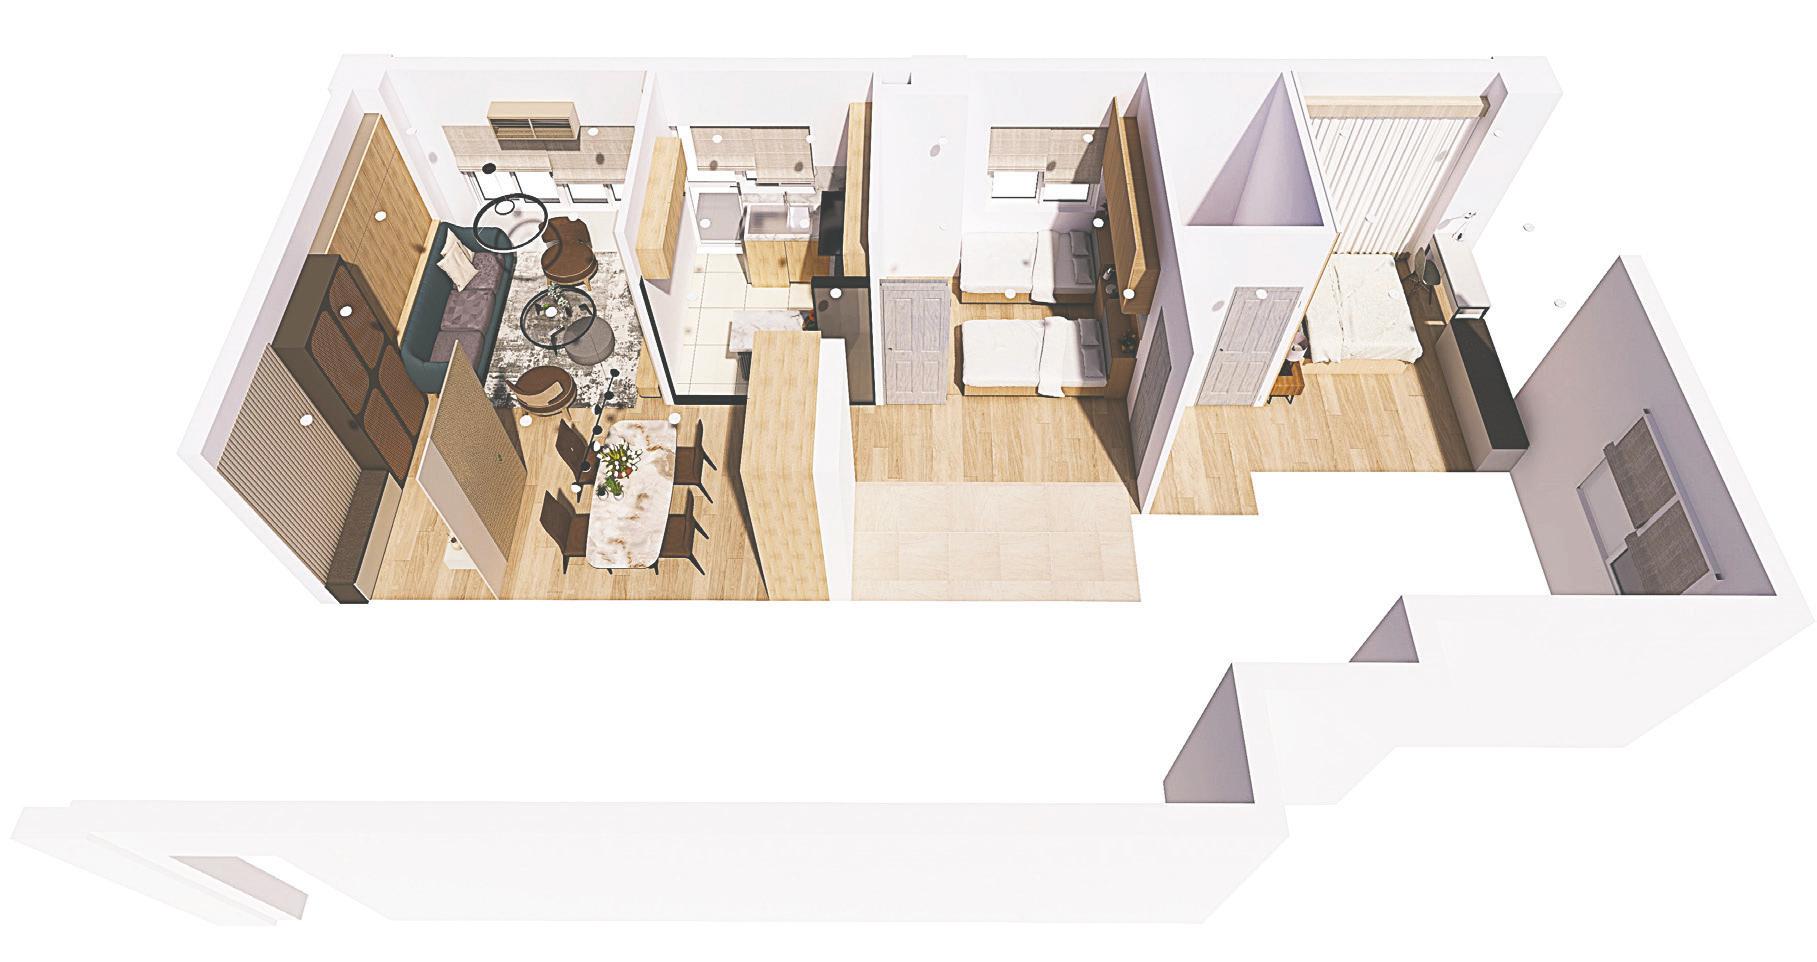
The apartment is 2BHK zoned to separate living room and private spaces. The entry leads to an open living room and dining space. The kitchen acts as semi public area. The master bedroom is segregated from those public areas by a hallway which has powder room around it. The master bedroom is separated, ensuring peace and privacy. This layout creates a balance between open social spaces and private retreats. The balcony acts a refreshment area which are linked to a kitchen and a master bedroom. The master bedroom has a attached washroom. The kitchen and dining are linked by a hallway. The foyer provides a starting area, where one can rest and store their shoes.
MASTER BEDROOM
Requirements of the project:
• Living room ( 4 to 5 seats sofa)
• Dining (4 seats)
• Kitchen
• Twin bedroom
• Powder room
• Master Bed room
CONCEPT AND INSPIRATION
TERAI BASED THEME
• Monochromatic theme
• Minimilistic
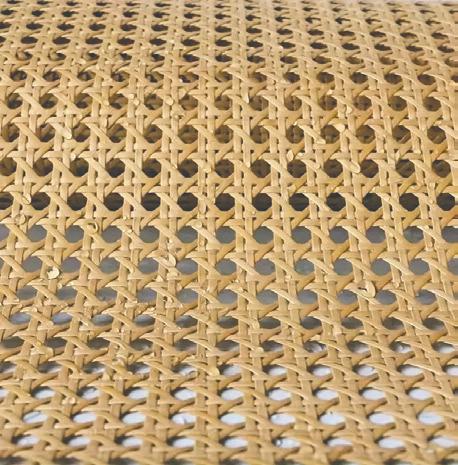
• Cane Material
DINING POWDER R0OM
DINING POWDER ROOM
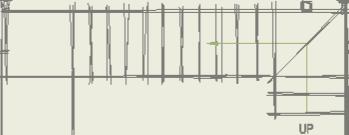
PLAN DEVELOPMENT
Living room spcae looks more vacant or under utilized.
Open kitchen space, island can help to link dining and kitchen
Questionable positionong of bed. Study table receives glare.
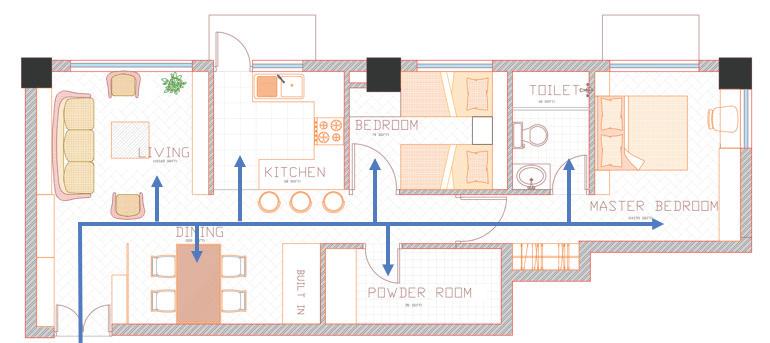
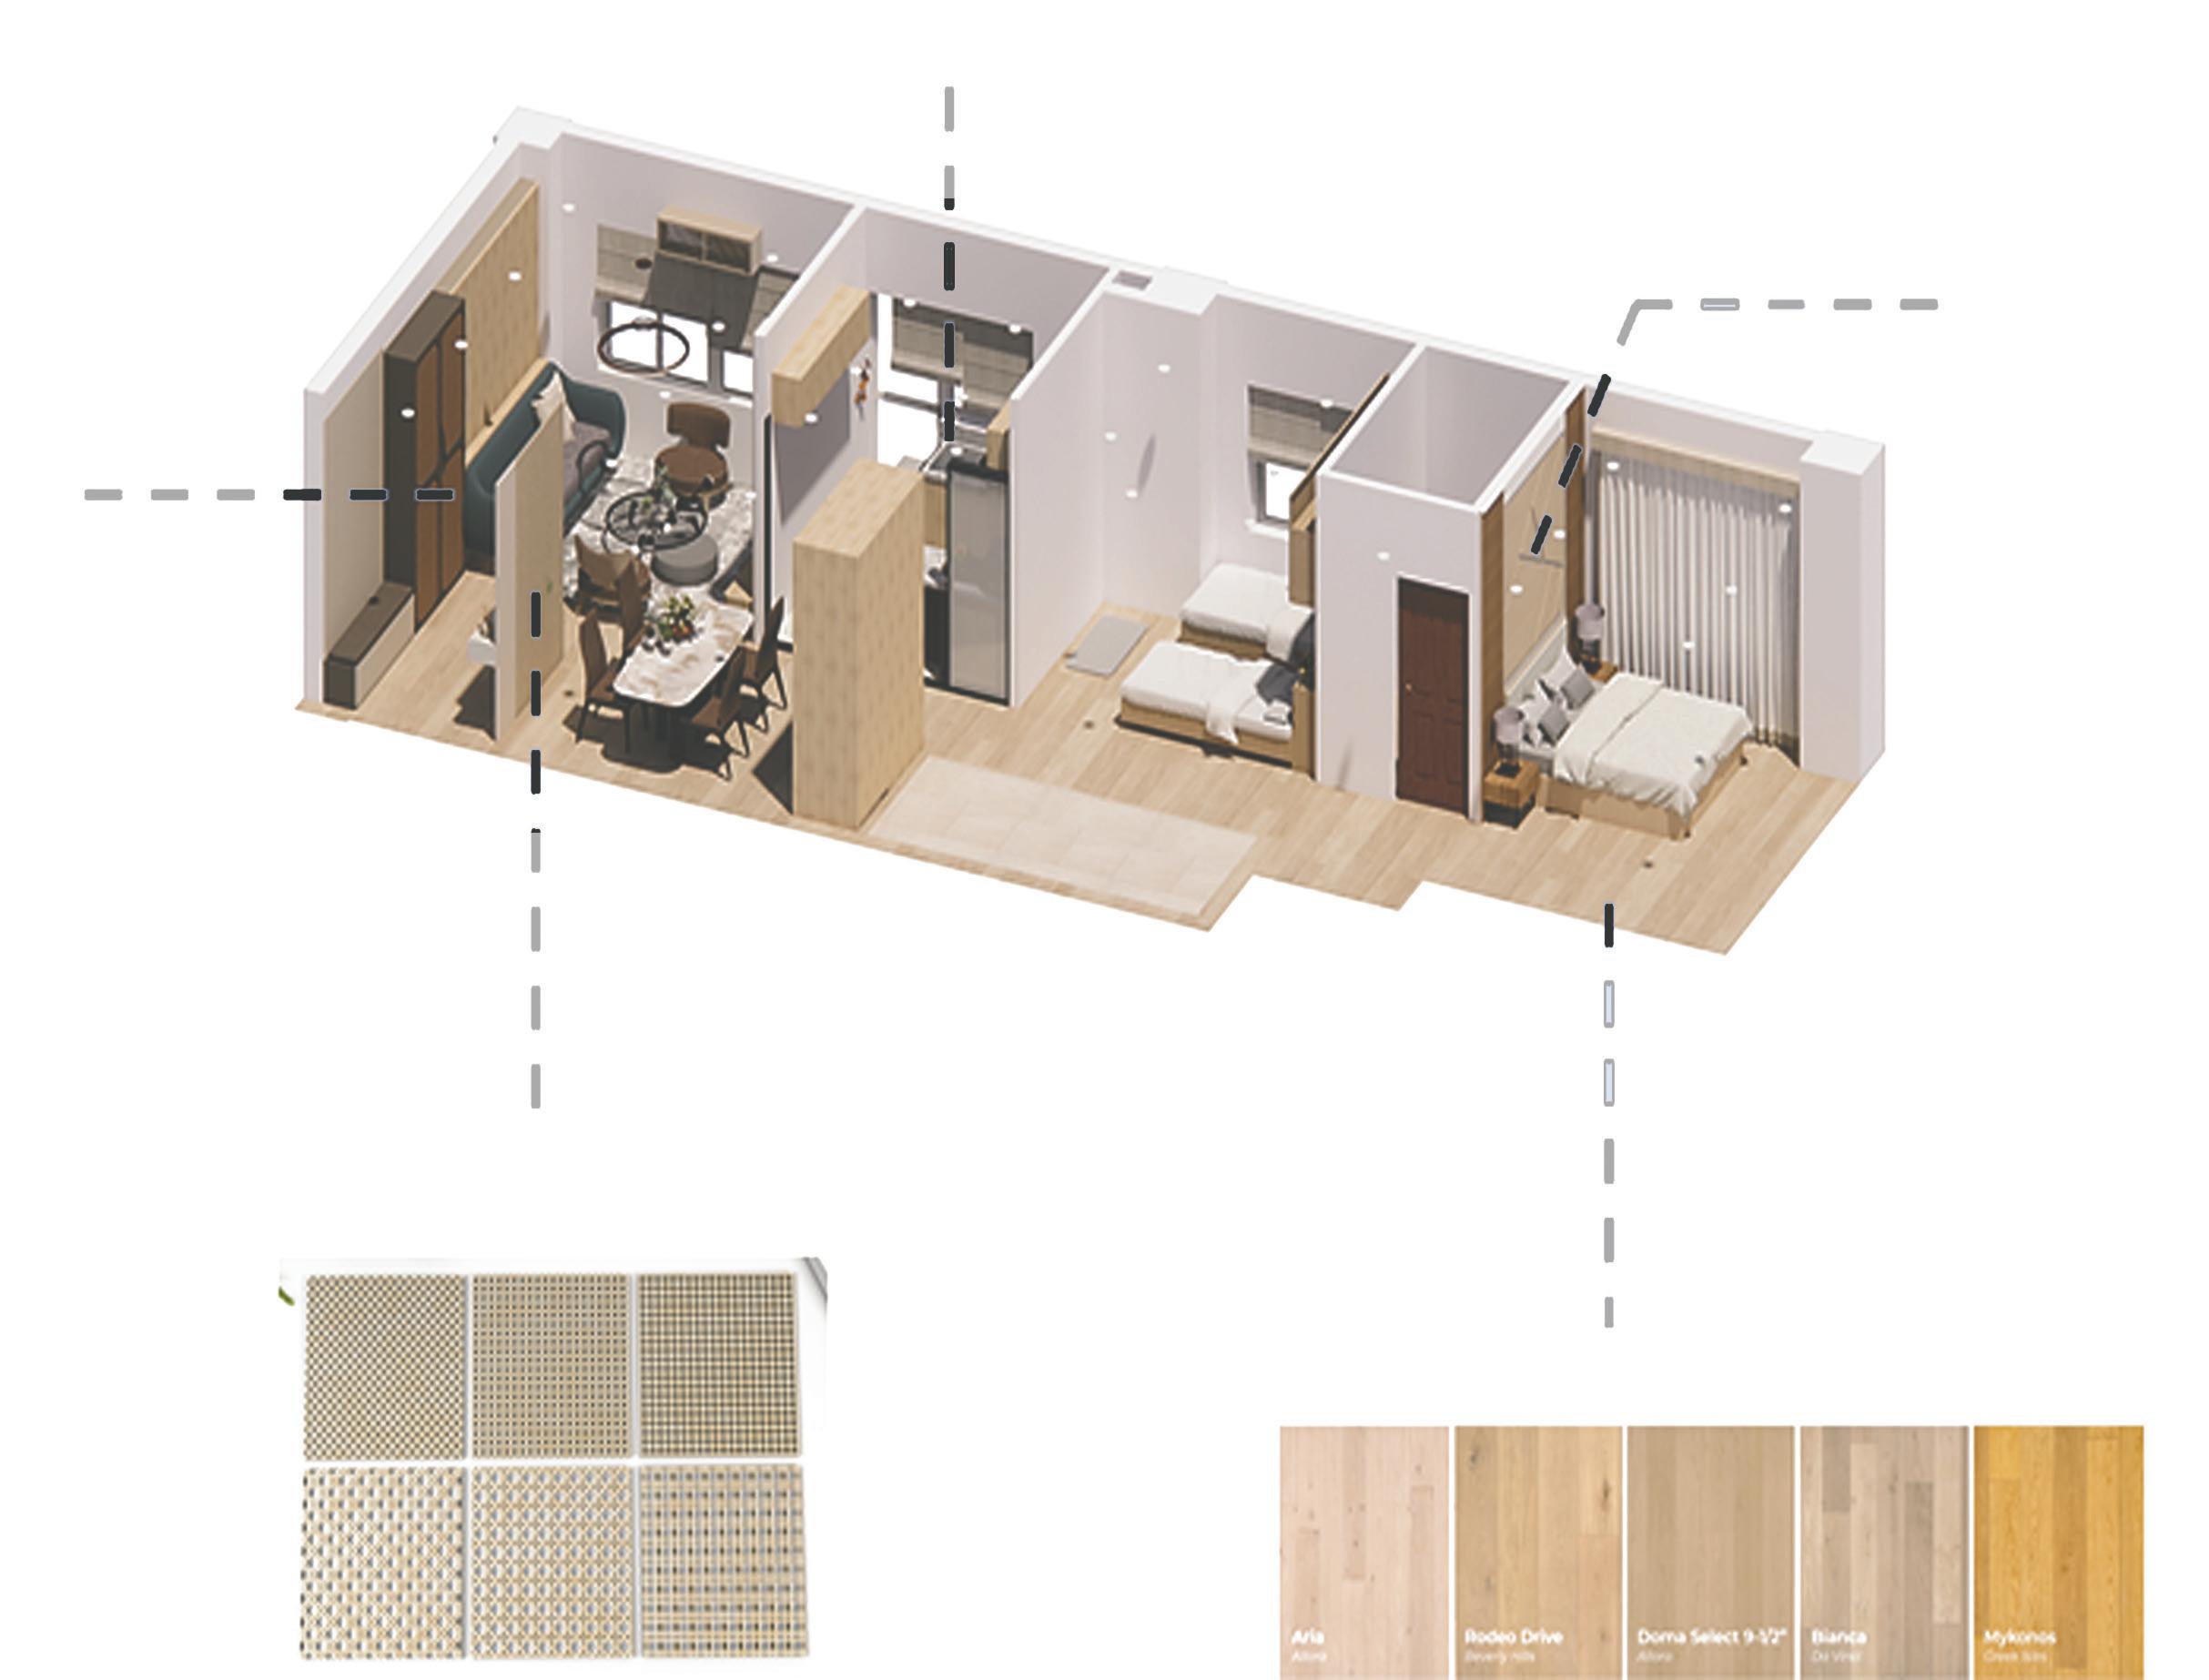
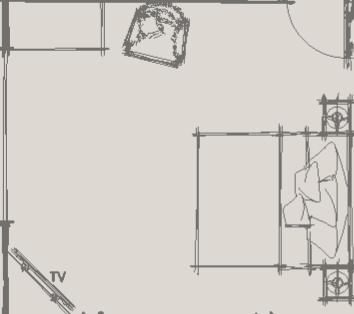
FINAL FLOOR PLAN
2BHK
PLANNING AND FLOW
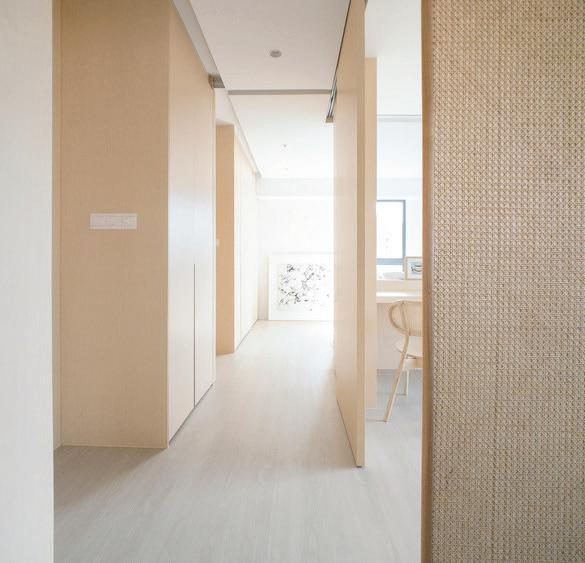
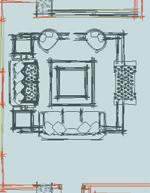
I have designed a 2BHK unit with a functional flow. The layout starts with a living room that opens into the dining area as open floor plan which then connects to the kitchen. This creates a seamless transition between spaces for easy interaction and comfortable living. The foyer and dining is separated by cane material full partition.
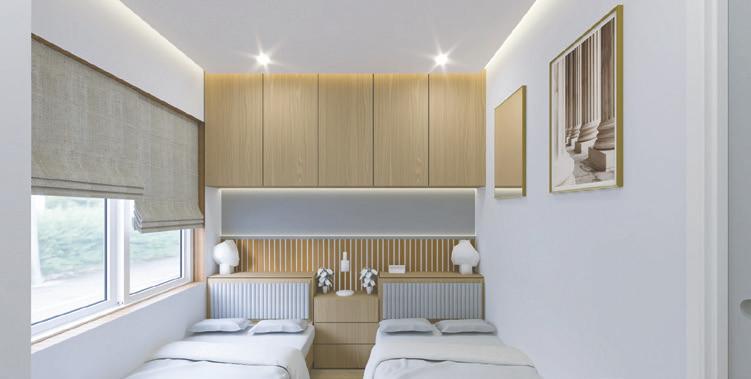
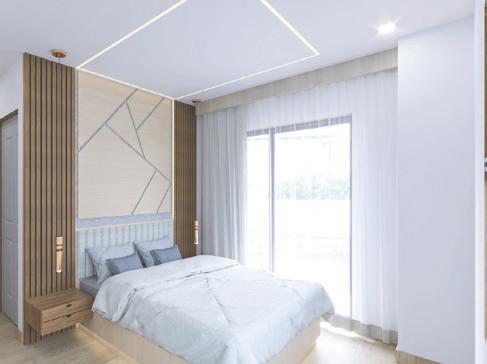
The twin bedroom is located after the kitchen, followed by the master bedroom which is placed in a private zone, that ensures the space remains a quiet, personal, separated from the more active areas of the unit.
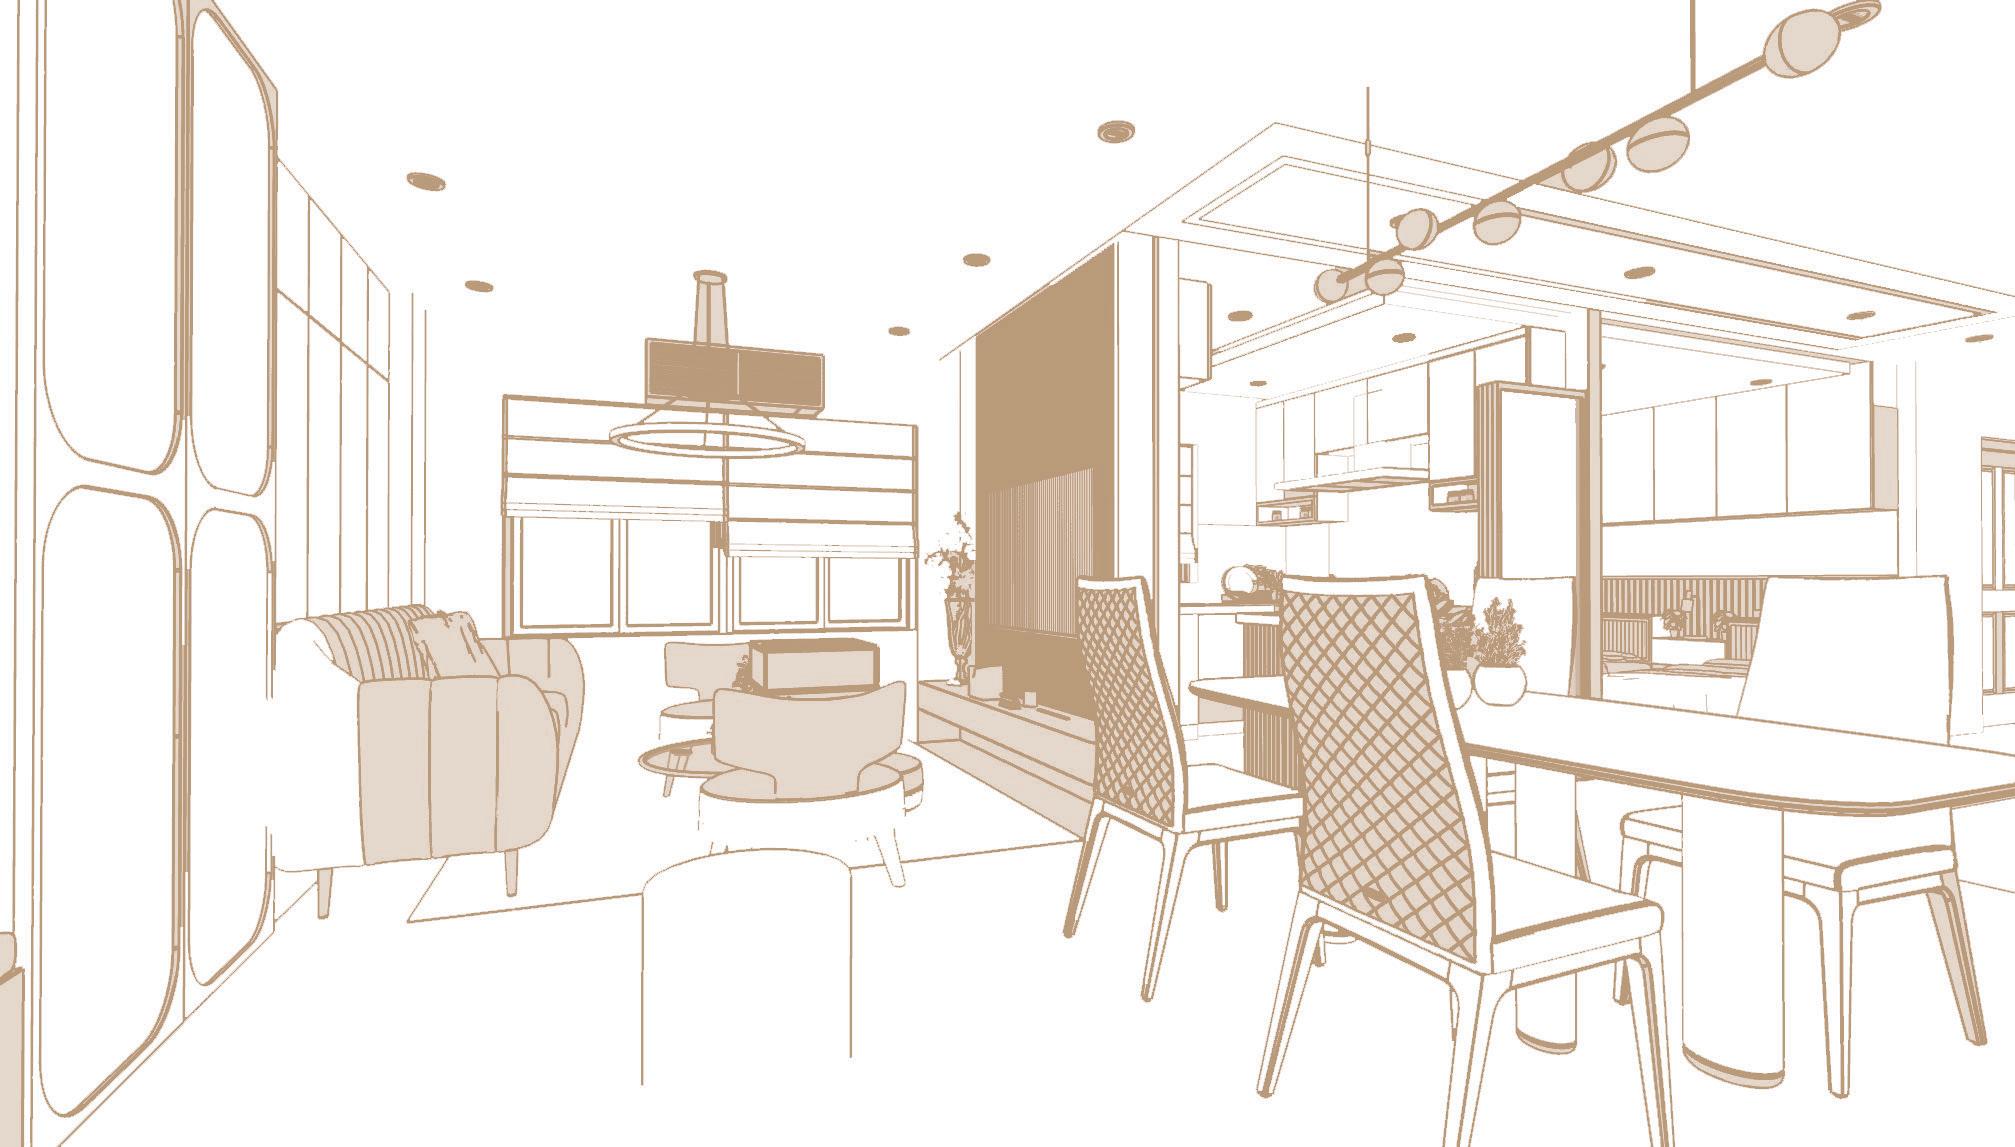
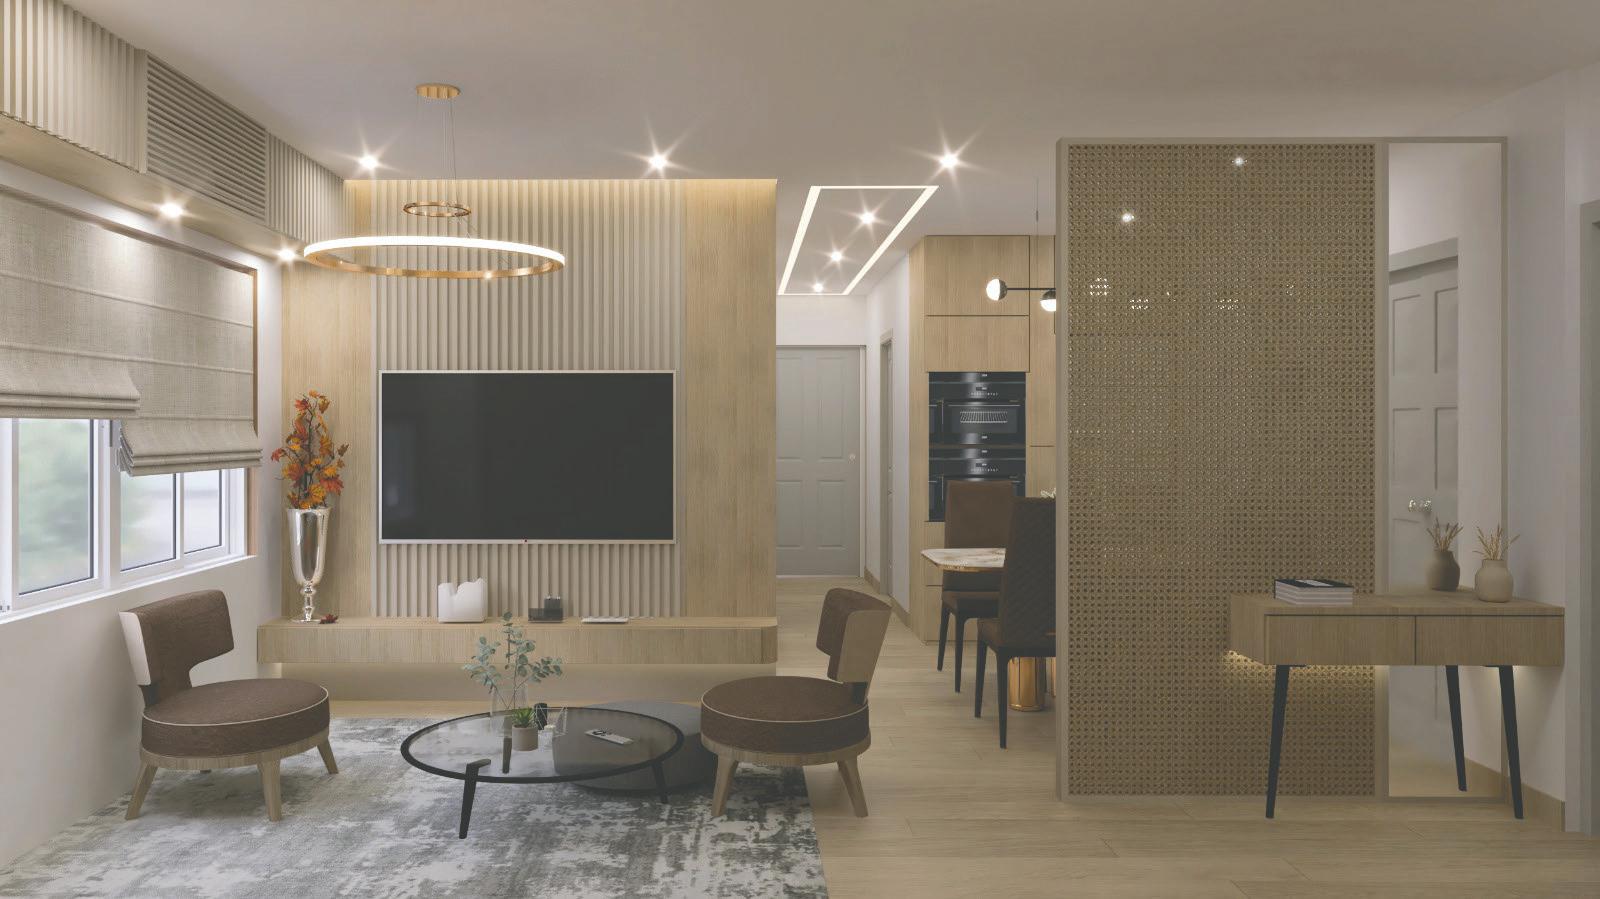
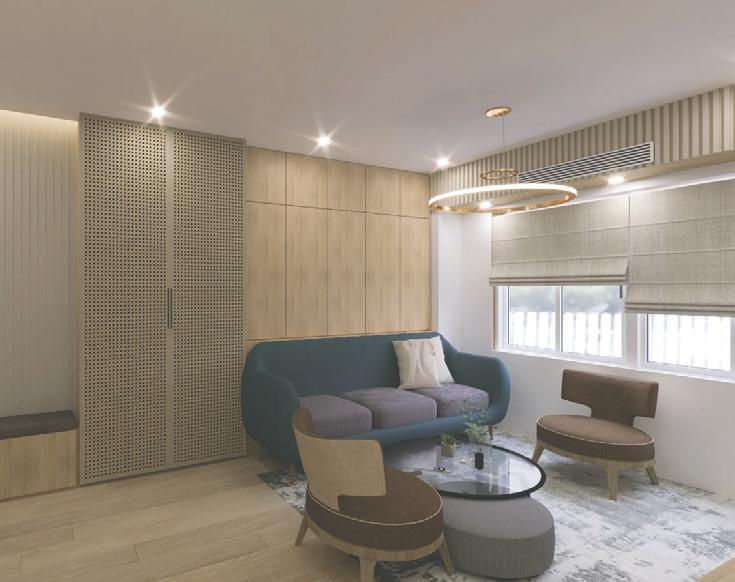
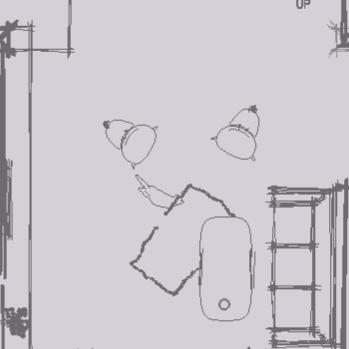
The living room features a grand design with a beige color theme and extensive use of cane material which adds traditional charm and a light, transparent effect. The space flows seamlessly into the dining area, with properly placed furniture that enhances both functionality and elegance.
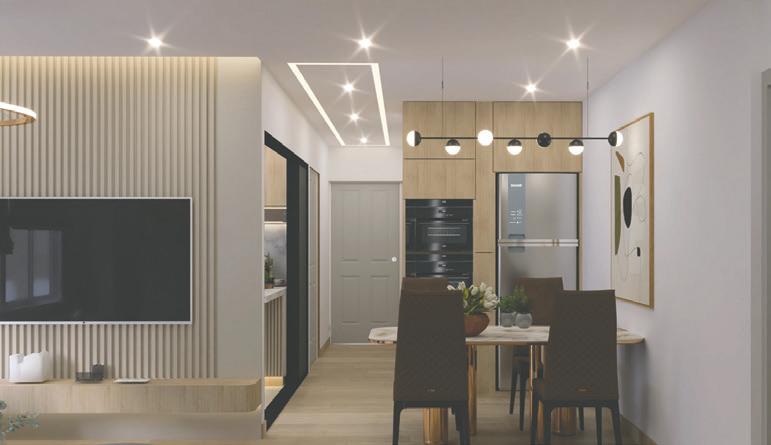
The following renders showcases the blend of beige and white colors. The louvers, niche cabinet, study table, overhead cabinet in kitchen also showcases the use of the chosen theme colors and materials. The furniture chosen in the living room brings contrast to the most covered beige colors.
Master Bedroom
Master Bedroom
Dining room
Twin Bedroom
Living room
Circular surface light
Cane full partition
Full height miroor
Matt beige floor
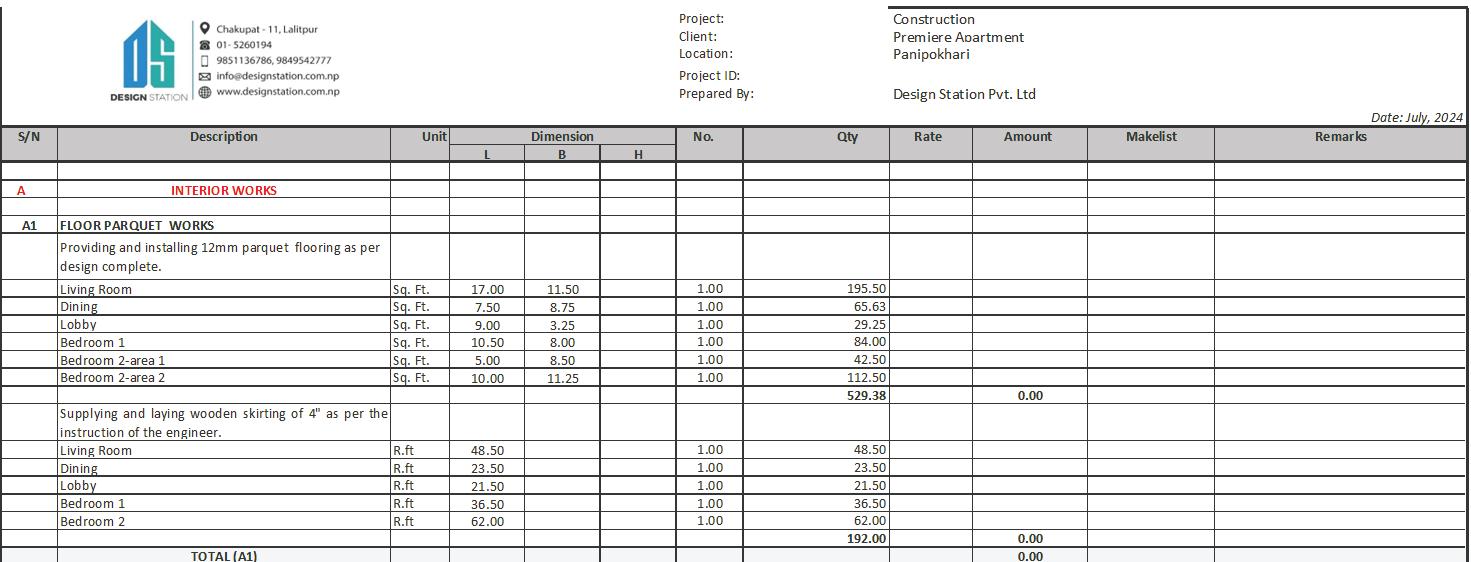
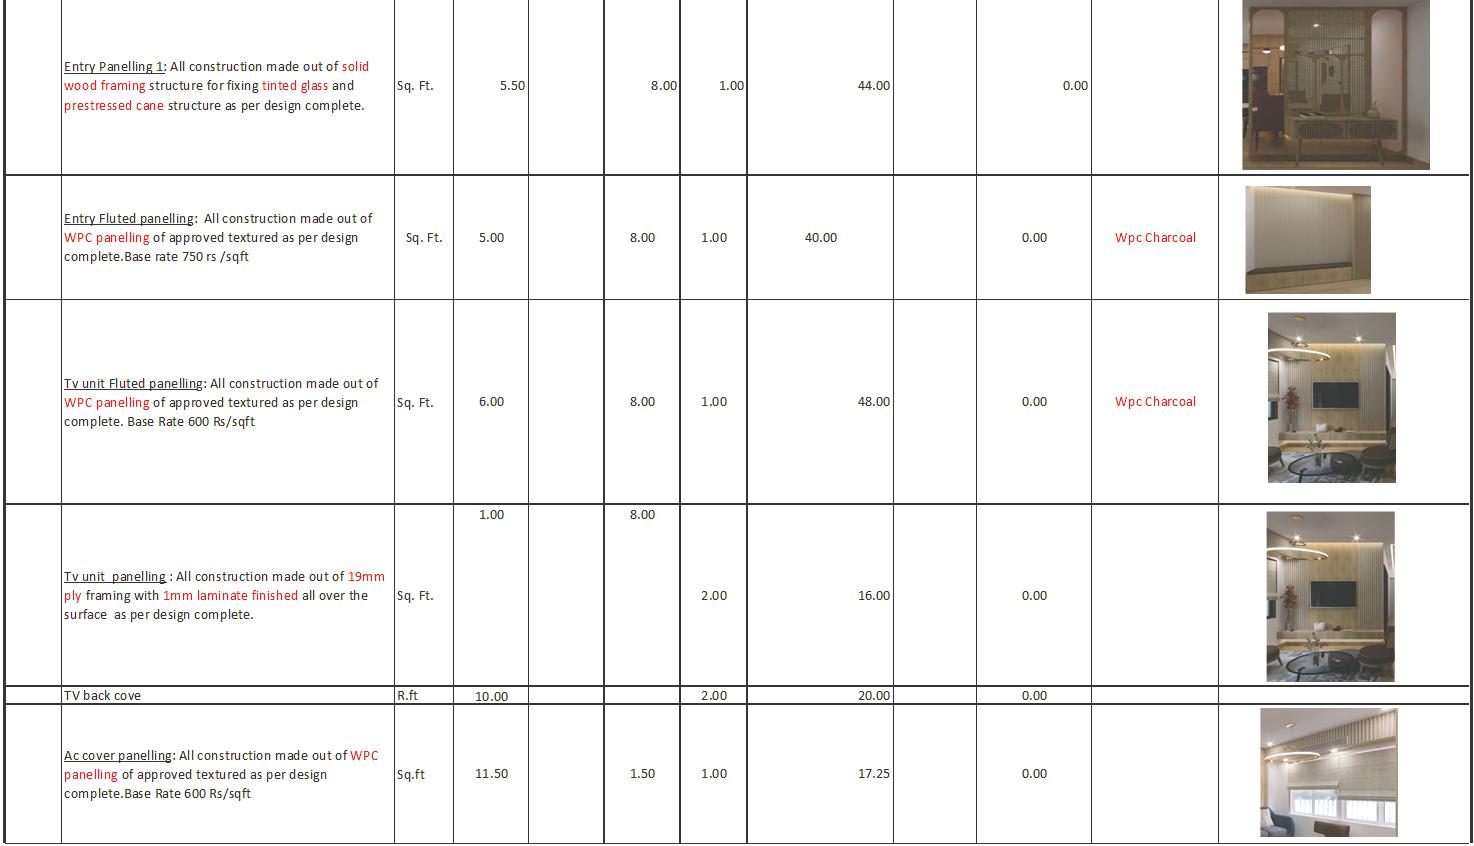
ESTIMATED BOQ
BILL OF QUNATITY (BOQ)
I was given a task to make BOQ of interior work such as bill of floor parqueting works and wall panelling of living rrom.
Note; Bill amount couldn’t be published due to office guidelines
1. DESIIGN PROCESS
• Feasibility Study
WHAT I LEARNED
• Site Visit Site Survey Access Bye Laws Construction Information
2. BUILDING MATERIALS
• Indoor panel louvers
• Wooden theme parquet
• Cane materials
• Sofa’s fabric and materials
• AC coverage grill
3. PROGRAM FORMULATION
• Space zoning and circulation
• Conection between spaces
• Distribution of offices
• Open floor plan
4. LIGHTING FIXTURES
• Electrical fixtures placement layout
• Selection and use of ceiling light, profile light, pendant hanging light, cob light and strip lights.
5. INTERIOR DESIGN THEME CONCEPT
• Terai themed monochromatic colors
• Cane themed furnitures
• Blend of beige and white colors.
• Color contrast between furnitures
6. BILL MAKING AND ANALYSIS
• BOQ (Bill of Quantity)
• Material bill in detail
7.SOFTWARES
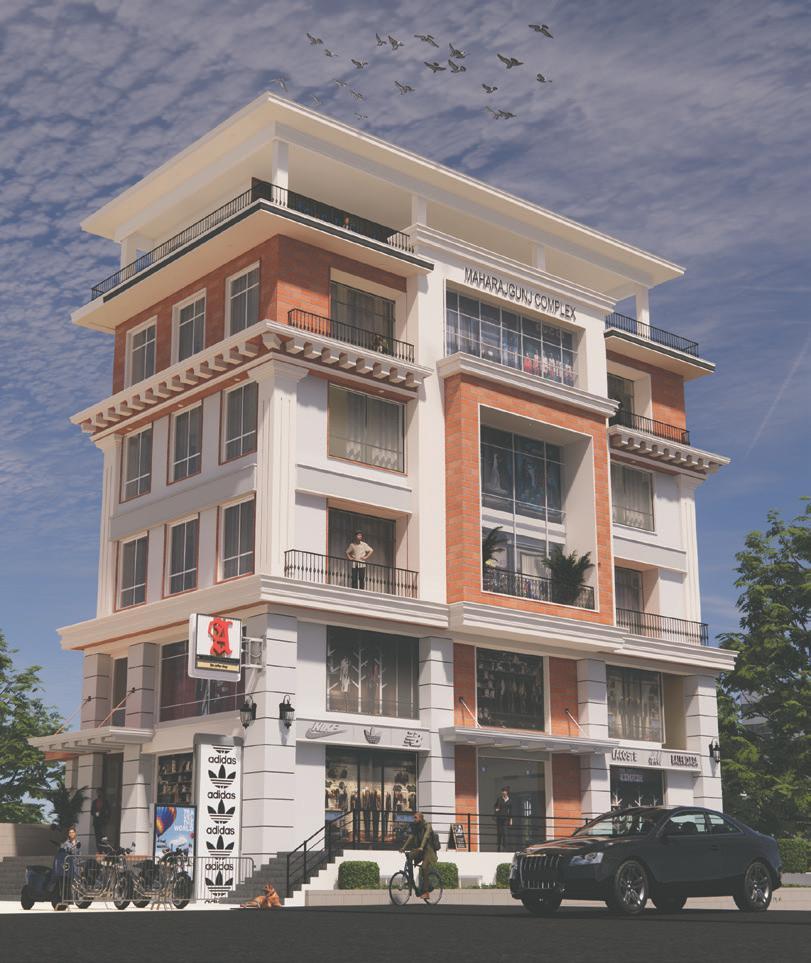
04 MAHARJGUNJ COMPLEX
MAHARJGUNJ, KATHMANDU
Role: Participating in planning,layout, facade treatment, 3D model and rendering.
ARCHITECTURE, EXTERIOR, INTERIOR
LOCATION: MAHARJHUNJ, KATHMANDI
CLIENT: UMESH SHRESTHA AND MAHESH SHRSTHA
STATUS: UNDER CONSTRUCTION
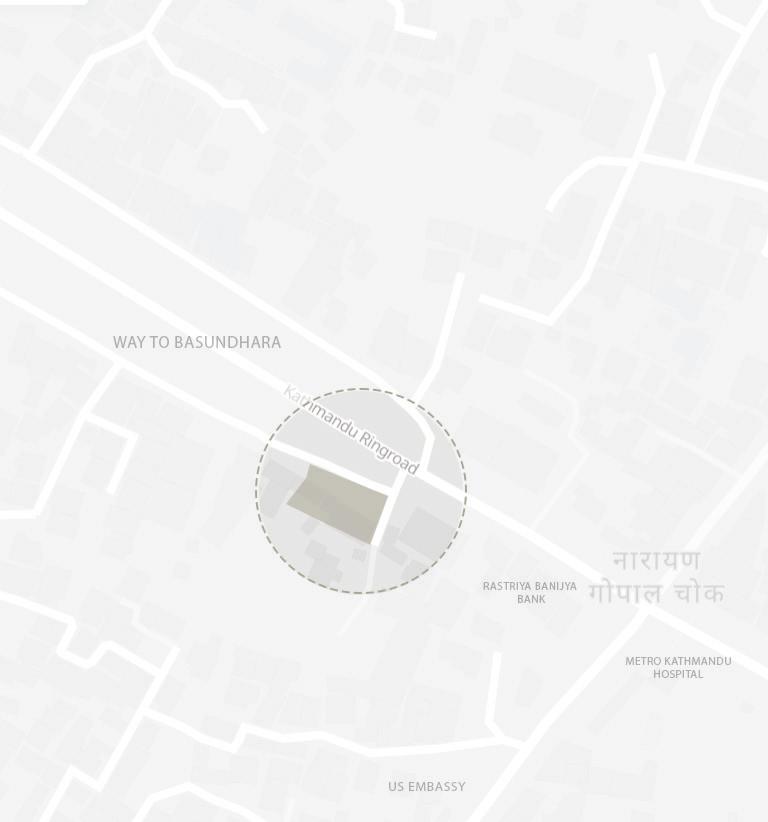
SITE AND ZONING
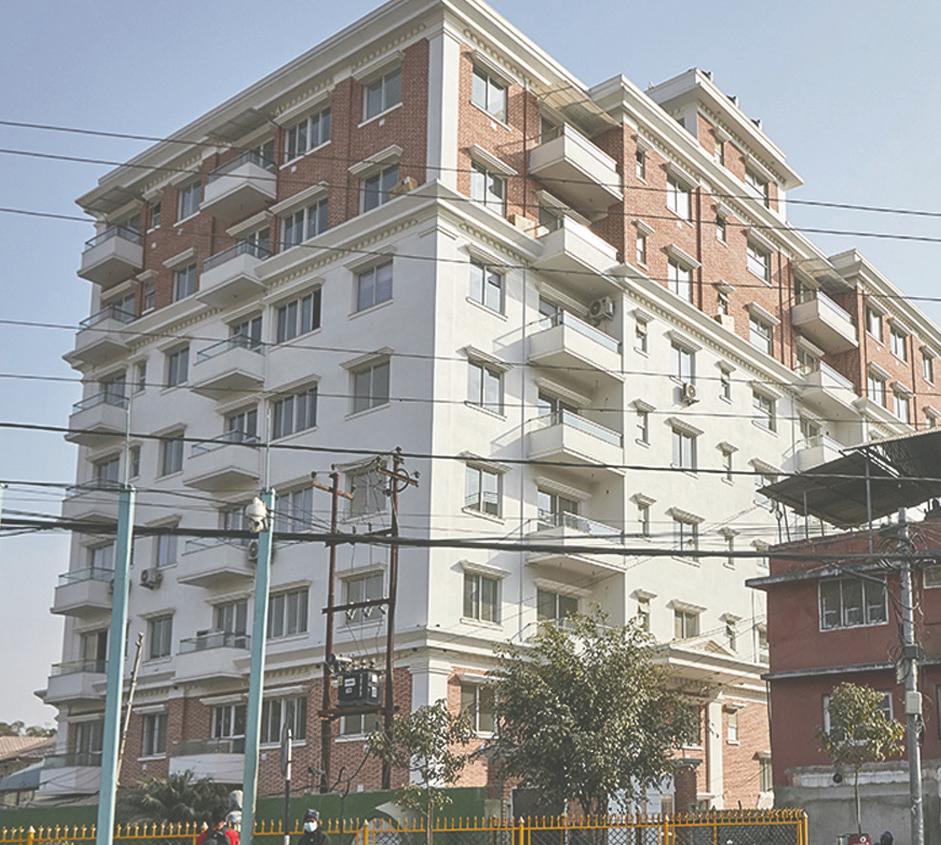
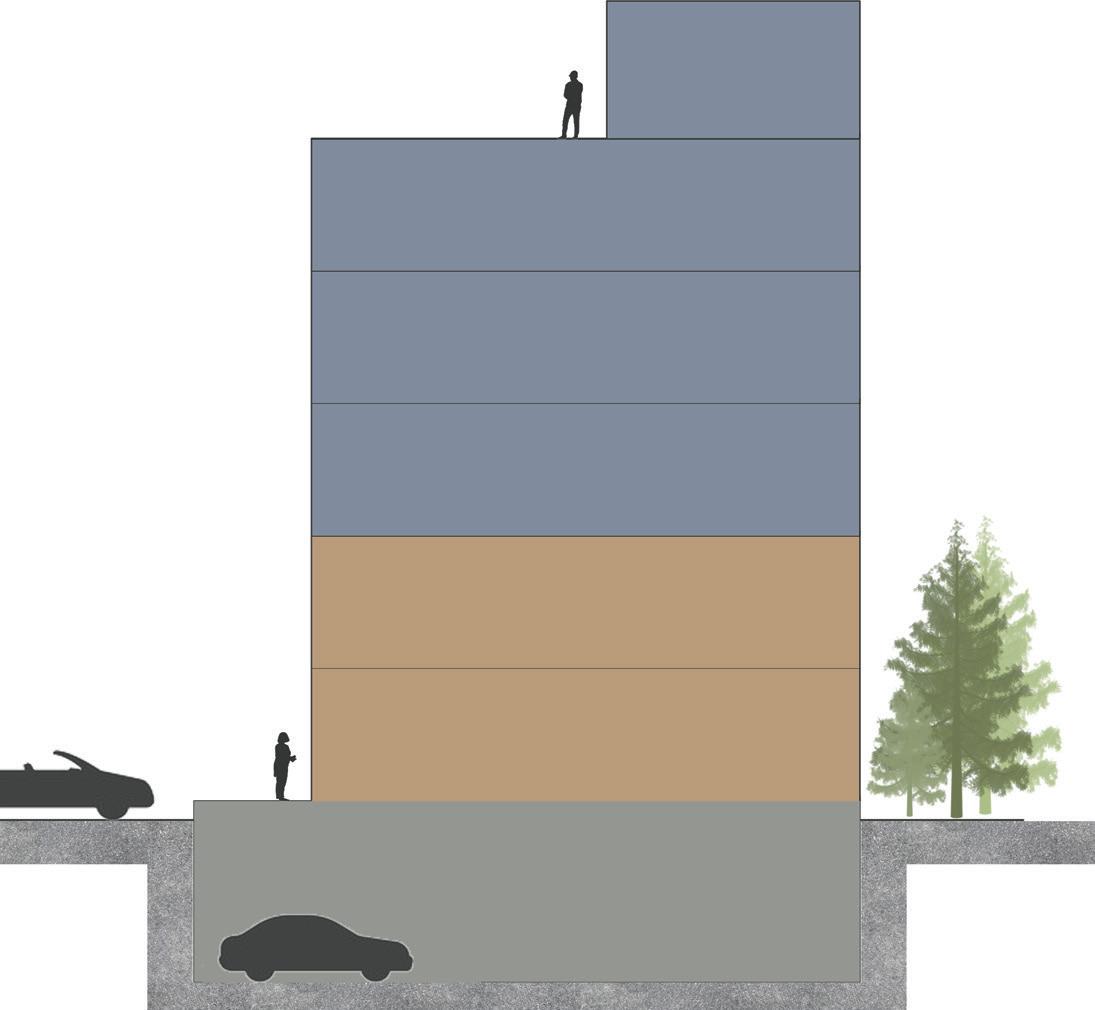
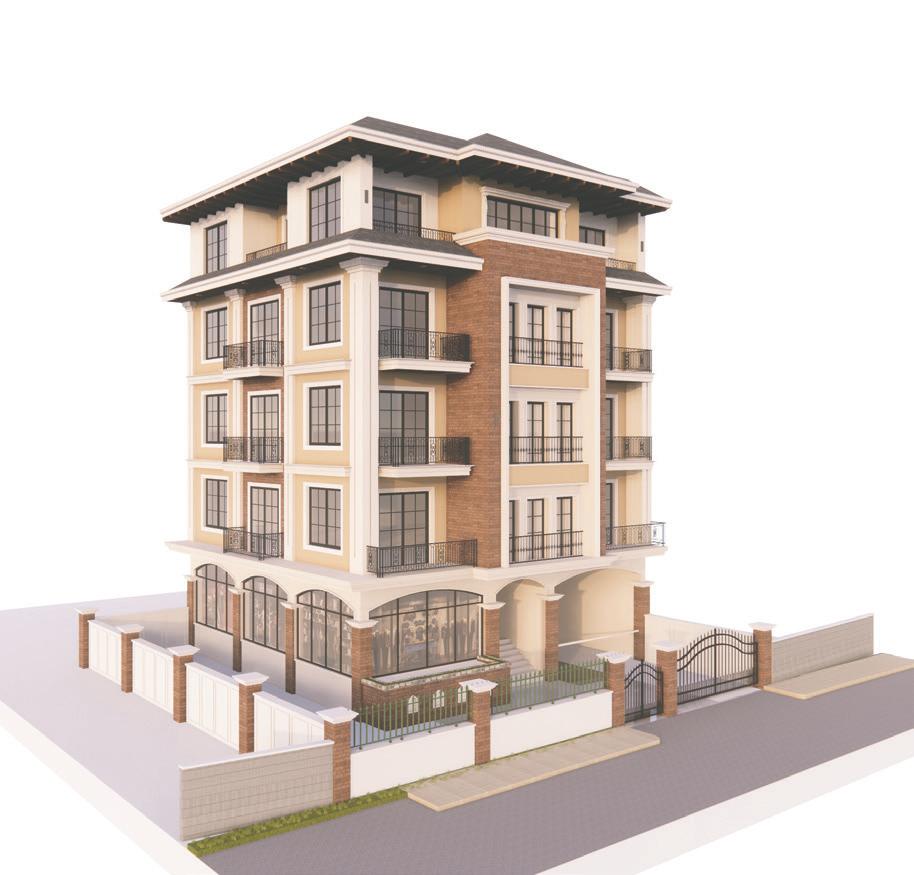
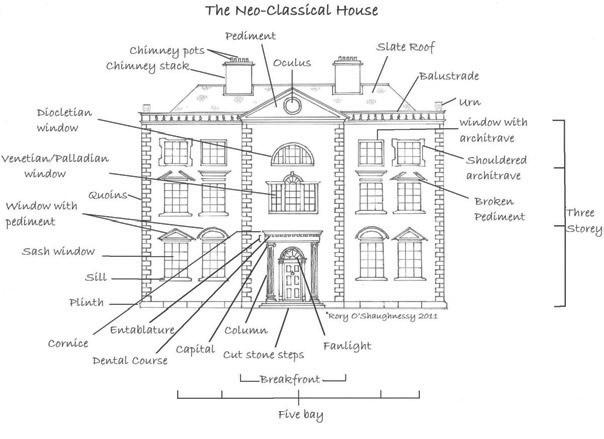
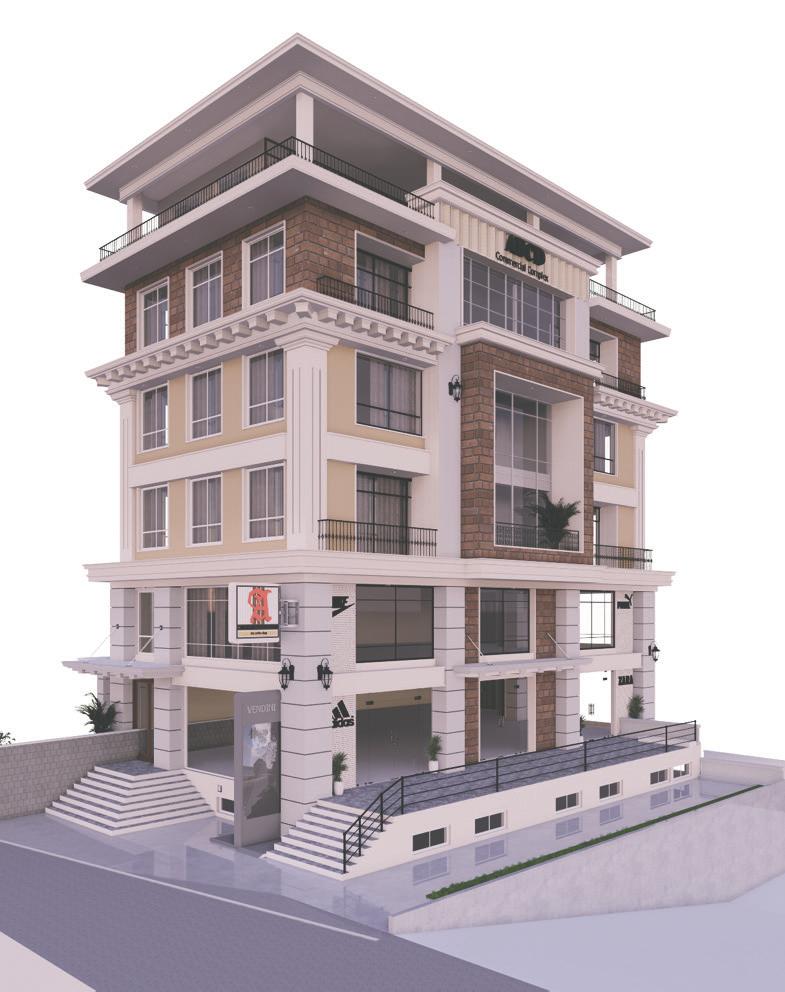
The Maharjgunj Complex is a six storey mixed-use building located in Maharjgunj Kathmandu. The main concept funtion flows form as the clients demanded the building to be a neoclassical of particular style. So, first the building’s form was
PUBLIC AREA
RENTAL AREA
LIFT
CIRCULATION
RING ROAD
MAIN ENTRY
BASEMENT ENTRY SECONDARY
HORIZONTAL ZONING
The neoclassical form with a brick facade was the main concept to the exterior elements. The form is symmetrical, openings are balanced and harmonious.
The first two floors are dedicated for rental areas whereas other floors are dedicated to residential activities. The plannings staircase acts as central point as the clients wanted the spaces can be easily split-ed into two halves the two clients have planning of dividing the property. The 4’-10” X 5’-0” lift and a open well staircase acts as vertical zoning. The service ducts can be seen at the side of staircase and common W/Cs. The 6th floor has a terrace for the residence.
INDEX
Residential Floors
Rental Floors
Basement Parking
MUNICIPAL DRAWINGS
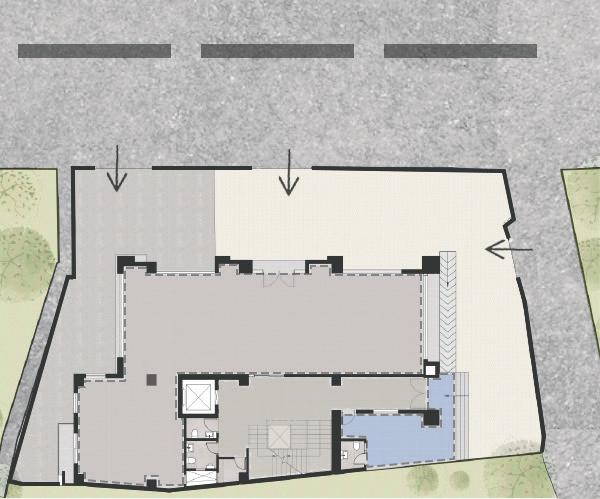
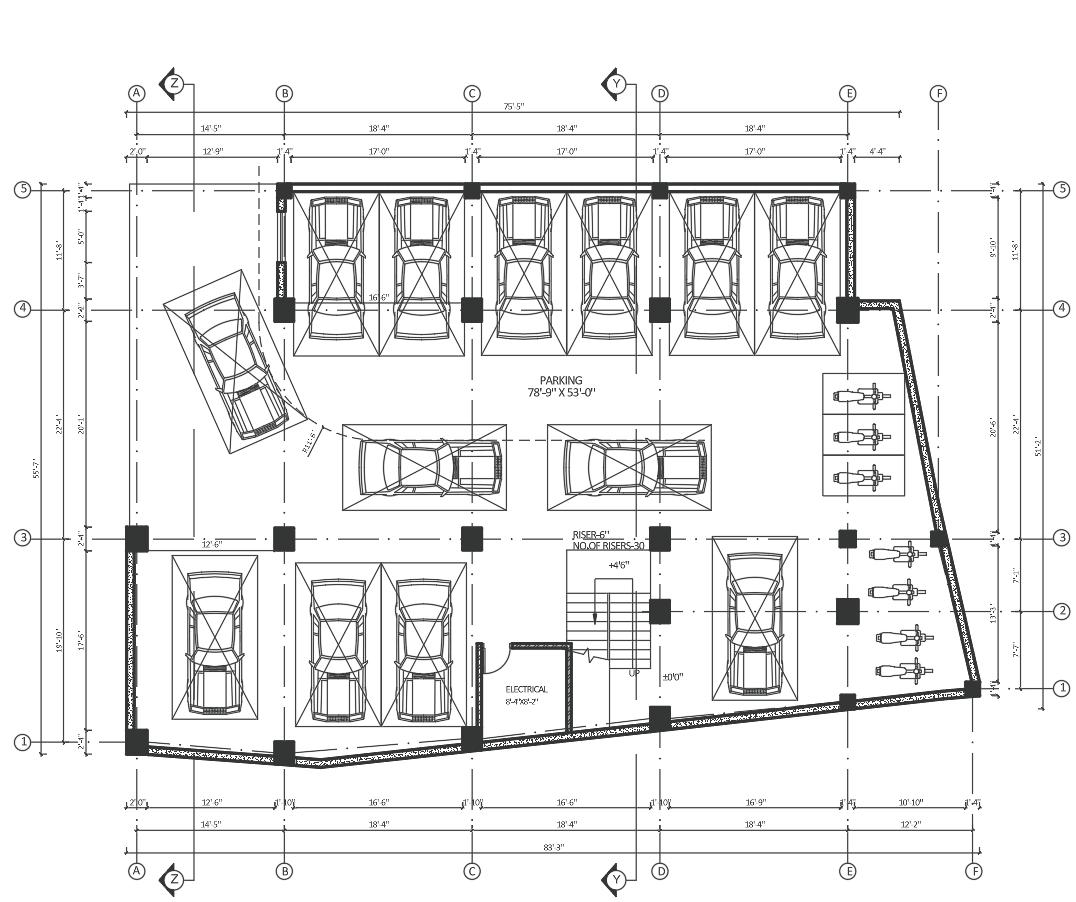
BASEMENT PLANNING
• 250mmX4500mm for one car
• Ramp ratio:1:6
• Turning radius: 3.5m
• Capacity: 10 Cars 10 Motorcycles
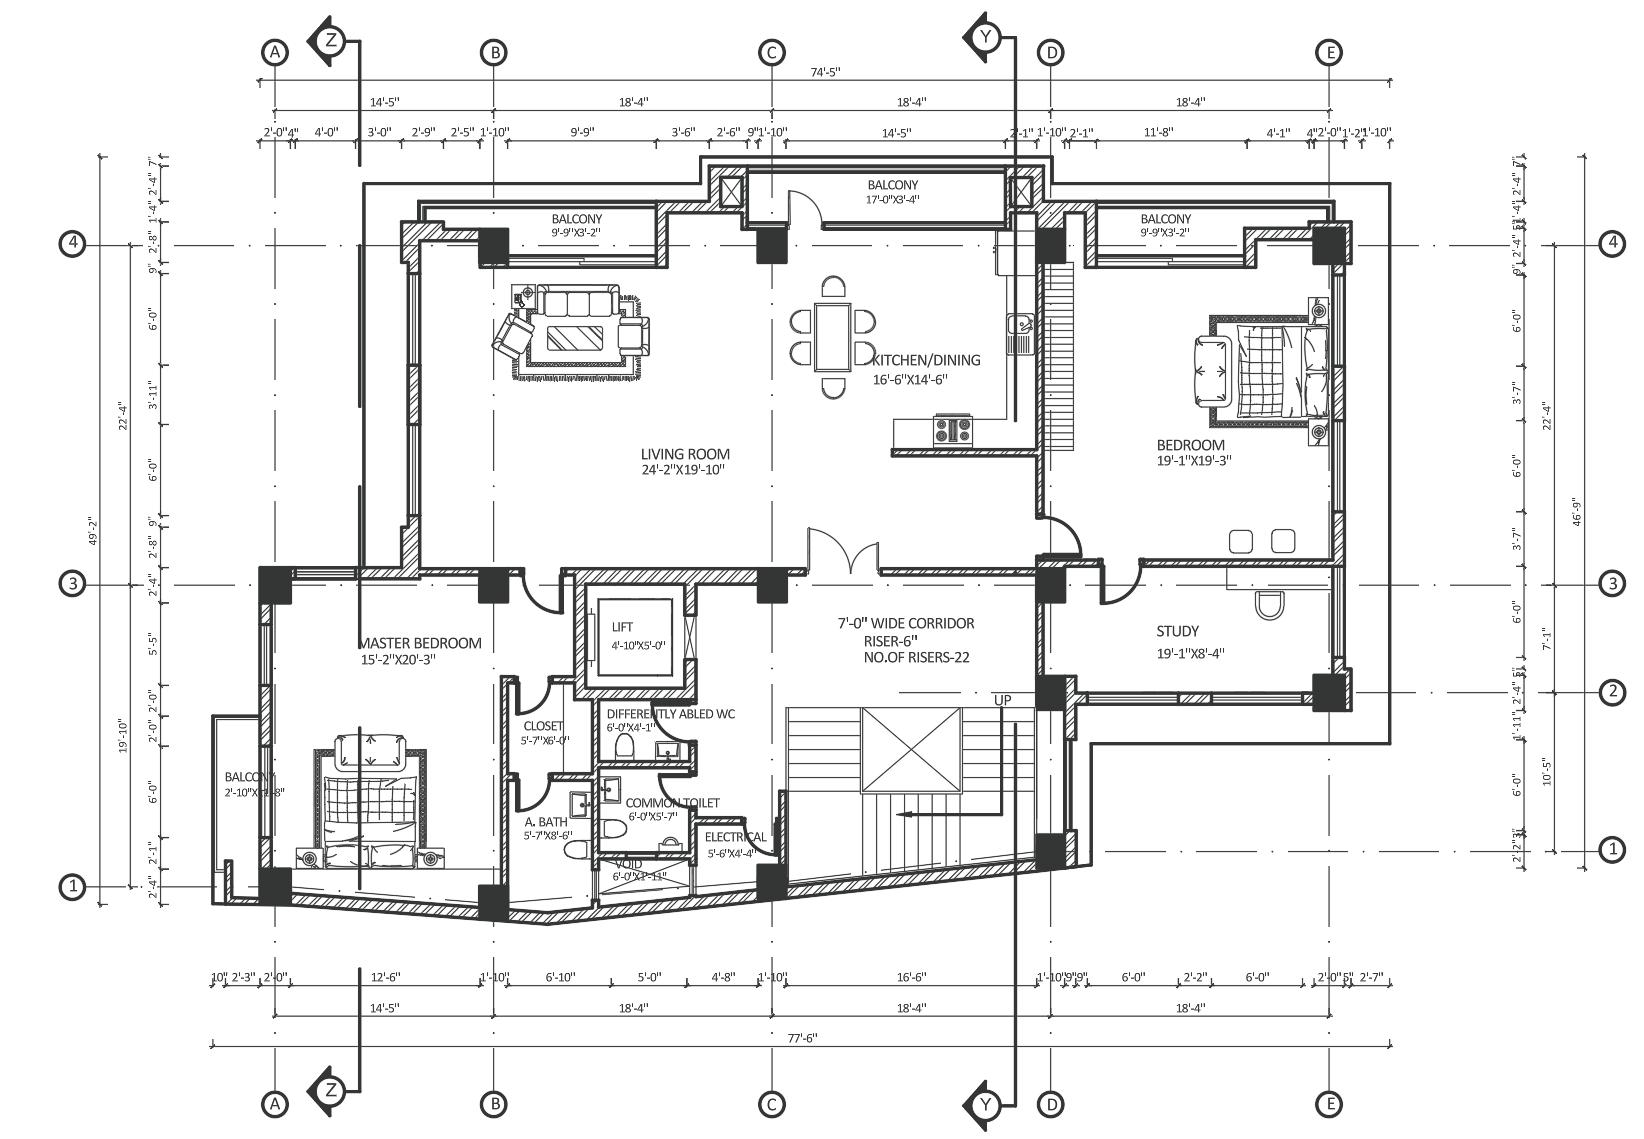
RESIDENTIAL PLANNING
• Living, kitchen and dining shall be connected.
• Master bedroom with walking closet.
• Bedroom
• Study room
• Store room
• Lift and staircase as vertical circulation
CONCEPTUAL SKETCH
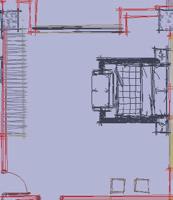
The basement floor is dedicated to parking, accommodating 10 cars and 10 motorcycles. The layout is designed to ensure smooth flow and circulation of vehicles, with clearly marked parking spaces and well-planned entry w exit from the same point. This efficient design allows for easy maneuvering of vehicles, minimizing congestion and maximizing the use of space. The basement’s organization ensures that both car and motorcycles parkings need are met, providing convenience for residents and the visitors in commercial alike.
CONCEPTUAL SKETCH
The mixed use building includes upper three residential floors, each featuring a similar 2bhk layout. Upon entering to each floors, the plan includes a kitchen and dining area that connects seamlessly with the living area. The master bedroom and second bedroom are strategically located to ensure they receive natural light and are strategically located to ensure, they receive natural light and are separated from maintaining privacy, the layout on all three floors provides a functional and comfortable living environment, consistently designed to ensure residential comfort and efficiency.
Note: For further municipal drawins, please refer drawings C from annex report.
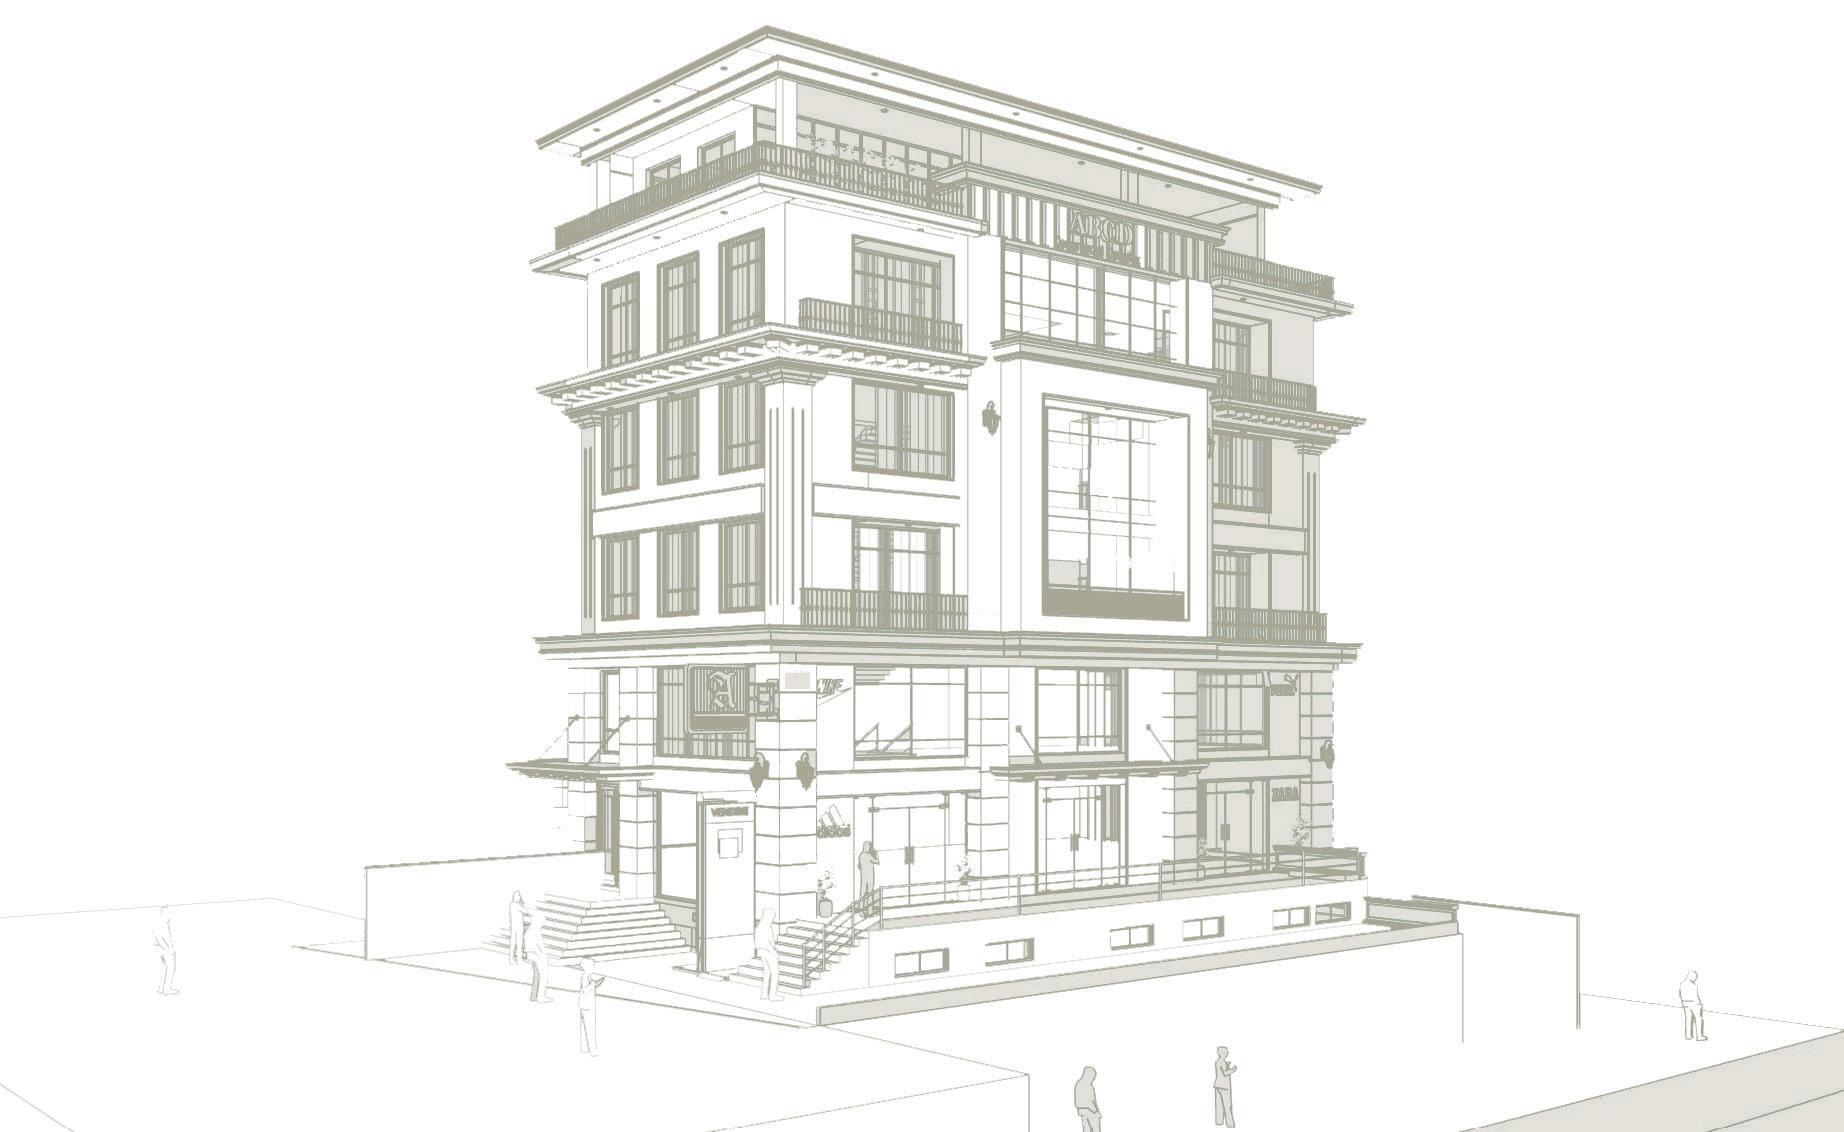
FORM DEVELOPMENT
Source: Design Station
Neoclassical style concept
CONCEPTUAL FORM
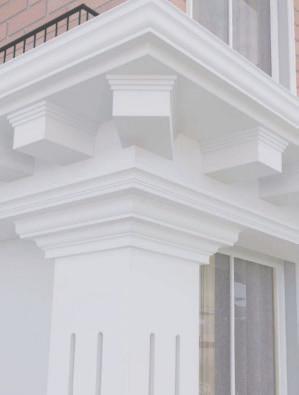
Mixed used building, ground floor acts as commercial zone and other floor acts as residential zone. The design is monotonous. The 3d model doesn’t matches with the floor plans as the initial stage only plan was to ensure commercial zone to only ground floor. The facade has arch on the ground floor followed by neoclassical column with shaft, capital and cornices. The windows are plain and are of same sizes. The slope roof with grey sheeting are included. The brick facade doesn’t add much to the form. No inclusion of terrace makes the building less commercial.
FORM DEVELOPMENT
The ground floor and first floor now acts as commercial zone. The other floors as residential zones. The facade now has straight vertical columns. The brick wall spreads to more area. The topmost floor was against bylaws due to height restrictions.
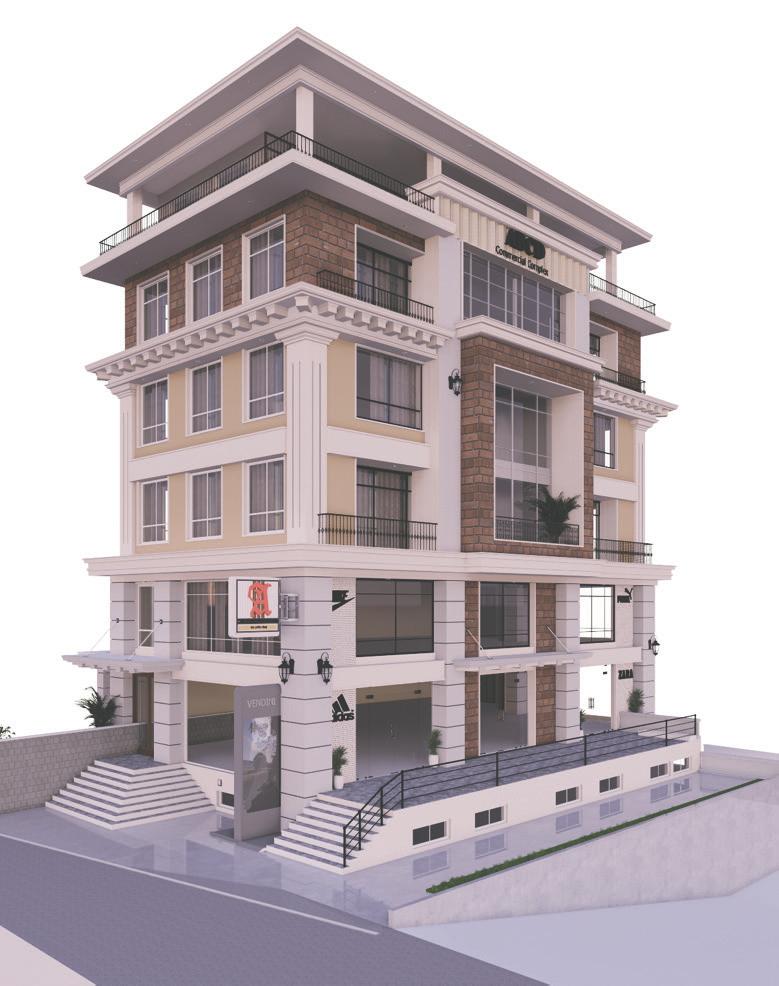
FINAL FORM
The final form has the advertisement board managed horizontal to traves. The top most is to be made from metal structure to tackle the height restriction.
Blank White Wall Brick Wall
1. DESIIGN PROCESS
• Feasibility Study
WHAT I LEARNED
• Site Visit Site Survey Access Bye Laws Construction Information
2. PROGRAM FORMULATION
• Residential and commerical use
• Basement and parking
3. DESIGN PROCESS, ZONING AND SPACE PLANNING
• Desgin development according to the client’s demand
• Distribution of the residential and commerical use in designated floors.
• Space for rental use and effectively flow of people
• Layout for residential use
4. FORM DEVELOPMENT
• Fuction follows. Inspiration taken from neoclassical building
• Blends with brick facade
• Use of neoclassical features like shaft, captial and cornices
Role: Participating in planning, layout, form development, 3d modeling and rendering.
ARCHITECTURE, EXTERIOR, INTERIOR
LOCATION: NAGI DANDA, BANEPA
CLIENT: MR. GYANENDRA LAL PRADHAN
STATUS: DESIGN PHASE UNGOING
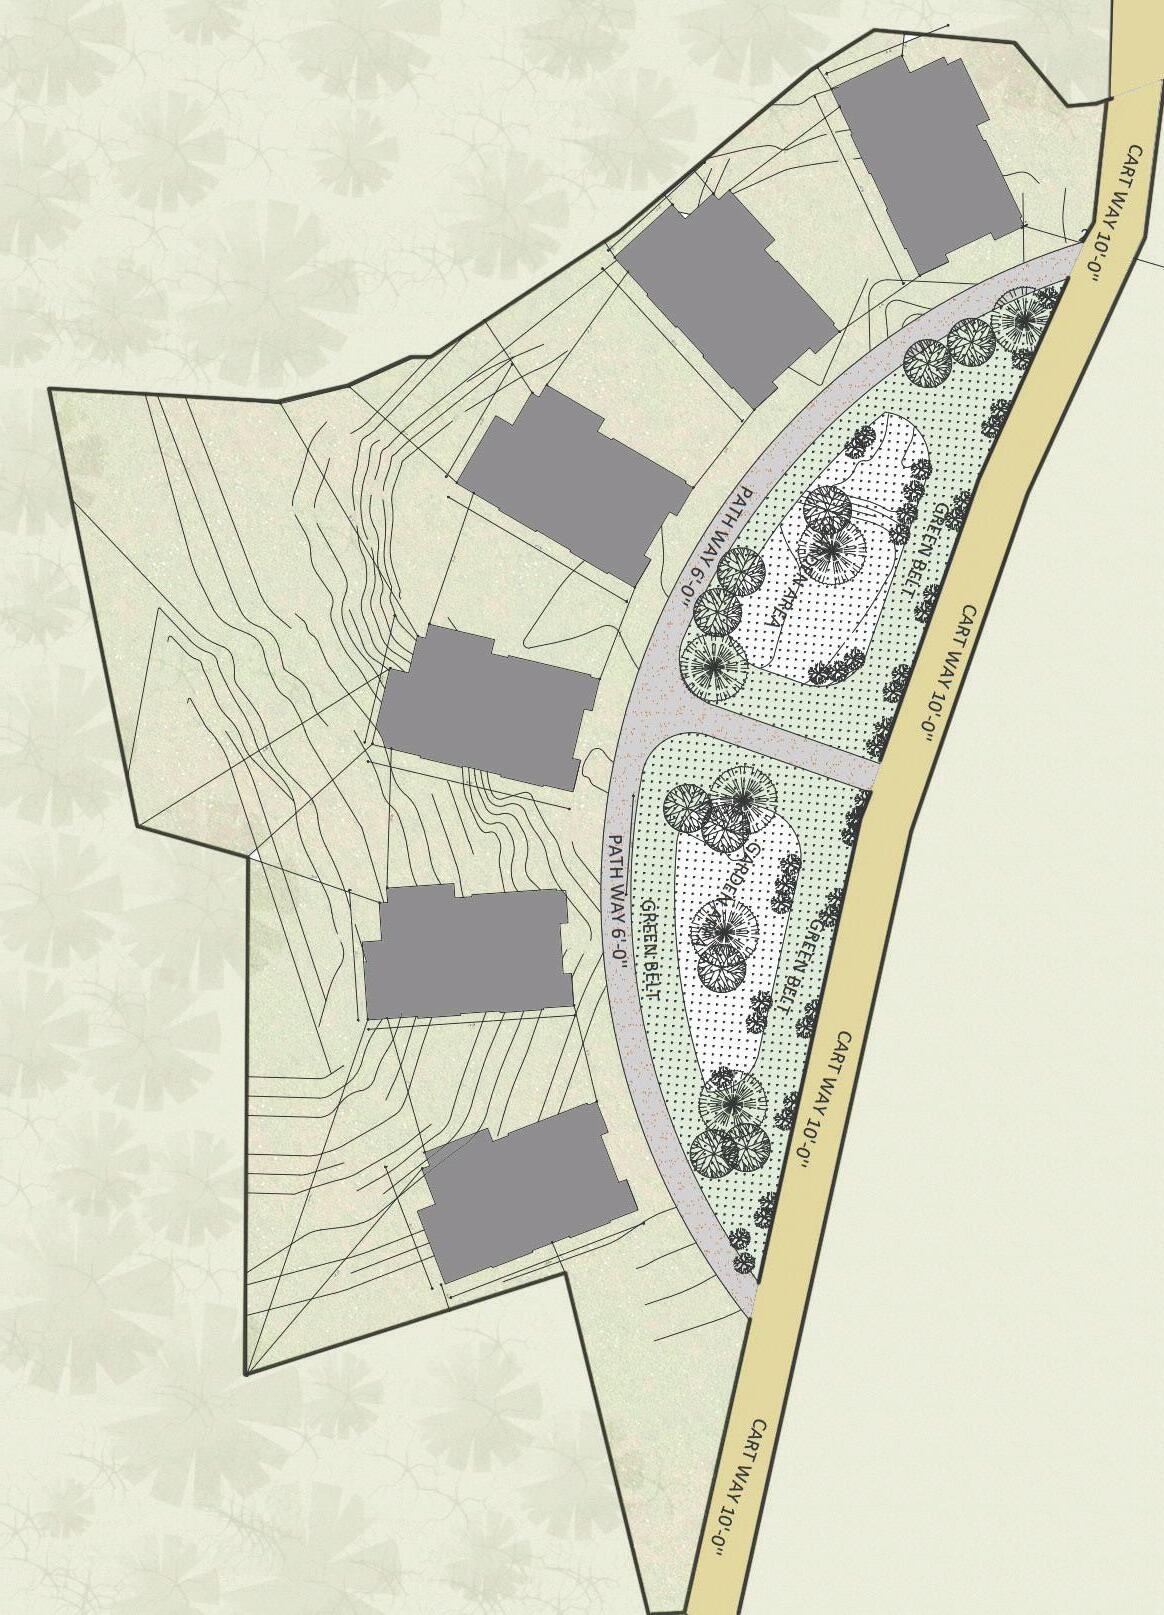
MASTERPLAN
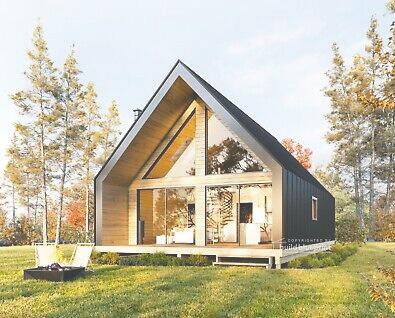
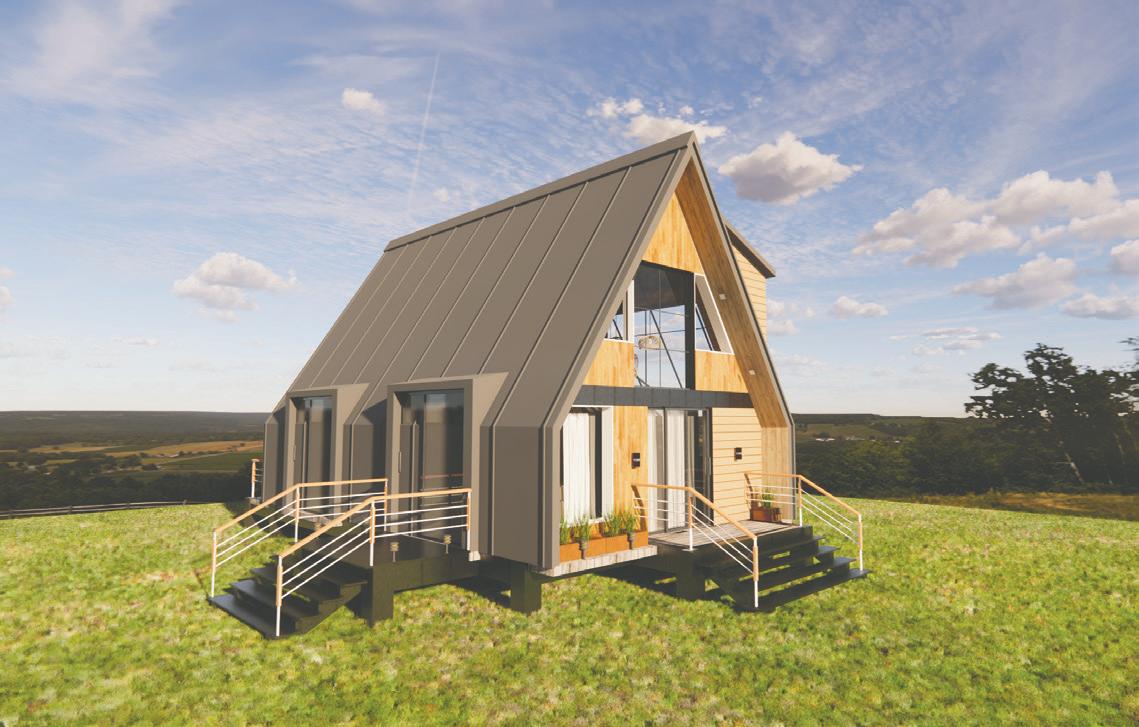
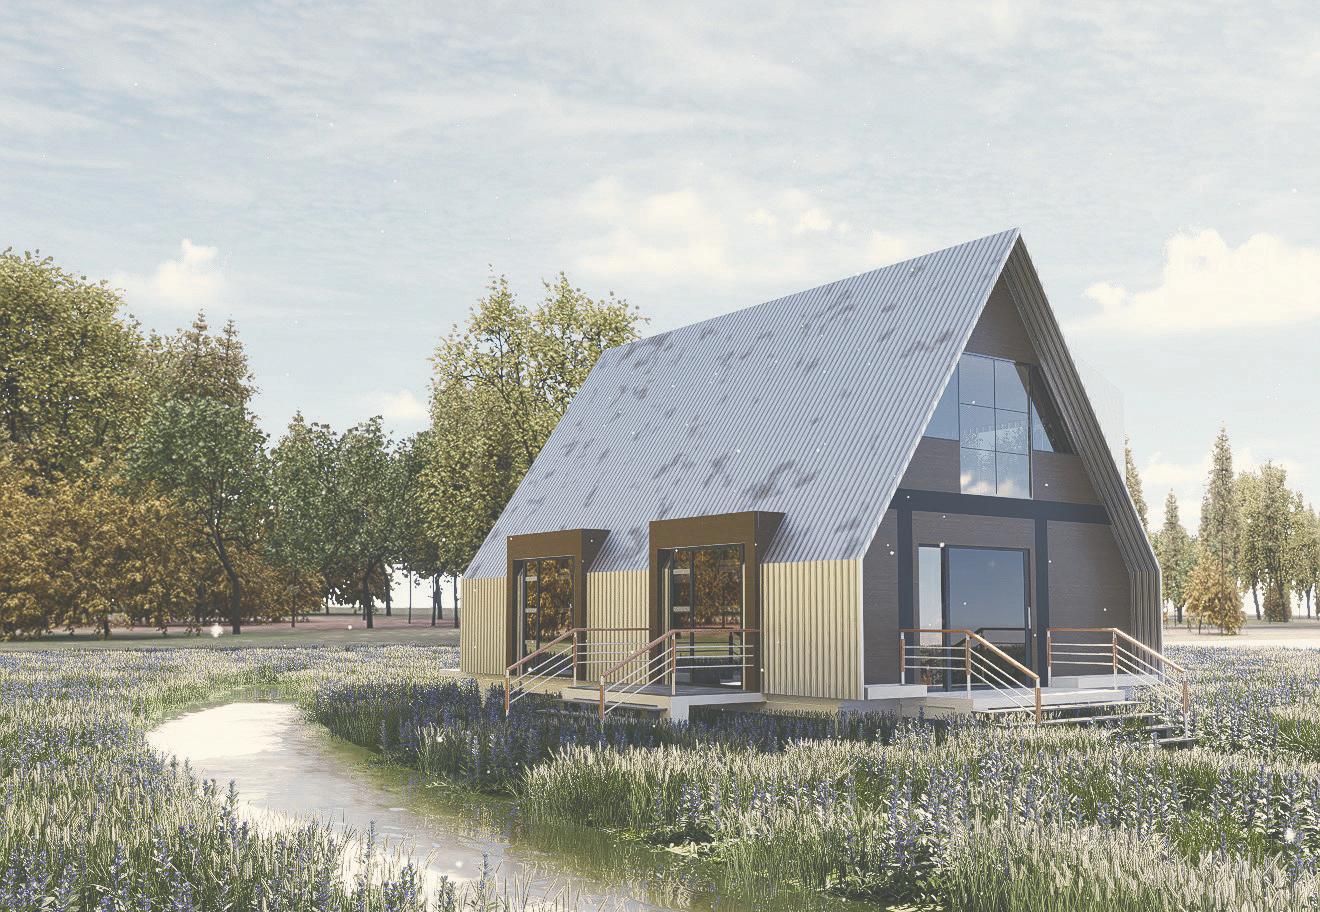
The A-Frame project is located in banepa below the Aaunya Nature Resort. It features six villas with a distrinctive a frame structure, arranged in C-shape creating a welcoming entrance for guests. The project provides a managed landscape with proper vehicular and pedestrian circulation. The landscpae plays with the existing tress to create an interesting environment. This design approach not only adds visual appeal but also provodes an unique lodging experience in the area.
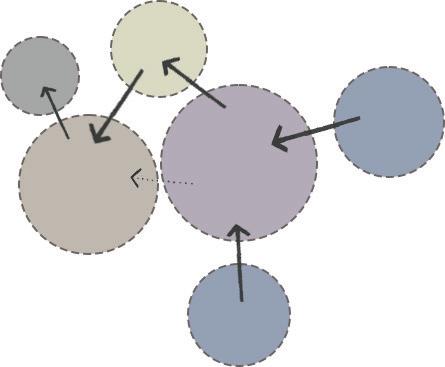
VILLA BUBBLE DIAGRAM
Direct Circulation
The design requirements included a well-appointed bedroom, a master bedroom woth an attached balcony in a loft area, and a spcaious living area complete with a mini bar. A private space to relax while taking in the breathtaking views of the surrounding resort landscape.
Cartway 10’-0”
Garden Area
Garden Belt
Pathway 6’-0”
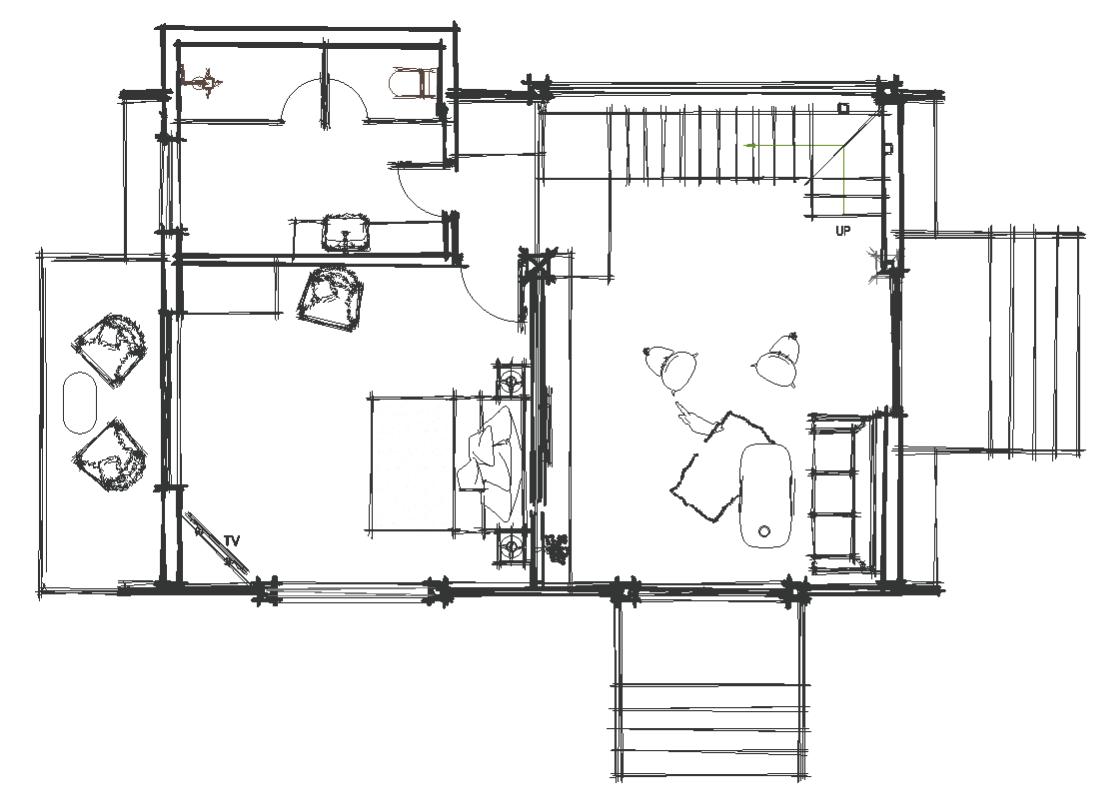
PLAN DEVELOPMENT
After establishing the concept, I progressed to developing the plan, with a strong emphasis on ensuring proper circulation throughout the space. This involved careful consideration of how the rooms and living area would flow together, ensuring a cohesive and functional design. Once the layout was finalized, I proceeded to complete the municipal drawing, which was a critical step in moving the project forward.
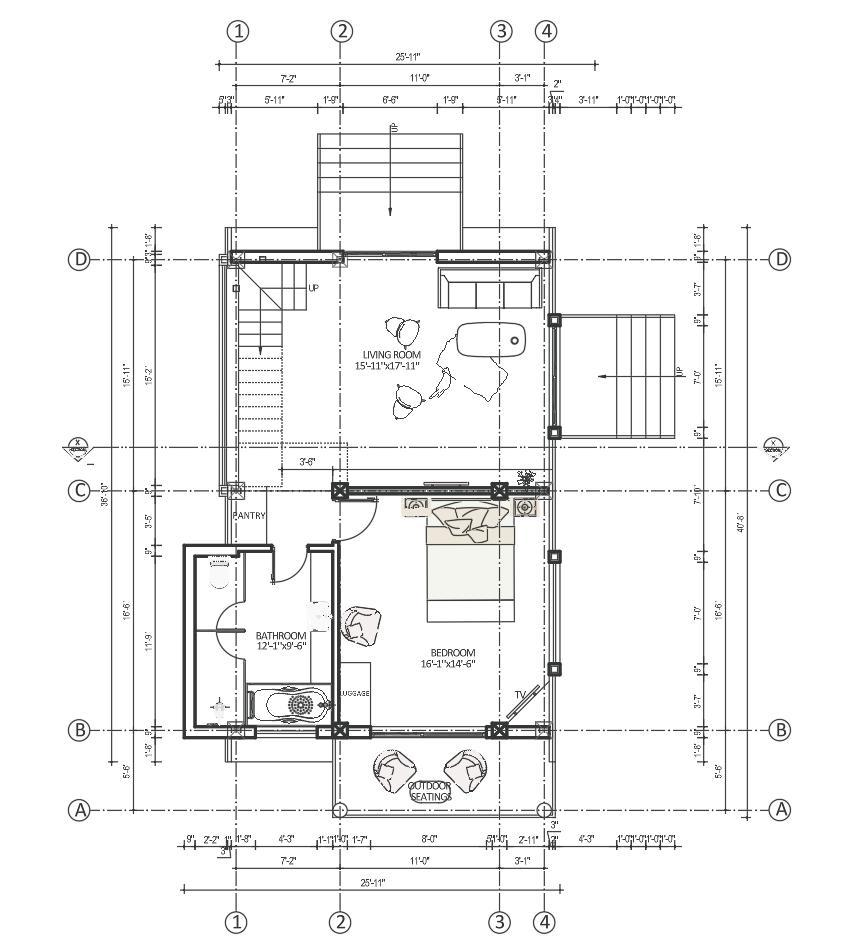
GROUNF FLOOR PLAN
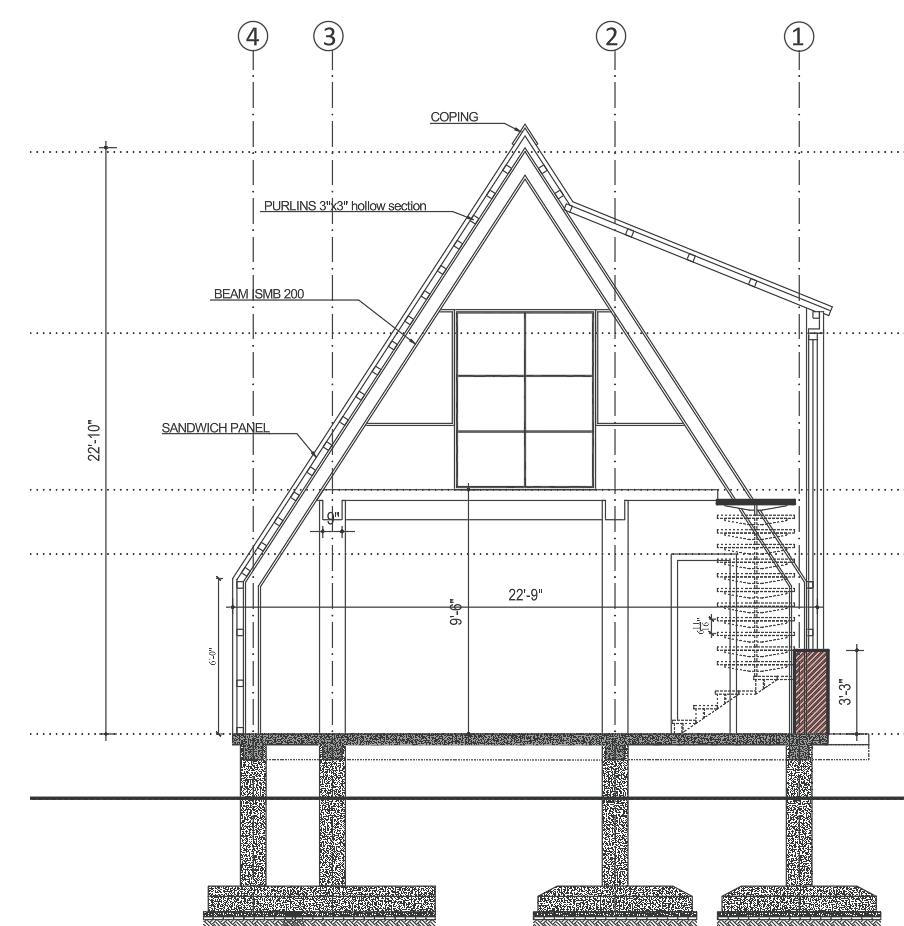
SECTION AT X-X
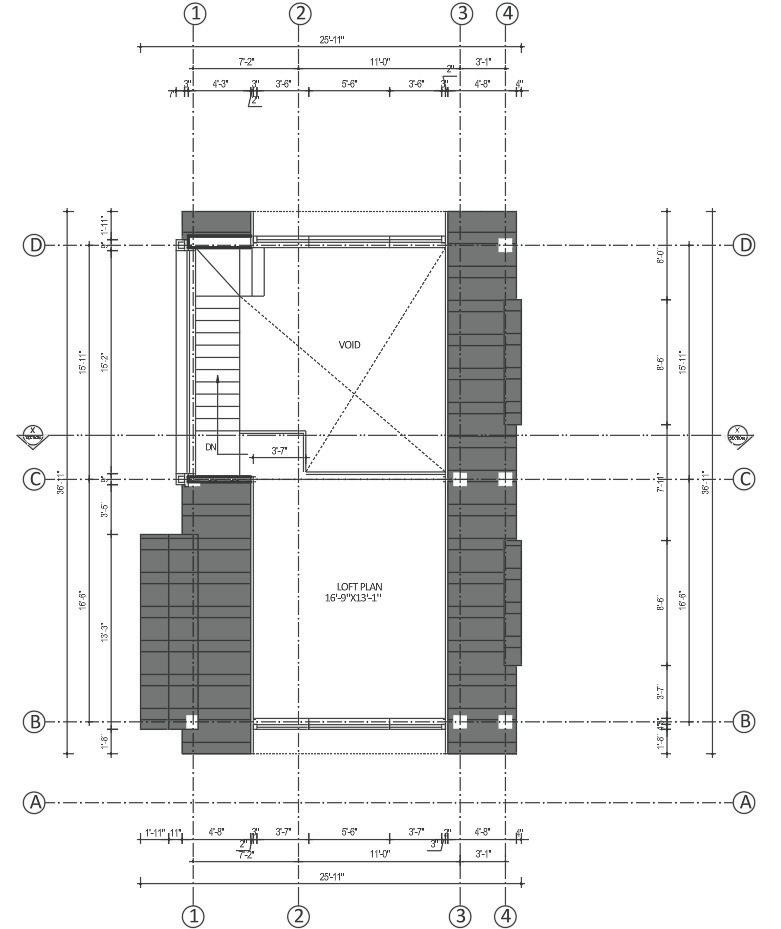
FIRST FLOOR PLAN
Note: For further details, please refer drawing B2 in annexreport.
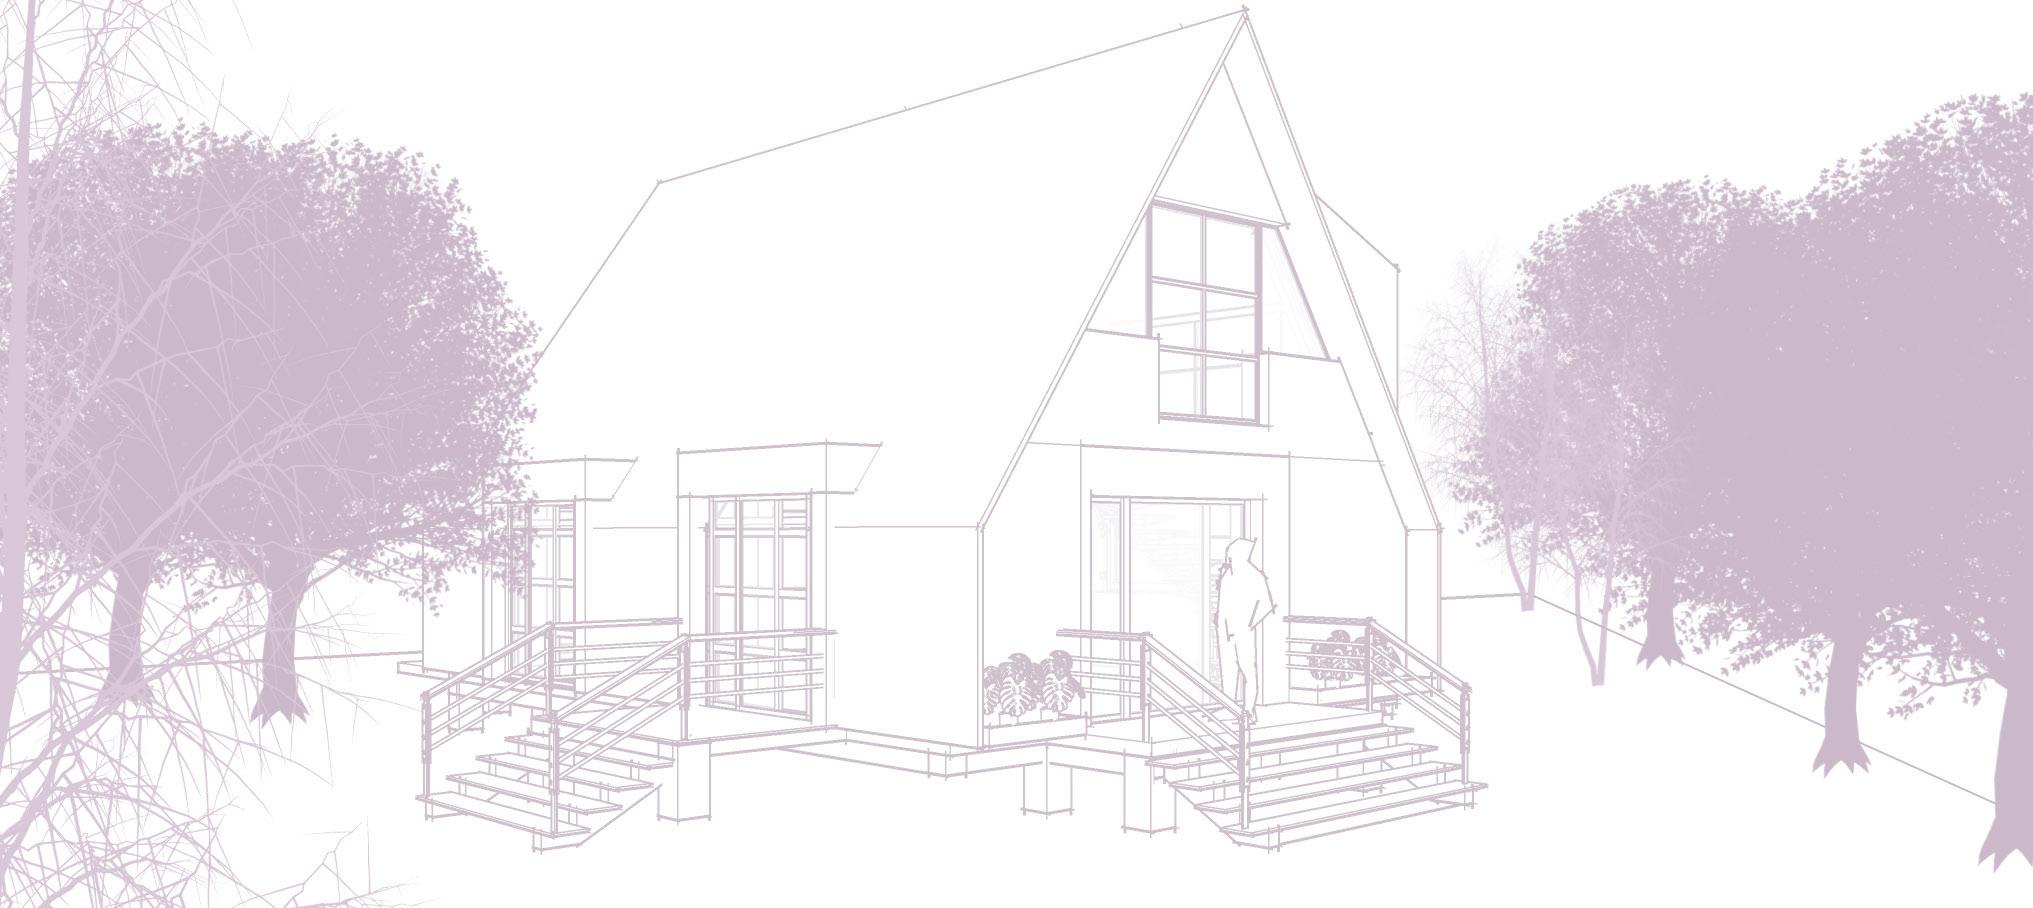
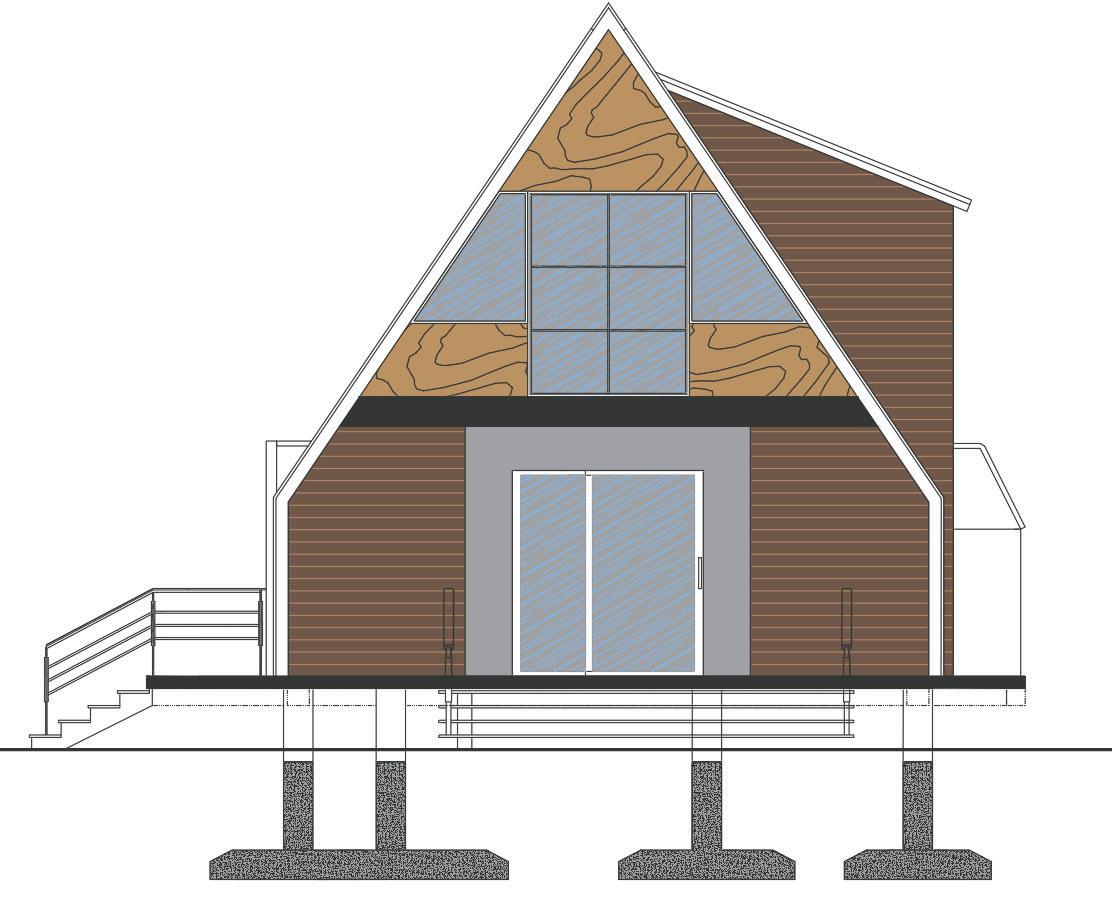
FRONT ELEVATION
FORM DEVELOPMENT
The form development process started from chosing a inspiration which can be seen at following refernce. The client wanted a traditional vibes in it so the use of wooden panel, sloped roof are included in this form. The stucture has two entrance to the open living room which connects to a bedroom. A staircase is provide which lead to a loft containing a bedroom and a attached washroom. The loft area is enclosed by a large windows, which ensures a interaction between the interior space to the outer surrounding.
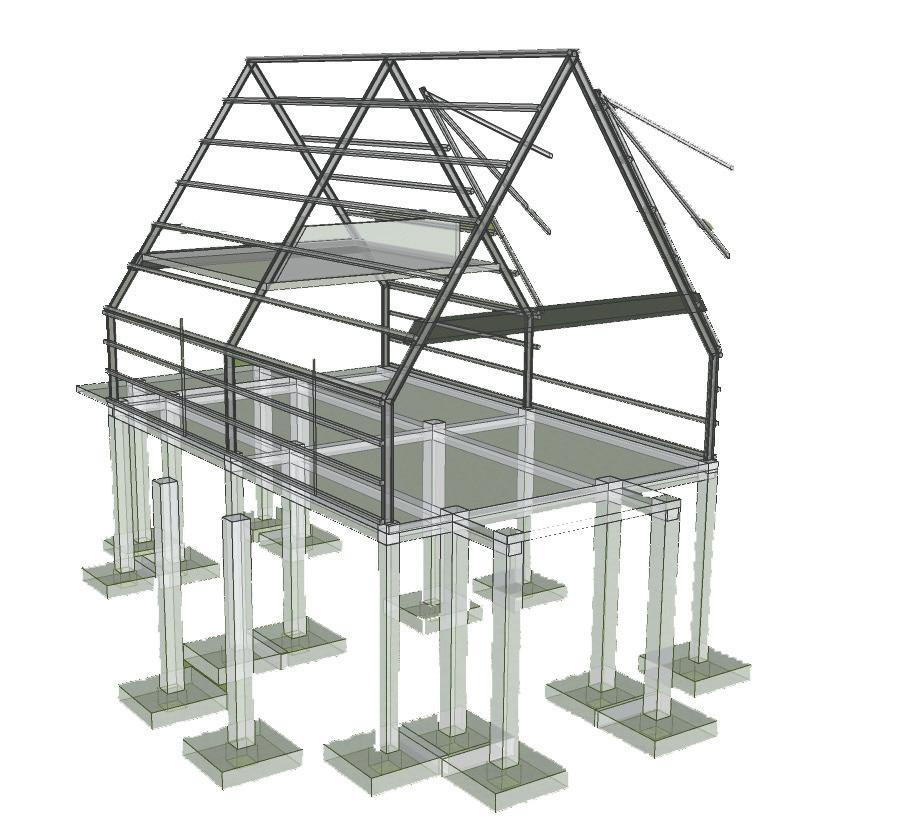
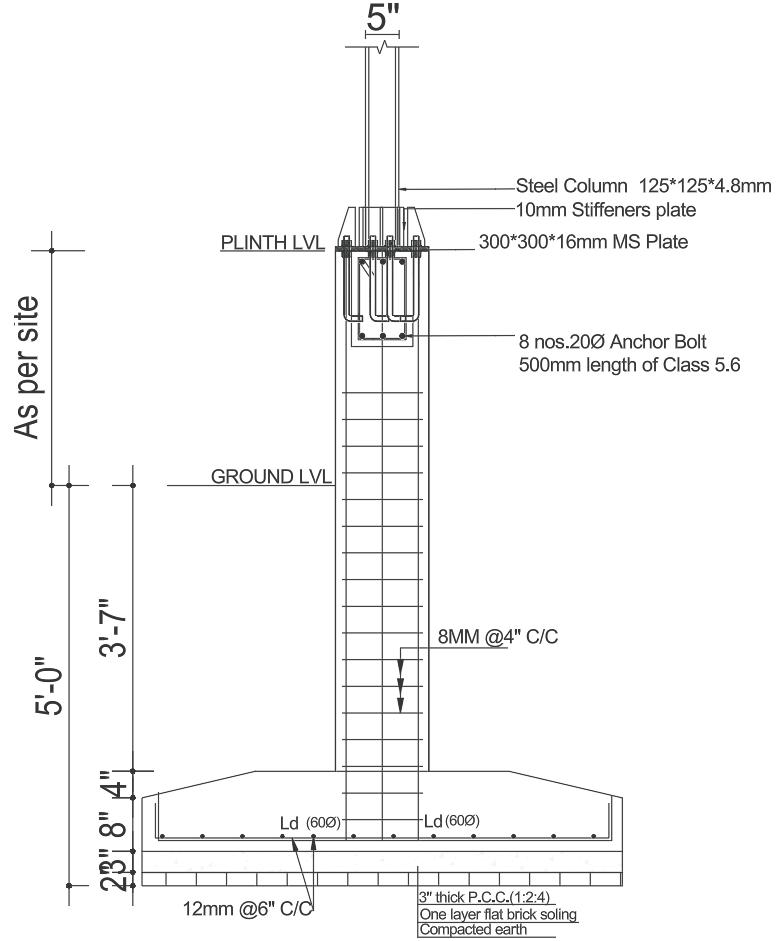
A-FRAME STRCUTURAL 3D DEMONSTRATION
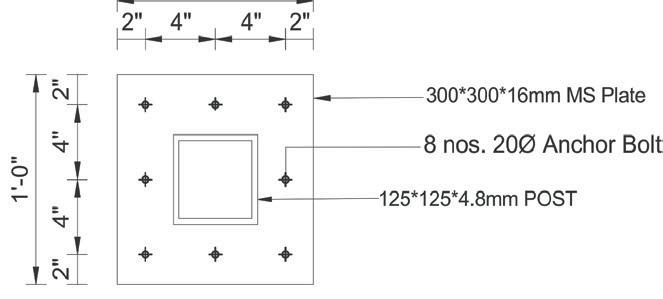
BASE PLATE PLAN
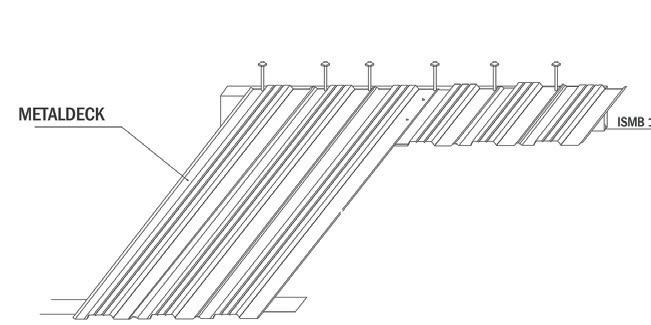
ELEVATION FOR RCC COLUMN AND METAL POST
Inspiration
TYPICAL
Sandwich panel
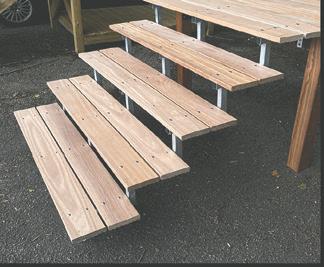
Wooden Panel Metal wooden staircase
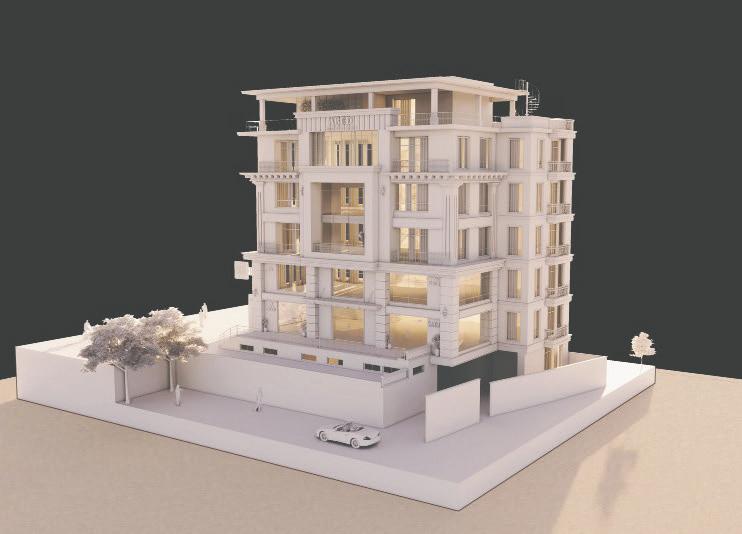
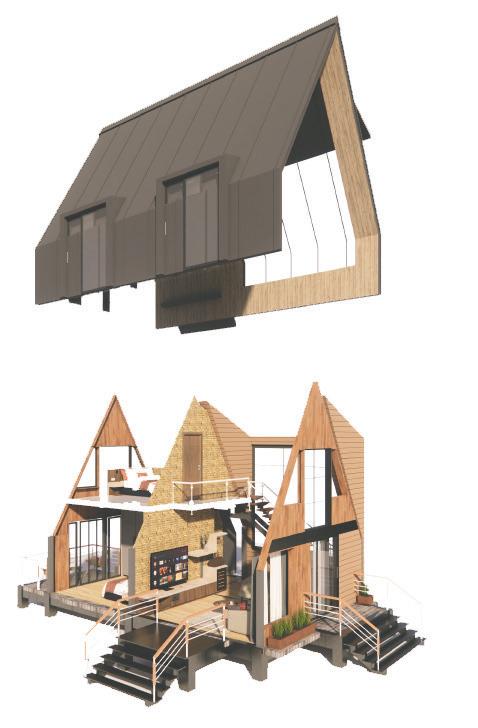
3D VISUALIZATION
EXPLODED AXONOMETRIC VIEW
The design priorities creating a luxurious, well- ventilated environment, ensuring that the interior spaces are comfortable and harmoniously integrated with the natural surroundings. The large windows and balconies are strategically placed to frame views of the resort, enhancing the connection between the interior and exterior spaces. This cohesive design ensures that each villa offers an unique and immersive experience for visitors.
Sandwich Panel Roof
Aluminum Window
Wooden Panel Wall
Living Room
Bedroom
3D VISUALIZATION
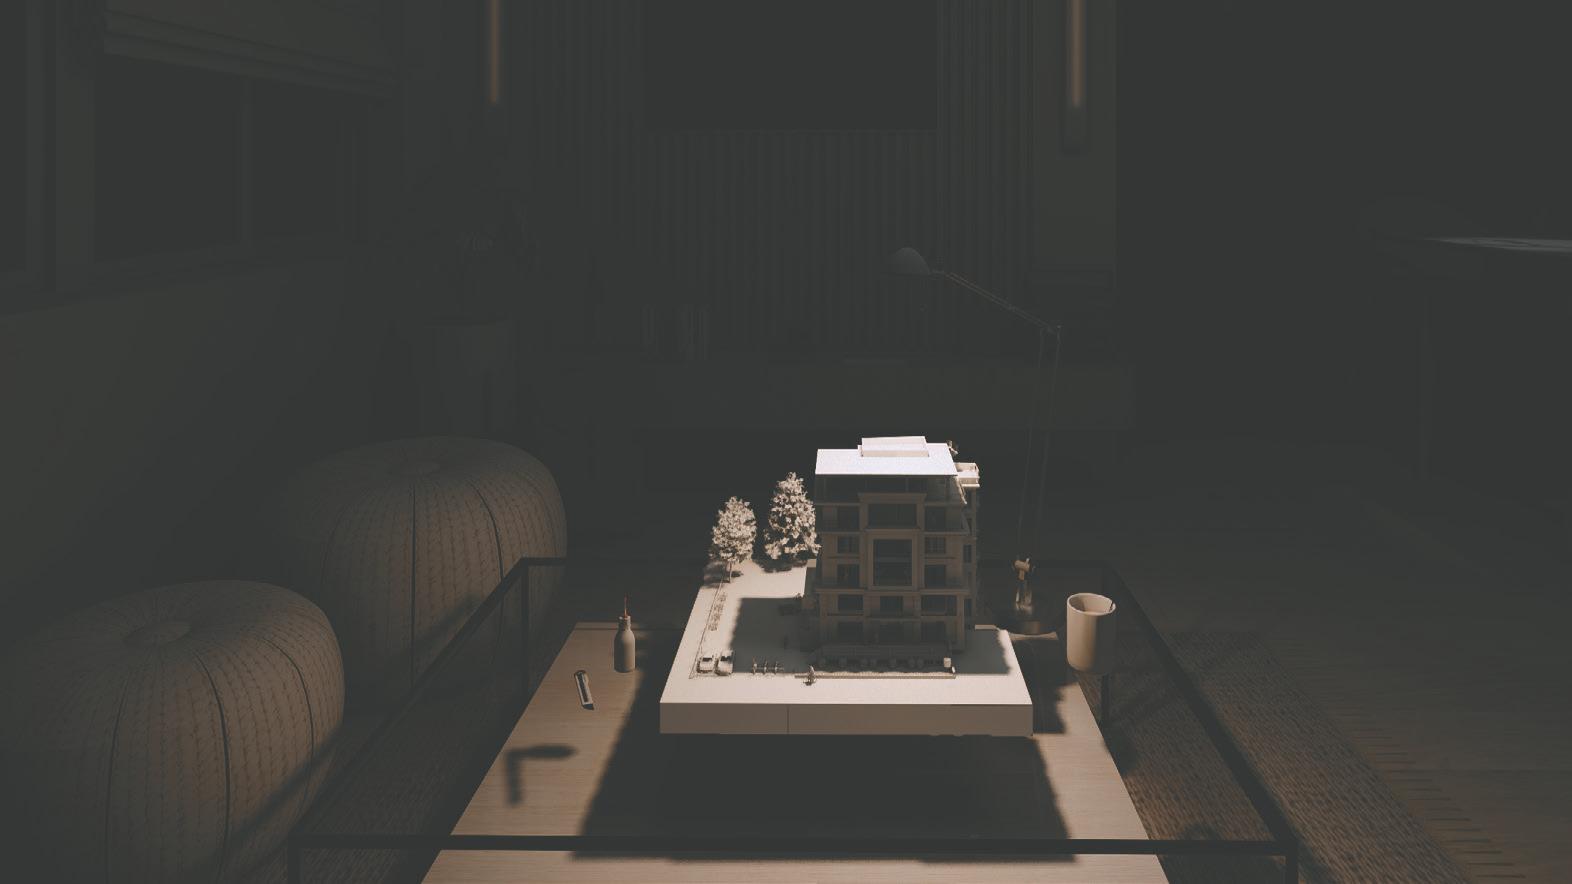
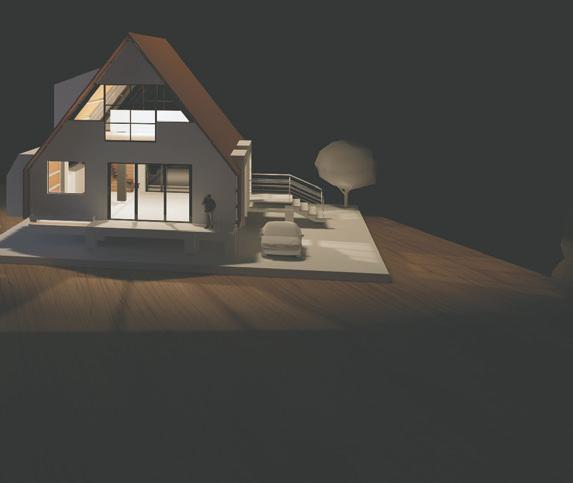
MAQUETTE MODEL RENDER
FINAL RENDER VIA LUMION
1. DESIIGN PROCESS
• Feasibility Study
WHAT I LEARNED
• Site Visit Site Survey Access Bye Laws Construction Information
2. PROGRAM FORMULATION AND ZONING
• Spaces required for villa (living room, master bedroom, balcony, attached W/C)
• Connection of different spaces
• Well placed staircase to the loft floor
3. MUNICIPAL DRAWINGS
• Floor plans, sections and elevation
4. FORM DEVELOPMENT
• Inspiration: Traditional vibes (Use of wooden panelling, sloped roof.
• Large window for views from loft floor.
5. ALTERNATIVE DESIGN IDEAS
• Metal and wooden staircase
• Two entry to the living room
6. STRUCTURAL DETAILS
• Foundation details
• RCC and metal post
• Baseplate
7.SOFTWARES
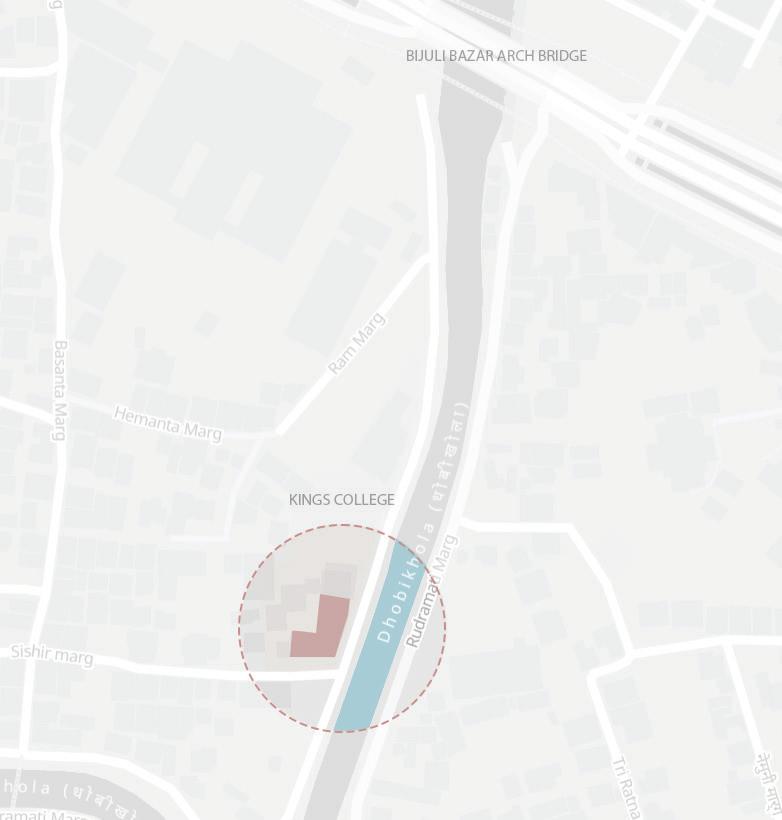
BUDDHANAGAR OFFICE
BUDDHANAGAR,KATHAMNDU
Role: Participating in planning, layout and 3d modeling
ARCHITECTURE, INTERIOR
LOCATION: BUDDHANAGAR, KATHMANDU
CLIENT: MR. ANKUSH SHRESTHA
STATUS: TILE WORKS ONGOING
ZONING AND FLOOR PLANS
BUBBLE DIAGRAM
Direct Circulation Indirect Cirulation
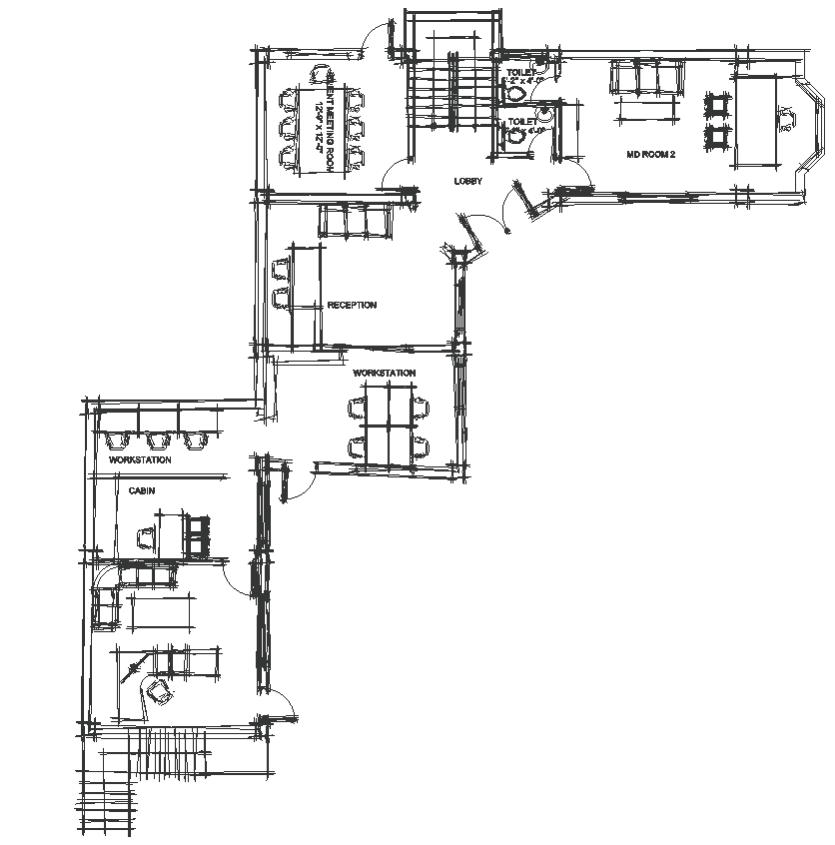
TYPICAL GROUND FLOOR ZONING
GROUND FLOOR PLAN
LAYOUT AND OPENINGS
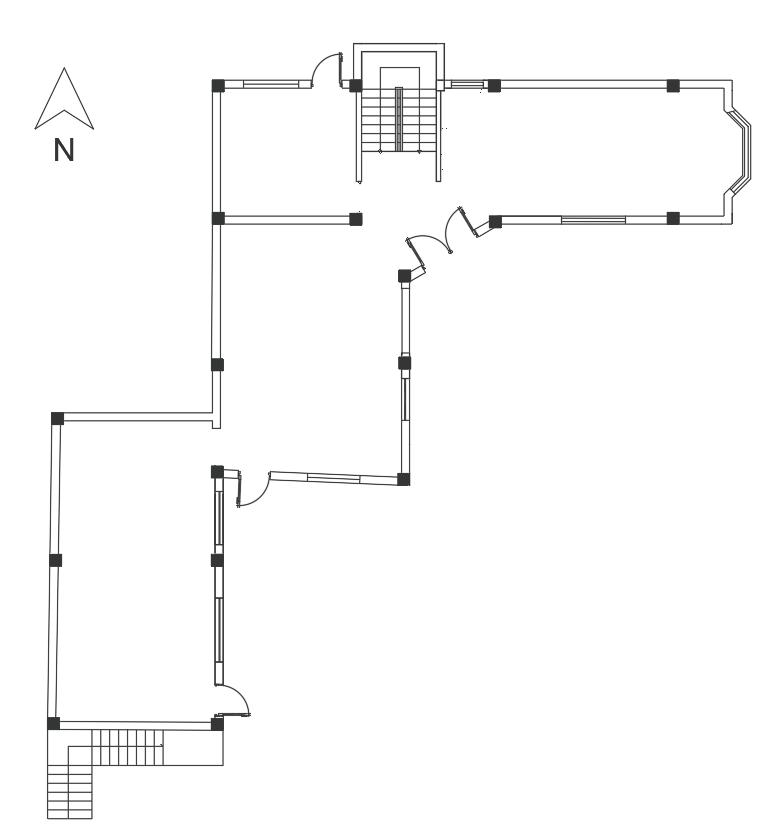
The office redesign project involved a four storey building, where we were tasked with designing the interior layout based on a provided site and floor plan. the first step in the process was to conduct site layout measurements to ensure the accuracy of the plan;s dimension. This step was crucial for cross checking and confirming that the existing structure aligns with our design intentions.
MD’s
MD’s
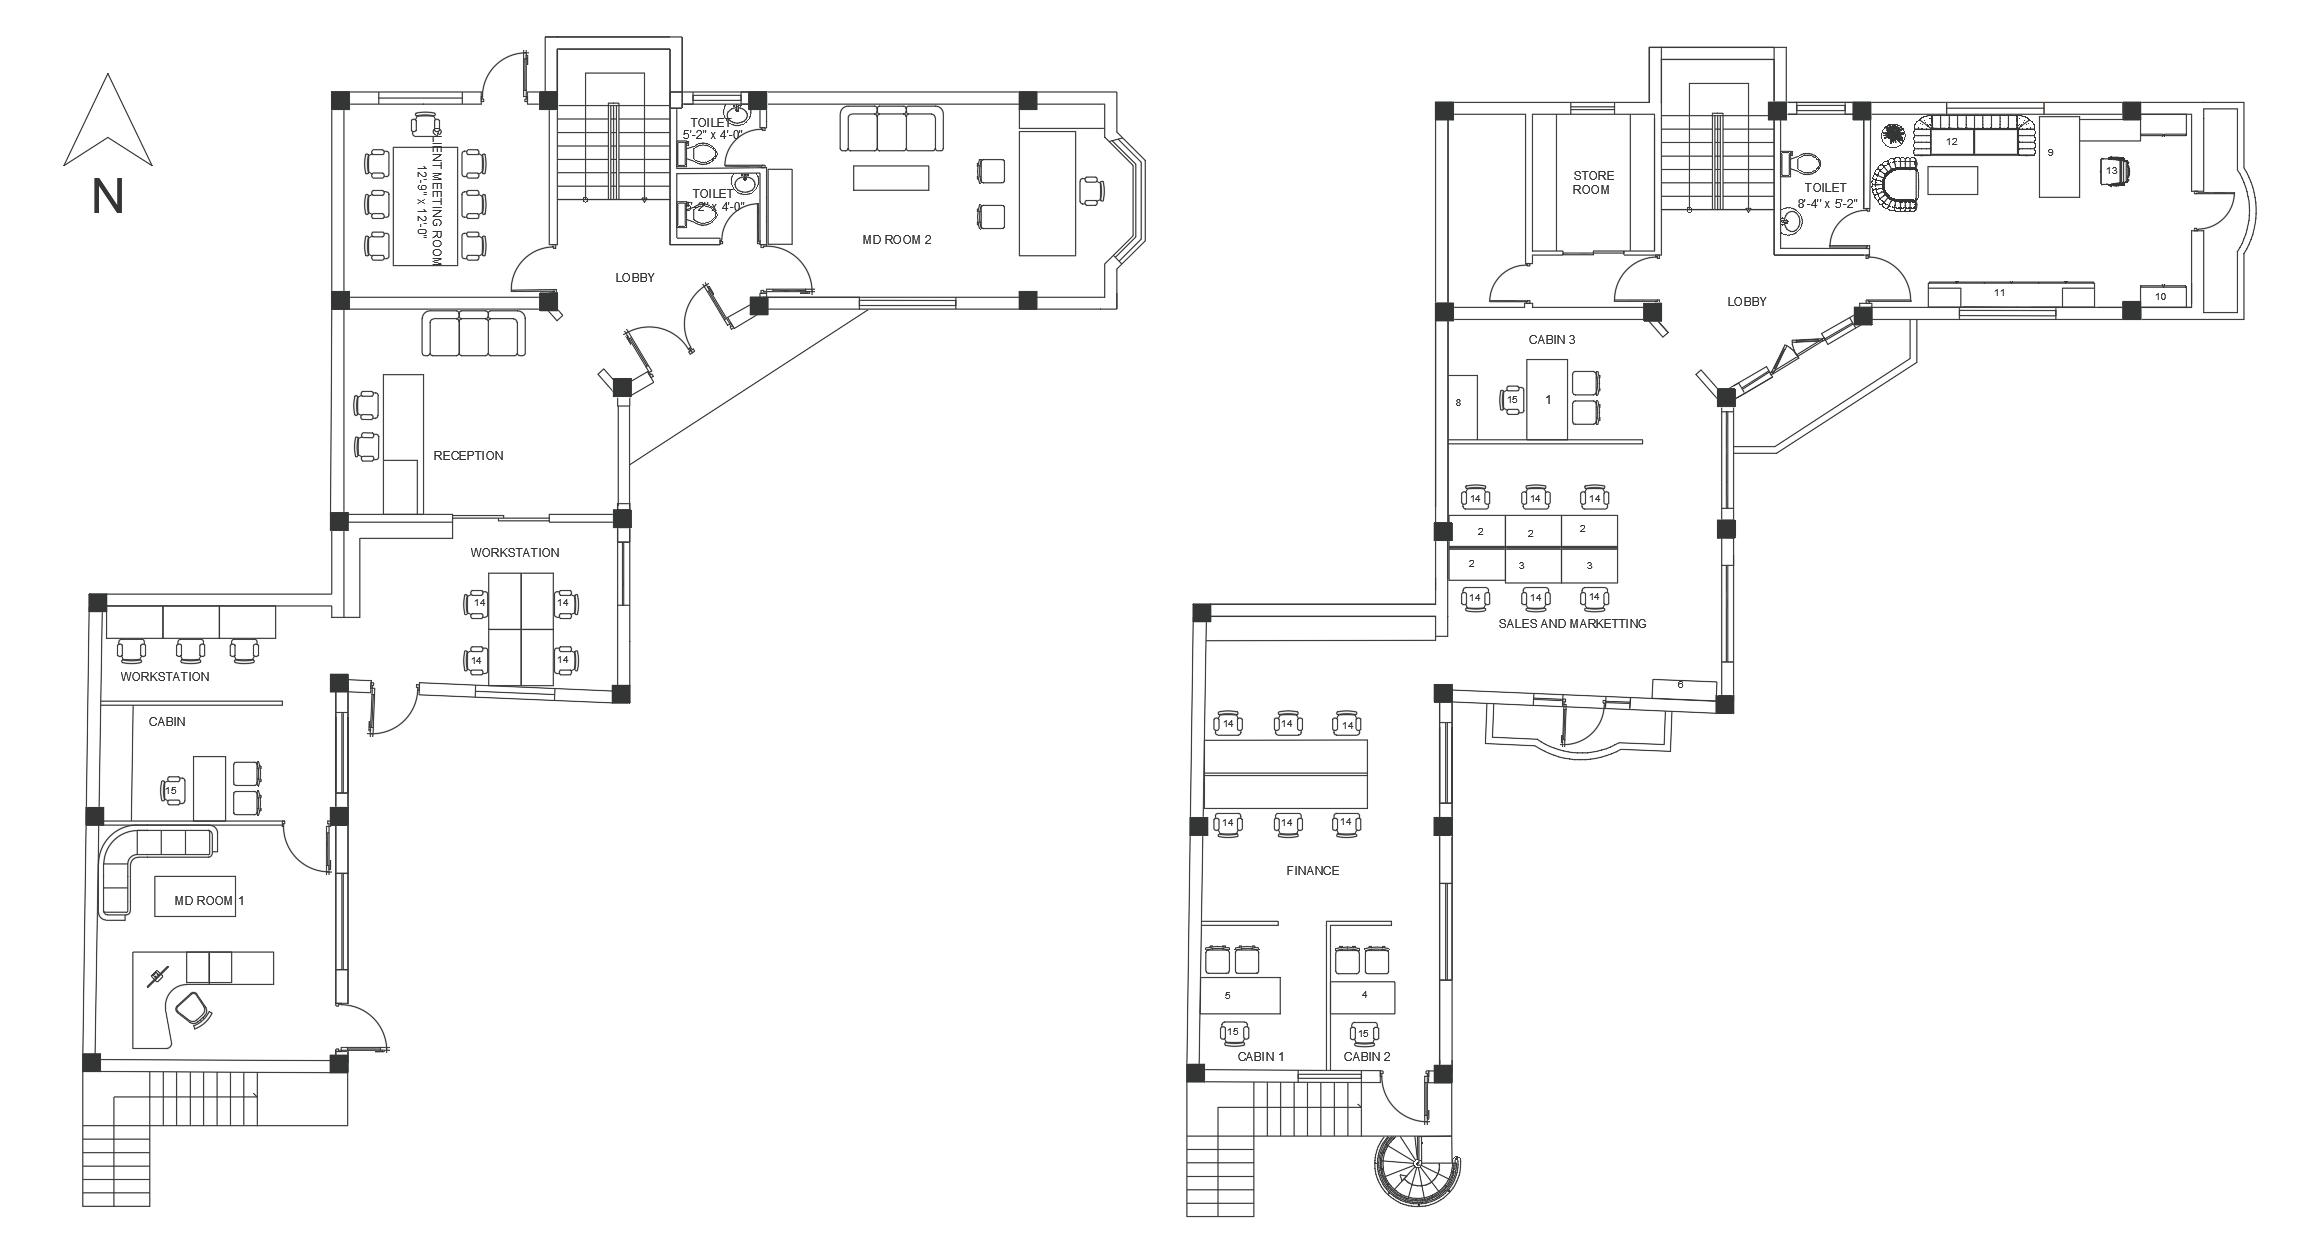
TYPICAL FLOOR PLANS
GROUND FLOOR PLAN
FIRST FLOOR PLAN
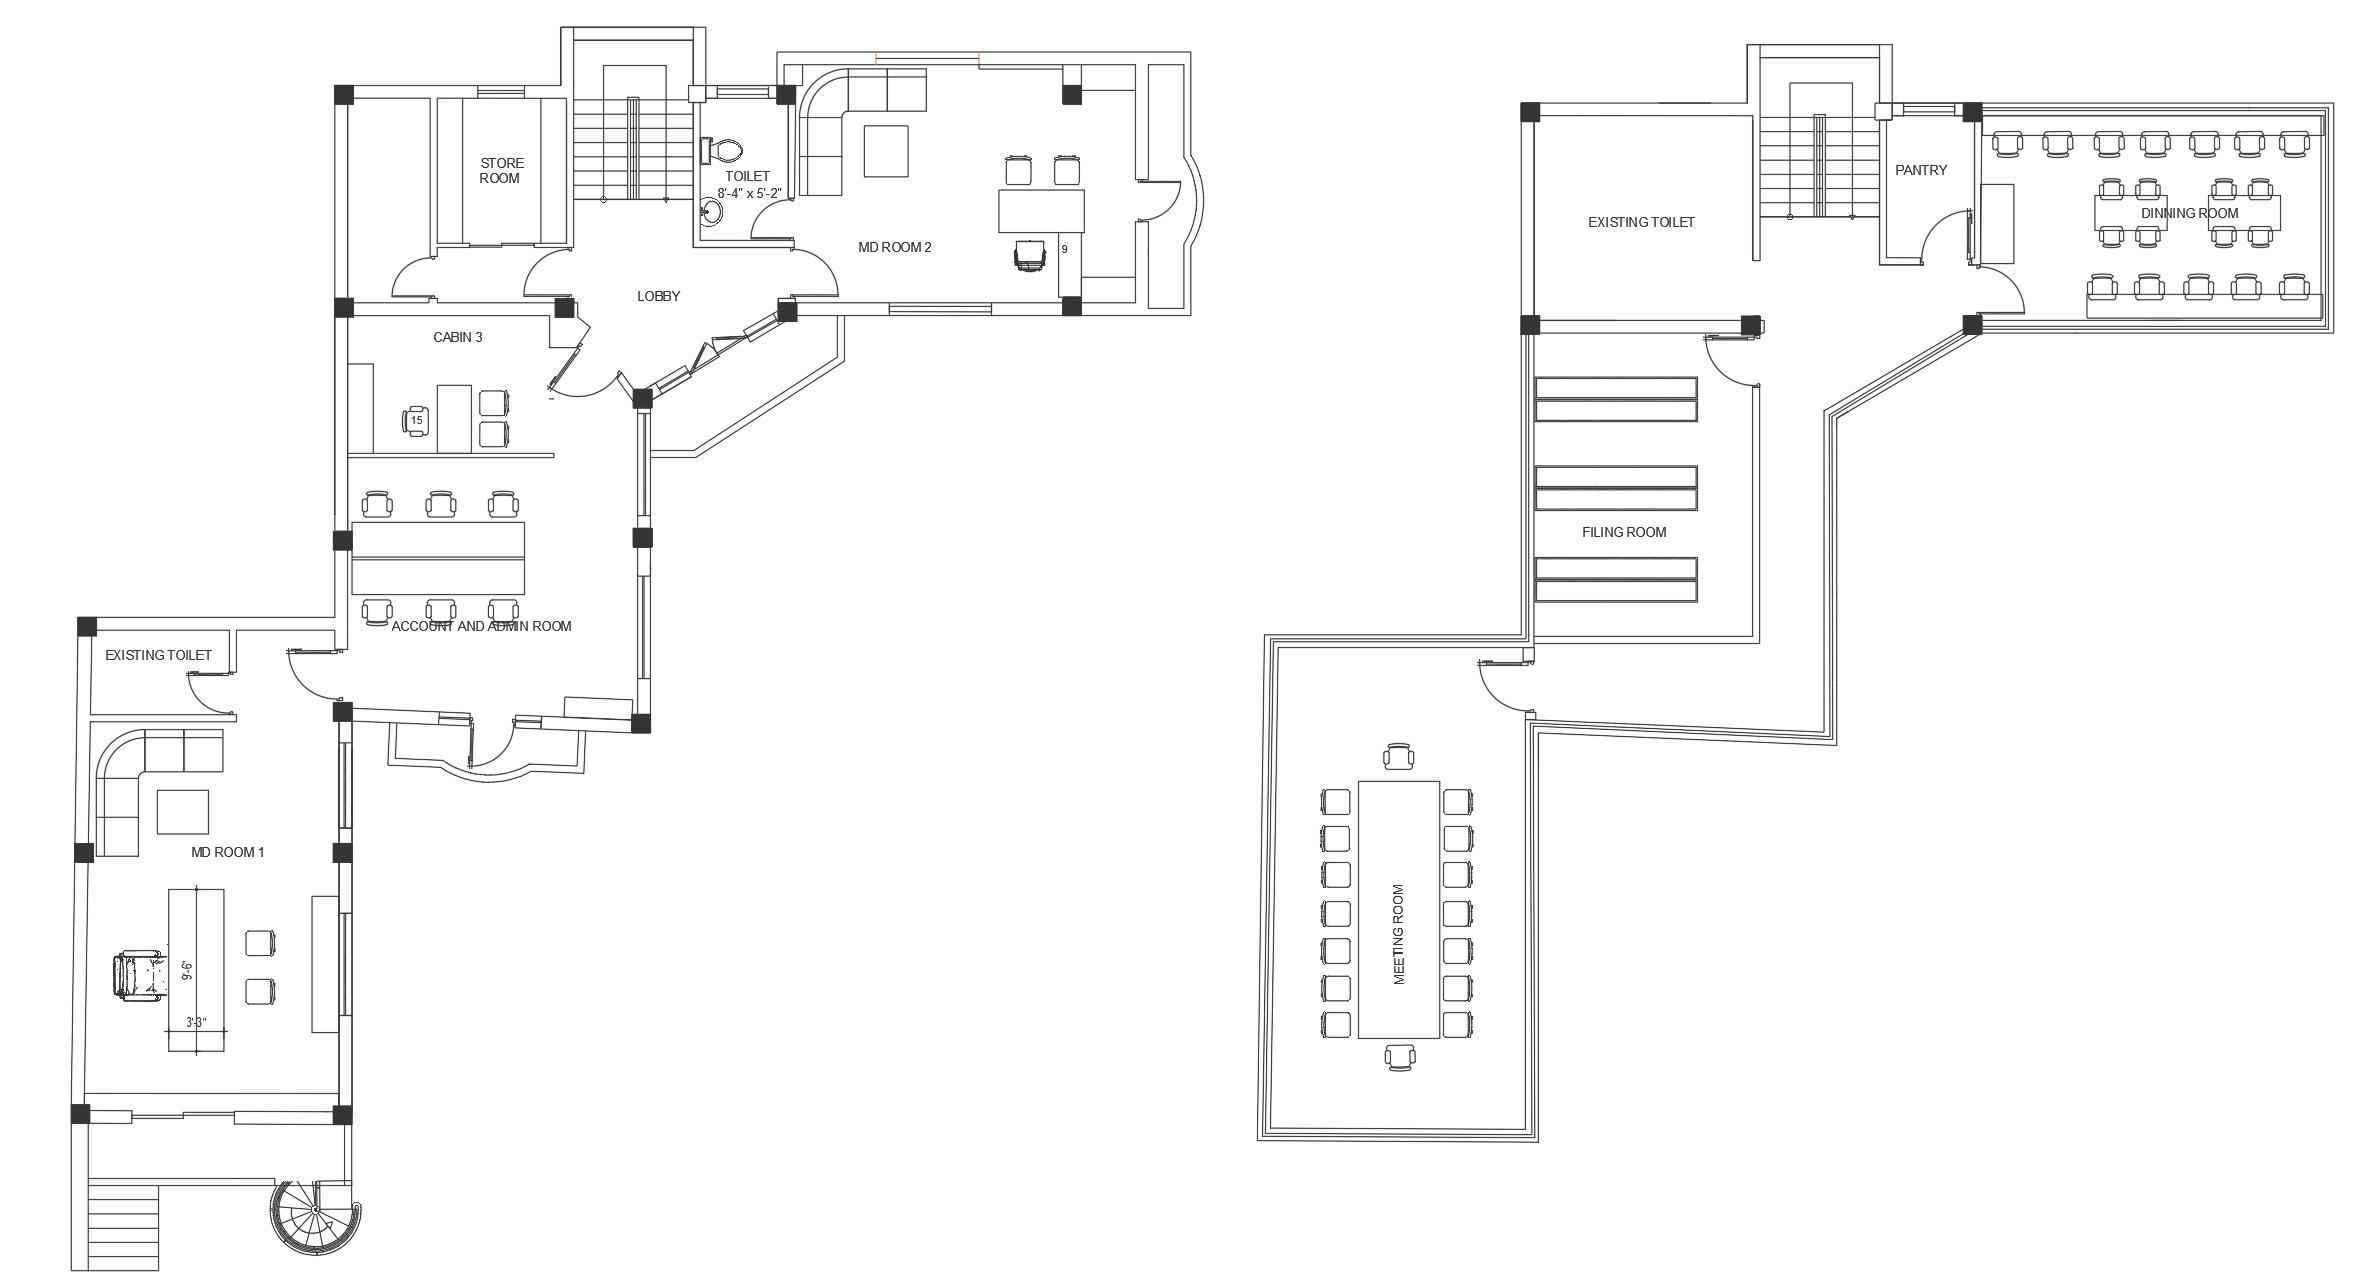
SECOND FLOOR PLAN
THIRD FLOOR PLAN
The grounf floor was designed with a reception area, two MD’s offices, workstation and a lobby for visitors, creating a functional entry. The first floor was zoned as a semi-private area, housing the finance and marketing offices, The second floor, designated as a private zone, included the account section and admin office
The third floor was planned as multifunctional space, a meeting room, file storage, and a dining area for the office staffs. Each floor was designed to balance functionality and flow, aligning with the iverall goals of the project.
Meeting and File Storage
Account section and admin room
3D VISUALIZATION
Finance and market team
Workstation and MD’s office
EXPLODED AXONOMETRIC VIEW
Main MD’s office which includes minimal themed design and a large space.v
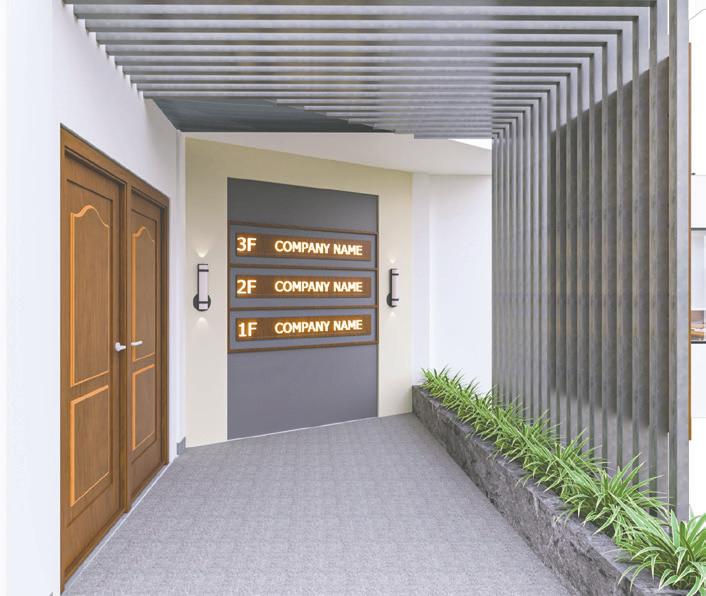
Reception acts as the centre of attraction connecting lobby space designed in minimal theme.
Workstation for the office team members
Coridoor space with the location signage.
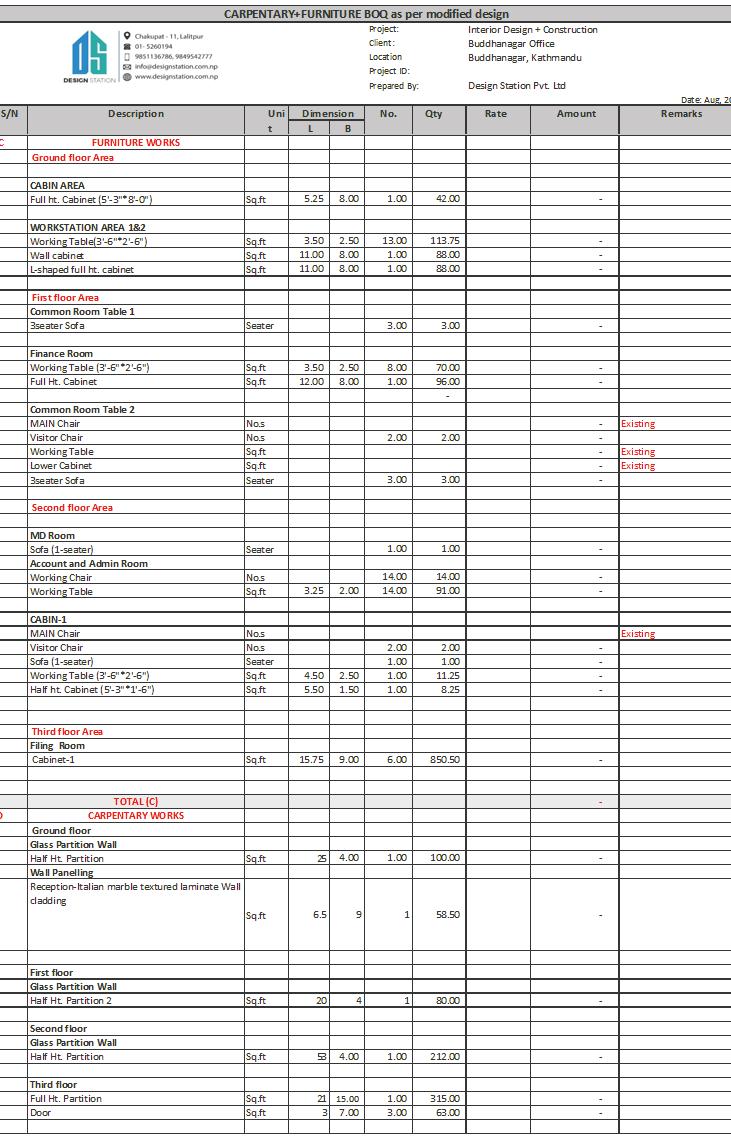
BILL OF QUANTITY (BOQ)
ESTIMATED BOQ
I was given a task to make a BOQ of interior works in which I made certain portion which includes furniture works and carpentry works of each floor
Note: Bill amount cannot be published due to office guidelines.
1. DESIGN PROCESS
• Feasibility Study
WHAT I LEARNED
• Site Visit Site Survey Access Bye Laws Construction Information
• Understanding of office circulation and activities.
• Office planning, layout and flow in irregular building.
3. MATERIALS
• Wooden panels
• Inerior louvers
• Furniture’s formicas, plyboards and attachment equipments.
4. FORM DEVELOPMENT
• Inspiration: Minimal and modern.
5. ELECTRICAL FIXTURES
• Selection and use of different light fixtures like ceiling light, stip lights and profile lights.
• Lights design under reception tables and coves in ceiling.
6. SOFTWARES
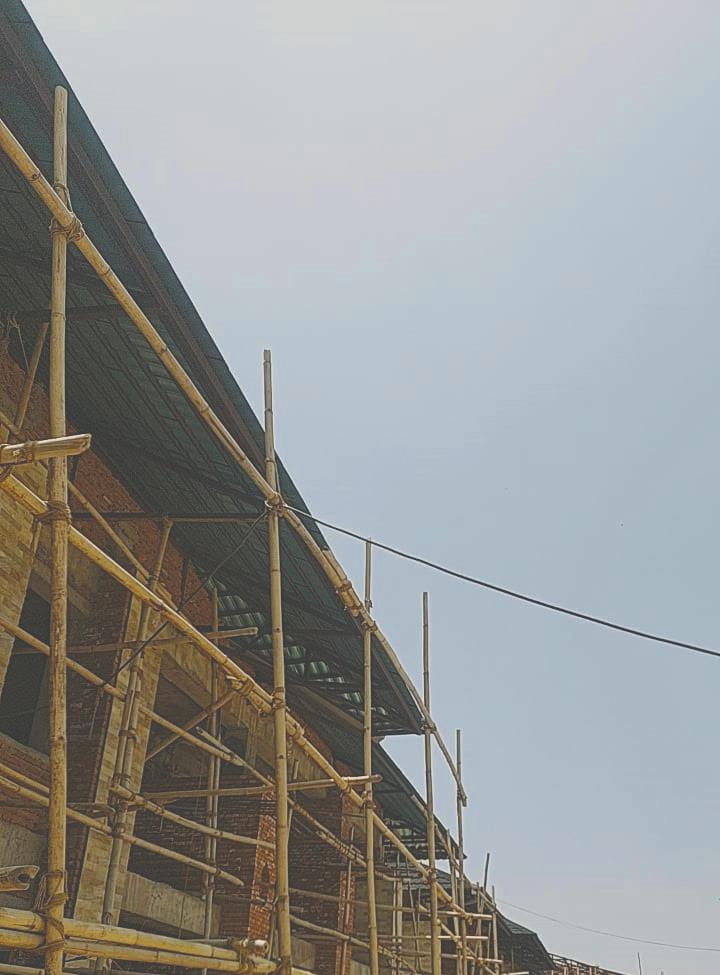
SITE OBSERVATIONS
This setction of the report consists of all the informations I gained from visiting different sites during my practicum peior. The site visits gave me a chance to observe how design are integrated in real life and how the construction works. i observed how projects progress, the importance of quality and safety, and how different teams coordinate. This section will highlgiht the key lessons I gained from these visits and how they have helped me for better visualization.
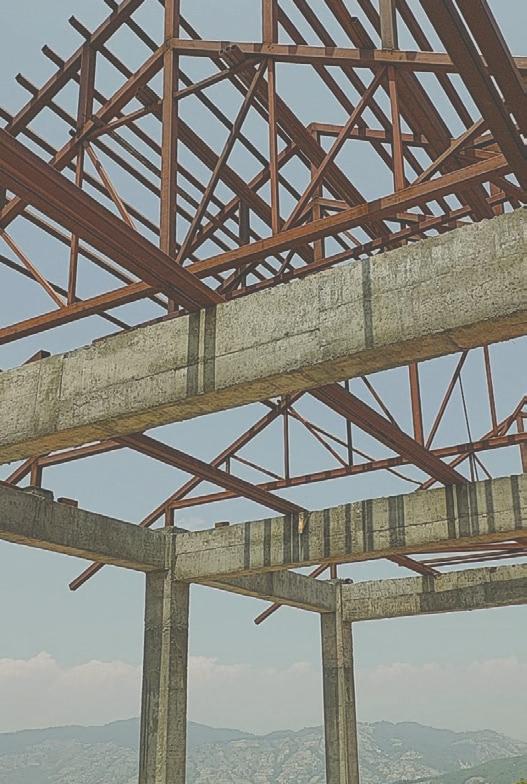
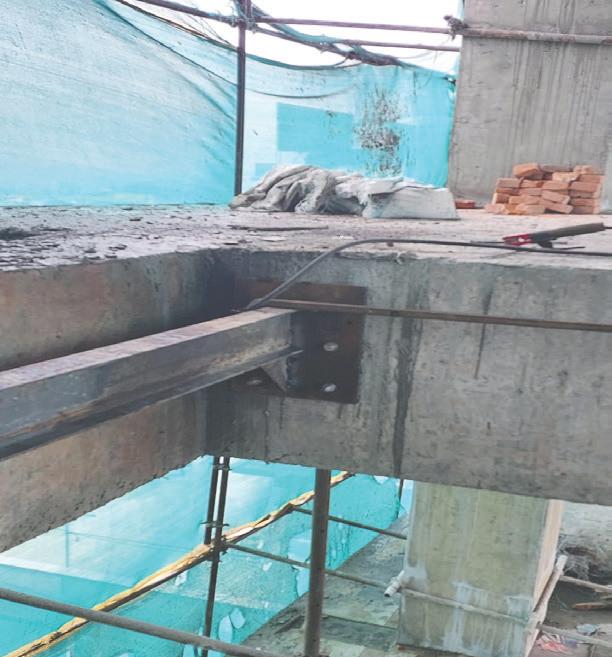
Connection of RCC structure & metal truss structure
Metal I-section post is welded in metal base plate which is bolted to RCC Beam
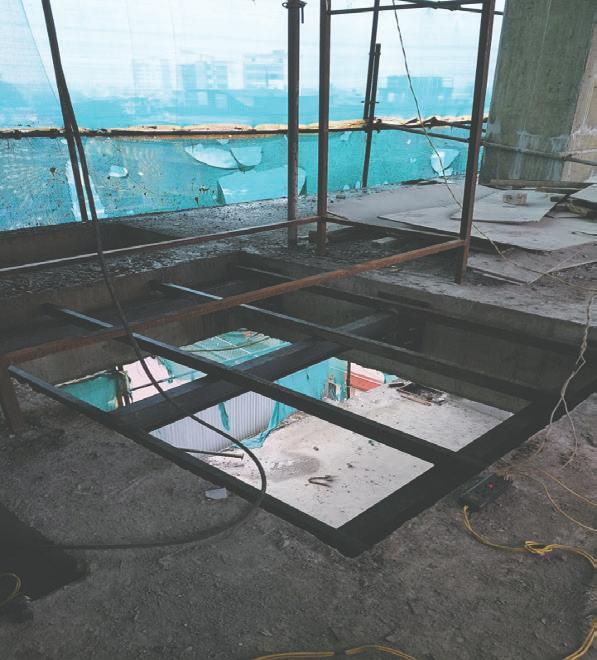
Metal post in welded on the top of I-section which act as rafters.
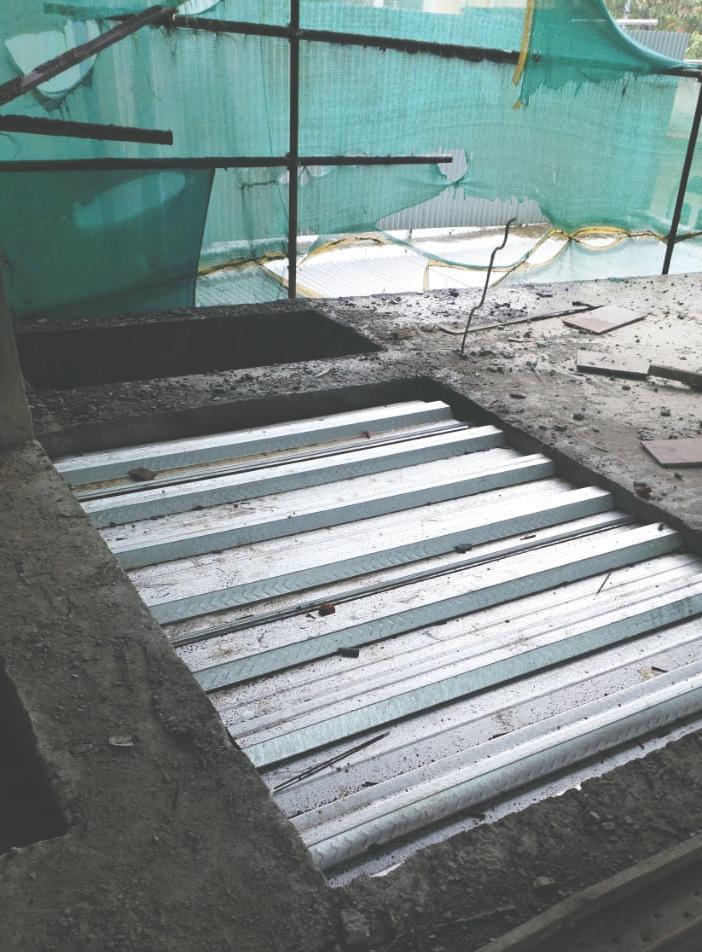
Steel base is placed on rafters after that cement agrregate will be filled.
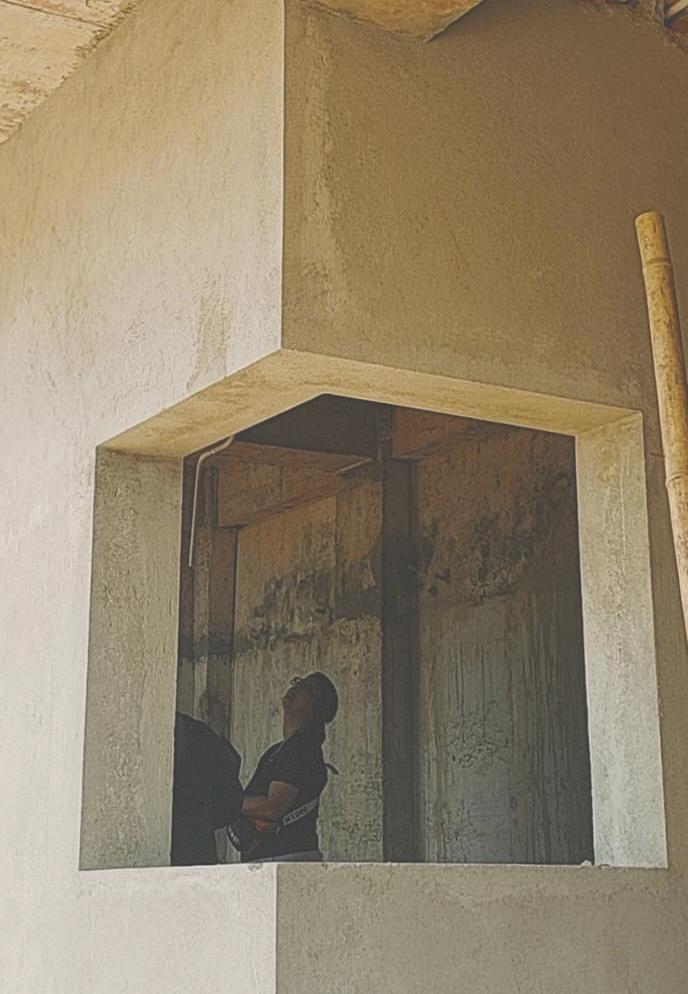
Stone and Brick Cladding Corner Window
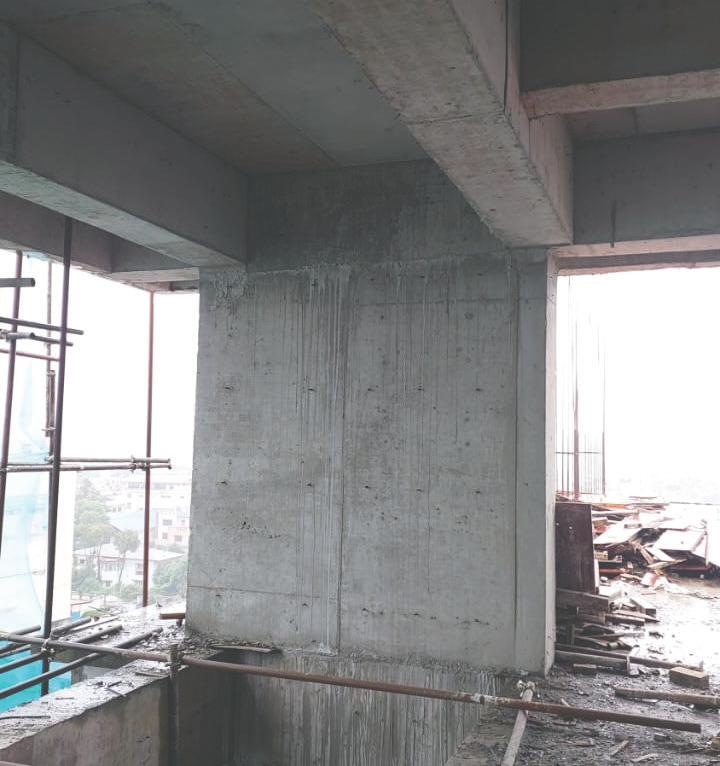
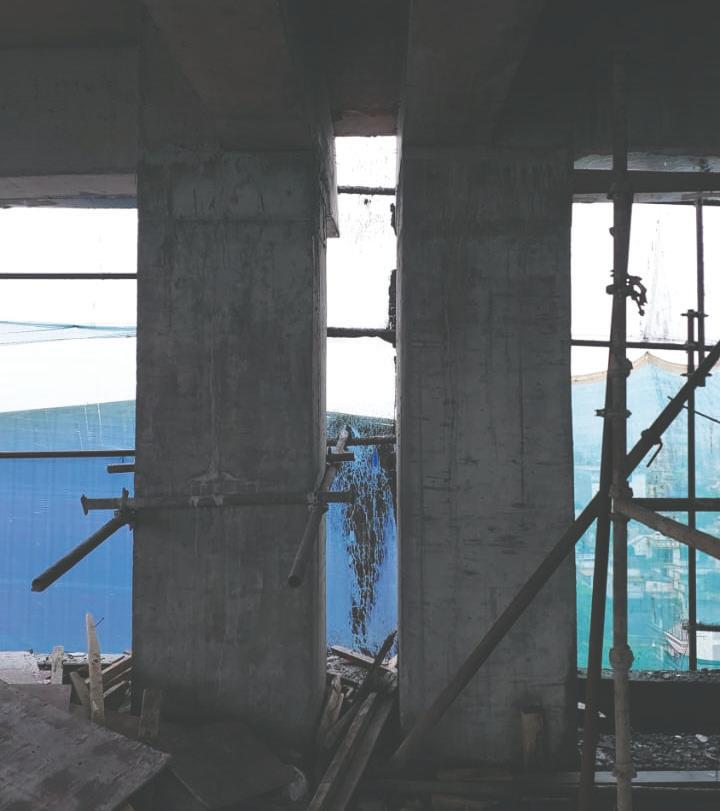
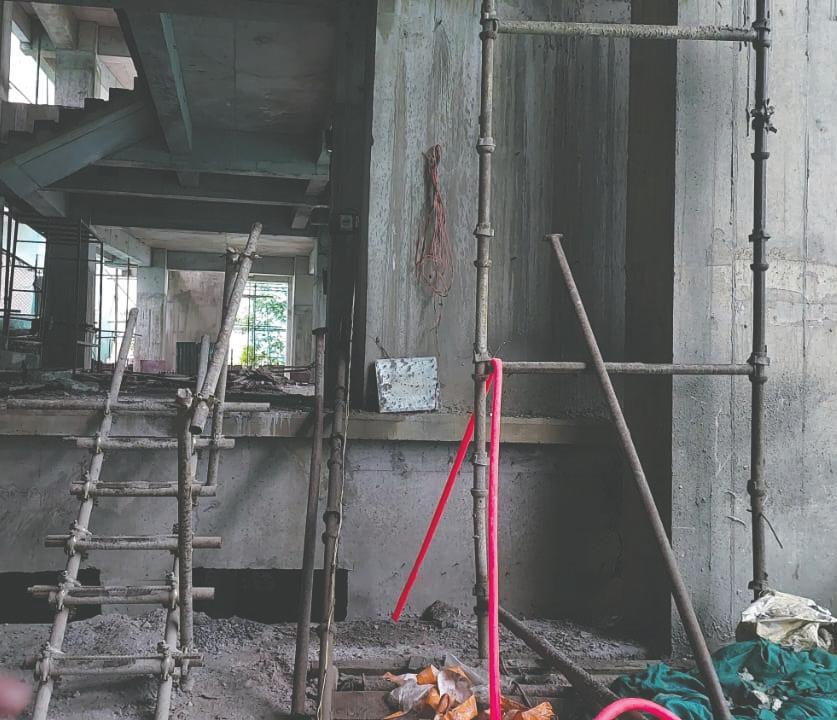
Shear Wall construction which acts as RCC column and usually found where load is more so, that it can be easily transfer the load to foundation.
Expansion joints are used to prevent crack, absorb seismic forces, ensuring structural stability.
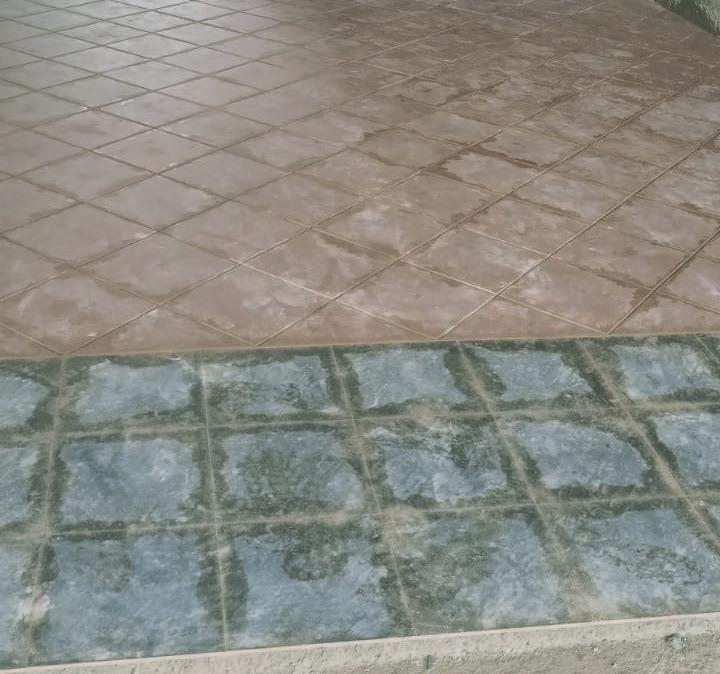
Different slab level in this picture to insure basement height and proper lighting in basement.
Shear Wall construction which acts as RCC column and usually found where load is more so, that it can be easily transfer the load to foundation.
CONCLUSION
Lastly, My internship at [Architectural Firm Name] has been an incredibly valuable experience. I got to work on different projects, from small interior project to bigger commercial building and resort, which helped me apply what I’ve learned in school to real-life situations.
During the internship, I gained important skills in project management, design, and communicating with clients. I also learned a lot by using different softwares and participating in site visits and meetings. This gave me a better understanding of how architecture works from start to finish.
One of the highlights was working on Nice Education Consultany , where I was able to work as site supervisior which extremely helped me out to figure real life project progress. This experience not only improved my technical skills but also helped me understand how important the site observations and how the works are carried out.
In short, my time at Design Station has played a big role in my development as an architect. I’m thankful for the guidance I received from the team and excited to use what I’ve learned in my future studies and career.
BRIDGING THEORY AND PRACTICE
Learned theoretical concepts results in real life experience.
PRACTICAL KNOWLDEGE
Enhanced understanding of practical aspects of architecture worked on real projects. Gained hands on experienced with architectural software and tools.
CLIENT INTERACTOIN
Experienced the process of client agreements and negotitations. Learned the importance of clarity, clear communication and understanding clients’ needs.
PROJECT MANAGEMENT
Gained insightsinto project timelines and deadlines. understood the workflow from intial design to project completion.
PROBLEM SOLVING SKILLS
Faced real world challenges and developed solutions. Improved critical thinking and adaptability in dynamic situations.
PERSONAL GROWTH
Improved time management and organizational skills. Developed a professional attitude and work ethic.
“In the world of architecture, learning never stops. Every project is a new chapter in the book of knowledge, and I’m committed to reading every word.”