Framework-supported restorations
91
style book
Margin
After removing the resulting inhibition layer on the opaquer with a disposable sponge (without solvent), the cervical and interdental areas were characterized with a 50:50 mixture of SR Nexco Stains clear and Effect orange (Fig. 5). This characterization enhances the in-depth effect.
Dentin
Incisal
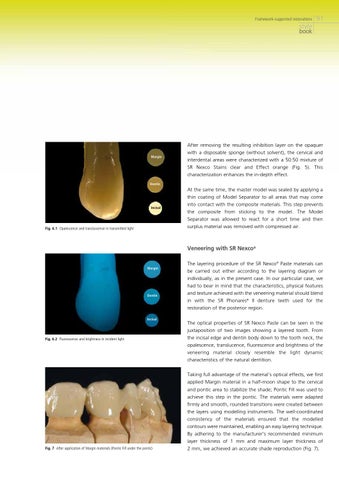
Fig. 6.1 Opalescence and transluscence in transmitted light
At the same time, the master model was sealed by applying a thin coating of Model Separator to all areas that may come into contact with the composite materials. This step prevents the composite from sticking to the model. The Model Separator was allowed to react for a short time and then surplus material was removed with compressed air.
Veneering with SR Nexco®
Margin
Dentin
Incisal
Fig. 6.2 Fluorescence and brightness in incident light
Fig. 7 After application of Margin materials (Pontic Fill under the pontic)
The layering procedure of the SR Nexco® Paste materials can be carried out either according to the layering diagram or individually, as in the present case. In our particular case, we had to bear in mind that the characteristics, physical features and texture achieved with the veneering material should blend in with the SR Phonares® II denture teeth used for the restoration of the posterior region. The optical properties of SR Nexco Paste can be seen in the juxtaposition of two images showing a layered tooth. From the incisal edge and dentin body down to the tooth neck, the opalescence, translucence, fluorescence and brightness of the veneering material closely resemble the light dynamic characteristics of the natural dentition. Taking full advantage of the material’s optical effects, we first applied Margin material in a half-moon shape to the cervical and pontic area to stabilize the shade; Pontic Fill was used to achieve this step in the pontic. The materials were adapted firmly and smooth, rounded transitions were created between the layers using modelling instruments. The well-coordinated consistency of the materials ensured that the modelled contours were maintained, enabling an easy layering technique. By adhering to the manufacturer’s recommended minimum layer thickness of 1 mm and maximum layer thickness of 2 mm, we achieved an accurate shade reproduction (Fig. 7).