5 minute read
International Journal for Research in Applied Science & Engineering Technology (IJRASET)


ISSN: 2321-9653; IC Value: 45.98; SJ Impact Factor: 7.538
Advertisement
Volume 11 Issue II Feb 2023- Available at www.ijraset.com
12) At the base now connect the water tank to the exit and allows water to move up hill as long as the sample is saturated. On the sample top the free water gather for a depth of about 100 mm. Alternatively by subjecting the specimen to a steadily rising vacuum with the bottom exist closed, the soil of low permeability can be filled to extract air from the voids. Slowly raise the vacuum to 7000 mm of mercury and depend on the soil form to manage it for 15 min. or more. Close both the outlet after sample is filled.
13) With the anticipated water the empty portion of the mould is filled with no effect on soil.
14) At end remove the tank from the exist.
15) Put water in standpipe
16) By removal of stop cock allow the water to remove all air in the mould.
17) Reinsert the cock.
18) Select h1 and h2. Calculate? h1h2.
19) This step involves fall from h1 to h1 h2 and from that to h2.
20) Replication of the 19 step at least two times, after altering the h1 and h2.
21) Halt the water flow and parts need to be detached.
22) For the water content determination take now a small amount of the soil specimen.
E. Unconfined Compressive& Shear Strength
The strength of unconfined compressive is given as:
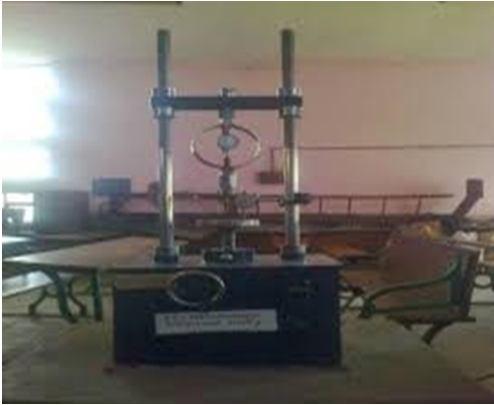
Equipment Used
1) Unconfined compression apparatus
2) Proving ring
3) Dial gauge
4) Balance
5) Oven where A= A0
1– ɛ
6) Stopwatch
7) Sampling tube
8) Mould
9) Sample extractor
10) Knife
11) Vernier caliper
Practice
Figure.4: Apparatus for Unconfined Compressive Strength and Shear Strength
Prepare the soil specimen at the desired water content and density in the large mould.
Push the sampling tube into the big mould, and remove the sampling tube filled with soil. For undisturbed sample, push the sampling tube into the clay sample.
Saturate the soil sample in the sampling tube by an ideal method
Coat the split mould gently with a thin layer of grease. Weigh the mould.
Extrude the sample out of the tasting tube into the splitting mould; utilize the sampling e tractor and the knife.
Cut the two ends of the specimen in the split mould and weigh the mould with the specimen.
Get rid of the specimen from the split mould by splitting the mould into 2 parts
ISSN: 2321-9653; IC Value: 45.98; SJ Impact Factor: 7.538
Volume 11 Issue II Feb 2023- Available at www.ijraset.com
Determine the length and size of the specimen with Vernier callipers.
Place the specimen on the bottom plate of the compression device, change the upper plat e to make contact with the specimen
Change the dial gauge and providing ring gauge to zero.
Apply the compression load to cause an axial strain at the rate ofi1/2 to 2% per minute.
Record the dial gauge reading, and the offering ring reading everythirty seconds up to a stress ofi6%. The reading may be taken after every 60 seconds for stress in between 6% to 12% and every 2 minutes oriso beyond 12%
Continue the test till failure surface have plainly established or up until an axial strain of 20% is reached.
Procedure the angle in between the failure surface areas and the horizontal, if possible.
Take the sample for the failure zone of the specimen for the water material decision.
F. Standard Proctor Compaction Test
Compaction simply means to decrease air in the soil and make it dense. It shows the dryness in soil. Between the dry density and water material a curve is strained to obtain the max dry density & the optimum water content. M represents total mass, V represents the volume of soil & w represents the water content
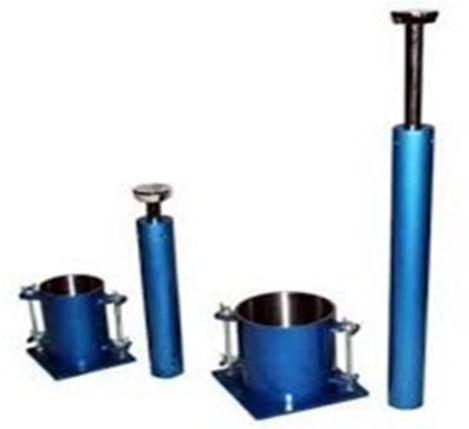
1) Apparatus Used a) The 1000ml capacity-based compaction mould b) Rammer mass 2.6 kg c) Detachable base plate d) Collar, 60 mm high e) 4.75 mmIS sieve f) Oven g) Desiccator h) Weighing balance with 1 gm accuracy. i) Large mixing pan j) Straight edge k) Spatula l) Graduated jar m) Mixing tools, spoons, trowels etc
Figure 5: Standard Proctor Compaction Test Apparatus.
2) Practice a) Take about 20 kg of air-dried soil. Sieve it through 20mm and 4.75 IS sieves. b) Determine the percentage kept on 20mm screen, and 4.75 mm screen and the portion pas sing 4.75 mm sieve.do not use the oil retained on 20mm sieve. c) Figure out the ratio of portion kept and that passing 4.75 mm screen. d) If portion retained on 4.75 mm sieve is greater than 20, utilize the large mould ofi150m m diameter. e) If it is less than 20%, the basic mould ofi100mm size can be utilized. The following procedure is for standard mould. f) Mix the soil retained on 4.75 mm screen and the passing 4.75 mm screen in the proportions determined in step 2 to obtain about 16 to 18 kg of soil specimen. g) Clean and dry the mould and the base plate to the closest 1 gm.
ISSN: 2321-9653; IC Value: 45.98; SJ Impact Factor: 7.538
Volume 11 Issue II Feb 2023- Available at www.ijraset.com h) Take about 16 to 18 kg of soil specimen. Include water to it to bring the water c material to about 4% if the soil is sandy and to about 8% of the soil is clayey. Keep the soil in an airtight container for about 18 to 20 hours for maturing. Mix the fully grown soil completely. Divide the processed soil into 6 to 8 parts i) Attach the collar to the mould. Place the mould on a strong base. j) Take about 21/2 kg of the processed soil, and position it in the mould in 3 layers. k) Take about one third the amount first, and compact it by providing 25 blows of the ram mer. The blows need to be uniformly dispersed over the surface area of each layer. The t op of the very first layer should be scratched with a spatula before positioning the 2nd layer. The 2nd layer must likewise be compacted by 25 blows of rammer. Similarly, position on the 3rdilayer and compact it. The amount of soil used must be just sufficient to fill the mould and leaving about 5mm above the top of the mould to be struck off when the collar is gotten rid of. l) Get rid of the collar and cut off the excess soil forecasting above the mould using a straight edge. Clean the base plate and the mould from outside. Weigh it to the nearest gm m) Eliminate the soil from the mould. The soil might also be ejected out. Take the soil sample for the water material decision from the top, middle and bottom parts. n) Add about 3% of water to a fresh part of the processed soil and repeat the Steps 10 to 1 4.
V. SIMULATION AND RESULTS
A. Consistency Limits
1) Liquid Limit And Plastic Limit At 0% Of Terrasil,0% RHA And 0% FA
The Conventional sample of expensive soil on index-based properties [ Liquid limit & Plastic limit] of examining soils has been shown in the following figure and table
Table No. .1 –Liquid Limit and Plastic Limit for Conventional Sample


