4 minute read
Battery Maintenance and Testing
1. Covering the positive battery terminal with a boot or nonconductive shield 2. Installing the battery in a covered battery box 3. Installing the battery in a compartment specially designed only for the battery or batteries
In addition, there are a few other rules in the standards with which you should be familiar.
The battery should not be located near fuelsystem components such as lines, filter canisters, or tanks.
Battery-box covers must be ventilated, and the area around the box must be vented to outside air.
All battery boxes and cases must be constructed of nonconductive, noncorroding materials.
Batteries must be secured so that the fasteners cannot come in contact with battery electrolyte.
Everything within 12 inches of the battery must be covered or in some way protected so that it’s completely nonconductive. This is to prevent any accidental short circuit between the item and the battery terminal.
An easy way to satisfy these standards is to install all batteries in a commercially made plastic battery box such as the one shown in figure 5-5.Pre-made battery boxes in a variety of sizes are available at any marine supply store. Just remember to secure the box with the straps provided, and make sure that the battery is well ventilated to outside air.
There are several situations that can cause premature battery failure, but the most common by far is owner neglect. The second most common cause of a battery cashing in its chips before its time is the malfunction of the charging system. However, I classify even this as owner neglect, because the conscientious skipper should monitor this charging system closely enough to catch a malfunction long before it can permanently damage the battery. Other common causes of premature battery burial are using the wrong type of battery for a given application, such as a deepcycle battery where a cranking battery is needed and vice versa; and using batteries that are too small for the task at hand. (The information on selecting batteries at the beginning of this chapter should have corrected any problems you may have had in those areas.) And then there are the boatowners who chuck out perfectly good batteries they have convinced themselves are bad.
I’veseenmorebatteriesunnecessarilyreplaced thananyothersystemscomponentIcanthinkof.It seemsthatmanyotherwisesanepeopleblamethebatteryforeverythingfromanautopilotthatdoesn’twork properlytowarmbeer.Theywillthrowawayahealthy batterywithoutathoughttothemoreprobablecauses oftheirtroubles.Justbecauseyourengineiscranking overslowlyoryourcabinlightsaregettingdimdoesn’t meanyouneedanewbattery.Withtheretailpriceofa smallmarinebatterybouncingaround$100,Ithink it’sworthcheckingtheoldonetomakesureifyoureallyneedtoreplaceitbeforeyoudiscardit.
As battery technology and construction methods have improved over the years, maintenance has gotten a lot easier. The biggest problems we used to have were keeping the terminals clean and topping up the cells with distilled water. These tasks are still necessary with the new versions of wet-cell batteries, but the new technologies have greatly reduced the constant need to add water.
Fig. 5-5. Typical plastic battery box.
Battery case construction has reached new highs also. Posts and case tops seem to remain sealed much longer than before, so electrolyte leakage and the resultant corrosion are not as important as they were. I’m still going to insist that you regularly check electrolyte levels and terminal integrity, though. A faulty charging system can literally boil the electrolyte out of the cells, damaging the battery and creating dangerous hydrogen gas, and it can do this in a very short period of time!
As you’ll remember from the basics covered earlier in this book, loose or corroded connections cause excessive resistance, and that causes heat. When a high current is drawn from a battery, such as when you start your engine, a loose corroded connection can generate enough heat to actually melt the plastic casing of the battery around the terminal stud. This opens the door for an electrolyte leak at the terminal that further compounds your problems.
The following maintenance checklist will go a long way toward keeping battery problems at bay, and I recommend doing at least the visual part of these checks once every week, especially if you’re hooked up to a shore-power charger.
Keep the tops of your batteries clean and dry. Use a little warm water on a rag to wipe away any accumulated dirt and grime. A mixture of baking soda and warm water is excellent for cleaning dirty or corroded batteries. Don’t overdo the baking soda, though. If it leaks through the caps or vent holes into a cell, it will neutralize the acid in the cell and destroy it.
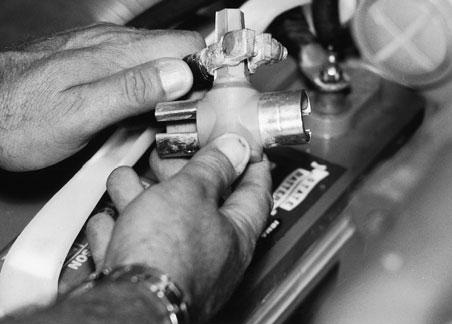
Check cables and connections for integrity and tightness. At any sign of corrosion, remove the cables and use a wire brush or dedicated terminalcleaner brush to clean the post and the cable connector. Terminal cleaning is shown in figures 5-6 and 5-7. Don’t cheat and think that you have done anything constructive by cleaning the exterior of the cable-end terminal and post. The electrical contact is made on the inside of the terminal—that’s what counts. If your battery has stud-type terminals, as many marine batteries do, the cleaning tool will have to be helped a little with coarse sandpaper or with a wire brush or pocketknife. The socket on the terminal tool just isn’t deep enough to clean the entire length of a studded terminal.
Top up the battery with distilled water. If you can’t get distilled water, at least use low-mineral tap water. There is a considerable variation in the mineral content of tap water from one municipality to the next. Some tap water with low mineral


Figs. 5-6, 5-7. Steps to cleaning the battery post and clamp, using a battery service brush. Use these tools until you see shiny surfaces on both the post and inside the clamp. Figure 5-6 shows the terminal being cleaned; figure 5-7 shows the battery post being cleaned.


